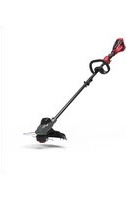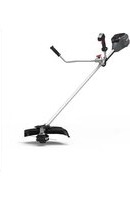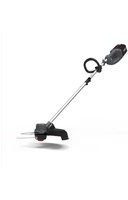
PD60LT - Grass trimmer Powerworks - Free user manual and instructions
Find the device manual for free PD60LT Powerworks in PDF.


User questions about PD60LT Powerworks
0 question about this device. Answer the ones you know or ask your own.
Ask a new question about this device
Download the instructions for your Grass trimmer in PDF format for free! Find your manual PD60LT - Powerworks and take your electronic device back in hand. On this page are published all the documents necessary for the use of your device. PD60LT by Powerworks.
USER MANUAL PD60LT Powerworks
English (original instructions)
SPECIFICATIONS
| Voltage 60 volts | |
| No load speed 6200 (±10%) RPM | |
| Cutting head Bump feed | |
| Cutting Line Diameter | 2.0 mm |
| Cutting Path Diameter | 356 mm |
| Battery pack 2907407, | 2907507 |
| Charger 2907607 | |
| Weight with battery pack | 9 lbs (4.1 kg) |
| Measured sound pressure level | L_PA=67.6 dB(A), K_PA=4.9 dB(A) |
| Measured sound power level | L_WA=87.6 dB(A), K_PA=4.9 dB(A) |
| Guaranteed sound power level | L_WA=96 dB(A) |
| Vibration 7.31 m/s | ^2,k=1.5 m/s^2 |
WARNING
The vibration emission during actual use of the power tool can differ from the declared total value depending on the ways in which the tool is used; avoid vibration risk suggestion: Wear glove during operation limit operating time and shorten trigger time.
DESCRIPTION
- Switch trigger
- Rear handle
- Lock-out trigger
- Front handle
- Upper shaft
- Shaft coupler
- Lower shaft
- Grass deflector
- Edge guide
- Cut-off blade
ASSEMBLY
UNPACKING
This product requires assembly.
■ Carefully remove the product and any accessories from the box. Make sure that all items listed in the packing list are included.
WARNING
Do not use this product if any parts on the Packing List are already assembled to your product when you unpack it. Parts on this list are not assembled to the product by the manufacturer and require customer installation. Use of a product that may have been improperly assembled could result in serious personal injury.
■ Inspect the product carefully to make sure no breakage or damage occurred during shipping.
■ Do not discard the packing material until you have carefully inspected and satisfactorily operated the product.
WARNING
If any parts are damaged or missing do not operate this product until the parts are replaced. Use of this product with damaged or missing parts could result in serious personal injury.
WARNING
Do not attempt to modify this product or create accessories not recommended for use with this product. Any such alteration or modification is misuse and could result in a hazardous condition leading to possible serious personal injury.
WARNING
To prevent accidental starting that could cause serious personal injury, always remove the battery pack from the product when assembling parts.
ATTACHING THE EDGE GUIDE See Figure 2.
■ The edge guide can limit the cutting range of the cutting line and reduce the risk of the rotating cutting line causing damage.
■ To use the edge guide, press the edge guide onto the trimmer head.
English (original instructions)
ATTACHING GRASS DEFLECTOR See Figure 3.
WARNING
Avoid contact with the blade. Failure to avoid contact can result in serious personal injury.
■ Remove the battery pack.
■ Invert the grass trimmer/edger to access the trimmer head.
■ Using a Phillips head screwdriver, remove the preinstalled screw from the trimmer head.
■ Place the guard on to the trimmer head.
■ Align the screw hole on the guard with the screw hole on the trimmer head.
■ Insert the screw into the trimmer head, fastening the guard in place.
WARNING
Do not allow familiarity with products to make you careless. Remember that a careless fraction of a second is sufficient to inflict serious injury.
WARNING
Always wear eye protection. Failure to do so could result in objects being thrown into your eyes resulting in possible serious injury.
WARNING
Do not use any attachments or accessories not recommended by the manufacturer of this product. The use of attachments or accessories not recommended can result in serious personal injury.
SHAFT ASSEMBLY See Figure 4.
The attachment connects to the power head by means of a coupler device.
■ Set the unit on a flat, level surface.
■ Loosen the knob (1) on the coupler (5).
■ Push in the release button (2) located on the lower shaft (3). Align the release button with the positioning hole (4) and slide the two shafts together. Rotate the lower shaft until the button locks into the positioning hole.
■ Tighten the knob securely.
NOTE: If the button does not release completely in the positioning hole, the shafts are not locked into place. Slightly rotate from side to side until the button is locked into place.
ATTACHING THE FRONT HANDLE See Figure 5.
■ Press the auxiliary handle (1) onto the upper shaft so that the handle is angled toward the rear handle that allows for comfortable operation.
■ Slide the auxiliary handle over the metal ring (2) and ensure the metal ring fits between the slot on the auxiliary handle.
■ Align the holes on the auxiliary handle with the holes on metal ring.
■ Insert the handle knob (3) through the auxiliary handle.
■ Tighten until there is no movement in the handle.
OPERATION
Hold the power head with your right hand on the rear handle and your left hand on the front handle. Keep a firm grip with both hands while in operation. Power head should be held at a comfortable position with the rear handle about hip height. Always operate power head at full throttle. If debris becomes wrapped around the attachment, RELEASE THE SWITCH TRIGGER, and remove the debris.
Use the harness when operation.
TO INSTALL BATTERY PACK See Figure 6.
Place the battery pack in the trimmer. Align raised ribs on battery pack with grooves in the trimmer's battery port.
■ Make sure the latch on bottom of the battery pack snaps in place and that battery pack is fully seated and secure in the trimmer before beginning operation.
TO REMOVE BATTERY PACK See Figure 6.
■ Release the switch trigger and lock-out trigger to stop the trimmer.
■ Press the power button to turn off the trimmer.
■ Press and hold the battery latch button at the bottom of the battery pack.
■ Remove battery pack from the trimmer.
STARTING/STOPPING THE TRIMMER See Figure 7.
■ To start the trimmer, grip the front handle with one hand while holding the rear handle with your other hand making sure to depress the lock-out trigger while squeezing the variable speed trigger.
■ To stop the trimmer, just release the variable speed control trigger.
English (original instructions)
WARNING
Noise. A degree of noise from the machine is not avoidable. Route noisy work is to be licensed and limits for certain periods. Keep rest periods and they may need to restrict the working hours to a minimum.
For their personal protection and protection of people working nearby, an appropriate hearing protection shall be worn;
Vibration. Always wear safety and anti-vibration glove. Excessive vibration may cause white finger disease or carpal tunnel syndrome. If you notice an unpleasant sensation or skin discoloration during use of the machine on your hands once you stop working. Place an adequate work breaks. And continual and regular users should monitor closely the condition of their hands fingers.
WARNING
Contact with the trimmer cutting head while operating can result in serious personal injury.
WARNING
When servicing, use only identical replacement parts. Use of any other parts may create a hazard or cause product damage.
WARNING
To avoid serious personal injury, always remove the battery pack from the tool when cleaning or performing any maintenance.
GENERAL MAINTENANCE
Before each use, inspect the entire product for damaged, missing, or loose parts such as screws, nuts, bolts, caps, etc. Tighten securely all fasteners and caps and do not operate this product until all missing or damaged parts are replaced.
Avoid using solvents when cleaning plastic parts. Most plastics are susceptible to damage from various types of commercial solvents and may be damaged by their use. Use clean cloths to remove dirt, dust, oil, grease, etc.
CUTTING TIPS See Figure 8.
- Keep the trimmer tilted toward the area being cut; this is the best cutting area.
■ The trimmer will cut better when moved from left right across the area to be cut; it is less effective when moved from right to left.
■ Use the tip of the cutting line to do the cutting; do not force cutting head into uncut grass.
■ Wire and picket fences cause extra cutting line wear, even breakage. Stone and brick walls, curbs, and wood may wear cutting line rapidly.
■ Avoid trees and shrubs. Tree bark, wood moldings, siding, and fence posts can easily be damaged by the cutting line.
■ Attach metal knob to the rubber hole on the rear handle when in use, unlock the metal knob when not in use.
ADVANCING CUTTING LINE See Figure 9.
While the string trimmer is operating, the cutting line gets worn down and becomes shorter. This trimmer is equipped with bump feed line advancement, which advances additional line once the head is bumped on the ground while rotating. The cutting blade will cut the line to keep an accurate cutting swath.
WARNING
Do not at any time let brake fluids, gasoline, petroleum-based products, penetrating oils, etc., come in contact with plastic parts. Chemicals can damage, weaken or destroy plastic which may result in serious personal injury.
Only the parts shown on the parts list are intended to be repaired or replaced by the customer. All other parts should be replaced at an Authorised Service Centre.
WARNING
To avoid serious personal injury, always remove the battery pack from the tool when cleaning or performing any maintenance.
SPOOL REPLACEMENT See Figure 10.
Use original manufacturer's replacement cutting line for best performance.
■ Remo ve the battery pack.
■ Push in tabs on side of spool cover.
■ Pull spool cover up to remove.
■ Remove the old spool.
■ To install the new spool, make sure the cutting line is captured in the slot on the new spool. Make sure the end of the cutting line is extended approximately 15cm
English (original instructions)
beyond the slot.
■ Install the new spool so that the cutting line and slot align with the eyelet in the cutting head. Thread the cutting line into the eyelet.
■ Pull the cutting line extending from the cutting head so the cutting line releases from the slot in the spool.
■ Reinstall the spool cover by depressing tabs into slots and pushing down until spool cover clicks into place.
centres where the material will be recycled.
■ Scrupulously comply with local regulations for the disposal of waste materials after mowing.
At the time of decommissioning, do not pollute the environment with the machine, but hand it over to a disposal centre, in accordance with the local laws in force.
CUTTING LINE REPLACEMENT See Figures 11.
■ Bend the line at the midpoint and hook the loop into the slot in the center rim of the spool. Ensure line snaps into position in the slot.
■ Wind the line evenly and firmly in a clockwise direction. Once completed, put the line in the slot so it does not unwind.
■ Do not wind the line beyond the edge of the spool.
STORING THE TRIMMER
■ Remove the battery pack from the trimmer before storing.
■ Store it in a place that is inaccessible to children.
- Keep away from corrosive agents such as garden chemicals and de-icing salts.
■ Store and charge your batteries in a cool area. Temperatures above or below normal room temperature will shorten battery pack life.
■ Store the battery pack where the temperature is below 27^ C and away from moisture.
All batteries gradually lose their charge. The higher the temperature, the quicker they lose their charge. If you store your unit for long periods of time without using it, recharge the batteries every month or two. This practice will prolong battery pack life.
- Secure the trimmer during transport to prevent damage or injury. Clean and maintenance before storage, use of guards on cutting attachments with metal blades. Use of cover for metal blades during transport and storage.
ENVIRONMENTAL PROTECTION
■ Environmental protection should be a priority of considerable importance when using the machine, for the benefit of both social coexistence and the environment in which we live. Try not to cause any disturbance to the surrounding area.
■ Scrupulously comply with local regulations for the disposal of packaging, deteriorated parts or any elements with a strong environmental impact; this waste must not be disposed of as normal waste, it must be separated and taken to specified waste disposal
English (original instructions)
TROUBLESHOOTING
| PROBLEM POSSIBLE CAUSE SOLUTION | ||
| String will not advance when using the bump-feed head. | String is welded to itself. Lubricate with silicone spray. | |
| Not enough string on spool. Install more string. Refer to string replacement earlier in this manual. | ||
| String is worn too short. Pull string while pressing line release button. | ||
| String is tangled on spool. Remove string from spool and rewind.Refer to string replacement earlier in this manual. | ||
| Grass wraps around shaft housing and string head. | Cutting tall grass at ground level | Cut tall grass from the top down to prevent wrapping. |
| Motor fails to start when switch trigger is depressed. | Battery is not secure. | To secure the battery pack, make sure the latch on bottom of the battery pack snaps into place. |
| Battery is not charged. | Charge the battery pack according to the instructions included with your model. | |
| Shaft not connected completely | Make sure lower shaft is fully seated in shaft coupler on upper shaft and secure shaft coupler. | |
The vibration emission during actual use of the power tool can differ from the declared total value depending on the ways in which the tool is used; avoid vibration risk suggestion: Wear glove during operation limit operating time and shorten trigger time.
DESCRIPTION
NOTE: If the button does not release completely in the positioning hole, the shafts are not locked into place. Slightly rotate from side to side until the button is locked into place.
GENERELT VEDLIKEHOLD
Brug selen under betjening.
INSTALLATION AF BATTERIPAKKE Se Figur 6.
Powerworks Warranty Policy for DIY machines
PERIOD OF WARRANTY
All new Powerworks machinery is supplied with a 2 year parts and labour warranty from original date of purchase. A 30 day warranty is available for machines used professionally as Powerworks are designed primarily to be used by DIY consumers. This warranty is non-transferable.
LIMITATIONS
This warranty applies only to defective parts/components and does not cover repairs due to:
- Normal wear and tear.
- Routine tune up or adjustment.
- Damage caused by improper handling/abuse/misuse or neglect.
- Overheating due to lack of maintenance.
- Damage due to fittings/fasteners becoming loose/detached through lack
of maintenance. - Damage caused by cleaning with water.
- Machines serviced or repaired by non-authorised Powerworks service centres.
- Machines incorrectly assembled or adjusted.
- Damage caused by improper use of the machine.
- Damage caused by improper winterisation (pressure washers)
- Items considered as consumable parts are not normally covered by the warranty, including but not limited to:
- Batteries
• Electric cables
- Blade and blade assemblies
- Belts
- Filters
• Chucks and tool holders
- Certain products may contain components such as engines, transmissions from an alternative manufacturer, these items will be subject to the appropriate manufacturer's warranty policy except where Greenworks Tools Europe GmbH agrees to underwrite any claims outside the said manufacturer's warranty period.
- Second hand goods are not covered under this warranty policy.
- The fitting of spares, replacements or extra components which are not supplied or approved by Greenworks Tools Europe GmbH.
Warranty
To claim a warranty on any product under this policy a proof of original purchase is required. Credit card statement do not qualify as sufficient proof of purchase. In the first instance of a warranty event occurring the consumer should return the product to the original place of purchase with their proof of purchase. The machine will be sent to our central service facility and an inspection made. If the machine be found to be at fault it will be repaired and sent back to the address of the consumer free of charge. Machines that retail for less than €100 euros including sales taxes will generally be replaced.
If the central service facility finds that machine is not found to be at fault then the consumer will be advised they will need to pay for the cost of the repair.
This warranty policy is subject to change from time to time to accommodate the needs of new products.

EC DECLARATION OF CONFORMITY FOR MACHINERY
Manufacturer:Changzhou Globe Co., Ltd.
Address: No.65 Xinggang Road Zhonglou Zone Changzhou, Jiangsu 213000
P.R.China
Name and address of the person authorised to compile the technical file:
Name: Gary Gao Naixin (Director of Outdoor Power Equipment)
Address: Greenworks Tools Europe GmbH
Wankelstrasse 40.
50996 Koln
Germany
Herewith we declare that the product
Category 60V battery lawn trimmer
Model....PD60LT
Serial number ...... See product rating label
Year of Construction ......See product rating label
• is in conformity with the relevant provisions of the Machinery Directive (2006/42/EC)
- is in conformity with the provisions of the following other EC-Directive
2014/30/EU (EMC-Directive), and
2000/14/EC (Noise-Directive) incl. modifications (2005/88/EC)
And furthermore, we declare that
- the following (parts/clauses of) European harmonised standards have been used EN60335-1, EN 50636-2-91, EN ISO 3744, ISO 11094, EN 55014-1, EN 55014-2
A V Technology Ltd AVTECH House, Arkle Avenue, Stanley Green Trading, Estate, Handforth, Cheshire, SK9 3RW
Measured sound power level
92.5 dB(A)
Guaranteed sound power level
96 dB(A)
Conformity assessment method to Annex VI/ Directive 2000/14/EC
Place, date: Changzhou, 11/01/2016
Signature: Gary Gao Naixin (BEng, CEng,
MIET) Vice president of Engineering

A V Technology Ltd AVTECH House, Arkle Avenue, Stanley Green Trading, Estate, Handforth, Cheshire, SK9 3RW
A V Technology Ltd AVTECH House, Arkle Avenue, Stanley Green Trading, Estate, Handforth, Cheshire, SK9 3RW
A V Technology Ltd AVTECH House, Arkle Avenue, Stanley Green Trading, Estate, Handforth, Cheshire, SK9 3RW
A V Technology Ltd AVTECH House, Arkle Avenue, Stanley Green Trading, Estate, Handforth, Cheshire, SK9 3RW
Endereço: No.65 Xinggang Road Zhonglou Zone Changzhou, Jiangsu 213000
China
Máquinas (2006/42/EC)
A V Technology Ltd AVTECH House, Arkle Avenue, Stanley Green Trading, Estate, Handforth, Cheshire, SK9 3RW
Naam: Gary Gao Naixin (Director of Outdoor Power Equipment)
Adres: Greenworks Tools Europe GmbH
Wankelstrasse 40.
50996 Koln
Germany
A V Technology Ltd AVTECH House, Arkle Avenue, Stanley Green Trading, Estate, Handforth, Cheshire, SK9 3RW
Gemeten geluidsdrukniveau 92.5 dB(A)
A V Technology Ltd AVTECH House, Arkle Avenue, Stanley Green Trading, Estate, Handforth, Cheshire, SK9 3RW
A V Technology Ltd AVTECH House, Arkle Avenue, Stanley Green Trading, Estate,
Handforth, Cheshire, SK9 3RW
Mitattu äänenteho
92.5dB(A)
Taattu äänenteho
96 dB(A)
Adress: Greenworks Tools Europe GmbH
Wankelstrasse 40.
50996 Koln
Germany
A V Technology Ltd AVTECH House, Arkle Avenue, Stanley Green Trading, Estate, Handforth, Cheshire, SK9 3RW
Uppmätt ljudeffekt
92.5 dB(A)
A V Technology Ltd AVTECH House, Arkle Avenue, Stanley Green Trading, Estate, Handforth, Cheshire, SK9 3RW
Målt lydeffektnivå
92.5 dB(A)
Garantert lydeffektnivå
96 dB(A)
Samsvarsvurdering til Tillegg VI/Direktiv 2000/14/EC
Sted, dato: Changzhou, 11/01/2016 Signatur: Gary Gao Naixin (BEng, CEng,
A V Technology Ltd AVTECH House, Arkle Avenue, Stanley Green Trading, Estate, Handforth, Cheshire, SK9 3RW
Målt lydeffektniveau
92.5 dB(A)
Garanteret lydeffektniveau
96 dB(A)
DEKLARACJA ZGODNOŚCI WE DLA MASZYN
Producent: Changzhou Globe Co., Ltd.
Adres: No.65 Xinggang Road Zhonglou Zone Changzhou, Jiangsu 213000 P.R. Chiny
A V Technology Ltd AVTECH House, Arkle Avenue, Stanley Green Trading, Estate, Handforth, Cheshire, SK9 3RW
A V Technology Ltd AVTECH House, Arkle Avenue, Stanley Green Trading, Estate, Handforth, Cheshire, SK9 3RW
A V Technology Ltd AVTECH House, Arkle Avenue, Stanley Green Trading, Estate, Handforth, Cheshire, SK9 3RW
A V Technology Ltd AVTECH House, Arkle Avenue, Stanley Green Trading, Estate, Handforth, Cheshire, SK9 3RW
A V Technology Ltd AVTECH House, Arkle Avenue, Stanley Green Trading, Estate, Handforth, Cheshire, SK9 3RW
Izmjerena razina zvučne snage:
92.5 dB(A)
96 dB(A)
Jamčena razina zvučne snage
Metoda procjene usklađenosti prema dodatku VI/Directive 2000/14/EC
Mjesto, datum: Changzhou, 11/01/2016
Potpis: Gary Gao Naixin (BEng,
CEng, MIET) Potpredsjednikinženjeringa

EK GÉPÉSZETI MEGFELELŐSÉGI NYILATKOZAT
A V Technology Ltd AVTECH House, Arkle Avenue, Stanley Green Trading, Estate, Handforth, Cheshire, SK9 3RW
Adresă: No.65 Xinggang Road Zhonglou Zone Changzhou, Jiangsu 213000 China
A V Technology Ltd AVTECH House, Arkle Avenue, Stanley Green Trading, Estate, Handforth, Cheshire, SK9 3RW
A V Technology Ltd AVTECH House, Arkle Avenue, Stanley Green Trading, Estate, Handforth, Cheshire, SK9 3RW
Address: Greenworks Tools Europe GmbH
Wankelstrasse 40.
50996 Koin
Germany
A V Technology Ltd AVTECH House, Arkle Avenue, Stanley Green Trading, Estate, Handforth, Cheshire, SK9 3RW
No.65 Xinggang Road Zhonglou Zone Changzhou,
Jiangsu 213000 P.R.China.
A V Technology Ltd AVTECH House, Arkle Avenue, Stanley Green Trading, Estate,
Handforth, Cheshire, SK9 3RW
A V Technology Ltd AVTECH House, Arkle Avenue, Stanley Green Trading, Estate. Handforth, Cheshire, SK9 3RW
Imza: Gary Gao Naixin (BEng, CEng,
Address: Greenworks Tools Europe GmbH
Wankelstrasse 40.
50996 Köln
תְבָרִי
A V Technology Ltd AVTECH House, Arkle Avenue, Stanley Green Trading, Estate, Handforth, Cheshire, SK9 3RW
92.5 dB(A)
הכלה: 96 dB(A)
A V Technology Ltd AVTECH House, Arkle Avenue, Stanley Green Trading, Estate,
Handforth, Cheshire, SK9 3RW
Adrese: No.65 Xinggang Road Zhonglou Zone Changzhou, Jiangsu 213000
P.R.China
Adrese: Greenworks Tools Europe GmbH
Wankelstrasse 40.
50996 Koln
Germany
Ar šo mês paziņojam, ka prece
Kategorija 60 V akumulatora zāles trimmeris
Modelis....PD60LT
A V Technology Ltd AVTECH House, Arkle Avenue, Stanley Green Trading, Estate, Handforth, Cheshire, SK9 3RW
A V Technology Ltd AVTECH House, Arkle Avenue, Stanley Green Trading, Estate,
Handforth, Cheshire, SK9 3RW