304257 - Irrigation timer Brandson - Free user manual and instructions
Find the device manual for free 304257 Brandson in PDF.


User questions about 304257 Brandson
0 question about this device. Answer the ones you know or ask your own.
Ask a new question about this device
Download the instructions for your Irrigation timer in PDF format for free! Find your manual 304257 - Brandson and take your electronic device back in hand. On this page are published all the documents necessary for the use of your device. 304257 by Brandson.
USER MANUAL 304257 Brandson
text_image
QR code image containing encoded data, no visible human-readable textENG: Current drivers, user manuals and other relevant documents for this product can be found on our homepage.
text_image
Diagram of a medical or laboratory device with labeled ports and directional arrows indicating flow or movement.Thank you for choosing a Brandon product. Please read the following user manual carefully so as to get the most from the product you have purchased. Before using the product, first check that the delivered item is complete, accurate and undamaged.
1. Scope of delivery
• Watering control system
• 1/2" plug for hose connector
• 1/2" connection adapter
- User manual
2. Technical data
| Operating voltage 3V | |
| Battery type Two 1.5V AA batteries | |
| Connections | • Water connection 3/4" (inlet / without adapter)• Water discharge 3/4" (outlet / without adapter) |
| Dimensions (H x W x D) 150mm x 120mm x 90mm | |
| Features • Manual operation | • Adjustable watering program |
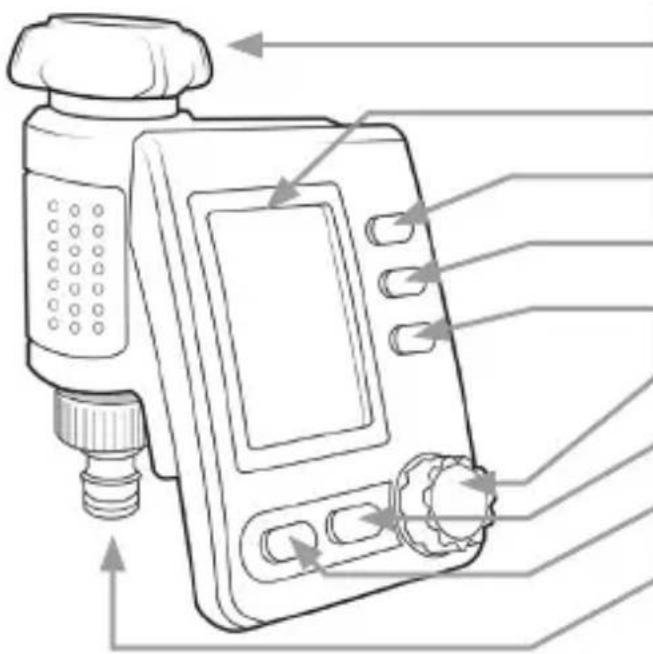
3. Product details
text_image
Technical diagram of a medical or laboratory device with labeled ports and directional arrows indicating flow or movement.| 1 Water connection | |
| 2 Display | |
| 3 Manual button (Man.) | |
| 4 Menu button (Menu) | |
| 5 OK button (Ok) | |
| 6 Dial | |
| 7 Increase value | |
| 8 Decrease value | |
| 9 Water outlet(hose connection) | |
12 English
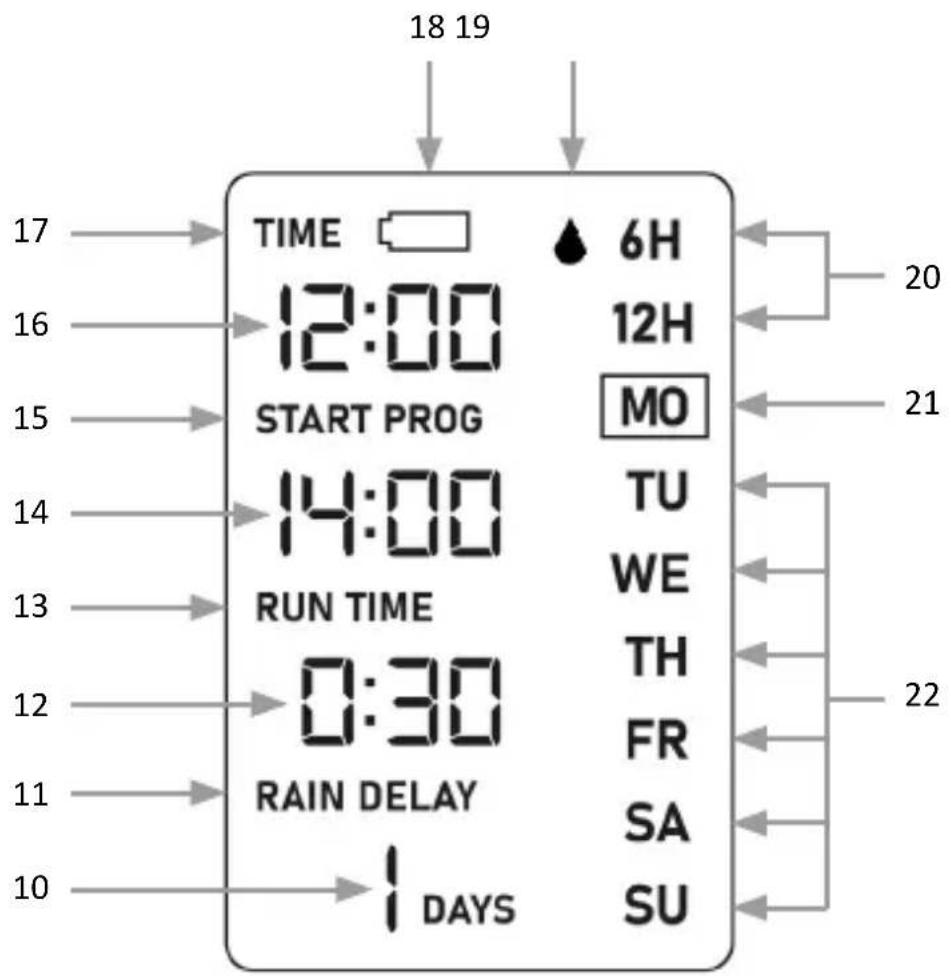
| 10 Display of time delay caused by rain | 17 Time |
| 11 Time delay due to rain 18 Display of battery capacity | |
| 12 Display of run time 19 Activation symbol | |
| 13 Run time 20 Watering cycle 6/12 hours. | |
| 14 Display of start time 21 Watering cycle mark | |
| 15 Start time 22 Watering cycle of the week day | |
| 16 Time display | |
text_image
18 19 17 TIME 6H 16 12:00 12H 15 START PROG MO 14 14:00 TU 13 RUN TIME WE 12 0:30 TH 11 RAIN DELAY FR 10 DAYS SA 20 21 22 SU4. Replacing / inserting batteries
The display shows when the batteries are empty. The battery indicator flashes on the display.
Open the battery compartment lid at the back of the removable panel. Remove the cap and insert two AA 1.5V batteries. Particularly make sure the polarity of the contacts is correct. Then close the battery compartment cover. Replace the control panel into the watering system computer.

Caution! Use only new batteries. Do NOT use rechargeable batteries.
5. Initial use
Time and day
- Press the menu (Menu) button to adjust the time. The TIME starts flashing in the display. Press the OK button to access the setting.
- The hour display then starts flashing. Use the dial to adjust the hours. Turn it left to reduce the value or turn it right to increase the value. Once you reach the desired hour, confirm by pressing the OK button.
- Then the minute display starts flashing. Using the dial, adjust the minutes desired and confirm by pressing the OK button.
- Next, the current day is highlighted. Select the current day using the dial and confirm it using the OK button.
Note: The menu items of hour, minute and day can also be navigated using the "Increase value" and "Decrease value" buttons.
Connecting
- Connect the water tap connection of the watering system computer directly to the desired water tap.
- Connect the hose of the desired watering system to the water outlet (hose connection) using a suitable connector.
- The device is now ready for use.
6. Initial use
Defining the start time
Adjust the start time for watering after connecting the watering system computer to the tap and the hose of the watering system.
- Press the Menu button twice. START flashes on the display. Open the settings by pressing the OK button.
- Use the dial to set the value for the start time. First set the hours. Confirm using the OK button. Then set the minutes. Turn it left to reduce the value or turn it right to increase the value. Confirm using the OK button.
Defining the watering duration
After setting the start time, the hour display of watering duration (Run Time) starts flashing.
- Adjust the watering duration using the dial. Turn it left to reduce the value or turn it right to increase the value. First select the hours. Confirm using the OK button.
- Then adjust the minutes of run time. Confirm using the OK button.
Note: The run time can be set to a maximum of 240 minutes (4 hours).
Defining the watering cycle
After adjusting the start time and watering duration, you can define the watering cycle.
The following watering cycles are available:
- every 6 hours,
- every 12 hours
• on any selected days of the week.
The display shows a water drop symbol on the right side ( ) after the watering time (Run Time) is set.
You can adjust the watering cycle using the two "Increase value" and "Decrease value" arrow keys. The current setting is shown in the display using the water drop symbol.
You can also select multiple days by selecting the day using the "Increase value" and "Decrease value" arrow keys and confirming by pressing the OK button. The water drop symbol ( ) is shown for the selected days.
Enabling the program
The display shows "PROG" once the watering cycle is configured. You have the option of enabling the program (On) or disabling it (Off).
Use the dial to choose between the two options and confirm by pressing the OK button.
- When enabled, the display shows the water drop symbol ( ) of the previously configured cycle. The symbol disappears once the program is disabled.
Rain Delay function
This feature is not supported by this device. If you accidentally set a Rain Delay (is shown at the bottom of the screen),
press the "Increase value" and "Decrease value" arrow keys simultaneously to disable the Rain Delay function.
7. Manual operation
You can override the automatic watering cycle with the manual operation.
- Press the manual button (Man.) to access manual operation.
- Adjust the watering duration (Run Time) using the dial. The run time can be configured to a maximum of 240 minutes.
- Then press the OK button to confirm.
- To turn off the manual operation and switch to automatic mode, press the manual (Man.) button.
8. Additional safety instructions
- The timer is water resistant, NOT water proof. The timer has to be installed above ground and vertically to the tap. Do not immerse the device in water!
- DO NOT pull the hose when it is connected to the watering control system to avoid damage to the timer.
- This timer is intended for outdoor use, to control watering systems.
- The device should not be used for industrial purposes
- The water pressure is between 0.2 bar and 8 bar (0 psi to 116 psi).
Use only with clean water and fresh water, the water temperature has to be above 1^ C and below 60^ C. - Protect the timer during winter season or from frost. Disassemble the device from the tap and drain all the water from it. Remove the batteries and keep the device and the batteries safely at home.
- Always keep the cover closed to prevent water from entering.
- Do not use the device if it has fallen down or has been subject to impact.
- Ensure that you clean the filter regularly if it is dirty.
9. Cleaning
Clean the filter in the water tap connection regularly to prevent your watering system computer from clogging.
10. Safety instructions and disclaimer
Never attempt to open the appliance to carry out repairs or modifications. Avoid contact with the mains voltage. Do not short-circuit the product. The appliance is not frost-proof. Store the appliance away from water and frost in winter. Keep the appliance away from high temperatures. Do not expose the device to sudden changes in temperature or strong vibrations, as this could damage the electronic components. Check the device for any damage before using it.
The device should not be used if it was subject to impact or has been damaged in some other manner. Please comply with the local regulations and restrictions. Do not use the device for purposes other than those described in the user manual. This product is not a toy. Keep it out of the reach of children or mentally disabled persons. Any repair or modification to the device, which is not carried out by the original supplier, will void any warranty and guarantee claims. The product should be used only by persons who have read and understood this user manual. The specifications of the device may be changed without any special prior notice.
11. Disposal instructions
In line with the European WEEE directive, electrical and electronic devices should not be disposed of along with domestic waste. Their components have to be separately sent for recycling or disposal, because improper disposal of toxic and dangerous components may permanently damage the environment. According to the electrical and electronic equipment act (ElektroG), you are obliged (as a consumer) to return (free of charge) all electrical and electronic devices to the manufacturer, the point of sale or public collection points at the end of their service life. The relevant local laws regulate the details in this regard. The symbol displayed on the product, in the user manual or/and on the packaging refers to these regulations. With this manner of sorting, recycling and disposal of used devices, you make an important contribution towards protecting our environment.
12. Instructions for battery disposal
In conjunction with the sale of batteries along with the supply of devices that include batteries, the supplier is obliged to point out the following to the customer: The customer is legally obliged to return used batteries. He can return used batteries which the supplier offers or has offered as new batteries in his assortment free of charge to the supplier's dispatch warehouse (shipping address). The symbols shown on the batteries indicate the following: Pb = battery contains more than 0.004 percent lead by weight, Cd = battery contains more than 0.002 percent cadmium by weight, Hg = battery contains more than 0.0005 percent mercury by weight.
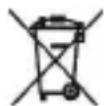
The symbol of the crossed-out dustbin means that the battery may not be disposed of in household waste.


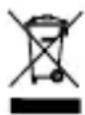
WEEE directive: 2012/19/EU
WEEE Register no.: DE 67896761
The company WD Plus GmbH hereby certifies that the device 304257 complies with the fundamental requirements and all other relevant stipulations. A complete conformity statement can be obtained from: WD Plus GmbH, Wohlenbergstraße 16, 30179 Hanover
text_image
Technical diagram of a medical device with labeled ports and directional arrows indicating flow or movement.Activer le programme
text_image
Technical diagram of a medical device with labeled ports and directional arrows indicating flow or movement.text_image
Technical diagram of a medical or laboratory device with labeled ports and directional arrows indicating flow or movement.MO-FR 9:30am - 18pm CET

text_image
QR code image containing encoded data, no visible human-readable textbrandson-equipment.de