FX-RME33 - Lawn mower Fuxtec - Free user manual and instructions
Find the device manual for free FX-RME33 Fuxtec in PDF.

User questions about FX-RME33 Fuxtec
0 question about this device. Answer the ones you know or ask your own.
Ask a new question about this device
Download the instructions for your Lawn mower in PDF format for free! Find your manual FX-RME33 - Fuxtec and take your electronic device back in hand. On this page are published all the documents necessary for the use of your device. FX-RME33 by Fuxtec.
USER MANUAL FX-RME33 Fuxtec
natural_image
Line drawing of a lawn mower with attached circuit breaker (no text or symbols)
natural_image
Orange icon of a person reading a book on black background (no text or symbols)
natural_image
Icon of a hand pointing at an open book with horizontal lines representing text pages (no actual text or symbols)Inhalt
DEUTSCHE VERSION 7
VERSION FRANCAISE 23
- Introduction and safety....55
- Safety instructions for lawnmowers 56
- Information and warnings....58
- Presentation 60
- Assembly....61
- Start and stop the motor....65
- Working instructions 66
- Tips for mowing....67
- Storage 67
- Disposal 67
- Technical data....68
- EU Declaration of Conformity 69
VERSION ESPANOLA....70
text_image
Two yellow warning signs: one with an exclamation mark and the other with a running figure symbol.text_image
Labeled diagram of a lawn mower with numbered parts for identificationnatural_image
Top-down view of a black and gray robotic car with a red circle highlighting the front wheel (no visible text or symbols)natural_image
Top-down view of a black lawn mower with a white arrow pointing to the blade (no text or symbols visible)
natural_image
Close-up of a mechanical component with three white arrows pointing upward and downward, indicating directional movement or flow (no text or symbols present)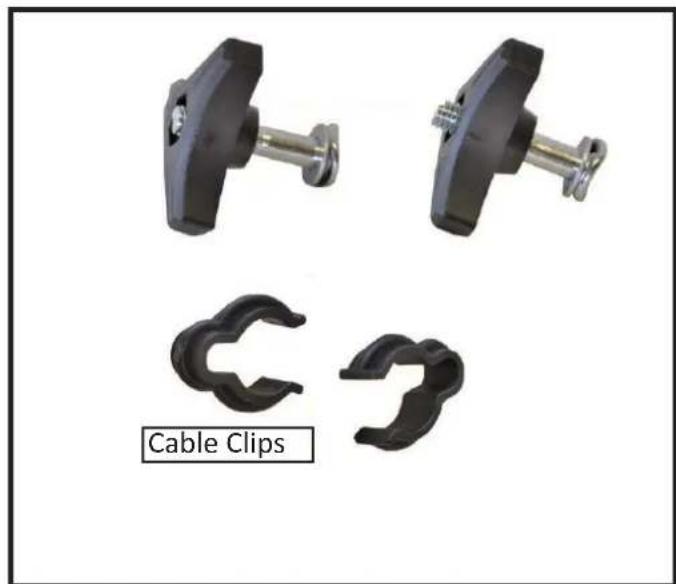
natural_image
Product image showing three black plastic clips with metal fittings and a label 'Cable Clips' (no other text or symbols)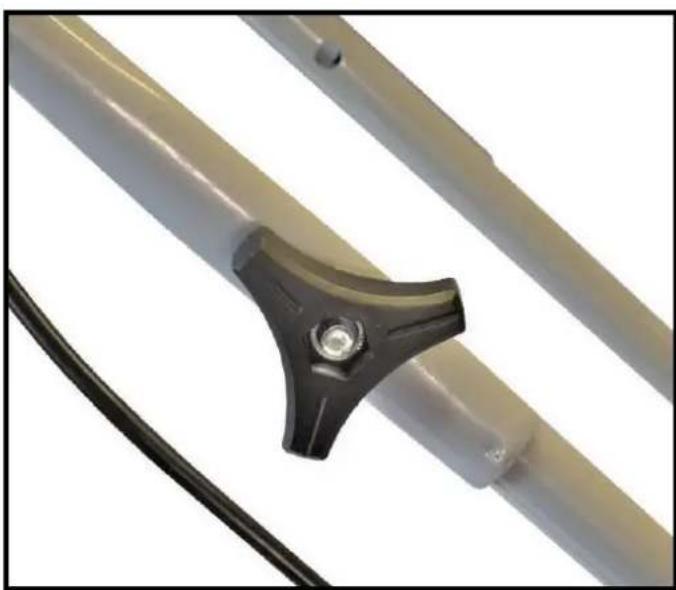
natural_image
Close-up of a mechanical component with a black triangular handle and wire, no visible text or symbolsnatural_image
Close-up of a mechanical device with two black arrows pointing upward, no visible text or symbolsnatural_image
Close-up of a black plastic container with two arrows pointing outward from its side (no text or symbols)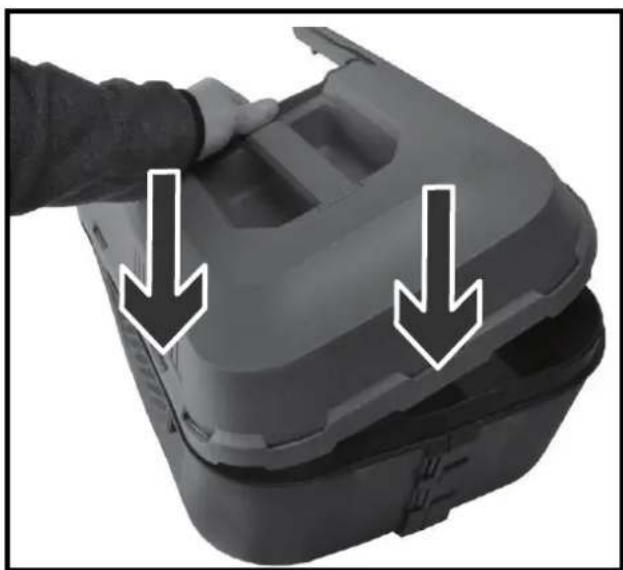
natural_image
Close-up of a hand holding a gray plastic container with two downward arrows indicating a process or inspection (no text or symbols present)natural_image
Side view of a modern lawn mower with visible vented seating and mounting bracket (no text or symbols)natural_image
Line drawing of a hand using a tool to adjust or install a vehicle tire (no text or symbols present)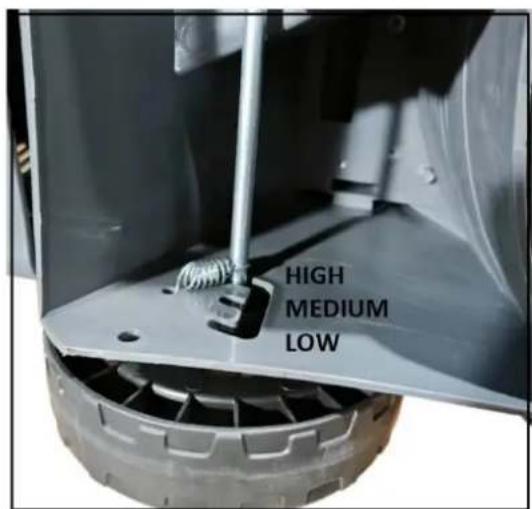
text_image
HIGH MEDIUM LOWtext_image
COOLING VENTS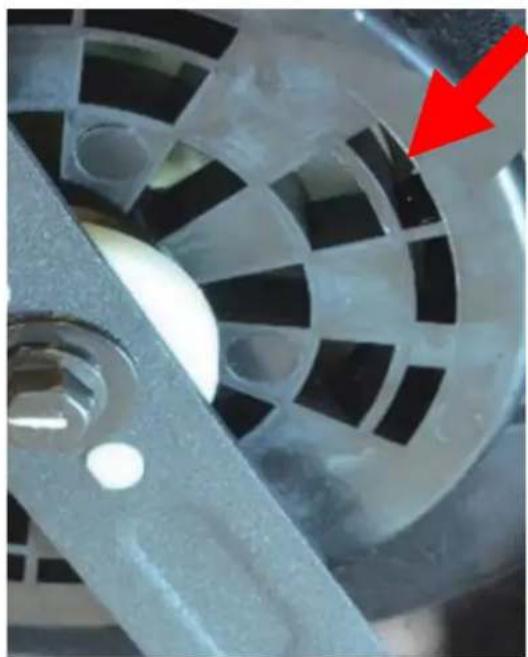
natural_image
Close-up of a mechanical component with a white spherical object and a red arrow pointing to it (no text or symbols visible)Recycling raw materials instead of waste disposal.
2000/14/EC amended by
2005/88/EC Annex IV
Angewandte Normen / Applicable standards
EN 62841-1:2015+AC:15+A11:2022
EN IEC 62841-4-3:2021+A11:2021
EN 62233:2008
EN IEC 55014-1:2021
EN IEC 55014-2:2021
EN IEC 61000-3-2:2019+A1:2021
EN 61000-3-3:2013+A1:2019+A2:2021
Hereby we declare that the above mentioned machine meet the essential safety and health requirements of the above stated EC directives. Any manipulation or change of the machine not being explicitly authorized by us in advance renders this document null and void.
text_image
Two yellow warning signs: one with an exclamation mark and the other with a running figure symbol.text_image
Labeled diagram of a lawn mower with numbered parts for identificationnatural_image
Top-down view of a gray and black toy car with a red circle highlighting the front wheel (no visible text or symbols)natural_image
Black and white photo of a lawn mower with a white arrow pointing to the blade (no text or symbols visible)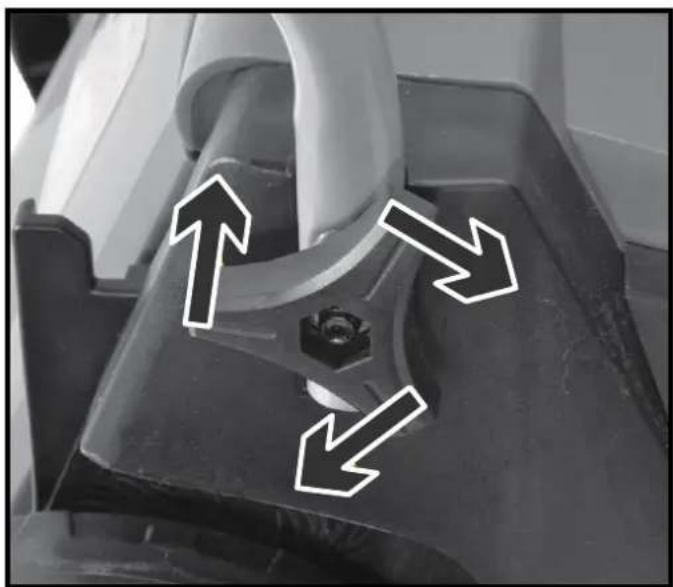
natural_image
Close-up of a mechanical component with three white arrows pointing inward, indicating direction or flow (no text or symbols present)
natural_image
Product image showing three black cable clips with metal fittings and a label 'Cable Clips' (no other text or symbols)
natural_image
Close-up of a mechanical component with a black triangular handle and wire, no visible text or symbols
natural_image
Close-up of a computer monitor with attached cable and stand, showing two black arrows pointing upward (no text or symbols)natural_image
Close-up of a black plastic container with two white arrows pointing outward from its side (no text or symbols)
natural_image
Close-up of a hand holding a black plastic container with two downward arrows pointing to the side (no text or symbols visible)natural_image
Side view of a modern lawn mower with visible vented seating and mounting bracket (no text or symbols)natural_image
Line drawing of a hand using a tool to adjust or install a vehicle tire (no text or symbols present)
text_image
HIGH MEDIUM LOWtext_image
COOLING VENTS
natural_image
Close-up of a mechanical component with a white spherical object and a red arrow pointing to it (no text or symbols visible)natural_image
Simple line drawing of a lawn mower (no text or symbols)2000/14/EC amended by
2005/88/EC Annexe IV
Normes appliquées / Applicable standards
EN 62841-1:2015+AC:15+A11:2022
EN IEC 62841-4-3:2021+A11:2021
EN 62233:2008
EN IEC 55014-1:2021
EN IEC 55014-2:2021
EN IEC 61000-3-2:2019+A1:2021
EN 61000-3-3:2013+A1:2019+A2:2021
text_image
Two yellow warning signs: one with an exclamation mark and the other with a running figure symbol.text_image
Labeled diagram of a lawn mower with numbered parts for identificationnatural_image
Top-down view of a black and gray robotic car with a red circle highlighting the front wheel (no visible text or symbols)natural_image
Top-down view of a black lawn mower with a white arrow pointing to the blade (no text or symbols visible)
natural_image
Close-up of a mechanical component with three white arrows pointing upward and downward, indicating directional movement or flow (no text or symbols present)
natural_image
Product image showing three black mechanical clips with metal fittings and a label indicating 'Clip per cavi' (no other text or symbols)
natural_image
Close-up of a mechanical component with a black triangular clamp and metallic rod, no visible text or symbolsnatural_image
Close-up of a mechanical device with attached wires and a ladder, showing upward arrows indicating motion or assembly (no text or symbols visible)natural_image
Close-up of a black plastic container with two white arrows pointing outward from its side (no text or symbols)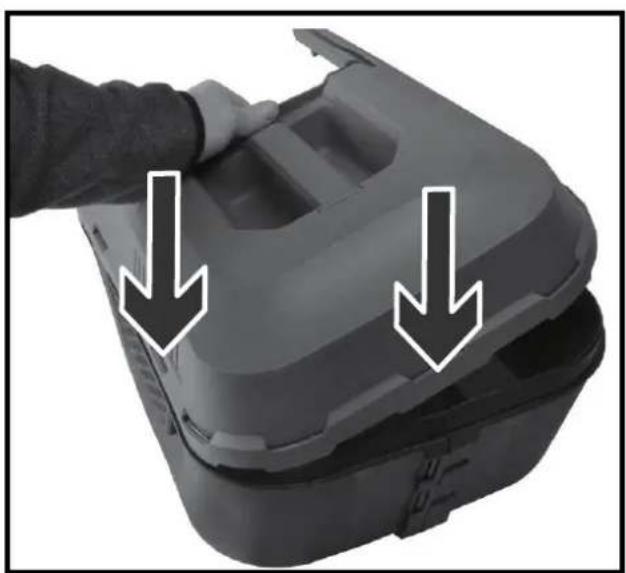
natural_image
Close-up of a hand holding a gray plastic container with two downward arrows pointing to the interior (no text or symbols visible)natural_image
Side view of a gray industrial robotic vehicle with visible vented door and wheels (no text or symbols)natural_image
Line drawing of a hand using a tool to adjust or install a tire component (no text or symbols present)
text_image
HIGH MEDIUM LOWtext_image
COOLING VENTS
natural_image
Close-up of a mechanical component with a white circular component and a red arrow pointing to it (no text or symbols visible)EN IEC 62841-4-3:2021+A11:2021
EN 62233:2008
EN IEC 55014-1:2021
EN IEC 55014-2:2021
EN IEC 61000-3-2:2019+A1:2021
EN 61000-3-3:2013+A1:2019+A2:2021
37. Introduction and safety
Never allow children or persons unfamiliar with these instructions to use the garden tool. Children should be supervised to ensure they do not play with the device.
Intended use
This device is intended exclusively for mowing lawns in private areas.
The device must be operated according to the descriptions and safety instructions. Only operate the device in the technical condition prescribed and delivered by the manufacturer. Any other use is not in accordance with the intended use. Use not in accordance with the intended use will result in the forfeiture of the warranty and the rejection of any responsibility on the part of the manufacturer. The user is liable for all damage to third parties and their property. Unauthorised modifications to the device exclude the manufacturer's liability for any resulting damage.
Vibration and noise reduction
To reduce the impact of vibration and noise, limit working time, use lower vibration and noise settings and wear personal protective equipment.
Observe the following points to keep vibration and noise pollution low:
- Only use the product as intended in accordance with the design and instructions.
- Make sure that the product is in perfect condition and well-maintained.
- Use the right accessories and make sure they are in good condition.
- Hold the product firmly but not tensely by the handles provided.
- Maintain the product according to these instructions and keep it well-lubricated.
- Plan your working hours according to these instructions to spread a higher workload over a more extended period.
Emergency
- Familiarise yourself with the use of the product by reading the operating instructions thoroughly. Memorise the safety instructions and follow them carefully. That will help you to avoid risks and hazards.
- Always be alert when using the product to identify and respond to hazards early. Quick action can prevent serious injury and property damage.
Residual risks
Even if you operate this lawnmower as instructed, there will always be residual risks. The following hazards may occur in connection with the design and construction of this lawnmower:
j) Injuries and property damage caused by flying parts.
k) Hearing impairment if you do not wear suitable hearing protection or use the lawnmower for an extended period.
I) Damage to health results from hand-arm vibrations if the lawnmower is used for a long time or is not guided correctly and maintained.
38. Safety instructions for lawnmowers
General safety instructions
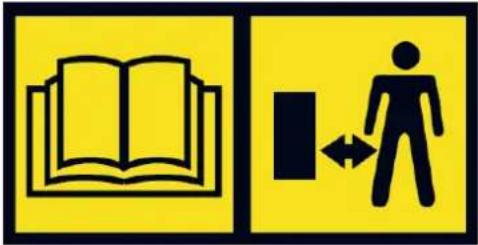
- For your safety and the safety of others, read this instruction manual and its safety instructions before using the device. Please keep the operating instructions and safely store their safety instructions for later use and keep these for ready to hand for every use.
- Pass on the operating instructions with the device if there is a change of ownership.
- Persons operating the device must not be under the influence of intoxicants (e.g. alcohol, drugs or medication).
- Operate the device only in the technical condition prescribed and supplied by the manufacturer. Unauthorised modifications to the device exclude the manufacturer's liability for any resulting damage.
- Use the device only in daylight or under good artificial lighting.
- Use the device only in dry weather conditions. Please keep it away from rain or wet conditions. The ingress of water into the device increases the risk of electric shock.
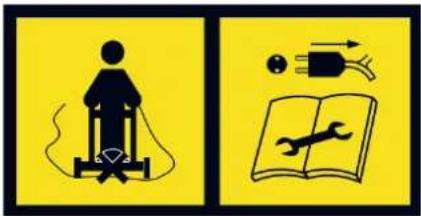
- Switch off the device and remove the battery in the following conditions:
♦ if the device is left unattended
♦ if the device starts to vibrate excessively.
Before use
- Before starting work, familiarise yourself with the device and its functions and controls.
- Check the device for signs of wear or damage before commissioning and after an impact.
- Do not use a device whose switch is defective and can no longer be switched on or off.
-
Check that all nuts, bolts and screws are tight to ensure that the device is operated safely.
-
Never use a device with damaged or missing parts. Have them repaired or, if necessary, replaced by a qualified specialist or specialist workshop.
- Always wear sturdy shoes, long trousers and the appropriate personal protective equipment (safety goggles, ear protectors, work gloves with a good grip, etc.) when working with or on the device.
Wearing personal protective equipment reduces the risk of injury.
During use
Do not switch on the device when people (especially children) or animals are in the immediate vicinity. Make sure that children do not play with the device.
Stop work if you notice that people (especially children) or pets are nearby.
Working on steep slopes can be dangerous. Make sure you have a firm footing and mow slowly. Always mow across the slope and not up and down. Be especially careful when changing direction.
There is a risk of tipping over!
Do not mow on steep slopes. Be especially careful when mowing backwards and pulling the mower on yourself.
Do not tilt the mower when starting the engine.
Keep a safe distance as indicated by the handle frame.
Do not switch on the engine until your feet are safe from the cutting blade. Be careful and do not reach into the rotating cutting blade. Never drive over gravel while the engine is running. There is a risk of being hit by stones! Switch off the lawnmower before tipping or transporting it, e.g., from / to lawns or over paths.
Before lifting or transporting the lawnmower, switch off the engine
until the cutting blade has come to a standstill. Do not adjust the cutting height until the engine is switched off and the cutting blade has stopped. Never open the discharge flap while the engine is running. Before removing the grass collector, switch off the engine and wait until the cutting blade has stopped. After emptying the grass collector, carefully reattach it and ensure it is securely fastened to the lawnmower. If possible, do not mow wet grass. Do not use the garden tool in an explosive environment with flammable liquids, gases or dust. When you stop work, never leave the device unattended and keep it in a safe place.
After use
Switch off the device, and only then put the device in a safe place.
Do not store the device within reach of children. Make sure that the ventilation slots in the device are clean.
Keep all nuts, bolts and screws tightened to ensure the mower is in safe working condition.
Check the grass collector frequently for wear or damage.
Only use a cutting blade designed for this lawnmower.
Only have repairs carried out by a qualified technician or service centre.
39. Information and warnings
  7081 HomeELECTRIC LAWNMOWERFX-RME33 7081 HomeELECTRIC LAWNMOWERFX-RME33 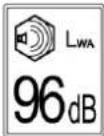 Power Source: 220-240 V, 50/60 Hz, IPX4Motor: 1200 WWorking Width: 330 mmWeight: 9 kgS/N: [IMAGE] Power Source: 220-240 V, 50/60 Hz, IPX4Motor: 1200 WWorking Width: 330 mmWeight: 9 kgS/N: [IMAGE] | Technical details of the mower:Power Source 220VMotor 1200 WattWorking Width 330mmNet weight 9kgSound power level | 96dB |
 | Operating instructions for starting the mower |
 | Risk of injury: keep your hands and feet away! |
 | Read the operating instructions carefully and keep a sufficient distance from dangerous areas |
 | DO NOT drive the mower over the power cable and disconnect the mower from the power supply before carrying out any work on the device. |
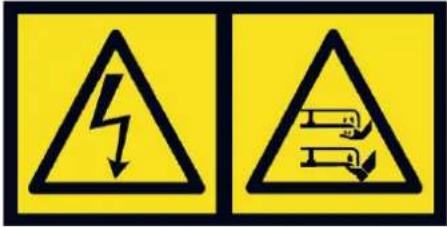 | If used improperly, there is a risk of electric shock.Keep your hands and feet away from the cutting unit! |
text_image
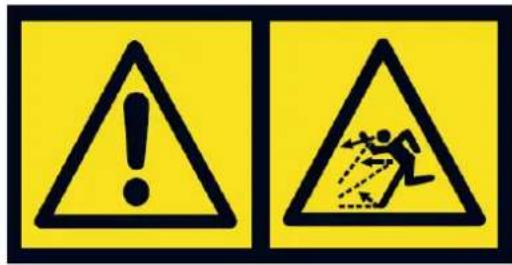
Two yellow warning signs: one with an exclamation mark and the other with a running figure symbol.Be careful. Objects can be thrown up by the mower. Please ensure that the area to be mowed is free of objects.
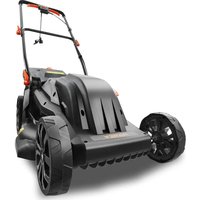
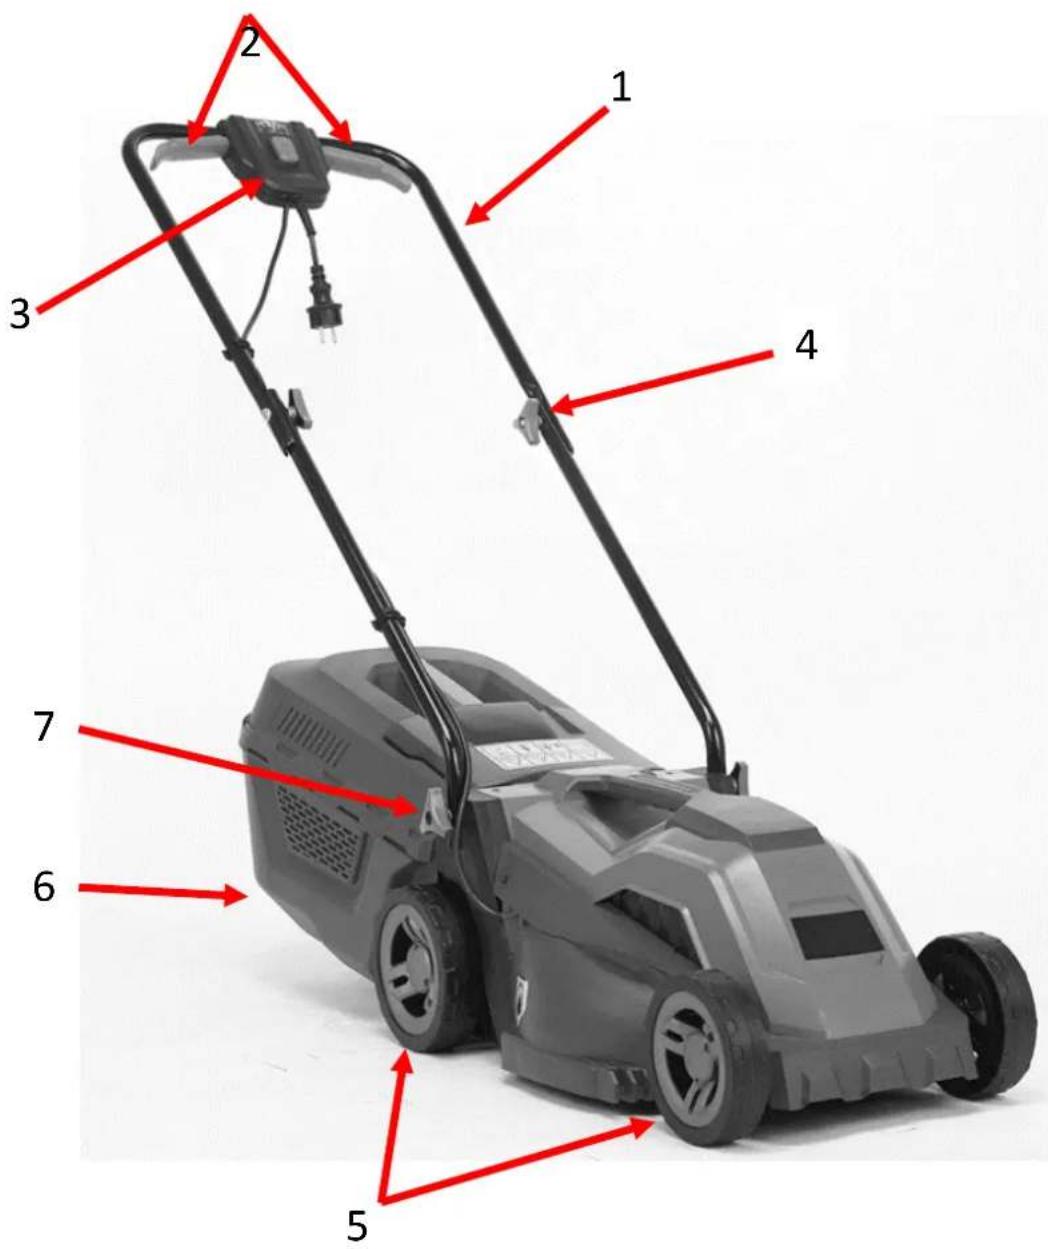
40. Presentation
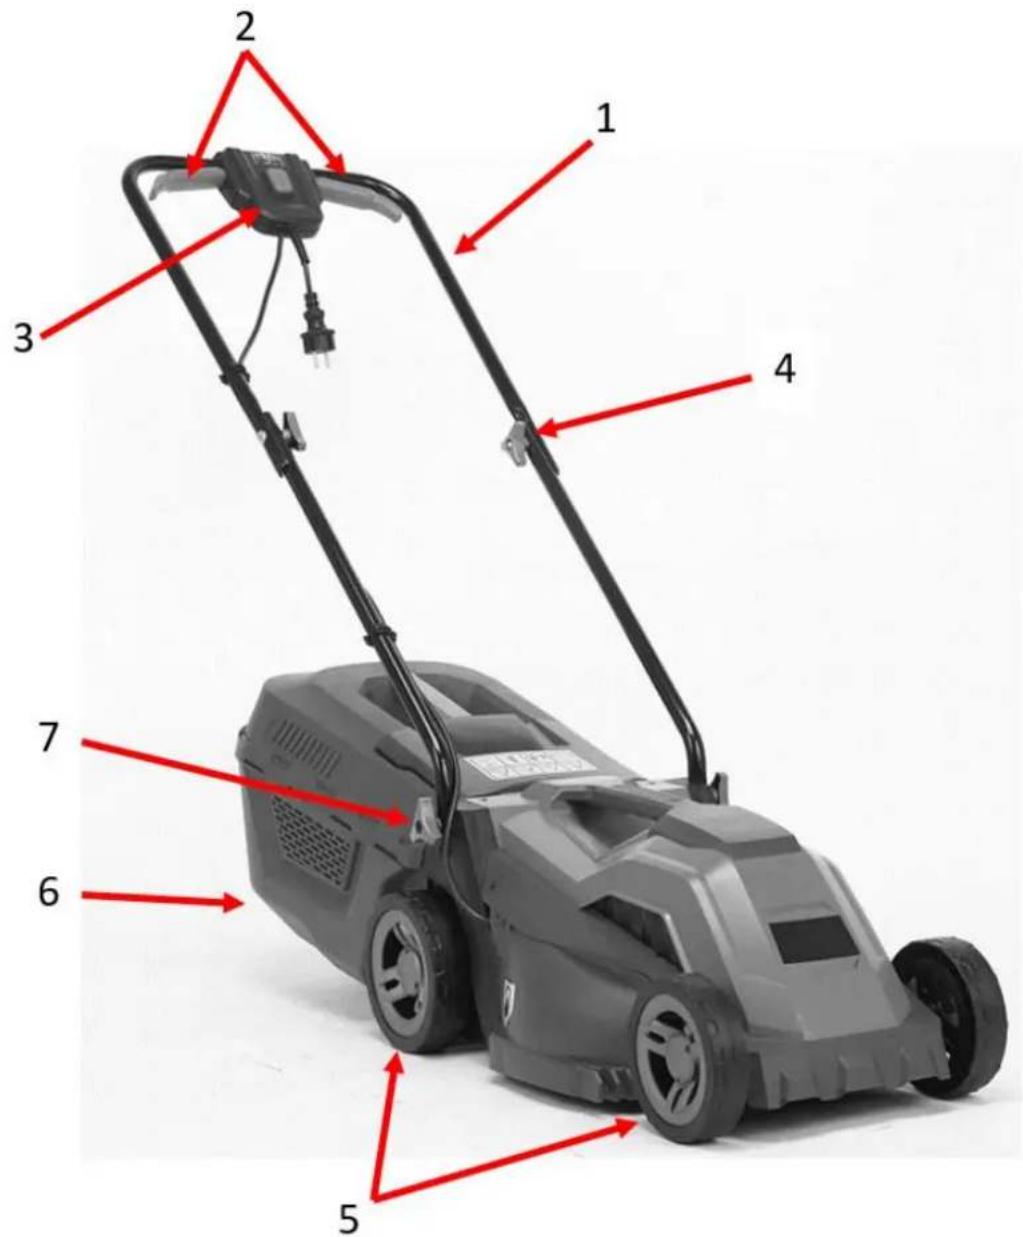
text_image
Labeled diagram of a lawn mower with numbered parts for identification1) Upper handle
2) Lever
3) Box with ON/OFF switch and plug
4) Quick release nut upper handle
5) Front and rear wheel
6) Grass collector
7) Nut lower handle
41. Assembly
Essential instructions for assembling the mower
Before assembling and operating the electric lawn mower, please read the full user manual and the instructions.
Remove the lawnmower from the cardboard packaging and check that no loose parts remain in the packaging.
natural_image
Top-down view of a gray and black toy car with a red circle highlighting the front wheel (no visible text or symbols)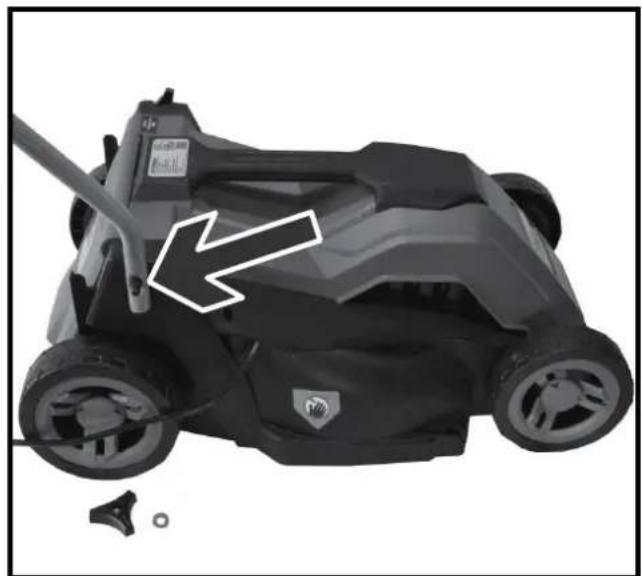
natural_image
Top-down view of a lawn mower with a white arrow pointing to the blade (no text or symbols visible)Fix the lower bar to the frame of the mower using the fastening nut and the M8 bolt.
First loosen the nuts, then guide the lower bar to the mower and place the washer between the nuts and the bar for better fastening.

natural_image
Close-up of a mechanical component or assembly with curved surfaces and a rectangular base (no visible text or symbols)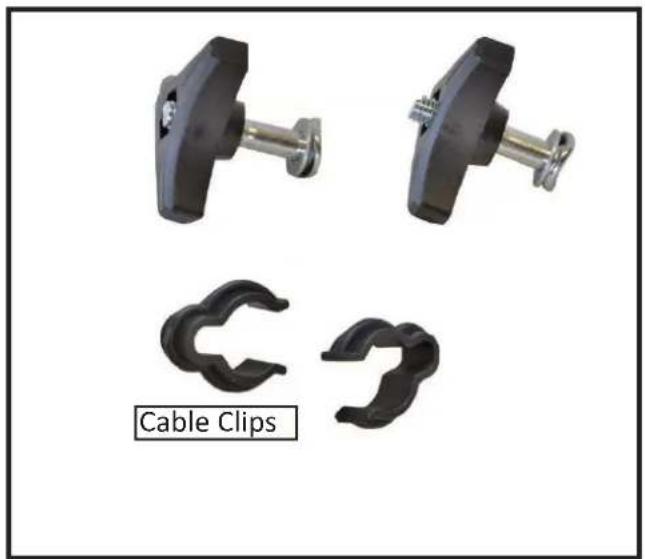
natural_image
Three black plastic clips with metal fittings, one labeled 'Cable Clips' (no other text or symbols)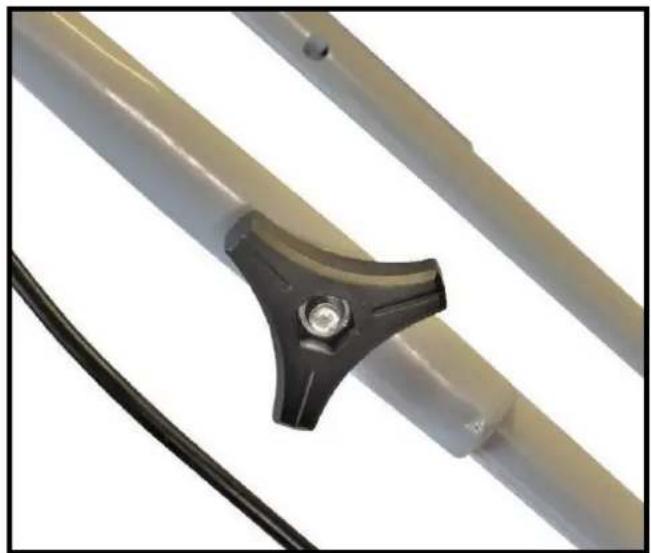
natural_image
Close-up of a mechanical component with a black triangular clamp and metallic rod, no visible text or symbols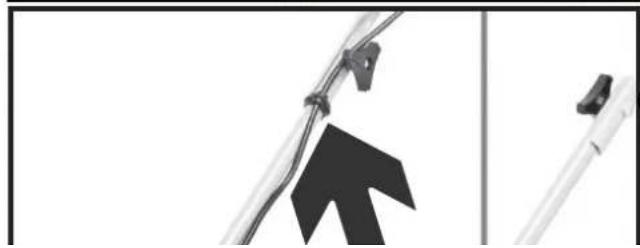
natural_image
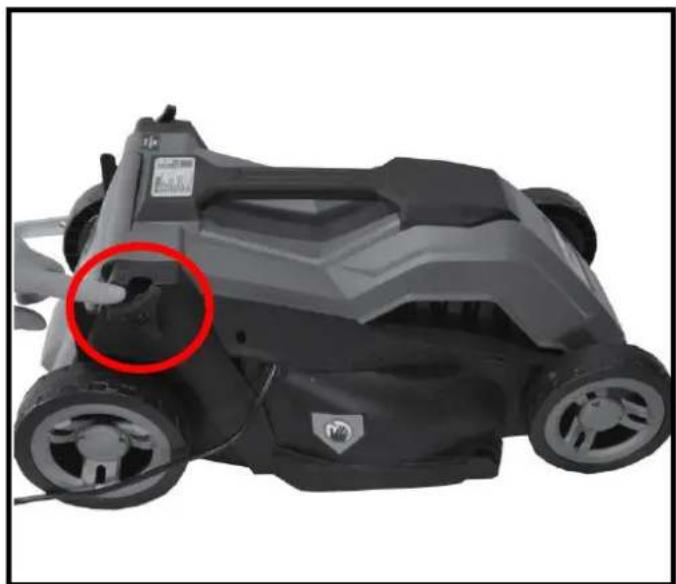
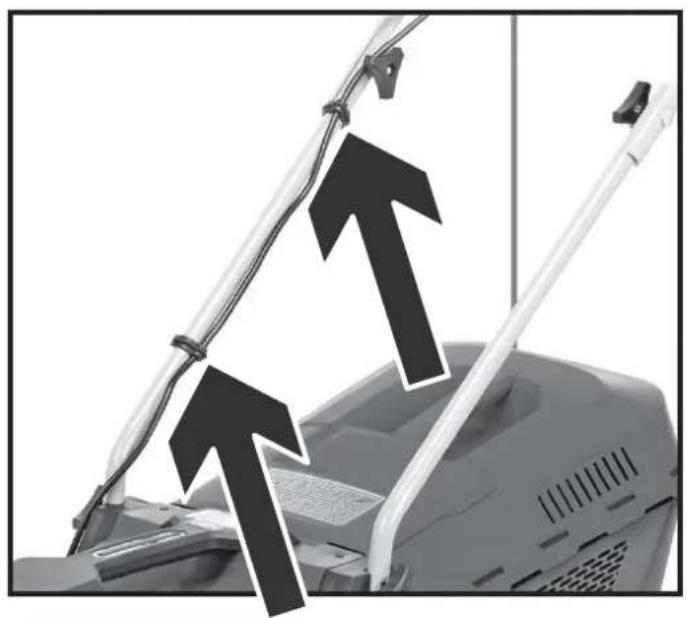
Close-up of a cable with a black arrow pointing downward, next to a partial view of a mechanical component (no text or symbols visible)Using the screws provided and the fastening nuts, connect the upper handle to the lower handle.
Press the power cable into the designated clamps on the bars.
natural_image
Close-up of a black plastic container with two white arrows pointing outward from its side (no text or symbols)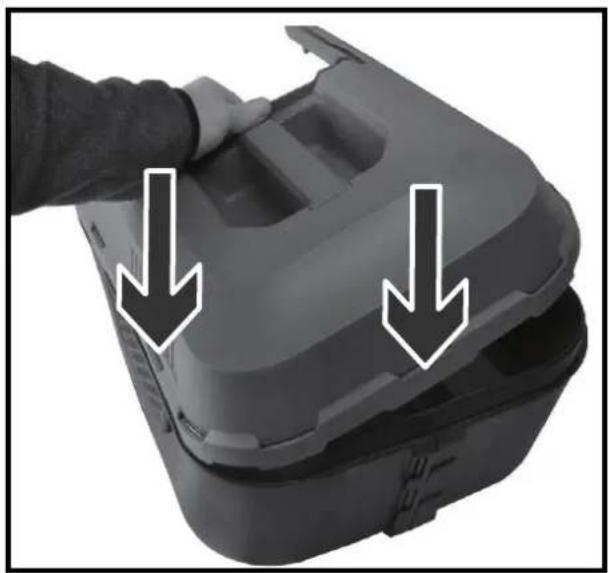
natural_image
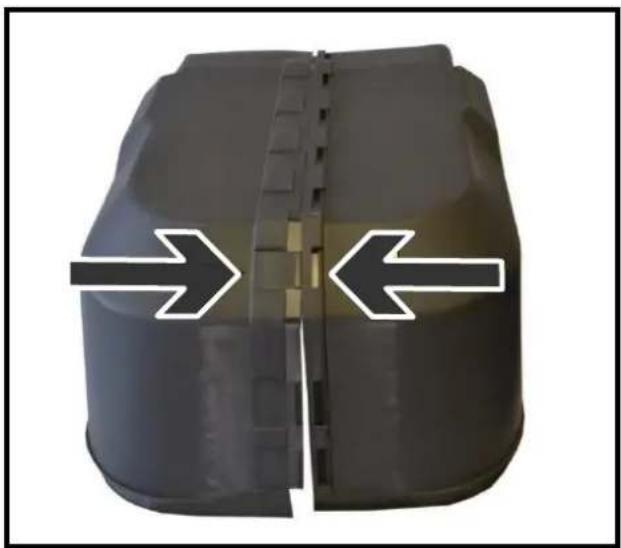
Close-up of a hand holding a gray plastic container with two downward arrows indicating a process or step (no text or symbols present)Assemble the grass catcher as shown.

natural_image
Side view of a modern lawn mower with visible vented seating and mounting bracket (no text or symbols)To install the grass catcher basket on the mower, lift the tailgate and attach the basket.
IMPORTANT: Only install or uninstall the grass catcher with the engine off. Otherwise there is a significant risk of injury
natural_image
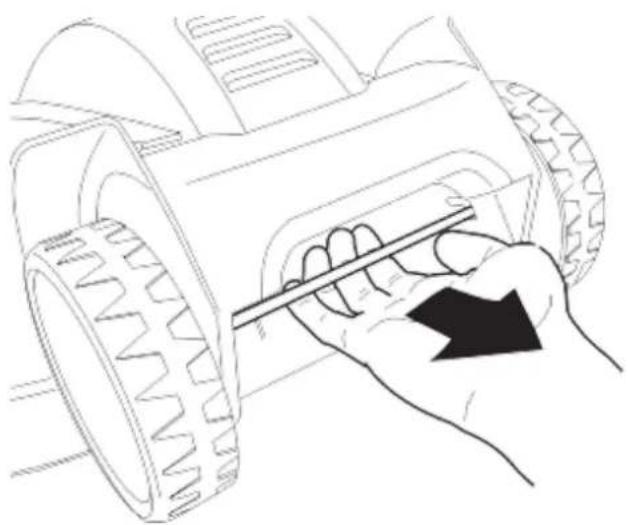
Line drawing of a hand using a tool to adjust or install a vehicle tire (no text or symbols present)You can choose three different cutting levels using the rear axle. To do this, hang the height adjustment lever in the desired recess.

text_image
HIGH MEDIUM LOW42. Start and stop the motor
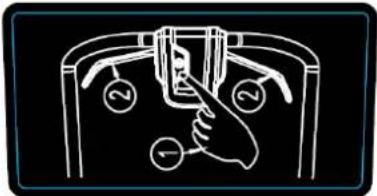
text_image
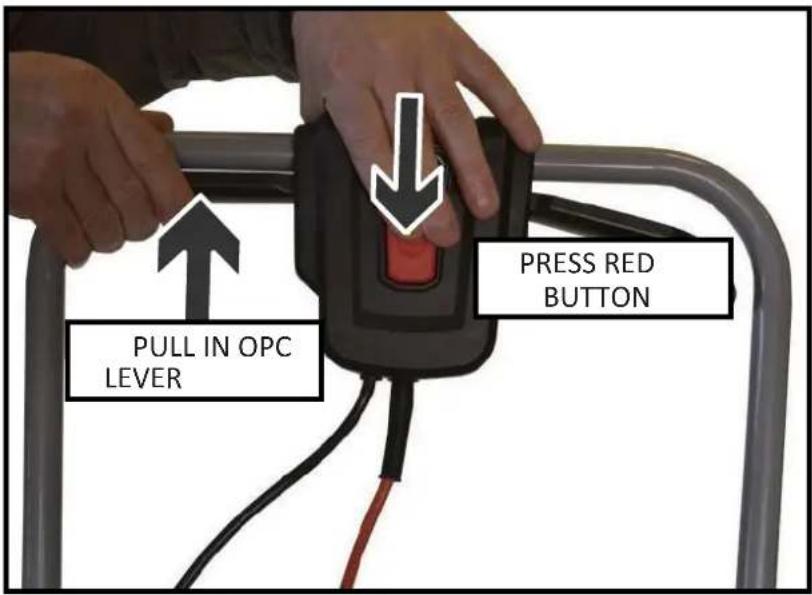
PRESS RED BUTTON PULL IN OPC LEVERTo start the motor, connect the mower to the power supply using an extension cord. Then first press the safety button in the middle of the panel and keep it pressed. Then pull one of the levers to start the motor.
Stopping the motor:
Release the lever. The motor stops, but the knife can still rotate for a few more seconds. Do not carry out any work on the mower until you are sure that the blade has stopped completely.
Manual\_FX-RME33\_Int24\_rev1
43. Working instructions
- Carefully check the entire area to be mown and remove all foreign bodies.
• Only operate the lawn mower if there are no third parties in the danger area. - Only mow if visibility is good.
- Only operate the machine at walking pace.
• Only operate the mower if the blade is sharp.
• Do not mow over obstacles (e.g. twigs, tree roots).
- On sloping terrain, always mow across the slope. Do not mow uphill or downhill or on slopes where the inclination exceeds 20^ .
• Exercise particular care when changing direction on sloping terrain.
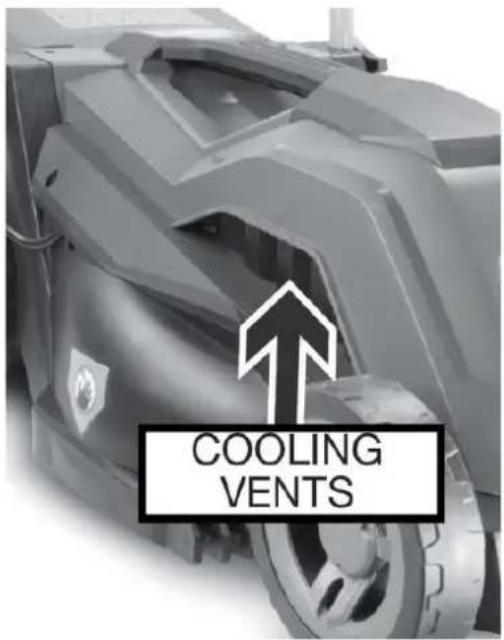
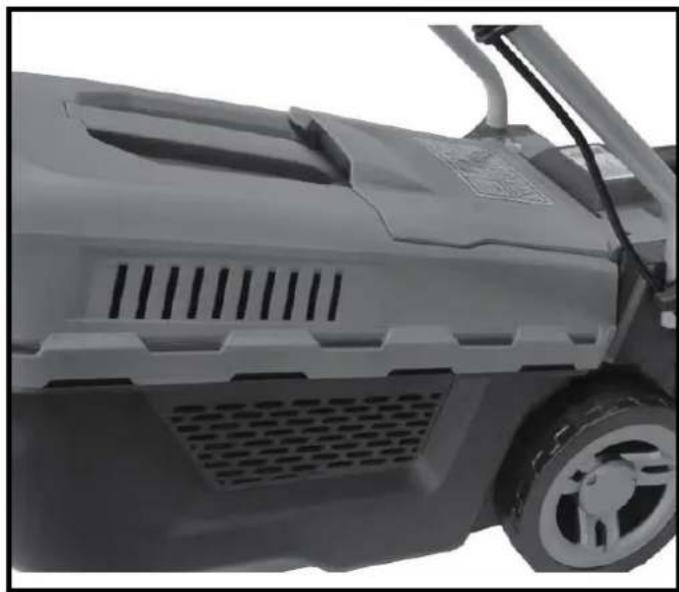
- Before, between and after mowing, check the air inlets that cool the electric motor and remove any blockages. This may only be done when the motor is switched off, otherwise there is a considerable risk of injury!
text_image
COOLING VENTS
natural_image
Close-up of a mechanical component with a white spherical object and a red arrow pointing to it (no text or symbols visible)44. Tips for mowing
- Start mowing as close as possible to the power socket.
• Always keep the extension lead on the section of lawn than has already been mown. - Maintain a constant cutting height of 3–5 cm; do not shorten the grass to less than half its original height.
- Do not overload the lawnmower! If the motor speed drops perceptibly due to long, heavy grass, in- crease the cutting height and mow several times.
- Mow in the morning or late afternoon to prevent the freshly cut grass from drying out.
- During phases of strong growth, mow twice weekly; in periods of low rainfall, increase intervals between mowing accordingly.
45. Storage
• Always unplug the machine from the mains for storage.
• To save space during storage, fold down the upper bar.
• Store the machine in a dry condition and out of reach of children and unauthorized persons
46. Disposal
i NOTE
Please contact your municipality/city for information about disposal options.
Recycling raw materials instead of waste disposal.
47. Technical data
| Motor | Electric 220V |
| Power | 1200 Watt |
| Cutting height | 20mm-60mm |
| Working width | 330 mm |
| Wheel size | 14cm front / 16cm rear |
| Capacity grass catcher | 30l |
| Sound power level | 96dB |
| Weight | 9kg |
48. EU Declaration of Conformity
Manufacturer / Producer FUXTEC GmbH
Kappstraße 69, 71083 Herrenberg Germany / Germany
Email: info@fuxtec.com Web: www.fuxtec.com
Designation/name Electric Lawn mower FX-RME33
EC Directive / EC directive 2006 42 EC
2014/30/EU
2000/14/EC amended by
2005/88/EC Annex IV
Applicable standards
EN 62841-1:2015+AC:15+A11:2022
EN IEC 62841-4-3:2021+A11:2021
EN 62233:2008
EN IEC 55014-1:2021
EN IEC 55014-2:2021
EN IEC 61000-3-2:2019+A1:2021
EN 61000-3-3:2013+A1:2019+A2:2021
We, with this, declare that, due to its design, the device mentioned above in the version placed on the market by us complies with the basic safety and health requirements of the listed EC directive. Any manipulation or modification of the device not expressly approved by us will render this document null and void.
We declare that the device mentioned above meets the above-stated EC directives' essential safety and health requirements. Any manipulation or change of the device not being explicitly authorised by us in advance renders this document null and void.
Custody of technical documents: FUXTEC GmbH ● Kappstraße 69 ● 71083 Herrenberg ● Germany, L. Zirkler, Management Board
Herrenberg, November the 29 ^th , 2023
C. Jille
text_image
Warning sign with exclamation mark and pictogram of person falling, both in black on yellow backgroundtext_image
Labeled diagram of a lawn mower with numbered parts for identificationnatural_image
Top-down view of a gray and black toy car with a red circle highlighting the wheel (no visible text or symbols)natural_image
Top-down view of a black lawn mower with a white arrow pointing to the wheel (no text or symbols visible)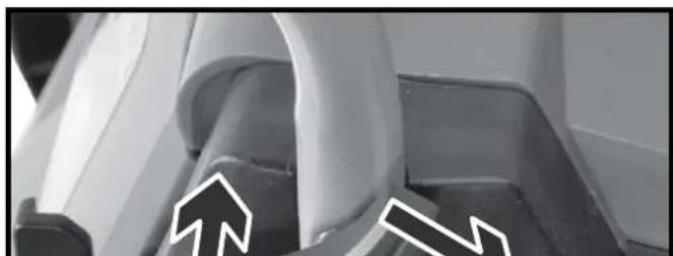
natural_image
Close-up of mechanical components with two white arrows pointing upward (no text or symbols)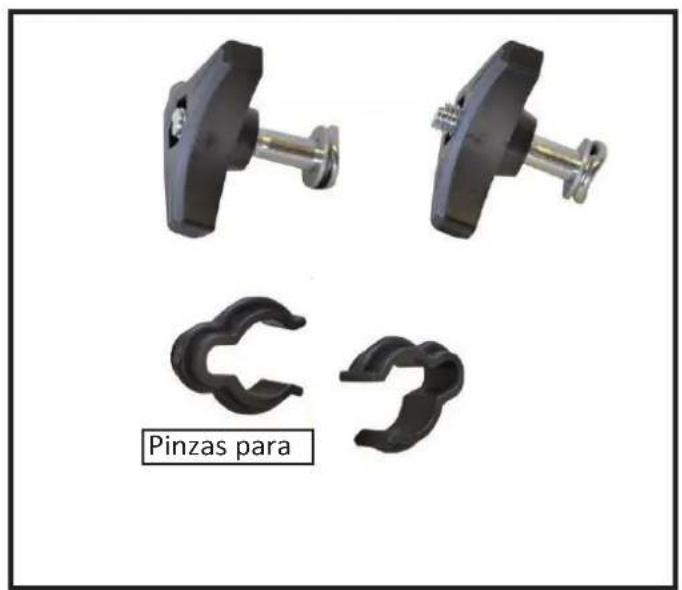
natural_image
Close-up of a mechanical component with a black triangular handle and wire, no visible text or symbols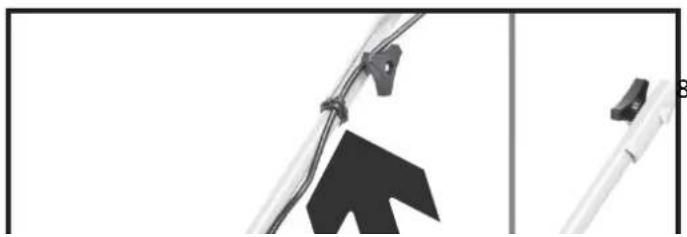
natural_image
Close-up of a mechanical clamp and bracket assembly with no visible text or symbolsnatural_image
Close-up of a black plastic container with two white arrows pointing left and right, indicating flow or movement (no text or symbols)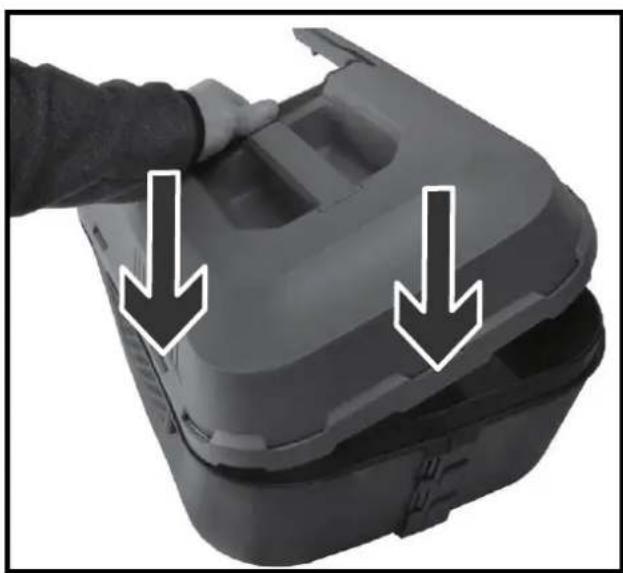
natural_image
Close-up of a hand holding a gray plastic container with two downward arrows indicating a process or inspection (no text or symbols present)natural_image
Side view of a grass lawn mower with visible vented seating and mounting bracket (no text or symbols)natural_image
Line drawing of a hand using a tool to adjust or install a tire component (no text or symbols present)
text_image
HIGH MEDIUM LOWtext_image
COOLING VENTS
natural_image
Close-up of a mechanical fan or wheel assembly with a red arrow pointing to a specific component (no visible text or symbols)ES IEC 62841-4-3:2021+A11:2021
EN 62233:2008
ES IEC 55014-1:2021
ES IEC 55014-2:2021
EN IEC 61000-3-2:2019+A1:2021
EN 61000-3-3:2013+A1:2019+A2:2021
text_image
Warning sign with exclamation mark and pictogram of person falling, both in black on yellow backgroundtext_image
Labeled diagram of a lawn mower with numbered parts for identificationnatural_image
Black and gray toy car with a red circle highlighting the front wheel (no visible text or symbols)natural_image
Top-down view of a black lawn mower with a white arrow pointing to the blade (no text or symbols visible)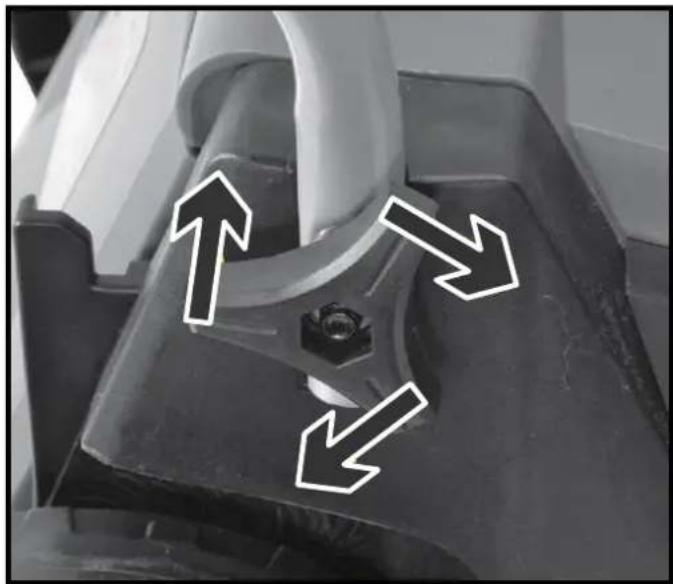
natural_image
Close-up of a mechanical component with three white arrows pointing upward and downward, indicating directional movement or flow (no text or symbols present)
natural_image
Product image showing three black plastic clips with metal fittings, one labeled 'Clipes para' (no other text or symbols)
natural_image
Close-up of a mechanical component with a black triangular handle and wire, no visible text or symbolsLigar a barra superior à barra inferior com os parafusos de orelhas fornecidos. Em seguida, fixar o cabo à calha com os suportes de cabo fornecidos
natural_image
Close-up of a mechanical device with attached wires and a ladder, showing upward arrows indicating motion or assembly (no text or symbols visible)natural_image
Close-up of a black plastic container with two white arrows pointing outward from its side (no text or symbols)
natural_image
Close-up of a mechanical component being adjusted by hand, with two downward arrows indicating fastening or disassembly (no text or symbols present)Montar o apanhador de relva como indicado.
natural_image
Side view of a gray industrial robotic vehicle with visible vented door and wheels (no text or symbols)natural_image
Line drawing of a hand using a tool to adjust or install a tire component (no text or symbols present)
text_image
HIGH MEDIUM LOWtext_image
COOLING VENTS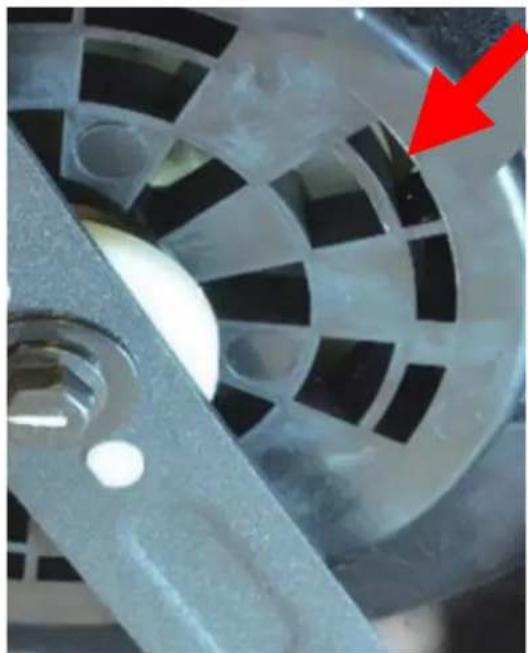
natural_image
Close-up of a mechanical component with a white spherical object and a red arrow pointing to it (no text or symbols visible)EN IEC 62841-4-3:2021+A11:2021
EN 62233:2008
EN IEC 55014-1:2021
EN IEC 55014-2:2021
EN IEC 61000-3-2:2019+A1:2021
EN 61000-3-3:2013+A1:2019+A2:2021
text_image
Warning sign with exclamation mark and pictogram of person falling, both in black on yellow backgroundtext_image
Labeled diagram of a lawn mower with numbered parts for identificationnatural_image
Black and gray toy car with a red circle highlighting the front wheel (no visible text or symbols)natural_image
Top-down view of a black lawn mower with a white arrow pointing to the blade (no text or symbols visible)
natural_image
Close-up of a mechanical component with three white arrows pointing upward and downward, indicating directional movement or flow (no text or symbols present)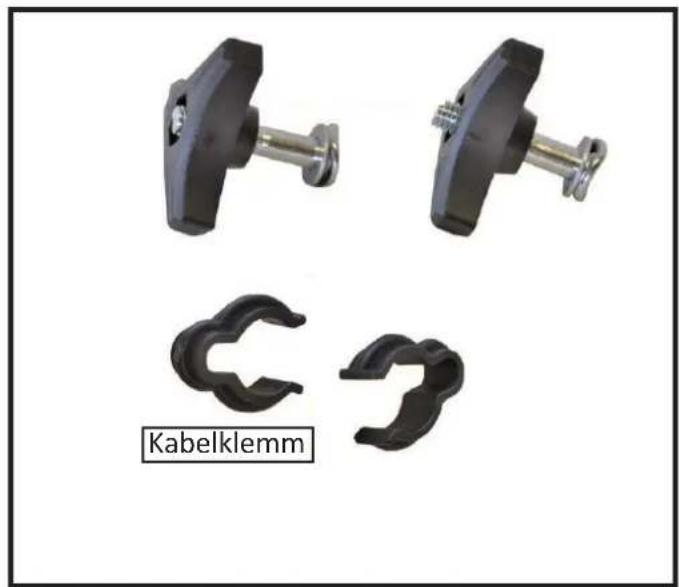
natural_image
Product photo of black plastic clips with metal fittings, labeled 'Kabelklemm' (no other text or symbols visible)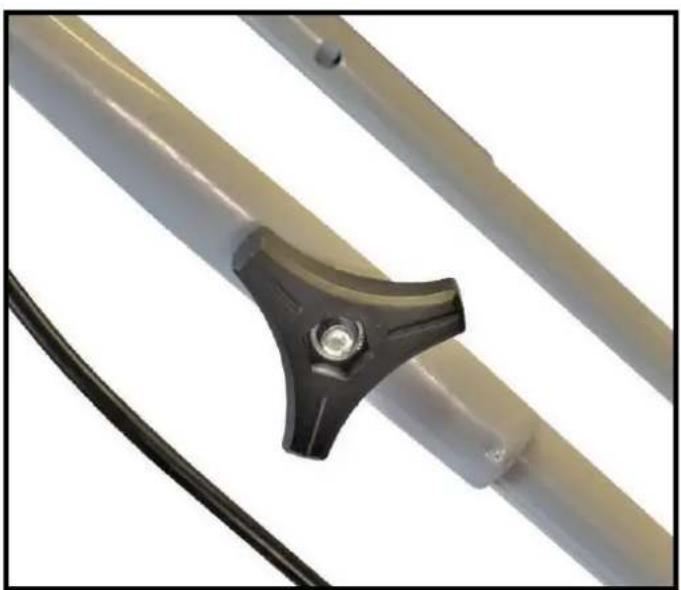
natural_image
Close-up of a mechanical component with a black triangular clamp and metallic rod, no visible text or symbolsnatural_image
Close-up of a mechanical device with attached wires and a ladder, showing upward arrows indicating motion or assembly (no text or symbols visible)natural_image
Close-up of a black plastic container with two white arrows pointing outward from its side (no text or symbols)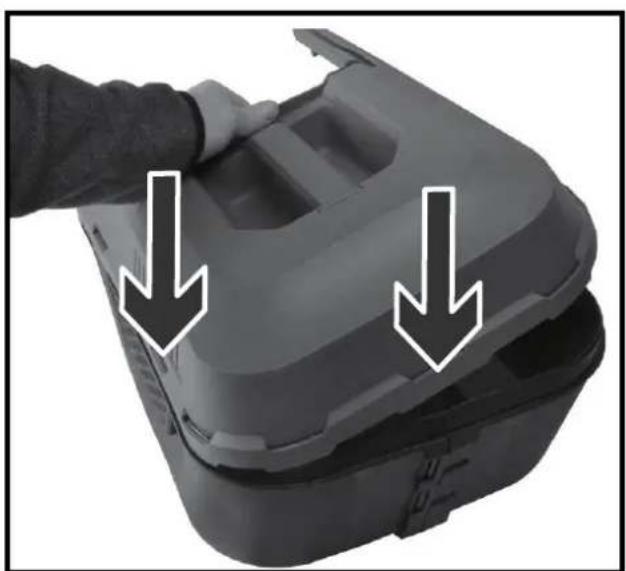
natural_image
Close-up of a mechanical component being adjusted by hand, with two downward arrows indicating fastening or disassembly (no text or symbols present)natural_image
Side view of a gray industrial robotic vehicle with visible vented door and wheels (no text or symbols)Om de grasvanger op de maaier te installeren, tilt u de achterklep op en bevestigt u de grasvanger.
natural_image
Line drawing of a hand using a tool to adjust or install a mechanical component (no text or symbols present)
text_image
HIGH MEDIUM LOWtext_image
COOLING VENTS
natural_image
Close-up of a mechanical fan or wheel assembly with a red arrow pointing to a specific component (no visible text or symbols)EN IEC 62841-4-3:2021+A11:2021
EN 62233:2008
EN IEC 55014-1:2021
EN IEC 55014-2:2021
EN IEC 61000-3-2:2019+A1:2021
EN 61000-3-3:2013+A1:2019+A2:2021
text_image
Warning sign with exclamation mark and pictogram of person falling, both in black on yellow backgroundtext_image
Labeled diagram of a lawn mower with numbered parts for identificationnatural_image
Black and gray toy car with a red circle highlighting the front wheel (no visible text or symbols)natural_image
Top-down view of a black lawn mower with a white arrow pointing to the blade (no text or symbols visible)
natural_image
Close-up of a mechanical component with three white arrows pointing upward and downward, indicating directional movement or flow (no text or symbols present)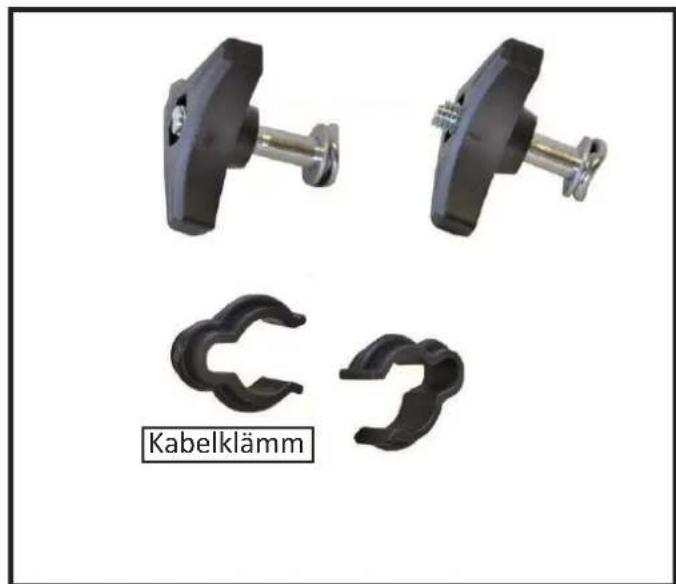
natural_image
Product image showing three black mechanical clips with metal fittings and a label 'Kabelklämm' below (no other text or symbols)
natural_image
Close-up of a mechanical component with a black triangular handle and wire, no visible text or symbolsnatural_image
Close-up of a mechanical device with attached wires and a ladder, showing upward arrows indicating motion or assembly (no text or symbols visible)natural_image
Close-up of a black plastic container with two white arrows pointing outward from its side (no text or symbols)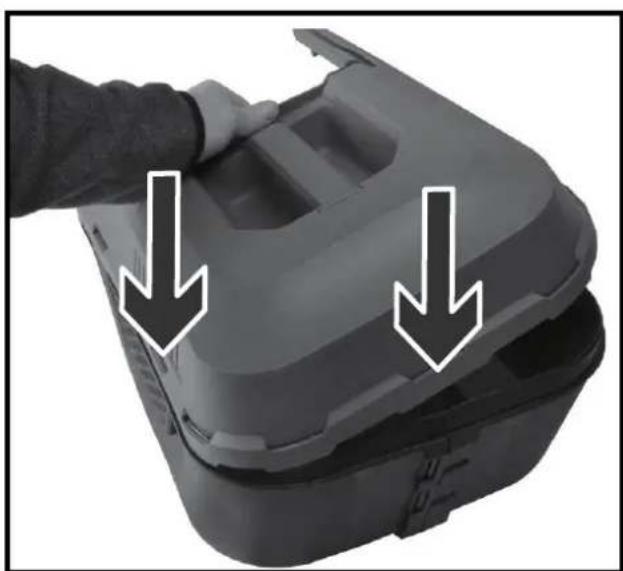
natural_image
Close-up of a mechanical component being adjusted by hand, with two downward arrows indicating fastening or disassembly (no text or symbols present)natural_image
Side view of a gray industrial robotic vehicle with visible vented door and wheels (no text or symbols)natural_image
Line drawing of a hand using a tool to adjust or install a mechanical component (no text or symbols present)text_image
HIGH MEDIUM LOWtext_image
COOLING VENTS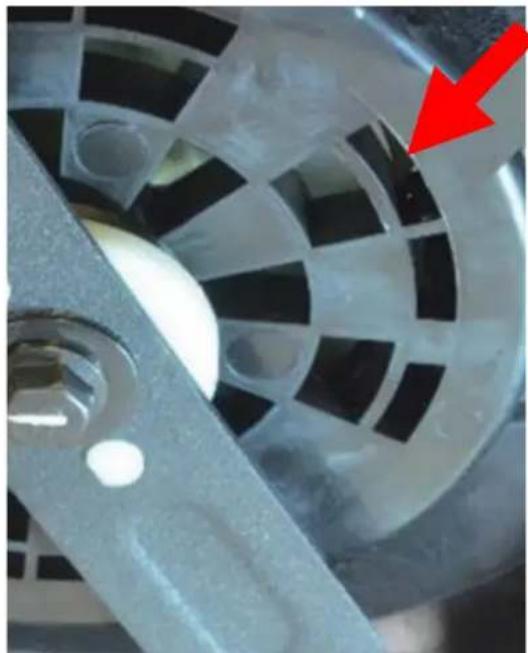
natural_image
Close-up of a mechanical component with a white circular component and a red arrow pointing to it (no text or symbols visible)EN IEC 62841-4-3:2021+A11:2021
EN 62233:2008
EN IEC 55014-1:2021
EN IEC 55014-2:2021
EN IEC 61000-3-2:2019+A1:2021
EN 61000-3-3:2013+A1:2019+A2:2021
POLSKA WERSJA JEZYKOWA
text_image
Warning sign with exclamation mark and pictogram of person falling off a slope100. Prezentacja
text_image
Labeled diagram of a lawn mower with numbered parts for identificationnatural_image
Black and gray toy car with a red circle highlighting the side wheel (no visible text or symbols)natural_image
Black lawn mower with a white arrow pointing to the side of the wheel (no text or symbols visible)
natural_image
Close-up of a mechanical component with three white arrows pointing upward and downward, indicating directional movement or flow (no text or symbols present)
natural_image
Three black plastic clips with metal fittings and a label 'Klipsy do' below (no other text or symbols)
natural_image
Close-up of a mechanical component with a black triangular clamp and metallic rod, no visible text or symbolsnatural_image
Close-up of a mechanical device with attached wires and a ladder, showing upward arrows indicating motion or assembly (no text or symbols visible)natural_image
Close-up of a black plastic container with two white arrows pointing outward from its side (no text or symbols)
natural_image
Close-up of a mechanical component being adjusted by hand, with two downward arrows indicating fastening or disassembly (no text or symbols present)natural_image
Side view of a gray industrial robotic vehicle with visible exhaust grilles and mounting brackets (no text or symbols)natural_image
Line drawing of a hand using a tool to adjust or install a mechanical component (no text or symbols present)text_image
HIGH MEDIUM LOWtext_image
COOLING VENTS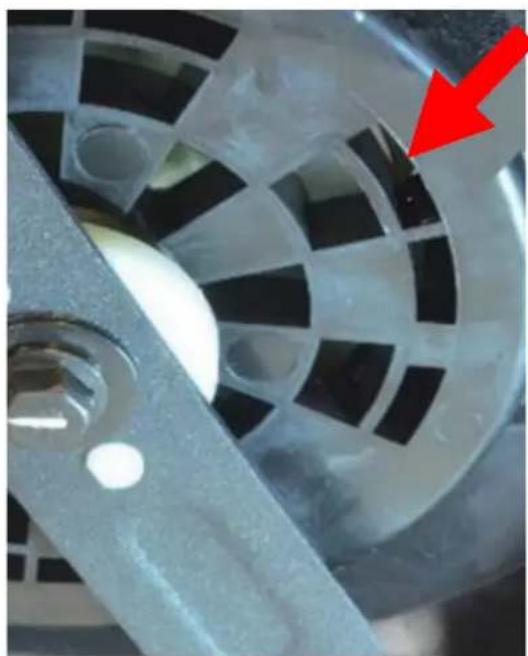
natural_image
Close-up of a mechanical fan or wheel assembly with a white spherical component and a red arrow pointing to a specific area (no text or symbols visible)EN IEC 62841-4-3:2021+A11:2021
EN 62233:2008
EN IEC 55014-1:2021
EN IEC 55014-2:2021
EN IEC 61000-3-2:2019+A1:2021
EN 61000-3-3:2013+A1:2019+A2:2021