USER MANUAL 011485 Meec Tools
Important! Read the user instructions carefully before use. Save them for future reference. (Translation of the original instructions)
SV BRUKSANVISNING
Care for the environment!
Recycle discarded product in accordance with local regulations.
Jula reserves the right to make changes.
For latest version of operating instructions, see www.jula.com
SYMBOLS
| Read the instructions. |
| Wear safety glasses and ear protection. |
| Wear a breathing mask. |
| Safety class II |
| Approved in accordance with the relevant EU directives. |
| Recycle as electrical waste. |
TECHNICAL DATA
| Rated voltage 230 V | ~ 50 Hz |
| Nominal input power 1300 W | |
| SafetyclassI | |
| Hose length 7.5 m | |
| Flow | 1.17 l/min |
| Weight | 7.5 Kg |
| Sound pressure level, LpA | 93.5 dB(A)
K=3 dB(A)) |
| Sound power level, LwA | 107.5 dB(A)
K=3 dB(A)) |
Always wear ear protection.
The declared values for vibration and noise, which have been measured according to a standardised test method, can be used to compare different tools with each other and for a preliminary assessment of exposure. The measurement values have been determined in accordance with EN 14462.
WARNING!
The actual vibration and noise level when using tools may differ from the specified maximum value, depending on how the tool is used and the material. It is therefore necessary to determine which safety precautions are required to protect the user, based on an estimate of exposure in actual operating conditions (taking into account all
stages of the work cycle, e.g. the time when the tool is switched off and when it is idling, in addition to the start-up time).
DESCRIPTION
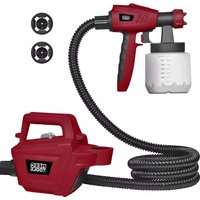
PACKAGE CONTENTS
1 spray, 1 high-pressure hose, 1 high-pressure spray gun, 2 spanners and 2 hex keys.
PRODUCT PARTS
- Power switch (on/off)
- Pressure switch
- Fluid outlet
- Button for manual valve
- Fluid inlet
- Pressure relief valve
- Pump
- Pressure control knob
- Power cord and plug
- Suction hose
- Outlet hose
- High-pressure hose
- Spray gun
FIG. 1
EXPLANATION OF PRODUCT CONTROLS AND FUNCTIONS
Power switch
When the switch is in position 1 the product is on, and in position 0 it is off.
FIG. 2
Pressure control knob
Pressure control knob (setting the pressure and material flow).
FIG. 3
Pressure relief valve
The product is supplied with pressure when the pressure relief valve lever is horizontal. Pressure is relieved in vertical position and air can be released. The pressure relief valve is mainly used to bleed the system before starting the product. It also protects from overflowing if there is overpressure in the product.
FIG. 4
Manual valve
If the product has not been used for sometime the ball in the inlet valve can fasten to the valve seat, which will prevent feeding of the paint. Press the manual valve lever repeatedly to release the inlet valve ball so that the inlet valve can work as usual.
FIG. 5
Pressure control valve
The pressure control valve has a sensor that detects the pressure in the pump housing and sends a signal to the control card, which regulates the pressure.
Outlet and inlet valves
The outlet and inlet valves are controlled together to keep the paint under pressure and to supply the high pressure for spraying.
ASSEMBLY
UNPACKING
Unpack the product and check that all the parts are included and undamaged. Check before use that all screw unions and other joints are properly tightened.
WARNING!
Do not use the product if parts are missing or damaged - risk of bursting that can cause serious personal injury and/or material damage.
- Connect the high-pressure hose (12) to the fluid outlet (3) and firmly tighten with a spanner. Connect the other end of the high-pressure hose (12) to the spray gun (13) and firmly tighten with two spanners. Check that the trigger lock is applied.
- Check that the nozzle is correctly inserted in the nozzle guard and that the nozzle guard is firmly mounted on the spray gun. See section "Fitting the nozzle".
- Release the pressure. See section "Pressure relief".
FITTING THE NOZZLE
- If the spray gun is not connected to the product, go to step 2. If the spray gun is connected to the product, release the pressure.
- Apply the trigger lock.
-
Fit the nozzle guard parts (2) in the order shown in the figure.
-
Fit the rubber gasket (5) and metal seal (4) in the nozzle guard (2) by using the nozzle (1).
The nozzle (1) should be inserted all the way in the nozzle guard (2). Turn the nozzle (1) and press down at the same time.
-
Turn the arrow shaped handle on the nozzle (1) forward to the spraying position.
-
Fit the nozzle (1) with the nozzle guard (2) on the spray gun and tighten the lock nut (3).
FIG. 6
PRESSURE RELIEF
- Apply the trigger lock and put the switch (1) in the off position.
- Turn the pressure control knob (8) to the lowest setting.
- Put the end of the outlet hose (11) in a suitable container and turn the pressure relief valve lever (6) to its vertical position to relieve the pressure.
- Press the spray gun firmly against an earthed metal container and point it down into the container. Release the trigger lock and press the trigger to relieve the pressure in the product.
- Apply the trigger lock.
NOTE:
- The system is not relieved of pressure when the pump motor is switched off.
- Leave the pressure relief valve lever (6) in its vertical position until spraying starts.
USE
FLUSHING OF PRESERVATIVE FLUID
NOTE:
The product must be flushed/tested before use. The product is tested at the factory with a fluid that must flushed out of the system before it is used for the first time. The preservative lubricant must then be flushed out from the system before use.
- Check that the power switch (1) is switched off.
-
Put the end of the outlet hose (11) in a suitable container and put the end of the suction hose (10) in an earthed metal container, partly filled with cleaning fluid, to flush the fluid from the factory out of the product. Flush out water-based paint with water and oil-based paint and preservative with white spirit or the equivalent.
-
The pressure relief valve lever (6) must be in its vertical position.
- The plug (9) must only be connected to a correctly earthed power point.
- Press the manual valve (4) several times to release the inlet valve ball.
- Turn the pressure control knob (8) to the lowest setting.
- Put the switch (1) in the on position. The product pump starts and fluid flows in through the suction hose (10) and out through the outlet hose (11).
- Let the fluid flow out through the outlet hose (11) for 45 to 60 seconds and then turn back the pressure relief valve lever (6) to its horizontal position. Wait until the pump stops.
- Wait about 1 minute and then check that all the connections are tight. If there is any leakage, release the pressure and tighten all the connections and then repeat steps 1 to 8. Never attempt to stop leakage with your hands, other parts of your body, or rags.
- If there is no leakage put the switch (1) in the off position, point the spray gun down in an empty container, release the trigger lock and press the trigger to empty the fluid from the system.
- Apply the trigger lock and turn the pressure relief valve lever (6) to its vertical position.
PREPARATION OF MATERIAL
The material to be sprayed must be mixed, diluted (if applicable) and filtered before use. If diluting is necessary use a solvent with a flash point higher than 21^ (flammable liquid class 2a or higher) that is compatible with actual material. Read all the safety instructions, other instructions and safety information sheets and labels on the containers for paints and solvents. Follow the instructions from the manufacturer of the paint and solvent.
FILTERING
Disposable filter bags can be bought in paint shops and used to remove coarse particles and impurities from new or used material. Filter the material before spraying to avoid filling problems and blocking the nozzle. Put a disposable filter bag over a clean container and let the material run through the filter.
PREPARATIONS FOR SPRAYING
When the material has been prepared and filtered it is ready to be sprayed.
- Check that all the connections are firmly tightened, that the pressure relief valve lever (6) is in its vertical position, and that the trigger lock is applied.
- Put the end of the suction hose (10) in the material container so that the suction opening is under the surface. Put the outlet hose (11) in a container.
- Put the switch (1) in the on position.
- Wait until the material flows out through the outlet hose (11) and put the switch (1) in the off position.
- Turn the nozzle to the cleaning position and check that the nozzle guard is firmly in place.
- Press the spray gun against the container and point it down into the container.
- Release the trigger lock, press the trigger and hold.
- Put the pressure relief valve lever (6) in its horizontal position.
- Put the switch (1) in the on position.
- Hold the spray gun pointing down in the container with the trigger pressed until material comes out.
- Release the trigger and apply the trigger lock.
-
Move the outlet hose (11) to the material container and fasten it to the suction hose (10).
-
Sink the suction hose and outlet hose down under the surface in the material container.
- Turn the nozzle to the spraying position and check that the nozzle guard is firmly in place. The product is now ready to use.
NOTE:
Fill material in the container when the level drops. The product can be damaged if the level is too low.
SPRAYING
Testing the spray pattern
Practice the spraying technique on a spare piece of paper or small area before spraying.
- Turn the pressure control knob (8) to the lowest setting.
- Release the trigger lock, point the spray gun at the test area or piece of paper, and press the trigger.
- Turn the pressure control knob (8) slowly clockwise to gradually increase the pressure until the spray pattern becomes uniform and of good quality.
Instructions for spraying
- Hold the spray gun 30~cm from the surface and pointing straight at the surface. Move your wrist so that the spray gun is kept pointing straight at the surface during the work.
FIG. 7
- The surface layer of material will be uneven if the spray gun is held at an angle to the surface or moved in an arc.
FIG. 8
-
Move the spray gun smoothly. To avoid thicker patches, start moving the spray gun before pressing the trigger and release the trigger before stopping. The spray gun should be in motion when the trigger is pressed or released.
-
Point the jet from the spray gun at the bottom edge of the previous stroke, so that each stroke overlaps by 50% .
- Start moving the spray gun
- Press the trigger
- Continue moving the spray gun
- Release the trigger
- Stop moving the spray gun
- Point here with the spray gun to overlap the previous stroke by 50%
- Release the trigger before the stroke is finished
- Press the trigger after starting the stroke
FIG. 9
Spray pattern and quality
The material is spread smoothly over the surface when the spray pattern is correct.
- The material should be finely dispersed and uniformly applied, without gaps at the edges.
- Adjust the pressure control knob (8) until the spray pattern is uniform, without gaps or thicker layers at the edges.
- If it is not possible to correct the spray pattern, check whether the nozzle is worn. The material may need to be diluted. Follow the instructions of the material manufacturer for dilution.
CLEANING THE NOZZLE
If the nozzle gets blocked during the spraying, turn the nozzle to quickly and easily clear away the particles without dismantling the product.
- Apply the trigger lock and turn the nozzle to the cleaning position. Check that the nozzle is inserted all the way in the nozzle guard.
-
Release the trigger lock, point the spray gun down in the container and press the trigger for 2 seconds.
-
Apply the trigger lock, turn back the nozzle to the spraying position, release the trigger lock and continue spraying.
CLEARING A BLOCKAGE
Follow the instructions below if no material comes out through the spray gun, or if you are not certain that the pressure was fully relieved when the process for relieving the pressure was carried out.
- Release the high-pressure hose very slowly from the spray gun.
- Put the pressure relief valve lever (6) in its horizontal position.
- Hold the hose in a firm grip and point the end down into the material container. Put the switch (1) in the on position.
- If no material flows out through the hose, connect the hose again and continue with step 6.
- If material flows out through the hose, follow the instructions for cleaning the spray gun and filter.
- Connect the hose to the spray gun and follow the instructions for preparations before spraying.
MAINTENANCE
Follow the maintenance instructions for best functionality and useful life.
- Check and clean the inlet filter and spray gun filter before use.
- Replace the filters if they are damaged or if they cannot be cleaned.
- Check the product for leakage, especially at the connections. Replace any damaged parts.
-
Always check the high-pressure hose for damage before use. Damaged hoses and connections must be replaced - never attempt to repair them.
-
Clean nozzle with a brush and a suitable cleaner fluid after use.
- The nozzle may need to be replaced after 57 to 277 litres of material has been sprayed, depending on the abrasive properties of the material.
CLEANING
- Carry out steps 1 to 3 in the instructions for pressure relief.
- Turn the nozzle to the cleaning position. Press the spray gun firmly against an earthed material container and point it down into the container. Release the trigger lock and press the trigger to return the material in the high-pressure hose to the material container.
- When the pressure has been relieved, release the trigger and apply the trigger lock.
- Lift up the suction hose (10) and outlet hose (11) and let them run out into the material container.
- Release the outlet hose (11) from the suction hose (10) and put the outlet hose (11) in an empty, earthed container.
- Sink the end of the suction hose (10) in an earthed container containing cleaner fluid. Flush out water-based paint with water and oil-based paint and preservative with white spirit or the equivalent.
- Turn the pressure control knob (8) clockwise to 1/3 of the maximum setting.
- Check that the pressure relief valve lever (6) is in its vertical position.
- Put the switch (1) in the on position.
- Wait until clean water or clean cleaner fluid comes out from the outlet hose (11).
- Put the pressure relief valve lever (6) in its horizontal position.
-
Turn the pressure control knob (8) to 1/2 of the maximum setting.
-
Turn the nozzle to the cleaning position. Press the spray gun firmly against an earthed container and point it down into the container. Release the trigger lock and press the trigger.
- Wait until clean water or clean cleaner fluid comes out. Release the trigger and apply the trigger lock.
- Release the pressure.
Cleaning the spray gun and filter
- Release the pressure.
- Unscrew the handle on the spray gun.
- Remove the filter from the spray gun and clean it with a brush and water, or cleaner fluid. Replace the filter if it is damaged.
- Remove the nozzle guard and clean it with a brush and water, or cleaner fluid.
- Replace the nozzle guard in accordance with the instructions for fitting the nozzle.
- Clean the outside of the spray gun with a cloth moistened with water or cleaner fluid.
Blocked nozzle
Material is pumped out at high pressure through a very small hole in the nozzle, and is finely dispersed. In the event of a blockage, twist the nozzle to quickly clear it.
FIG. 10
STORAGE
- Do not store the product filled with water.
- Do not allow water to freeze in the product.
- Do not store the product pressurised.
- Do not store the product outdoors.
TABLE FOR SPRAY PRESSURE
| Material* Spray pressure | |
| Oil-based varnish At least 55 bar | |
| Wood preservative At least 55 bar | |
| Concrete paint At least 55 bar | |
| Enamel paint At least 103 bar | |
| Varnish At least 103 bar | |
| Aluminium paint without flake metal At least 103 | bar 1700 |
| Vinyl latex paint At least 117 bar | |
| Acrylic latex paint At least 117 bar | |
| Oil-based paint At least 117 bar | |
| Oil- and water-based primer At least 117 bar | |
- Examples of material that cannot be used: textured coatings, elastomers, asphalt coatings, wood preservatives, filler.
TROUBLESHOOTING
WARNING!
- Release the pressure before inspection and/or repairs.
- The troubleshooting guide is used to determine the causes of common problems and how they can be rectified. Contact your dealer if you experience a problem that is not included in this troubleshooting guide.
| Symptom Possible cause | Proposed action | |
| The motor will not start. Check that the plug is firmly plugged into a correctly earthed power point (230 VAC, 50 Hz) and that the switch is switched on. | Pressure set too low. | Turn the pressure control knob clockwise to set a higher pressure. |
| Worn or loose carbon brushes. | Replace or adjust the carbon brushes. |
| The power point is without power. | Use a functional power point. |
| The pump jams (material has hardened or water has frozen in the pump). | Switch off the product and pull out the plug. Contact an authorised service centre. |
| Motor or control damaged. | Switch off the product and pull out the plug. Contact an authorised service centre. |
| The product is on but there is no pressure in the pump to fill material in the suction hose. | Air in the pump, hose or spray gun. | Follow the instructions in the section for preparations for spraying. |
| The inlet valve ball has fastened to the valve seat. | Press the button for the manual valve (4) repeatedly. |
| The inlet filter is blocked or the suction hose is not submerged under the surface in the material container. | Clean the inlet filter and check that the end of the hose is under the surface in the material container. |
| Blockage caused by particles in the material. | Follow the instructions for clearing a blockage and for filtering. |
| Leakage in the suction hose. | Check the suction hose and its connections for cracks and leakage. |
| Too little or no flow of material, or it is not possible to achieve an acceptable spray pattern. | Not enough material. | Check that the end of the suction hose is under the surface in the material container. |
| The suction hose is blocked. | Follow the instructions for clearing a blockage. |
| The nozzle insert is in the cleaning position. | Turn the nozzle insert to the spraying position. |
| The nozzle insert is blocked. Clean | Clean the nozzle insert. |
| The spray gun filter is blocked. | Clean the spray gun and filter. |
| The material is too thick. | Dilute the material in accordance with the instructions of the material manufacturer. |
| The nozzle insert is too big for the actual job. | Choose another nozzle insert. See the table for nozzle inserts. |
| The nozzle insert is worn. Replace the nozzle insert. |
| The seal and gasket on the nozzle insert are worn or missing. | Replace the metal seal and gasket. |
| The inlet filter is blocked. Clean | the inlet filter. |
| The inlet or outlet valve is blocked. | Clear the valves. |
| Pressure set too low. | Turn the pressure control knob clockwise to set a higher pressure. |
| The high-pressure hose is too long. | Use a suitable high-pressure hose. |
| The product does not maintain the pressure. | Leakage. | Relieve the pressure and tighten all the connections. |
| The seal is worn. Replace seal. | |
| The inlet or outlet valve is worn. | Contact an authorised service centre. |
| The nozzle insert is worn or too big for the actual job. | Replace the nozzle insert. |
| The material runs or forms ridges on the surface. | The layer of material is too thick. | Move the spray gun quicker. |
| Use a nozzle insert with a smaller opening or wider spray pattern. |
| Make sure to hold the spray gun 30 cm from the surface. |
| The material does not cover the surface very well. | The material is too thin. | Move the spray gun more slowly. |
| Use a nozzle insert with a larger opening or more compact spray pattern. |
| Make sure to hold the spray gun 30 cm from the surface. |
| The spray pattern varies a lot during the work. | The pressure control is worn, which causes the pressure to vary. | Contact an authorised service centre. |
| It is not possible to press the trigger on the spray gun. | The trigger lock is applied. | Turn the trigger lock to release it. |
| The flow from the spray gun does not stop when the trigger is released. | The spray gun is worn. Replace | the spray gun. |
| Material runs out at the pressure control knob. | The pressure control is worn. | Contact an authorised service centre. |
| Material runs out through the outlet hose. | Pressure is too high in the product. | Contact an authorised service centre. |
| The motor overheats and runs intermittently. The motor switches off automatically when overheated. The product can be damaged if the reason for the overheating is not rectified. | The ventilation openings in the casing are blocked, or the product has been covered over. | Keep the ventilation openings clean and do not cover the product. |
| The extension cord is too thin or too long. | Use a suitable extension cord. |
| Supply voltage too high. | Check that the voltage corresponds to the rated voltage on the type plate. |
| Defective motor. | Contact an authorised service centre. |
SICHERHEITSHINWEISE
TUOTTEEN HALLINTALAITTEET JA TOIMINNOT
Virtakytkin