
030-206 - Plane Meec Tools - Free user manual and instructions
Find the device manual for free 030-206 Meec Tools in PDF.


| Product Type | Hand Plane |
| Brand | Meec Tools |
| Model | 030-206 |
| Body Material | High-quality cast iron |
| Sole Length | 250 mm |
| Cutting Width | 50 mm |
| Blade Material | Hardened tool steel |
| Blade Width | 50 mm |
| Handle Material | Beechwood |
| Weight | 1.5 kg |
| Depth Adjustment | Knob with fine threads |
| Lateral Adjustment | Lever for blade alignment |
| Chip Breaker | Yes, adjustable |
| Cap Iron | Yes, with screw |
| Number of Blades | 1 |
| Blade Angle (Bevel) | 25 degrees |
| Product Dimensions | 310 x 65 x 130 mm |
| Maintenance | Regular oiling and blade sharpening |
| Spare Parts Available | Replacement blades and chip breakers |
| Recommended Use | Smoothing and general woodworking |
Frequently Asked Questions - 030-206 Meec Tools
User questions about 030-206 Meec Tools
0 question about this device. Answer the ones you know or ask your own.
Ask a new question about this device
Download the instructions for your Plane in PDF format for free! Find your manual 030-206 - Meec Tools and take your electronic device back in hand. On this page are published all the documents necessary for the use of your device. 030-206 by Meec Tools.
USER MANUAL 030-206 Meec Tools
Bruksanvisning för Elhyvel 900 W Bruksanvisning for El-høvel 900 W Instrukcja obsługi strug Elektryczny 900 W Operating instructions for Electric Planer 900 W
030206
Värna om miljön!
Care for the environment!
Must not be discarded with household waste! This product contains electrical or electronic components that should be recycled. Leave the product for recycling at the designated station e.g. the local authority's recycling station.
SE - Bruksanvisning i original
EN - Operating instructions (Translation of the original instructions)
Jula reserves the right to make changes. In the event of problems, please contact our service department. www.jula.com
Tillverkare/ Produsent / Produenci/ Manufacturer Jula AB, Box 363, 532 24 SKARA
Distributör/ Distributør/ Dystrybutor/ Distributor
Jula Poland Sp. z o.o., ul. Malborska 49, 03-286 Warszawa, Polska
SAFETY INSTRUCTIONS....20
TECHNICAL DATA....22
DESCRIPTION 22
OPERATION 23
Parallel guide 23
Chamfering 23
Replacing the planing bit 24
MAINTENANCE 24
Replacing the drive belt 24
SÄKERHETSFÖRESKRIFTER
Fasning
Byta hyvelstål
UNDERHÅLL

VEDLIKEHOLD
Fazowanie
KONSERWACJA
Read the Operating Instructions carefully before use!
Read these Safety Instructions carefully before you start using the machine. Familiarise yourself with the functionality of the machine and how it should be used Always follow the maintenance instructions to ensure efficient performance of the machine. Store the Operating Instructions and other documents near the machine.
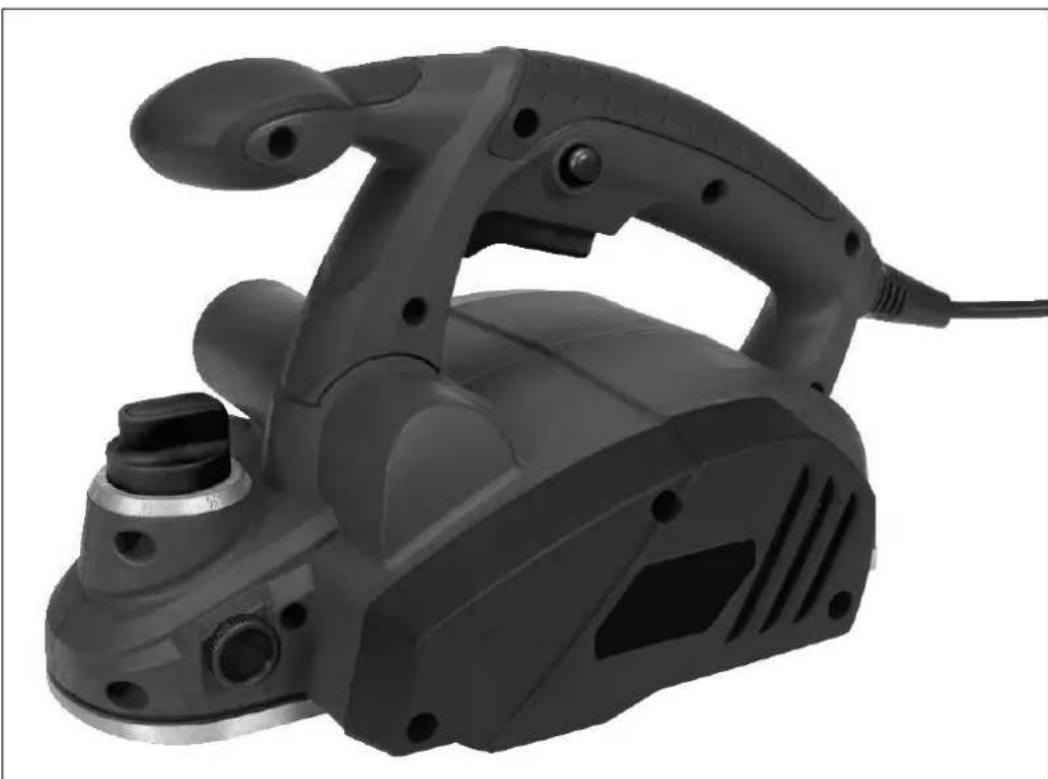
- This electric planer has double protective insulation and is intended for manual operation. Its handy size and design make it easy to use and store. The machine is safe and reliable and is powered by a single-phase electric motor via a V-belt. You can use it to plane wooden beams, panels, etc. for smooth, even results.
- Always take basic safety precautions when using this power tool to safeguard against the risk of fire, electric shock and personal injury.
- The electric planer must only be connected to a 230-volt domestic power outlet. Do not leave the machine unattended. When not in use, store the machine in a cool, dry place out of the reach of children.
• Never touch the planing tool when adjusting, installing or putting down this machine. - Make sure the power switch on the machine is in the OFF position (0) before connecting it to the mains power.
• If you pass on the machine to a third-party, make sure to include these Operating Instructions. - Keep the work area clean and tidy. Cluttered work areas increase the risk of accidents and injuries.
- Keep the workplace environment safe. Never use or leave power tools in the rain. Do not use power tools in damp or wet areas. Make sure there is adequate ventilation and never use power tools in the vicinity of flammable liquids, objects or gases.
- Protect against the risk of electric shock. Avoid body contact with earthed or grounded surfaces such as pipes, radiators, cookers and refrigerators.
- Keep children away from the tool. Do not let anyone touch the power tool or the cord. Keep other people at a safe distance from the work area.
- Do not overload the power tool. You will be able to work more easily and safer if you stay within the limits specified in the specifications.
• Use the correct power tool. Do not use low-powered tools for heavy work. - Wear proper work clothes. Loose-fitting clothing and jewellery can get caught in moving parts. We recommend rubber gloves and non-slip shoes when working outdoors. Wear a hair net if you have long hair.
- Wear eye protection. Wear a face mask when doing work that produces a lot of dust.
- Use the extraction equipment to remove shavings.
- Use the power cord only for its intended purpose. Never carry the electric planer by the cord. Never pull the cord to remove the plug from the mains socket. Keep the cord away from heat, oil and sharp edges.
- Check that the workpiece is properly secured. Use clamping devices or a vice to keep the workpiece firmly in place. This is safer than using your hands and means you have both hands free to operate the tool.
• Try not to stand in an unnatural position. Always maintain a firm footing and good balance. - Always unplug from the mains supply when the electric planer is not in use, before carrying out maintenance work or changing accessories.
- Check that there are no spanners or other tools left on the machine. Always check that spanners, keys and adjusting tools have been removed before starting the machine.
- Avoid accidental starting. Never carry a power tool with your finger on the switch when it is connected to the mains. Always make sure the machine is switched off before plugging it into the mains supply.
- Using extension cords outdoors: only use approved extension cords when working outdoors and make sure that they are properly marked for this purpose.
- Always pay attention to what you are doing. Use your common sense when working. Never use the tool if you are tired or find it difficult to concentrate.
-
Always inspect the electric planer for damage after use. Before using the machine again, carefully check the parts and protective insulation for damage to ensure that everything is operating correctly and in accordance with the specifications.
-
Make sure that moving parts function correctly and do not jam and that no parts are damaged. All parts must be correctly fitted in accordance with all the instructions and conditions for the power tool to function perfectly.
- If the protective insulation or parts are damaged, these must be repaired or replaced at an approved service centre. Damaged parts, controls or worn carbon brushes and belts must be replaced at a customer service centre.
- Do not use power tools that cannot be switched off.
• Always use ear protection when working with the machine. - The use of an RCCB (residual current circuit breaker) or RCD (residual current detector) is recommended when using power tools to guarantee electrical safety.
- Only use the additional equipment or accessories specified in the Operating Instructions. The use of other tools or accessories can cause personal injury.
- Do not take the power tool or accessories apart. Never change any of the components yourself.
- Pull out the plug immediately if you detect anything unusual while you are working, such as an abnormal noise or smell, if the casing become abnormally hot, or if the machine starts to smoke. Hand in the machine to an approved workshop to check for any damage and to have it repaired if necessary.
- Power tools must only be repaired by authorised electricians. This power tool conforms with the requirements in general safety instructions and standards. Repair work must only be carried out by an authorised electrician and only original parts from the manufacturer must be used. Failure to do so can lead to accidents and injuries.
• Wait until the motor and planing tool have completely stopped before putting the planer down. - Use the right accessories. Do not use low-powered tools or accessories for heavy work. Use tools only for their intended purpose. The electric planer must only be used for work that does not involve any danger to the user. It must not be used to shorten boards or battens, grind floors or scrape off rust from metal objects.
- Maintain power tools correctly. Keep the planing bits sharp and clean, so that they are easy to work with and safe.
• Follow the maintenance instructions and the instructions for changing the planing bit. - Check the plug and power cord regularly. Have them replaced by an authorised electrician, if necessary.
- Check the extension cord regularly. Replace it if damaged.
- Keep the handle dry and free from oil and grease.
TECHNICAL DATA
| Rated voltage | 230 V / 50 Hz |
| Output power | 900 W |
| Speed (no load) | 16000 rpm |
| Bit width | 82 mm |
| Bit depth | 0-3 mm |
| Safety class | II |
| Sound power level, LwA | 97 dB(A) |
| Sound pressure level, LpA | 86 dB (A), K=3 dB |
| Vibration level | 6,4 m/s 2 , K=1,5 m/s 2 |
Wear hearing protection!
The declared vibration value, which has been measured by a standardised test method, can be used to compare different tools with each other and for a preliminary assessment of exposure.
WARNING!
The actual vibration level when using power tools may differ from the specified maximum value, depending on how the tool is used. It is therefore necessary to determine which safety precautions are required to protect the user, based on an estimate of exposure in actual operating conditions (taking into account all stages of the work cycle, e.g. the time when the tool is switched off and when it is idling, in addition to the start-up time).
DESCRIPTION
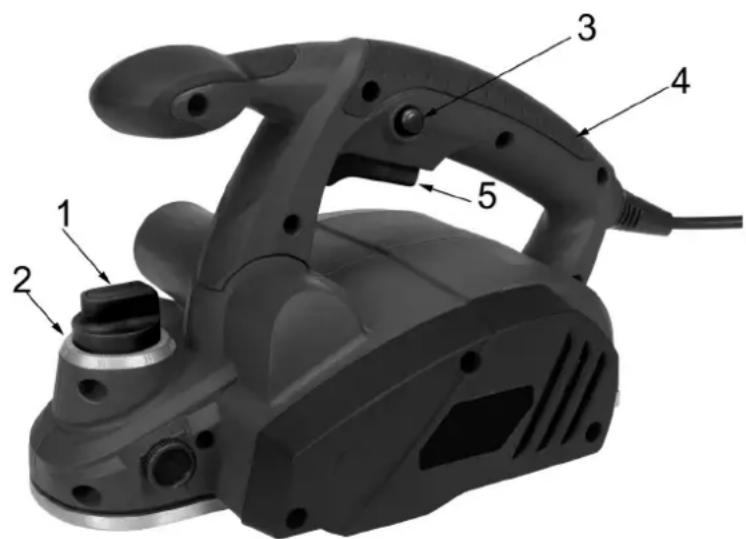
- Control knob for planing depth
- Planing depth display
- Safety lock
- Handle
- Power switch
OPERATION
NOTE!
- Always disconnect the power cord from the mains power before adjusting, servicing or maintaining the machine.
- Never change the planing depth during operation because this will make the surface uneven. To avoid incorrect use, reset the planer to "0".
- Never touch the workpiece while you are working.
Before starting the machine, check that the voltage on the planer type plate corresponds with the mains voltage.
Place the worktable on a stable and level surface and adjust the tool with a clamp or vice.
Turn the adjusting screw clockwise to set the planing depth. There is a scale on the adjusting knob that shows the set planing depth in mm. Turn the knob to set the required planing depth.
Connect to the mains supply. To turn the machine on, press in the safety lock first while pressing the switch (ON/OFF). The machine is now switched on and you can release the safety lock.
Use a deeper planing depth for rough planing and reduce the depth for fine planing to achieve a smooth, even surface. Keep the planer straight while working, otherwise the surface will become uneven. Switch off the planer when you have finished, and pull out the plug.
Only use the planer on the top of the workpiece, never underneath or from the side.
Make sure that all moving parts have stopped moving before putting down the machine.
Parallel guide
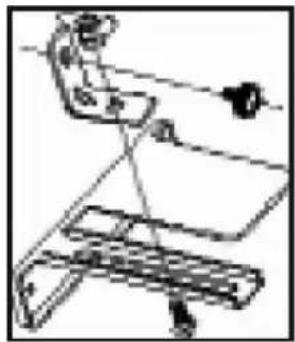
A parallel guide is supplied with this electric planer. This accessory allows you to maintain a precise alignment on a straight workpiece. This illustration shows how to fit it.
Chamfering
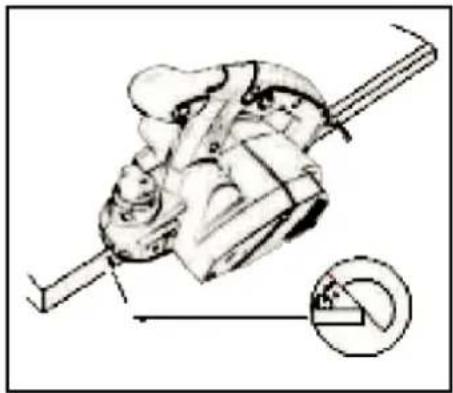
There is a V-groove at the front of the vertically adjustable base plate. This groove can be used to make an approximately 6 mm wide chamfer on the edges of a workpiece. Chamfering is a more advanced way of using the machine and requires considerable skill on the part of the user for perfect results.
Replacing the planing bit
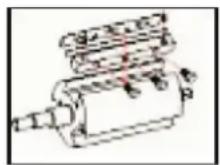
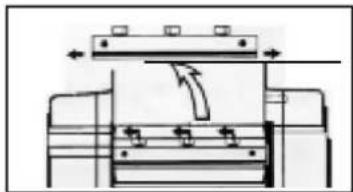
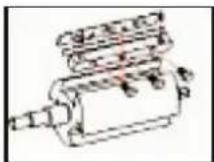
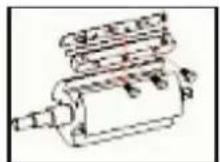
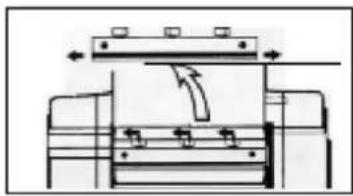
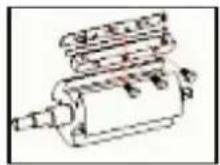
Always wear gloves when replacing planing bits. The planing bits for this machine are reversible. To replace or invert a planing bit: Use the supplied spanner (accessory). Unscrew the three screws in the bit retainer. Now remove the bit retainer from the cutter and pull out the planing bit from the side. Push the new, or reversed, planing bit into the bit retainer from the side.
Now press the retainer as far as it goes into the cutter and centre the bit. Screw tight the three screws in the bit retainer so that it sits firmly in place.
MAINTENANCE
Make sure the plug is disconnected from the mains supply before cleaning the machine. Wipe the casing with a dry, soft cloth. The planing bit on this machine becomes worn in time. Continuous use of a blunt or damaged planing bit will reduce the performance of the machine and can overload the electric motor. Check the planing bit regularly.
Replacing the drive belt
After a long period of use the drive belt can slip off the drive shaft, or may even break. If the planing bit no longer rotates when the motor is running this is probably what has happened. To replace the belt, open the left side of the planer with a Phillips screwdriver. Now remove the belt by lifting it with a large screwdriver, while turning the drive shaft a few turns. Put the new belt on the small wheel first and then on the large one, while turning it a few turns. Contact our customer service if you have problems replacing the drive belt.
CE
EU DECLARATION OF CONFORMITY
EU FÖRSÄKRAN OM ÖVERENSSTÄMMELSE
EU SAMSVARSERKLÆRING
DEKLARACJA ZGODNOŚCI UE

Jula AB, Box 363, SE-532 24 SKARA, SWEDEN
This declaration of conformity is issued under the sole responsibility of the manufacturer
Machinery Directive 2006/42/EC
EN 62841-1:2015+AC, EN 62841-2-14:2015
Electromagnetic Compatibility 2014/30/EU
EN 55014-1:2017, EN 55014-2:2015
EN 61000-3-2:2014, EN 61000-3-3:2013
RoHS Directive 2011/65/EU
EN 50581:2012
This product was CE marked in year -09
Name and address of the person authorised to compile the technical file:

- VÄRNA OM MILJÖN
- CARE FOR THE ENVIRONMENT
- SÄKERHETSFÖRESKRIFTER
- FASNING
- BYTA HYVELSTÅL
- UNDERHÅLL
- VEDLIKEHOLD
- FAZOWANIE
- KONSERWACJA
- READ THE OPERATING INSTRUCTIONS CAREFULLY BEFORE USE
- WEAR HEARING PROTECTION
- WARNING
- OPERATION
- NOTE
- PARALLEL GUIDE
- CHAMFERING
- REPLACING THE PLANING BIT
- MAINTENANCE
- REPLACING THE DRIVE BELT
- CE
- EU DECLARATION OF CONFORMITY
- EU FÖRSÄKRAN OM ÖVERENSSTÄMMELSE
- EU SAMSVARSERKLÆRING
- DEKLARACJA ZGODNOŚCI UE
Brand : Meec Tools
Model : 030-206
Category : Plane