F10 - Phone Fysic - Free user manual and instructions
Find the device manual for free F10 Fysic in PDF.

| Product Type | Senior mobile phone |
| Brand | Fysic |
| Model | F10 |
| Compatible networks | GSM, DCS, WCDMA, LTE (4G) |
| Screen | Color LCD, large icons and text |
| Battery | Lithium-ion 3.7 V, 1000 mAh |
| Battery life | Long standby and talk time |
| Main functions | SOS button, volume amplification (+25 dB), flashlight, FM radio, camera, magnifier, voice recorder, calendar, calculator, alarm clock, Bluetooth 5.0 |
| Storage | microSD card (not included) |
| Power supply | AC adapter 100-240 V AC, output 5 V DC / 0.5 A |
| Care and cleaning | Clean with a soft, dry cloth. Do not use abrasive products. |
| Safety | SOS button, keypad lock, SIM lock, blacklist, fixed dialing |
| Spare parts and repairability | Contact after-sales service via www.fysic.nl |
| General information | Compliant with directive 2014/53/EU. SAR head: 0.665 W/kg, body: 1.783 W/kg |
Frequently Asked Questions - F10 Fysic
User questions about F10 Fysic
0 question about this device. Answer the ones you know or ask your own.
Ask a new question about this device
Download the instructions for your Phone in PDF format for free! Find your manual F10 - Fysic and take your electronic device back in hand. On this page are published all the documents necessary for the use of your device. F10 by Fysic.
USER MANUAL F10 Fysic
text_image
Technical diagram showing three labeled views of a device or component with numbered annotations (20, 21, 22, 23, 24)Amplify receiver volume----34
Specificaties.... 35
natural_image
Three technical line drawings of a smartphone interior layout, showing front, top, and side views with no visible text or symbols.natural_image
Line drawing of a mobile phone chassis with internal compartments and ports (no text or symbols)
natural_image
Line drawing of a mobile phone interior layout (no text or symbols)Amplify receiver volume:
Building 8, Zhengzhong Industrial Plant, Xintian Community, Fuhai Street, Baoan
District, Shenzhen, China
Model-ID: EE-0501000DPE
Mobile phone with panic button

text_image
FYSIC M2 > 3 DEF 6 MNO 9 WXYZ 1 ABC 2 GHI 5 JKL 7 PQRS 8 TUV 0Introduction
Thank you on purchasing the Fysic F10 telephone. This easy to use mobile phone for seniors is hearing aid compatible and suitable for 4G mobile network. It offers many functions such as a SOS alarm button which sends SMS with SOS message to emergency numbers or calls emergency numbers in handsfree mode.
The font size on the color LCD display is large and the buttons on the button pad are easy to see and use with big buttons, speed dial buttons, call volume amplification, zoom function, built-in flashlight, long stand-by and operating time, calendar, calculator, camera, video, FM-Radio, phonebook, speakerphone, speed dial buttons and no SIM-lock. It is important that you read the instructions below in order to use your Fysic F10 telephone to its full potential. Keep this user guide in a safe place for future reference.
Description phone
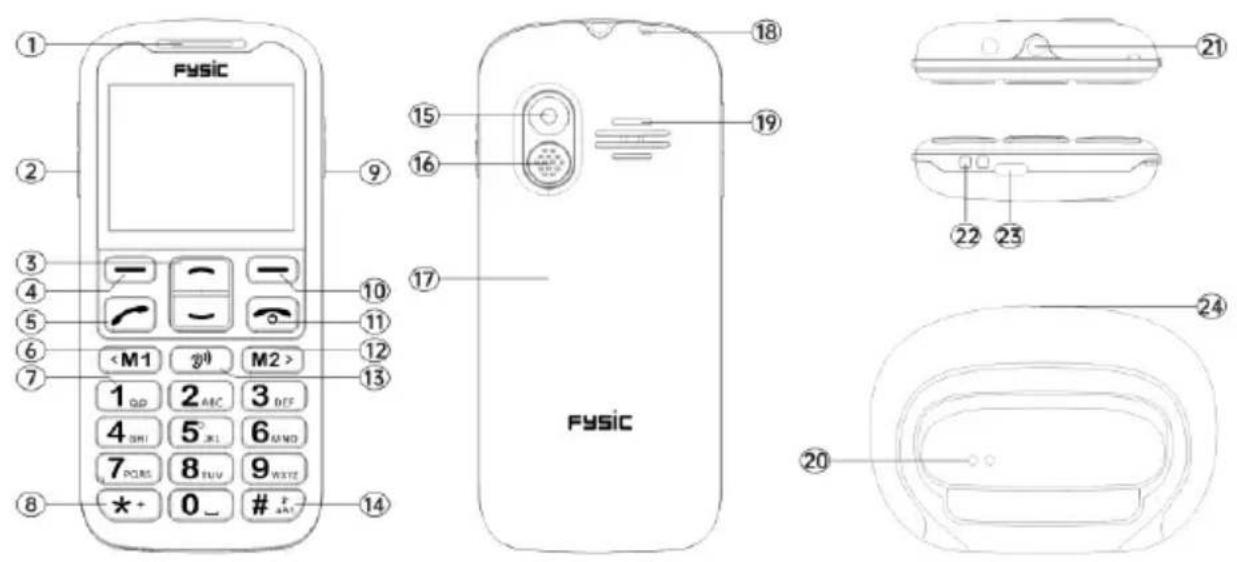
Instructions buttons and telephone appearance
| 1. Earpiece | 2. Volume buttons |
| 3. Arrow buttons | 4. Left-selection button |
| 5. Call button | 6. Speed dial button: M1 |
| 7. Voice mail | 8. Lock button |
| 9. Torch button | 10. Right-section button/Back button |
| 11. End call button/Power on/Power off | 12. Speed dial button: M2 |
| 13. Amplification button | 14. Silent/Input method |
| 15. Camera | 16. SOS button |
| 17. Battery cover | 18. Auto jack |
| 19. Loudspeaker | 20. Cradle socket |
| 21. Torch light | 22. Charging station contact point |
| 23. USB charging socket | 24. Phone charging contact point |
Contents
Installation....7
Installing the SD card....7
Installing the SIM card....8
Installing the battery....8
Phonebook....9
Add new contact....10
Photo contact....11
Delete multiple....11
Import/Export....12
Others....12
Messages....12
Write Message....12
Inbox 13
Outbox....14
Drafts....14
Sentbox 15
Security inbox 15
Templates 15
Broadcast message....15
Voice mail server....16
Settings....16
Message capacity 16
Call logs....16
Alarm 17
Camera....17
Magnifier 19
Recorder....19
Organizer 20
Calendar 20
Calculator....21
Alarm 21
Multimedia....22
Settings....23
SOS setting....24
Phone settings 24
Call settings....26
Display 26
Profiles 27
Security settings 27
Connections....28
Bluetooth....28
Speed dial....29
Dial Num Voice....29
Amplify receiver volume 29
Specifications 30
EU declaration of conformity....32
Installation
IMPORTANT
Turn off the phone and disconnect the charger before removing the battery cover.
Installing the SD card
Insert the memory card into the slot under the SIM card holder, make sure the card faces downwards. Do not scratch or bend the card. The SD card is used as a phone storage. When connect to a computer by a USB cable you can copy data such as music, contacts, pictures,...

natural_image
Three technical line drawings of a smartphone interior layout, showing front, top, and side views with no visible text or symbols.Installing the SIM card
- Insert the SIM card into the SIM card slot upon the memory card holder. (Make sure the card is facing inwards.)
- First, turn off the phone before taking out the SIM card.
natural_image
Line drawing of a mobile phone chassis with internal compartments and ports (no text or symbols)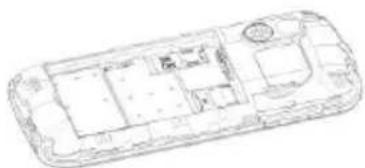
natural_image
Line drawing of a mobile phone interior layout (no text or symbols)Installing the battery
When you use the phone for the first time, charge the battery for 4 hours to achieve the best state of the battery. Remove the battery cover, insert the battery into the battery compartment and replace the cover.

text_image
Battery
text_image
BatteryMenu
When in standby mode, you can choose by the Left-selection button — “Menu” different options by scrolling the buttons and you can choose the options
“Phonebook”, “Message”, “Call logs”, “Alarm”, “Camera”, “Magnifier”,
“Recorder”, “Organiser”, “Multimedia”, “Settings”. The chapters below explain each section in detail.
Phonebook
When you enter the menu Phonebook you can immediately start adding contacts or by pressing the Left-selection button — you can choose Options where you can find:
“New”, “Photo contact”, “Delete multiple”, “Import/Export”, “Others”.
You can enter these options by scrolling ☐ and select with the Left-selection button to choose the required option.
Note: You can enter the menu "Phonebook" by pressing the Right-section button/Back button — or the Left-selection button — and choose the icon "Phonebook".
Add new contact:
You can add a new contact to the SIM card or Phone.
- Press the Right-section button/Back button — to enter the menu of the "phonebook".
- Select Add contacts with the Left-selection button — and then New with the Left-selection button —. You can choose to save your contact on your “Phone” or “SIM card”.
- You can scroll with ☐ to choose to enter a Photo, Name and Telephone number. Then follow the menu by pressing the Left-selection button ☐ to enter your data.
- Press the Right-section button/Back button — to Save.
Searching contacts: When you want to search a contact then follow underneath steps:
go to Phonebook you can:
a. Scroll with to find your required contact.
b. In the Search field you type a few first letters of the name and your required contact will appear.
Photo Contact:
Go to “Phonebook” and choose at options “Photo Dial” and choose from 1 – 8
a contact with the scroll button

1. Press Options:
→ add contact from Phonebook
→ enter details to Edit Number, Edit Picture (select from album or take a picture directly with the camera. Note using default image size 176*220pixel to take a picture makes the Caller picture more suitable and nice). This picture will be displayed when you call the corresponding contact or when they are calling you. And Edit ringtone. Select “save”.
- Use └─ to select the Caller picture you have made.
Note: When you select in your phonebook a contact person and then press “options” you can view this contact, edit, call, or sms directly.
Delete multiple:
You can multi-select the contacts and delete them.
Import/Export:
You can import or export contacts.
Others:
Indicates the memory status of your contacts.
Message
In standby mode you press Menu and scroll to Message. You can choose the following options: "Write message", "Inbox", "Outbox", "Drafts", "Sentbox", "Security inbox", "Templates", "Broadcast message", "Voice mail", "Settings", "Message capacity".
Write message:
- Press Menu, scroll to Message.
- Select Write message and press OK.
-
Choose first your contact person via Options - Phonebook - Select contact - Options - Mark - Ok → you can see your contact and start typing your message.
-
Press Options to choose Send to send the message. When receiving a text message, an alert tone will be audible. 1 NEW MESSAGE will be displayed on the LCD.
Remark: Press Options you can select “Insert template” “Add contact info” Add phiz” “Save as draft” “Exit” whatever functions you need.
IMPORTANT! You can press the input method button to choose your required way of typing messages
Inbox:
- Press Menu and scroll to Message.
- Select Inbox and press OK.
- Select a message from the list and press the OK button to view the message.
Others options as below: Reply by SMS
Input your message and send to the sender.
a. Reply: You can reply on the message.
b. Delete: Press ok to delete the message.
c. Delete all: Delete all received messages.
d. Call: Press Call to make a phone call.
e. Move: Press Move to move the messages to Security inbox, SIM or Phone.
f. Mark: Mark or Unmark the messages you select.
g. Sort: There are options: "Time", "Phonebook", "Subject" and Type" you can select.
h. Export SMS: Export the SMS to a path or Memory Card.
i. Add sender to: You can add the sender to your contact list.
j. Delete repeated numbers
k. Add to blacklist: You can add the number on the blacklist so the sender can't contact you anymore.
Outbox:
- Press Menu enter into Message and press OK.
- Select Outbox and press OK.
- Select a message from the list and press Options to Resend/Delete/Delete all/Move/Mark/Sort message.
Drafts:
Here you can see the messages which you saved. The draft box stores messages that you have saved but not sent yet.
-
Menu ---> Message ---> Drafts.
-
Scroll to the message you wish to review.
-
You now get the chance to Delete/Edit/Move/Mark or Sort your message.
Sentbox:
Here you can check all messages you sent out.
Security inbox:
Here you can check all security messages you moved and default password is “1234”.
Templates:
Here you can check the messages templates you like when sending a message. You can also create your own message by choosing “Edit” and create your own text.
Broadcast message:
Here you can check and activate a Broadcast message. A broadcast message is a message you can send to all of your contacts or a group of contacts.
Voice mail server:
Here you can save the voice mail number.
Settings:
Here you can check SMS validity, Status report, Reply path, Save sent messages, Preferred storages (in SIM card or Phone), Export SMS.
Message capacity:
Here you can check the SMS memory on SIM card or Phone (max: 200).
Note: You can delete messages in the Inbox, Outbox, Draftbox or Sent Message.
- Menu ---> Message ---> Select either Inbox, Outbox, Drafts or Sentbox ---> Options - --> Delete All ---> Yes
Call logs
- In the standby mode, press Menu, scroll to Call logs and press OK.
-
All missed, dialed, received and rejected calls are saved in Call logs.
-
Use and scroll to view Missed calls/Dialed calls/Received calls/Rejected calls
and Delete call logs or check Call timers.
Alarm
- In standby mode, press Menu and scroll to Alarm. Press OK and select the required alarms.
- Use button — to select Status On/Off.
- Use button — to select Edit to create an Alarm, Time, Ringtone, Repeat mode.
- Enter time with number button pad.
- Scroll to select Repeat mode to select Once/Daily/Working days.
To stop the alarm, press Off or Snooze to delay the reminder of alarm.
Note: The Alarm is available even if the phone is power off.
Camera
-
Press Menu and scroll to Camera and press OK.
-
Take a photo and Press OK

- Press Options and select Image viewer
a) You can see all your pictures by scrolling.
b) When you press again “Options” you can choose “View”, “Delete”, “Mark”, “Rename”, “Slide play”, “Details”
View: you can see all picture on the complete screen.
Delete: you can delete every picture.
Mark: you can select several pictures.
Rename: you can give your picture a name.
Slide play: there will be a slide show of all your pictures.
Details: you can view all data of your picture such as filename, date, time, size, location, resolution.
- Press Options and select Video mode. By Pressing OK — you can start filming.
When done you can choose Options and you can select “New”, “Delete”, “Send”, “Play”, “View video directory” to choose your required option. - Press Options and select Effect. You can choose in this view different color settings.
- Press Options and select Settings. You can choose your own settings in "Size", "Quality", "Banding", "Sound", "Auto save", "Storage"
Warning! If the memory card is insufficient, delete some documents or expand the storage.
Magnifier
In standby mode, press Menu, scroll to Magnifier.
With the camera's magnifier, users can zoom in by adjusting the focus distance.
With this function, the elderly users can read the newspapers, magazines and other books
more easily. Press the button to zoom in or zoom out it.
Recorder
In standby mode, press Menu, scroll to Recorder.
-
Press OK —
-
Press Options — and choose “Start recording, “Record file list”, “Storage”, “file format”, Start recording.
The recorder starts recording. You can switch by Pause/Continue. When press “Stop”, your record will be saved. By pressing “Options”, you can choose to Play you recorded
sound, Delete it, Send it, Record it, Store it and choose your file format. Note: It's better before you start recording you set your required settings first!
Organiser
In standby mode, press Menu and you scroll to use the options “Calendar”, “Calculator”, “Alarm”.
Calender:
- Press Menu enter into Organiser, press OK to select Calendar.
Today's day and date is shown on the display.
- Press Options to do following settings:
Add new schedule: for some important reminder
a) Input subject for the event.
b) Enter a start date and time for the event.
c) Activate Ringtone and repeat mode for the event.
d) Save the event.
View schedules: Show the events for the selected dates.
All schedules: View all events.
Clear today's schedules: Clear today's event.
Clear all: Clear all events.
Go to date: Shown today date.
Calculator:
- Press Menu enter into Organizer, press OK to select Calculator.
- Calculate the number according to following steps:
a) Enter the first number and use the button *+ to make the numbers decimal.
b) Use - and
c) Enter the second number then press left button OK. The result is shown on the screen.
Alarm:
- Press Menu enter into Oraniser, press OK to select Alarm.
- You can set 3 different alarms. Please refer to chapter "Alarm" to set your required settings.
Multimedia
In standby mode, press Multimedia and press OK. You can scroll and choose the following options: "Image", "Camera", "DV", "Audio", "Video", "FM radio", "My files".
Image: View all saved photos under this menu.
Camera: See details in chapter "Camera"
DV: You can record a video. See details in chapter "Recording"
Audio: All audio files can be shown in this menu. With the scroll button you can adjust the volume. By pressing ‘Options’, you can choose for “Music list”, “Refresh”, “Add”, “Set as ringtone”, “Shuffle”, “Repeat”, “Settings”, “Exit”
Video: All video files can be shown in this menu. With the scroll button you can adjust the volume.
FM radio: Press "Option" and choose a required option.
- Select Auto search and save and hold the button for a few seconds. Channels will be searched automatically
- Press Options to view and set up/save your Channel list. Select Manual search when you have channel you like.
- Select Open speaker, when you insert earphone on the phone, you can press open speaker to listen via earphone.
- Press Background play, if you set background play On, the radio
continues to play in standby mode.
- Select Record, you can record the sound from the current channel.
- View Timing record and Predefined time & frequency if you like.
- Select Record file list to view record list.
- Select Storage to choose the storage path on the phone or Memory Card.
-
Press the arrow buttons
-
Press the volume button to adjust the volume. Press the button to turn on or turn off the FM radio
My files: Manage all your files. You can view, rename, copy, delete, move the files from your phone and Memory Card. You can check all saved documents such as Audio, My music, Photos, Video etc.
Settings
In standby mode, Press Menu and scroll to Settings. You can choose the following options: "SOS", "Phone settings", "Call settings", "Display", "Profiles", "Security", "Connections", "Bluetooth", "Speed dial", "Dial Num Voice", "Amplify receiver volume".
SOS settling:
- Scroll to Menu --> Settings --> SOS setting, select Status "On".
- SOS number list: There are 5 contact numbers as options to add.
- Send SOS SMS: If you would like to send SOS notification message when SOS button activated, please select Status "On".
- SOS message settings: The default message is “Please help me! I am in an emergency”. You can edit any SMS you like.
- Warning Tone Status: If you would like an alert to sound when the SOS button is activated, select Status "On".
In this case the alert can remind people around that the elderly is in danger.
Phone settings:
Press Menu, scroll to Settings and select Phone settings and press OK.
Then you can setup as below:
1. Time and date
a) Select Time and date and press OK.
b) Select Set time/date to set time, and date.
c) Select Set format to set the format of Time (12 or 24) and Date.
d) Select Date format to set the format of Date (Year-Mon-Day or Mon-Day-Year or Day-Mon-Year).
e) Select World clock to add city, delete city or set daylight saving system.
f) Select Update time settings
1) Enable or disable Auto update time.
2) You can also select Manual update time when there's a SIM card.
- Language settings: Set default language.
- Shortcut settings: You can define the default menu you like when press the arrow buttons.
1) The default setting of Up button is Messages,
2) The default settings of Down button is Photo contact.
Remark: You can use button to change the arrow button menu to be Menu, Contacts, Call logs, Message, Write SMS, Audio player, Video player, FM radio, Camera, Profiles, Alarm, My files, Image, Bluetooth, Calendar, Calculator, Inbox, Recorder, Photo contact etc.
-
Auto power on/off: You can enable Auto power on and off by pressing button, and set the Time and Repeat mode you like.
-
Power management: You can see status of the battery.
-
Restore factory setting: In this menu Restore factory settings, after you input the phone password and the phone powers on again, you can let all the settings of the phone back to the original settings. The default restore password of the phone is "1234".
Call settings:
- Press Menu, scroll to Settings, select Call settings and press OK.
You can set Call divert, Call waiting, Call barred, Hide ID and Others (some advanced settings like Reply SMS after reject, Flight mode and Auto record voice call, etc.)
Display:
-
Set Wallpaper form the phone or memory card.
-
Set LCD Brightness by pressing
-
Set LCD backlight Time.
-
Set button pad backlight time.
Profiles:
- Press Menu, scroll to Settings, select Profiles and press OK.
- Scroll to select available mode, you can see four modes: Normal / Silent / Meeting /
- In the standby mode, press long on #1 and you change into Meeting mode (silent or vibe).
- After you select Normal mode, you can setup its Ring settings like Caller ringtone, Message ringtone, Adjust volume, Ring type, Other alert rings like Button tone, Battery low alert and Dial tone.
Outdoor.
Security:
- SIM security: Under this menu, you can turn on or turn off PIN lock and change the PIN code.
- Phone locked: Under this menu, you can turn on or turn off Phone lock and modify the phone password. The default phone password is "1234".
- Modify the cellphone Password: Under this menu, you can enter a password when using you phone.
- Auto button pad lock: Under this menu, you can choose the seconds when you phone will be in locked position.
- Lock screen by end-button: Under this menu, you can select to activate a screen lock
or not.
-
Fixed dialing number: How to use this function? For example, when you lent your mobile phone, but don't want somebody to make random calls. You can just set up a fixed dial number. So somebody can only call these fixed numbers, and can't call other numbers.
-
Blacklist: Here you can block the specific contacts by input the number or import contacts from phonebook. Select Blacklist settings to choose Audio call interception or Message interception you like to operate for the blacklist contacts.
Connections:
You can find Network selection, Network type and VoLTE here.
Bluetooth:
Press Menu scroll to Settings and press OK.
Scroll to Bluetooth and Press OK for the below settings: Activate Bluetooth, Bluetooth visible, Pair another device
Visibility: Select left button Activate/Close to make the phone visible or invisible to other devices.
Pair device: Allow you to search new available devices and pair new device.
Device name: Bluetooth name for current device.
Bluetooth file storage, you can select to save the file from Phone or Memory Card.
Speed dial:
- M1/M2/button: Press Menu, scroll to Settings, select Speed dial and press OK, select Status to set the status On/Off, then select Set numbers and set the
button number from the phonebook, then press OK to save.
Remark: When in standby mode, long press button
When pressing on of these buttons, then will start dialing.
- 2-9 Number: press OK, select Status to set the status On/Off, then select Set numbers and set the 2-9 numbers from the phonebook, then press OK to save.
Dial Num voice:
Here you can enable or disable button pad voice by pressing Activate or Off.
Amplify receiver volume:
This mobile telephone has a loud ringer. Moreover, there is a amplified function to increase extra 25dB volume with an amplified button. This useful feature makes it a highly suitable telephone for the elderly with hard of hearing without using extra hearing aid device or people in very noisy surrounding.
Press Menu enter into Settings, scroll to Amplify receiver volume, and press OK to select On or Off. When select On, whenever you make or receive a call, the amplify feature can be set to On or Off as a default to open or close the amplified function by pressing M2 button at 1 time.
Lock/unlock button:
-
To lock the keys: In the home screen, press 'Menu' (top left key). Then press the *key (bottom left key).
-
To unlock the keys: In the home screen, press 'Menu' (top left key). Then press the *Button (bottom left).
Specifications
Network:
GSM900 class 4 / 880.2-959.8 MHz / < 33 dBm
DCS1800 class 1/1710.2-1879 MHz / < 30 dBm
WCDMA class 3 band I / 1922.4-2167.6 MHz / < 24 dBm
WCDMA class 3 band VIII / 882.4-957.6 MHz / < 24 dBm
LTE class 3 band 1,3,7,8,20,28 / 703-2170 MHz / < 24 dBm
Bluetooth 5.0 FHSS / 2402-2480 MHz / < 20 dBm
FM receive / 87.5-108 MHz
GNSS GPS / 1575.42 MHz
Accu: Li-Ion 3.7V 1000mAh
SAR/DAS: Head: 0.665W/kg - Body: 1.783W/kg - Limbs: 1.779W/kg
Information power adapter:
Manufacturers name and address : Shenzhen YingQin Electronic Co., Ltd, Floor 5, Building 8, Zhengzhong Industrial Plant, Xintian Community, Fuhai Street, Baoan
District, Shenzhen, China
Model Identifier: EE-0501000DPE
Input voltage: 100-240VAC
Input AC frequency : 50/60 Hz
Output voltage: 5.0V DC
Output current: 0.5 A
Output Power: 5.0 W
Average active efficiency: 73.78 %
No load Power consumption: 0.08 W
EU declaration of conformity
Hereby, Commaxx declares that the radio equipment type F10 is in compliance with Directive 2014/53/EU. The full text of the EU declaration of conformity is available at the following internet address: https://commaxx-certificates.com/doc/F10_doc.pdf

text_image
Service Help → HSC WWW.FYSIC.NL SERVICE@FYSIC.NL FYSIC® Commaxx B.V., Wiebachstraat 37, 6466 NG, Kerkrade, The NetherlandsFYSIC®
text_image
Technical diagram showing three labeled views of a device with numbered annotations (20, 21, 22, 23, 24)Amplify receiver volume 36
natural_image
Three technical line drawings of a smartphone interior layout, showing front, top, and side views with no visible text or symbols.SIM-Karte einsetzen
natural_image
Line drawing of a smartphone interior layout (no text or symbols)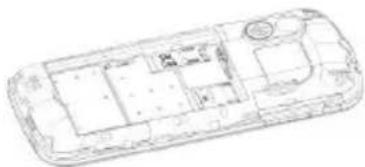
natural_image
Line drawing of a mobile phone casing with internal compartments and a circular button (no text or symbols)Akku einsetzen
Amplify receiver volume:
Herstellername und Anschrift: Shenzhen YingQin Electronic Co., Ltd, Floor 5, Building 8, Zhengzhong Industrial Plant, Xintian Community, Fuhai Street, Baoan District, Shenzhen, China
Modellidentifikator: EE-0501000DPE
text_image
FYSIC 10Introduction
text_image
Technical diagram showing three labeled views of a device with numbered annotations (20, 21, 22, 23, 24)Importer/Exporter 12
Autres----12
Message 13
Ecrire un message 13
Amplify receiver volume 37
Spécifications 38
natural_image
Three technical line drawings of a smartphone interior layout, showing front, top, and side views with no visible text or symbols.natural_image
Line drawing of a mobile phone chassis with multiple compartments and ports (no text or symbols)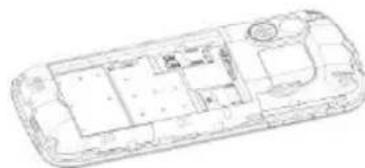
natural_image
Line drawing of a smartphone interior layout with no visible text or symbolstext_image
Battery BatteryMenu
Voicemail-server: 17
Indstillinger: 17
Beskedkapacitet: 18
Opkaldslogge 18
Alarm 19
Kamera 20
Zoom 21
Optager 22
Organisator....22
Kalender: 23
Lommeregner: 24
Alarm: 24
Multimedie.... 25
Indstillinger 27
SOS-indstilling: 27
natural_image
Three technical line drawings of a mobile device interior layout, showing room layouts and structural components (no text or labels)natural_image
Line drawing of a mobile phone interior layout (no text or symbols)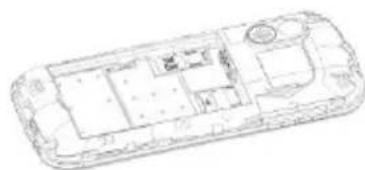
natural_image
Line drawing of a smartphone interior layout with no visible text or symbolsIlægning af batteri
text_image
Battery BatteryMenu
Producentens navn og adresse: Shenzhen YingQin Electronic Co., Ltd, Floor 5, Building 8, Zhengzhong Industrial Plant, Xintian Community, Fuhai Street, Baoan District, Shenzhen, Kina
Modelnr. EE-0501000DPE
text_image
Technical diagram showing three labeled views of a device or component with numbered annotations (20, 21, 22, 23, 24)Delete multiple (ta bort flera):....11
Import/Export (importera/exportera):....12
natural_image
Line drawing of a smartphone interior layout (no text or symbols)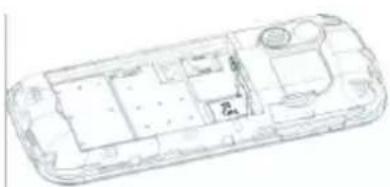
natural_image
Line drawing of a smartphone interior layout with no visible text or symbols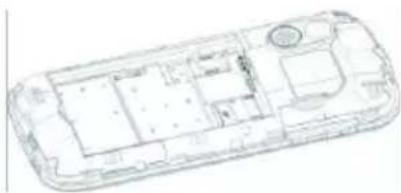
natural_image
Line drawing of a mobile phone interior layout (no text or symbols)Sätta i simkortet
natural_image
Line drawing of a smartphone interior layout (no text or symbols)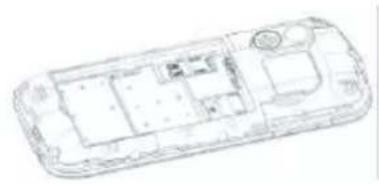
natural_image
Line drawing of a smartphone interior layout (no text or symbols)Sätta i batteriet
text_image
Battery BatteryMeny
Delete multiple (ta bort flera):
8, Zhengzhong Industrial Plant, Xintian Community, Fuhai Street, Baoan District,
Shenzhen, Kina