NM 3795 - Sewing machine CLATRONIC - Free user manual and instructions
Find the device manual for free NM 3795 CLATRONIC in PDF.
| Product type | Sewing machine |
| Brand | Clatronic |
| Model | NM 3795 |
| Mains power supply | DC 6 V, 1200 mA (power adapter SW0601200-W02, input AC 100-240 V) |
| Battery power | 4 AA/LR6 batteries (1.5 V) |
| Net weight | Approx. 2.1 kg |
| Protection class | III |
| Lamp | LED 0.1 W, 3 V (non-replaceable) |
| Needle system | Flat shank needle system 130 (sizes 80 to 110) |
| Stitch patterns | 12 patterns (straight stitch, zigzag, buttonhole, etc.) |
| Sewing speed | 2 levels (L/H) via switch or variable foot pedal |
| Reverse sewing | Yes, reverse button (7) |
| Presser foot | Removable, with release lever |
| Bobbin winder | Automatic with built-in stop |
| Thread cutter | Built-in (12) |
| Supplied accessories | 2 needles, 2 bobbins, threader, presser foot, foot pedal, power adapter |
| Maintenance | Clean the housing with a damp cloth and the bobbin area with a dry brush |
| Storage | In a dry, well-ventilated place, out of reach of children |
| Safety | Unplug before threading, changing needle or cleaning; use only the specified power adapter |
| Warranty | Refer to the warranty certificate provided with the appliance |
Frequently Asked Questions - NM 3795 CLATRONIC
User questions about NM 3795 CLATRONIC
0 question about this device. Answer the ones you know or ask your own.
Ask a new question about this device
Download the instructions for your Sewing machine in PDF format for free! Find your manual NM 3795 - CLATRONIC and take your electronic device back in hand. On this page are published all the documents necessary for the use of your device. NM 3795 by CLATRONIC.
USER MANUAL NM 3795 CLATRONIC
natural_image
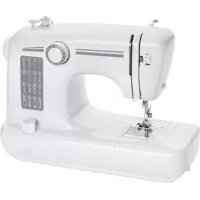
White sewing machine with control knobs and a scale ruler, no visible text or symbols on the device itself.Bedienungsanleitung......Seite 4
Instruction Manual...... Page 11
Gebruiksaanwijzing......Pagina 18
Mode d'emploi.... Page 25
Manual de instrucciones ...... Página 32
Istruzioni per l'uso....Pagina 39
Instrukcja obsługi......Strona 46
Használati utasítás .... Oldal 54
Руководство по эксплуатации ...... стр. 61
73 صفحة دليل التعليمات

27

28

30
WICHTIG:
natural_image
Close-up of a precision optical instrument with a circular component and an arrow indicating direction (no visible text or symbols)natural_image
Close-up of a wall-mounted soap dispenser with a circular vent (no visible text or symbols)
natural_image
Close-up of a small mechanical component or tool with no visible text or symbols
natural_image
Simple line drawing of a hook on a wall next to a vertical panel (no text or symbols)natural_image
Mechanical device with circular gauges and a magnified inset showing internal components (no visible text or symbols)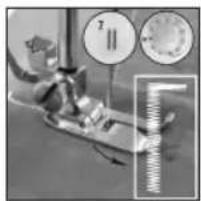
natural_image
Close-up of a mechanical device with a ruler and two circular gauges (no visible text or symbols)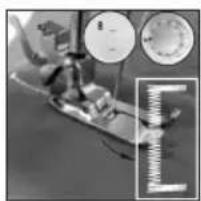
natural_image
Close-up of a mechanical device with circular gauges and a magnified inset showing a spring scale (no visible text or symbols)natural_image
Close-up of a robotic arm with a tool, possibly a robotic or mechanical device, on a textured surface (no visible text or symbols)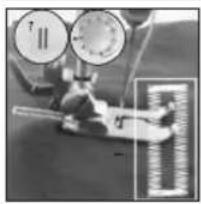
natural_image
Close-up of a mechanical device with pressure gauge and measurement markings (no readable text or symbols)Betrieb beenden
Be sure to read the separately enclosed safety instructions first.
Instruction Manual
Thank you for choosing our product. We hope you will enjoy using the appliance.
Read the instruction manual and the separately enclosed safety instructions very carefully before using this appliance. Keep these documents, including the warranty certificate, receipt and, if possible, the box with the inner packaging in a safe place. If you pass the appliance on to a third party, always include all the relevant documents.
Symbols in this Instruction Manual
Important information for your safety is specially marked. It is essential to comply with these instructions in order to avoid accidents and prevent damage to the appliance:

WARNING:
This warns you of dangers to your health and indicates possible injury risks.

CAUTION:
This refers to possible hazards to the appliance or other objects.
Content
Overview of the Components....3
Unpacking the Appliance.... 11
Scope of Delivery....11
Overview of the Components.... 11
Warnings for the Use of the Appliance ....12
Handling Batteries....12
Notes for Use....12
Inserting the Batteries....12
Connecting the Power Supply Unit....12
Switching the Appliance On and Off 12
LED Sewing Field Light....12
Selection of Needle Size and Threads ....13
Operation 13
Inserting the Needle....13
Attaching and Removing the Presser Foot....13
Threading the Upper-thread 13
Adjusting the Upper-thread Tension 14
Winding the Under-thread Bobbin 14
Inserting the Under-thread Bobbin....14
Bringing up the Under-thread 14
Select Stitch Pattern....14
Sewing....14
Buttonholes 15
End Operation 15
Cleaning....15
Storage....15
Troubleshooting....15
Technical Data....16
Product Specifications in Accordance
with Regulation (EU) 2019/1782 Power Supplies......16
Disposal 17
Battery Disposal 17
Meaning of the "Dustbin" Symbol 17
Unpacking the Appliance
- Remove the appliance from its packaging.
- Remove all packaging material, such as foils, filling material, cable ties and cardboard packaging.
- Check the scope of delivery for completeness.
- If the contents of the packaging are incomplete or if damage can be detected, do not operate the appliance. Return it to the dealer immediately.
Scope of Delivery
1× Sewing machine
1 × Foot pedal
1 × Power supply unit
2× Sewing needle
2×Upper-threadbobbin
2×Under-thread bobbin
1× Threader
1×Presserfoot
Overview of the Components
1 Thread lever
3 Stitch pattern adjusting wheel
4 Carrying handle
5 Symbolism stitch selection
6 Handwheel
7 Back button
8 On / off switch / speed switch
9 Battery compartment
10 Bobbin cover
11 Light switch
12 Thread cutter
13 Bobbin winder stop
14 Winder
15 Thread spool holder
16 Thread guide
17 Lever for the presser foot
18 Presser foot fixing screw
2 Upper-thread tension adjusting wheel
19 Lever for releasing the presser foot
20 Presser foot
21 Needle clamp screw
22 Mains connection socket
23 Foot pedal connection socket
24 Accessories compartment
25 Foot pedal
26 Power supply unit
27 Bobbin under-thread
28 Thread spool
29 Sewing needle
30 Threader
Warnings for the Use of the Appliance

Read the instructions!

Only use with "SW0601200-W02" power supply unit! For the purpose of recharging the battery, only use the detachable supply unit provided with this appliance.

Do not use power supply with damaged plug! If the pins of the plug part are damaged, the plug-in power supply shall be scrapped.

WARNING:
- Make sure that the switch (8) is in the OFF position. Otherwise the sewing machine will start sewing immediately.
- Always unplug the foot pedal (25) from the appliance when threading, changing needles or inserting the bobbin.
- Use only the accessories supplied or recommended in these instructions. Use of non-recommended accessories may cause injury.
Handling Batteries

Do not charge batteries!

Do not disassemble batteries!

Do not short-circuit batteries!

Observe polarity (+ / -)!

Danger of explosion!
Do not expose batteries to intense heat, such as sunshine, fire or similar.
- Batteries can leak battery acid. If the appliance will not be used for a longer period of time, remove the batteries.
-
If a battery leaks, do not rub the liquid into the eyes or mucous membranes. In case of contact, wash hands, rinse eyes with clean water. Seek medical attention if any discomfort persists.
-
Different battery types and new and used batteries must not be used together.
- Batteries are not to be disposed of together with domestic wastes. Return used batteries to the responsible collection points or to the dealer.
Notes for Use
You can operate the appliance either with batteries or with the power supply unit supplied.
Inserting the Batteries
(Batteries not included in scope of delivery)

WARNING:
Make sure that the switch (8) is in the OFF position. Otherwise the sewing machine will start sewing immediately.
- Remove the battery compartment cover on the underside of the appliance.
- Insert 4 AA / LR6 batteries into the battery compartment. Pay attention to the correct polarity. You will find a note on this in the battery compartment. Do not use rechargeable batteries.
- Close the battery compartment again with the cover.
Connecting the Power Supply Unit

WARNING:
Make sure that the switch (8) is in the OFF position. Otherwise the sewing machine will start sewing immediately.
- Check that the mains voltage you want to use matches that of the power supply unit.
- Insert the mains plug into the mains connection socket (22) on the back of the appliance.
- Connect the appliance to a properly installed protective contact socket.
Switching the Appliance On and Off
- The appliance is switched off when the switch (8) is in the OFF position.
- There are two ways to switch on the appliance:
1) Set the switch to OFF and use the foot pedal (25).
2) Select a speed level L (Low) or H (High) with the switch and the machine starts sewing directly.
LED Sewing Field Light
The LED sewing lamp is maintenance-free and does not require replacement.
Selection of Needle Size and Threads
Needle system: System 130 flat-shank needle
| Needle Size | Fabrics Thread | |
| 80(12) | Medium weight fabrics: Cotton, satin, workwear, canvas, double-faced fabrics, lightweight wool | Most threads are of medium size and suitable for these fabrics and needle sizes. For best results: use polyester threads for synthetics and cotton or naturally woven fabrics. Always use the same thread at the top and bottom. |
| 90(14) | Medium weight fabrics: Wool, heavier knitwear, terry cloth, denim fabrics | |
| 100(16) | Heavy fabrics: Wool, tent fabrics and quilted fabrics, denim, upholstery fabrics (light to medium) | |
| 110(18) | Heavy fabrics: Wool, coat fabrics, upholstery fabrics, some leather and vinyl (with leather needles) | Durable thread |
Operation
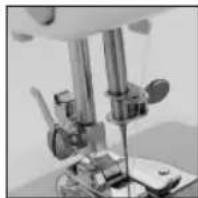
Inserting the Needle

WARNING: Risk of Injury!
Before inserting or replacing the needle, unplug the power supply unit from the sewing machine.
Change the needle regularly, especially if it is bent or the tip is damaged. A bent needle causes skipped stitches.
Defective needle tips damage the fabric.
Insert the needle as follows:
-
The needle guide must be completely raised. Turn the handwheel (6) in the direction of the arrow.
-
Loosen the needle clamp screw (21) and remove the old needle.
-
Insert the new needle as far as it will go. The flat side of the needle must face backwards.
-
Tighten the needle clamp screw again.
natural_image
Close-up of a microscope instrument with a circular dial and an arrow indicating motion (no visible text or symbols)Attaching and Removing the Presser Foot
There are different types of presser feet. You can buy them in shops. Make sure you get the right size. Not all presser feet fit every sewing machine.
To change or remove the presser foot, refer to the following description with the illustrations 1–3.
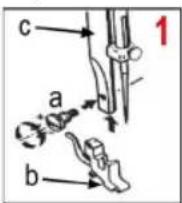
1. Illustration 1:
Pull the presser foot lever (17) up. Loosen the presser foot
fixing screw (a). Place the presser foot holder (b) on the presser foot bar (c) and tighten the screw (a).
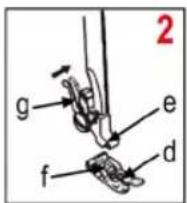
2. Illustration 2:
Place the presser foot (d) on the needle plate. Lower the presser foot lever (17) until the notch (e) is exactly over the presser foot pin (f). Press the lever (g) until the pin (f) engages in the notch (e).
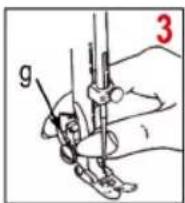
3. Illustration 3:
To remove the presser foot (20), press lever (g). The presser foot falls off.
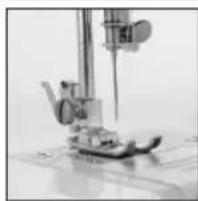
Threading the Upper-thread
For threading the upper-thread, refer to the illustrations below. Also refer to the illustrated instructions on the appliance.
When threading, make sure that the presser foot (20) is raised and the thread lever (1) is in the uppermost position!
-
Place the thread spool on the thread spool holder (15).
-
Pull the thread through the thread guide (16).
-
Guide the thread down past the adjusting wheel (2).
-
When you reach the bottom, guide it up the left side to the thread lever (1).
-
Guide the thread through the hole on the thread lever (1). Make sure that the thread is inserted from right to left.
natural_image
Close-up of a small mechanical component or tool with no visible text or symbols
natural_image
Simple line drawing of a bird perched on a branch next to a vertical scale (no text or symbols)
natural_image
Close-up of a mechanical component with labeled parts (i, u), no readable text or symbols beyond the markings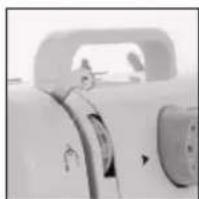
natural_image
Close-up of a car's front and side panels showing engine, dashboard, and window (no visible text or symbols)- Continue to guide the thread down and pass it through the hole on the needle clamp.
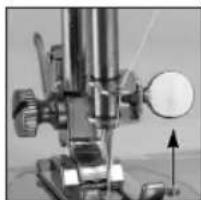
- Finally, pull the thread through the needle hole. Let the thread run to the back under the presser foot (20). Make sure you pull the thread about 10 cm behind the presser foot.
natural_image
Close-up of a sewing machine needle and foot press on a sewing machine (no visible text or symbols)Adjusting the Upper-thread Tension
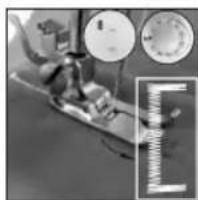
The setting is made by turning the adjusting wheel (2).
The basic setting is between 4 and 5.
Depending on the fabric and yarn thickness, turn the adjusting wheel so that the knotting of the upper and lower threads is visible as a dot on the top of the fabric. If loops form, the thread tension is too loose.
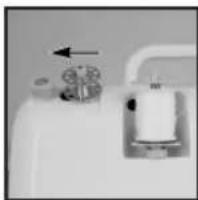
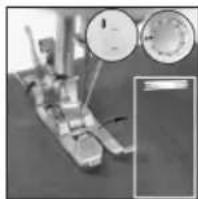
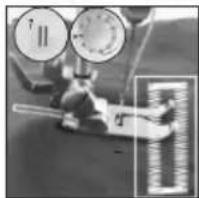
Winding the Under-thread Bobbin

CAUTION:
Remove the upper thread completely from the sewing machine. Otherwise it will wrap around internal components and the sewing machine will block.
- Place a thread spool on the thread spool holder (15).
- Put an empty under-thread bobbin (27) on the bobbin winder (14).
- Guide the thread through the thread guide (16) to the empty bobbin.
- Wind the thread clockwise a few times around the empty bobbin.
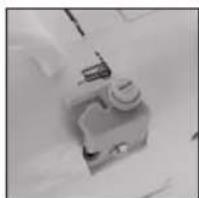
- Push the bobbin against the bobbin winder stop (13) (see illustration).
- Start winding with the foot pedal (25) or use the switch (8).
- When the winder is full, the winding stops automatically. If you want to stop winding prematurely, release the foot pedal.
- Cut the thread and remove the bobbin.
natural_image
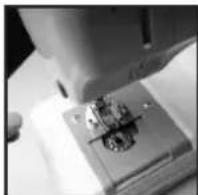
Close-up of a white toilet sink with a white cylindrical component and a black outlet, no visible text or symbols.Inserting the Under-thread Bobbin
- The needle must be fully raised when inserting or removing the under-thread bobbin (27). Turn the handwheel (6) in the direction of the arrow.
- Pull the bobbin cover (10) off to the front.
- Place the bobbin in the hook so that it turns anticlockwise (see illustration). Let the thread hang out of the bobbin by about 10 cm.
- Push the bobbin cover back in.
natural_image
Close-up of a sewing machine needle stitching fabric (no visible text or symbols)Bringing up the Under-thread
- Raise the presser foot (20).
- Hold the upper-thread with your left hand.
- At the same time, with your right hand, turn the handwheel (6) in the direction of the arrow until the needle is raised (one complete turn of the handwheel).
- Pull the lower and upper-threads 10 cm back under the presser foot. You can use a scissor or the thread cutter (12) for this.
Select Stitch Pattern
There are 12 stitch pattern types to choose from.
Select a stitch pattern using the table below. When turning the stitch pattern adjusting wheel (3), the needle must always be in the uppermost position.
| Stitch Pattern | Explanation |
| 1 Straight stitch, small stitch length | |
| 2 Straight stitch, medium stitch length | |
| 3 Straight stitch, long stitch length | |
| 4 Straight stitch, needle left, medium stitch length | |
| 5 Elastic stitch | |
| 6 Blind stitch | |
| 7 Buttonhole | |
| 8 Buttonhole | |
| 9 Wide zigzag stitch, small stitch length | |
| 10 Narrow zigzag stitch, medium stitch length | |
| 11 Wide zigzag stitch, medium stitch length | |
| 12 Wide zigzag stitch, long stitch length | |
- The needle must be completely raised. Turn the handwheel (6) in the direction of the arrow.
- Set the stitch pattern adjusting wheel to the desired setting. Make sure that the stitch pattern adjusting wheel locks in the desired position.
Sewing
- Make sure that the winder (14) is in the left position.
- Raise the presser foot (20). Make sure that the upper-thread and under-thread is pulled back about 10 cm.
- Place the fabric under the presser foot and lower the presser foot.
- Start sewing. Slowly press the foot pedal (25) or select one of the two speed levels with the switch (8). Guide the fabric with your hand.
- IMPORTANT! Do not pull or push the fabric while sewing. This can cause damage to the needle!
-
To sew a bartack at the end of the seam or in the seam, press down the button to sew backwards (7). When the button is released, the sewing machine sews forward again.
-
At the end of the seam, the needle must be in the upper position to allow the thread to be pulled out easily.
- Lift the presser foot to remove the fabric.
- To cut the threads, you can pass them over the thread cutter (12). Or use a pair of scissors.
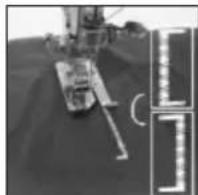
Buttonholes
- Place the fabric under the presser foot (20).
- Lower the presser foot where you want to sew the buttonhole.
- Then select stitch pattern 8 with the adjusting wheel (3).
- Sew 5 - 6 stitches with low speed (L).
- Select stitch pattern 7 with the adjusting wheel (3).
- Sew on the fabric at a suitable length. Make sure the stitch is sewn in a straight line.
- Select stitch pattern 8 with the adjusting wheel (3).
- Sew 5 - 6 stitches with low speed (L).
- Lift the presser foot (20) and turn the fabric 180°.
- Select stitch pattern 7 with the adjusting wheel (3).
- Sew until the buttonhole is completely sewn.
natural_image
Mechanical device with attached wires and a magnified inset showing circular components (no visible text or symbols)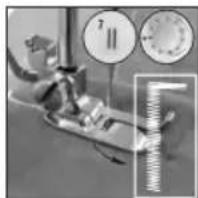


End Operation
- Switch off the appliance by sliding the switch (8) to the OFF position.
- Switch off the light with the switch (11).
- Unplug the power supply unit (26) from the socket.
- Disconnect the foot pedal (25) and power supply unit (26) from the sewing machine.
Cleaning
WARNING:
- Switch off the appliance before cleaning. Unplug the power supply unit from the socket.
- Never immerse the sewing machine, the foot pedal or the power supply unit in water for cleaning! It could cause an electric shock or fire.
CAUTION:
- Do not use a wire brush or other abrasive objects.
-
Do not use any sharp or abrasive cleaning agents.
-
Use only a moderately damp cloth to clean the outside of the housing. If necessary, use a little hand dishwashing detergent. Then dry the housing with a soft cloth.
- Clean the area underneath the bobbin cover with a dry brush.
Storage
• We recommend storing the appliance in its original packaging if you do not intend to use it for a long period of time.
• Always store the appliance out of the reach of children in a well-ventilated and dry place.
Troubleshooting
| Problem Possible Cause Remedy | ||
| The upper-thread breaks. | The upper-thread is not threaded correctly in the sewing machine. | Re-thread the upper-thread. |
| The thread tension is too tight. Loosen the thread tension (lower number). | ||
| The thread is too thick for the needle. Select a larger needle. | ||
| The needle is not inserted correctly. Remove the needle and reinsert it. (Flat side of the needle points to the back.) | ||
| The needle is damaged. Replace the needle. | ||
| The under-thread breaks. | The under-thread bobbin is not inserted correctly. | Check the position of the under-thread bobbin. |
| The upper-thread tension is too loose. Adjust the upper-thread tension (higher number). | ||
| Stitches are skipped. The needle is not inserted correctly. Remove the needle and reinsert it. (Flat side of the needle points to the back). | ||
| The needle is damaged. Insert a new needle. | ||
| The wrong needle size has been used. Choose a needle that is suitable for the thread and fabric. | ||
| The presser foot is not attached correctly. Check the position of the presser foot and insert it correctly. | ||
| The needle breaks. The needle was damaged. Insert a new needle. | ||
| The needle is not inserted correctly. Remove the needle and reinsert it. (Flat side of the needle points to the back). | ||
| Wrong needle size for the fabric. Choose a needle that is suitable for the thread and fabric. | ||
| The presser foot is not attached correctly. Check the position of the presser foot and insert it correctly. | ||
| Loose stitches | The upper-thread is not threaded correctly in the sewing machine. | Check the threading of the upper-thread. |
| The under-thread bobbin is not inserted correctly. | Insert the under-thread bobbin correctly. | |
| Needle / fabric / thread combination is wrong. | The needle size must be suitable for fabric and thread (see table on page 13). | |
| Wrong thread tension. | Correct the thread tension. | |
| Seam curls | The needle is too big for the fabric. | Select a finer needle. |
| The stitch length is set incorrectly. | Select a suitable stitch pattern with the stitch pattern adjustment wheel. | |
| The thread tension is too tight. | Loosen the thread tension (lower number). | |
Technical Data
Model: NM 3795
Protection class:....III
Power supply:.....DC 6 V, 1200 mA
Sewing field light: LED 0.1W, 3V
Net weight: .... approx. 2.1 kg
Power Supply Unit
Protection class:....II
Input: AC 100–240V, 50/60Hz, max. 0.4A
Output: DC 6V, 1200mA
Polarity:
Battery operation: 4× 1.5V type AA/LR6
The right to make technical and design modifications in the course of continuous product development remains reserved.
This appliance has been tested according to all applicable, current CE directives and built according to the latest safety regulations.
* not applicable due to an output power of less than 10 W.
Product Specifications in Accordance with Regulation (EU) 2019/1782 Power Supplies
| Information about the Power Supply Used | Value | Unit |
| Distributor | ||
| Clatronic International GmbH | ||
| Commercial register number HRB 9158 | ||
| Industriering Ost 40, 47906 Kempen | ||
| Germany | ||
| Model identifier | SW0601200-W02 | |
| Input voltage | 100–240 | V~ |
| Input alternating current frequency | 50/60 | Hz |
| Output voltage AC /DC | 6.0 | V DC |
| Output current | 1.2 | A |
| Information about the Power Supply Used | Value Unit | |
| Output power 7.2 W | ||
| Average efficiency in operation 81 | .38 % | |
| Low load efficiency (10 %) | * | % |
| No-load power consumption 0.071 W | ||
The relevant load conditions are as follows:
Percentage of nameplate output current
| Load condition 1 100% ± 2% | |
| Load condition 2 75% ± 2% | |
| Load condition 3 50% ± 2% | |
| Load condition 4 25% ± 2% | |
| Load condition 5 10% ± 1% | |
| Load condition 6 0% (no-load condition) | |
Disposal
Battery Disposal
As a consumer you are obliged by law to return old batteries / accumulators.
Your appliance contains batteries. If these batteries are spent, follow the instructions below:

CAUTION:
Batteries / rechargeable batteries must not be disposed of with household waste!
• The batteries must be removed from the appliance.
• Take spent batteries to the appropriate collection point or to a dealer.
- Your town or local authority can provide information about public collection points.
Meaning of the "Dustbin" Symbol

Protect our environment: do not dispose of electrical equipment in the domestic waste.
Please return any electrical equipment that you will no longer use to the collection points provided for their disposal.
This helps avoid the potential effects of incorrect disposal on the environment and human health.
This will contribute to the recycling and other forms of re-utilisation of electrical and electronic equipment.
Information concerning where the equipment can be disposed of can be obtained from your local authority. Your dealer and contractual partner is also obliged to take back the old appliance free of charge.
BELANGRIJK:
natural_image
Close-up of a precision optical instrument with a circular dial and mechanical components (no visible text or symbols)natural_image
Close-up of a bathroom sink with a glass tube and a small object on the wall (no visible text or symbols)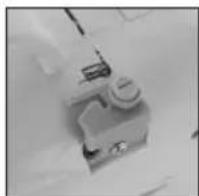
natural_image
Close-up of a small mechanical component with a cylindrical top and base, possibly a valve or actuator (no visible text or symbols)
natural_image
Simple line drawing of a hook on a vertical pole next to a ruler (no text or symbols visible)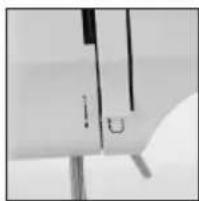
natural_image
Close-up of a car's front and side panels showing engine, dashboard, and window (no visible text or symbols)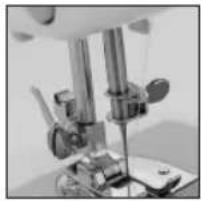
natural_image
Close-up of a sewing machine needle and handle assembly (no visible text or symbols)
natural_image
Close-up of a sewing machine needle stitching fabric (no visible text or symbols)natural_image
Close-up of a white industrial piping bag with a valve and a black arrow pointing to it (no visible text or symbols)natural_image
Close-up of a sewing machine needle stitching fabric on a small electronic component (no visible text or symbols)Onderdraad opnemen
natural_image
Close-up of a sewing machine needle with measurement scales (no visible text or symbols)
natural_image
Close-up of a mechanical device with dual gauges and a magnified inset showing a spring scale (no visible text or symbols)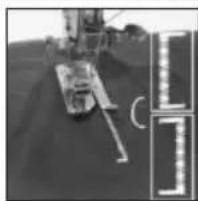
natural_image
Industrial machinery in operation on a conveyor belt (no visible text or symbols)natural_image
Close-up of a microscope with an arrow pointing to the lens (no visible text or symbols)natural_image
Close-up of a bathroom sink appliance with a glass tube and lid (no visible text or symbols)
natural_image
Close-up of a small mechanical component with a cylindrical top and flange (no visible text or symbols)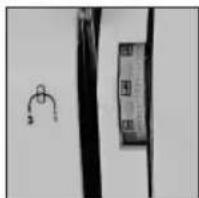
natural_image
Simple line drawing of a door with a handle and a hanging object, next to a wall-mounted device (no text or symbols)natural_image
Close-up of a sewing machine needle stitching a small electronic component (no visible text or symbols)natural_image
Close-up of a gas pressure regulator with gauges and tubing (no visible text or symbols)| Condition de charge 1 100% ± 2% | |
| Condition de charge 2 75% ± 2% | |
| Condition de charge 3 50% ± 2% | |
| Condition de charge 4 25% ± 2% | |
| Condition de charge 5 10% ± 1% | |
| Condition de charge 6 | 0% (condition sans charge) |
Élimination
natural_image
Close-up of a precision optical instrument with a circular component and an arrow indicating direction (no visible text or symbols)natural_image
Close-up of a white object with vertical lines and a small mark, possibly part of a device or tool (no readable text or symbols)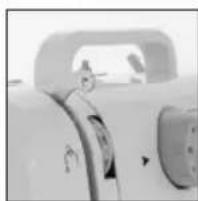
natural_image
Close-up of a vehicle's front wheel and side door (no visible text or symbols)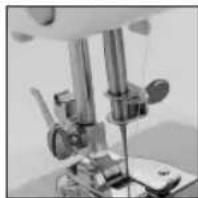
natural_image
Close-up of a mechanical device with metallic components and a stand (no visible text or symbols)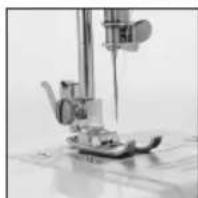
natural_image
Close-up of a sewing machine needle stitching fabric (no visible text or symbols)natural_image
Close-up of a mechanical device with measurement gauges and a magnified inset showing a scale (no visible text or symbols)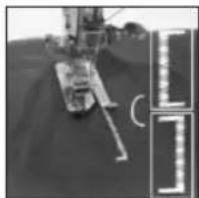
natural_image
Close-up of a pressure regulator with gauges and tubing (no visible text or symbols)Fin del manejo
natural_image
Close-up of a microscope with an arrow pointing to a circular component (no visible text or symbols)natural_image
Close-up of a kitchen sink with a cylindrical water dispenser mounted on a stand (no visible text or symbols)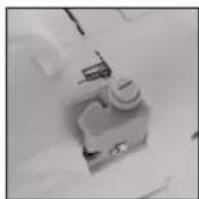
natural_image
Close-up of a small mechanical component with a circular housing and a handle (no visible text or symbols)
natural_image
Simple line drawing of a hook on a vertical pole next to a labeled box (no text or symbols)natural_image
Close-up of a pressure gauge and mechanical component (no visible text or symbols)Fine dell'utilizzo
natural_image
Close-up of a laboratory microscope with an arrow pointing to a component (no visible text or symbols)natural_image
Pure electrical circuit lines without any symbols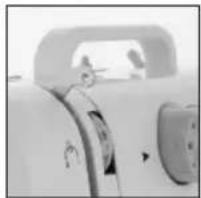
natural_image
Close-up of a vehicle's front and side panels showing a helmet and dashboard (no visible text or symbols)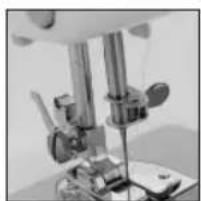
natural_image
Close-up of a mechanical sewing machine needle and base mount (no visible text or symbols)
natural_image
Close-up of a sewing machine needle and foot press on a sewing machine (no visible text or symbols)natural_image
Close-up of a kitchen sink with a white appliance and a pipe, no visible text or symbolsnatural_image
Close-up of a sewing machine needle stitching fabric (no visible text or symbols)Podnoszenie pod nici
natural_image
Mechanical device with attached wires and a magnified inset showing circular components (no visible text or symbols)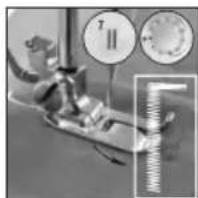
natural_image
Close-up of a mechanical device with dual gauges and a ruler, no visible text or symbols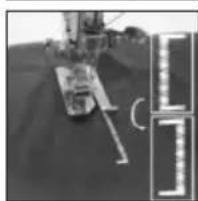
natural_image
Industrial machinery setup with a conveyor belt system and a worker (no visible text or symbols)natural_image
Close-up of a mechanical pressure gauge and a magnified view of a cylindrical component (no visible text or symbols)Zakończenie obsługi
CTC Clatronic Sp. z o.o
Ul. Brzeska 1
45-960 Opole
Usuwanie
Usuwanie baterii
natural_image
Close-up of a precision optical instrument with a circular component and an arrow indicating direction (no visible text or symbols)natural_image
Close-up of a mechanical device with two circular inset views showing magnified details (no visible text or symbols)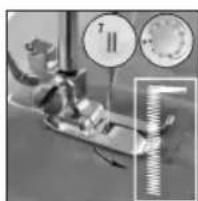
natural_image
Close-up of a mechanical device with circular gauges and a spring-like spring attached (no visible text or symbols)
natural_image
Close-up of a mechanical device with measurement scales and a close-up of a scale ruler (no visible text or symbols)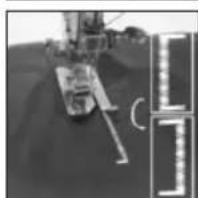
natural_image
Close-up of a robotic arm with articulated joints, possibly a robotic or mechanical device, on a textured surface (no visible text or symbols)natural_image
Close-up of a mechanical pressure gauge and a magnified view of a cylindrical component (no visible text or symbols)Művelet befejezése
natural_image
Close-up of a precision optical instrument with a dial indicator and mechanical components (no visible text or symbols)natural_image
Close-up of a bathroom sink appliance with a water dispenser and handle (no visible text or symbols)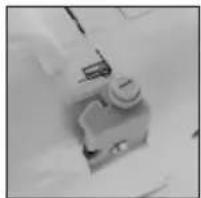
natural_image
Close-up of a sewing machine needle and handle (no visible text or symbols)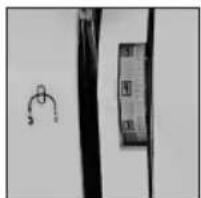
natural_image
Simple line drawing of a hook and a ruler on a vertical pole (no text or symbols)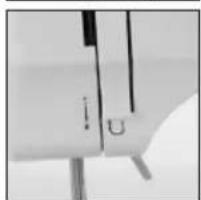
natural_image
Close-up of a white surface with two vertical black lines and a small 'i' mark, possibly part of a diagram or schematic (no readable text or symbols)
natural_image
Close-up of a white object with a curved handle and small circular elements, possibly a device or tool (no visible text or symbols)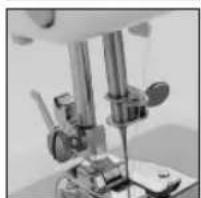
natural_image
Close-up of a laboratory instrument with glassware and a tripod, no visible text or symbols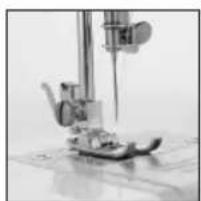
natural_image
Close-up of a sewing machine needle stitching fabric (no visible text or symbols)natural_image
Close-up of a sewing machine needle stitching a small electronic component (no visible text or symbols)Вывод нижней нити
natural_image
Mechanical device with attached wires and a magnified inset showing a circular dial (no visible text or symbols)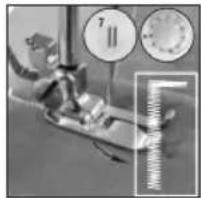
natural_image
Close-up of a mechanical device with measurement scales and a ruler, no visible text or symbols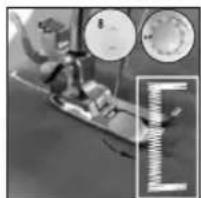
natural_image
Close-up of a mechanical device with circular gauges and a ruler, no visible text or symbols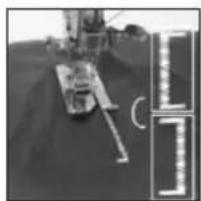
natural_image
Exterior view of a mechanical device on a textured surface (no visible text or symbols)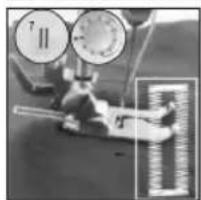
natural_image
Close-up of a mechanical pressure gauge and a ruler on a surface (no visible text or symbols)العراوي
natural_image
Close-up of a sewing machine needle stitching a small electronic component (no visible text or symbols)natural_image
Close-up of a sewing machine needle stitching fabric (no visible text or symbols)5.omega Highway over the same purpose of the world
natural_image
Close-up of a small mechanical component or tool with no visible text or symbolsnatural_image
Simple line drawing of a hanging hook and a rectangular object on a vertical surface (no text or symbols)natural_image
Close-up of a metallic object with vertical lines and a small mark, possibly part of a tool or component (no visible text or symbols)natural_image
Close-up of a precision optical instrument with a mounted lens and base mount (no visible text or symbols)کامل. قم بتدوير . 1