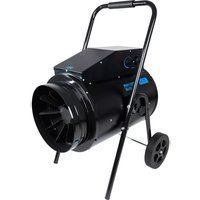
GEH 15 - Heating Güde - Free user manual and instructions
Find the device manual for free GEH 15 Güde in PDF.



| Product type | Electric individual heater |
| Brand | Güde |
| Model | GEH 15 |
| Rated heating power | 15 kW |
| Minimum heating power | 7.5 kW |
| Power supply | 400 V / 3~ / 50 Hz |
| Rated current | 22 A |
| Plug type | CEE 32A (400 V) |
| Heating levels | 2 (7.5 / 15 kW) + fan |
| Air flow | 1,560 m³/h |
| Room heating capacity | Approx. 300 m³ |
| Dimensions (L x W x H) | 590 x 500 x 850 mm |
| Net weight | 18.9 kg |
| Protection class | IP24 / Class I |
| Room thermostat | Mechanical, adjustable |
| Overheat protection | Tripping at 60 °C |
| Sound level | 57 dB (at 1 m) |
| Blow angle | Adjustable and lockable |
| Power cable type | H07RN-F 4G 2.5 mm² |
| Mounting | On casters (included) |
| Use | Well-insulated rooms, occasional use |
| Warranty | 24 months |
| Maintenance | Cleaning with a dry cloth |
| After-sales service | Güde GmbH & Co. KG, support@ts.guede.com |
Frequently Asked Questions - GEH 15 Güde
User questions about GEH 15 Güde
0 question about this device. Answer the ones you know or ask your own.
Ask a new question about this device
Download the instructions for your Heating in PDF format for free! Find your manual GEH 15 - Güde and take your electronic device back in hand. On this page are published all the documents necessary for the use of your device. GEH 15 by Güde.
USER MANUAL GEH 15 Güde
Translation of the original operating instructions Electric heater
ENGLISH Please read the instructions carefully before starting the machine.
ENGLISH This device is only suitable for well-insulated rooms or occasional use.
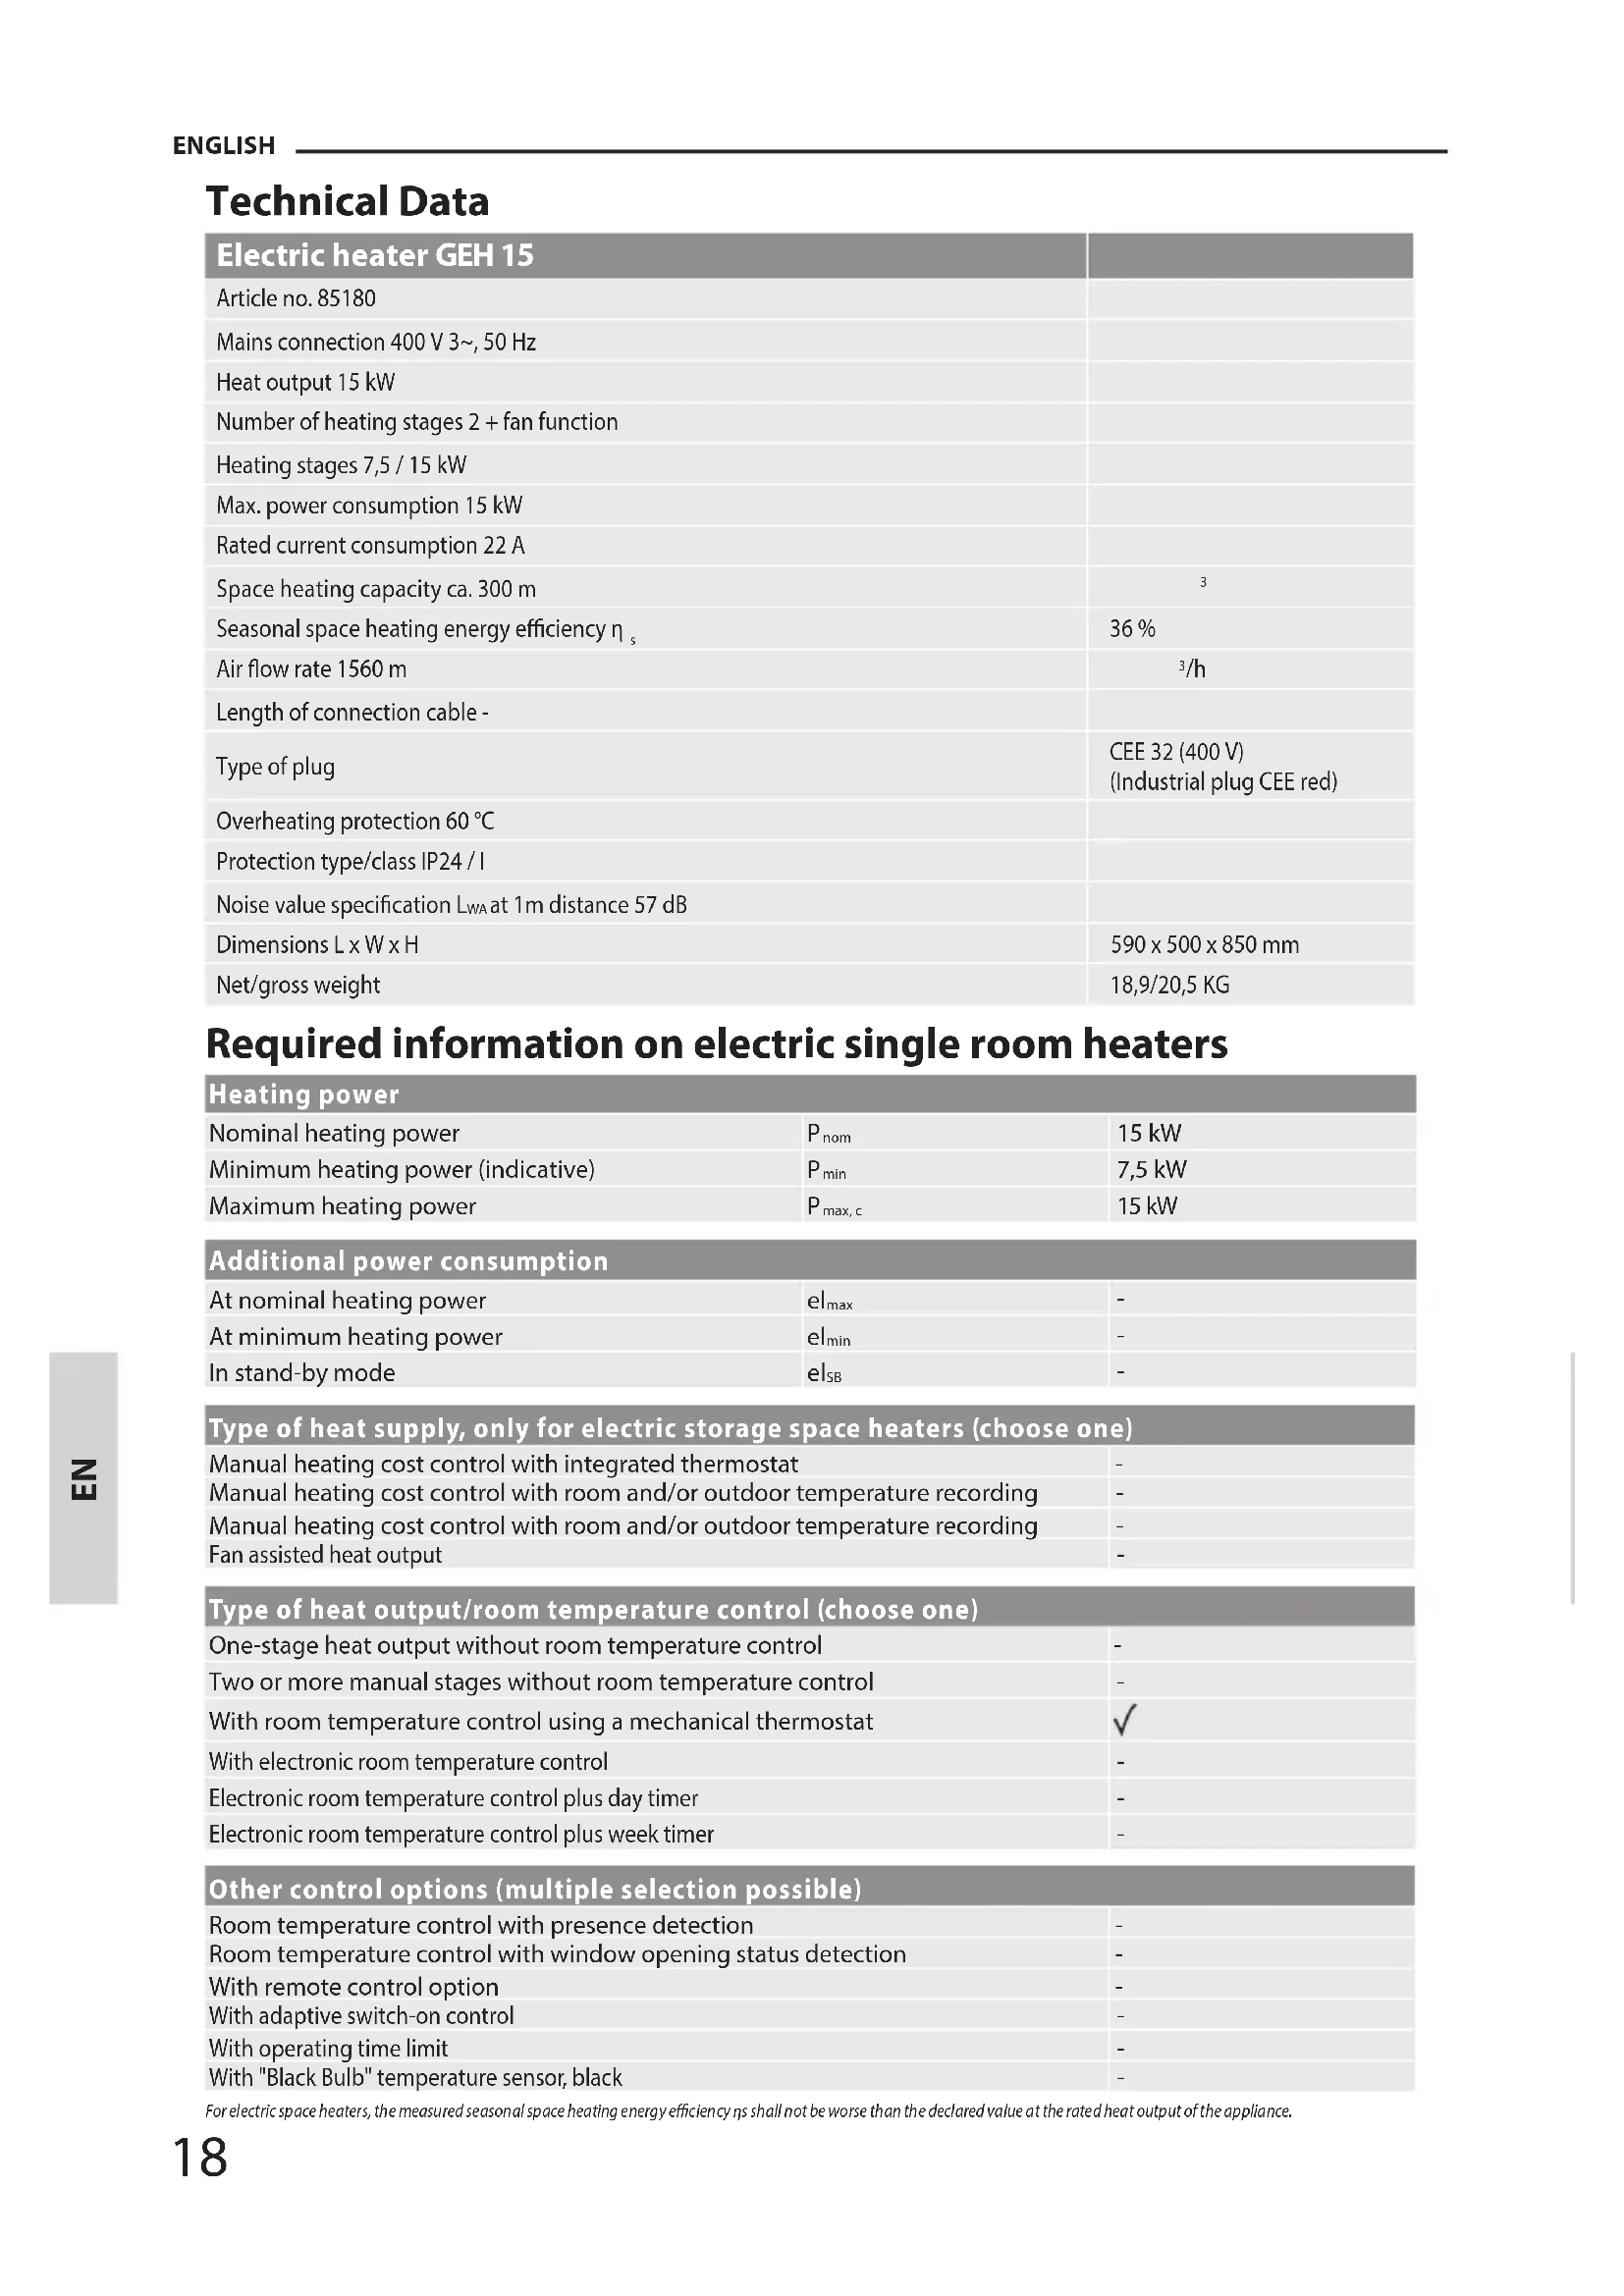
| Electric heater GEH 15 | |
| Article no.85180 | |
| Mains connection 400 V 3~, 50 Hz | |
| Heat output 15 kW | |
| Number of heating stages 2 + fan function | |
| Heating stages 7,5 / 15 kW | |
| Max. power consumption 15 kW | |
| Rated current consumption 22 A | |
| Space heating capacity ca. 300 m | 3 |
| Seasonal space heating energy efficiency ηs | 36 % |
| Air flow rate 1560 m | 3/h |
| Length of connection cable - | |
| Type of plug | CEE 32 (400 V) (Industrial plug CEE red) |
| Overheating protection 60 °C | |
| Protection type/class IP24 / I | |
| Noise value specification LwA at 1m distance 57 dB | |
| Dimensions L x W x H | 590 x 500 x 850 mm |
| Net/gross weight | 18,9/20,5 KG |
Required information on electric single room heaters
| Heating power | ||
| Nominal heating power | Pnom | 15 kW |
| Minimum heating power (indicative) | Pmin | 7,5 kW |
| Maximum heating power | Pmax, c | 15 kW |
Additional power consumption
| At nominal heating power | elmax | - |
| At minimum heating power | elmin | - |
| In stand-by mode | els8 | - |
Type of heat supply, only for electric storage space heaters (choose one)
| Manual heating cost control with integrated thermostat | - |
| Manual heating cost control with room and/or outdoor temperature recording | - |
| Manual heating cost control with room and/or outdoor temperature recording | - |
| Fan assisted heat output | - |
Type of heat output/room temperature control (choose one)
| One-stage heat output without room temperature control | - |
| Two or more manual stages without room temperature control | - |
| With room temperature control using a mechanical thermostat | ✓ |
| With electronic room temperature control | - |
| Electronic room temperature control plus day timer | - |
| Electronic room temperature control plus week timer | - |
Other control options (multiple selection possible)
| Room temperature control with presence detection | - |
| Room temperature control with window opening status detection | - |
| With remote control option | - |
| With adaptive switch-on control | - |
| With operating time limit | - |
| With "Black Bulb" temperature sensor, black | - |
For electric space heaters, the measured seasonal space heating energy efficiency nS shall not be worse than the declared value at the rated heat output of the appliance.
Security
Explanation of symbols

Attention Danger! Safety instructions marked with this symbol must be observed. Failure to do so may result in serious damage to health and immense material damage.

Warning of hot surfaces! Risk of burns!

Warning of electrical voltage

Warning: To prevent the heater from overheating, do not cover the heater.

To reduce the risk of injury, read the operating instructions.

Electrical or electronic equipment that is damaged and/or needs to be disposed of must be handed in at the recycling points provided for this purpose.

European conformity mark

Read the operating uctions carefully before
commissioning/using the unit and keep them for future reference! Read all safety notes and instructions. Failure to comply with the safety information and instructions may result in serious injury and/or damage to property. Ensure that third parties also only use this product after receiving the necessary instructions.
Important safety instructions

WARNING!
This appliance can be used by children aged from 8 years and above and persons with reduced physical, sensory or mental capabilities or lack of experience and knowledge if they have been given supervision or instruction concerning use of the appliance in a safe way and understand the hazards involved.
Children must not play with the appliance.
Cleaning and maintenance work must not be carried out by children without supervision.
Children aged 3 to under 8 years may only switch the appliance on and off if it is set up or installed in the intended normal operating position and they have been supervised or instructed in the safe use of the appliance and understand the hazards involved. Children aged 3 to under 8 years must not connect, adjust or clean the appliance or carry out maintenance. Children under 3 years of age should be kept away unless they are supervised at all times.

WARNING!
To avoid overheating, the heater must not be covered.

WARNING!
The appliance must not be used in small rooms if there are people in them who are not under constant supervision and cannot leave the room on their own.

CAUTION
Some parts of this product can become very hot and cause burns. Special care should be taken when children and vulnerable persons are present.
Specific safety instructions
The following basic precautions should always be observed when using electrical equipment:
The fan heater is not suitable for use outdoors in damp weather, in bathrooms or in other wet or humid environments.
The fan heater must not be located directly under a wall socket.
Never use the fan heater after a fall or if it shows any form of damage!
Only use the fan heater when it is placed on a horizontal, stable and non-flammable surface!
WARNING!
To reduce the risk of fire, combustible objects such as furniture, curtains and similar combustible materials must be at least 1m away from the air outlet! The fan heater must not be covered.
Do not use the fan heater in the immediate vicinity of a bathtub, shower or swimming pool.
This appliance is not intended to be used by persons (including children) with reduced physical, sensory or mental capabilities, or lack of experience and knowledge, unless they have been given supervision or instruction concerning use of the appliance by a person responsible for their safety.
Do not connect the fan heater with an on/off timer or other devices that can switch the appliance on automatically.
The fan heater must not be installed in rooms where flammable liquids or gases are used or stored.
You must not connect any other appliances to the same socket as the fan heater.
If the mains cable is damaged, it must be replaced by the manufacturer, its after-sales service or similarly qualified persons in order to avoid a hazard.
Make sure that the heater is always supervised and keep children and animals away from it;
Do not place the unit on moving vehicles or in places where it can easily tip over.
If you are not going to use the appliance for a long time, unplug it from the mains. Do not leave the appliance standing for a long time when it is in use. Pull the plug straight out, never by pulling on the cable.
Keep the heater away from curtains or places where the air intake can be easily blocked.
The mains coupling is waterproof when not in use. To avoid possible electric shock or leakage current, never use the appliance with wet hands and do not operate the appliance when water is on the power cord.
Do not dispose of electrical appliances as unsorted municipal waste, but use separate collection points. If electrical appliances are disposed of in landfills or rubbish tips, hazardous substances can enter the groundwater and food chain and affect your health and well-being.
Children should be supervised to ensure that they do not play with the appliance.
Check the marking on the power cord before use.
Depending on the type of power cord, this unit can be used in different environmental conditions.
Mains cable overview
| Type | You can use the unit in: | Do not use in: |
| H07RN-F | Household, warehouse and workshops, construction sites or greenhouses | |
| H05RN-F | Household, warehouses and workshops or greenhouses | Construction sites |
| H05RR-F | Household, warehouses and workshops | Construction sites or greenhouses |
Overheating protection
The unit has a safety thermostat. In case of overheating, i.e. exceeding the operating temperature, it switches on and the heating is deactivated. The fan is not switched off by the safety thermostat. It continues to run to cool down the unit. Look for the cause of the overheating and eliminate it. When the unit has cooled down sufficiently, it switches on again automatically.
If the problem persists, please contact customer service.
Behaviour in an emergency
- Switch off the unit immediately.
- In an emergency, disconnect the unit from the mains supply. So unplug the mains cable from the socket by grasping it by the mains plug.
- A defective unit must no longer be connected to the mains!
Intended use
Depending on the type of mains cable, this fan heater may only be used in the household, in warehouses and workshops, on construction sites or in greenhouses (see overview of mains cables). It is only suitable for well-insulated rooms or occasional use. Use for agricultural purposes (for example in barns, for drying straw) is strictly prohibited! When using the unit, always observe the respective local building and fire protection regulations as well as the necessary electrical fuses. This unit may only be used as specified for its intended purpose. The manufacturer cannot be held responsible for any damage caused by non-compliance with the provisions of the generally applicable regulations and the provisions of this manual.
The unit is primarily suitable as an auxiliary heater and is intended exclusively for floor installation.
Assembly & commissioning
Delivery
Remove the unit from the packaging and completely remove all packaging parts from the unit.
Unwind the mains cable completely and make sure that it is not damaged.

Warning Danger of suffocation!
Keep packaging parts out of the reach of children and dispose of them as soon as possible.
Note
Please have visible damage to the outer packaging confirmed by the driver of the parcel service immediately upon delivery. If transport damage is only noticed during unpacking, the parcel service must be notified in writing within 24 hours of delivery in order to hold them liable for the damage.
Assembly
Before you can set up the unit, the feet, the axle with castors, as well as the handle and the locking screw for the discharge angle must be fitted.
You will find an illustrated illustration on page 6-7 of this manual.
Proceed as follows for assembly:
- Attach the two brackets B to the heater A with the corresponding fasteners I Ensure the correct direction of the brackets in order to be able to mount the axle at the rear end.(p.6,fig.1) Screw the locking screw with the fasteners H to the heater A through the brackets B as well.(p. 6, picture 1)
- Mount the handle C with the fasteners J on the brackets B. (p. 6, picture 2)
- Insert the wheel axle D through the holes provided in the brackets B and mount the castors E on it with the fasteners F. Secure the axle with the two cotter pins G. (p. 7, picture 3)
Commissioning
When installing the unit, the prescribed minimum distances must be observed,
See the graph below.
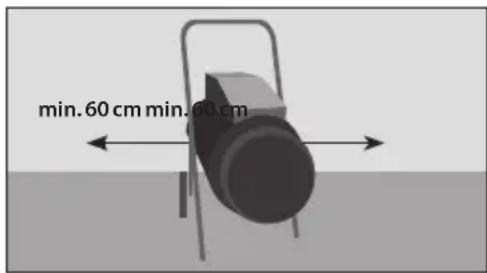

Position the fan heater so that it is upright on a solid surface and a safe distance away from damp environments and flammable objects.
Note
When you operate the heater for the first time, there may be a slight emission of smoke. This is quite normal and will stop after a short time. The heating element is made of stainless steel and was coated with a protective oil during manufacture. The smoke is caused by the remaining oil during heating. There may also be an odour here. This is also normal and will fade.
Electrical connection
The heater is supplied with an industrial plug installed in the unit. An additional coupling or extension cable is required to use the heater.
The following must be observed here:

CEE coupling 380V/415V 50/60Hz (32A)
Y Mains cable: H07RN-F 4G2.5mm²
Z CEE plug 380V/415V 50/60Hz IP24 (32A)
The user should use the purchased mains coupling as shown in the illustration. The coupling should fit the unit and extend the earth connection. The coupling should be VDE approved. The length of the mains cable may be more than 1.8m but less than 3m . If the mains cable is
too long and heavy, it may fall off the coupling, cause an electric shock or be tripped over by a child.
Make sure that the cable is completely unwound.
When you connect the mains plug to the appliance, open the cover with the direction of the arrow. See picture 2.

Make sure that the unit voltage (see type plate) and mains voltage match.
Make sure that the unit is completely switched off when you plug it in.
Only connect the mains plug to a properly installed and fused socket.
Make sure that the mains cable is always routed behind the unit - never in front of it!
Operation
Control panel

Position Electric fan heater GEH 15
| 1 Room thermostat control dial | |
| 2 | Function controller heating stages and ventilation O: Off * : Ventilation / fan ■ : Heating level 1 (7,5 kW) ■ : Heating level 2 (15 kW) |
Switch on the unit
If you have set up the unit correctly and ready for operation as described in the chapter Installation & Commissioning, taking into account all safety instructions, you can now switch it on.
Note
Discharge angle of the heater fan can be varied and locked by the locking screws 6.
Set heating level
With the function control 2 you can choose between heating level 1 and heating level 2.
Position: Heating level 1 (7,5 kW)
Position: Heating level 2 (15 kW)
To use the unit as a fan only, set the function control ② to the ventilation function
Setting the room thermostat
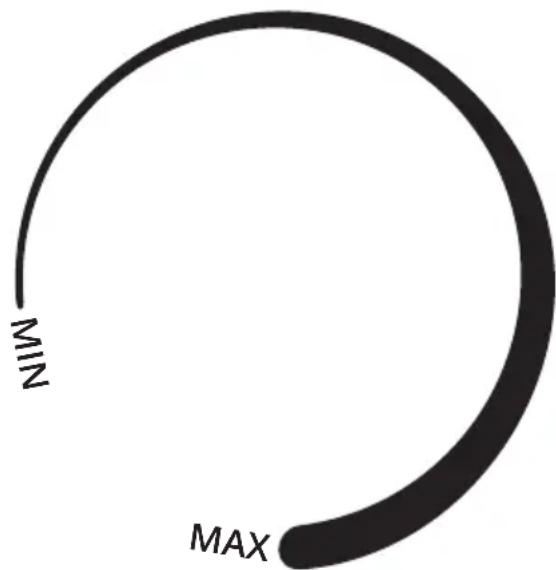
To set the stepless rotary control 1 of the room thermostat to the desired room temperature, please proceed as follows:
- Set the rotary control ① to max.
- Set the function control ② to heating level 1 or 2.
- Let the unit run at full power until the desired room temperature is reached.
- Slowly turn the control dial ① back. You will hear a click. This indicates that the heating coils in the appliance are now switched off, but the fan continues to work.
The unit now regulates the room temperature automatically via the room thermostat. The heating coils switch off automatically when the set temperature is exceeded and switch on again when the temperature falls below this.
Note
The desired room temperature should be higher than the current room temperature.
Switch off the unit
- Set the stepless control dial ① of the room thermostat to min.
- Set the function control ② to the fan and let it run for a few minutes to cool down the unit.
- Switch off the unit by setting the function control 2 to 0.
- Pull the mains cable out of the socket by the mains plug.
- Disconnect the extension cable from the heater.
- Let the unit cool down completely.
Troubleshooting
| Problem | Possible cause | Solution |
| The heater does not work even if it is plugged in and one heating level and the room thermostat are switched on | The plug is loose, bad connection | Pull out the plug, check the connection of plug and socket. Reconnect. |
| Socket has no power | Insert the plug into a suitable socket outlet | |
| The heating coils glow | The input voltage is too high or too low | Use the power supply unit according to the specifications on the type plate |
| The air inlet grille is blocked | Position the heater far enough away from objects such as curtains, plastic bags, paper and other things that may obscure the air intake. | |
| The unit does not heat up or only the fan works | No heating level is set | Set heating level |
| The room thermostat does not work | Turn the knob for the room thermostat and listen if it opens/closes. If no click is heard and the room thermostat is not damaged, the heating switches on automatically when the unit has cooled down. | |
| The safety thermostat has triggered | Switch off the heater and check for blockage of the inlet or outlet. Unplug the heater and wait at least 10 minutes for the protection system to reset before attempting to restart the heater. | |
| Abnormal noise | The unit is not upright | Place the heater on a flat surface |
Note
After all troubleshooting, maintenance and cleaning work, wait at least 5 minutes before switching the unit on again.
If the unit still does not work properly, please contact the customer service or an authorised electrician. The unit must then be checked and repaired if necessary.
Cleaning & Maintenance
Hot surface warning
Warning of electrical voltage
Before cleaning, always switch off the appliance, disconnect the mains plug and allow the appliance to cool down.
Never place/immerse the appliance in water for cleaning as this could result in electric shock or fire.
Never touch the mains plug with wet or damp hands.
Remove dust from the unit with a dry cloth.
A slightly damp cloth can be used to remove stains.
Warning of electrical voltage
Work on electrical components may only be carried out by an authorised specialist company.
Repairs and work not described in these instructions should only be carried out by qualified personnel. Only use original accessories and original spare parts.
Repairs that require opening the unit are reserved exclusively for the manufacturer or its customer service.
Always keep the appliance clean, especially the ventilation slots.
Storage
Hot surface warning
Before storage, always unplug the mains cable from the socket by grasping it by the mains plug.
Always disconnect the extension cable from the heater and store it separately.
Switch off the unit and let it cool down before storing. Clean the unit (see chapter Cleaning) and store it in the original packaging.
Store the appliance in a well-ventilated and dry place out of the reach of children.
Store the unit protected from heat, frost, direct sunlight and dust.
Store the unit in an upright position.
Warranty
The warranty period is 24 months for consumers and begins at the time of purchase of the appliance.
The warranty only covers defects that are due to material or manufacturing faults. When claiming a defect within the meaning of the warranty, the original purchase receipt with the date of sale must be enclosed.
Improper use, e.g. overloading of the unit, use of force, damage due to external influences or foreign bodies, are excluded from the warranty. Non-observation of the operating instructions and normal wear and tear are also excluded from the warranty.
Important customer information!
Please note that a return within or even outside the warranty period should always be made in the original packaging. This measure effectively avoids unnecessary transport damage and its often contentious settlement. Only in the original box is your device optimally protected and thus a smooth processing is ensured.
Service
Do you have technical questions? A complaint? Do you need spare parts or operating instructions? On the homepage of the company Gude GmbH & Co KG (www.guede. com) in the service area we will help you quickly and unbureaucratically. Please help us to help you. In order to be able to identify your unit in the event of a complaint, we need the serial number as well as the item number and year of manufacture. You will find all these data on the type plate.
Tel.: +49 (0) 79 04 / 700-360
Fax: +49 (0) 79 04 / 700-51999
E-Mail: support@ts.guide.com
Disposal
Warning Danger of suffocation!
Keep packaging parts out of the reach of children and dispose of them as soon as possible.
The packaging protects the unit from damage during transport. The packaging materials are usually selected according to environmentally compatible and disposal aspects and are therefore recyclable. Returning the packaging to the material cycle saves raw materials and reduces the amount of waste. Packaging parts (e.g. foils, Styrofoam) can be dangerous for children.
Do not dispose of electrical appliances in household waste, use the collection points in your municipality. Ask your local authority for the locations of the collection points. If electrical appliances are disposed of in an uncontrolled manner, hazardous substances can enter the groundwater and thus the food chain during weathering, or flora and fauna can be poisoned for years. If you replace the appliance with a new one, the seller is legally obliged to accept the old one for disposal at least free of charge.
When disposing of the unit, the relevant regulations on the disposal of used oil must be followed.
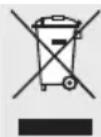
Devices that are damaged and/or need to be disposed of must be handed in at the recycling points provided for this purpose.
Translation of the EC-Declaration of Conformity
We, hereby declare the conception and construction of the below mentioned appliances correspond - at the type of construction being launched - to appropriate basic safety and hygienic requirements of EC Directives.
In case of any change to the appliance not discussed with us the Declaration expires.
- Security
- Explanation of symbols
- Important safety instructions
- WARNING!
- CAUTION
- Specific safety instructions
- Overheating protection
- Behaviour in an emergency
- Intended use
- Assembly & commissioning
- Delivery
- Warning Danger of suffocation!
- Note
- Assembly
- Commissioning
- Electrical connection
- Operation
- Control panel
- Switch on the unit
- Set heating level
- Setting the room thermostat
- Switch off the unit
- Troubleshooting
- Cleaning & Maintenance
- Hot surface warning
- Warning of electrical voltage
- Storage
- Warranty
- Important customer information!
- Service
- Disposal
- Translation of the EC-Declaration of Conformity
Brand : Güde
Model : GEH 15
Category : Heating