Easytwist - Bike Kinderkraft - Free user manual and instructions
Find the device manual for free Easytwist Kinderkraft in PDF.
User questions about Easytwist Kinderkraft
0 question about this device. Answer the ones you know or ask your own.
Ask a new question about this device
Download the instructions for your Bike in PDF format for free! Find your manual Easytwist - Kinderkraft and take your electronic device back in hand. On this page are published all the documents necessary for the use of your device. Easytwist by Kinderkraft.
USER MANUAL Easytwist Kinderkraft
text_image
10 YEARS WARRANTY Available only in selected countries Details on kinderkraft.com
text_image
WATCH MANUAL VIDEO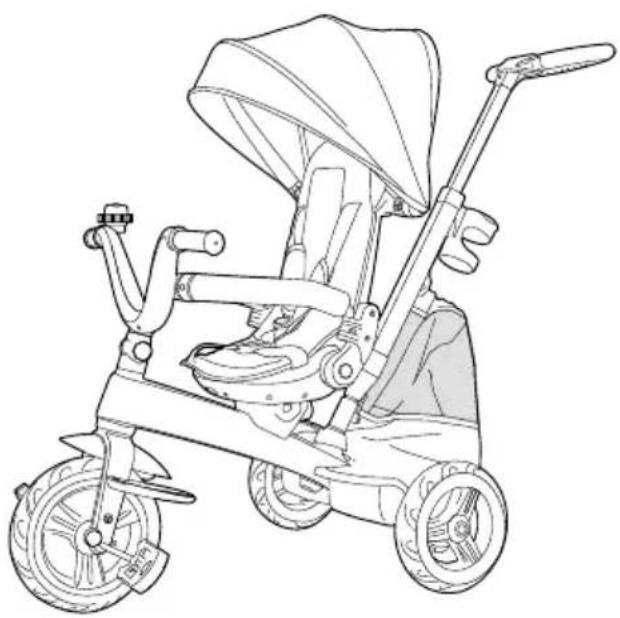
natural_image
Line drawing of a two-wheeled baby stroller with a canopy and wheels (no text or symbols)
kinderkraft.com

/kinderkraftofficial

kinderkraft

@kinderkraftofficial
(AR) الاستخدام
(CS) TROJKOLKA
(DE) FAHRRADS
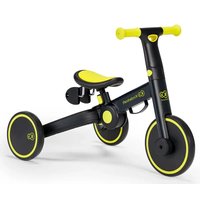
(EN) TRICYCLE
(ES) BICICLETA
(FR) TRICYCLE
(HU) GYEREK BI
(IT) TRICICLO
MANUAL DE INSTRUÇÕES
MANUAL DE UTILIZARE
natural_image
Technical line drawing of a mechanical device with no visible text or symbolsA
natural_image
Technical line drawing of two identical wheel rim components with four spokes (no text or symbols)B

natural_image
Line drawing of a circular mechanical component with a handle and central hub (no text or symbols)C

natural_image
Line drawing of a V-shaped pipe fitting with a central connector (no text or symbols)D

natural_image
Technical line drawing of a mechanical component with flanged ends and a circular base (no text or symbols)E
natural_image
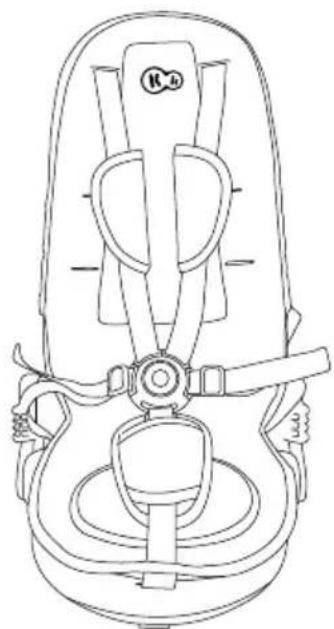
Line drawing of a car seat with straps and seatbelt (no text or symbols)F
natural_image
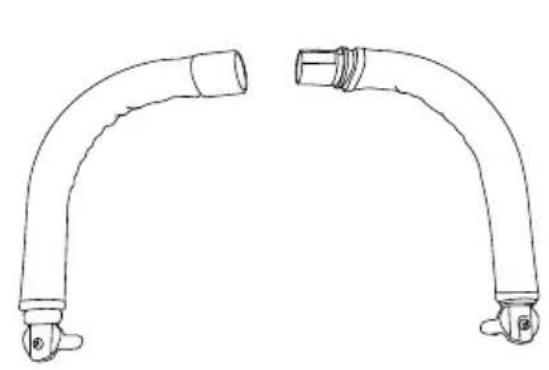
Line drawing of two curved pipe fittings with connectors (no text or symbols)
natural_image
Technical line drawing of a mechanical component with labeled parts (G and I), no readable text or symbols beyond labels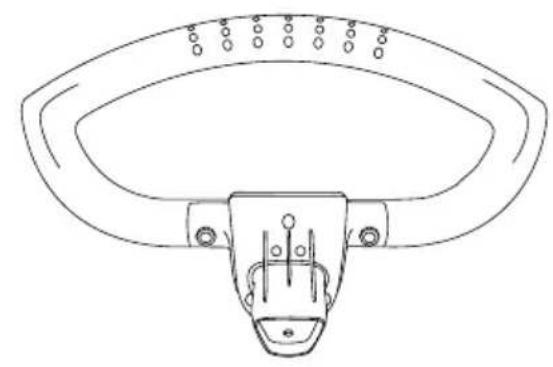
natural_image
Line drawing of a mechanical component with a circular head and mounting holes (no text or symbols)H
natural_image
Line drawing of a mechanical component with curved and rectangular features (no text or symbols)J

natural_image
Technical line drawing of a hexagonal nut and a threaded bolt (no text or symbols)K+L

natural_image
Technical line drawing of a bolt and hex nut (no text or symbols)M+N

0

natural_image
Line drawing of a bag with a strap and handle, no text or symbols presentR
natural_image
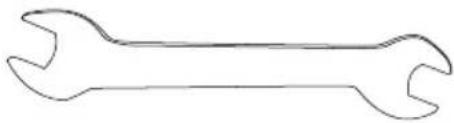
Simple line drawing of a double-ended wrench (no text or symbols)P

natural_image
Line drawing of a 3D object resembling a toilet or showerhead (no text or symbols)S

natural_image
Line drawing of a three-wheeled robotic vehicle with wheels and a head-mounted sensor (no text or symbols)
text_image
Technical diagram of a mechanical assembly with labeled components and directional arrow indicating motion or force2

natural_image
Technical line drawing of a mechanical assembly with no visible text or symbols3

natural_image
Line drawing of a stroller with two wheels and a seat, showing mechanical components and directional arrows (no text or symbols)4

text_image
I II A
text_image
I II B C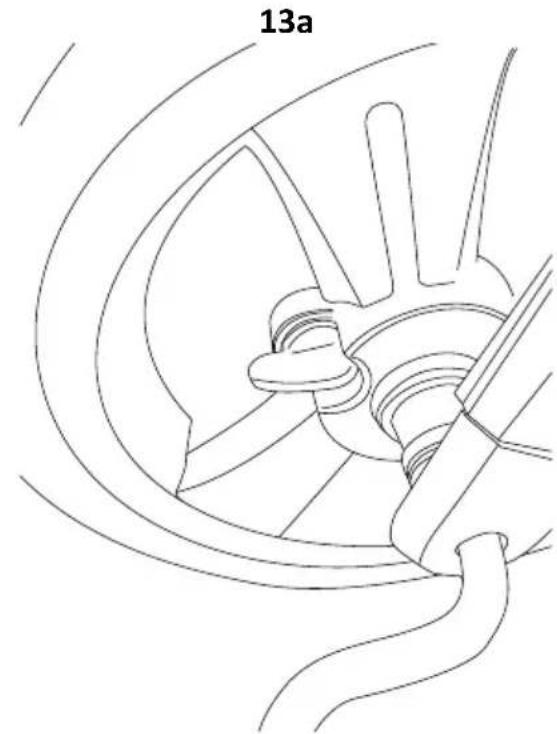
natural_image
Technical line drawing of a mechanical component with no visible text or symbols14
natural_image
Line drawing of a children's tricycle in a seatbelt, showing front wheel, wheels, and seat (no text or symbols)15
Thank you for purchasing a Kinderkraft product.
Our products are designed to help your child – we always care about safety and quality, thus ensuring the comfort of the best choice.
Important – Read carefully and keep for future reference
SAFETY INSTRUCTIONS AND PRECAUTIONS
WARNING!
- Compliance with the user manual ensures safe use of the toy. Read the user manual carefully before using the bike and keep it for future use. Recommended for children from the age of 9 months.
- Use personal protective equipment such as helmets, gloves, elbow pads and knee pads. This product is intended for outdoor use. Do not use in road traffic. The kids cruiser bike should not be used near motor vehicles, streets, swimming pools, hills, roads, stairs or on uneven ground.
- Use the toy on flat, obstacle-free surfaces.
- To avoid serious injuries, continuous adult supervision is necessary.
- To avoid falls and collisions causing injury to the user or others, parents/guardians should draw children's attention to the safety precautions to be taken. Before using the product, it is important to explain to children how to use it safely.
- The person using the product must always wear shoes.
- Assembly must always be carried out by an adult. Before each use, check that the item is not damaged or worn and that all assembly and fastening parts are in good condition. Ensure that the bolts and nuts retain their auto-locking properties. Check that the assembly is complete and in good condition. If you notice that some parts are missing or damaged, do not use the product, but contact your retailer.
- Be careful when riding bicycles, you should know how to ride to avoid falls or collisions that could cause injury to the user or a third person.
- The safest areas for the persons using the bicycle are those with little or no vehicular traffic, such as private areas, playgrounds, schoolyards, and school playgrounds.
- This product is intended for one user with a maximum weight of 25 kg.
- Keep the packaging or dispose of it in accordance with local regulations.
- For the safety of children, do not leave parts of the packaging freely accessible (plastic bags, cardboard boxes, etc.). Risk of suffocation!
I Elements of bicycle
| Part | Name | Part | Name |
| A | Frame | J | Roof |
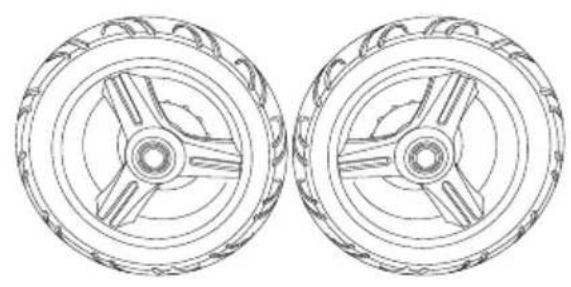
| B | Rear wheel | K | Fixing but for wheel x2 |
| C | Front wheel | L | Fixing bolt for wheel x2 |
| D | Handle bar | M | Fixing bolt for handlebar |
| E | Bell with fixing bolt | N | Fixing nut for handlebar |
| F | Saddle with sheathing and safety belts | O | Phillips screwdriver |
| G | Side covers | P | Structural wrench 2 |
| H | Upper part of parent's handle | R | Rucksack |
| I | Lower part of parent's handle | S | Beverage holder |
II Assembly of bicycle
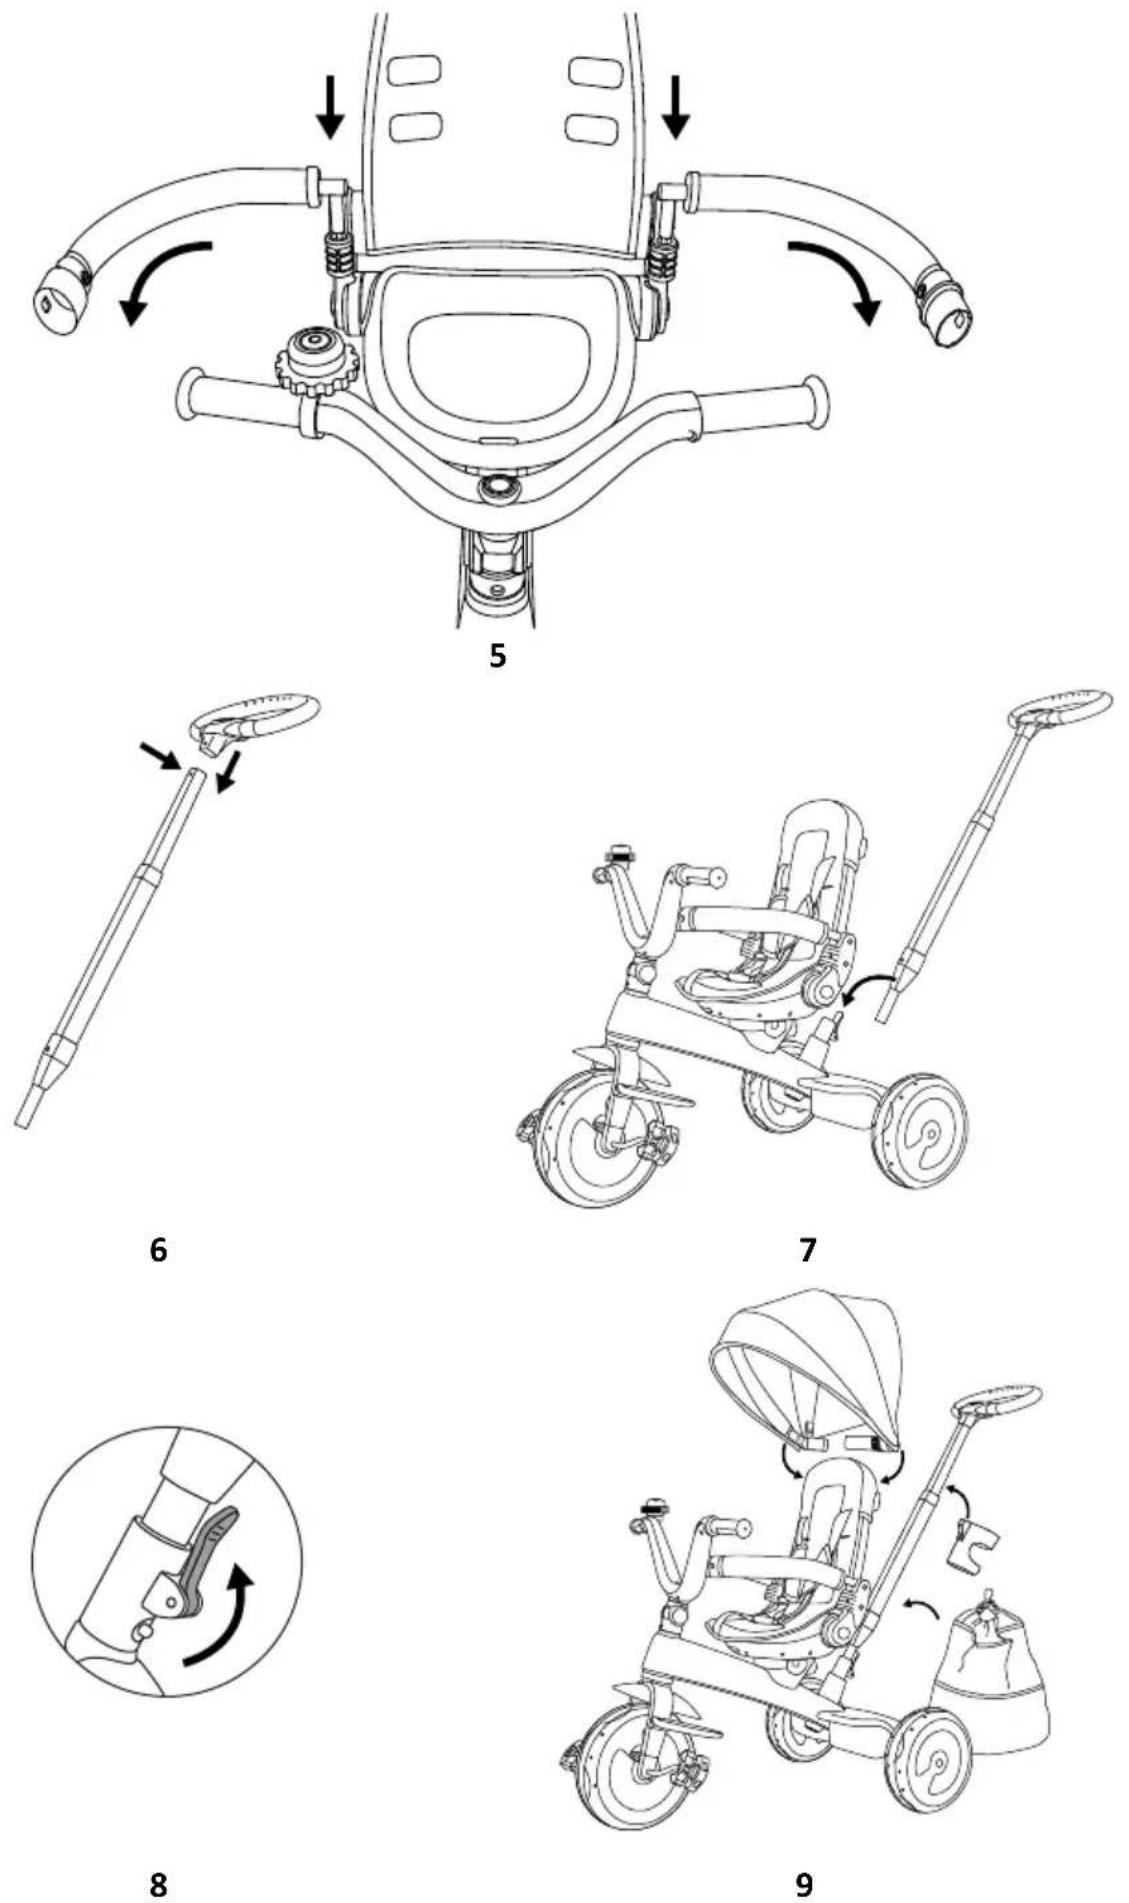
An assembly of the bicycle should be started from connecting the frame (A) with the rear wheels (B) by sliding them in on the both sides. When properly assembled, you should hear a click (Fig. 1). The next step is to connect the front wheel (C) with the fork installed on the front part of the frame. In order to do this, slide the plastic guides located on the both sides of the wheel into the holes in the fork, and then secure the connections with the bolts (K), nuts (L) and assembly elements (O and P) as shown in Fig. 2. The assembly of the handlebar (D) should be started by screwing the bell (E) on the right or left side of the handlebar with the use the fixing bolt attached to the bell. Then slide the handlebars over the bicycle frame and
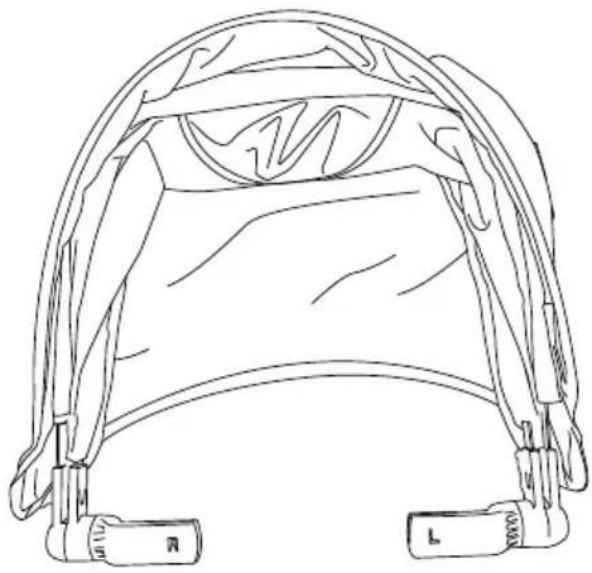
secure with the bolt and nut (M and N) (Fig. 3). Unfold the saddle (F) until you hear a characteristic click and place it in the bicycle frame facing forward until you hear the lock sound. In order to unfasten the saddle, you should push the buttons on both sides of the saddle (Fig. 4). The next step is the installation of the side covers (G). Insert the plastic tubes into the hollows on both sides of the saddle while paying attention to the protruding pin at the end of the tube that enables to assembly (and the disassembly) the covers only in one position (Fig. 5). The cover is closed by joining both elements until they click. The next stage is the assembly of the parent's handle. Press the metal button in the lower part of the parent's handle (I) and slide the upper part of the handle (H) until you hear a click (Fig. 6). Slip the resulting element over a hole in the rear side of the frame, at the same time pressing the metal button (Fig. 7). Secure the parent's handle by lifting lever up (Fig. 8). Slide the beverage holder (S) onto the mandrel on the parent's handle and hang the rucksack (R) (Fig. 9). Slide the roof (J) into the holes in the rear part of the backrest until you hear a click (Fig. 9). The correctly assembled bicycle is shown in Fig. 10. It is possible to remove the cover: for this purpose the buckles at the back of the bike backrest (Fig.11) and the buckle from the crotch belt (Fig.12) must be removed.
III Adjustment of bicycle:
Position of roof - a length of the roof is adjustable.
Footrest – depending on the child's level of development, the footrest can be folded or unfolded so that the child can propel the bicycle independently. WARNING! Whenever the parent's handle is assembled and the footrest is unfolded, the wheel lock should be disengaged so that the pedals rotate freely without setting the wheel in motion (drive is disengaged). A failure to unlock the lock, may result in crushing or injuring the feet! After removing the parent's handle, you should fold up the footrest and connect the wheel lock so that the pedals set the wheel in motion (drive is engaged).
Safety belts – adjust the length so that they hold the child firmly, without blocking his/her movements. You can change the position of the belt in order to adjust to a child's height.
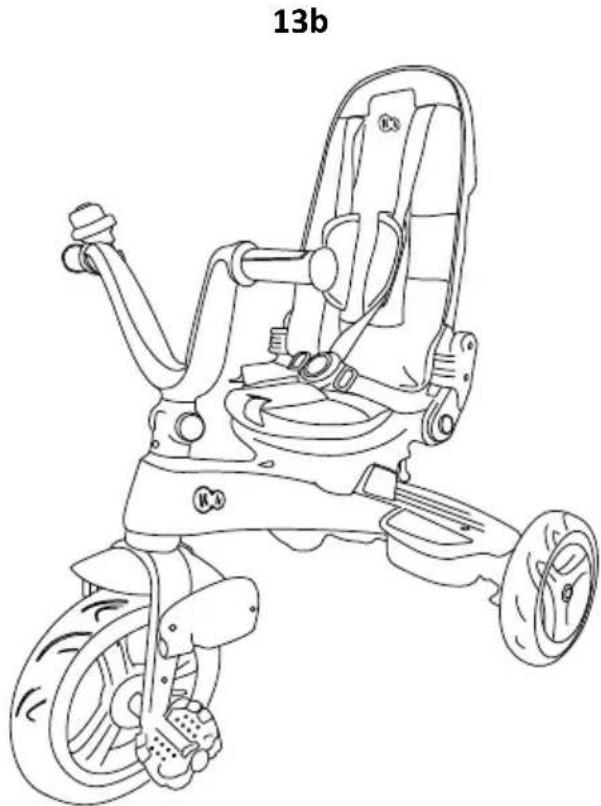
Handlebar – adjustable in two positions. In order to adjust it, press the green button at the base of the handlebar and set it to a comfortable position (Fig.13b).
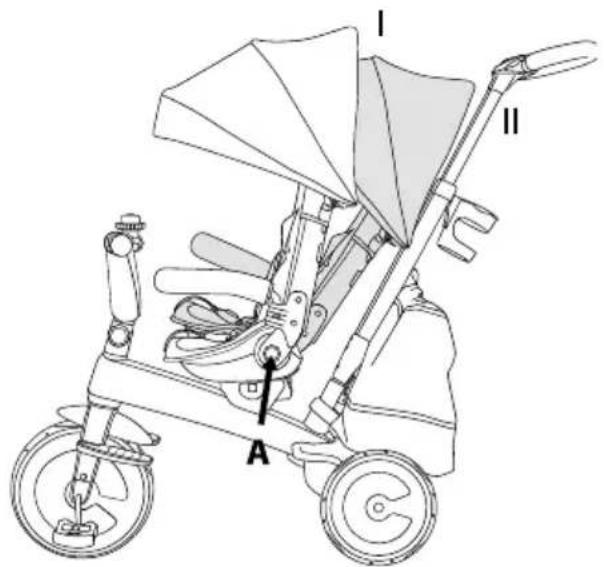
Position of backrest – the backrest has two levels of its adjustment (I & II). The angle of the backrest is adjusted by pressing buttons situated on both sides of the saddle and simultaneously pushing the backrest forward or backward (Fig. 13a,A).
Position of saddle – the saddle can be turned both forward and backward. In order to do this, set the backrest in position I, press the button located under the saddle in the rear part of the bicycle and rotate the saddle (13b,C). WARNING! In the rear-facing position, always lower the handlebar down! (Fig. 13b,B). In order to turn the saddle forward-facing, press the button under the saddle again and rotate the it. WARNING! The handlebar must always be raised when the saddle facing forward.
The bicycle can be adapted for the older children by removing the roof, side covers and parent's handle and folding the footrest (Fig. 15).
Length adjustment of parent's handle – press one of the green buttons on the parent's handle, change a height of the handle by raising or lowering it until you hear click of the look. It is possible to set four height levels.
IV Maintenance and cleaning
 | Do not wash. Clean the product gently with a damp cloth and a mild detergent. |  | Do not dry in a tumble dryer |
 | Wash at max. 30°C, gentle process. |  | Do not iron |
 | Do not bleach |  | Do not dry clean |
 | Hand wash at a maximum temperature of 40 °C. | ||
Rucksack: Remove from the frame and clean according to the instructions on the label.
Roof: Do not wash. Do not bleach. Do not tumble dry. Do not iron. Do not dry clean. Clean with a clean, damp cloth and mild soap. Leave to air dry. Do not immerse in water.
Saddle cover, safety belts: Hand wash at max. 40 °C Do not bleach. Do not tumble dry. Do not iron. Do not dry clean.
Frame: Clean the frame with a soft, clean and moistened cloth and mild soap.
Storage
Keep out of the reach of children.
V Warranty
-
All Kinderkraft products are covered by a 24-month warranty. The warranty period starts from the date the product is handed over to the Buyer.
-
The warranty is only valid in the member states of the European Union, excluding overseas territories (as currently defined, including in particular: Azores, Madeira, Canary Islands, French Overseas Departments, Åland Islands, Athos, Ceuta, Melilla, Helgoland, Büsingen am Hochrhein, Campione d'Italia and Livigno) and the territory of the United Kingdom of Great Britain and Northern Ireland excluding the British Overseas Territories (e.g. Bermuda, Cayman Islands, Falkland Islands).
- The manufacturer's warranty does not apply to countries not listed above. The conditions of the additional warranty may be determined by the Seller.
- In some countries, it is possible to extend the warranty to a limited period of 120 months (10 years). The complete terms and conditions and the warranty extension registration form are available at WWW.KINDERKRAFT.COM
- The warranty is valid only in the territory indicated in paragraph 2.
- Claims must be made by completing the form available at WWW.RMA.KINDERKRAFT.COM
- The warranty does not cover:
A. Cosmetic damage, including but not limited to: scratches, dents and cracks in plastic, unless the failure is due to a material or manufacturing defect;
B. Damage resulting from misuse or poor maintenance - including but not limited to: mechanical damage to products caused by misuse or poor maintenance;
o Refer to the instructions for use and installation of the product contained in the user manual;
C. Damage caused by improper assembly, installation or disassembly of products and/or accessories;
o Refer to the instructions for use and installation of the product contained in the user manual;
D. Damage caused by corrosion, mould or rust, resulting from improper maintenance, care and storage;
E. Damage caused by normal wear and tear or otherwise resulting from the normal passage of time; - This includes: tears or punctures in inner tubes; tyre damage; tyre tread damage; fading of fabrics resulting from mechanical use (e.g. on joints and covering of moving parts);
F. Damage or erosion caused by sun, perspiration, detergents, storage conditions or frequent washing, etc;
G. Damage caused by accident, abuse, misuse, fire, contact with liquid, earthquake or other external causes;
H. Products that have been modified to change functionality without 4Kraft's written consent;
I. Products from which the serial number or lot number has been removed or tampered with in any way;
J. Damage caused by the use of third party components or products - including but not limited to: cup holders, umbrellas, reflectors, bells;
K. Damage caused by transport or by ground handling service providers. - The warranty period for accessories included with the product is 6 months from the date of sale, excluding the faults described above.
- These warranty conditions are complementary to the Customer's statutory rights with respect to 4KRAFT sp. z o.o. The warranty does not exclude, limit or suspend the Customer's rights under warranty for defects in goods sold.
- The full text of the Terms and Conditions of the Warranty is available on the website WWW.KINDERKRAFT.COM
All rights to the present document belong entirely to 4Kraft Sp. z o.o. Any unauthorized use of them against their purpose, including in particular: using, copying, reproducing, making available - in whole or in part, without the consent of 4Kraft Sp. z o.o. may result in legal consequences.
ES
¡Estimado Cliente!
(EN) In the interests of our Clients - we are at your disposal! If you have a problem with the product you received, contact us in the most convenient way for you!