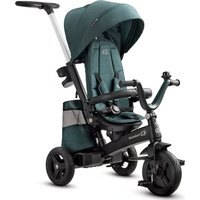
4Trike - Bike Kinderkraft - Free user manual and instructions
Find the device manual for free 4Trike Kinderkraft in PDF.
| Product type | Evolutive children's bike (balance bike / tricycle / pedal tricycle) |
| Brand | Kinderkraft |
| Model | 4Trike |
| Recommended age | From 12 months |
| Maximum user weight | 25 kg |
| Dimensions (L x W x H) | Approx. 70 x 40 x 50 cm (estimated) |
| Product weight | Approx. 4.5 kg (estimated) |
| Materials | Metal frame, plastic parts, padded seat |
| Possible configurations | Balance bike (position 1), tricycle (position 3), pedal tricycle |
| Wheels | Front and rear wheels, adjustable position |
| Pedals | Removable, attached to the front wheel in pedal tricycle mode |
| Seat | Height adjustable with two tubes (standard and long) |
| Safety | Mandatory wearing of helmet, gloves, elbow and knee pads; adult supervision required |
| Use | Outdoors, on flat surfaces without obstacles, away from traffic |
| Assembly | By an adult, tool included (assembly wrench) |
| Maintenance and cleaning | Damp cloth and mild soap |
| Storage | Out of reach of children |
| Warranty | 24 months, extendable up to 120 months (10 years) upon registration |
| Included accessories | Metal connector, additional seat tube, assembly wrench |
| Repairability | Spare parts available from the manufacturer; repair possible by an adult |
| Power supply | None (manual operation) |
Frequently Asked Questions - 4Trike Kinderkraft
User questions about 4Trike Kinderkraft
0 question about this device. Answer the ones you know or ask your own.
Ask a new question about this device
Download the instructions for your Bike in PDF format for free! Find your manual 4Trike - Kinderkraft and take your electronic device back in hand. On this page are published all the documents necessary for the use of your device. 4Trike by Kinderkraft.
USER MANUAL 4Trike Kinderkraft
Available only in selected countries Details on kinderkraft.com

text_image
WATCH MANUAL VIDEO
natural_image
Line drawing of a children's tricycle with wheels and seat (no text or symbols)
kinderkraft.com

/kinderkraftofficial

kinderkraft

@kinderkraftofficial
(AR)
الاستخدام
(CZ) TROJKOLKA
(DE) FAHRRADS
(EN) TRICYCLE
(ES) BICICLETA
(FR) TRICYCLE
(HU) GYREK BICIKLI
(IT) TRICICLO
MODEL: 4 TRIKE
NÁVOD K OBSLUZE
BEDIENUNGSANLEITUNG
USER MANUAL
MANUAL DE USARIO
GUIDE D'UTILISATION
HASZNÁLATI UTASÍTÁS
ISTRUZIONI PER UTENTE
(NL)FIETSJE
(PL) ROWEREK
(PT) BICICLETA
(RO) BICICLETĂ
MANUAL DE INSTRUÇÕES
MANUAL DE UTILIZARE
natural_image
Technical line drawing of a mechanical device with pulleys and gears (no text or symbols)1
natural_image
Simple line drawing of a saddle and backpack (no text or symbols)2


4
3

natural_image
Simple black curved bracket with two small holes, isolated on white background (no text or symbols)5

natural_image
Technical illustration of a mechanical assembly with a hand operating a gear and a wheel assembly, showing no text or symbols.A

natural_image
Diagram showing a hand operating a mechanical device with rotating wheels and a dashed outline indicating motion (no text or symbols)B

natural_image
Diagram showing a hand operating a bicycle wheel with an arrow indicating rotation (no text or symbols present)C

text_image
I II D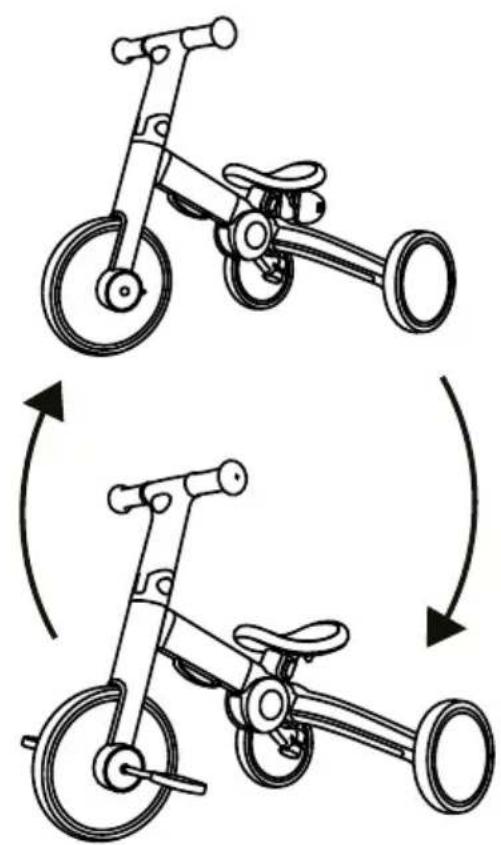
natural_image
Two line drawings of a children's tricycle with wheels, showing rotational motion (no text or symbols)E
|

natural_image
Line drawing of a bicycle seatbelt mechanism with no text or symbols||

natural_image
Mechanical diagram showing a pulley system with rotating components and directional arrows indicating motion (no text or labels)F

|
natural_image
Line drawing of a children's tricycle with a close-up inset showing the wheel assembly (no text or symbols)||
natural_image
Line drawing of a bicycle with a wheel and attached suspension, showing mechanical components and a magnified inset (no text or symbols)III

natural_image
Technical line drawing of a mechanical device with a magnified inset showing a component detail (no text or symbols)J
AR
عميلنا العزي!
Thank you for purchasing a Kinderkraft product.
We design our bicycles with your child in mind - we always care about safety and quality, which guarantees that with the purchase of our products you get the comfort of the best possible choice.
IT IS IMPORTANT TO KEEP THIS MANUAL FOR FUTURE USE.
SAFETY INSTRUCTIONS AND PRECAUTIONS
Warning:
- Compliance with the user manual ensures safe use of the toy. Read the user manual carefully before using the bike and keep it for future use. Recommended for children from the age of 12 months.
- Use personal protective equipment such as helmets, gloves, elbow pads and knee pads. This product is intended for outdoor use. Do not use in road traffic. The kids cruiser bike should not be used near motor vehicles, streets, swimming pools, hills, roads, stairs or on uneven ground.
- Use the toy on flat, obstacle-free surfaces.
- To avoid serious injuries, continuous adult supervision is necessary.
- To avoid falls and collisions causing injury to the user or others, parents/guardians should draw children's attention to the safety precautions to be taken. Before using the product, it is important to explain to children how to use it safely.
- The person using the product must always wear shoes.
- Assembly must always be carried out by an adult. Before each use, check that the item is not damaged or worn and that all assembly and fastening parts are in good condition. Ensure that the bolts and nuts retain their auto-locking properties. Check that the assembly is complete and in good condition. If you notice that some parts are missing or damaged, do not use the product, but contact your retailer. Small items must be kept out of the reach of children.
- Be careful when riding bicycles, you should know how to ride to avoid falls or collisions that could cause injury to the user or a third person.
- The safest areas for the persons using the bicycle are those with little or no vehicular traffic, such as private areas, playgrounds, schoolyards, and school playgrounds.
• Maximum user weight – 25 kg - Keep the packaging or dispose of it in accordance with local regulations.
- For the safety of children, do not leave parts of the packaging freely accessible (plastic bags, cardboard boxes, etc.). Risk of suffocation!
- Do not carry the bike by the metal connector
I Bike components
- Frame with wheels and steering wheel mounted
- Seat with pedals
- Additional seat tube
- Mounting spanner
- Metal connector
II Mounting the bike
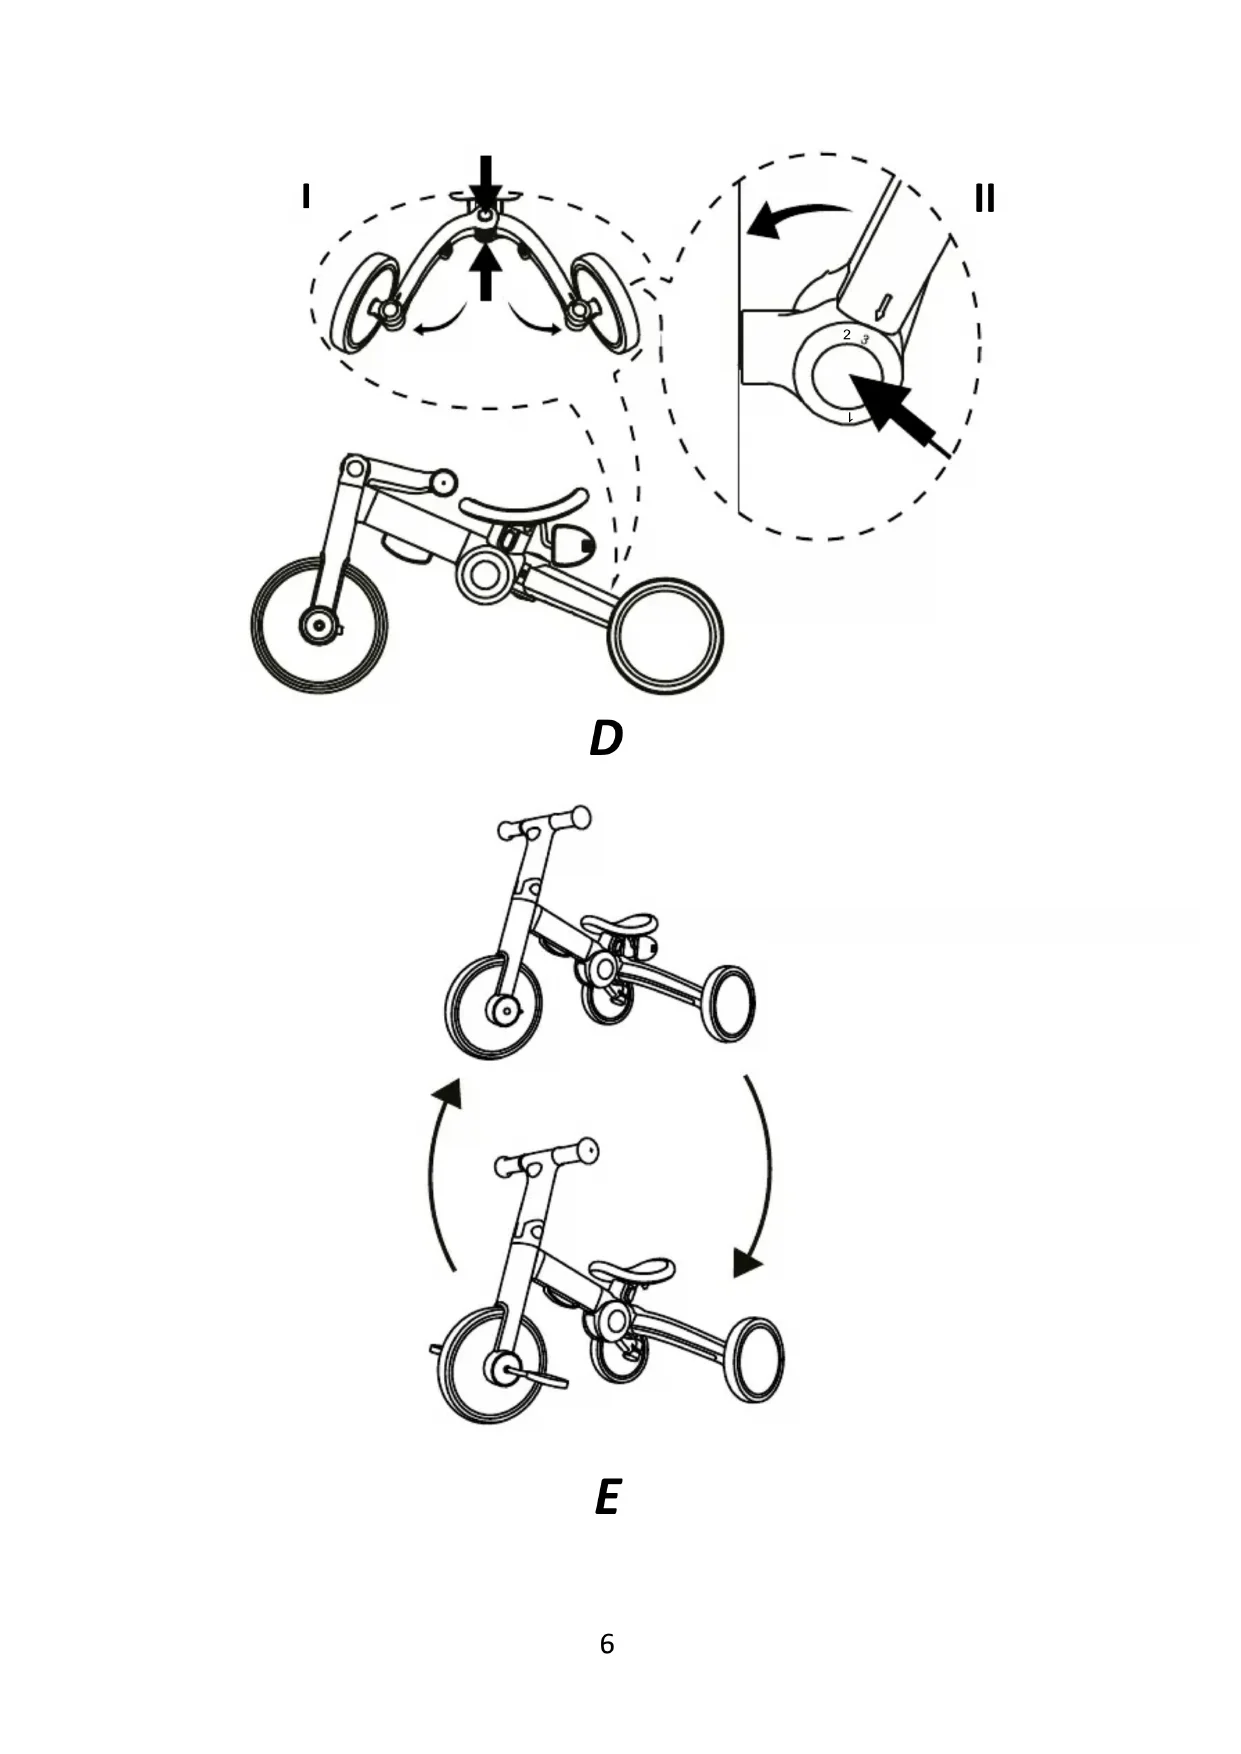
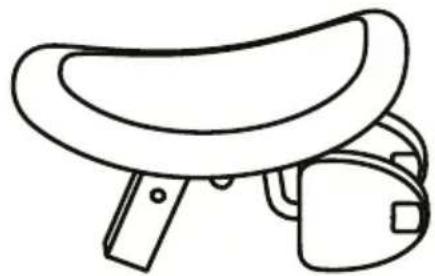
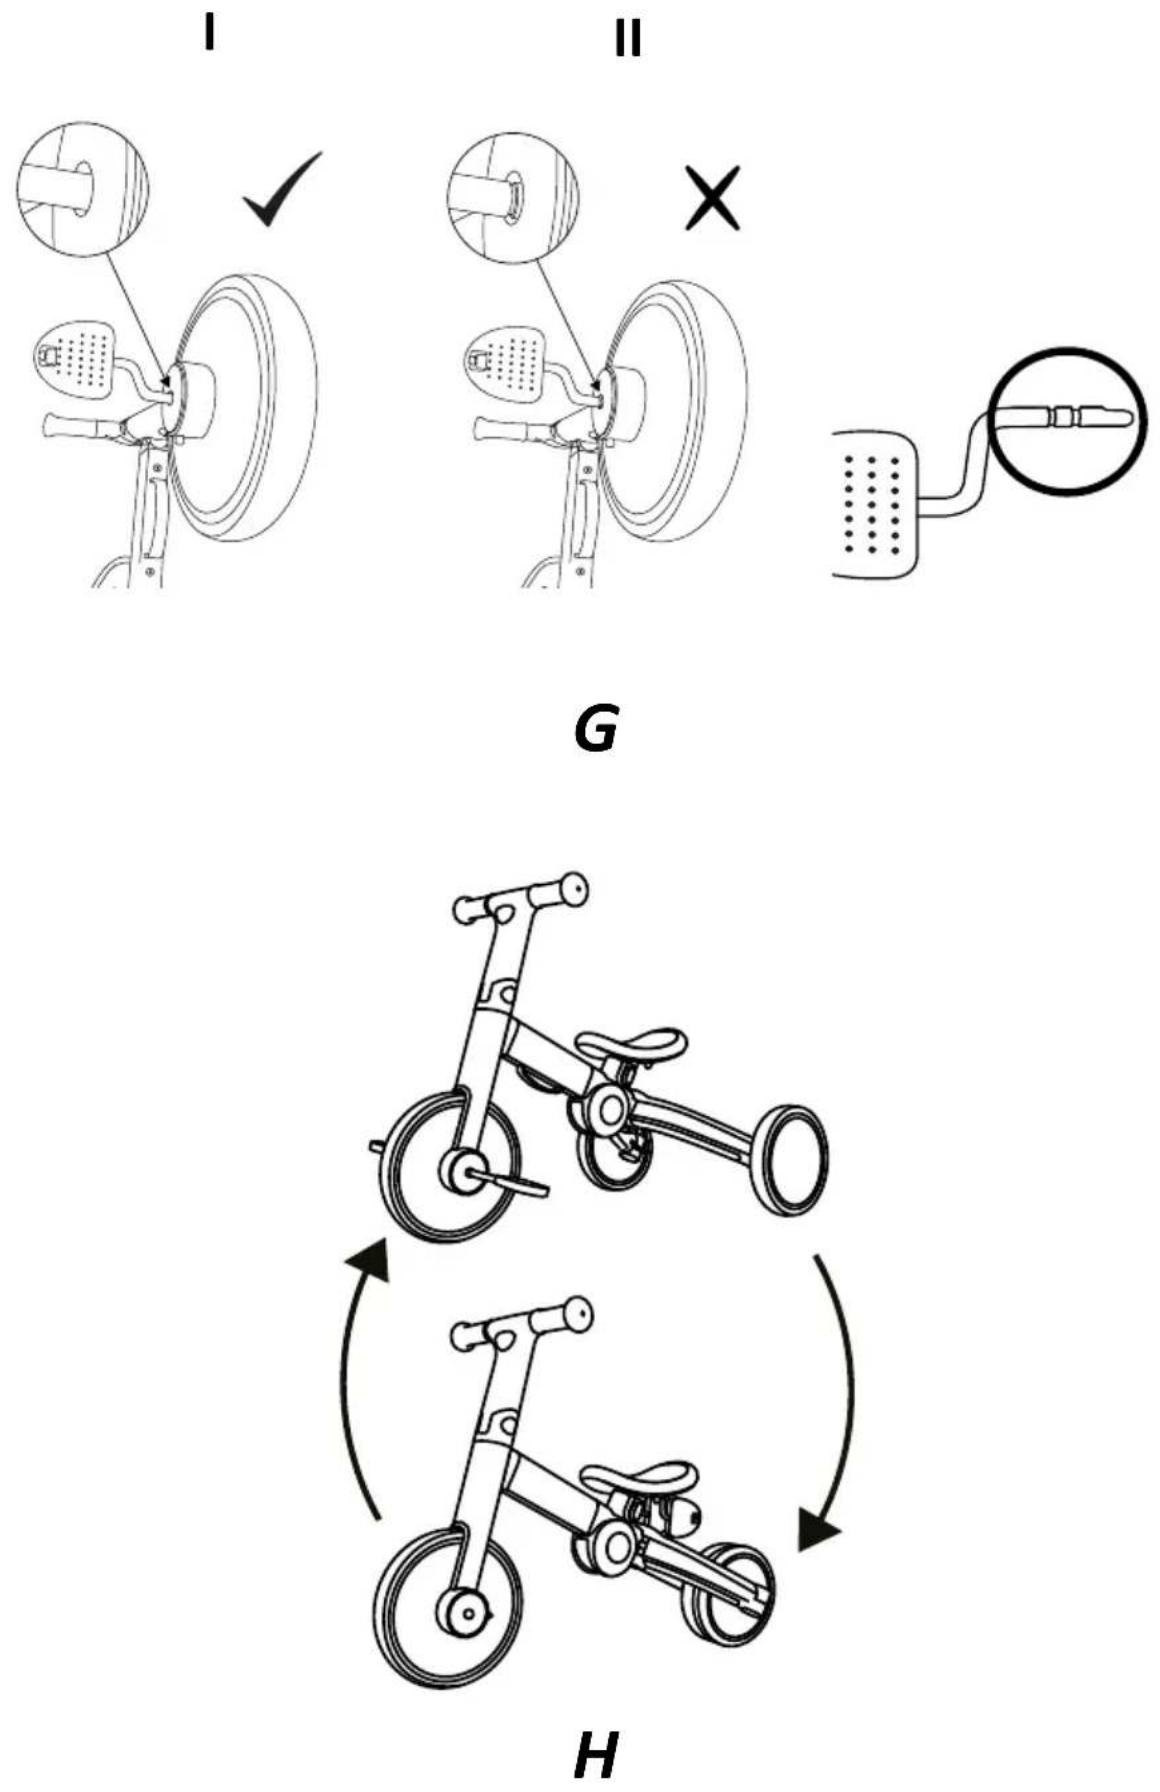
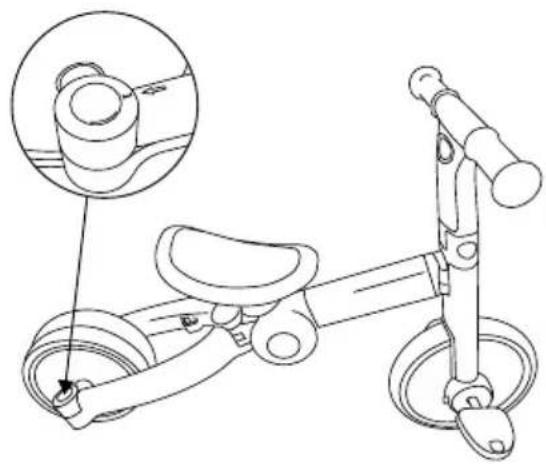
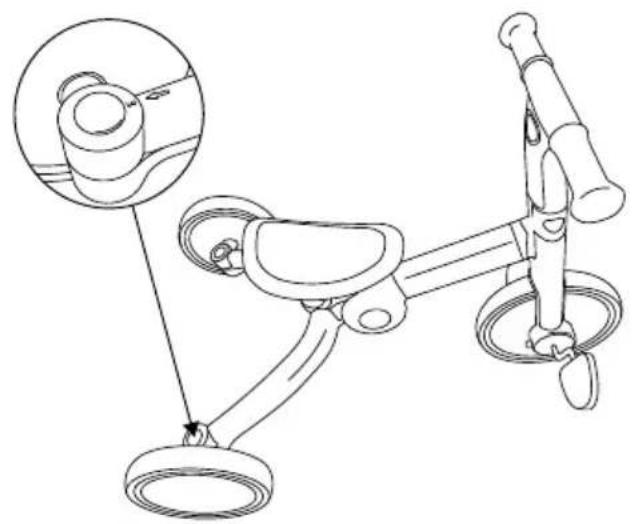
Start mounting the bike by inserting the seat (2.) in the frame (1.). Slide the tube into the hole as shown in Figure A. Once correctly installed, you will hear a characteristic click. Then grip the front fork and lift it up. With the fork up, press the button on both sides of the frame (Fig. B). The frame will lock. To unfold the steering wheel, press the buttons at the same time (Fig. C.I) and lift it up until it locks. The bike can have one of three functions: a tricycle, a tricycle with pedals and a balance bike. To transform it into a tricycle, press the upper and lower buttons (Fig. D.I), and unfold the frame as much as possible, with setting the rear wheels in the position marked with number 3 (Fig. D.II). It is possible to install pedals for older children (Fig. E). Remove the pedals by pressing the buttons (Fig. F.I) underneath the seat, hold the lock open and place the pedals on both sides of the front wheel (Fig.F.II). Once properly positioned, the pedals will lock. The pedals can be locked in two positions. The first position makes it impossible to drive the bike with pedals and is undesirable (Fig.G.I) while the second position is correct (Fig.G.II). Leave the rear wheels in the position marked with number 3. To transform the bike from a tricycle to a balance bike (Fig.H), start by moving the wheels to the position marked with number 1 by pressing the button (Fig.I.I). Then use the buttons (Fig.I.II) to fold the rear axle until the rear wheels are folded. Remove the metal connector (5.) (Fig.I.III) from underneath the frame by pulling, and insert it into the holes on the rear axle (Fig.I.IV). If the pedals are mounted, remove them from the front wheel by pressing the button (Fig.I.V) and place them back under the seat (Fig.I.VI). It is possible to change the seat tube (3.) to a longer one; to do so, unscrew the screw that holds the seat tube with the mounting spanner (4.) and pull the tube out of the hole. Then insert the longer tube so that the holes in the tube and seat overlap. Tighten the screw with the mounting spanner. NOTE: The bike can be used in two rear wheel alignment configurations. Position 1 - balance bike (Fig. J.I), Position 3 - tricycle (Fig. J.II). Do not use the bike in position 2. Position 2 is used to adjust the wheels during storage and transport (Fig. J.III).
III. Maintenance and Cleaning
Wash with soft, clean and damp cloth and mild soap.
Storage
Store the product out of reach of children.
IV. Warranty
- All Kinderkraft products are covered by a 24-month warranty. The warranty period starts from the date the product is handed over to the Buyer.
- The warranty is only valid in the member states of the European Union, excluding overseas territories (as currently defined, including in particular: Azores, Madeira, Canary Islands, French Overseas Departments, Åland Islands, Athos, Ceuta, Melilla, Helgoland, Büsingen am Hochrhein, Campione d'Italia and Livigno) and the territory of the United Kingdom of Great Britain and Northern Ireland excluding the British Overseas Territories (e.g. Bermuda, Cayman Islands, Falkland Islands).
- The manufacturer's warranty does not apply to countries not listed above. The conditions of the additional warranty may be determined by the Seller.
-
In some countries, it is possible to extend the warranty to a limited period of 120 months (10 years). The complete terms and conditions and the warranty extension registration form are available at WWW.KINDERKRAFT.COM
-
The warranty is valid only in the territory indicated in paragraph 2.
-
Claims must be made by completing the form available at WWW.RMA.KINDERKRAFT.COM
-
The warranty does not cover:
A. Cosmetic damage, including but not limited to: scratches, dents and cracks in plastic, unless the failure is due to a material or manufacturing defect;
B. Damage resulting from misuse or poor maintenance - including but not limited to: mechanical damage to products caused by misuse or poor maintenance;
o Refer to the instructions for use and installation of the product contained in the user manual;
C. Damage caused by improper assembly, installation or disassembly of products and/or accessories;
o Refer to the instructions for use and installation of the product contained in the user manual;
D. Damage caused by corrosion, mould or rust, resulting from improper maintenance, care and storage;
E. Damage caused by normal wear and tear or otherwise resulting from the normal passage of time;
This includes: tears or punctures in inner tubes; tyre damage; tyre tread damage; fading of fabrics resulting from mechanical use (e.g. on joints and covering of moving parts);
F. Damage or erosion caused by sun, perspiration, detergents, storage conditions or frequent washing, etc;
G. Damage caused by accident, abuse, misuse, fire, contact with liquid, earthquake or other external causes;
H. Products that have been modified to change functionality without 4Kraft's written consent;
- Products from which the serial number or lot number has been removed or tampered with in any way;
J. Damage caused by the use of third party components or products - including but not limited to: cup holders, umbrellas, reflectors, bells;
K. Damage caused by transport or by ground handling service providers. - The warranty period for accessories included with the product is 6 months from the date of sale, excluding the faults described above.
- These warranty conditions are complementary to the Customer's statutory rights with respect to 4KRAFT sp. z o.o. The warranty does not exclude, limit or suspend the Customer's rights under warranty for defects in goods sold.
- The full text of the Terms and Conditions of the Warranty is available on the website WWW.KINDERKRAFT.COM
All rights to this data are entirely reserved to 4Kraft Sp. z o.o. Any unauthorized use or misuse, including usufruct, copying, duplication and sharing, wholly or partially, without consent of 4Kraft Sp. z o.o. may result in legal consequences.
ES
Estimado cliente
(EN) In the interests of our Clients - we are at your disposal! If you have a problem with the product you received, contact us in the most convenient way for you!