
LBPS3005DN - Battery charger VELLEMAN - Free user manual and instructions
Find the device manual for free LBPS3005DN VELLEMAN in PDF.
| Product Type | Programmable CC Power Supply |
| Input Voltage | 220 V / 50 Hz |
| Fuse | 3 A / 250 V |
| Output Voltage | 0 - 30 V |
| Output Current | 0 - 5 A |
| Source Regulation | C.V. ≤ 0.01 % + 3 mV / C.C. ≤ 0.1 % + 3 mA |
| Load Regulation | C.V. ≤ 0.01 % + 2 mV / C.C. ≤ 0.1 % + 10 mA |
| Setting Resolution | 10 mV / 1 mA |
| Setting Accuracy (25 °C ± 5 °C) | ≤ 0.5 % + 20 mV / ≤ 0.5 % + 10 mA |
| Ripple (20 Hz - 20 MHz) | ≤ 2 mV rms / ≤ 3 mA rms |
| Temperature Coefficient | ≤ 100 ppm + 10 mV / ≤ 100 ppm + 5 mA |
| Display Accuracy | 10 mV / 1 mA |
| Reaction Time (10% nominal load) | ≤ 100 ms (rise and fall) |
| Dimensions | 110 (L) x 156 (H) x 260 (D) mm |
| Weight | 4.3 kg |
| Battery Life | 8 hours at max load |
| Display | Dual LED (voltage and current) |
| Output Connectors | Isolated safety jacks (red +, black -) |
| Remote Control | USB (type B) and RS232 |
| Included Software | V2.5 for Windows XP, Vista, 7, 8, 8.1 (32/64 bit) |
| Programmable Memory | 5 memories (M1 to M5) |
| Protection Modes | Overvoltage (OVP) and Overcurrent (OCP) protection |
| Cleaning and Maintenance | Disconnect before cleaning; use a damp, lint-free cloth; avoid alcohol and solvents |
| Spare Parts and Repairability | User-replaceable fuse; other parts: contact dealer |
| General Information | 24-month warranty (consumers); indoor use only; do not open the housing |
Frequently Asked Questions - LBPS3005DN VELLEMAN
User questions about LBPS3005DN VELLEMAN
0 question about this device. Answer the ones you know or ask your own.
Ask a new question about this device
Download the instructions for your Battery charger in PDF format for free! Find your manual LBPS3005DN - VELLEMAN and take your electronic device back in hand. On this page are published all the documents necessary for the use of your device. LBPS3005DN by VELLEMAN.
USER MANUAL LBPS3005DN VELLEMAN
EN PROGRAMMABLE DC LAB POWER SUPPLY 0-30V/ USB 2.0
NL PROGRAMMEERBARE LABORATORIUMVOEDING 0-30 V / USB 2.0
FR ALIMENTATION LABORATOIRE PROGRAMMABLE - 0-30 V / USB 2.0
To all residents of the European Union
Important environmental information about this product

This symbol on the device or the package indicates that disposal of the device after its lifecycle could harm the environment. Do not dispose of the unit (or batteries) as unsorted municipal waste; it should be taken to a specialized company for recycling. This device should be returned to your distributor or to a local recycling service. Respect the local environmental rules.

If in doubt, contact your local waste disposal authorities.
Thank you for choosing Velleman! Please read the manual thoroughly before bringing this device into service. If the device was damaged in transit, don't install or use it and contact your dealer.
2. Safety Instructions
 | Keep this device away from children and unauthorized users. |
 | Indoor use only. Keep this device away from rain, moisture, splashing and dripping liquids. Never put objects filled with liquids on top of or close to the device. |
 | DO NOT disassemble or open the cover under any circumstances. Touching live wires can cause life-threatening electroshocks. There are no user-serviceable parts inside the device. Refer to an authorized dealer for service and/or spare parts.Always connect the device to an earthed power socket. |
 | Caution: device heats up during use. Make sure the ventilation openings are clear at all times. For sufficient air circulation, leave at least 1" (±2.5 cm) in front of the openings. Place the device on a flat, heat resistant surface, do not place the device on carpets, fabrics... |
 | Always disconnect mains power when device not in use or when servicing or maintenance activities are performed. Handle the power cord by the plug only. |
 | Keep this device away from dust and extreme temperatures. |
 | Protect this device from shocks and abuse. Avoid brute force when operating the device. |
 | Do not use the device when damage to housing or cables is noticed. Do not attempt to service the device yourself but contact an authorised dealer. |
3. General Guidelines
Refer to the Velleman® Service and Quality Warranty on the last pages of this manual.
- Familiarise yourself with the functions of the device before actually using it.
- All modifications of the device are forbidden for safety reasons. Damage caused by user modifications to the device is not covered by the warranty.
- Only use the device for its intended purpose. Using the device in an unauthorised way will void the warranty.
- Damage caused by disregard of certain guidelines in this manual is not covered by the warranty and the dealer will not accept responsibility for any ensuing defects or problems.
- Keep this manual for future reference.
LABPS3005D
4. Features
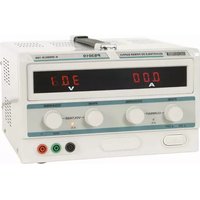
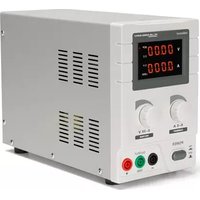
- dual LED display for voltage and current
• coarse and fine adjustments of voltage and current
• protection mode: voltage or current limiting - output connectors: insulated safety plugs
- organic glass front panel / other panels made of steel
- memory: 5 programmable memories
- computer connectivity: pc remote control via USB or RS232
- software V2.5 included for Windows XP, Vista and W7, W8, W8.1 (32 bits + 64 bits)
5. Description
The LABPS3005D is a highly accurate, DC-regulated power supply with an adjustable output. This output can be used for constant voltage (C.V.) and constant current (C.C.).
The output voltage can be adjusted between 0V and 30V when the device is in the constant voltage mode. The current-limiting point can be set arbitrarily in this mode.
The output current can be adjusted continuously between 0A and 5A in the constant current mode.
The output current and voltage are indicated on the LED displays.
Refer to the illustrations on page 2 of this manual.
| 1 | Off/On: output on/off | 13 | M1-M5 indicator: active memory |
| 2 | OVP: overvoltage protection on/off | 14 | Adjust: adjustment knob for voltage and current; selection of memory 5 |
| 3 | OCP/Beep: overcurrent protection / key tones on/off | 15 | < >: digit selection buttons for coarse/fine tuning of voltage and current |
| 4 | Lock/Unlock: lock/unlock panel keys | 16 | Voltage/Current: select between voltage or current for adjustment |
| 5 | M1-M4: memory save / recall | 17 | Earth (ground) terminal, connected to the chassis and earth pin of the power supply socket |
| 6 | Current display (ampere) | 18 | Output terminals |
| 7 | Voltage display (volt) | 19 | Power: on/off button |
| 8 | OVP indicator: overvoltage protection is active | 20 | RS232 port for remote control via pc |
| 9 | OCP indicator: overcurrent protection is active | 21 | USB port (type B) for remote control via pc |
| 10 | CC indicator: constant current mode | 22 | Fan |
| 11 | CV indicator: constant voltage mode | 23 | Power supply socket |
| 12 | OUT indicator: output is on | 24 | Fuse holder |
6. Operation
Switching the Power Supply On or Off
- Connect the included power cord to the back of the device [23] and plug the other end into a suitable, earthed power socket.

Always connect the device to an earthed power socket.
-
Press the Power button [19] to switch the power supply on.
The power supply automatically recalls the settings from memory 1. (See Setting Voltage and Current for more information.) The display shows the existing settings, the M1 indicator [13] lights.
At this moment, there is no output voltage or current on the output terminals. -
Press the Power button [19] to switch the power supply off.
LABPS3005D
Using the Power Supply in Constant Voltage Mode
If you want to use the power supply in constant voltage mode, you set up the desired output voltage between 0V and 30V. You also set up the desired current limit.
If the output current exceeds the limit, the power supply automatically goes into constant current mode.
Using the Power Supply in Constant Current Mode
If you want to use the power supply in constant current mode: you set up the desired output current between 0A and 5A. You also set up the desired voltage limit.
Setting Voltage and Current
You can save 4 different voltage/current settings using the memory keys M1\~M4.
- Press the memory key [5] of the memory for which you want to define the settings. The corresponding indicator M1\~M4 [13] lights and the existing settings for voltage and current are displayed.
-
Press the Voltage/Current key [16] to set the voltage. The voltage readout flashes.
-
For use in constant voltage mode: this is the desired constant voltage.
- For use in constant current mode: this is the desired voltage limit.
-
If you enable overvoltage protection, the output switches off automatically if the voltage exceeds this value.
-
Turn the adjustment knob [14] until you reach approximately the desired voltage. Press < or > [15] to select a digit in the voltage readout [7] and turn the adjustment knob to fine-tune.
-
Press the Voltage/Current key [16] again to set the current. The current readout flashes.
-
For use in constant voltage mode: this is the desired current limit.
o For use in constant current mode: this is the desired constant current. -
If you enable overcurrent protection, the output switches off automatically if the current exceeds this value.
-
Turn the adjustment knob [14] until you reach approximately the desired current. Press < or > [15] to select a digit in the current readout [6] and turn the adjustment knob to fine-tune.
- Press the memory key again (or wait until the display stops flashing).
The settings are saved in the selected memory.
Recalling Settings
To recall one of the saved settings, press the corresponding memory key M1\~M4 [5]. The corresponding indicator M1\~M4 [13] lights and the corresponding voltage/current settings appear on the display.
Note: the output is switched off automatically when you press a memory key to recall a setup.
Using Memory 5
To use memory 5, proceed as follows:
- Press memory key 4 and turn the adjustment knob until indicator M5 lights.
- Set the voltage and current as desired. Wait until the display stops flashing. The settings are automatically stored in memory 5.
- To recall the settings, press memory key 4 and turn the adjustment knob again until indicator M5 lights.
Connecting a Load
- Connect the load's positive terminal to the red + terminal [18] of the power supply.
- Connect the load's negative terminal to the black - terminal [18] of the power supply.
- You can connect the + or - terminal to the green earth terminal [17] of the power supply to pin the voltage to 0V (earth potential) at that terminal.
If you leave the earth terminal unconnected, the output floats with respect to the ground.
Applying Voltage to the Load
- Press the Off/On key [1] to apply the voltage to the load.
The OUT [12] and C.V. indicators [11] light. The power supply works in constant voltage (CV) mode; the display now shows the actual output voltage and current.
If the current exceeds the set current limit, the power supply automatically goes into constant current (CC) mode. The C.V. indicator goes out and the C.C. indicator [10] lights.
- Press the Off/On key [1] to switch the output off.
LABPS3005D
7. Panel Keys
Locking the Panel
To prevent unwanted operation of the panel keys, you can lock the front panel.
-
Press and hold the Lock/Unlock key [4] for about 2 seconds. You hear a short tone. The keys are now locked.
-
To unlock the panel, press and hold the button again. You hear a short tone.
Key Tones
Each time you press a key on the front panel, you hear a tone.
-
To switch off the tone, press and hold the OCP/Beep key [3] for about 2 seconds.
-
To switch the tone on again, press and hold the OCP/Beep key [3] for about 2 seconds.
8. Protection
Using Overvoltage Protection
- To protect against overvoltage, set up the maximum voltage and then press the OVP button. The OVP indicator lights.
- Press Off/On to apply the output to the load. If the output voltage becomes higher than the set value, the power supply cuts off the output and the OVP indicator flashes.
- Disconnect the load.
- To recover, press the OVP key.
Using Overcurrent Protection
- To protect against overcurrent, set up the maximum current and then press the OCP button. The OCP indicator lights.
- Press Off/On to apply the output to the load. If the output current becomes higher than the set value, the power supply cuts off the output and the OCP indicator flashes.
- Disconnect the load.
- To recover, press the OCP key.
9. Troubleshooting
- Nothing happens when you press the panel keys.
The keys are locked. Press and hold the Lock/Unlock key [4] about 2 seconds. You hear a tone when they keys are unlocked. - Power is on and output is switched on, but there is no output.
The load is not properly connected, or the current setup is 0.
• The output voltage rises slowly when the output is switched on.
The current setup is too small.
10. Remote Control via PC
To operate the power supply via the included pc software, proceed as follows:
- Install the software on your pc and launch the software.
- Connect the power supply to the pc via the USB [21] or RS232 [20] port and switch it on. The power supply connects automatically to the software. When connection is successful, you hear a tone. On the pc, the communication status is indicated.
Note: the keys on the front panel are locked when the power supply is connected to a pc. You can only operate the power supply via the pc. The LED display and indicators work normally.
- Click the shortcut icon to launch the software. The opening screen appears.
- Choose the connected interface number from the drop list and click ENTER to confirm.
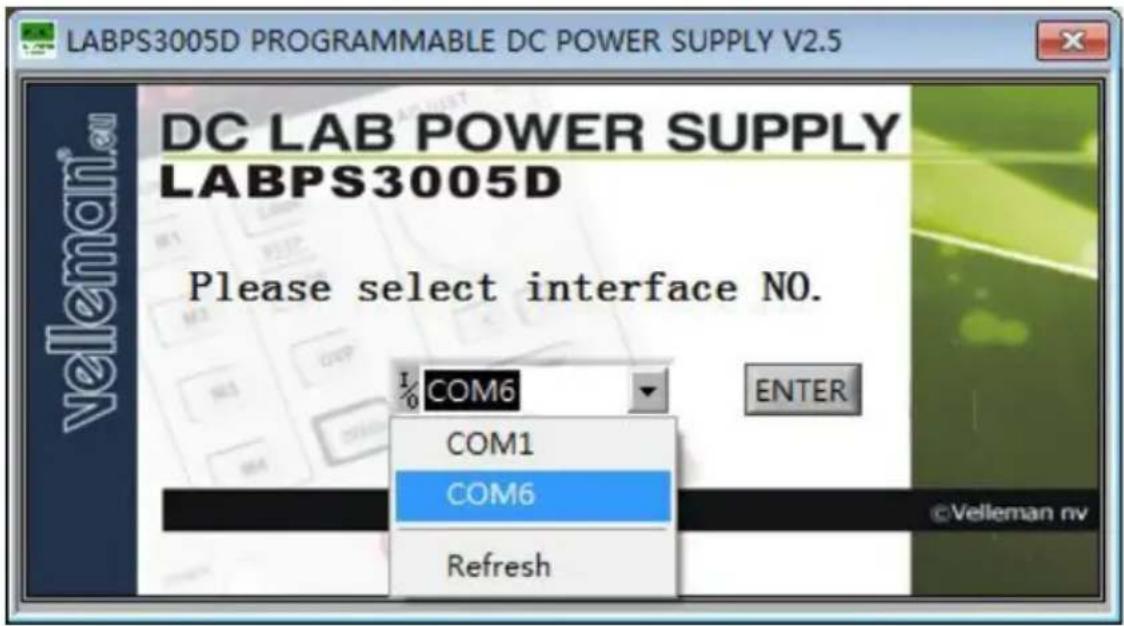
- The main screen appears.
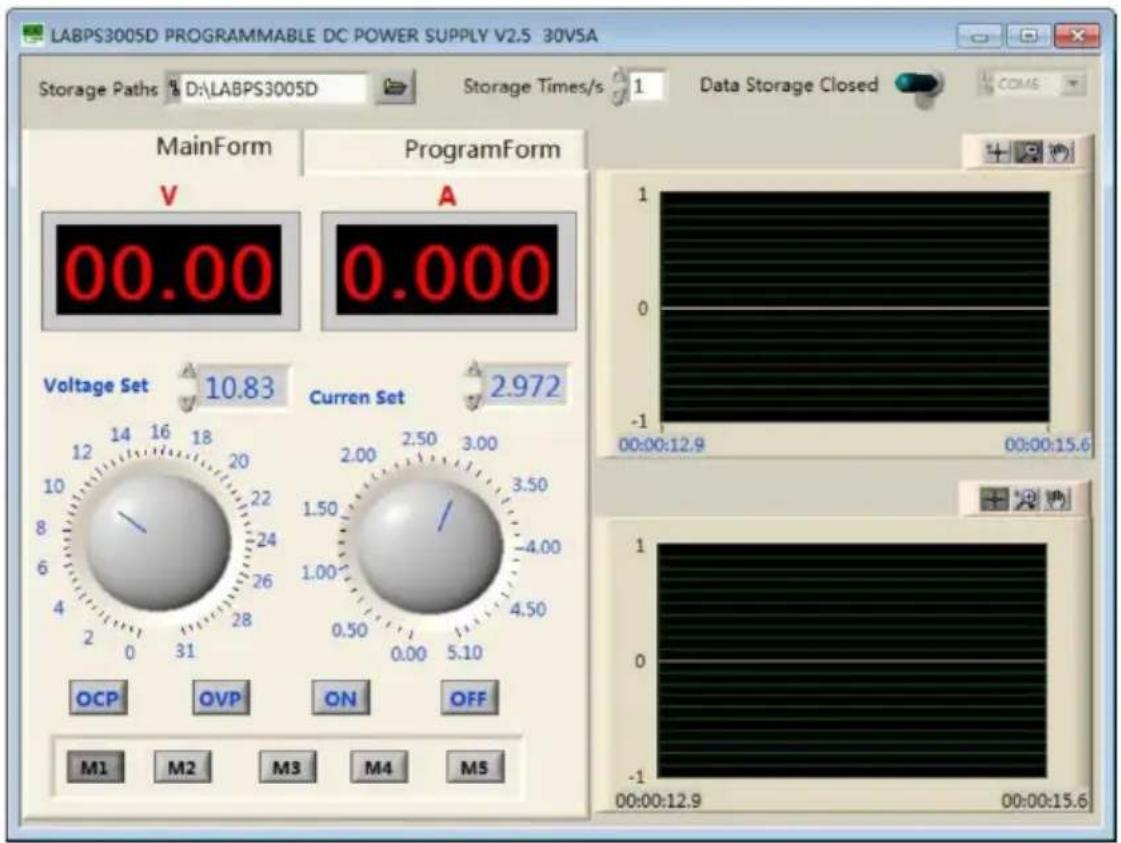
MainForm tab
Storage Paths
Adjustment of the storage path.
Storage Times/s
Adjustment of the storage time. The higher the value, the more data is saved.
Data Storage
Data storage on-off switch. Data will be saved in the file of the data storage path when this function is "open".
Voltage/Current output display
Display for the output voltage and current.
LABPS3005D
Voltage Set/Current Set
Setting windows for the voltage and current values. Change the value with the arrows.
Voltage Set/Current Set rotating knob
Setting knob for the voltage and current values.
OCP - OVP - ON - OFF
Setting buttons (OCP: Over-Current Protection, OVP: Over-Voltage Protection).
M1 - M2 - M3 - M4 - M5
Recalling buttons to recall the saved output parameters.
Voltage waveform diagram
Displays the voltage wave curve.
Current waveform diagram
Displays the current wave curve.
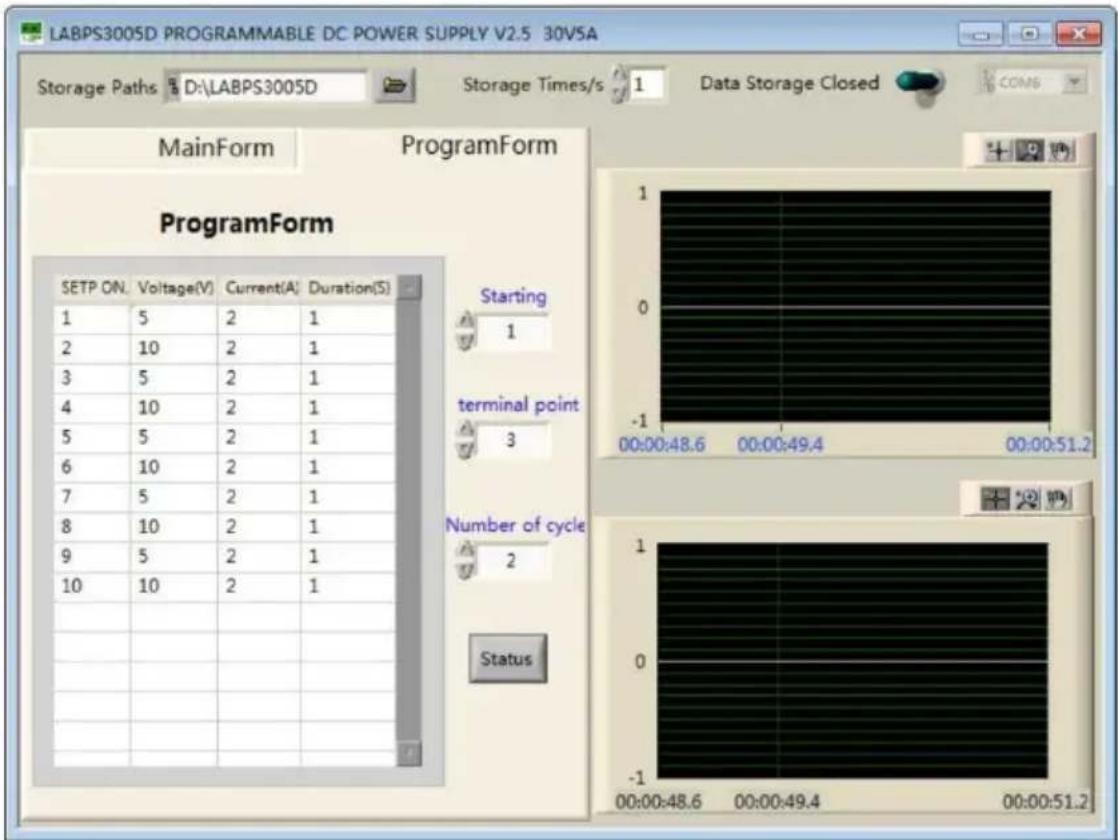
ProgramForm tab
SETP ON.
Interface number.
Voltage (V)
Voltage parameters.
Current (A)
Current parameters.
Duration (S)
Timeout for every parameter.
Starting
Starting point of the programming output.
terminal point
Ending point of the programming output.
Number of cycle
Number of cycles of the programming output.
Status
On-off button for the programming output.
LABPS3005D
11. Cleaning and Maintenance
- Disconnect the device from the mains prior to maintenance activities.
- The power supply cables must not show any damage. Have a qualified technician maintain the device.
- Wipe the device regularly with a moist, lint-free cloth. Do not use alcohol or solvents.
- There are no user-serviceable parts, apart from the fuse. Contact your dealer for spare parts if necessary.
- Store the device in a dry, well-ventilated, dust-free room.
Replacing the Fuse
Only replace the fuse by a fuse of the same type and rating.
- Before replacing the fuse, unplug the mains lead.
- Wedge the fuse holder out of its housing with a flat-head screwdriver.
- Remove the damaged fuse from its holder and replace with the exact same type of fuse.
- Insert the fuse holder back in its place and reconnect power.
12. Technical Specifications
| input voltage | 220 V / 50 Hz |
| fuse | 3 A /250 V |
| output voltage | 0-30 V |
| output current | 0-5 A |
| source effect | C.V. ≤ 0.01 % + 3 mVC.C. ≤ 0.1 % + 3 mA |
| load effect | C.V. ≤ 0.01 % + 2 mVC.C. ≤ 0.1 % + 10 mA |
| setup resolution | 10 mV1 mA |
| setup accuracy (25°C ± 5°C) | ≤ 0.5 % + 20 mV≤ 0.5 % + 10 mA |
| ripple (20Hz-20MHz) | ≤ 2 mV rms≤ 3 mA rms |
| temperature coefficient | ≤ 100 ppm + 10 mV≤ 100 ppm + 5 mA |
| read back accuracy | 10 mV1 mA |
| read back temp. coefficient | ≤ 100 ppm + 10 mV≤ 100 ppm + 5 mA |
| reaction time (10% rated load) | voltage rise: ≤ 100 msvoltage drop: ≤ 100 ms |
| dimensions | 110 (W) x 156 (H) x 260 (D) mm |
| weight | 4.3 kg |
| autonomy | 8 hours of continuous use at maximum load |
Use this device with original accessories only. Velleman nv cannot be held responsible in the event of damage or injury resulting from (incorrect) use of this device. For more info concerning this product and the latest version of this manual, please visit our website www.velleman.eu. The information in this manual is subject to change without prior notice.
© COPYRIGHT NOTICE
The copyright to this manual is owned by Velleman nv. All worldwide rights reserved. No part of this manual may be copied, reproduced, translated or reduced to any electronic medium or otherwise without the prior written consent of the copyright holder.
GEBRUIKERSHANDLEIDING
1. Inleiding
Voltage Set/Current Set
Voltage Set/Current Set
Voltage Set/Current Set
Voltage Set/Current Set
LABPS3005D
Zakładka MainForm
Ścieżka zapisu
© INFORMACJA O PRAWACH WŁASNOŚCI
Velleman® Service and Quality Warranty
Since its foundation in 1972, Velleman® acquired extensive experience in the electronics world and currently distributes its products in over 85 countries.
All our products fulfil strict quality requirements and legal stipulations in the EU. In order to ensure the quality, our products regularly go through an extra quality check, both by an internal quality department and by specialized external organisations. If, all precautionary measures notwithstanding, problems should occur, please make appeal to our warranty (see guarantee conditions).
General Warranty Conditions Concerning Consumer Products (for EU):
- All consumer products are subject to a 24-month warranty on production flaws and defective material as from the original date of purchase.
- Velleman® can decide to replace an article with an equivalent article, or to refund the retail value totally or partially when the complaint is valid and a free repair or replacement of the article is impossible, or if the expenses are out of proportion.
You will be delivered a replacing article or a refund at the value of 100% of the purchase price in case of a flaw occurred in the first year after the date of purchase and delivery, or a replacing article at 50% of the purchase price or a refund at the value of 50% of the retail value in case of a flaw occurred in the second year after the date of purchase and delivery.
• Not covered by warranty:
- all direct or indirect damage caused after delivery to the article (e.g. by oxidation, shocks, falls, dust, dirt, humidity...), and by the article, as well as its contents (e.g. data loss), compensation for loss of profits;
- consumable goods, parts or accessories that are subject to an aging process during normal use, such as batteries (rechargeable, non-rechargeable, built-in or replaceable), lamps, rubber parts, drive belts... (unlimited list);
- flaws resulting from fire, water damage, lightning, accident, natural disaster, etc....;
- flaws caused deliberately, negligently or resulting from improper handling, negligent maintenance, abusive use or use contrary to the manufacturer's instructions;
- damage caused by a commercial, professional or collective use of the article (the warranty validity will be reduced to six (6) months when the article is used professionally);
- damage resulting from an inappropriate packing and shipping of the article:
- all damage caused by modification, repair or alteration performed by a third party without written permission by Velleman®.
- Articles to be repaired must be delivered to your Velleman® dealer, solidly packed (preferably in the original packaging), and be completed with the original receipt of purchase and a clear flaw description.
- Hint: In order to save on cost and time, please reread the manual and check if the flaw is caused by obvious causes prior to presenting the article for repair. Note that returning a non-defective article can also involve handling costs.
• Repairs occurring after warranty expiration are subject to shipping costs.
- The above conditions are without prejudice to all commercial warranties.
The above enumeration is subject to modification according to the article (see article's manual).
NL


- To all residents of the European Union
- Important environmental information about this product
- Safety Instructions
- General Guidelines
- LABPS3005D
- Features
- Description
- Operation
- Switching the Power Supply On or Off
- Using the Power Supply in Constant Voltage Mode
- Using the Power Supply in Constant Current Mode
- Setting Voltage and Current
- Recalling Settings
- Using Memory 5
- Connecting a Load
- Applying Voltage to the Load
- Panel Keys
- Locking the Panel
- Key Tones
- Protection
- Using Overvoltage Protection
- Using Overcurrent Protection
- Troubleshooting
- Remote Control via PC
- MainForm tab
- Storage Paths
- Storage Times/s
- Data Storage
- Voltage/Current output display
- Voltage Set/Current Set
- Voltage Set/Current Set rotating knob
- OCP - OVP - ON - OFF
- M1 - M2 - M3 - M4 - M5
- Voltage waveform diagram
- Current waveform diagram
- ProgramForm tab
- SETP ON.
- Voltage (V)
- Current (A)
- Duration (S)
- Starting
- terminal point
- Number of cycle
- Status
- Cleaning and Maintenance
- Replacing the Fuse
- Technical Specifications
- © COPYRIGHT NOTICE
- GEBRUIKERSHANDLEIDING
- Inleiding
- Zakładka MainForm
- Ścieżka zapisu
- © INFORMACJA O PRAWACH WŁASNOŚCI
- Velleman® Service and Quality Warranty
- General Warranty Conditions Concerning Consumer Products (for EU):
- • Not covered by warranty:
- NL
Brand : VELLEMAN
Model : LBPS3005DN
Category : Battery charger