Twin Zone 58685 - Deep fryer UNOLD - Free user manual and instructions
Find the device manual for free Twin Zone 58685 UNOLD in PDF.
| Brand | Unold |
| Model | Twin Zone 58685 |
| Product type | Dual zone air fryer |
| Power | 1700 W |
| Voltage/Frequency | 220-250 V, 60 Hz |
| Total capacity | 8 liters (4 liters per basket) |
| Maximum french fries capacity | 1 kg |
| Dimensions (L × W × H) | 37.7 × 36.2 × 32 cm |
| Weight | 8 kg |
| Cable length | 70 cm |
| Housing material | Cool-touch plastic |
| Display | Touchscreen LED display |
| Control | Rotary button and touch keys |
| Preset programs | 10 programs: french fries, chicken, fish, shellfish, steak, chops, pizza, cake, chicken thighs, vegetables |
| Temperature range | 60°C to 200°C (in 5°C increments) |
| Timer | 1 to 60 minutes |
| Baskets | 2 baskets with non-stick coating, cooking grates included |
| Handle | Thermo-insulated |
| Safety | Safety switches, safety cut-off, automatic shut-off when removing basket |
| Memory function | Keeps settings for up to 1 hour in case of power failure |
| Cleaning | Baskets and grates washable with soapy water; wipe housing with damp cloth |
| Included accessories | User manual, recipe book, 2 cooking grates, 2 baskets |
| Warranty | 24 months (domestic use), 12 months (professional use) |
Frequently Asked Questions - Twin Zone 58685 UNOLD
User questions about Twin Zone 58685 UNOLD
0 question about this device. Answer the ones you know or ask your own.
Ask a new question about this device
Download the instructions for your Deep fryer in PDF format for free! Find your manual Twin Zone 58685 - UNOLD and take your electronic device back in hand. On this page are published all the documents necessary for the use of your device. Twin Zone 58685 by UNOLD.
USER MANUAL Twin Zone 58685 UNOLD
natural_image
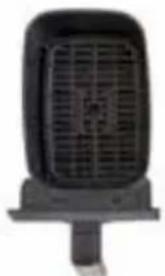
Black air fryer with digital display and two side panels, no visible text or symbols on the device itself.Bedienungsanleitung
Instructions for use | Notice d'utilisation Gebruiksaanwijzing | Istruzioni per l'uso Instrucciones de uso | Instrukcja obsługi
Modell 58685
INHALTSVERZEICHNIS
Instructions for use Model 58685
Foreword....32
Technical data....32
Explanation of symbols....33
For your safety....33
Special safety information for deep fryers...36
Before first use....37
Explanation oft he controls ....38
Programs 39
Safety switches 39
Before first use....40
Operation....40
Cleaning and care 44
Tips for handling hot-air deep fryers.....45
Recipes for hot-air deep fryer....48
Troubleshooting....49
Guarantee Conditions....51
Waste Disposal/
Environmental Protection ....51
Service 31
natural_image
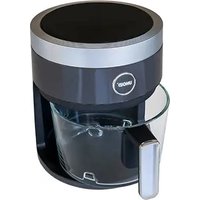
Modern air fryer with digital display and stainless steel kitchen pan, open to reveal food slices (no visible text or symbols)natural_image
Front view of a black rectangular fan or vent with a central hole and slats (no text or symbols visible)
natural_image
Black rectangular device with a grid pattern and a small protruding rod (no visible text or symbols)natural_image
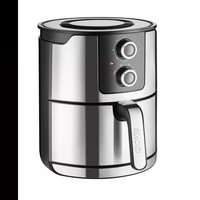
Modern air fryer with digital display and open oven containing food items (no visible text or symbols)natural_image
Symbol of a trash bin with crossed lines indicating no waste or restriction, and a solid black rectangle below (no text or labels)INFORMATIONEN FÜR DEN FACHHANDEL

Thank you for having chosen a quality product from the Unold range! Please read this instruction manual carefully. This will allow you to familiarise yourself quickly with all functions of your new hot-air deep fryer (hereinafter also “appliance”).
Please make sure that all persons who use, clean or maintain the appliance have read the instructions and adhere to them. When handing over the appliance to a new owner, always include the instruction manual.
If you have any queries that are not answered in this document, or if you encounter technical problems, please contact our customer service department or your dealer.
Important: Figures and drawings are provided for reference purposes and can differ from the actual product.
TECHNICAL DATA
| Power: 1,700 | Watt, 220 V-2450 z-60 H |
| Capacity: | approx. 8 litres (4 litres per fry basket), for up to 1 kg of chips |
| Dimensions: | approx. 37.7 x 36.2 x 32 cm (W/D/H) |
| Weight: approx. 8 kg | |
| Cord length: a | pprox. 7@m |
| Housing: Pla | stic |
| Features: | Touch LED screen, rotary control for selecting 10 programs such as Chips, chicken, and fish; manual setting per fry basket 60–200 °C, manual time selection per fry basket 1–60 minutes, cool touch housing, fry basket with non-stick coating, safety switch-off function |
| Accessories: | Instructio manual and recipe booklet |
| Features, technology, colours and design subject to change without notice; errors excepted | |
CE
EXPLANATION OF SYMBOLS

This symbol denotes a possible hazard which could cause injury or damage to the appliance.

This symbol indicates a potential burning hazard. Please be especially careful at all times here.
FOR YOUR SAFETY
Please read this instruction manual carefully and keep it for future reference. General safety instructions
- This appliance can be used by children aged 8 years or more and persons with reduced physical, sensory or mental capabilities or lack of experience and knowledge, provided they are supervised or have been instructed in the safe use of the appliance and understand the hazards involved.
- Children must not play with the appliance.
- Children aged 8 or above may be permitted to clean or maintain the appliance, provided they are supervised.
- Keep the appliance and its power cord out of the reach of children under the age of 8.
- CAUTION - Certain parts of the appliance might become very hot when it is in use. There is thus a risk of injury from burns! Special caution is required, if the appliance is operated in the presence of children or other vulnerable persons.
- Only use the appliance for the purposes described in this instruction manual.
- Regularly check the appliance, the cable and the plug for wear and damage. If the power cord or other parts of the appliance are damaged, return it for inspection and repair to our customer service department. Improper repair can result in serious hazards to the user and shall void all warranty.
Installation and operation
- Connect the appliance to an alternating current source as specified on the type plate.
- To prevent short circuits or other hazards, make sure that the plug is correctly inserted in the power socket and is not loose.
- Do not connect the appliance to an external timer or remotely controlled power system.
- Never immerse the appliance or the cable in water or another liquid.
- Do not clean the heating element or the power cord in a dishwasher.
- Never touch the appliance or the cable with wet hands.
- The appliance is designed for domestic use and for use in similar facilities, e.g.
■tea kitchens in offices, shops, or other workplaces, ■farms,
■ kitchenettes for guests in hotels, motels, hostels, ■ holiday homes etc.
- Never place the appliance on a hot or wet surface or on a metal tray.
- Do not place the appliance or the cable close to naked flames.
- Always use the deep fryer on an uncluttered, level and heat-resistant surface.
- Make sure there is sufficient distance (at least 10 cm) to walls or other objects.
- Do not place any objects on the appliance.
- Never operate the appliance near flammable materials such as curtains, etc. Do not operate the appliance on top of or near gas or electric burners, heated ovens or stove plates.
- Make sure that the ventilation slots are unobstructed when the appliance is in use.
-
To avoid damage to the appliance, never use the deep fryer without the fry basket and insert.
-
Do not allow the power cord to hang from the worktop, as this could result in accidents, for example if pulled on by small children.
- To prevent damage to the power cord, never wrap the power cord around the appliance.
- Make sure that the power cord is not in contact with hot parts of the appliance.
- Use the deep fryer only indoors.
- Place foods in the fry basket with insert, and never directly in the deep fryer – danger of fire!
- When the appliance is in use, the inside surfaces of the appliance become very hot. Therefore, only touch the appliance at the insulated handle and the control panel.
- Watch out for escaping hot air when removing the fry basket – danger of burns!
- Notice: While the appliance is on, hot steam might escape from the ventilation slots – risk of injury from scalding! Maintain a safe distance from the ventilation slots.
- Never operate the deep fryer in the vicinity of flammable liquids, nor on or near heat sources.
- Do not use a metal sponge for cleaning. Metal parts can split off and cause electric shock.
- The deep fryer must not be switched on unless both insert grilles have been inserted.
- The power cord fitted on the deep fryer is short to reduce the risk of an accident for children from pulling on or becoming entangled in the cord. For this reason, do not use an extension cord.
- This deep fryer operates with hot air. Therefore, never put solid or liquid fat in the deep fryer – danger of fire!
-
Should the appliance catch fire, immediately pull the plug from the power socket. Never use water to extinguish flames; instead, use damp cloths or towels.
-
Do not displace the appliance as long as it is hot, as this poses a risk of injury.
- Do not operate the appliance with accessories from another manufacturer or brand, as this might cause damage to the appliance.
- Unplug the appliance from the power socket after use and before cleaning. Never leave the appliance unattended while it is connected to the power socket.
- Clean the appliance after every use.
- All parts, especially the removable fry basket, must be completely dry before reassembling the appliance.
- Connect the appliance to an alternating current source as specified on the type plate.


Never open the appliance housing. Risk of injury from electric shock!
Never place oil or fat in the appliance, as this might cause damage to the appliance.
Caution! During and after use, the appliance and its component parts are very hot! Do not reach into the appliance after use – danger of burns! Keep children away from the appliance!
The manufacturer will not be liable in the event of incorrect assembly, improper or incorrect use or if repairs are carried out by unauthorized third parties.
SPECIAL SAFETY INFORMATION FOR DEEP FRYERS


- During use, the deep fryer becomes very hot. As soon as the food is ready and the appliance is no longer needed, switch it off and unplug the plug from the power socket.
-
Use the appliance only to cook food as described in this nual. Use only foods that are suitable for deep frying.
-
Dry food before deep frying.
-
Never add water to the food in the appliance.
-
Hot steam can develop during deep frying. Keep your face and hands at a safe distance and be especially careful when opening the deep fryer.
-
Provide for adequate ventilation during deep frying.
- Never cover the deep fryer when it is in use, as it might overheat.
- Notice: During the first use, there might be some harmless smoke.
- Note: The silicone stopper located in the front of the frying basket does not need to be removed. It serves to protect the coating of the deep-frying insert and complies with all legal requirements for objects that come into contact with food.
BEFORE FIRST USE
- Remove all packaging materials and any transport guards and stickers (not the type plate or the serial number!). Keep the packaging material away from children. Choke hazard! Dispose of the packaging material according to the applicable statutory waste disposal regulations.
- Tip: Keep the packaging material in case you wish to return the appliance for repairs.
- Notice: The silicone bumpers fitted on the four corners of the insert grille do not have to be removed. They are designed to protect the coating of the fry basket and correspond to all legal requirements that apply to objects coming into contact with food.
- Inspect the appliance for damage. If there is visible damage, do not operate the appliance; instead, contact our customer service department.
- Clean the fry basket and insert with warm soapy water and dry thoroughly.
- Clean the inside of the appliance with a damp cloth.
- Place the appliance on a level, sturdy and heat-resistance surface.
- Connect the plug to a power socket as specified on the type plate.
EXPLANATION OFT HE CONTROLS

flowchart
graph TD
    A["1"] --> B["2"]
    B --> C["3"]
    B --> D["4"]
    B --> E["5"]
    B --> F["6"]
    B --> G["7"]
    B --> H["8"]
    B --> I["9"]
    B --> J["10"]
    C --> K["200 Min"]
    D --> K
    E --> K
    F --> K
    G --> K
    H --> K
    I --> K
    J --> K
1 Refer to the section below for additional information on the individual symbols and programs
Settings for fry basket 1
Select the desired program
4 Adjust runtime and temperature to your preferred setting
The corresponding symbol lights up on the display with a press of this button
5 Indicates in alternation the current runtime in minutes and seconds as well as the temperature for both fry baskets.
Reduce the temperature or runtime
Increase the temperature or runtime
Start, pause and stop the program sequence
Switches the appliance on and off
Settings for fry basket 2
Symbols Programs
2 Button "Fry basket 1"
Button "Menu"
Button "Time/Temperature"
Displays
6 Button “-”
7 Button "+"
10 Button "Fry basket 2"
PROGRAMS
| Program | Oven chips | Fish | Cru-stace-ans | Steak Chop | Pizza | Cake | ||
| Symbol |  |  |  |  |  |  |  | |
| Time / Min. | 20 18 20 | 20 25 20 | 30 | |||||
| Temp. °C | 200 200 | 180 180 | 180 200 | 160 | ||||
| Programm | Chicken legs | Chicken | Vegetables |
| Symbol |  |  |  |
| Time / Min. | 20 3 18 | 5 | |
| Temp. °C | 200 200 | 160 |
When running the programs “Oven chips” or “Chicken legs”, we recommend that you remove the fry basket halfway into the program sequence and shake the food a little before you continue with the cooking of the food.
The pre-set times and temperatures mentioned above are averages, which you may have to adjust to your preferences and the ingredients used. When both fry baskets are in use at the same time, it may be necessary to extend the cooking time by approx. 5 minutes.
SAFETY SWITCHES
- The appliance houses safety switches which keep it from being switched on if the fry baskets have been inserted incorrectly.
- If you pull out the fry basket that is currently switched on during operation, the appliance switches off automatically and restarts again as soon as the
fry basket has been reinserted. If you chose both baskets when you made the fry basket selection, only the side where you pulled out the fry basket will switch off.
BEFORE FIRST USE
- Remove all packaging materials and any transport guards and stickers (not the type plate or the serial number!). Keep the packaging material away from children. Choking hazard! If necessary, dispose of the packaging material according to the applicable statutory waste disposal regulations.
- Tip: Keep the packaging material in case you wish to return the appliance for repairs at a later time.
- Inspect the appliance for damage. If there is visible damage, do not operate the appliance; instead, contact our customer service department.
- Clean the fry baskets and grates with warm soapy water and dry thoroughly. Notice: The silicone plugs located in the four corners of the grate do not have to be removed. They are designed to protect the coating.
- Clean the outside of the appliance with a damp cloth.
- Place the appliance on a level, sturdy and heat-resistance surface. Keep a distance of at least 10 ~cm from other objects, walls, etc.
- Notice: During the first use, there might be some harmless fumes.
OPERATION

Notice: For health reasons, we recommend frying food to a golden-brown colour, avoiding dark crusts. This keeps the formation of potentially harmful acrylamide low.
Notice: This deep fryer operates with hot air. Therefore, never put solid or liquid fat in the deep fryer – danger of fire!
Preparation
Caution: The following is a description of the cooking process with one fry basket and one grate. The process is identical for both sides.
- Before using the appliance, prepare it as described in the section "Before first use".
- Insert the grate carefully into the fry basket until it is seated firmly in the bottom of the fry basket. Do not place the food directly
natural_image
Black rectangular device with grid pattern and a small protruding arm (no visible text or symbols)into the fry basket. Any escaping grease and juices are collected below the grate.
- Now put the food in the fry basket. Do not fill the basket past the MAX mark. This will ensure optimal frying results.
- Slide the fry basket into the opening of the appliance until the fry basket snaps into place. If the fry basket is not inserted properly, the heating of the corresponding fry basket cannot be switched on for safety reasons.
- Connect the plug to a power socket as specified on the type plate.
- All symbols light up briefly and go out again. An acoustic signal sounds, and the ON/OFF button is lit. The appliance is now in standby mode.
- Press the "ON/OFF" button for approx. 1 second to switch the appliance on All buttons light up, and the display shows "----".
Selecting the fry basket
-
Start by selecting one or both fry baskets by pressing button no. 1 (left basket), no. 10 (right basket) or both buttons one after the other for both baskets.
-
The symbol of the respective fry basket lights up on the display along with the default setting of 180^ C and 15 minutes of operating time.
-
To cancel the respective programming process, press and hold the fry basket button again for at least 2 seconds until an acoustic signal confirms the abort. The display shows “----” again.
-
Tip: To ensure a long useful life for your appliance, we recommend that you always use the same side of the appliance for frying food.
Selecting a program
- Use the “Menu” button to select the desired program by pressing the button repeatedly until the symbol of the program you wish to use starts flashing. Both the fry basket symbol and the symbol of the currently selected program will flash. The display alternates between the operating time and the temperature of the program.
-
If you wish to change the pre-set runtime and temperature of the selected program, press the “Time/Temperature” button repeatedly until the desired setting flashes on the display. Next, use the buttons “+” and “-” to set the desired time or temperature. You can adjust the time between 1 and 60 minutes and the temperature between 60 and 200 °C (in 5 degree increments). Notice: Time and temperature can also be changed during operation/frying by pressing the “+” or “-” buttons.
-
Tip: If you hold the buttons “+” and “-” down, the indicated values will change more quickly.
- If the appliance is cold, you must add about 5 minutes to the desired cooking time in order to let the appliance heat up. Tip: You can also heat the appliance for 5 minutes without food and then add the ingredients to the fry basket.
- Press the “Start/Stop” button once you have selected the desired program. If you do not make a selection, the appliance will return to standby mode after approx. 3 minutes, and you will have to start over.
- The display shows in alternation the selected temperature and the remaining runtime. The remaining runtime is counted down to indicate the remaining cooking time.
Pausing a program
- To interrupt the program for a short time, briefly press the “Start/Stop” button again. During the pause, the fry basket button as well as the indicator on the display and the “Start/Stop” button will flash. Press the “Start/Stop” button again to resume the program.
- Notice: You can cancel the selected program at any time with a long press of the corresponding fry basket button. The fan on the appliance will keep running for a short while following a program abort.
- When the display shows “- - -” again, the appliance has returned to its original mode.
- While the program is paused, you can change temperature and runtime using the buttons “+” and “-”.
Remaining program sequence
- To achieve better results, it may be necessary to shake the ingredients in the fry basket halfway through the cooking time, depending on the food. To do so, pull the fry basket out of the appliance by the handle. The appliance switches off, the remaining runtime stops, and the corresponding display reads "Open".
- Gently shake the ingredients in the fry basket. Depending on the quantity of ingredients in the basket, this may need to be repeated several times. Tip: Do not leave the fry basket outside of the appliance for too long to keep the appliance from cooling off too much. Caution – grease may spatter – risk of injury from burns!
-
Next, slide the fry basket back into the appliance. Cooking resumes.
-
Once the program sequence is complete, an acoustic signal will sound multiple times. The corresponding display reads "OFF", all indicators turn off after a while, and the appliance switches off.
FRYING WITH CUSTOM SETTINGS
Selecting the fry basket
-
Start by selecting one or both fry baskets by pressing button 1 (left basket), 2 (right basket) or both buttons (for both baskets). Tip: To ensure a long useful life for your appliance, we recommend that you always use the same side for frying food.
-
To cancel the corresponding process, press and hold the fry basket button again.
Remaining program sequence
-
Keep pressing the "Time/Temperature" button until the desired setting flashes on the display. Use the buttons "+" and "-" to set the desired runtime.
-
Next, press the “Time/Temperature” button again until the pre-set temperature is shown on the display and then set the desired temperature using the “+” and “-” buttons.
-
You can adjust the time between 1 and 60 minutes in increments of one minute and the temperature between 60 and 200^ in increments of 5^ .
-
Finish by pressing the "Start/Stop" button. The appliance will start frying.
Reheating
- To reheat good, manually set the temperature to 150^ C and the time to no more than 10 minutes.
Removal of food
- Remove the fry basket and check whether the food has been fried to the desired degree. If not, cook the food a little longer with the same desired temperature and runtime.
Caution:
Never turn the fry basket completely upside down. Excess grease from the food is collected beneath the grate in the fry basket.
-
Therefore, use tongs to remove the food from the fry basket. Pay attention to excess grease again.
-
Food such as chips can be removed by allowing it to glide carefully from the fry basket into a bowl.
-
If you wish to deep fry other foods, you can start frying again right away. To utilise the residual heat and thus save energy, we recommend that you cook the food in the fry basket that you have just used.
- ne Schüssel gleiten lassen.
Memory function
- The appliance has a memory function. The settings you adjusted will be stored for up to one hour, e.g. in the event of a power failure.
Switching off the appliance
- Once the program sequence is complete, an acoustic signal will sound multiple times. The corresponding display reads "OFF", all indicators turn off after a while, and the appliance switches off.
- You can also switch off the appliance yourself by pressing the "ON/OFF" button for approx. 2 seconds. The corresponding display reads "OFF", all indicators turn off after a while, and the appliance switches off.
- Disconnect the power plug.
- As long as it is connected to the power supply, the appliance will consume - a small amount of - electricity. We therefore recommend that you disconnect the power plug when cooking is complete.

Caution: During and after use, the appliance and the fry baskets are very hot – risk of injury from burns! Touch only the handles of the fry baskets.
CLEANING AND CARE
After use and before cleaning, switch off the appliance by pressing the ON/OFF button and disconnect the power plug from the socket. Allow the appliance to cool. Removing the fry baskets with insert grilles will speed up cooling.
Pour out any grease that collected in the corresponding fry basket.
- The appliance must never be immersed in water or come into contact with water.
- Pour out any grease that collected in the fry baskets.
- Wipe the inside and the outside of the appliance with a damp cloth and a little washing-up liquid. If necessary, use a grease cleaner and then wipe
the surfaces clean, using a damp cloth and clean water. Do not use caustic or abrasive cleaners. Ensure that there is no water ingress. After cleaning, carefully dry the appliance.
-
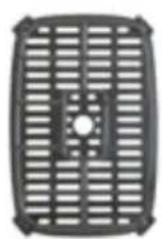
Remove the corresponding insert grille from the fry baskets by pulling firmly on the handle fitted in the middle. Notice: The silicone bumpers fitted on the four corners of the insert grille do not have to be removed. They are designed to protect the coating of the fry basket and correspond to all legal requirements that apply to objects coming into contact with food.
-
Fry baskets and insert grilles can be cleaned in warm water with mild washing-up liquid added. To remove stubborn residue, put some warm washing-up liquid in the fry basket and allow to soak about 10 minutes. Rinse with water and then clean as described above.
-
Always dry the accessories thoroughly before putting them away. Next, return the fry baskets and grates to the appliance.
-
Make sure to slide down the respective grate all the way to ensure there is enough clearance to the heating coil on the inside of the appliance.
-
Regular and proper cleaning prolongs the service life of your appliance.
-
When not in use, store the appliance in a dry place and protected against dust.
TIPS FOR HANDLING HOT-AIR DEEP FRYERS
The cooking times depend on the size, thickness and quality of the foods and possibly also on the material of the baking tin.
Starchy foods that have not been pre-baked, such as fresh chips, should be brushed or sprayed with a thin coat of oil. This likewise applies to vegetables.
Before turning out cake or bread, check it with the “skewer test”: Simply insert a wooden skewer into the cake or bread and pull it back out. If nothing sticks to the skewer, the bread or cake is done.
Half-baked rolls or frozen rolls should be sprayed with water before baking. This will give them a shiny crust as if fresh from the baker.
When cooking sausages, make sure they are not in contact with each other in the fry basket. Brush the sausages with cream to make them brown especially well.
All of our cooking times are approximate and can be adjusted to suit your personal taste. The same applies to the cooking temperatures.
Spread the food evenly in the fry basket to ensure that the food will be fully cooked and browned on all sides. If this is not possible due to the size of the food, switch the appliance off after the completion of half the cooking time,
remove the fry basket, shake the food briefly and continue with the cooking process.
Recipes that have turned out well in a conventional oven are, of course, also suitable for hot-air deep fryers. Reduce the cooking temperature by approx. 10 °C and regularly check on the cooking process during the first few attempts. If food is caused to spin around by the circulating air, fix it in place using, for instance, a small skewer.
Only consume food that is fully cooked.
| Food Quantity | Approx. time min. | Temp. °C | |
| Potato dishes | |||
| Baked potatoes 2 40 0 | -60 | 18 | |
| Potato crisps or straws, shake several times | 250 g -201580 | ||
| Frozen croquettes 1 200 | 8 | 6-20 | |
| Frozen sweet potato chips, shake several times | 500 g 5-201200 | ||
| Frozen spring rolls, small, turn | 6 | 16-20 | 180 |
| Frozen chips, thick, shake several times | 500 g 35-40 180 | ||
| Frozen chips, thin, shake several times | 500 g 30-35 180 | ||
| Fresh chips, thin, mix with 1-2 tbsp oil | 500 g 40-45 180 | ||
| Frozen fried potatoes 2 20-22 180 | |||
| Fish | |||
| Frozen squid, breaded 500 g 15-20 180 | |||
| Frozen fish fingers, turn 8 15-17 200 | |||
| Frozen fish fillet, breaded 2 13-15 200 | |||
| Fish, whole, 300-400 g 1-2 20-25 200 | |||
| Scallops 4 6-10 200 | |||
| Vegetables | |||
| Aubergine, halved, brushed with oil | 1 12–15 20 | 0 | |
| Mixed oven-roasted veggies, in chunks and tossed with oil | 400 g 12–20 | 190 | |
| Corn on the cob, brushed with oil 2 | 12–18 190 | ||
| Fruit | |||
| Apples 2 12 180 | -15 | ||
| Bananas in the peel 2 70 | 8–10 | 1 | |
| Eggs | |||
| Eggs, in shell, medium-hard 1–8 | 180 | 7 | |
| Cake/bread | |||
| Frozen apple strudel | 1 (cut in half) | 12–15 180 | |
| Frozen puff pastries –10 180 | 2 | 8 | |
| Frozen bread, turn 1 x | 500 g 10–15 | 160 | |
| Fresh bread 500 g 40–45 160 | |||
| Fresh rolls 3 18–20 180 | 2– | ||
| Frozen rolls | 2 7–9 | 180 | |
| Bruschetta | 2 servings | 5–7 | 200 |
| Croutons, shake several times | 200 g | 5–8 | 180 |
| Cake | 500 g 30–35 | 180 | |
| Meat | |||
| Fresh sausages, thin, turn | 4 16–18 20 | 0 | |
| Fresh chicken wings, turn | 500 g 25–30 | 180 | |
| Frozen chicken wings | 500 g 30–33 | 180 | |
| Frozen cordon bleu | 2 17–20 19 | 0 | |
| Frozen meatballs with cheese | 6 12–15 20 | 0 | |
| Rissoles 2 12–15 190 | |||
| Drumsticks 2 40–50 180 | |||
| Chicken 1,000 g 12 40–45 180 | |||
| Meat loaf 500 g 20–30 180 | |||
| Frozen chicken sticks, breaded 4–6 12–18 180 | |||
| Crusted roast 500 g | 40–4560–80 | 160 | |
| Lamb chops 2 20–22 200 | |||
| Rolled roast turkey, wrapped in bacon strips | 500 g 40 | 1600 | |
| Sliced belly of pork 2 1 0 | 0–12 | 20 | |
| Pork tenderloin, wrapped in bacon | 1, approx. 500 g | 15–18 80 | 1 |
| Saddle of pork 200 | 2 | 12–18 | |
RECIPES FOR HOT-AIR DEEP FRY ER
Deep-fried chicken
1 chicken (800 g), 3–4 tbsp oil, salt, pepper, paprika
Wash chicken, pat dry and cut in half, if necessary. Make a marinade from the oil, salt, pepper and paprika, and brush marinade on all sides of the chicken.
Put the chicken in the fry basket and fry at 180 degrees for 40–60 minutes, depending on the size of the chicken.
Oven-roasted veggies
400 g mixed vegetables, e.g. bell pepper, zucchini, aubergines, mushrooms, snow peas, onions etc. For the marinade: 2 tbsp oil, 1 clove garlic chopped fine, salt, pepper
Cut vegetables into chunks, wash and pat dry. Make marinade from oil, garlic, pepper and salt, and mix with the vegetables. Put the vegetables in the fry basket and cook at 190 degrees for 15–20 minutes. Tip: You can add 1 tbsp curry powder or 1 tbsp soy sauce and 1 tbsp sesame oil to the marinade (then omit the salt)
Homemade French fries
350 g mealy potatoes, 1 TBSP oil
Peel potatoes, cut into appropriate lengths 1 cm thick, place in cold water briefly. Let drain, dry with paper towels.
Place the fries in the frying container, pour a little oil on them, mix briefly and bake at 200^ C for approx. 20 minutes, turn several times in this process.
Hot, roasted chestnuts (sweet chestnuts)
250 g sweet chestnuts
Let chestnuts soften in cold water approx. 2 hours. Cut the shell crosswise on one side. Place in the frying container, pour a little oil on them, mix briefly and bake at 180^ C for approx. 30 minutes, turn several times in this process.
Cranberry apples
3 apples, 1 egg, 1 TBSP powdered sugar, 1 TBSP bread crumbs, 3 fried and peeled, finely chopped sweet chestnuts, 1 TBSP ground almonds, 2 TBSP cranberry jam, 1 pinch cinnamon, 50 g marzipan
Wash apples, at the top cut off an approx. 1 cm lid, remove the core with an apple corer and slightly enlarge the hole left by the removing the core. Seal the bottom hole on the apple with the marzipan.
Whisk egg and powdered sugar until foamy, mix in bread crumbs, chestnuts, almonds cranberry jam and cinnamon. Fill the apples with the mixture. Put the „lids“ on, place apples in the frying container and bake at 180^ C for approx. 25 minutes.
TROUBLESHOOTING
| Problem se Remedyau | ||
| The appliance does not operate | Power plug not plugged inTimer not switched on | Check whether the power plug is properly plugged in.Select the required cooking time with the timer |
| Problem Cause Remedy | ||
| Food is not done at the end of the cooking time | Quantity of ingredients too highTemperature is too lowCooking time too short | Check the quantity of ingredients and put a smaller quantity in the fry basketSelect a higher temperatureSelect a longer cooking time |
| Food browns un-evenly | Food was not shaken half-way through the cooking time | Food such as chips must be shaken once halfway through frying to achieve even browning.Home-made chips must be rinsed and dried thoroughly before frying to remove excess starch. |
| Food not crispy enough | Some foods are intended for frying in conventional deep fryers | Coat the food with a little oil |
| The fry container cannot be inserted in the appliance | Greasy ingredientsGrease residues in the frying container | With extremely greasy foods, grease drips into the frying container so that white smoke occurs.This is normal.Thoroughly clean the frying container. |
| White smoke is escaping from the appliance | The fry basket is overfullThe fry basket is not inserted correctly | Observe the MAX mark on the fry basketCheck whether the fry basket is correctly locked into position. |
GUARANTEE CONDITIONS
We grant a 24 months guarantee, and in case of commercial use a 12 months guarantee, starting from the date of purchase for any damage demonstrably due to manufacturing defects and when the appliance has been used according to its intended use. Within the warranty period we will remedy defective materials or workmanship through repair or replacement, at our option. Our warranty terms apply only to appliances sold in Germany and Austria. For other countries, please contact the responsible importer. In the event of a claim for remedy of defects, please send the appliance to our after sales service, properly packaged, together with a copy of the automatically generated sales receipt, which must show the date of purchase, and a description of the defect. You can print out a return receipt on our website www.unold.de/ruecksendung. (only for entries from Germany and Austria). The warranty does not cover damage from normal wear, improper handling and failure to comply with the maintenance and care instructions. The warranty is void if repairs or modifications are made to the appliance by third parties. Any claims of the end consumer vis-à-vis the retailer are not limited by this warranty.
WASTE DISPOSAL / ENVIRONMENTAL PROTECTION
Our appliances are produced on a high quality level for a long lifetime. Regular maintenance and expert repairs by our after-sales service can extend the useful life of the appliance. If an appliance is defective and repair is not possible we ask you to follow the following instructions for disposal. Do not dispose this appliance together with your standard household waste. Please bring this product to an approved collection point for recycling of electric and electronic products. By separate collection and disposal of waste products you help to protect natural resources and ensure, that the product is disposed in an adequate way to protect health and environment.

natural_image
Symbol of a trash bin with crossed lines indicating no waste or discharge (no text or labels)The authors have thoroughly considered and tested the recipes included in these operating instructions. Nevertheless, a guarantee cannot be accepted. The authors, respectively UNOLD AG and their assignees shall not be liable for personal injuries, material damages and financial loss.
The instruction booklet is also available for download: www.unold.de
NOTICE D'UTILISATION MODÈLE 58685
AVANT-PROPOS
natural_image
Front view of a black rectangular fan or vent with vertical slats and a central hole (no text or symbols)
natural_image
Black rectangular device with a grid pattern and a small protruding rod (no visible text or symbols)CONDITIONS DE GARANTIE
natural_image
Symbol of a trash bin with crossed lines indicating no waste or restriction (no text or labels)natural_image
Front view of a black rectangular fan or vent with vertical slats and a central hub (no text or symbols visible)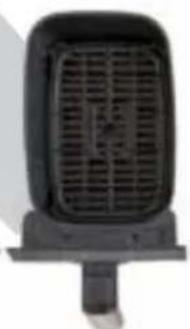
natural_image
Black rectangular device with a grid pattern and a small protruding rod (no visible text or symbols)natural_image
Symbol of a trash bin with crossed lines indicating no waste, and a solid black rectangle below (no text or labels)natural_image
Front view of a black rectangular fan or vent with horizontal slats and a central hole (no text or symbols visible)
natural_image
Black industrial fan or vent device with a small protruding arm (no visible text or symbols)natural_image
Symbol of a trash bin with crossed lines indicating no waste or restriction, and a solid black rectangle below (no text or labels)natural_image
Front view of a black rectangular fan or vent with a central circular hole (no text or symbols visible)
natural_image
Black rectangular device with a grid pattern and a small protruding shaft (no visible text or symbols)natural_image
Symbol of a trash bin with crossed x and y lines, no text or labels presentnatural_image
Front view of a black rectangular fan or vent with horizontal slats and a central hole (no text or symbols)