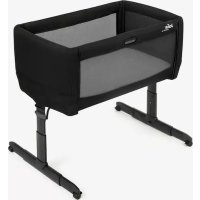
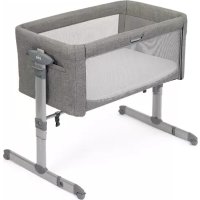
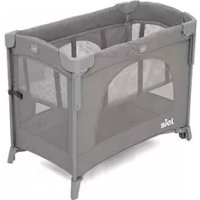
Calmi - Baby bed Joie - Free user manual and instructions
Find the device manual for free Calmi Joie in PDF.
| Product type | Baby car carry cot (carrycot) |
| Brand | Joie |
| Model | Calmi |
| Recommended age | From birth to approximately 12 months (child not yet able to sit unaided) |
| Maximum child weight | 13 kg |
| Child height | 40 cm to 75 cm |
| Safety standard | UN Regulation No. 129 (i-Size) |
| Installation type | ISOFIX with dedicated base (i-Base lx 2 or i-Base Encore, sold separately) |
| Main features | Lie-flat position, carry handle, removable apron, newborn insert, canopy with ventilation window, storage pockets |
| Materials | Plastic, metal, fabric |
| Included accessories | Apron, newborn insert, mattress, crotch pad, shoulder pads, rain cover |
| Care and cleaning | Clean with a damp cloth; do not use abrasives or bleach. Soft parts are washable according to the instructions on the label. |
| Spare parts and repairability | Use only genuine Joie parts. Regularly check the product condition; stop using it if any part is torn or missing. |
| General information | Enhanced child restraint device. Do not use without harness. Do not add extra mattress. |
Frequently Asked Questions - Calmi Joie
User questions about Calmi Joie
0 question about this device. Answer the ones you know or ask your own.
Ask a new question about this device
Download the instructions for your Baby bed in PDF format for free! Find your manual Calmi - Joie and take your electronic device back in hand. On this page are published all the documents necessary for the use of your device. Calmi by Joie.
USER MANUAL Calmi Joie
natural_image
Line drawing of a baby care device with handle and seat (no text or symbols)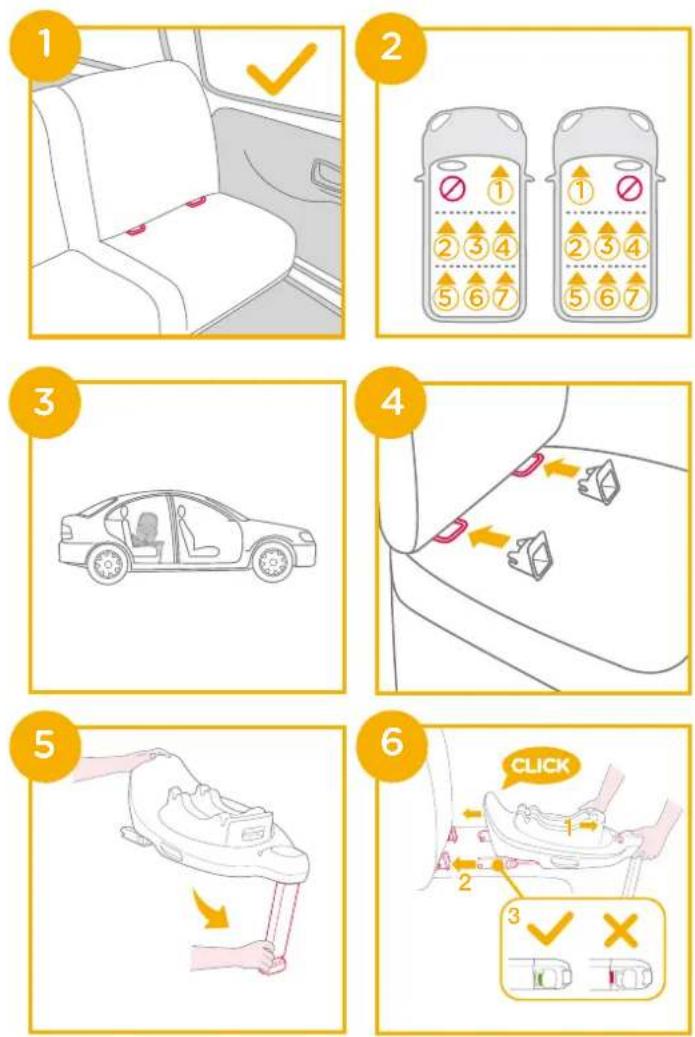
text_image
7 2 Joie 1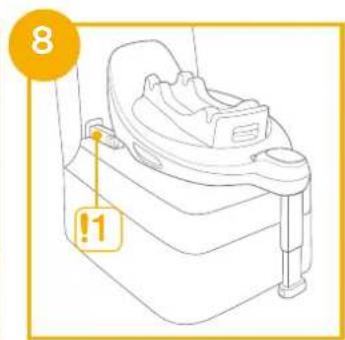
text_image
8 !1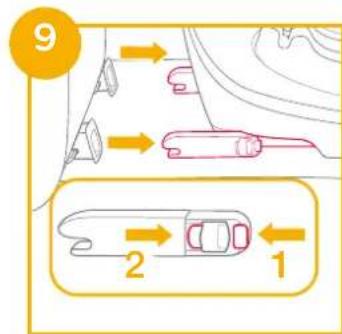
text_image
9 2 1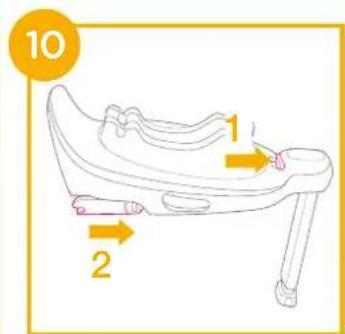
text_image
10 1 2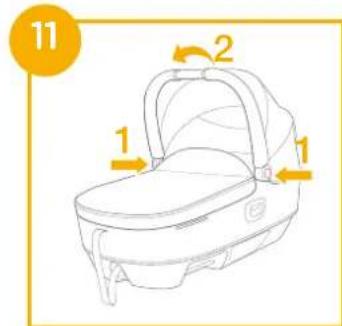
text_image
11 1 2 1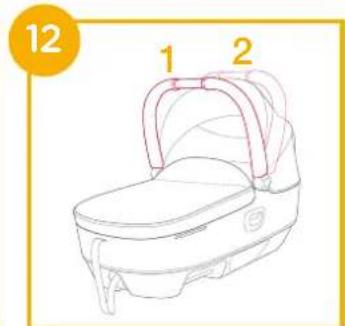
text_image
12 1 2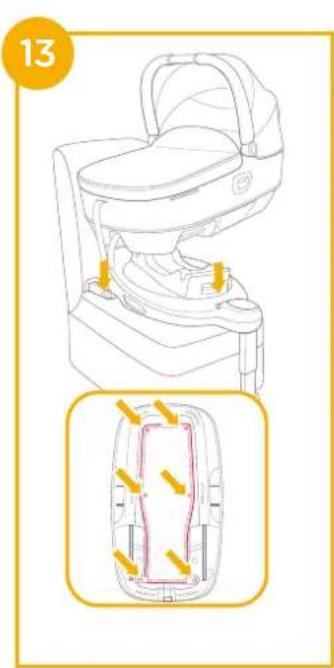
text_image
13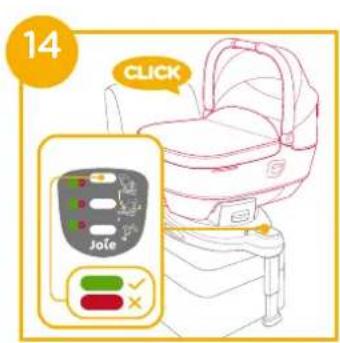
text_image
14 CLICK Jolie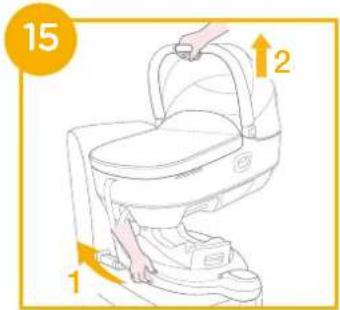
text_image
15 1 2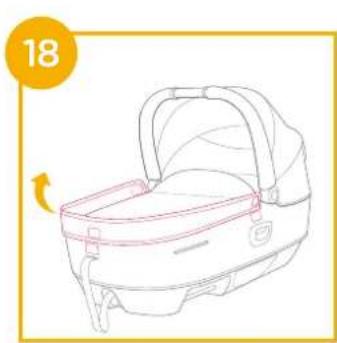
natural_image
Line drawing of a baby care kit with handle and side panel, no text or symbols present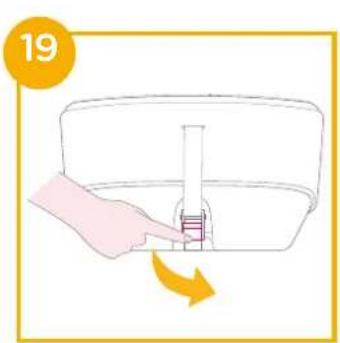
natural_image
Illustration of a hand placing a small object into a bowl with an arrow indicating rotation (no text or symbols)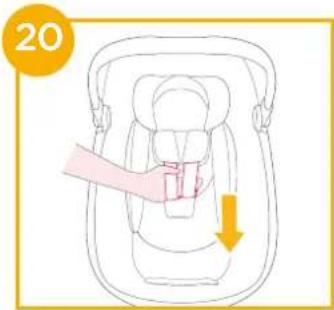
text_image
20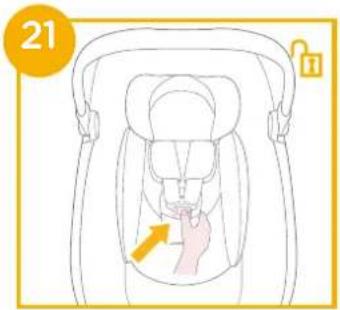
text_image
21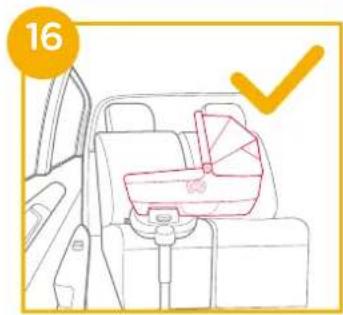
natural_image
Line drawing of a car seat with a highlighted seatbelt and checkmark (no text or symbols)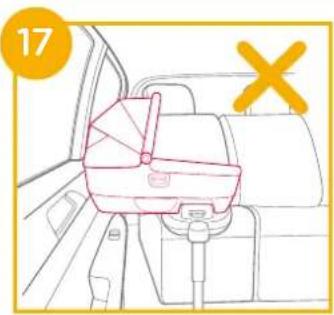
text_image
17 ×
natural_image
Line drawing of a person wearing a seatbelt and holding hands, with number 22 in the top-left corner (no text or symbols on the diagram itself)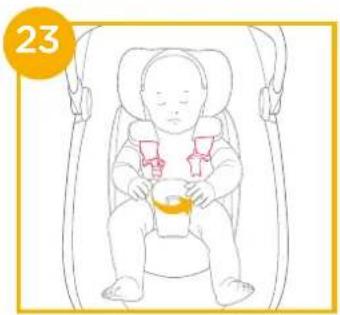
natural_image
Line drawing of a baby sitting in a seatbelt with a bandage, no text or symbols present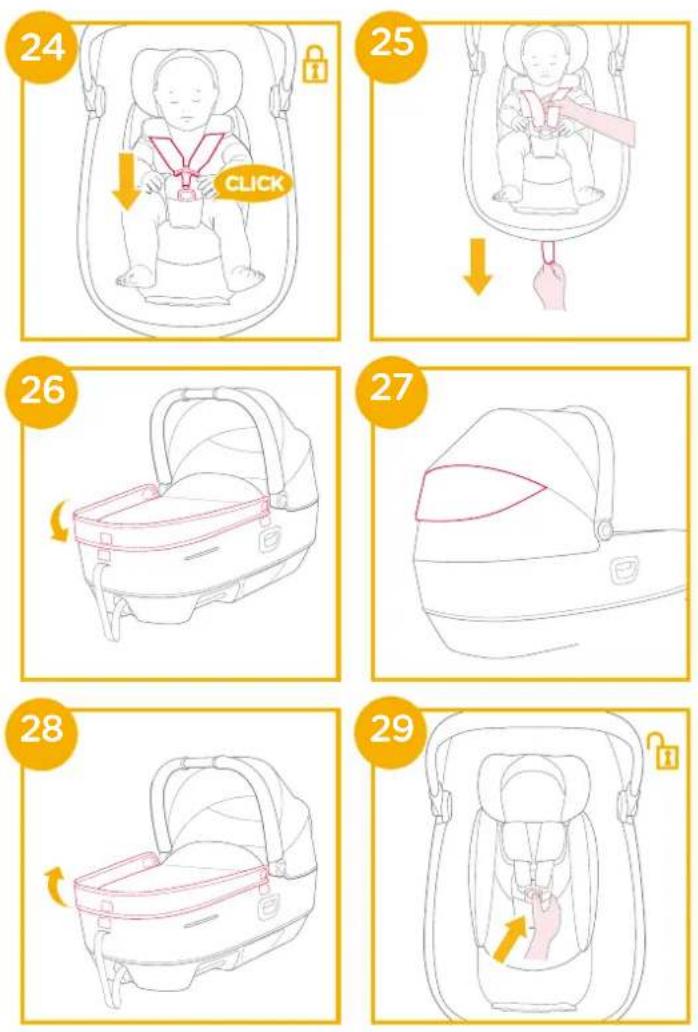
natural_image
Line drawing of a baby car seat with directional arrows indicating movement (no text or symbols)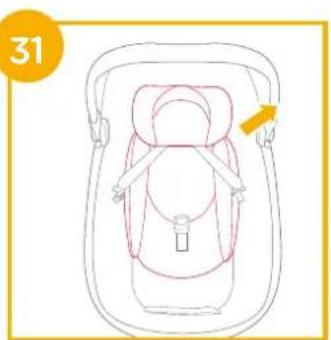
natural_image
Line drawing of a baby seat with a highlighted arm and seat number 31 (no text or symbols on the diagram itself)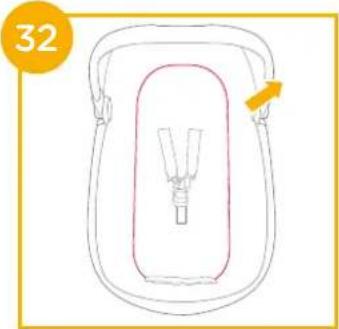
natural_image
Simple line drawing of a container with a handle and internal structure, no text or symbols present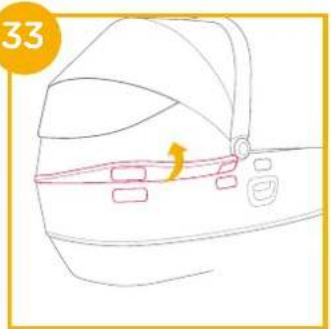
natural_image
Line drawing of a shoe's front panel with a highlighted seam and buttons, no text or symbols present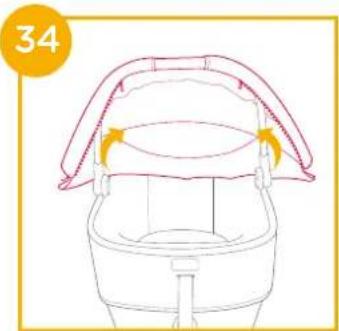
natural_image
Line drawing of a bucket with a handle and seat, no text or symbols present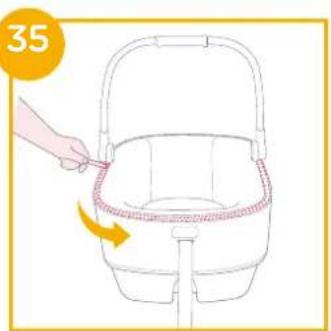
natural_image
Illustration of a hand placing a mop into a basket with a yellow arrow indicating rotation (no text or symbols)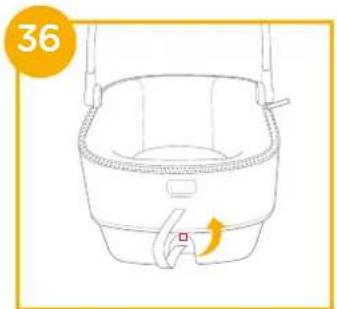
natural_image
Line drawing of a square bucket with a handle and arrow indicating rotation (no text or symbols)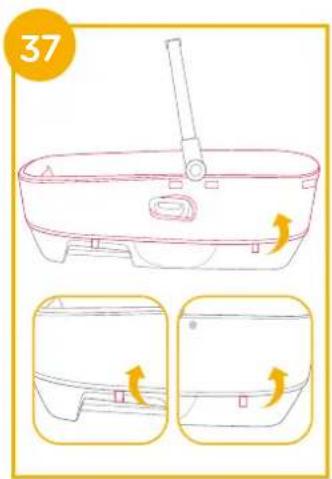
text_image
37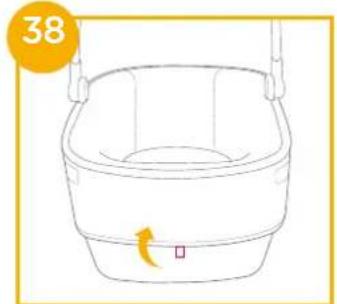
natural_image
Line drawing of a bucket with a handle and arrow indicating rotation (no text or symbols)
text_image
39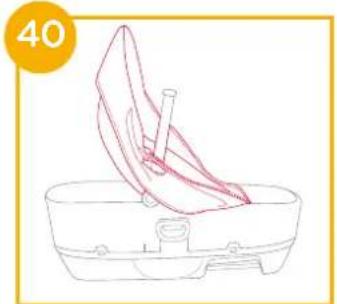
natural_image
Line drawing of a baby seat with a handle and seatbelt, no text or symbols presentGB
Welcome to Joie ^TH
You have purchased a high quality, fully certified child safety child restraint. This product is suitable for the use of children with height 40cm-75cm/weight Max 13kg.
Keep this instruction manual for future reference.
This product complies with the European standard the UN Regulation No.129. This is the Integral Specific vehicle ISOFIX Enhanced Child Restraint System. If in doubt, consult either the Enhanced Child Restraint System manufacturer or the retailer.
Base
These instructions show the use of the infant carrier and the base. Please read all the instructions in this manual before installing and using the product.
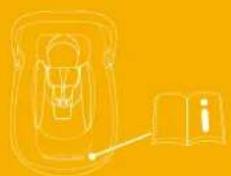
IMPORTANT: KEEP FOR FUTURE REFERENCE. PLEASE READ CAREFULLY.
Please keep the instruction manual at the side pocket.
natural_image
Simple line drawing of a skull and an open book on a yellow background (no text or symbols)Parts List
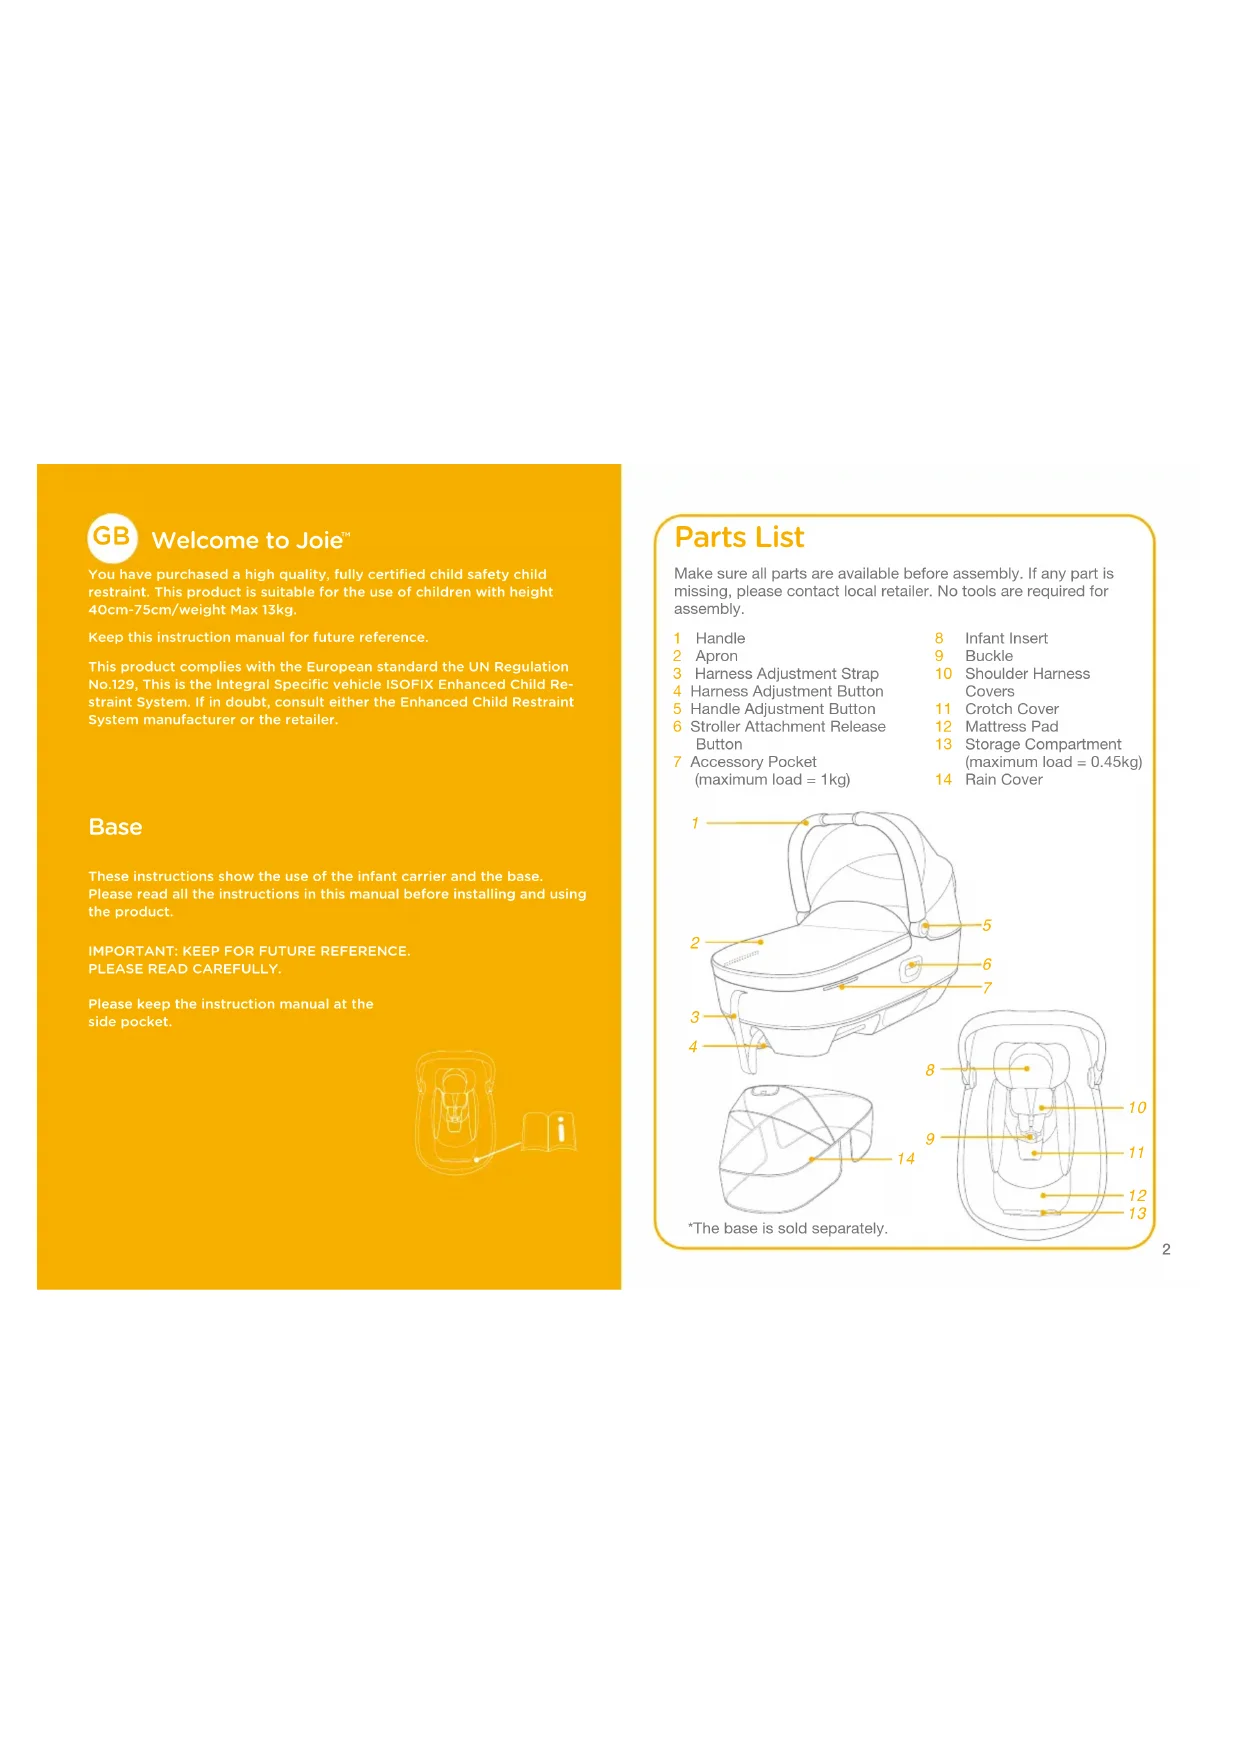
Make sure all parts are available before assembly. If any part is missing, please contact local retailer. No tools are required for assembly.
1 Handle
2 Apron
3 Harness Adjustment Strap
4 Harness Adjustment Button
5 Handle Adjustment Button
6 Stroller Attachment Release Button
7 Accessory Pocket (maximum load = 1kg)
8 Infant Insert
9 Buckle
10 Shoulder Harness Covers
11 Crotch Cover
12 Mattress Pad
13 Storage Compartment (maximum load = 0.45kg)
14 Rain Cover

text_image
1 2 3 4 5 6 7 8 9 10 11 12 13 *The base is sold separately.Emergency
In case of emergency or accidents, it is most important to have your child taken care of with first aid and medical treatment immediately.
Product Information
- This is an Integral Specific vehicle ISOFIX Enhanced Child Restraint System.
- If in doubt, consult either the Enhanced Child Restraint System manufacturer or the retailer.
- calmi lie-flat car cot has to be installed on i-Base lx 2 or i-Base Encore when use in car.
Materials Plastics, metal, fabrics Patent No. Patents pending
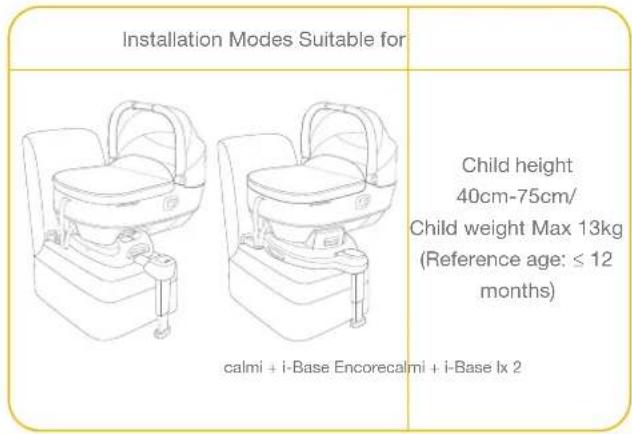
Child Usage Requirements
This product is suitable for use with children who meet the following requirements:
text_image
Installation Modes Suitable for calmi + i-Base Encorealmi + i-Base lx 2 Child height 40cm-75cm/ Child weight Max 13kg (Reference age: ≤ 12 months) Child! For installation with i-Base lx 2, please refer to i-Base lx 2 manual.
WARNING
! CAREFULLY read the warnings given in the separate Safety Manual to ensure a secure usage of the product.
Product Set Up
see images 1 - 3
This enhanced child restraint system is only suitable for vehicle seats equipped with ISOFIX anchorage points.
! DO NOT install this enhanced child restraint on vehicle seats that face sideways or rearward with respect to the moving direction of the vehicle.
! Please refer to your vehicle owner's manual for recommended or suggested installation positions. ^2
This enhanced child restraint must be installed on the rear vehicle seat.
! DO NOT install this enhanced child restraint on movable vehicle seats during installation.
Product Use
Base Installation
see images 4 - 8
- Attach the ISOFIX guide to the vehicle's ISOFIX anchor points (see vehicle owner's manual). The ISOFIX guides can protect the surface of the vehicle seat from being torn. They can also guide the ISOFIX connectors.
-
Unfold the load leg from storage compartment. 5
-
Press the ISOFIX adjustment button to adjust the ISOFIX connectors. Line up the ISOFIX connectors with the ISOFIX guides, and then click both ISOFIX connectors into the ISOFIX anchor points.
! Make sure that both ISOFIX connectors are securely attached to their ISOFIX anchor points. There should be two audible clicks and the colors of the indicators on the both ISOFIX connectors should be completely green. 6-3
! Check to make sure the base is securely installed by pulling on the both ISOFIX connectors.
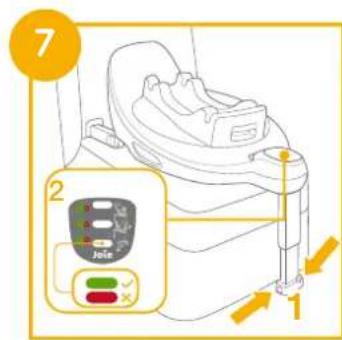
- After placing the base on the vehicle seat, extend the load leg to floor ⑦. When the load leg is installed correctly, the load leg indicator will show green. Red will be shown when installed incorrectly. ⑦-2
! The load leg has multiple positions. When the load leg indicator shows red this means the load leg is in the wrong position.
! Make sure the load leg is in full contact with the vehicle floor pan.
! Squeeze the load leg adjustment button, then shorten the load leg upwards. 7-1
- The completely assembled base is shown as
! The ISOFIX connectors must be attached and locked onto the ISOFIX anchor points. 8 -1
-
To remove the base from the vehicle seat, push the secondary lock buttons ⑨ -1 first and then press the ISOFIX releasing buttons ⑨ -2 on the ISOFIX connectors before removing the base from the vehicle seat.
-
For transporting, press ISOFIX adjustment button and move the ISOFIX connectors back into the storage position.
Attachment to the base
see images 11 - 17
- Pull up the canopy as illustrated while pressing the buttons on both sides.
- Check to make sure the handle is secure before placing the child in the lie-flat car cot. 12 -1
Make sure that the handle is in the correct position of use before carrying or lifting.
- Install the lie-flat car cot onto the base 13, the child restraint indicators should turn green when the lie-flat car cot and base are securely connected. 14
! Please check that the mesh at the bottom of the lie-flat car cot is fixed properly before installing lie-flat car cot. ^13
! Check that the lie-flat car cot is locked onto the base by lifting the handle.
4. Press the ISOFIX adjustment and push the base back until it comes in contact with the vehicle seat backrest.
5. To release the lie-flat car cot, squeeze the infant carrier release button on the base 16 -1, then lift the lie-flat car cot up. 16 -2
6. When lie-flat car cot is installed on base, the correct installation is shown in 16. The incorrect installation is shown in 17.
Securing Child
see images 18 - 27
- Remove the lie-flat car cot apron from the velcros on the side.
- Press the harness adjustment button while pulling the both shoulder harnesses of the enhanced child restraint to the desired length. 19:20
- Undo the buckle by pressing the red button. 21
! We recommend using the infant insert while the baby is under 60cm and until they outgrow the insert.
- Place child into the enhanced child restraint and engage the buckle. 23 24
- Tighten the shoulder harness straps by pulling the adjustment webbing. 25
! Make sure the space between the child and the shoulder harness straps is about the thickness of one hand.
- Place the apron back on the lie-flat car cot. 26
- The canopy window can be opened for ventilation.
Detach & Assemble Soft Goods
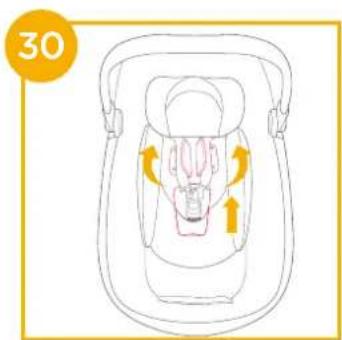
see images 28 - 40
Follow steps 28 - 40 to detach soft goods.
To re-attach the soft goods please repeat the above steps in the reverse order.
Cleaning and Maintenance
! Clean the frame, plastic parts, and fabric with a damp cloth, but do not use abrasives or bleach. Do not use silicon lubricants as they will attract dirt and grime. Do not store the lie-flat car cot in a damp place.
! To ensure long-lasting use, wipe this product off with a soft, absorbent cloth after using it in rainy weather and before storing away.
! Refer to the care labels attached to the soft goods for washing and drying instructions.
! It is normal for fabric to color from sunlight and to show wear and tear after a long period of use, even when used normally.
! For reasons of safety, only use original Joie parts.
! Check regularly if everything functions properly. If any parts are torn, broken, or missing, stop using this product.

PT
Bem-vindo à Joie™
natural_image
Simple line drawing of a car with a sensor and an open book, no text or symbols presentLista de componentes
natural_image
Simple line drawing of a car with a pen and an open book, no text or symbols presentLista de piezas
natural_image
Simple line drawing of a skull and an open book on a yellow background (no text or symbols)Liste des pièces
text_image
Labeled diagram of a baby car with numbered parts for identification
natural_image
Abstract line drawing of a 3D object with a yellow arrow pointing to a numbered label '14' (no text or symbols on the object itself)natural_image
Simple line drawing of a car with a pen and an open book, no text or symbols presentOnderdelenlijst
(maximale belasting = 1kg)
8 Baby-inzetstuk
9 Gesp
natural_image
Simple line drawing of a skull and an open book on a yellow background (no text or symbols)Elenco parti
(maximale Last = 1 kg)
8 Babyeinsatz
9 Schnalle
natural_image
Simple line drawing of a car with a pen and an open book, no text or symbols presentLista över delar
natural_image
Simple line drawing of a car with a pen and an open book, no text or symbols presentnatural_image
Simple line drawing of a car with a sensor and an open book, no text or symbols presentAlkatrészek listája
natural_image
Simple line drawing of a car with a pen and an open book, no text or symbols presentListe over dele
VIKTIG: BEHOLD FOR FREMTIDIG OPPSLAG. LES NÖYE.
Oppbevar bruksanvisningen i sidelommen.
natural_image
Simple line drawing of a car with a handle and an open book, no text or symbols presentDeleliste
Allison Baby UK Ltd, Venture Point, Towers Business Park Rugeley, Staffordshire, WS15 1UZ
NUNA International B.V. Van der Valk Bourmanweg 178 C, 2352 JD Leiderdorp, The Netherlands