WHW420 - Manual winch Toolland - Free user manual and instructions
Find the device manual for free WHW420 Toolland in PDF.
| Product type | Manual winch |
| Brand | Toolland |
| Model | WHW420 |
| Rated capacity | 420 kg |
| Gear ratio | 4.3:1 |
| Weight | 2760 g |
| Frame thickness | 3.5 mm |
| Gear thickness | 8.0 mm |
| Coating | Anti-rust electrostatic black |
| Lubrication | Drum and gear factory-lubricated |
| Compatible sling type | Rope or steel cable |
| Operating temperature | -10 °C to +50 °C |
| Maximum lifting angle | 4° (horizontal and vertical) |
| Ratchet positions | 3 (wind, freewheel, unwind) |
| Safety | Do not exceed rated load; keep at least 4 wraps on drum |
| Maintenance | Clean with a cloth; lubricate cable with light oil; grease gear |
| Warranty | 24 months for consumer use (see conditions) |
| Included accessories | None (cable, rope, and hook not included) |
| Intended use | Lifting and hauling loads (not horizontal pulling) |
| Drum material | Steel |
Frequently Asked Questions - WHW420 Toolland
User questions about WHW420 Toolland
0 question about this device. Answer the ones you know or ask your own.
Ask a new question about this device
Download the instructions for your Manual winch in PDF format for free! Find your manual WHW420 - Toolland and take your electronic device back in hand. On this page are published all the documents necessary for the use of your device. WHW420 by Toolland.
USER MANUAL WHW420 Toolland
natural_image
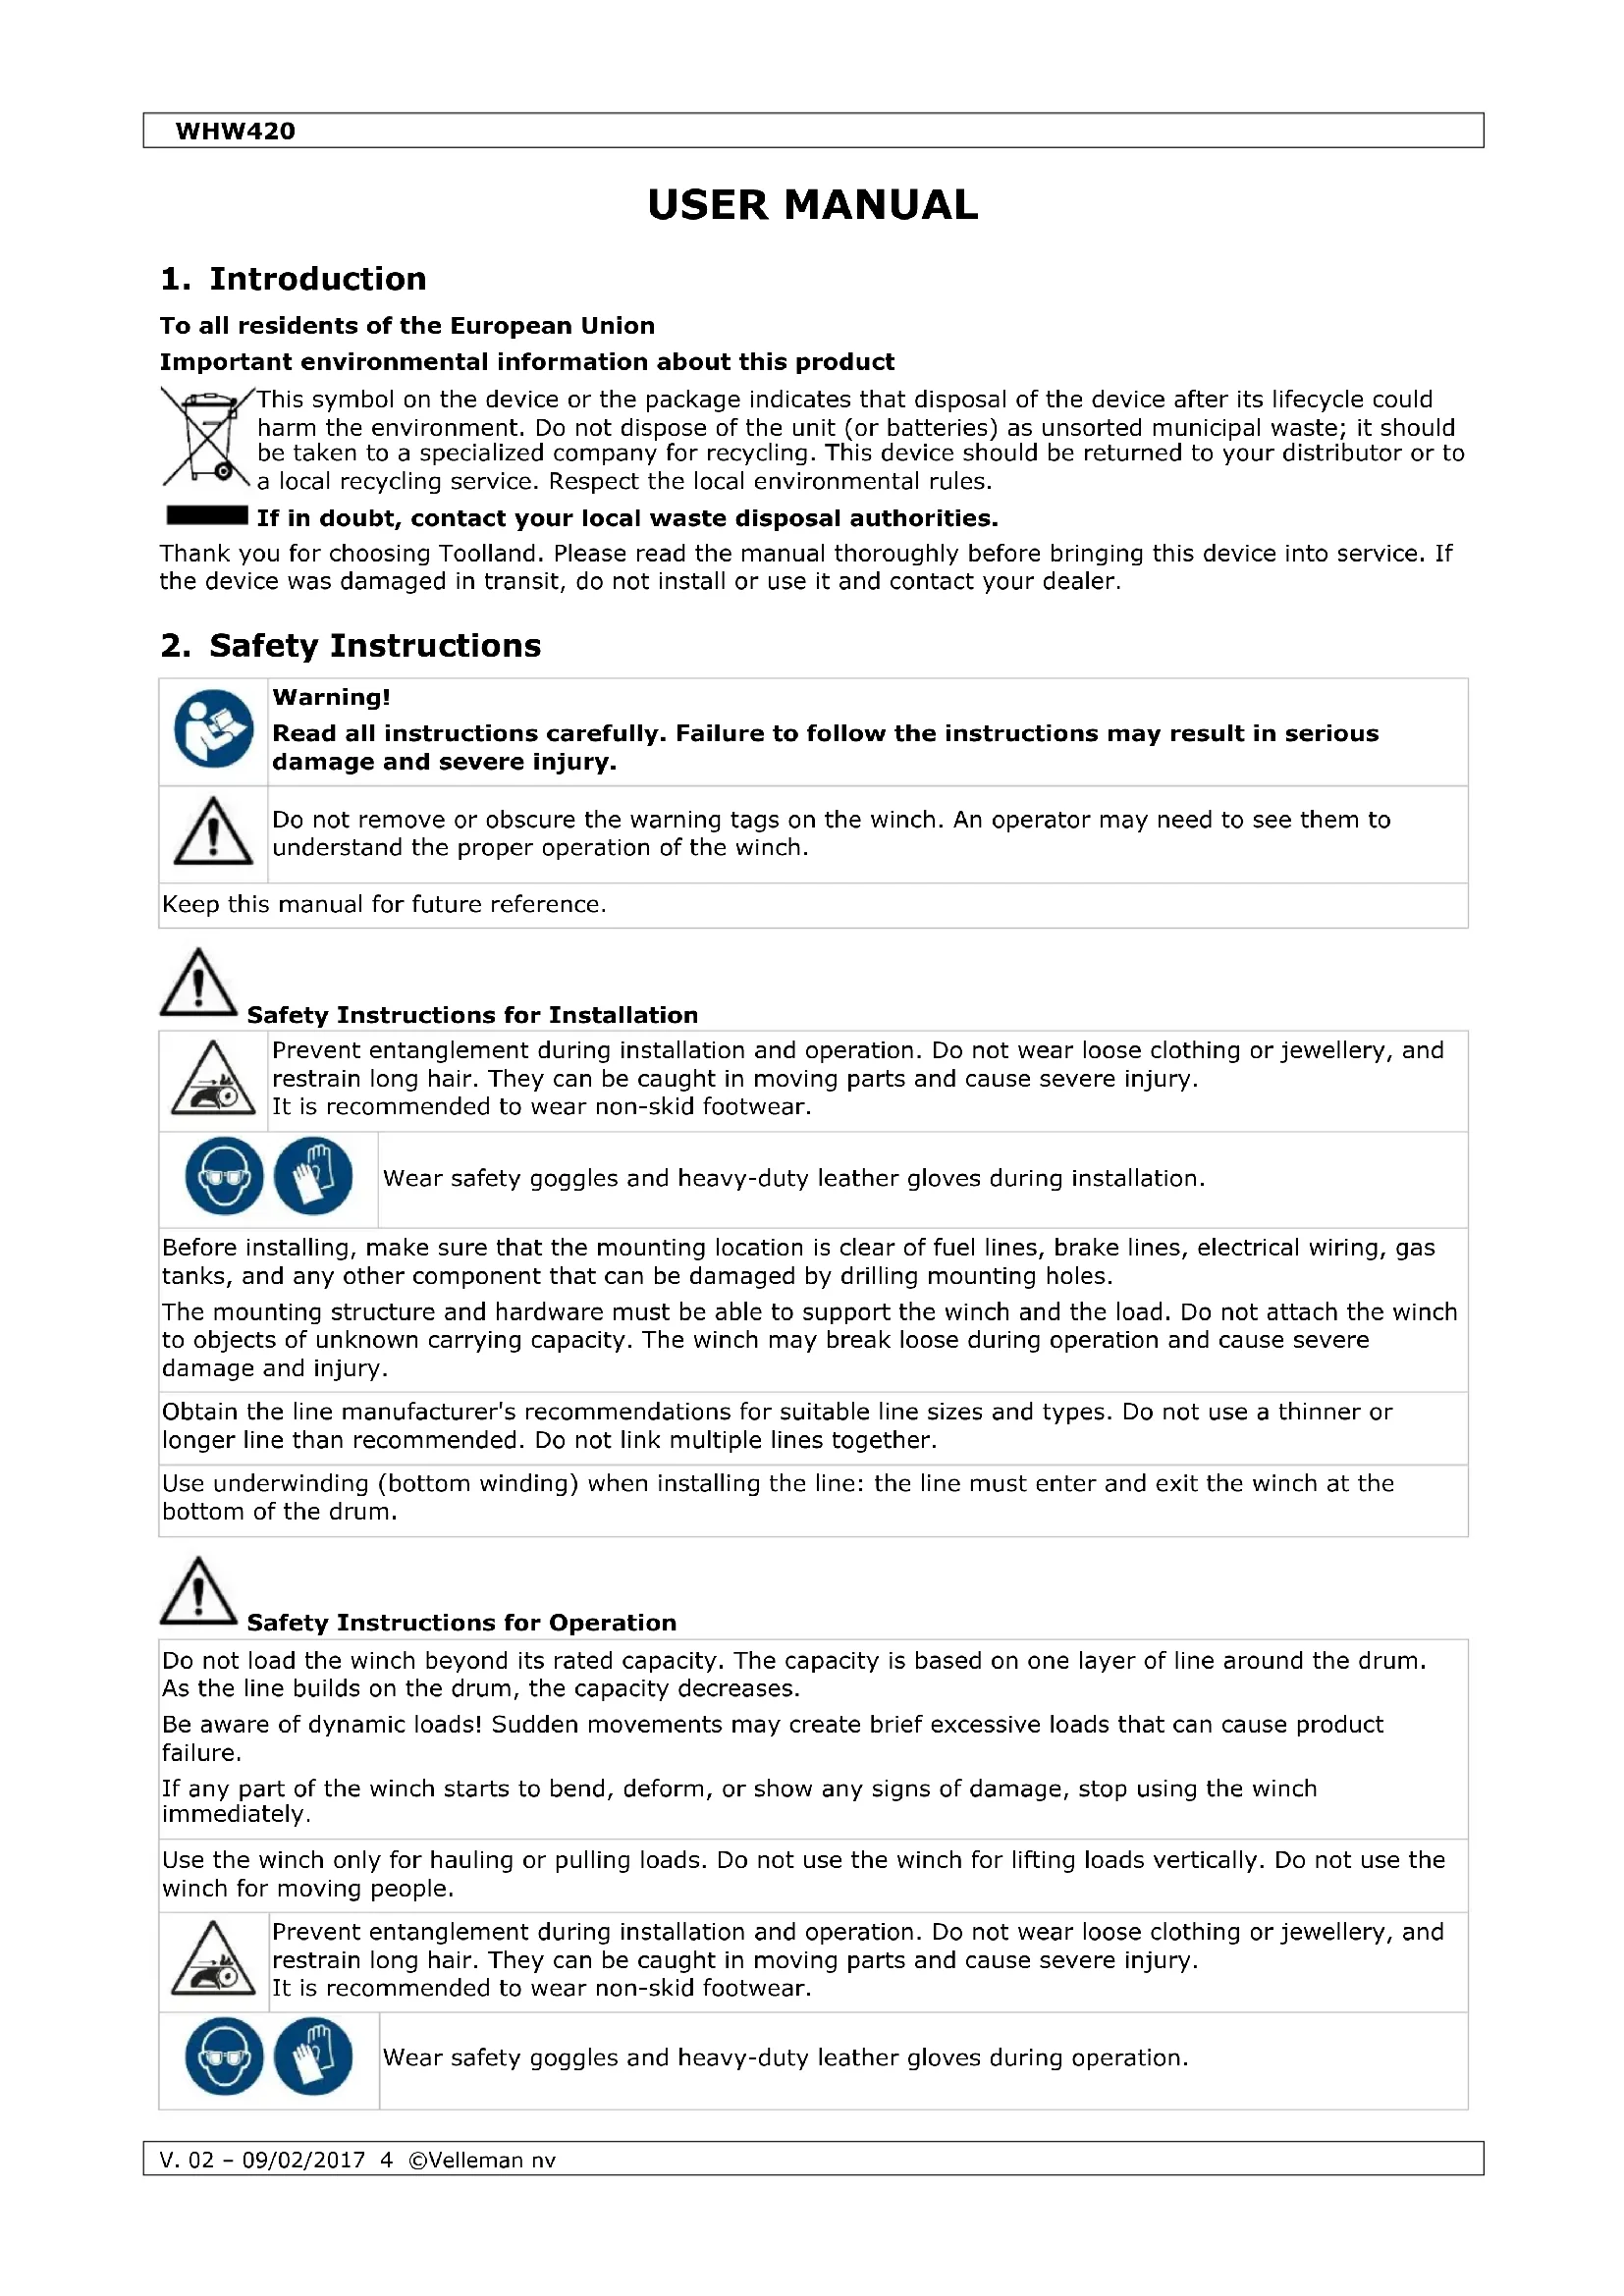
Black manual winch with gear and handle, no visible text or symbols on the device itselfUSER MANUAL 4
GEBRUIKERSHANDLEIDING 10
MODE D'EMPLOI 16
MANUAL DEL USUARIO 22
natural_image
Mechanical gear assembly with labeled parts (a, b, c) and a license plate (no text or symbols on the main components)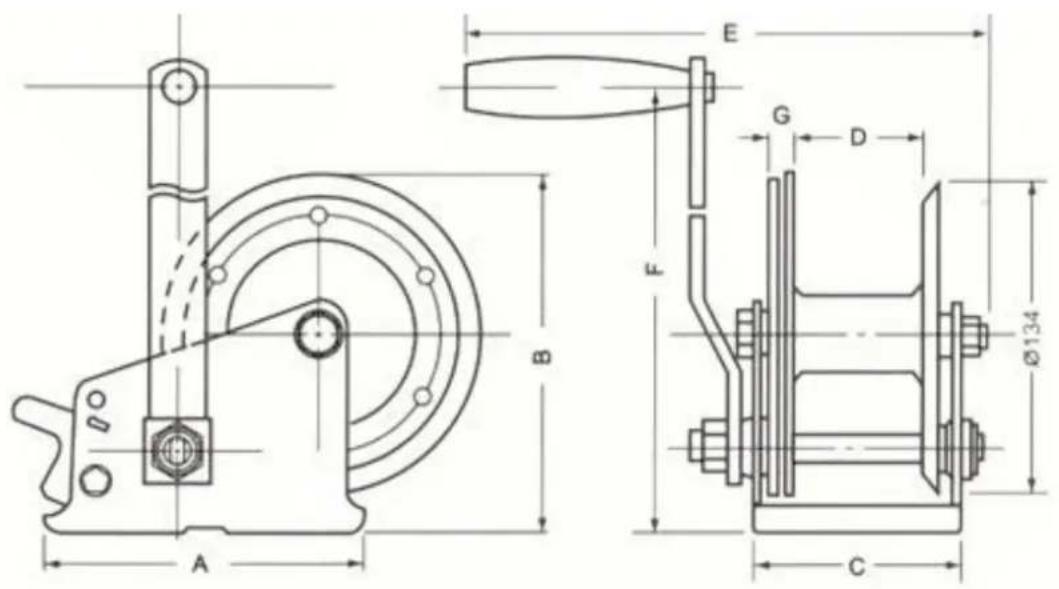
text_image
Technical drawing of a mechanical device with labeled dimensions and component views| A | 138 mm |
| B | 153 mm |
| C | 89 mm |
| D | 52 mm |
| E | 240 mm |
| F | 223 mm |
| G | 12 mm |
USER MANUAL
1. Introduction
To all residents of the European Union
Important environmental information about this product
This symbol on the device or the package indicates that disposal of the device after its lifecycle could harm the environment. Do not dispose of the unit (or batteries) as unsorted municipal waste; it should be taken to a specialized company for recycling. This device should be returned to your distributor or to a local recycling service. Respect the local environmental rules.

If in doubt, contact your local waste disposal authorities.
Thank you for choosing Toolland. Please read the manual thoroughly before bringing this device into service. If the device was damaged in transit, do not install or use it and contact your dealer.
2. Safety Instructions

Warning!
Read all instructions carefully. Failure to follow the instructions may result in serious damage and severe injury.

Do not remove or obscure the warning tags on the winch. An operator may need to see them to understand the proper operation of the winch.
Keep this manual for future reference.

Safety Instructions for Installation

Prevent entanglement during installation and operation. Do not wear loose clothing or jewellery, and restrain long hair. They can be caught in moving parts and cause severe injury. It is recommended to wear non-skid footwear.


Wear safety goggles and heavy-duty leather gloves during installation.
Before installing, make sure that the mounting location is clear of fuel lines, brake lines, electrical wiring, gas tanks, and any other component that can be damaged by drilling mounting holes.
The mounting structure and hardware must be able to support the winch and the load. Do not attach the winch to objects of unknown carrying capacity. The winch may break loose during operation and cause severe damage and injury.
Obtain the line manufacturer's recommendations for suitable line sizes and types. Do not use a thinner or longer line than recommended. Do not link multiple lines together.
Use underwinding (bottom winding) when installing the line: the line must enter and exit the winch at the bottom of the drum.

Safety Instructions for Operation
Do not load the winch beyond its rated capacity. The capacity is based on one layer of line around the drum. As the line builds on the drum, the capacity decreases.
Be aware of dynamic loads! Sudden movements may create brief excessive loads that can cause product failure.
If any part of the winch starts to bend, deform, or show any signs of damage, stop using the winch immediately.
Use the winch only for hauling or pulling loads. Do not use the winch for lifting loads vertically. Do not use the winch for moving people.

Prevent entanglement during installation and operation. Do not wear loose clothing or jewellery, and restrain long hair. They can be caught in moving parts and cause severe injury. It is recommended to wear non-skid footwear.


Wear safety goggles and heavy-duty leather gloves during operation.
Never try to guide the line while winching. Broken cable strands are sharp. Never slide cable through your hands, even if you are wearing gloves.
Keep away from the winching area during operation. If the line slips or breaks, it may whip back, which can cause damage and severe injury. Place a heavy blanket or rug (not incl.) over the line. The weight of the cloth acts as a damper and prevents the broken line from whipping.

natural_image
Simple diagram of a pulley system with a block, rope, and hanging weights (no text or symbols)Do not step over the line with a load attached. Do not push against a load-bearing line; this may overload the line and cause it to break.
Do not allow people to stand on or behind the load.
Examine the device for safe operation before each use. Make sure that all nuts and bolts are tight.
Salts, chemicals, and rust can affect components. Do not use if you notice damaged or loose parts, structural cracks, bends, or any other condition that may affect the safe operation of the winch. Do not use the winch even if only minor damage appears.
If the spring is broken or the locking system fails, stop using the winch immediately and contact your dealer for repair.
Do not operate the winch if the line is knotted, twisted, kinked, frayed, corroded, or shows any sign of weakening. As soon as a loop starts to form in the line, stop the winch and straighten the loop. If you notice any damage to the line, replace it immediately.
Note that a kink permanently weakens a steel cable, even after you straighten it. Kinked cable can suddenly fail even before it reaches its load capacity. Never use cable that has been kinked.
Secure the load after moving. Winches are not designed to secure loads. Use tie-down ropes or straps to secure the load.
Warning! Never fully extend the line while under load.
Always keep at least 4 full turns of line on the drum to supply friction for proper anchoring. If not, the line may pull loose from the drum. Keep the line properly aligned on the drum.
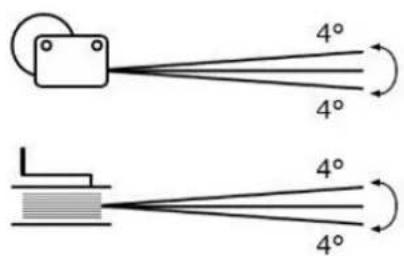
Do not winch at an angle. This may damage the winch drum and the line. The recommended maximum winching angle is 4^ , both horizontally and vertically.
Do not operate the winch with other than manual power.
Never release the handle while winching a load. The handle may spin violently and cause serious injury. Never try to stop a spinning handle.
Boat trailers not equipped with keel and side hull rollers are designed to be submerged in the water when the boat is loaded; this means that the boat is "floated" onto the trailer. If the trailer is not submerged, attempts to drag the boat onto the trailer can cause winch failure and possible injury.

Keep hands and fingers clear of the winch and line during operation.
Always check the correct rotation direction before using the winch.
If used on a vehicle, do not move the vehicle to assist the winch. The combination of the winch and vehicle pulling together can overload the line.
Never hook the line back onto itself. This creates an unacceptable strain on the line. Do not loop the line around the load.
The ambient operating temperature is between -10 ^ and +50 ^ . Do not operate outside of these specifications.

Safety Instructions for Servicing


Wear safety goggles and heavy-duty leather gloves during maintenance.
When replacing a line, do not use a thinner or longer line than recommended by the manufacturer. Do not link multiple lines together.
Have the device repaired by a qualified service person using only identical replacement parts. This ensures that the safety of the device is maintained.
3. General Guidelines
Refer to the Velleman® Service and Quality Warranty on the last pages of this manual.
• Familiarise yourself with the functions of the device before actually using it.
- All modifications of the device are forbidden for safety reasons. Damage caused by user modifications to the device is not covered by the warranty.
- Only use the device for its intended purpose. Using the device in an unauthorised way will void the warranty.
- Damage caused by disregard of certain guidelines in this manual is not covered by the warranty and the dealer will not accept responsibility for any ensuing defects or problems.
- Keep this manual for future reference.
4. Features
• solid gear construction
- black electrostatic discharge coating finish against rusting
• internally lubricated drum and pinion gear bushings
- moulded handle for smooth rotation
- formed reinforcements in frame for added strength.
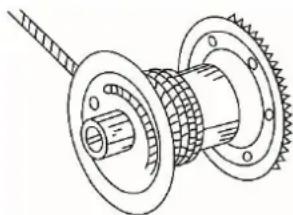
5. Overview
Refer to the illustrations on page 2 of this manual.
| 1 | frame | 4 | drum |
| 2 | pawl | 5 | handle |
| 3 | shaft | 6 | mounting surface |
Pawl Positions
The pawl has three positions:
| a | reeling in: turn the handle clockwise to reel in the line. |
| b | free spooling: turn the handle in any direction to reel in or out. |
| c | reeling out: turn the handle counter-clockwise to reel out the line. |
Warning! If a load is attached to the line, keep a firm grip on the handle when switching the pawl position or when using free spooling.
6. Installation

Read the entire safety instructions at the beginning of this manual before installing the device.
- Choose a suitable mounting location. Take care of the following points:
- The mounting structure and hardware must be able to support the winch and the load without damage or weakening. If necessary, use steel reinforcement plates or additional bracing.
-
Make sure that the handle [5] can rotate freely by 360°.
-
Place the winch on the mounting surface [6] and mark the location of the mounting holes.
-
Before drilling, verify that there are no hidden parts or structural pieces in the mounting area that can be damaged.
-
Drill the holes at the marked locations.
-
Use three 3/8" (M10) bolts, washers, and lock nuts (not incl.) to fix the winch frame [1] on the mounting surface [6].
7. Installing the Winch Line

Make sure that the line is strong enough to move the load. Obtain the line manufacturer's recommendations for suitable line sizes and types. Use an appropriate end connection to attach the hook to the line. (Cable, rope, hook, and hardware for attaching are not included.) Always follow the line manufacturer's safety and operation instructions.
You can use the winch either with a rope or with a steel cable (wire rope). The attachment method differs depending on the type of line.
7.1 Rope
Attaching a rope to the winch drum requires no bolts, nuts, or rope clamp.
- Place the pawl [2] in the free-spooling position [b] so that it is disengaged from the gear and the drum can rotate freely.
- Guide the rope end under the hub of the drum [4].
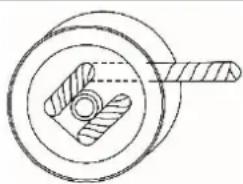
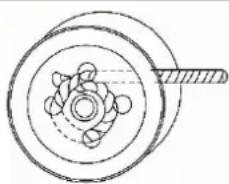
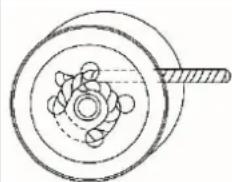
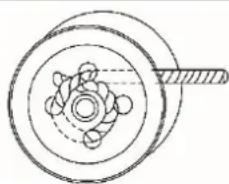
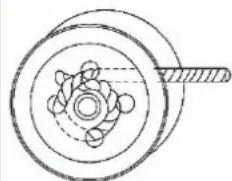
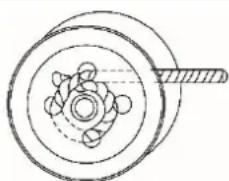
- Thread the rope through the round holes in the drum's side. There are two methods, depending on the weight of the line. See the illustration below for instructions.
natural_image
Technical line drawing of a mechanical component with concentric circles and a shaft (no text or symbols)heavy line
natural_image
Technical line drawing of a mechanical component with concentric circles and a shaft (no text or symbols)light line
- Place the pawl [2] in the reel-in position [a].
- Turn the handle clockwise to reel in the rope. Pack the coils tightly side by side, so that the next layers cannot slip between the coils.
- When you have reeled in the rope, attach the hook to the shaft [3] to prevent that the rope unwinds.
7.2 Cable
Attaching a Cable
Attaching cable requires a cable clamp (not incl.). To attach a cable to the winch drum, proceed as follows:
- Place the pawl [2] in the free-spooling position [b] so that it is disengaged from the gear and the drum can rotate freely.
-
Attach the clamp with the bolt through the square hole in the drum's side. The bolt goes on the inside, the locking nut and washer on the outside. Do not tighten the nut yet.
-
Guide the cable end under the hub of the drum [4].
- Thread the cable through a round hole in the drum's side.
- Thread the cable further through the clamp and make sure that the end protrudes about 1" (2.5 cm).
- Tighten the nut firmly.
- Place the pawl [2] in the reel-in position [a].
- Turn the handle clockwise to reel in the cable. Pack the coils tightly side by side, so that the next layers cannot slip between the coils.
Warning! Prevent kinks in the cable.
- When you have reeled in the cable, attach the hook to the shaft [3] to prevent that the cable unwinds.
Detaching a Cable

Warning! Be very careful when you detach an old cable. The cable clamp holds the cable under tension, and the cable may spring back forcefully.
To detach an old cable, proceed as follows:
- Detach any load from the cable.
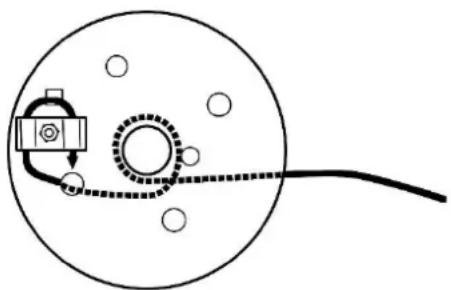
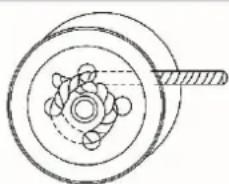
- Place the pawl [2] in the reel-out position [c].
natural_image
Simple line drawing of a circular object with internal components and a connecting rod (no text or symbols)- Turn the handle counter-clockwise to reel out the entire cable.
- Loosen the clamp nut and remove the cable from under the clamp.
- Inspect all parts of the drum and clamp before installing a new cable.
8. Operation
8.1 Precautions

Warning! Read all instructions carefully. Failure to follow the instructions may result in serious damage and severe injury.
Warning! To prevent serious injury from winch failure, do not use damaged equipment. If you observe any abnormal noise or vibration, stop using the device immediately and have it serviced by a qualified technician.
Before use, make sure that the load is within the rated capacity.
If any part of the winch starts to bend, deform, or show any signs of damage, stop using the winch immediately.
Warning! Do not let go of the handle when the pawl is in the unlocked position while there is a load on the winch. The handle can spin violently and cause serious injury. Never try to stop a spinning handle.
Never unwind the line fully when pulling a load. Always keep 4 to 6 complete turns of line around the drum; otherwise, the line may come loose from the drum.
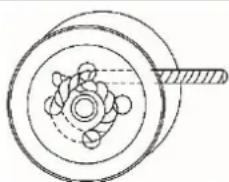
natural_image
Technical line drawing of a mechanical gear assembly with no visible text or symbols8.2 Winching
To winch a load, proceed as follows:
- Before connecting the line to the load, make sure that the winch and line are capable of pulling the load.
- Place the pawl [2] in the reel-out position [c].
- Detach the hook from the shaft and turn the handle counter-clockwise to reel out the line. The line and hook must be routed under the shaft [3].
Warning! Make sure that the line does not get knotted, twisted, kinked or damaged.
Warning! Leave at least 4 full turns of line on the drum.
- Attach the line to the load. For this purpose, carefully follow the instructions of the line/hook manufacturer.
- Place a heavy blanket or rug (not incl.) over the line.

natural_image
Simple diagram showing a block connected to a line with a gray band, no text or symbols presentWarning! Keep all bystanders away from the winch, the line, and the load.
- Place the pawl [2] in the reel-in position [a].
- Turn the handle clockwise to reel in the load.
When winding the line on the drum, pack the coils tightly side by side, so that the next layers cannot slip between the coils.
- When the load is reeled in, secure it.
- When the load is secured, place the pawl in the reel-out position [c] and turn the handle counter-clockwise to release the strain on the line.
- Remove the blanket or rug, and detach the line from the load.
- Place the pawl back in the reel-in position [a] and turn the handle clockwise to wind the line on the drum.
- Attach the hook to the shaft.
9. Inspection and Maintenance

Only perform the maintenance as described in this manual. Any other repair or maintenance must be performed by a qualified service person using only identical replacement parts. This ensures that the safety of the device is maintained.
Before Each Use
Salts, chemicals, and rust can affect components. Before each use, inspect the general condition of the winch and line. Check for the following aspects:
- All hardware is tightly fixed.
- Moving parts are properly aligned and free to move.
- Parts are not broken or cracked.
- The line is not frayed, kinked, or damaged in any other way.
- Check for any other condition that may affect safe operation.
After Each Use
After use, wipe the external surfaces of the winch clean with a cloth.
Periodical Maintenance
Periodically, lubricate the steel cable with a light oil.
Lubricate the gear with gear grease.
10. Technical Specifications
gear ratio 4.3:1
working capacity 420 kg
dimensions: see illustration on page 2
body thickness.... 3.5 mm
gear thickness 8.0 mm
weight....2760 g
Use this device with original accessories only. Velleman nv cannot be held responsible in the event of damage or injury resulting from (incorrect) use of this device. For more info concerning this product and the latest version of this manual, please visit our website www.toolland.eu. The information in this manual is subject to change without prior notice.
© COPYRIGHT NOTICE
The copyright to this manual is owned by Velleman nv. All worldwide rights reserved. No part of this manual may be copied, reproduced, translated or reduced to any electronic medium or otherwise without the prior written consent of the copyright holder.
GEBRUIKERSHANDLEIDING
1. Inleiding
natural_image
Simple diagram showing a block connected to a line with a gray hanging item, no text or symbols present.natural_image
Technical line drawing of a mechanical component with concentric circles and a shaft (no text or symbols)zware lijn
natural_image
Technical line drawing of a mechanical component with concentric circles and a shaft (no text or symbols)lichte lijn
natural_image
Simple line drawing of a circular object with internal components and a connecting rod (no text or symbols)natural_image
Technical line drawing of a mechanical gear assembly with no visible text or symbols8.2 Takelen
natural_image
Simple diagram of a lever system with a weight and a hanging block (no text or symbols)natural_image
Simple diagram showing a block connected to a line with a gray hanging part, no text or symbols present.natural_image
Technical line drawing of a mechanical component with concentric circles and a shaft (no text or symbols)élingue lourde
natural_image
Technical line drawing of a mechanical component with concentric circles and a shaft (no text or symbols)élingue légère
natural_image
Simple line drawing of a circular object with internal components and a curved line extending from it (no text or symbols)natural_image
Technical line drawing of a mechanical gear assembly with no visible text or symbols8.2 Treuillage
natural_image
Simple diagram showing a block connected by a line with a circular element on the left (no text or symbols)natural_image
Simple diagram of a lever system with a block, fulcrum, and fulcrum (no text or symbols)natural_image
Technical drawing of a mechanical component with concentric circles and a shaft (no text or symbols)cuerda gruesa
natural_image
Technical line drawing of a mechanical component with concentric circles and a shaft (no text or symbols)cuerda ligera
natural_image
Pure diagram of a circular device with internal components and wiring, no text or symbols presentnatural_image
Technical line drawing of a mechanical gear assembly with no visible text or symbolsnatural_image
Simple diagram showing a block connected by a line to a rectangle, with no text or symbols present.natural_image
Simple diagram showing a block connected to a line with a gray band, no text or symbols presentnatural_image
Technical line drawing of a mechanical component with concentric circles and a shaft (no text or symbols)robustes Seil
natural_image
Technical line drawing of a mechanical component with concentric circles and a shaft (no text or symbols)leichtes Seil
natural_image
Simple line drawing of a circular device with a sensor and connecting wires (no text or symbols)natural_image
Technical line drawing of a mechanical gear assembly with no visible text or symbolsnatural_image
Simple diagram of a lever system with a weight and a hanging block (no text or symbols)natural_image
Simple diagram showing a block connected to a line with a gray hanging part, no text or symbols present.natural_image
Technical line drawing of a mechanical component with concentric circles and a shaft (no text or symbols)ciężka lina
natural_image
Technical line drawing of a mechanical component with concentric circles and a shaft (no text or symbols)lekka lina
natural_image
Simple line drawing of a circular object with internal components and a curved line extending from it (no text or symbols)natural_image
Technical line drawing of a mechanical gear assembly with no visible text or symbols8.2 Wciąganie
natural_image
Simple diagram showing a block connected by a line to a rectangle, with no text or symbols present.natural_image
Simple line diagram showing a block connected to a rectangle via a diagonal line (no text or symbols)natural_image
Technical line drawing of a mechanical component with concentric circles and a shaft (no text or symbols)cabo pesado
natural_image
Technical line drawing of a mechanical component with concentric circles and a shaft (no text or symbols)cabo leve
natural_image
Diagram of a circular device with internal components and a curved line, no text or symbols presentRemover o cabo

natural_image
Technical line drawing of a mechanical gear assembly with no visible text or symbols8.2 Rebocar
natural_image
Simple diagram of a lever system with a weight and a hanging block (no text or symbols)Velleman® Service and Quality Warranty
Since its foundation in 1972, Velleman® acquired extensive experience in the
electronics world and currently distributes its products in over 85 countries.
All our products fulfil strict quality requirements and legal stipulations in the EU. In
order to ensure the quality, our products regularly go through an extra quality check, both by an internal quality department and by specialized external organisations. If, all precautionary measures notwithstanding, problems should occur, please make appeal to our warranty (see guarantee conditions).
General Warranty Conditions Concerning Consumer Products (for EU):
- All consumer products are subject to a 24-month warranty on production flaws and defective material as from the original date of purchase.
- Velleman® can decide to replace an article with an equivalent article, or to refund
the retail value totally or partially when the complaint is valid and a free repair or
replacement of the article is impossible, or if the expenses are out of proportion.
You will be delivered a replacing article or a refund at the value of 100% of the
purchase price in case of a flaw occurred in the first year after the date of purchase and delivery, or a replacing article at 50% of the purchase price or a refund at the value of 50% of the retail value in case of a flaw occurred in the second year after the date of purchase and delivery.
• Not covered by warranty:
- all direct or indirect damage caused after delivery to the article (e.g. by oxidation.
shocks, falls, dust, dirt, humidity...), and by the article, as well as its contents (e.g.
data loss), compensation for loss of profits:
- consumable goods, parts or accessories that are subject to an aging process during
normal use, such as batteries (rechargeable, non-rechargeable, built-in or
replaceable), lamps, rubber parts, drive belts... (unlimited list);
- flaws resulting from fire, water damage, lightning, accident, natural disaster, etc....;
- flaws caused deliberately, negligently or resulting from improper handling, negligent
maintenance, abusive use or use contrary to the manufacturer's instructions;
- damage caused by a commercial, professional or collective use of the article (the
warranty validity will be reduced to six (6) months when the article is used
professionally);
- damage resulting from an inappropriate packing and shipping of the article;
- all damage caused by modification, repair or alteration performed by a third party
without written permission by Velleman®.
- Articles to be repaired must be delivered to your Velleman® dealer, solidly packed (preferably in the original packaging), and be completed with the original receipt of purchase and a clear flaw description.
- Hint: In order to save on cost and time, please reread the manual and check if the
flaw is caused by obvious causes prior to presenting the article for repair. Note that
returning a non-defective article can also involve handling costs.
• Repairs occurring after warranty expiration are subject to shipping costs.
• The above conditions are without prejudice to all commercial warranties.
The above enumeration is subject to modification according to the article (see article's manual).