60083 - Pest control Gardigo - Free user manual and instructions
Find the device manual for free 60083 Gardigo in PDF.
| Product Type | Animal Water Jet Repellent |
| Brand | Gardigo |
| Model | 60083 |
| Power Supply | 2 AA batteries (not included) |
| Sensor | PIR sensor (passive infrared) |
| Detection Angle | Horizontal: 100°, Vertical: 65° |
| Motion Detector Range | Up to 10 m (adjustable) |
| Water Jet Range | Up to 10 m (depends on water pressure) |
| Jet Spray Angle | Up to 170° (adjustable via clips) |
| Max. Water Pressure | 8 bar |
| Protection Rating | IP X6 |
| Operating Temperature | 0 °C to +50 °C, ≤ 90 % RH |
| Storage Temperature | 0 °C to +50 °C, ≤ 90 % RH |
| Water Consumption per Jet | Equivalent of 2 to 3 cups of water |
| Package Contents | Repellent, 2-part stake, hose connector, plug, manual |
| Intended Use | Deter animals with water jet (outdoor) |
| Maintenance | Clean with damp cloth, no abrasive products |
| Warranty | Warranty on material and manufacturing defects |
| After-Sales Service | service@gardigo.de |
| Weight (approx.) | 0.5 kg |
| Dimensions (approx.) | 20 x 15 x 10 cm |
Frequently Asked Questions - 60083 Gardigo
User questions about 60083 Gardigo
0 question about this device. Answer the ones you know or ask your own.
Ask a new question about this device
Download the instructions for your Pest control in PDF format for free! Find your manual 60083 - Gardigo and take your electronic device back in hand. On this page are published all the documents necessary for the use of your device. 60083 by Gardigo.
USER MANUAL 60083 Gardigo
natural_image
Black Garotio air purifier device with mounted sensor and control panel (no visible text or symbols)DE Gebrauchsanweisung 3
GB Instruction manual 7
FR Notice d'utilisation 10
ES Manual de instrucciones 13
IT Istruzioni per l'uso 16
PRODUKTZEICHNUNG

Gebrauchsanweisung
Art.-Nr. 60083
Stand: 12/16
thank you for choosing one of our quality products. In the following, we will explain the functions and operation of our product. Please take the time to read through the instructions carefully. Please take some time to read through the instructions carefully. Please note all the included safety and operating instructions. Keep this manual safe and ensure that you include it when passing on the product on to a third party. If you have any questions or suggestions about this product, please contact your supplier or our service team.
We would appreciate it if you would recommend us to others, and we hope you enjoy using this unit.
1. Designated use
The Water Animal-repellent is designed as an animal repellent. The animal passing the device is startled by a jet of water. The water jet is triggered by a PIR sensor. The device is powered by batteries. Any use other than the specified is not permitted! No liability will be taken for any damage or consequential damages caused by improper use and/or not following the instructions and/or technical modifications and in consequence the warranty will expire.
2. Important notes on operation and use
The device does not repel all animals immediately. The emitted water jet will only startle the animals and make them feel uncomfortable. After some repetitions the animals will move to other areas which appear more quiet and pleasant. The reach of the water jet depends on the water pressure and the adjustments made to the sprayer. The spray angle can be adjusted up to 170°. The product can easily be mounted and is an ideal protection against unwanted animals. The device is environmentally friendly and does not have any harmful effect on the animals, as it is only a burst of water which is used to startle them. Every trigger alarm uses 2 – 3 cups of water. Please make sure that the PIR motion sensor is not covered
and has an unobstructed view of the area you're wishing to control. It is not recommended to use the device in temperatures lower than 5^ C.
3. Safety instructions
- Electrical appliances, packaging materials, etc. do not belong in the hands of children.
- The device may only be used with the stated voltage: 2 x AA batteries.
- If repairs are needed, only original spare parts may be used to avoid serious damage.
- It must be determined if the device is suitable for the respective use.
- The use of this device is not designed for use by persons (including children under 8 years) with reduced physical, sensory or mental capabilities, or the lack of experience or lack of knowledge, unless they are supervised or have been instructed in the use of the device by a person responsible for their safety.
- If you do not use the device for an extended period of time, remove the batteries and store them accordingly.
- Batteries should not be used in temperatures under 0^ C. They may become damaged and lose their capacity.
- Keep these instructions in a safe place and pass them on when giving the device to a third party.
- This unit is suitable for outdoor use.
- Please make sure that the connected hosepipe is laid out in such a way, that it does not become a tripping hazard.
4. Contents
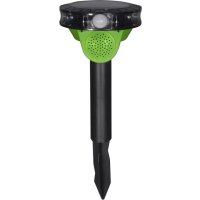
• Water Animal-repellent
- Sprinkler unit
- Ground spike, 2-parts
• Standard connector for garden hose
- Stopper Cap
- Instruction manual
5. Getting started
The Gardigo Water Animal-repellent, Solar is powered by batteries. The garden hose is connected with a quick snap connector.
Inserting the batteries:
- You will need two Mignon (AA) batteries.
- Open the cover of the battery compartment [located below the PIR sensor by sliding it downwards.
- Open the battery compartment by lifting up the latch.
- Insert the batteries. Pay attention to the polarity. The minus end of the battery always connects to the spring in the battery compartment.
- Close the battery compartment [7] Make sure that the rubber sealing is in the groove and has not been twisted.
- Slip the cover of the battery compartment back on.
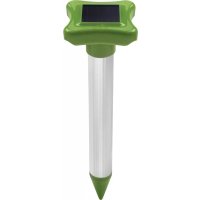
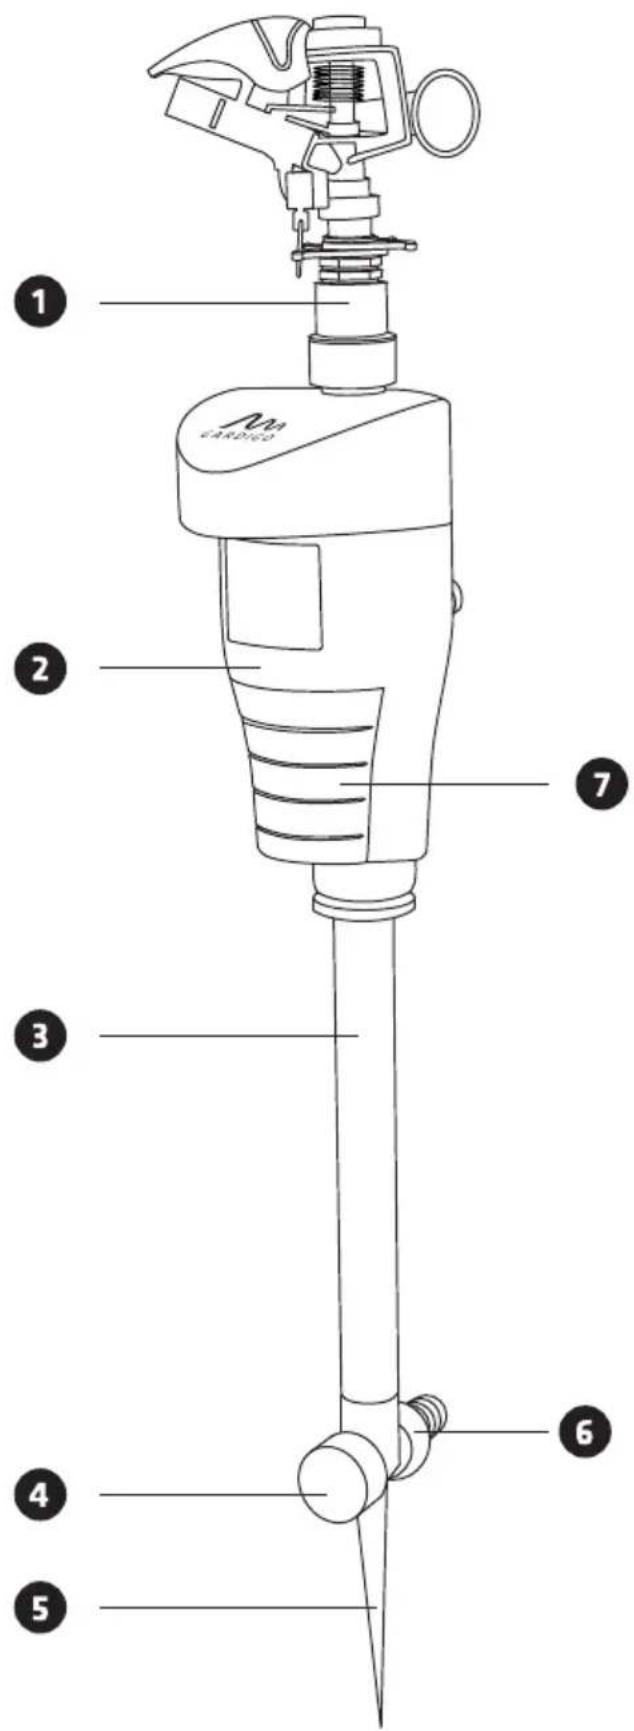
Assembly:
- Screw the plastic tube to the connector at the bottom of the device.
- Screw the metal spit to the plastic tube [8]
- Screw the quick connector for the garden hose to the metal spit [6]
- Screw the spraying unit 1 to the top of the device.
- The repellent can now be set up in the garden or near the pond.
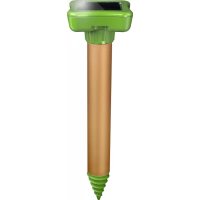
Operation:
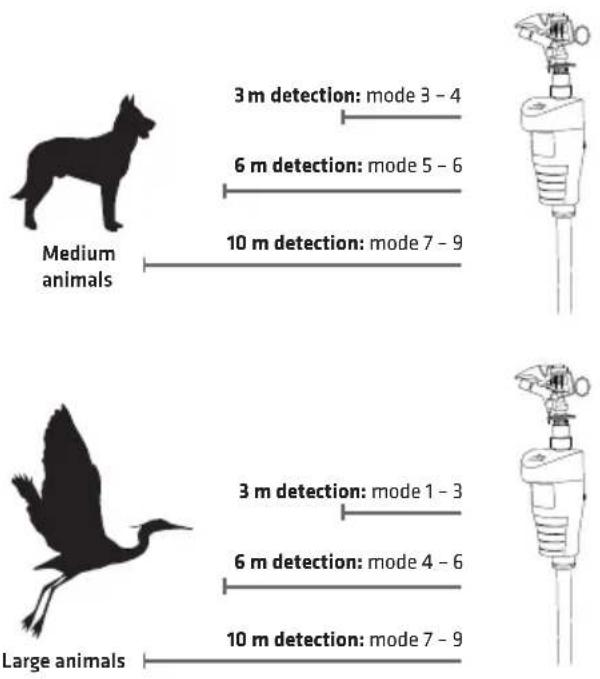
To set up the Water Repellent choose a spot that will oversee the area you want to clear of animals. Make sure to look for a position where the animals will walk across the sensors viewing area rather than walking directly towards the sensor. Make sure that the view of the sensor is not obstructed by leaves or foliage and that the surface of the sensor is clean. When adjusting sensor sensitivity you need to consider what kind of animal you want to scare away and the distance of detection (see below). It is possible to adjust the angle and the distance of the waterspout. Make sure that the sensor has a stable stand, as the recoil during the waterspout can be quite strong. Place the ground spit into the ground. If the earth is too hard we recommend to soften it by soaking it with water. The sensor should not be higher than 1 m above the area that is being controlled. If you want to place the device in an area that has no soil, we recommend the use of an umbrella stand.
Note: False alarms can be triggered by objects that are warmer than the surroundings, by strong water movement, by rapid temperature changes and by house pets. On very hot days it may occur that an animal is not detected as the surrounding temperature is equal to that of the body temperature. This function is normal for a PIR sensor.
Connect your garden hose to the quick connector on the spike [15] Make sure that the hose and all connections are in good condition and that there is no leakage. Make sure that there is no sand or other debris is in the garden hose. If you do not want to use the second outlet in the spike, then close this with the supplied cap [4] You should check the function of the device, before opening the water tap. Switch the device to position 9 and wave your hand in front of the motion sensor. If you hear a silent click, then the device has been activated and the valve for the water has switched. Open your water tap to full.
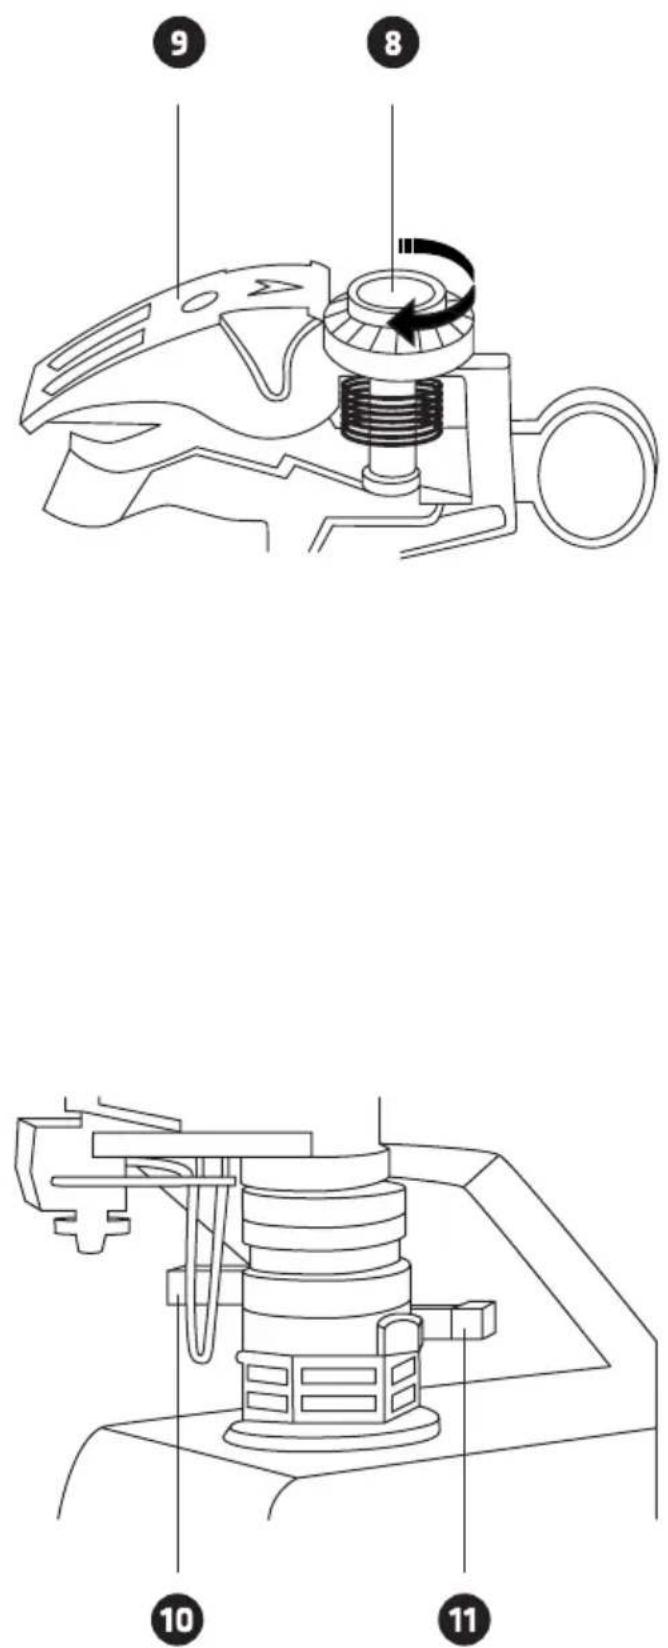
Controlling the waterspout:
The motion sensor [12] has a horizontal detection angle of 100^ and vertical detection angle of 65^ . With a water pressure of 8 bar, the waterspout can reach up to 10 m. The distance can be adjusted and reduced. This should be done on-site. There are generally two ways of adjusting the water spray:
- Distance: turn the plastic screw the top of the sprinkler unit [The further the water-blocker [] is extended, the shorter the distance of the water spray.
- Scattering angle: at the base of the sprinkler unit you will find two clips [10] biting the scattering angle of the spray unit. These can be easily turned and adjusted when they are slightly pulled apart. Each clip defines the stopper for left [10] and right []. The metal clip is the detector. When this hits one of the clips it will change the direction of the sway.
Adjusting the sensitivity of the motion sensor:
At the back of the device you will find the on-off/sensitivity button [●] The adjustments are also dependent on the surroundings and the activity of the sun.
- Mode 0 (full left): the device is switched off but will still charge the batteries through the solar panel.
- Mode 1–9: Increases the sensitivity of the motion sensor.
Small animals
3m detection: mode 5 - 7
T
6 m detection: mode 8 - 9
Tip: if you want to reduce or direct the detecting angle of the sensor you can do this by covering parts of the lens with a light proof, adhesive foil.
6. Specifications
- Adjustable spray coverage
• Distance: up to 10m (depending on water pressure) - PIR-Sensor
• Sensitivity control for motion sensor
• Power supply: 2 x AA mignon batteries
• Protection class: IP X6 - Operating temperature:
-0°C to +50°C and ≤ 90% humidity
• Storage temperature: -0^ C to +50^ C and ≤ 90% humidity
7. General information
- The CE conformity has been proven and the declarations are deposited with us.
- The safety and conformity reasons it is not permitted to rebuild or modify the device and/or use it in any other way than described above.
- This device has a warranty of two years. As Gardigo has no control of the correct of appropriate installation and use of the device the warranty can only be applied to a fully equipped device in prime condition. We assume neither warranty nor liability for damages or following damages related to this product. This applies especially if it has been modifications or repairs have been made by the customer, if the circuitry has been modified or components have been used other than the original components and/or if the operation
of the device has been incorrect, careless or abusive.
- If you have any questions or suggestions about this product, please contact your dealer.
- Clean the device with a soft damp cloth. Do not use any detergents.
8. Guarantee
The guarantee covers the elimination of all shortcomings, which can be attributed to imperfect materials or manufacturing errors. As Gardigo has no influence on the correct and proper assembly or operation, we can only guarantee the quality of the components – and that the product is complete. We assume neither a guarantee nor liability for damage or resulting damage in connection with this product. This applies in particular when amendments or attempts to repair the product have been conducted, circuits have been modified or other components have been used or damage has been caused through operator errors, negligent handling or misuse.
Service Hotline: Phone +49 (0) 53 02 9 34 87 88
Your Gardigo-Team

Environmental protection notice
At the end of its life span this product may not be disposed as normal household waste but must be disposed of at a collecting place for recycling of electrical and electronic equipment. The icon on the product, in the manual, or on the packing points to this fact. The materials are recyclable according to their labelling. Through reusing, material recycling, or other forms of utilisation of old devices you make an important contribution to the protection of the environment. Please ask the local administration for the responsible waste disposal centre.

Do not throw batteries or rechargeable batteries into household waste!
Consumers are legally obligated to return used and rechargeable batteries, whether they contain harmful substances* or not, to designated recycling areas, disposal sites, or stores where batteries/rechargeable batteries can be bought. By doing so, you are fulfilling all legal battery recycling and disposal obligations and are contributing to a better environment. Make sure batteries are completely discharged before disposing!
*marked with: Cd = cadmium
Hg = mercuric
Pb = lead
WASSER-TIERABWEHR