Babyline 8.2 - Baby monitors Lionelo - Free user manual and instructions
Find the device manual for free Babyline 8.2 Lionelo in PDF.
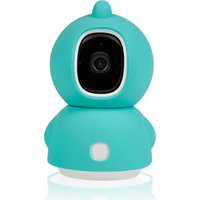
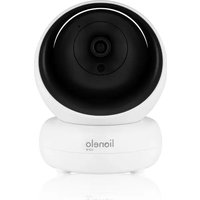
| Product type | Video baby monitor |
| Brand | Lionelo |
| Model | Babyline 8.2 |
| Camera | Lens, light sensor, microphone, speaker, night vision, temperature sensor |
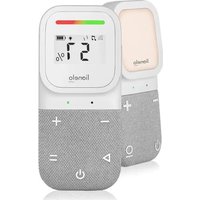
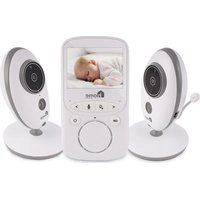
| Parent unit | LCD screen, antenna, speaker, intercom microphone, rechargeable battery |
| Power supply | 5V USB power adapter (included) x2 for camera and monitor |
| Monitor battery life | Approximately 3.5 hours full charge, battery life not specified |
| Range | Not specified |
| Main functions | Video and audio transmission, VOX mode (energy saving), cry detection (Cry Alert), lullabies, intercom, temperature alarm, feeding reminder |
| Settings | Date/time, language, Cry Alert sensitivity, sound alarms, temperature unit |
| Adding cameras | Ability to pair multiple cameras (not specified how many) |
| VOX mode | By default, screen turns off after 30 seconds of silence, wakes up on sound |
| Lullabies | 5 built-in lullabies, loop play or selection |
| Temperature | Display and programmable alarm (high/low) |
| Feeding reminder | Programmable alarm at a fixed time |
| Maintenance and cleaning | Clean with a dry, soft cloth. Do not immerse. |
| Safety | Keep out of baby's reach (distance >1m). Do not use outdoors. Do not expose to water or heat. |
| Spare parts | USB power adapters, USB cables |
| Repairability | Contact customer service. No user-serviceable parts. |
| General information | Compliant with directives 2014/53/EU, 2014/30/EU, 2014/35/EU, 2011/65/EU. Recycle via WEEE. |
Frequently Asked Questions - Babyline 8.2 Lionelo
User questions about Babyline 8.2 Lionelo
0 question about this device. Answer the ones you know or ask your own.
Ask a new question about this device
Download the instructions for your Baby monitors in PDF format for free! Find your manual Babyline 8.2 - Lionelo and take your electronic device back in hand. On this page are published all the documents necessary for the use of your device. Babyline 8.2 by Lionelo.
USER MANUAL Babyline 8.2 Lionelo
natural_image
Line drawing of a digital camera module with lens, screen, and control buttons (no text or symbols)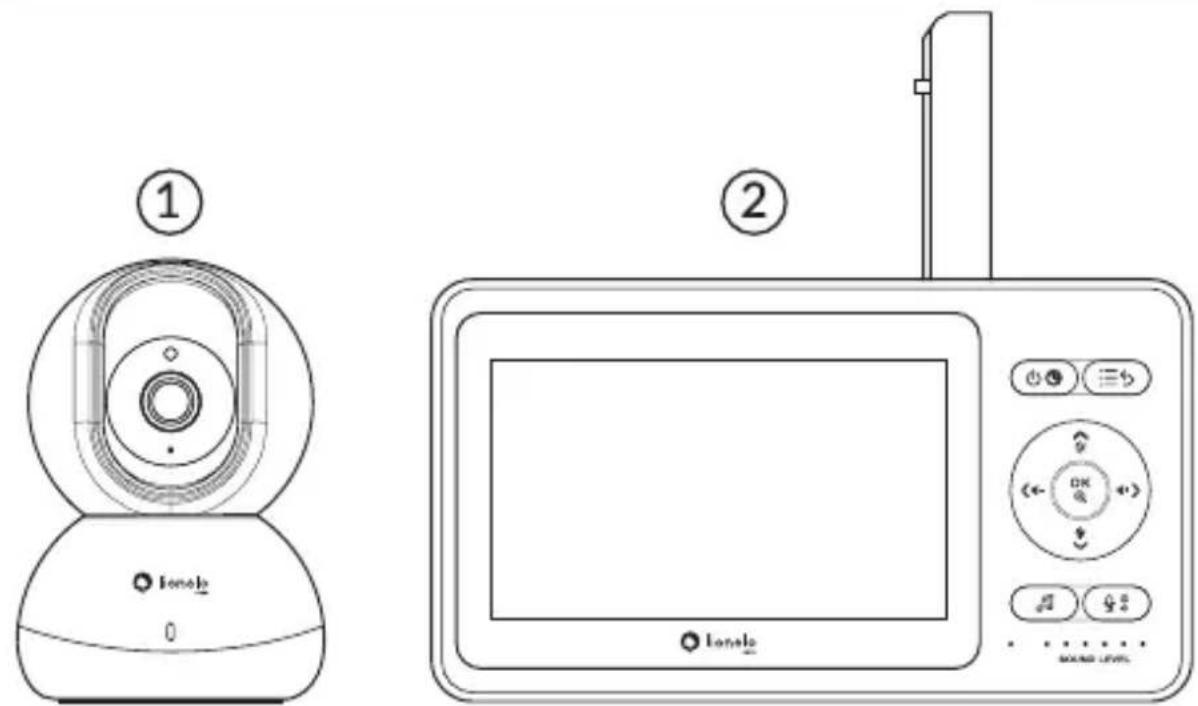
text_image
Technical diagram showing two types of digital camera devices with labeled parts and control buttons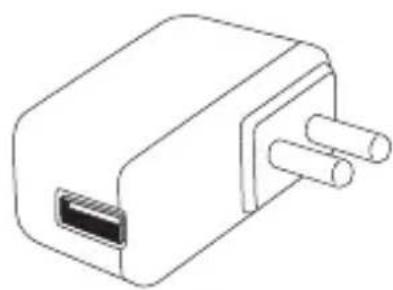
natural_image
Line drawing of a rectangular electronic component with two leads (no text or symbols)③
natural_image
Line drawing of a USB cable with two connectors (no text or symbols)④

text_image
User Manual⑤
A
text_image
Technical diagram showing two views of a device with numbered components, likely illustrating a mechanical or electronic assembly.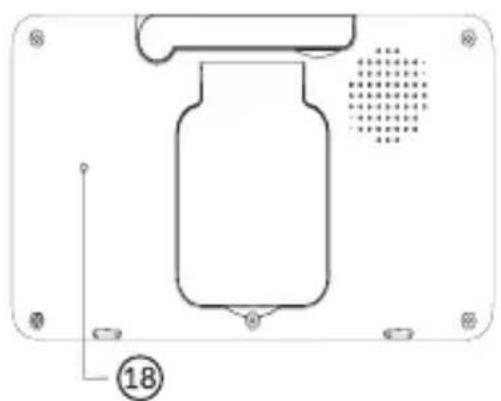
natural_image
Technical line drawing of a mechanical component with mounting holes and a central cylindrical body (no text or symbols)
text_image
Diagram of a digital camera with numbered labels pointing to the screen, keypad, and control buttons.C
natural_image
Simple line drawing of a metal railing with vertical bars and two circular base markers (no text or symbols)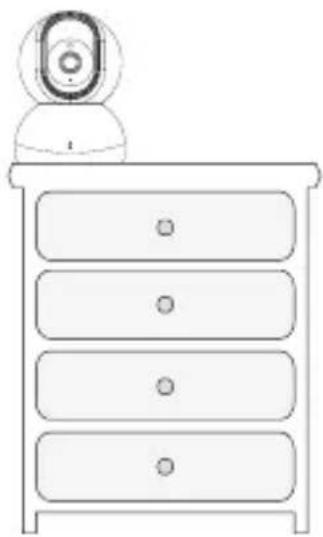
natural_image
Line drawing of a four-tiered cabinet with a webcam on top (no text or symbols)1
natural_image
Diagram showing a device with a plug and connector, alongside a magnified view of its internal components (no text or symbols)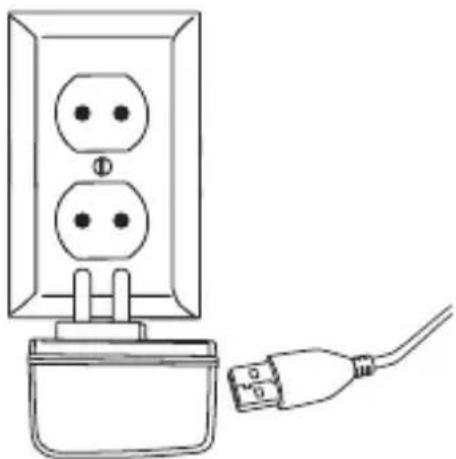
natural_image
Line drawing of a wall socket connected to a plug, showing two socket holes and a cable (no text or symbols)32
natural_image
Diagram of a smartphone showing the cable connector and its internal structure (no text or symbols)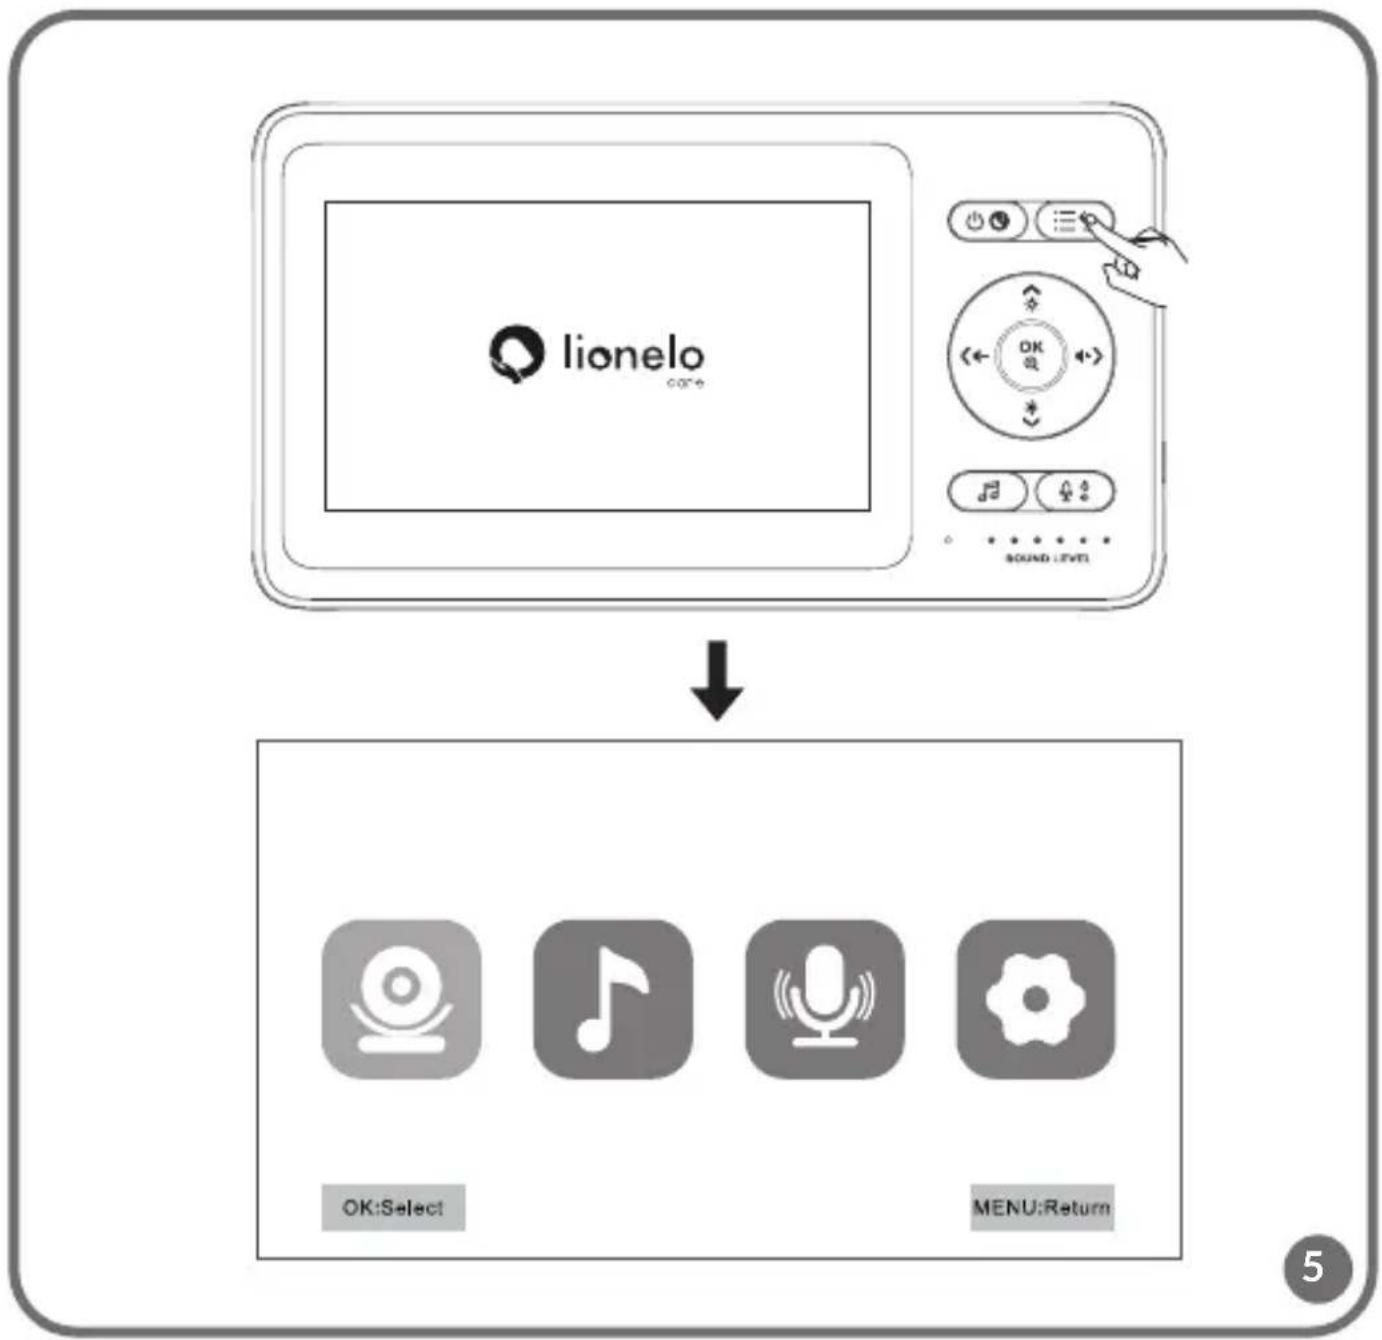
flowchart
graph TD
    A["lionelo core"] --> B["OK:Select"]
    A --> C["MENU:Return"]
    D["SOUND: LSTM"] --> E["User Interface"]
flowchart
graph LR
    A["OK:Select"] --> B["MENU:Return"]
    B --> C["OK:Select"]
    C --> D["MENU:Return"]
text_image
Start pairing, please press the SET button on the camera.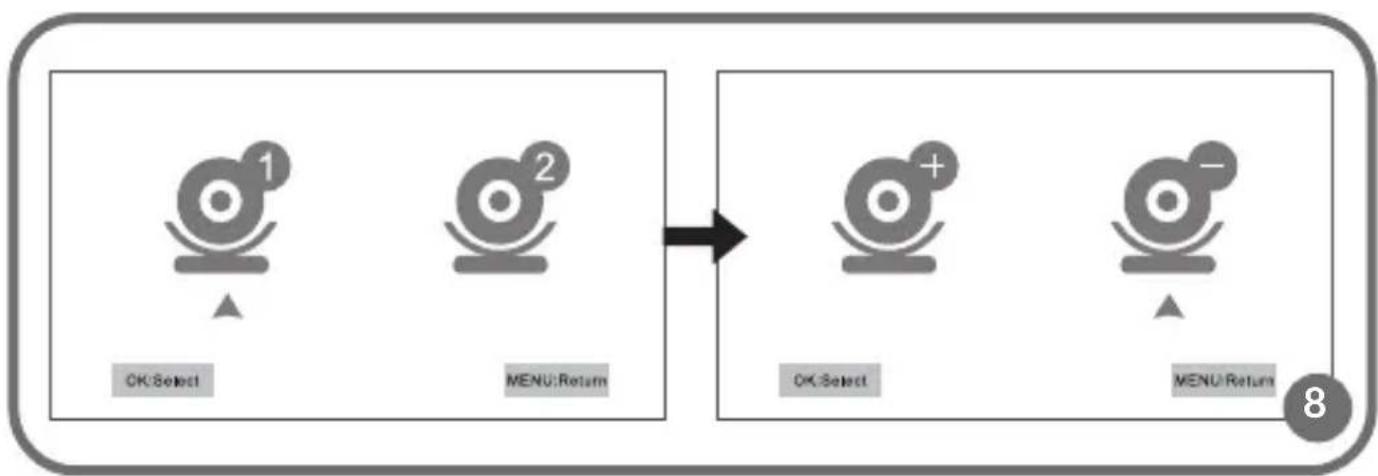
flowchart
graph LR
    A["OK:Select"] --> B["MENU:Return"]
    B --> C["OK:Select"]
    C --> D["MENU:Return"]

text_image
OK:Select MENU:Return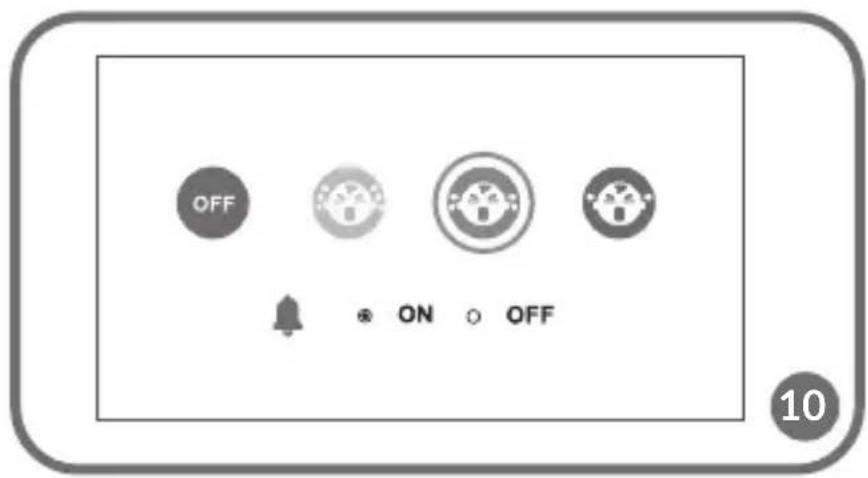
text_image
OFF ON OFF 10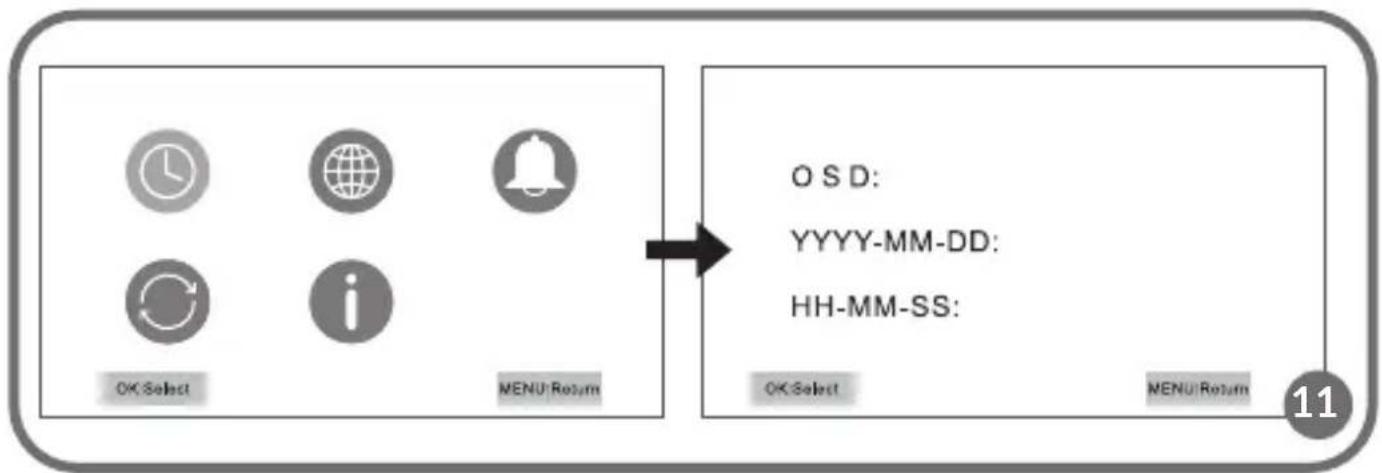
flowchart
graph LR
    A["OK Select"] --> B["MENU Return"]
    C["ON/OFF"] --> D["Menu"]
    E["ON/OFF"] --> F["Menu"]
    G["ON/OFF"] --> H["Menu"]
    I["ON/OFF"] --> J["Menu"]
    K["ON/OFF"] --> L["Menu"]
    M["ON/OFF"] --> N["Menu"]
    O["ON/OFF"] --> P["Menu"]
    Q["ON/OFF"] --> R["Menu"]
    S["ON/OFF"] --> T["Menu"]
    U["ON/OFF"] --> V["Menu"]
    W["ON/OFF"] --> X["Menu"]
    Y["ON/OFF"] --> Z["Menu"]
    AA["ON/OFF"] --> AB["Menu"]
    AC["ON/OFF"] --> AD["Menu"]
    AE["ON/OFF"] --> AF["Menu"]
    AG["ON/OFF"] --> AH["Menu"]
    AI["ON/OFF"] --> AJ["Menu"]
    AK["ON/OFF"] --> AL["Menu"]
    AM["ON/OFF"] --> AN["Menu"]
    AO["ON/OFF"] --> AP["Menu"]
    AQ["ON/OFF"] --> AR["Menu"]
    AS["ON/OFF"] --> AT["Menu"]
    AU["ON/OFF"] --> AV["Menu"]
    AW["ON/OFF"] --> AX["Menu"]
    AY["OS D: YYYY-MM-DD: HH-MM-SS: OK Select MENU Return 11"]
flowchart
graph LR
    A["OK:Select"] --> B["MENU:Return"]
    C["ON"] --> D["OK:Select"]
    E["OFF"] --> F["MENU:Return"]
flowchart
graph LR
    A["OK:Select"] --> B["MENU:Return"]
    B --> C["OK:Select"]
    C --> D["MENU:Return"]
    style A fill:#f9f,stroke:#333
    style B fill:#f9f,stroke:#333
    style C fill:#ccf,stroke:#333
    style D fill:#ccf,stroke:#333

flowchart
graph LR
    A["OK:Select"] --> B["MENU:Return"]
    C["OK:Select"] --> D["MENU:Return"]
    style A fill:#f9f,stroke:#333
    style B fill:#f9f,stroke:#333
    style C fill:#f9f,stroke:#333
    style D fill:#f9f,stroke:#333

flowchart
graph LR
    A["OK:Select"] --> B["MENU:Return"]
    C["YES"] --> D["NO"]
    E["NO"] --> D
    style A fill:#f9f,stroke:#333
    style B fill:#ccf,stroke:#333
    style C fill:#cfc,stroke:#333
    style D fill:#fcc,stroke:#333
flowchart
graph LR
    A["OK:Select"] --> B["MENU:Return"]
    C["Rx: Rx Date:"] --> D["Tx: Tx Date:"]
    E["Tx: Tx Date:"] --> F["Tx: Tx Date:"]
    G["MENU:Return"] --> H["16"]
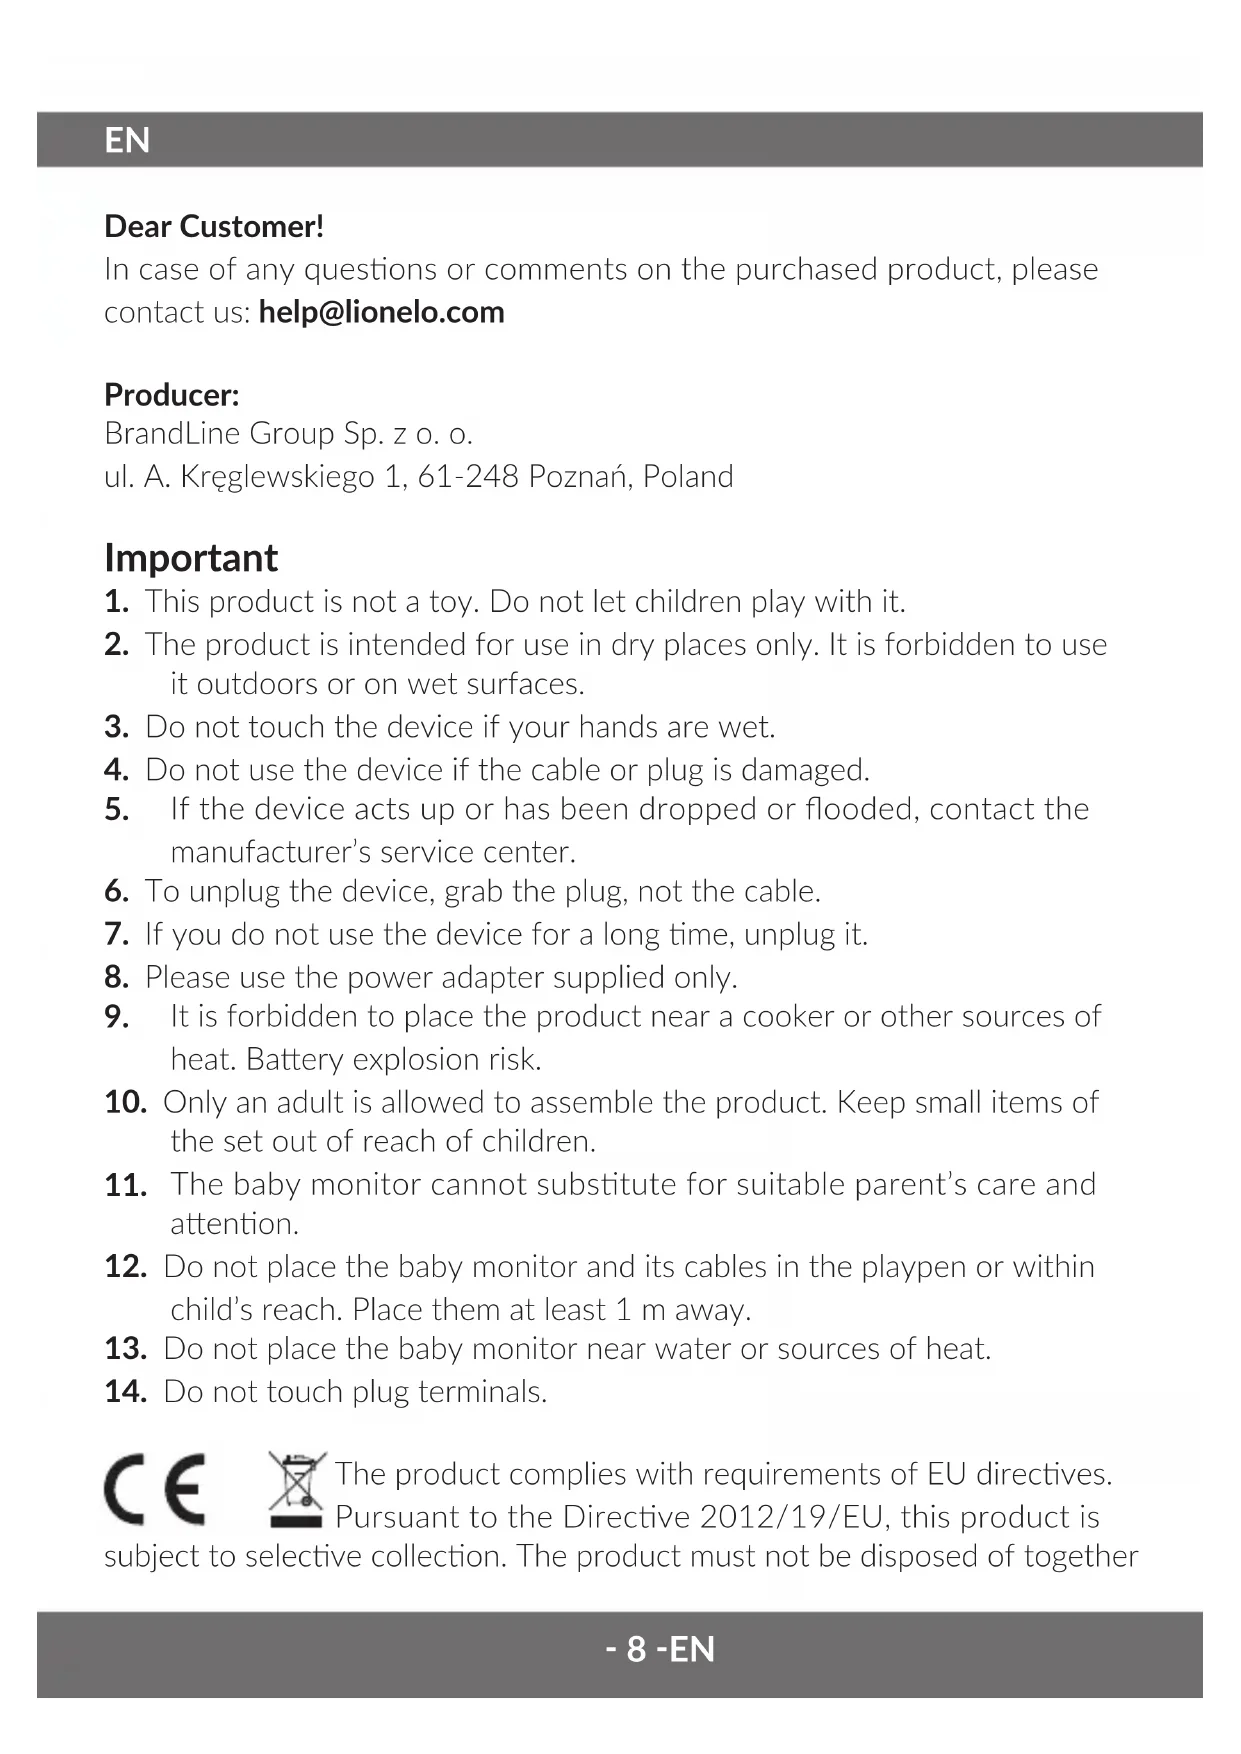
Dear Customer!
In case of any questions or comments on the purchased product, please
contact us: help@lionelo.com
Producer:
BrandLine Group Sp. z o. o.
- This product is not a toy. Do not let children play with it.
- The product is intended for use in dry places only. It is forbidden to use it outdoors or on wet surfaces.
- Do not touch the device if your hands are wet.
- Do not use the device if the cable or plug is damaged.
- If the device acts up or has been dropped or flooded, contact the manufacturer's service center.
- To unplug the device, grab the plug, not the cable.
- If you do not use the device for a long time, unplug it.
- Please use the power adapter supplied only.
- It is forbidden to place the product near a cooker or other sources of heat. Battery explosion risk.
- Only an adult is allowed to assemble the product. Keep small items of the set out of reach of children.
- The baby monitor cannot substitute for suitable parent's care and attention.
- Do not place the baby monitor and its cables in the playpen or within child's reach. Place them at least 1 m away.
- Do not place the baby monitor near water or sources of heat.
- Do not touch plug terminals.


The product complies with requirements of EU directives.
Pursuant to the Directive 2012/19/EU, this product is
subject to selective collection. The product must not be disposed of together
with domestic waste as it may pose a threat to the environment and human health. The worn-out product must be handed over to electrics and electronics recycling point.
Set (fig. A)
- Camera
- Display unit
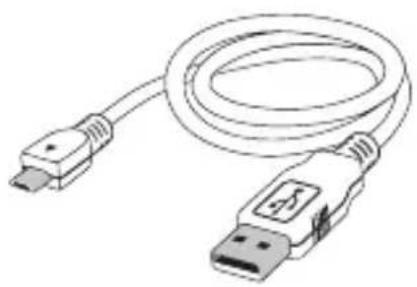
- Power cable USB x2
- Adapter x2
- Operating manual
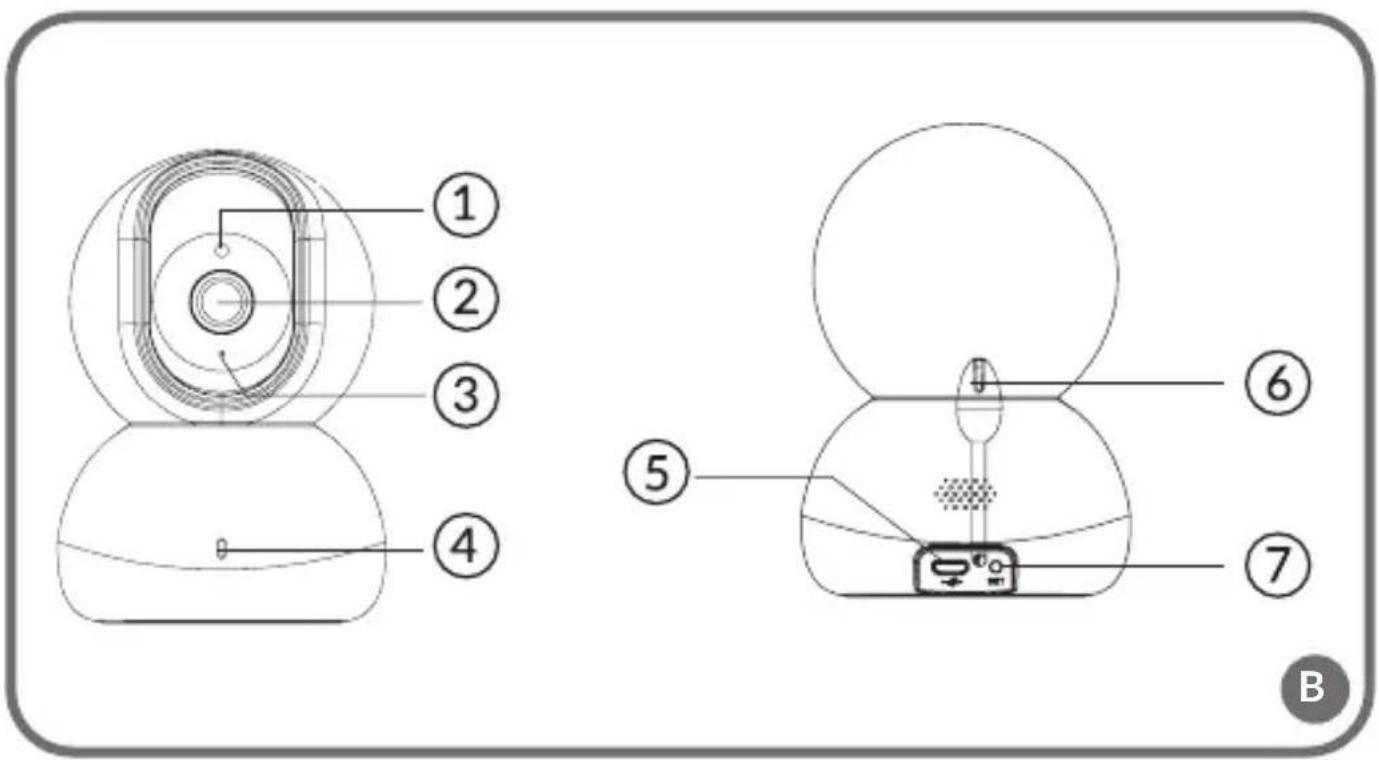
Description of the device (fig. B, C)
- Light-sensitive detector
- Lens
- Camera microphone
- Camera LED light
- Camera power port
- Temperature sensor
- SET key
- Aerial
- ON/OFF/ECO mode
- Menu/return key
- Up/down keys
- Left/right keys
- Play music key
- Display charging port
- Display microphone
-
Reset key
-
Intercom (long press)/change settings (short press)
-
Charging/sounds volume indicator
Explanation of icons on the screen
| No connection between the camera and display unit | |
 | Signal strength |
 | Room temperature |
 | Battery status |
| [XDWG] | Temperature alarm active |
 | Baby feeding reminder active |
 [68X0] [68X0] | Sound alarm active |
 | Camera not paired/camera unplugged |
 | Temperature alarm |
| [2882] | Baby feeding reminder |
 | Low battery |
| [STAT] [22V0] [02K1] [4C2S] [2HC6] [44Y6] SOUND LEVEL | Sound volume – five LEDs flash in greenCharging – the first LED on the right glows in red |
How to use
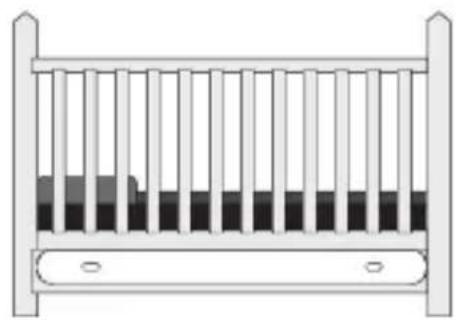
Put the camera in a desired place (e.g. on the table or shelf) and point the lens at the area you want to monitor (fig. 1).
NOTE! Do not place the camera within child's reach.
In case of any sound or image interference, reposition the camera and make sure there are no other electric devices nearby.
How to switch the camera on
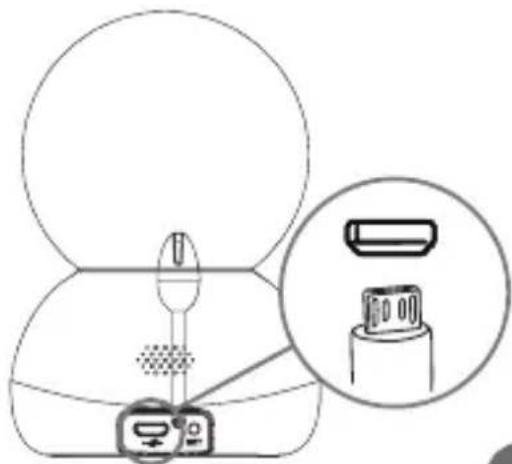
- Connect the USB power cable to the camera (fig. 2) and adapter (fig. 3), and then plug the camera in.
- The camera will activate automatically after you have supplied it with power. The camera LED light will turn green.
How to charge the display unit
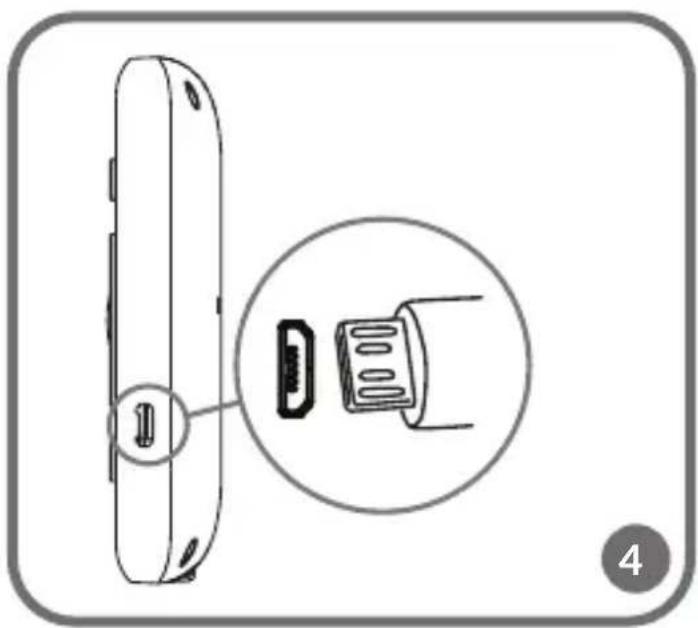
- If it is necessary to charge the device, connect the USB power cable to the display unit (fig. 4) and adapter, and then connect the display unit to the source of power.
- Full charging takes about 3,5 hours. The battery level icon on the display will stop flashing.
How to switch the display unit on
- Switch the display unit on by pressing the on/off key (9, fig. C).
- The display unit has been paired with the camera in the factory. If there is no image on the display unit despite connecting the camera to the source of power, please retake the pairing procedure as described in the subchapter – How to add and delete the camera.
- To gain access to the menu, press the menu key (fig. 5).
How to add and delete the camera
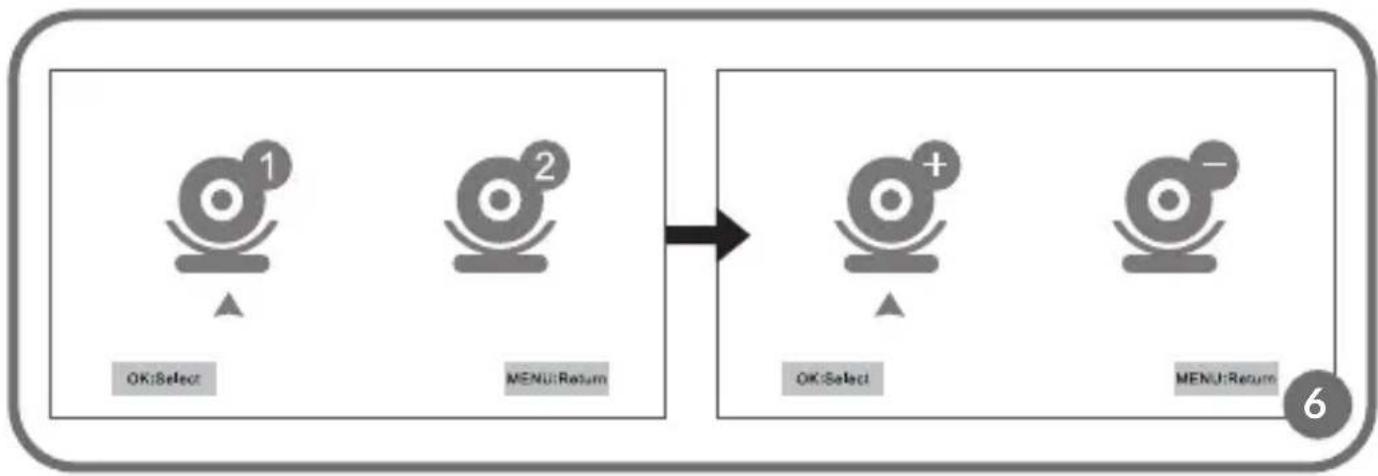
How to add the camera

- In the menu, select icon and press OK.
- From the list, select the camera which is to be added and press OK. Next choose camera adding (fig. 6).
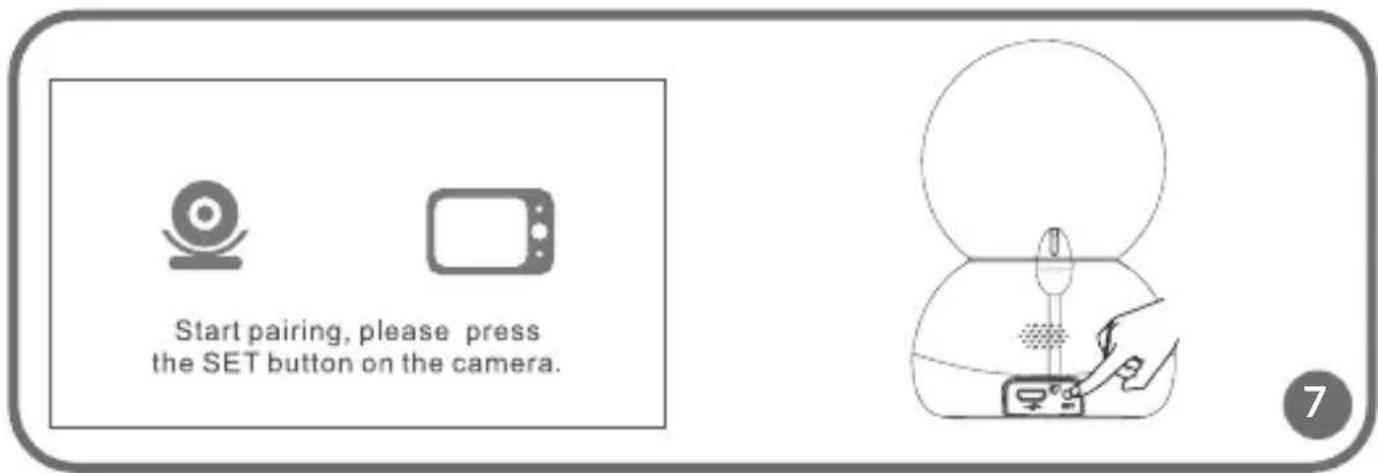
- When you can see a command on the screen (fig. 7), press SET on the camera (7, fig. B).
- When you have successfully paired the camera, the display unit will display image from the camera in real time.
- While using the device, the camera must be connected to the source of power.
How to delete the camera

- In the menu, select the icon and press OK.
- From the list select the camera which is to be deleted and press OK. Next choose camera deleting (fig. 8).
Lullabies
- In the menu, select

icon and press OK.
- The camera allows you to play five lullabies (fig. 9). Select the lullaby you want to play and press OK. To stop playing, press OK again.
- Select 🖼All icon to play all lullabies one after another.
- In the lullaby selection interface (fig. 9) you can use left/right keys (◀▶) to change the lullaby, and up/down keys (▲▼), to change the volume.
- You can enter the lullaby selection interface also by pressing the music playing key 🎩 (13, fig. C).
VOX mode
- VOX mode, a default mode in the device, allows you to save a battery.
- If the child is sleeping and the device cannot detect any sound in 30 seconds, the display unit will switch into the standby mode, and the image broadcast will be terminated. When the device can detect the sound, the image broadcast will be resumed. No sound alarm.
- When VOX mode is inactive, the image broadcast can be activated and deactivated manually through a switch. When the image broadcast is inactive, the display unit serves only to transmit sounds. No sound alarm.
- Cry alert function is available when VOX mode is active (fig. 12).
Cry alert
- The device can activate the alarm on the display unit and sound signal in case your child starts crying.
- In the menu, select icon and press OK.
- Select one of three cry sensitivity levels.
on and press OK.
Low

, medium


- Select „ON“ and next press OK (fig. 10).
- When the device can detect the child crying, the image broadcast will be resumed and the flashing icon will pop up in the screen, sound alarm will also be activated.
How to set the date and time
- In the menu, select icon and press OK.
- Select icon and press OK to set the date and time. Set the date and time and then press OK (fig. 11).
- OSD (on screen display): decide if the date and time are to be showed on the display screen (ON/OFF, fig. 11).
How to set the language
- In the menu, select icon and press OK.
- Select icon and press OK to set the language. Select the language and then press OK.
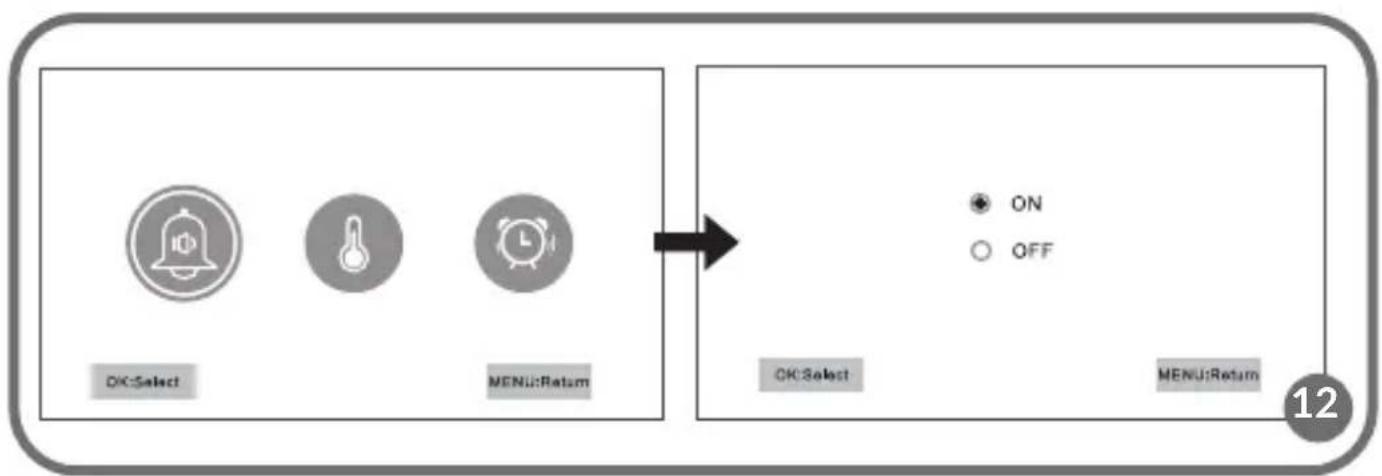
How to set alarms
- In the menu, select icon and press OK.
- Select icon and press OK to set alarms. Activate or deactivate the sound alarm (fig. 12).
- If the sound alarm is inactive, the temperature/feeding alarm will be displayed only on the screen, with no sound signal.
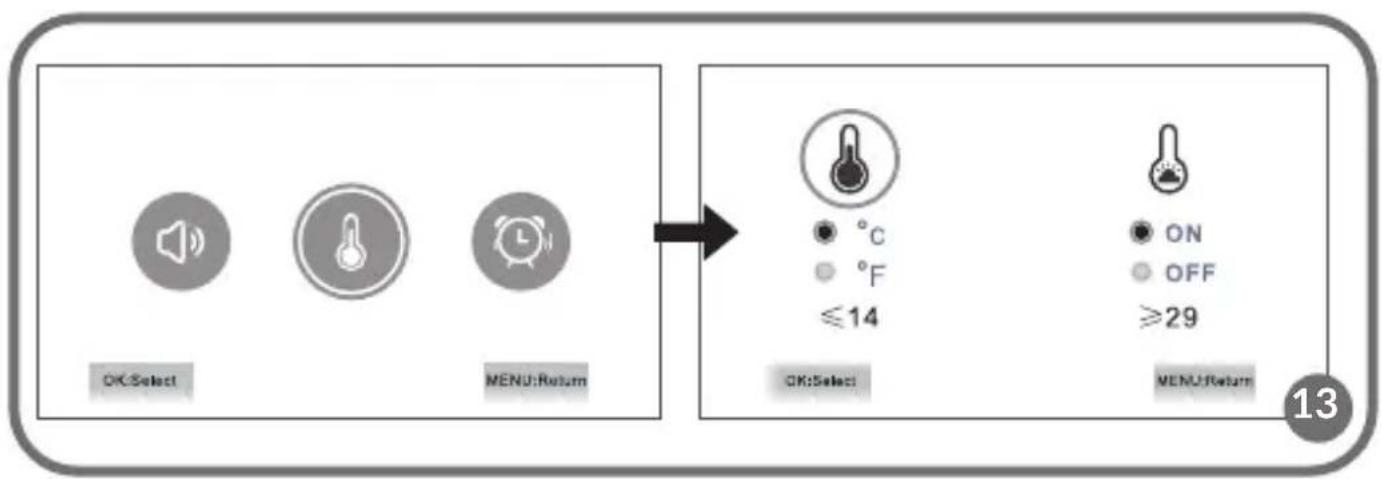
Temperature alarm
- The device can sound the alarm on the display unit when the temperature in the child's room is too low or too high.
- In alarm settings, select the temperature alarm (fig. 13).
- Choose the temperature unit (Celsius or Fahrenheit degrees) and press OK.
Baby feeding reminder
-
The device can sound the alarm on the display unit in order to remind you about the scheduled baby feeding.
-
In alarm settings, select the baby feeding reminder (fig. 14).
- Select alarm/alarms time and press OK.
How to restore the factory settings

-
In the menu, select icon and press OK.
-
Select 🤒 icon and press OK.
- The message on the screen will ask you to restore default settings. Choose „YES“ and press OK (fig. 15).
- NOTE! If you restore default settings, you will delete all previous values.
How to reset the device
If the display unit does not work properly, use a needle to press the reset key, located on the left side of the rear cover (18, fig. C). The device will activate again in a moment.
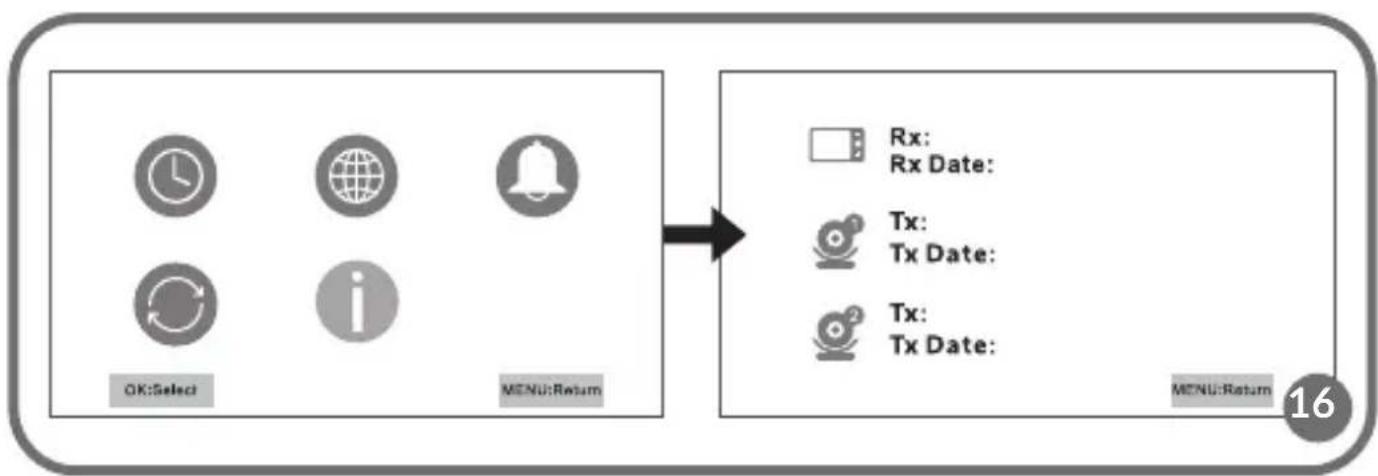
Information on the device

- In the menu, select icon and press OK.
- Select icon and press OK to see information on the device (fig. 16).
The pictures are for reference only. The real design of the products may differ from the pictures presented.
Drogi Kliencie!
EN: Simplified EU declaration of conformity
BrandLine Group Sp. z o. o. hereby declares that the “BABYLINE 8.2” product complies with the directive: 2014/53/EU - RED Directive, 2014/30/EU - EMC Directive, 2014/35/EU - LVD Directive, 2011/65/EU - RoHS Directive.
Full content of EU declaration of conformity is available on the following website: