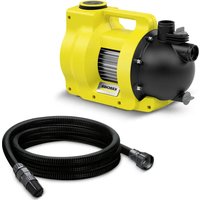
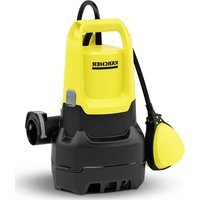
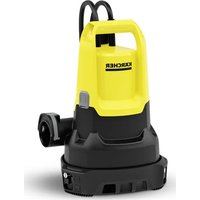
SP 9.500 Dirt - Pump Kärcher - Free user manual and instructions
Find the device manual for free SP 9.500 Dirt Kärcher in PDF.
| Product type | Dirty water pump |
| Brand | Kärcher |
| Model | SP 9.500 Dirt |
| Mains voltage | 230-240 V |
| Mains frequency | 50 Hz |
| Nominal power | 280 W |
| Maximum flow rate | 9 500 l/h |
| Pressure (max.) | 0.06 MPa (0.6 bar) |
| Delivery head (max.) | 6 m |
| Immersion depth (max.) | 7 m |
| Permissible liquid temperature | 5 °C to 35 °C |
| Max. particle size | 20 mm |
| Minimum liquid level (manual mode) | 60 mm |
| Residual liquid level | 25 mm |
| Weight (without accessories) | 3.8 kg |
| Authorized fluids | Fresh water with particles up to 20 mm, treated pool water, detergent solution |
| Main uses | Drainage, tank transfer, collection of spring or well water |
| Operating mode | Automatic (float switch) or manual |
| Maintenance | Rinse with clean water after use, clean exterior with a soft cloth |
| Storage | Empty and dry, protect from frost, store indoors |
| Warranty | According to the country's commercial conditions, contact authorized customer service |
Frequently Asked Questions - SP 9.500 Dirt Kärcher
User questions about SP 9.500 Dirt Kärcher
0 question about this device. Answer the ones you know or ask your own.
Ask a new question about this device
Download the instructions for your Pump in PDF format for free! Find your manual SP 9.500 Dirt - Kärcher and take your electronic device back in hand. On this page are published all the documents necessary for the use of your device. SP 9.500 Dirt by Kärcher.
USER MANUAL SP 9.500 Dirt Kärcher
natural_image
3D mechanical component diagram showing a pipe fitting with arrows indicating assembly or connection (no text or symbols)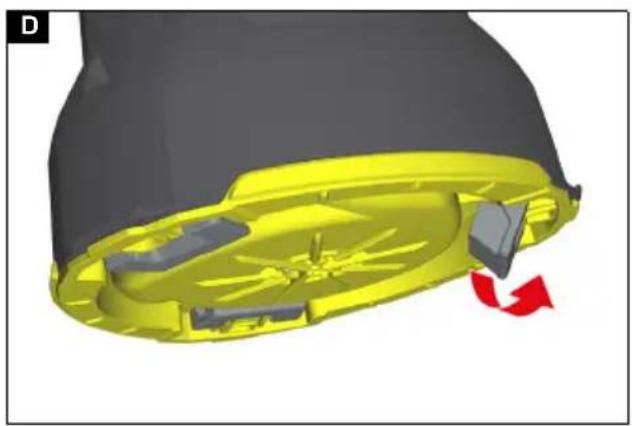
natural_image
3D rendered mechanical component with yellow and gray parts, showing internal structure and red directional arrows (no text or symbols)
natural_image
3D rendered mechanical component with yellow and gray surfaces, showing a small black arrow pointing to a specific feature (no text or symbols)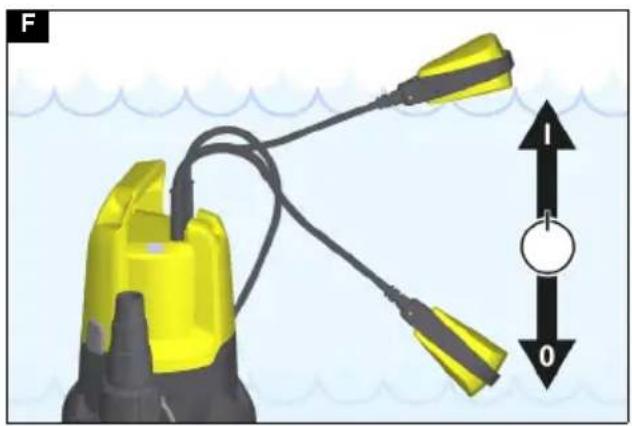
natural_image
Illustration of a yellow underwater spray gun with attached cables and a vertical scale indicator (no text or symbols)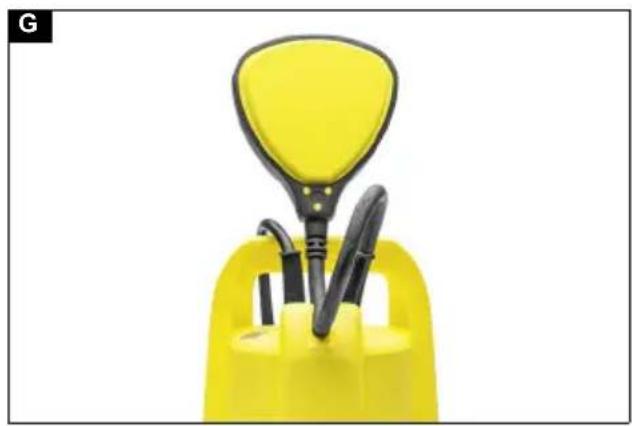
natural_image
Yellow plastic tool holder with black handle and three accessories (no text or symbols visible)Inhalt
H. Jenner
Chairman of the Board of Management
S. Reiser
Manager Regulatory Affairs & Certification
71364 Winnenden (Germany)
Tel.: +49 7195 14-0
Fax: +49 7195 14-2212
Winnenden, 2021/06/01
Contents
General notes.... 8
Intended use 9
Hazard levels 9
Environmental protection 9
Accessories and spare parts.... 9
Scope of delivery.... 9
Warranty....9
Description of the device.... 9
Initial startup.... 10
Operation 10
Care and maintenance.... 11
Transport.... 11
Storage.... 11
Troubleshooting guide.... 11
Technical data 12
Optimising the flow rate.... 12
Declaration of Conformity.... 12
General notes


Read these original operating instructions and the enclosed safety instructions before using the device for the first
time. Proceed accordingly.
Keep both books for future reference or for future owners.
Intended use
Only use the device in private households.
Intended use:
- Removal of water from building sections in the event of flooding
• Transferring and pumping water from containers
• Water removal from wells and shafts - Pumping fresh water out of boats and yachts
For notes on functional principle, see chapter Operation.
Permissible feed fluids
⚠️DANGER
Danger of death and risk of damage when pumping explosive, flammable or unsuitable substances!
Flammable or explosive substances may ignite or explode.
Unsuitable substances can damage the pump.
Do not pump explosive, flammable or corrosive liquids or gases (e.g. fuels, petroleum, nitro thinner) and do not pump fats, oils, salt water or waste water from sanitary facilities or water that has a lower flowing ability than clean water.
Permissible feed fluids:
- Fresh water up to the specified degree of contamination
Water with a degree of contamination up to a diameter of 20 mm
Water with a degree of contamination up to a diameter of 5 mm - Swimming pool water with intended dosage of additives
- Washing lye, e.g. from leaking washing machines. Afterwards, rinse and clean the pump with clear fresh water, see chapter Rinsing and cleaning.
- The temperature of the feed fluids should lie between 5 °C and 35 °C
SP 9,500 Dirt and SP 11,000 Dirt (dirty water pump):
SP 9,000 Flat (clean water pump):
Improper use
ATTENTION
Risk of damage due to frost!
Operation during frost may damage the device.
An incompletely emptied device can be damaged by frost.
Do not operate the device during frost.
Protect the device from frost.
ATTENTION
Risk of damage during continuous operation!
The device is not suitable for continuous operation.
Do not operate the device continuously for long periods (e.g. continuous circulation operation in ponds) or as a stationary installation (e.g. as a water lifting system, fountain pump).
Note
The manufacturer accepts no liability for possible damage caused by improper use or incorrect operation.
Hazard levels
⚠️DANGER
- Indication of an imminent threat of danger that will lead to severe injuries or even death.
⚠ WARNING
- Indication of a potentially dangerous situation that may lead to severe injuries or even death.
△CAUTION
- Indication of a potentially dangerous situation that may lead to minor injuries.
ATTENTION
- Indication of a potentially dangerous situation that may lead to damage to property.
Environmental protection

The packing materials can be recycled. Please dispose of packaging in accordance with the environmental regulations.

Electrical and electronic devices contain valuable, recyclable materials and often components such as batteries, rechargeable batteries or oil, which - if handled or disposed of incorrectly - can pose a potential danger to human health and the environment. However, these components are required for the correct operation of the device. Devices marked by this symbol are not allowed to be disposed of together with the household rubbish.
Notes on the content materials (REACH)
Current information on content materials can be found at: www.kaercher.de/REACH
Accessories and spare parts
Only use original accessories and original spare parts. They ensure that the appliance will run fault-free and safely.
Information on accessories and spare parts can be found at www.kaercher.com.
Scope of delivery
The scope of delivery for the appliance is shown on the packaging. Check the contents for completeness when unpacking. If any accessories are missing or in the event of any shipping damage, please notify your dealer.
Warranty
The warranty conditions issued by our sales company responsible apply in all countries. We shall remedy possible malfunctions on your device within the warranty period free of cost, provided that a material or manufacturing defect is the cause. In a warranty case, please contact your dealer (with the purchase receipt) or the next authorised customer service site.
(See overleaf for the address)
Description of the device
See graphics page for illustrations Illustration A
① Carrying handle
② Power supply cable with plug
③ Lock (float switch)
④ *Pump connecting piece G 1 ( 34 " and 1" hose connection and G 1 - thread)
⑤*Check valve
⑥ G 1 - threaded connection
⑦ Pump connecting piece G 1 ½ (1", 1 ¼" and 1 ½" hose connection and G 1 ½ - thread)
⑧ Pipe union (G 1 ½ - thread)
⑨ Float switch
⑩ Quick-Connect
⑪ Automatic venting device
⑫Feet (SP 9,000 Flat)
*Not included in the scope of delivery.
Initial startup
⚠️DANGER
Risk of electric shock and risk of injury!
The device contains electrical and mechanical components.
Always disconnect the device from the power supply before assembling, disassembling or cleaning.
Note
The shorter the hose length and larger the hose diameter, the higher the pump capacity.
To avoid clogging the pump, use a pre-filter for hose diameters smaller than 1 14 ".
The pump connection is equipped with a plug-in system (Quick-Connect).
The pipe union with pump connecting piece G 1 12 and the G 1 threaded connection are supplied unassembled with the device.
Note
Hoses with a diameter of 1", 1 ¼" and 1 ½" can be connected to the pump connecting piece G 1 ½.
A sufficiently large hose diameter must be selected and the pump connecting piece G 1 12 must be shortened according to the grooves so that the required particle size can be used. A large hose diameter is also recommended for smaller particle sizes to allow a high flow volume.
Connect hose to pump if using a 1", 1 14 " or 1 12 " hose:
1 Screw the pump connecting piece G 1 12 onto the pipe union.
Illustration B
2 Push the hose clamp onto the hose.
3 Push the hose onto the pump connecting piece G 1 12 and fasten it with a hose clamp.
4 Push the pipe union into the Quick-Connect. Illustration C
Connect hose to pump if using a 34 " or 1" hose:
1 Screw the G1 threaded connection onto the pipe union.
Illustration B
2 Fit the special accessory pump connecting piece G 1 (6.997-359.0 pump connecting piece G 1 (33.3 mm) incl. check valve - not included in the scope of delivery) onto the G 1 threaded connection:
a Place the check valve on the G 1 threaded connection so that the lettering 'UP' is legible.
b Screw the pump connecting piece G 1 onto the G 1 threaded connection.
3 Push the hose clamp onto the hose.
4 Push the hose onto the pump connecting piece G 1 and fasten it with a hose clamp.
5 Push the pipe union into the Quick-Connect. Illustration C
Setting up / immersing the pump:
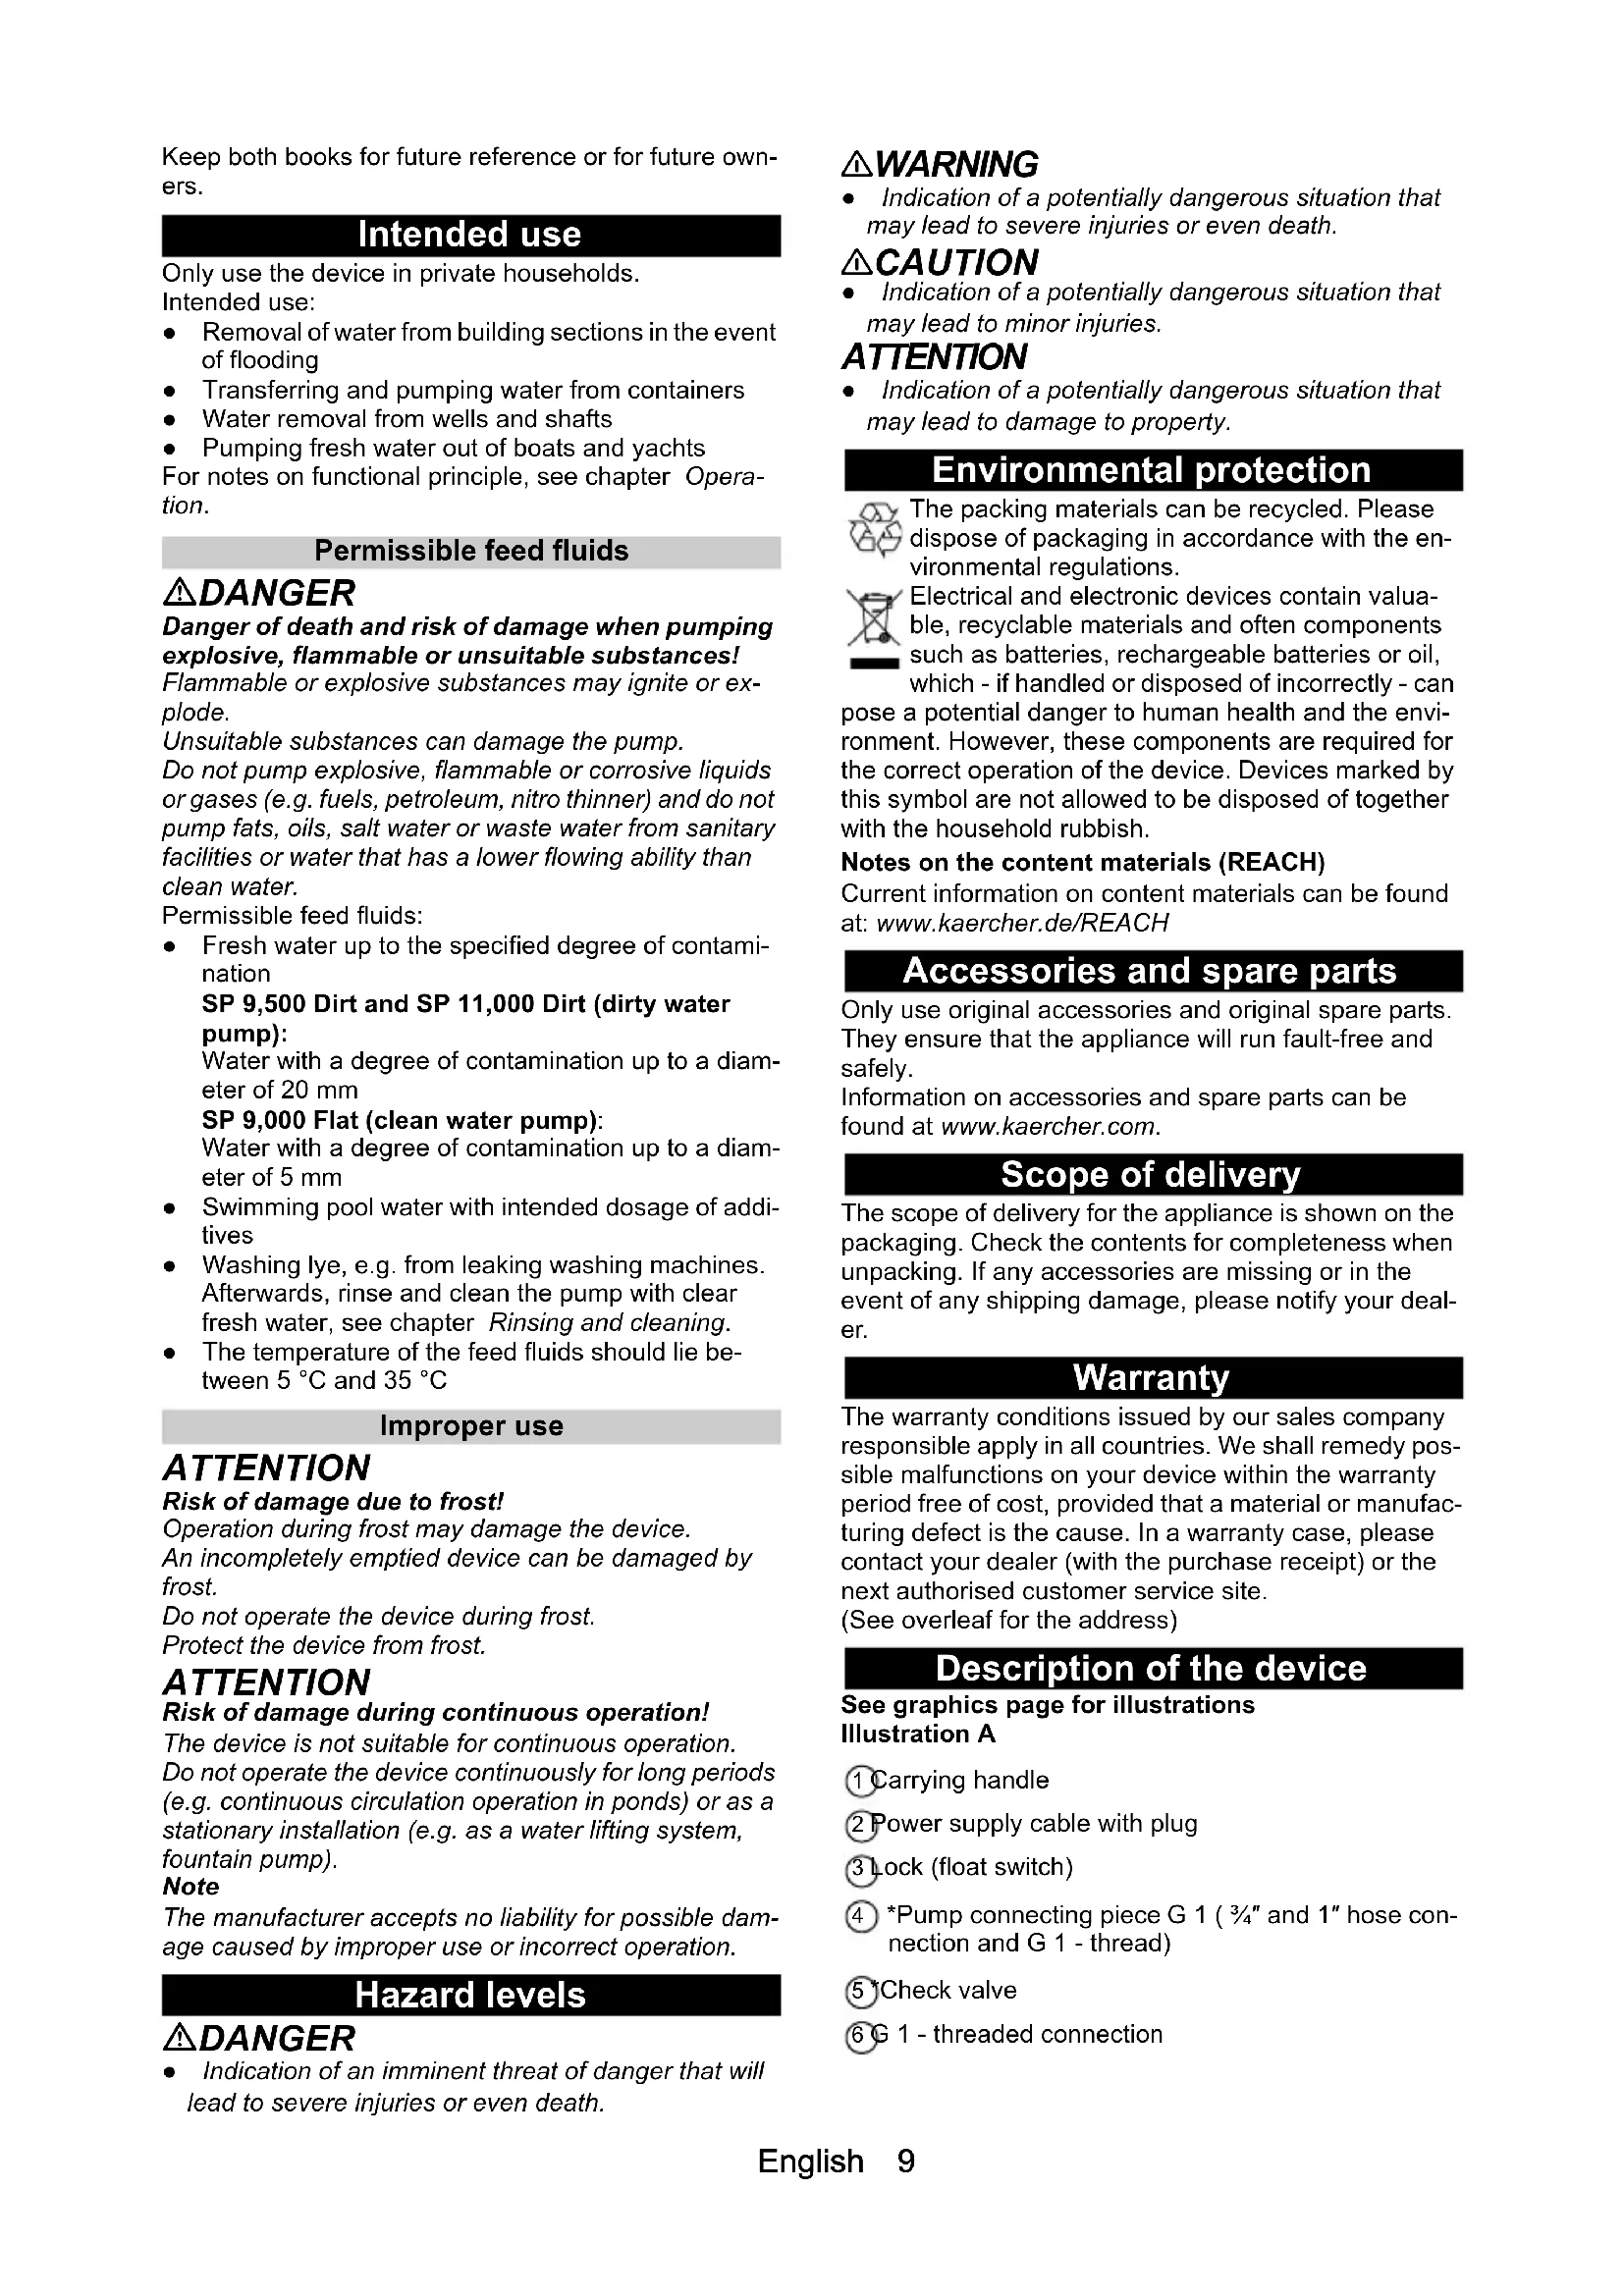
1 Fold out or in the feet (SP 9,000 Flat).
Illustration D
2 Place the pump securely on solid ground in the feed fluid or immerse it by means of a rope attached to the carrying handle.
Note
The suction area must not be blocked by contamination. If the ground is muddy, place the pump on a brick or something similar. Make sure that the pump is horizontal. Do not carry the pump using the cable or hose.
Operation
⚠️DANGER
Danger of death from electric shock.
Danger of death from electric shock if live parts are touched.
During operation, do not touch the rope attached to the carrying handle or any objects that are in contact with the pumped liquid (e.g. pipelines protruding into the pumped liquid, railings) and do not reach into the pumped liquid.
Automatic venting device
- If the fluid level is low, any sucked-in air, or air present in the pump, may escape via the automatic venting device. Fluid can also leak along with air. If the pump has problems with suction when the fluid level is low, unplug and plug in the mains plug repeatedly to assist the suction process.
Illustration E
Automatic mode
- If necessary, fold out the feet, see chapter Initial startup (SP 9,000 Flat).
Note
Folding out the feet is not absolutely necessary, but it does increase the pump capacity.
- Plug the mains plug into a mains socket.
Note
In automatic mode, the float switch controls the pumping process automatically.
The pump switches on as soon as the float switch has reached the switch-on height caused by the rising fluid level.
The pump switches off as soon as the float switch has reached the switch-off height caused by the sinking fluid level.
The float switch must be able to move freely.
Illustration F
| Min / Max SP | 9,000 Flat | SP 9,500 Dirt | SP 11,000 Dirt |
| Switch-on height cm* | 36 / 44 43 / 50 | 43 / 50 | |
| Switch-off height cm* | 15 / 24 18 / 30 | 18 / 30 |
* The switching heights vary depending on the position of the float switch.
Manual operation
Note
In manual operation, the pump stays switched on continuously. For the pump to suction itself in manual mode, the fluid level must be at least 60 mm (SP 9,500 Dirt and SP 11,000 Dirt) or 7 mm (SP 9,000 Flat).
Note
The pump can pump up to a residual fluid height of 25 mm (SP 9,500 Dirt and SP 11,000 Dirt) or 1 mm (SP 9,000 Flat).
The specified residual fluid heights are only achieved in manual operation.
The float switch must be able to move freely.
- Fold in the feet, see chapter Initial startup (SP 9,000 Flat).
Note
By folding in the feet, flat suction of the fluid up to 1 mm residual fluid height is possible in manual operation.
- Fasten the float switch in the lock so it points upwards.
Illustration G
ATTENTION
Risk of damage from dry running!
Dry running leads to increased wear on the pump.
Do not leave the pump unattended in manual operation. In case of dry running, immediately pull the mains plug out of the socket.
- Plug the mains plug into a mains socket.
Finishing operation
- Pull the mains plug out of the socket. The device stops.
ATTENTION
Risk of damage!
Risk of damage due to dried soiling or additives.
Rinse and clean the device immediately after each use.
-
If dirty liquids or liquids with additives have been pumped, rinse and clean the device immediately after finishing operation, see chapter Rinsing and cleaning.
-
Drain the device and accessories and let them dry.
Care and maintenance
⚠️DANGER
Risk of electric shock and risk of injury!
The device contains electrical and mechanical components.
Cleaning and user maintenance may not be carried out by children.
Rinsing and cleaning
ATTENTION
Risk of damage!
Risk of damage due to dried soiling or additives.
Rinse and clean the device immediately after each use.
1 If dirty liquids or liquids with additives have been pumped, the device must be rinsed afterwards: Use the device to pump clear fresh water without additives until all soiling or additives have been flushed out of the device.
⚠️DANGER
Risk of electric shock and risk of injury!
The device contains electrical and mechanical components.
Always disconnect the device from the power supply before assembling, disassembling or cleaning.
2 Pull the mains plug out of the socket.
3 Press the Quick-Connect button and remove the connection nozzle.
Illustration C
4 Where necessary, remove residue from the hose and on Quick-Connect.
5 Clean the outside of the device with a soft, clean cloth and clear fresh water.
6 Drain the device and accessories and let them dry.
Service
The device is maintenance-free.
Transport
Manual transport
△CAUTION
Risk of injury from tripping!
There is a risk of injury from tripping on loose cables and hoses.
Be careful of cables and hoses when moving the device.
- Lift and carry the device by the carrying handle.
Transport in vehicles
⚠ WARNING
Risk of injury, risk of damage!
Note the weight of the device during transport.
Store or secure the device in accordance with applicable guidelines so that it cannot slip or be thrown around during transport.
- When transporting the device in vehicles, secure it to prevent it from slipping or overturning in accordance with the respectively applicable guidelines.
Storage
ATTENTION
Risk of damage due to frost!
An incompletely emptied device can be damaged by frost.
Completely empty the device and accessories before storing them.
Protect the device from frost.
Store the device in a frost-free place and not outdoors.
△CAUTION
Failure to observe the weight
Risk of injury and damage
Be aware of the weight of the device during storage.
-
Completely empty the pump and accessories.
-
Allow the pump and accessories to dry out.
-
Store the pump in a frost-protected place.
Troubleshooting guide
Malfunctions often have simple causes that you can remedy yourself using the following overview. When in doubt, or in the case of malfunctions not mentioned here, please contact your authorised Customer Service.
| Fault Cause Rectification | ||
| Pump is running, but not delivering | Air is in the pump. 1. Check for correct startup (see chapter Initial startup and Operation). | |
| Dirt particles block the suction area. 1. Pull the mains plug out of the socket.2. Clean the suction area. | ||
| The fluid level is too low (manual operation), see chapter Technical data. | 1. Immerse the pump deeper into the feed fluid, see chapter Manual operation. | |
| Fault Cause Rectification | ||
| The pump does not start or stops during operation | The power supply is disconnected. 1. Check the fuses and the electrical connections. | |
| The thermal protection switch has switched off the pump because of overheating. | 1. Pull the mains plug out of the socket.2. Allow the pump to cool down.3. Clean the suction area.4. Prevent the pump from running dry. | |
| Dirt particles are trapped in the suction area. | 1. Pull the mains plug out of the socket.2. Clean the suction area. | |
| The float switch switches the pump off. 1. | Automatic mode: Check the position and free movement of the float switch and correct if necessary, see chapter Automatic mode.2. Manual operation: Attach the float switch correctly, see chapter Manual operation. | |
| The pump capacity drops or is too low | The suction area is clogged. 1. Pull the mains plug out of the mains socket and clean the suction area. | |
| The delivery rate of the pump depends on the delivery head and the connected periphery. | 1. Observe the maximum delivery height, see chapter Technical data. If necessary, select a larger hose diameter or shorter hose length. | |
| The cross-section on the pressure side is narrowed, e.g. due to the valve/ball tap not being fully open. | 1. Fully open the valve / ball tap. | |
| The pressure side hose is kinked. 1. Eliminate the kink points in the hose. | ||
| Quick-Connect cannot be opened | The Quick-Connect plug system is blocked by contamination. | 1. Remove the clip and clean it. |
Technical data
| SP9.000Flat | SP9.500Dirt | SP11.000Dirt | ||
| Device performance data | ||||
| Mains voltage V | 230-240 | 230-240 | 230-240 | |
| Power frequen-cy | Hz 50 | 50 | 50 | |
| Nominal power W | 280 | 280 | 400 | |
| Maximum flow rate | l/h | 9.000 | 9.500 | 11.000 |
| Solids content in water | kg/m ^3 | >2,5 | >2,5 | >2,5 |
| Pressure (max.) | MPa(bar) | 0,06(0,6) | 0,06(0,6) | 0,07(0,7) |
| Delivery height (max.) | m | 6 | 6 | 7 |
| Immersion depth (max.) | m | 7 | 7 | 7 |
| Perm. temp. feed fluid | °C | 5...35 | 5...35 | 5...35 |
| Particle size (max.) of permissible feed fluids | mm | 5 | 20 | 20 |
| Minimum fluid level (manual mode) | mm | 7 | 60 | 60 |
| Residual fluid height | mm | 1 | 25 | 25 |
| SP9.000Flat | SP9.500Dirt | SP11.000Dirt | |
| Weight (without kg accessories) | 3,7 | 3,8 | 4,4 |
Subject to technical modifications.
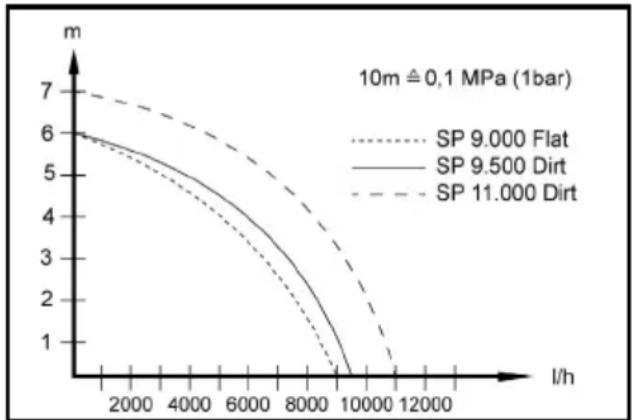
Optimising the flow rate
The flow rate is further increased:
• The lower the delivery height is.
• The greater the diameter of the hose used is.
• The shorter the hose used is.
- The smaller the pressure loss caused by the connected up accessories.
line
| l/h | SP 9.000 Flat | SP 9.500 Dirt | SP 11.000 Dirt | | ------ | ------------- | ------------- | -------------- | | 0 | 6.0 | 6.0 | 7.0 | | 2000 | 5.5 | 5.5 | 6.5 | | 4000 | 4.5 | 4.5 | 5.5 | | 6000 | 3.5 | 3.5 | 4.5 | | 8000 | 2.5 | 2.5 | 3.5 | | 10000 | 1.0 | 1.0 | 2.5 | | 12000 | 0.5 | 0.5 | 1.5 |Declaration of Conformity
EU Declaration of Conformity
We hereby declare that the machine described below complies with the relevant basic safety and health re-
quirements in the EU Directives, both in its basic design and construction as well as in the version placed in circulation by us. This declaration is invalidated by any changes made to the machine that are not approved by us.
Product: Pump
Type: 1.645-xxx
Currently applicable EU Directives
2014/35/EU
2014/30/EU
2011/65/EU
2009/125/EC
Commission Regulation(s)
(EU) 2019/1781
Harmonised standards used
EN 60335-1
EN 60335-2-41
EN 62233: 2008
EN 55014-1: 2017 + A11: 2020
EN 55014-2: 2015
EN 61000-3-2: 2014
EN 61000-3-3: 2013
EN IEC 63000: 2018
The signatories act on behalf of and with the authority of the company management.
H. Jenner
Chairman of the Board of Management

S. Reiser
Manager Regulatory Affairs & Certification
Documentation supervisor:
S. Reiser
Alfred Kärcher SE & Co. KG
Alfred-Kärcher-Str. 28 - 40
71364 Winnenden (Germany)
Ph.: +49 7195 14-0
Fax: +49 7195 14-2212
Winnenden, 2021/06/01
Declaration of Conformity (UK)
We hereby declare that the product described below complies with the relevant provisions of the following UK Regulations, both in its basic design and construction as well as in the version put into circulation by us. This declaration shall cease to be valid if the product is modified without our prior approval.
Product: Pump
Type: 1.645-xxx
Currently applicable UK Regulations
S.I. 2016/1101 (as amended)
S.I. 2016/1091 (as amended)
S.I. 2012/3032 (as amended)
S.I. 2010/2617 (as amended)
Commission Regulation(s)
(EU) 2019/1781
Designated standards used
EN 60335-1
EN 60335-2-41
EN 62233: 2008
EN 55014-1: 2017 + A11: 2020
EN 55014-2: 2015
EN 61000-3-2: 2014
EN 61000-3-3: 2013
EN IEC 63000: 2018
The signatories act on behalf of and with the authority of the company management.

H. Jenner
Chairman of the Board of Management

S. Reiser
Manager Regulatory Affairs & Certification
Documentation supervisor:
S. Reiser
Alfred Kärcher SE & Co. KG
Alfred-Kärcher-Str. 28 - 40
71364 Winnenden (Germany)
Ph.: +49 7195 14-0
Fax: +49 7195 14-2212
Winnenden, 2021/06/01
Contenu

H. Jenner
Chairman of the Board of Management
S. Reiser
Manager Regulatory Affairs & Certification
71364 Winnenden (Germany)
Chairman of the Board of Management
S. Reiser
Manager Regulatory Affairs & Certification
71364 Winnenden (Germany)
Tel.: +49 7195 14-0
Fax: +49 7195 14-2212
Winnenden, 01/06/2021
Inhoud
Chairman of the Board of Management

S. Reiser
Manager Regulatory Affairs & Certification
71364 Winnenden (Germany)
Tel.: +49 7195 14-0
Fax: +49 7195 14-2212
Winnenden, 2021/06/01
H. Jenner
Chairman of the Board of Management
S. Reiser
Manager Regulatory Affairs & Certification
71364 Winnenden (Germany)
Tel.: +49 7195 14-0
Fax: +49 7195 14-2212
Winnenden, 01/06/2021
Índice
Chairman of the Board of Management

S. Reiser
Manager Regulatory Affairs & Certification
SP 9.000 Flat (rentvandspumpe):
H. Jenner
Chairman of the Board of Management
S. Reiser
Manager Regulatory Affairs & Certification
71364 Winnenden (Germany)
Tlf.: +49 7195 14-0
Fax: +49 7195 14-2212
Winnenden, 2021/06/01
Indhold
Generelle merknader.... 43
Optimere transportmengden 47
Optimere transportmengden

Chairman of the Board of Management
S. Reiser
Manager Regulatory Affairs & Certification
71364 Winnenden (Germany)
Tlf.: +49 7195 14-0
Winnenden, 2021/06/01
Innehåll
D-71364 Winnenden (Germany)
Tfn: +49 7195 14-0
Fax: +49 7195 14-2212
Winnenden, 01.06.2021
Sisältö
Yleisiä ohjeita 52
S. Reiser
Manager Regulatory Affairs & Certification
Dokumentointivastaava: S. Reiser
Alfred Kärcher SE & Co. KG
Alfred-Kärcher-Str. 28 - 40
71364 Winnenden (Germany)
Puh.: +49 7195 14-0
Faksi: +49 7195 14-2212
Winnenden, 1.6.2021
Περιεχόμενα

H. Jenner
Chairman of the Board of Management
S. Reiser
Manager Regulatory Affairs & Certification
71364 Winnenden (Germany)
Tηλ.: +49 7195 14-0
Φαξ: +49 7195 14-2212
Winnenden, 2021/06/01
İçindekiler
Chairman of the Board of Management

S. Reiser
Manager Regulatory Affairs & Certification
Winnenden, 2021/06/01
Содержание
Общие указания 66

H. Jenner
Chairman of the Board of Management

S. Reiser
Manager Regulatory Affairs & Certification
71364 Winnenden (Germany)
Тел.: +49 7195 14-0
Факс: +49 7195 14-2212
H. Jenner
Chairman of the Board of Management
S. Reiser
Manager Regulatory Affairs & Certification
Winnenden, 2021/06/01
Obsah
Obecné pokyny 77
H. Jenner
Chairman of the Board of Management
S. Reiser
Manager Regulatory Affairs & Certification
Winnenden, 2021/06/01
Kazalo
H. Jenner
Chairman of the Board of Management
S. Reiser
Manager Regulatory Affairs & Certification
Winnenden, 1. 6. 2021
Spis treści

H. Jenner
Chairman of the Board of Management

S. Reiser
Manager Regulatory Affairs & Certification
71364 Winnenden (Germany)
Tel.: +49 7195 14-0
Directive UE relevante
2014/35/UE
2014/30/UE
2011/65/UE
2009/125/UE
Regulament(e) utilizat(e)
(UE) 2019/1781
Norme armonizate aplicate
EN 60335-1
EN 60335-2-41
EN 62233: 2008
EN 55014-1: 2017 + A11: 2020
EN 55014-2: 2015
EN 61000-3-2: 2014
EN 61000-3-3: 2013
EN IEC 63000: 2018
H. Jenner
Chairman of the Board of Management

S. Reiser
Manager Regulatory Affairs & Certification
71364 Winnenden (Germania)
Tel.: +49 7195 14-0
Fax: +49 7195 14-2212
Winnenden, 2021/06/01
Obsah
Všeobecné upozornenia 96
Chairman of the Board of Management
S. Reiser
Manager Regulatory Affairs & Certification
71364 Winnenden (Germany)
Tel.: +49 7195 14-0
Fax: +49 7195 14-2212
Winnenden, 01.06.2021
Sadržaj
Opće napomene 101

H. Jenner
Chairman of the Board of Management

S. Reiser
Manager Regulatory Affairs & Certification
Opunomoćenik za dokumentaciju:
S. Reiser
Alfred Kärcher SE & Co. KG
Alfred-Kärcher-Str. 28 - 40
71364 Winnenden (Njemačka)
Tel.: +49 7195 14-0
Telefaks: +49 7195 14-2212
Winnenden, 01.06.2021.
Sadržaj
| Opšte napomene | 106 |
| Namenska upotreba | 106 |
| Stepeni opasnosti | 106 |
| Zaštita životne sredine | 106 |
| Pribor i rezervni delovi | 106 |
| Obim isporuke | 106 |
| Garancija | 106 |
| Opis uređaja | 106 |
| Puštanje u pogonl | 107 |
| Rad | 107 |
| Nega i održavanje | 108 |
| Transport | 108 |
| Skladištenje | 108 |
| Otklanjanje smetnji | 108 |
| Tehnički podaci | 109 |
| Optimizacija količine protoka | 110 |
| EU izjava o usklađenosti | 110 |
Opšte napomene


Pre prve upotrebe, pročitajte originalna uputstva za upotrebu i priložene bezbednosne instrukcije. Postupajte u
skladu sa tim.
Sačuvajte obe knjižice za buduću upotrebu ili sledeće vlasnike.
Namenska upotreba
Uređaj koristite isključivo za privatno domaćinstvo. Namenska upotreba:
- ispuštanje vode u delovima objekata prilikom poplava
- prepumpavanje i ispumpavanje rezervoara
- uzimanje vode iz bunara i šahtova
- pumpanje slatke vode iz brodova i jahti
Za napomene o načinu rada pogledajte poglavlje Rad.
Dozvoljene radne tečnosti
⚠ OPASNOST
Opasnost po život i od oštećenja pri transportu eksplozivnih, zapaljivih odn. neodgovarajućih materija!
Zapaljive odn. eksplozivne materije mogu da se zapale odn. eksplodiraju.
Neodgovarajuće matwerije mogu da oštete pumpu. Nemojte transportovati eksplozivne, zapaljive ili nagrizajuće tečnosti ili gasove (npr. goriva, petrolej, nitro razređivač) niti masti, ulja, slanu vodu ili otpadnu vodu iz toaleta ili vodu koja ima manju sposobnost proticanja od čiste vode.
Dozvoljene radne tečnosti:
- Sveža voda do navedenog stepena zagađenja SP 9.500 Dirt i SP 11.000 Dirt (pumpa za otpadne vode):
Voda sa stepenom zagađenja do veličine zrna 20 mm
SP 9.000 Flat (pumpa za čistu vodu):
Voda sa stepenom zagađenja do veličine zrna 5 mm - Baze ni pri namenskom doziranju aditiva
- Voda u kojoj je otopljen deterdžent, npr. iz mašina za pranje veša. Zatim isperite pumpu čistom svežom vodom i očistite je, pogledajte poglavlje Ispiranje i čišćenje.
- Temperatura radnih tečnosti mora biti između 5 °C i 35 °C
Nenamenska upotreba
PAŽNJA

Chairman of the Board of Management
S. Reiser
Manager Regulatory Affairs & Certification
Lice ovlašćeno za dokumentaciju:
S. Reiser
Alfred Kärcher SE & Co. KG
Alfred-Kärcher-Str. 28 - 40
71364 Winnenden (Germany)
Tel.: +49 7195 14-0
Winnenden, 2021/06/01
Съдържание
Общи указания 110
Употреба по предназначение 110
Степени на опасност.... 111

Chairman of the Board of Management
Manager Regulatory Affairs & Certification
71364 Winnenden (Germany)
Тел.: +49 7195 14-0
Факс: +49 7195 14-2212
Виненден, 2021/06/01
Sisukord
H. Jenner
Chairman of the Board of Management

S. Reiser
Manager Regulatory Affairs & Certification
71364 Winnenden (Germany)
Tel: +49 7195 14-0
Winnenden, 2021/06/01
Saturs

H. Jenner
Chairman of the Board of Management
S. Reiser
Manager Regulatory Affairs & Certification
Chairman of the Board of Management
S. Reiser
Manager Regulatory Affairs & Certification
Chairman of the Board of Management
S. Reiser
Manager Regulatory Affairs & Certification
71364 Winnenden (Germany)
Тел.: +49 7195 14-0
Факс: +49 7195 14-2212
H. Jenner
Chairman of the Board of Management
S. Reiser
Manager Regulatory Affairs & Certification
文書の全権委員:
S. Reiser
Alfred Kärcher SE & Co. KG
Alfred-Kärcher-Str. 28 - 40
71364 Winnenden (Germany)
電話番号:+49 7195 14-0

Chairman of the Board of Management
S. Reiser
Manager Regulatory Affairs & Certification
3Group Luxury Luxury Luxury Luxury Luxury Luxury Luxury Luxury Luxury Luxury Luxury Luxury Luxury Luxury Luxury Luxury Luxury Luxury Luxury Luxury Luxury Luxury Luxury Luxury Luxury Luxury Luxury Luxury Luxury Luxury Luxury Luxury Luxury Luxury Luxury Luxury Luxury Luxury Luxury Luxury Luxury Luxury Luxury Luxury Luxury Luxury Luxury Luxury Luxury Luxury Luxury Luxury Luxury Luxury Luxury Luxury Luxury Luxury Luxury Luxury Luxury Luxury Luxury Luxury Luxury Luxury Luxury Luxury Luxury Luxury Luxury Luxury Luxury Luxury Luxury Luxury Luxury Luxury Luxury Luxury Luxury Luxury Luxury Luxury Luxury Luxury Luxury Luxury Luxury Luxury Luxury Luxury Luxury Luxury Luxury Luxury Luxury Luxury Luxury Luxury Laser Luxury Laser Laser Laser Laser Laser Laser Laser Laser Laser Laser Laser Laser Laser Laser Laser Laser Laser Laser Laser Laser Laser Laser Laser Laser Laser Laser Laser Laser Laser Laser Laser Laser Laser Laser Laser Laser Laser Laser Laser Laser Laser Laser Laser Laser Laser Laser Laser Laser Laser Laser Laser Laser Laser Laser Laser Laser Laser Laser Laser Laser Laser Laser Laser Laser Laser Laser Laser Laser Laser Laser Laser Laser Laser Laser Laser Laser Laser Laser Laser Laser Laser Laser Laser Laser Laser Laser Laser Laser Laser Laser Laser Laser Laser Laser Laser Laser Laser Laser Laser Laser laser laser laser laser laser laser laser laser laser laser laser laser laser laser laser laser laser laser laser laser laser laser laser laser laser laser laser laser laser laser laser laser laser laser laser laser laser laser laser laser laser laser laser laser laser laser laser laser laser laser laser laser laser laser laser laser laser laser laser laser laser laser laser laser laser laser laser laser laser laser laser laser laser laser laser laser laser laser laser laser laser laser laser laser laser laser laser laser laser laser laser laser laser laser laser laser laser laser laser laser LED
خرطوم.
natural_image
Black and white line drawing of a hand giving a thumbs-up gesture (no text or symbols)THANK YOU!
MERCI! DANKE! iGRACIAS!

Register your product and benefit from many advantages.
www.kaercher.com/welcome


Rate your product and tell us your opinion.
natural_image
Icon showing a gear and wrench inside a square frame (no text or symbols)www.kaercher.com/dealersearch
Alfred Kärcher SE & Co. KG
Alfred-Kärcher-Str. 28-40
71364 Winnenden (Germany)