FW 2500 - Food Processor CASO - Free user manual and instructions
Find the device manual for free FW 2500 CASO in PDF.
| Product type | Food processor / Meat grinder with 3-in-1 hamburger press |
| Use | Grinding meat, making sausages, cookie dough, hamburger patties |
| Blade material | Titanium-coated blade |
| Continuous operation capacity | 5 minutes maximum, then 10 minutes cooling |
| Safety | Reverse button (R) for unjamming, overheating protection, automatic shut-off |
| Cleaning | Dishwasher-safe removable parts (except motor block, auger, housing, locking ring, filling tray); sharp blade, handle with care |
| Included accessories | 3 grinding plates (3, 5, 8 mm), sausage stuffing tube, cookie dough nozzle with template, 3-in-1 hamburger press (10 cm and 6.5 cm plates), 2-in-1 drip tray, pusher |
| Warranty | 24 months (Germany, Austria, Netherlands; for other countries, contact customer service) |
| Power supply | 220-240 V, 50 Hz; circuit protection 16 A |
Frequently Asked Questions - FW 2500 CASO
User questions about FW 2500 CASO
0 question about this device. Answer the ones you know or ask your own.
Ask a new question about this device
Download the instructions for your Food Processor in PDF format for free! Find your manual FW 2500 - CASO and take your electronic device back in hand. On this page are published all the documents necessary for the use of your device. FW 2500 by CASO.
USER MANUAL FW 2500 CASO
Fleischwolf FW 2500 Black
Mincer FW 2500 Black
Tritacarne FW 2500 Black
Picadora de carne FW 2500 Black
Gehaktmolen FW 2500 Black
natural_image
Exterior view of a Coso Design robotic feedstock (no signage or text on the device itself)Technische Daten / Technical Data / Caractéristiques techniques / Dati tecnici / Datos técnicos / Technische gegevens / Технические характеристики / Dane techniczne / Tekniska data
| Gerät / Device / Appareil /Apparecchio / Aparato / Apparaat / Прибор / Urządzenie / Apparat | Fleischwolf, Mincer, Hachoir à viande, Tritacarne, Picadora de carne, Gehaktmolen, Мясорубка, Maszynka do mielenia mięsa, Köttkvarnen |
| Name / Name / Nom / Nome / Denominación / Name / Наименовани / Nazwa / Namn | CASO FW 2500 Black |
| Artikel-Nr. / Item No. / N°. d'article / N. Articolo / N° de art / Artikelnr. / N° артикула / Nr artykułu / Artikel-nr. | 02874 |
| Anschlussdaten / Mains data / Données de raccordement / Dati connessione / Conexión / Aansluitgegevens / Параметры подключения / Dane przyłączeniowe / Anslutningsdata | 220 V – 240 V; 50 Hz – 60 Hz |
| Leistungsaufnahme / Power consumption / Puissance consommée / Potenza assorbita / Consumo de potencia / Vermogens / Мощность / Pobór mocy / Eff ektbehov | 400 W |
| Außenabmessungen (B/H/T) / External measurements (W/H/D) / Dimensions extérieures (l/h/p) / Misure esterne (L/H/P) / Dimensiones exteriores (An/H/P) / Afmetingen (B/H/D) / Габаритные размеры (Ш/В/Г) / Wymiary zewnętrzne (szer./wys./gł.) / Yttermått (BxHxD) | 375 mm x 310 mm x 170 mm |
| Nettogewicht / Net weight / Poids net / Peso netto / Peso net / Nettogewicht / Bec / Masa netto / Nettovikt | 4,6 kg |
text_image
Exploded view diagram of a kitchen tool with numbered parts for identificationnatural_image
Simple line drawing of a cylindrical object with a flanged top and base (no text or symbols)20
21
22
natural_image
Technical line drawing of a mechanical component with a flanged top and inner circular base (no text or symbols)18
flowchart
graph TD
    R["0"] --> 1["1"]
    1 --> 2["2"]
R = Rückwärts
0 = Aus
natural_image
Technical line drawing of a mechanical component with three views: wheel, blade, and perforated plate (no text or symbols)1.3 Limitation of liability 20
1.4 Copyright protection....20
2 Safety....20
2.1 Intended use....20
2.2 General Safety information....21
2.3 Sources of danger 22
2.3.1 Danger of injury 22
2.3.2 Dangers due to electrical power....23
3 Commissioning 23
3.1 Packaging safety information 23
3.2 Delivery scope and transport inspection....24
3.3 Unpacking 24
3.4 Setup location requirements....24
3.5 Electrical connection....25
4 Design and Function....25
4.1 Overview....25
4.1.1 Mincer....25
4.1.2 3 in 1 Burger press....26
4.2 Controlelements....26
4.3 Assembling....27
4.4 Rating plate....27
5 Operation and Handing....27
5.1 Before first use....27
5.2 Operation of the mincer 27
5.3 Making sausage 28
5.4 Processing dough for example spritz biscuit 28
5.5 Assembly and use of the 3 in 1 burger press....28
5.5.1 Burger patties with a diameter of approx. 10 cm and 6.5 cm ....28
5.5.2 Burger patties with fillings....28
6 Cleaning and Maintenance 29
6.1 Safety information....29
6.2 Cleaning....29
7 Troubleshooting 29
7.1 Safety notices ....30
8 Disposal of the Old Device 30
8.1 Disposal of the packaging....31
9 Guarantee....31
1General
Please read the information contained herein so that you can become familiar with your device quickly and take advantage of the full scope of its functions.
Your device will serve you for many years if you handle it and care for it properly. We wish you a lot of pleasure in using it!
1.1 Information on this manual
These operating instructions are a component of the mincer FW 2500 Black (referred to hereafter as the Device) and provide you with important information for the initial commissioning, safety, intended use and care of the device.
The Operating Instructions must be available at all times at the device. This Operating Manual must be read and applied by every person who is instructed to work with the device:
- Commissioning, - Operation,
- Troubleshooting and/or • Cleaning
Keep the Operating Manual in a safe place and pass it on to the subsequent owner along with the device.
1.2 Warningnotices
The following warning notices are used in the Operating Manual concerned here.

DANGER
A warning notice of this level of danger indicates a potentially dangerous situation. If the dangerous situation is not avoided, this can lead to death or serious injuries.
Observe the instructions in this warning notice in order to avoid the danger of death or serious personal injuries.

WARNING
A warning notice of this level of danger indicates a possible dangerous situation. If the dangerous situation is not avoided, this can lead to serious injuries.
Observe the instructions in this warning notice in order to avoid the personal injuries.

ATTENTION
A warning notice of this level of danger indicates a possible dangerous situation. If the dangerous situation is not avoided, this can lead to slight or moderate injuries.
Observe the instructions in this warning notice in order to avoid the personal injuries.
PLEASE NOTE
A notice of this kind indicates additional information, which will simplify the handling of the machine.
1.3 Limitation of liability
All the technical information, data and notices with regard to the installation, operation and care are completely up-to-date at the time of printing and are compiled to the best of our knowledge and belief, taking our past experience and findings into consideration. No claims can be derived from the information provided, the illustrations or descriptions in this manual.
The manufacturer does not assume any liability for damages arising as a result of the following:
• Non-observance of the manual
• Uses for non-intended purposes
- Improper repairs
• Technical alterations, modifications of the device
- Use of unauthorized spare parts
Modifi cations of the device are not recommended and are not covered by the guaran- tee. All translations are carried out to the best of our knowledge. We do not assume any liability for translation errors, not even if the translation was carried out by us or on our instructions. The original German text remains solely binding.
1.4 Copyright protection
This document is copyright protected.
Braukmann GmbH reserves all the rights, including those for photomechanical reproduction, duplication and distribution using special processes (e.g. data processing, data carriers, data networks), even partially. Subject to content and technical changes.
2Safety
This chapter provides you with important safety notices when handling the device. The device corresponds with the required safety regulations. Improper use can result in personal or property damages.
2.1 Intendeduse
This device is intended for use in the household and for similar applications such as:
- Preparation of minced meat, tartare and (fi sh) rissoles, burger patties
• Preparation of sausages, tofu frying sausages
• Preparation of potato dumplings, vegetarian rissoles - processing of dough for example for spritz biscuit
Uses for a different purpose or for a purpose which exceeds this description are considered incompatible with the intended or designated use.

WARNING
Danger due to unintended use!
Dangers can emanate from the device if it is used for an unintended use and/or a different kind of use.
▶ Use the device exclusively for its intended use.
▶ Observe the procedural methods described in this Operating Manual.
Claims of all kinds due to damages resulting from unintended uses are excluded. The User bears the sole risk.
2.2 General Safety information
PLEASE NOTE
Please observe the following general safety notices with regard to the safe handling of the device.
Children must not use this appliance. Keep the appliance and its power supply unit away from children.
The device may be used by individuals with reduced physical, sensory or mental capabilities or a lack of experience and / or knowledge of their use if they are supervised or have been instructed at to the safe use of the device and have understood the resulting hazards.
▶ Children shall not play with the appliance.
Use the appliance only as described in the user's guide to avoid possible injury from misuse.
▶ Operate the appliance only in dry indoor areas.
▶ Do not operate the appliance unattended.
▶ Do not use the appliance:
- if the appliance itself or parts are damaged,
- if the power cord or plug is damaged,
- if the appliance has been dropped.
▶ Make sure that the power socket is easily accessible so that you can quickly unplug the device if required.
Do not make any modifications to the appliance or the power cord. Only have repairs carried out by a specialist workshop, as appliances that have not been repaired properly endanger the user. Please also observe the enclosed warranty conditions.
▶ Only use the device with original accessories.
Place the appliance on a stable, level surface. Ensure sufficient distance between the appliance and strong heat sources such as hotplates, heating pipes, etc.
▶ Do not clean the appliance with hard, scratchy or abrasive cleaning agents such as steel wool or similar.
▶ Cleaning and user maintenance shall not be made by children.
PLEASE NOTE
▶ Defective components must always be replaced with original replacement parts. Only such parts will guarantee that the safety requirements are fulfilled.
▶ Only customer service departments authorized by the manufacturer may carry out repairs on the device during the guarantee period, as otherwise the guarantee entitlements will be null and void in the event of any subsequent damages.
Carefully clean all components that will come in contact with food before first use.
▶ Do not process bones, nuts or other hard ingredients.
▶ Process sinewless, boneless and fatless meat in pieces.
▶ Use the device continuously for a maximum of 5 minutes. Then let the device could down for 10 minutes.
▶ Turn switch to R if the unit is blocked. The snake rotates backwards. The meat is loosened to resolve the blockage.
▶ Do not overload the device and do not let it operate un-loaded.
▶ Be sure the parts are properly assembled to original base and in place.
2.3 Sources of danger
2.3.1 Danger of injury

WARNING
Careless use of the appliance may result in injury. Note the following warnings to avoid injury.
▶ Never put your fingers into the blade while it is still turning. Also keep other kitchen utensils, such as spoons, away from moving parts.
▶ Never use your finger os tools to push ingredients deeper into the head tube while the device is running. Always use the pusher for this purpose.
▶ Disconnect the device from mains power if it is unsupervised; before assembling it; when changing over accessories and when disassembling or cleaning it.
The blade is sharp. Be careful when handling or cleaning the device.

WARNING
▶ Turn the device off and disconnect it from mains power before changing over accessories or installing spare parts which move during operation.
▶ Stop processing of food immediately if rotating accessories no longer turn or only turn with diffi culty and unplug the device.
▶ Never hold your face over the head tube with hopper plate when the motor is running. If you have overlooked hard components during the preparation of the ingredients, they and also pieces of meat can be thrown out. Warning: Danger of injury!
2.3.2 Dangers due to electrical power

DANGER
Mortal danger due to electrical power!
Mortal danger exists when coming into contact with live wires or subassemblies! Observe the following safety notices to avoid dangers due to electrical power:
If the power cord of this appliance is damaged, it must be replaced by the manufacturer or its customer service or a similarly qualified person in order to avoid hazards.
Do not open the housing on the device under any circumstances. There is a danger of an electrical shock if live connections are touched and the electrical or mechanical structure is altered. In addition, functional faults on the device can also occur.
▶ Do not immerse the appliance in water for cleaning.
3Commissioning
This chapter provides you with important safety notices during the initial commissioning of the device. Observe the following notices to avoid dangers and damages:
3.1 Packaging safety information

WARNING
Personal and property damages can occur during commissioning of the device! Observe the following safety notices to avoid such dangers:
Packaging materials may not be used for playing. There is a danger of suffocation.
3.2 Delivery scope and transport inspection
The device includes the following components:
Mincer:
- Motor unit
- Pusher
- Auger housing
- Auger
- Titanium-coated blade
- Fixing ring
- Sausage fi ller
- Cookie attachment with template
- 3 cutting plate
- Storage of the accessories
(fi ne - 3 mm, medium - 5 mm, coarse - 8 mm) - 2 in 1 collection tray (can be used as a cover for the filling tray when stored and as a collection tray)
- Operating manual
Burger press:
- Base plates in 2 sizes
- Patty formers in 2 sizes
- 2 in 1 pusher with handle (for pushing and for production of patties with fillings)
PLEASE NOTE
Examine the shipment to ensure the unit and manual are included and inspect the unit for any visible damage.
Immediately notify the carrier and/or the supplier about an incomplete shipment or any damage as a result of inadequate packaging or mishandling.
3.3 Unpacking
Carefully remove the packaging material and unit from the carton.
PLEASE NOTE
If possible, keep the original packaging for the duration of the guarantee period in the event a return is necessary.
3.4 Setup location requirements
In order to ensure the safe and trouble-free operation of the device, the setup location must fulfil the following prerequisites:
- Place the device on a firm and even work surface.
- Choose the setup location in such a way that children cannot reach any hot surfaces on the device.
- The device is not intended to be installed in a wall or a built-in cupboard.
- Do not use the device outdoors.
• The device requires adequate air circulation (minimum distance 15 cm). - Do not set up the device in a hot, wet or extremely damp environment or near flammable material.
- The installation and assembly of this device in non-stationary setup locations (e.g. on ships) must be carried out by specialist companies / electricians, provided they guarantee the prerequisites for the safe use of this device.
3.5 Electricalconnection
In order to ensure the safe and trouble-free operation of the device, the following instructions must be observed for the electrical connection:
- Before connecting the device, compare the connection data (voltage and frequency) on the rating plate with those of your electrical network. This data must agree in order that no damages occur in the device. If in doubt, ask your qualified electrician.
- The connection between the device and the electrical network may employ a 3 meter long (max.) extension cable with a cross-section of 1.5 mm ^2 . The use of multiple plugs or gangs is prohibited because of the danger of fire that is involved with this.
- Make sure that the power cable is undamaged and has not been installed under the ice maker or over hot or sharp surfaces.
- The electrical outlet must be protected by a 16A safety cut-out switch.
- The electrical safety of the device is only guaranteed if the device is connected to a properly installed protective conductor system. If in doubt, have the house installation checked over by a qualified electrician. The manufacturer cannot be made responsible for damages that are caused by a missing or damaged protective conductor.
4 Design and Function
This chapter provides you with important safety notices on the design and function of the device.
4.1Overview

text_image
4.1.1Mincer 17 2 1 3 4 6 7 8 95 10 11 12 13 14 15 16DE
EN
FR
IT
ES
NL
RUS
PL
SE
① Motor unit
② Switch (R, 0, 1, 2)
③ Locking handle
④ Attachment outlet
⑤ Auger housing
⑥ Filling tray
⑦ Pusher
⑧ 2 in 1 collection tray (can be used as a cover for the filling tray when stored and as a collection tray)
⑨ Auger
⑩ Titanium-coated blade
⑪ Cutting Plate fine (3 mm)
12 Cutting Plate medium (5mm)
13 Cutting Plate coarse (8 mm)
14 Fixing Ring
15 Sausage fi Iler
16 Cookie attachment with template
17 Storage of the accessories
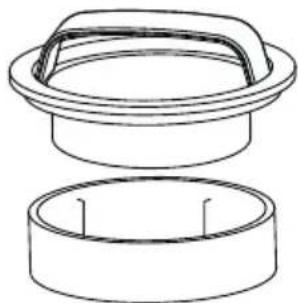
4.1.2 3 in 1 Burger press

natural_image
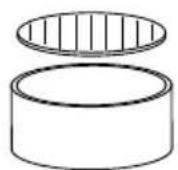
Simple line drawing of a cylindrical object with a lid, labeled with numbers 18 and 19 (no text or symbols on the object itself)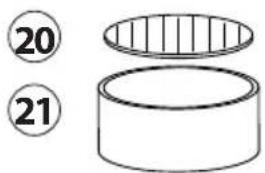
text_image
20 2122
natural_image
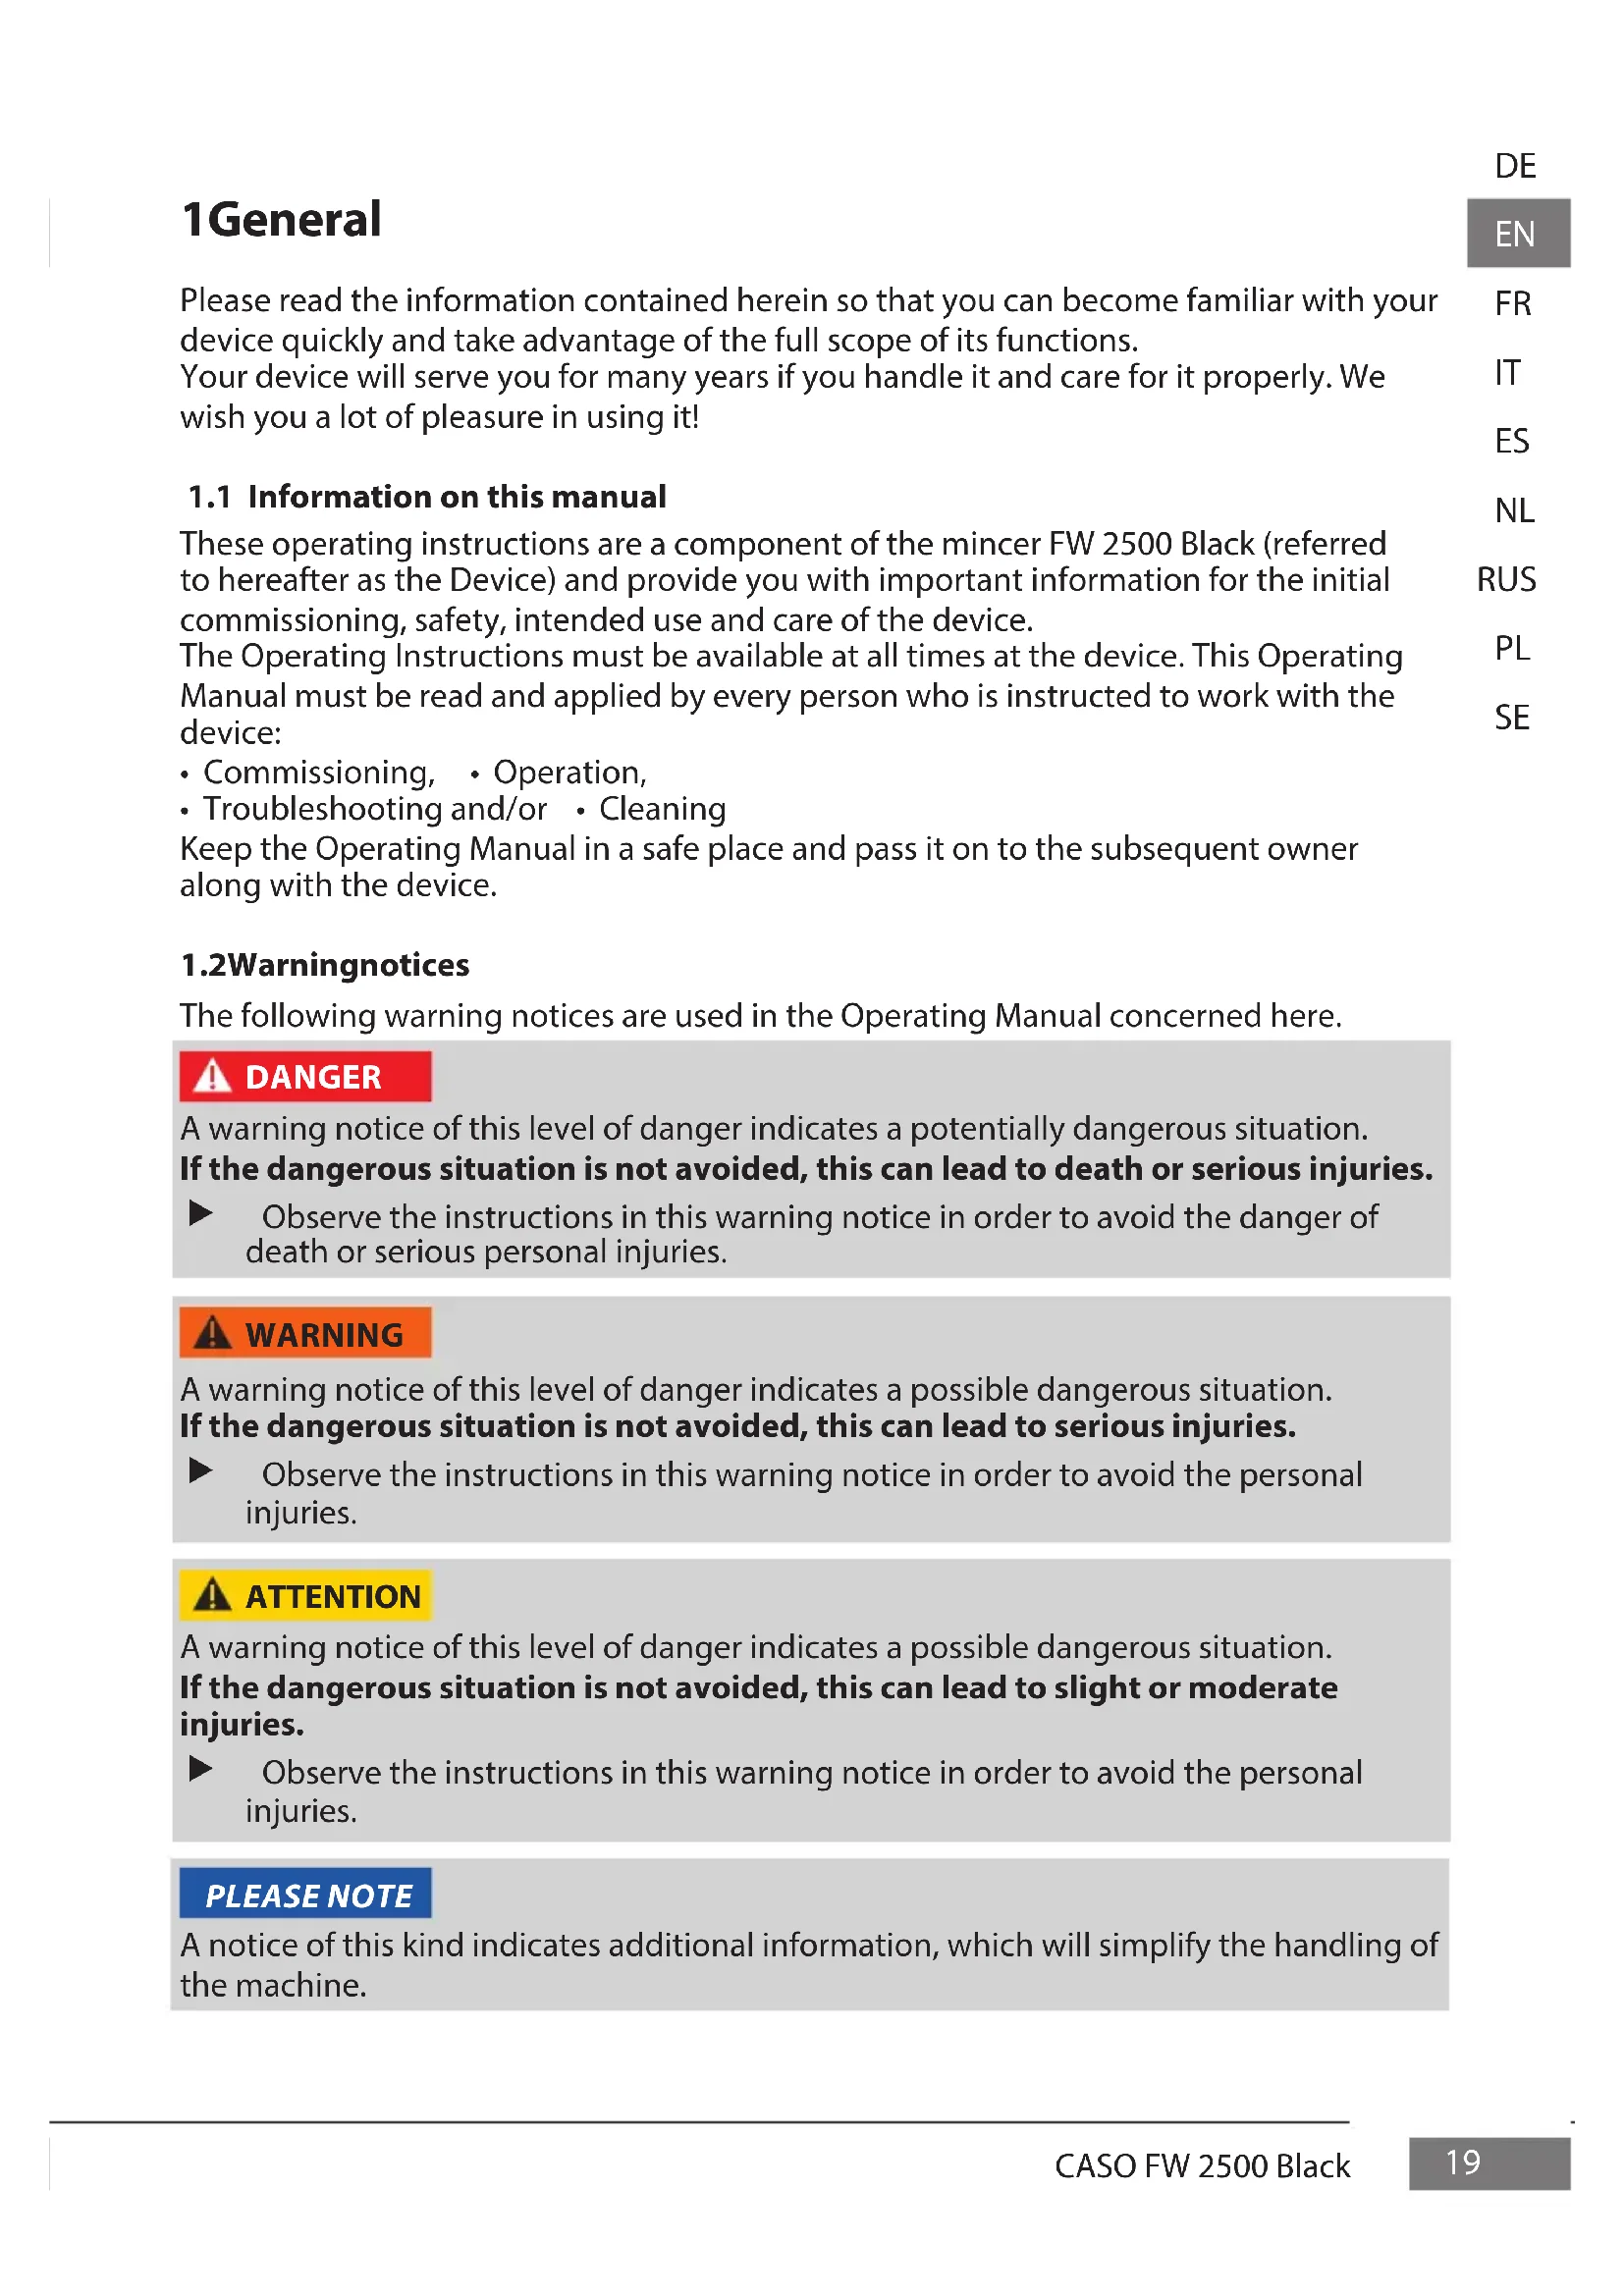
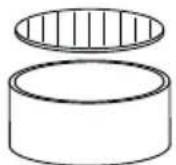
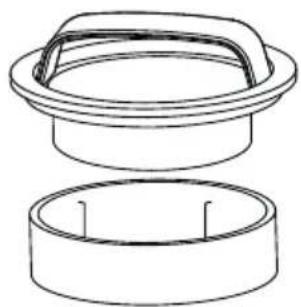
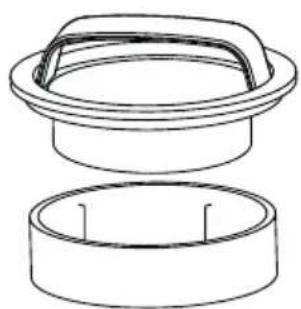
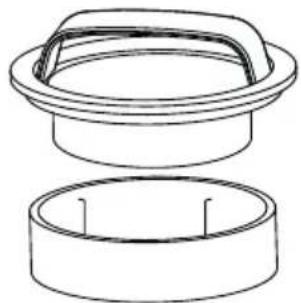
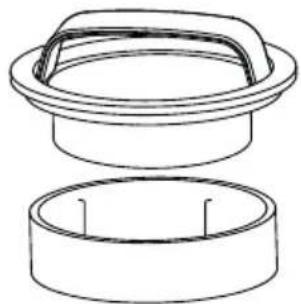
Technical line drawing of a mechanical component with a flanged top and inner circular base (no text or symbols)18 Base plate large (10 cm)
19 Patty former large
20 Base plate small (6.5 cm)
21 Patty former small
22 2 in 1 pusher with handle (for pushing and for production of patties with fi llings)
4.2 Controlelements
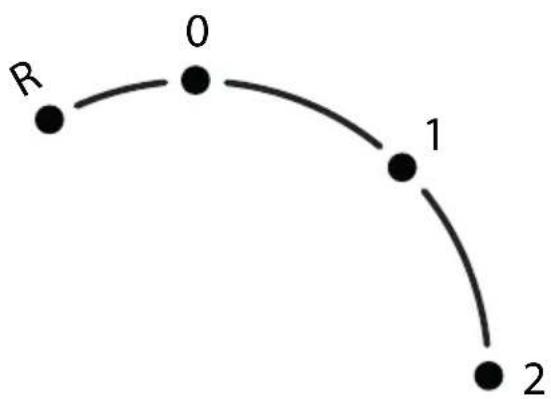
flowchart
graph TD
    R --> 0
    0 --> 1
    1 --> 2
R = Reverse
0 = Off
1 = Speed level 1
2 = Speed level 2
4.3 Assembling
- Place the motor unit (1) on a fl at surface.
- The locking handle (3) on the attachment outlet (4) must be turned upwards (
- Place the mincer body (5) in the attachment outlet (4).
- Turn the locking handle (3) downwards ( ).
- Place the snake (9) with the thicker end first into the head tube (5).
- Place the blade (10) on the scroll (9) with the fl at sides facing outwards towards the mincer screen.
- Insert the desired cutting plates (11,12 or 13) over the blade, paying attention to the two notches (left/right) on the mincer body (5).
- Fit the fixing ring (14) and turn it clockwise until it sits tightly.
- Fit the filling tray (6) onto the mincer body (5).
- Put the collecting tray (8) under the device's outlet.


natural_image
Technical illustration of three mechanical components: a pulley, a fan, and a circular housing (no text or symbols)4.4 Ratingplate
The rating plate with the connection and performance data can be founded beneath the device.
5 Operation and Handing
This chapter provides you with important notices with regard to operating the device. Observe the following notices to avoid dangers and damages:

WARNING
Do not leave the device unsupervised when it is in operation, so that you can intervene quickly in the event of dangers.
PLEASE NOTE
Tip: Cool the auger housing (5) vor using oft he device in the refrigerator or rinse it with cold water, this will improve the processing.
If you want to produce tartare, you should mince the meat 2 times by using the medium cutting plate.
5.1 Before first use
Clean the device, see "cleaning".
5.2 Operation of the mincer
- Prepare the meat to pieces. Remove all bones, gristle, sinews. Do not use frozen meat. Let frozen meat thaw completely!
- Enter the meat in the fi llilng tray.
- Plug the power plug into the power outlet.
- Turn the switch to the desired speed level.
- Slide the meat gently with the pusher into the head tube.
- After use, set the switch back to 0 and unplug the appliance from the power socket.
5.3 Making sausage
You need the sausage fi ller (15). Soak the sausage skin in water for at least 10 minutes before you fi ll them.
- Place the auger (9) as usual with the thicker end first into the auger housing (5).
- Insert the blade (10) and the cutting plates (11, 12 or 13) onto the auger.
- Then place the sausage fi ller (15) on cutting plate (11, 12 or 13).
- Tigthen the fixing ring (14).
- Enter your already minces and spices filling for the sausages on filling tray (6) and push in gently with pusher (7) into the auger housing (5).
- Clutch the sausage skin of the sausage filler (15) and use the device as usual. If sausage skin gets stuck onto sausage filler then wet it with some water.
5.4 Processing dough for example spritz biscuit
You need the Cookie attachment with template (16).
- Place the auger (9) as usual with the thicker end first into the auger housing (5).
- Insert the blade (10) and the cutting plates (11, 12 or 13) onto the auger.
- Place the dough accessory (16) on cutting plate (11, 12 or 13).
- Tigthen the fixing ring (14).
- Slide the pattern for spritz biscuit through the dough accessory.
- Put the filling tray (6) onto the mincer body (5) as usual and use the pusher (7) to push the dough into the mincer body.
5.5 Assembly and use of the 3 in 1 burger press
5.5.1 Burger patties with a diameter of approx. 10 cm and 6.5 cm
- Place the burger patty in the patty former.
- Fill the patter former with minced meat or plant-based alternatives.
- Use the pusher to push the mixture down.
- Turn the burger press with the filling and push the burger patty out of the patty former. Carefully remove the patty from the burger plate.
5.5.2 Burger patties with fi llings
- Place the larger burger plate in the larger patty former.
- Fill the patter former with minced meat or plant-based alternatives.
- Remove the bottom cover from the pusher by turning the top part of the attachment in the "OPEN" arrow direction.
- Use the small pusher to make a depression in the patty.
- Fill the depression with the desired ingredients.
- Cover the depression with minced meat.
- Replace the large cover on the pusher.
- Push the patty down again and then remove it as described above.
PLEASE NOTE
Tip: Place baking paper between the individual, completed burger patties to stop them sticking together.
6 Cleaning and Maintenance
This chapter provides you with important notices with regard to cleaning and maintaining the device. Please observe the notices to prevent damages due to cleaning the device incorrectly and to ensure trouble-free operation.
6.1 Safetyinformation

ATTENTION
Please observe the safety instructions, before cleaning your device:
▶ Unplug the device when not in use and before any cleaning.
Do not clean the motor unit with power cord (1), the scroll (9), the mincer body, the fixing ring (14) or the filling tray (6) in a dishwasher.
The blade (10) is sharp. Handle it with care.
6.2Cleaning
Clean accessories immediately after use.
- Remove meat and dough residues from the head tube by mincing a piece of bread.
- Turn the switch to 0 and unplug the device.
- Remove the filling tray (6).
- Unscrew the fixing ring (14) and remove all accessory parts from the mincer body (5).
- Turn the locking handle (3) on the attachment outlet (4) upwards ( ) and remove the mincer body (7).
- Wash all parts which were in contact with food in warm soapy water and dry them immediately.
- The pusher (5), the blade (9), the mincer screens (10, 11, 15), the sausage filler (13), the cookie attachment with template (14) and the collecting tray can be cleaned in a dishwasher.
- Wipe the blade and the mincer screen with a small amount of vegetable oil before reusing them.

WARNING
▶ Warning the blade is sharp. Danger of injury
PLEASE NOTE
Please take care that small parts do not get lost in the dishwasher.
7Troubleshooting
This chapter provides you with important notices with regard to operating the device. Observe the following notices to avoid dangers and damages:
7.1 Safetynotices

ATTENTION
Repairs of electrical appliances must be carried out by qualified person who are trained by the manufacturer.
Repairs performed by untrained persons may result in considerable hazards for the user and damage the machine.
7.2 Troubleshootingtable
Problem Solution
| The device does not start. | Please check whether the power plug is properly plugged. Please check whether the assembly is done according to assembly methods. |
| The device is blocked. | Turn the switch to R to loosen the blockage. If this is not enough please switch of the device, unplug the cord and deassemble the device to remove the blockage. |
| The device stopped. | The device is overheated. Turn the switch to 0 and unplug the device. Disassemble the device and remove ingredients from it. Press the red reset button on the device's base. Let it cool down for 60 minutes. Contact customer service if overheating system is activated too often. |
PLEASE NOTE
If you cannot solve the problem by carrying out the steps described above, our Customer Service will help you free of charge.
Clean the device before you send it to customer service.
8 Disposal of the Old Device
Old electric and electronic devices frequently still contain valuable materials. However, they also contain damaging substances, which were necessary for their functionality and safety. If these were put in the non-recyclable waste or were handled incorrectly, they could be detrimental to human health and the environment. Therefore, do not put your old device into the non-recyclable waste under any circumstances.

PLEASE NOTE
Utilise the collection point, established in your town, to return and recycle old electric and electronic devices. If necessary, contact your town hall, local refuse collection service or your dealer for information.
▶ Ensure that your old device is stored safely away from children until it is taken away.
8.1 Disposal of the packaging
The packaging protects the device against damages during transit. The packaging materials are selected in accordance with environmentally compatible and recycling-related points of view and can therefore be recycled. Returning the packaging back to the material loop saves raw materials and reduces the quantities of accumulated waste.
Take any packaging materials that are no longer required to "Green Dot" recycling collection points for disposal.

9Guarantee
We provide a 24-month guarantee for defects caused by production or material faults, beginning on the date of purchase. Our guarantee is valid for Germany, Austria and the Netherlands. For all other countries, please contact us.
Your legal guarantee claims as per Art. 437 ff . German Civil Code (BGB) will remain unaff ected by this. You may exercise your statutory guarantee rights free of charge. The guarantee does not cover damage caused by improper handling or use of the product or defects which have only a minor impact on the product's functionality or value. In addition to this, the guarantee also excludes parts which are subject to wear and tear; transport damages insofar as we are not responsible for them and damages caused by repairs which were not carried out by us.
This product has been constructed for non-commercial use (domestic use) and its performance is designed to meet the corresponding needs. The guarantee only covers commercial use insofar as it is comparable to domestic use. The product is not intended for any other type of commercial use.
In the case of legitimate complaints we may either repair the defective product or replace it with a defect-free product at our discretion. Obvious defects must be notified to us within 14 days of the product's delivery. Any further claims are excluded.
When making a guarantee claim please contact us before you return the product (always with the purchase receipt!). Our contact details ("Guarantor") are provided at the beginning of this instruction manual.
DE
EN
FR
IT
ES
NL
RUS
PL
SE
text_image
Exploded view diagram of a kitchen appliance with numbered parts for identificationnatural_image
Simple line drawing of a cylindrical object with a top flange and side grooves (no text or symbols)20

22
natural_image
Technical line drawing of a mechanical component with a flanged top and inner circular base (no text or symbols)flowchart
graph TD
    R["0"] --> 1["1"]
    1 --> 2["2"]
R = en arrière
0 = arrêt
natural_image
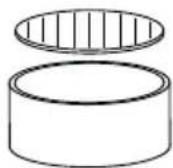
Technical illustration of a mechanical component with three views: wheel, fan, and circular housing (no text or symbols)4.4Plaquesignalétique
text_image
Exploded view diagram of a kitchen appliance with numbered parts for identificationnatural_image
Simple line drawing of a cylindrical object with a top flange and a side cover (no text or symbols)20
21

22
natural_image
Technical line drawing of a mechanical component with a flanged top and inner circular base (no text or symbols)flowchart
graph TD
    R --> 0
    0 --> 1
    1 --> 2
natural_image
Technical illustration of a mechanical component with three views: a pulley, a fan blade, and a circular housing (no text or symbols)text_image
Exploded view diagram of a kitchen appliance with numbered parts for identificationnatural_image
Simple line drawing of a cylindrical object with a top flange (no text or symbols)20

22
natural_image
Technical line drawing of a mechanical component with a flanged top and inner circular base (no text or symbols)18 Placa de base grande (10 cm)
19 Molde para hamburguesas grande
20 Placa de base pequeña (6,5 cm)
flowchart
graph TD
    R["0"] --> 1["1"]
    1 --> 2["2"]
R = atrás
0 = OFF
natural_image
Technical line drawing of a mechanical component with three views: wheel, blade, and perforated plate (no text or symbols)text_image
Exploded view diagram of a kitchen appliance with numbered parts for identificationnatural_image
Simple line drawing of a cylindrical object with a top lid and flange (no text or symbols)20
21
22

natural_image
Technical line drawing of a mechanical component with two views: top shows a circular housing with a handle, bottom shows a cylindrical housing with internal components (no text or symbols)flowchart
graph TD
    R["0"] --> 1["1"]
    1 --> 2["2"]
natural_image
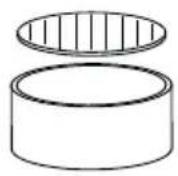
Technical line drawing of a mechanical component with three views: wheel, blade, and perforated plate (no text or symbols)4.4Typeplaatje
text_image
Exploded view diagram of a kitchen tool with numbered parts for identificationnatural_image
Simple line drawing of a cylindrical container with a lid (no text or symbols)20
21
22

natural_image
Technical line drawing of a mechanical component with two views (top and bottom), no text or symbols present.flowchart
graph TD
    R --> 0
    0 --> 1
    1 --> 2
R = Назад
0 = Выкл.
1 = ступень скорости 1
natural_image
Technical line drawing of a mechanical component with three views: wheel, blade, and perforated plate (no text or symbols)text_image
Exploded view diagram of a kitchen appliance with numbered parts for identificationnatural_image
Simple line drawing of a cylindrical object with two circular annotations labeled 18 and 19 (no text or symbols on the object itself)20
21
22

natural_image
Technical line drawing of a mechanical component with a flanged top and inner circular base (no text or symbols)flowchart
graph TD
    R["0"] --> 1["1"]
    1 --> 2["2"]
R = wstecz
0 = wyl.
natural_image
Technical line drawing of a mechanical component with three views: wheel, blade, and perforated plate (no text or symbols)text_image
Exploded view diagram of a kitchen appliance with numbered parts for identificationnatural_image
Simple line drawing of a cylindrical object with a top circular lid (no text or symbols)20
22
natural_image
Technical line drawing of a mechanical component with a flanged top and inner circular base (no text or symbols)18 Bottenplatta stor (10 cm)
19 Biff ormare stor
20 Bottenplatta liten (6,5 cm)
flowchart
graph TD
    R --> 0
    0 --> 1
    1 --> 2