AirflowTestMaster - Anemometer Laserliner - Free user manual and instructions
Find the device manual for free AirflowTestMaster Laserliner in PDF.
| Device type | Anemometer |
| Brand | Laserliner |
| Model | AirflowTestMaster |
| Dimensions (W x H x D) | 85 x 165 x 38 mm |
| Weight | 200 g |
| Power supply | 1 9V battery (6F22) |
| Wind speed range | 0.80 to 30.00 m/s (also km/h, ft/s, knots, mil/h, ft/m) |
| Speed resolution | 0.01 m/s |
| Speed accuracy | ±(2.0% + 50 digits) |
| Ambient temperature range | -10 °C to 60 °C |
| Temperature resolution | 0.1 °C |
| Temperature accuracy | ±1.5 °C |
| Relative humidity range | 20 to 80 % RH (extended: <20 and >80 % RH) |
| Humidity resolution | 0.1 % RH |
| Humidity accuracy | ±3 % (at 25 °C, 20-80 % RH) ; ±5 % (out of range) |
| Volumetric flow range | 0 to 99990 m³/min (also CFM, CMS) |
| Main functions | Wind speed measurement, volumetric flow, temperature, humidity, dew point, wet bulb, MIN/MAX, HOLD, auto power off (20 min), backlight, USB data transfer with software |
| Operating temperature | 0 °C to 40 °C |
| Max operating humidity | 85 % |
| Maintenance and cleaning | Clean with a dry, soft cloth. Avoid excessive moisture and solvents. |
| Safety | Follow safety instructions. Use the battery correctly. Do not expose to shocks or extreme temperatures. |
| General information | Compliant with EU directives. Disposal according to WEEE. More information at www.laserliner.com/info |
Frequently Asked Questions - AirflowTestMaster Laserliner
User questions about AirflowTestMaster Laserliner
0 question about this device. Answer the ones you know or ask your own.
Ask a new question about this device
Download the instructions for your Anemometer in PDF format for free! Find your manual AirflowTestMaster - Laserliner and take your electronic device back in hand. On this page are published all the documents necessary for the use of your device. AirflowTestMaster by Laserliner.
USER MANUAL AirflowTestMaster Laserliner
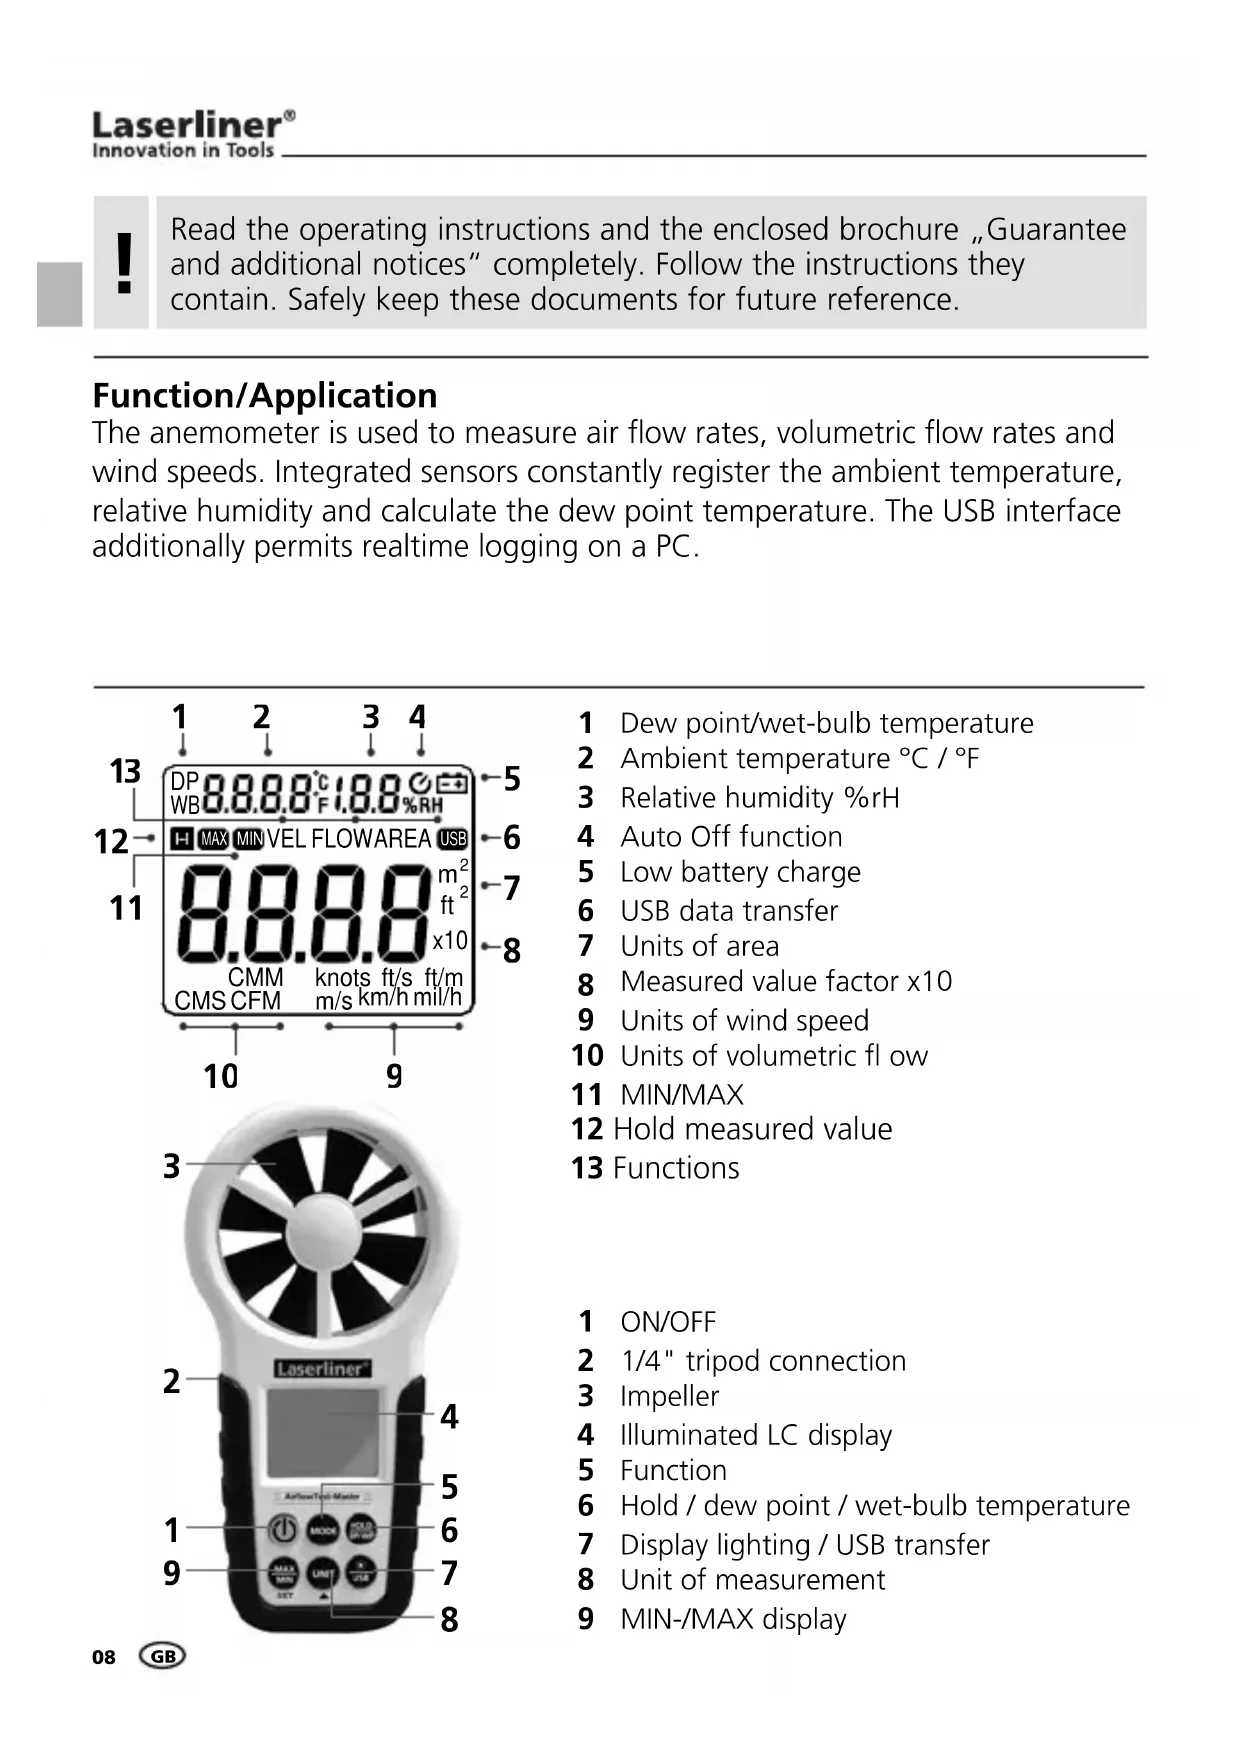
Read the operating instructions and the enclosed brochure „Guarantee and additional notices" completely. Follow the instructions they contain. Safely keep these documents for future reference.
Function/Application
The anemometer is used to measure air flow rates, volumetric flow rates and wind speeds. Integrated sensors constantly register the ambient temperature, relative humidity and calculate the dew point temperature. The USB interface additionally permits realtime logging on a PC.
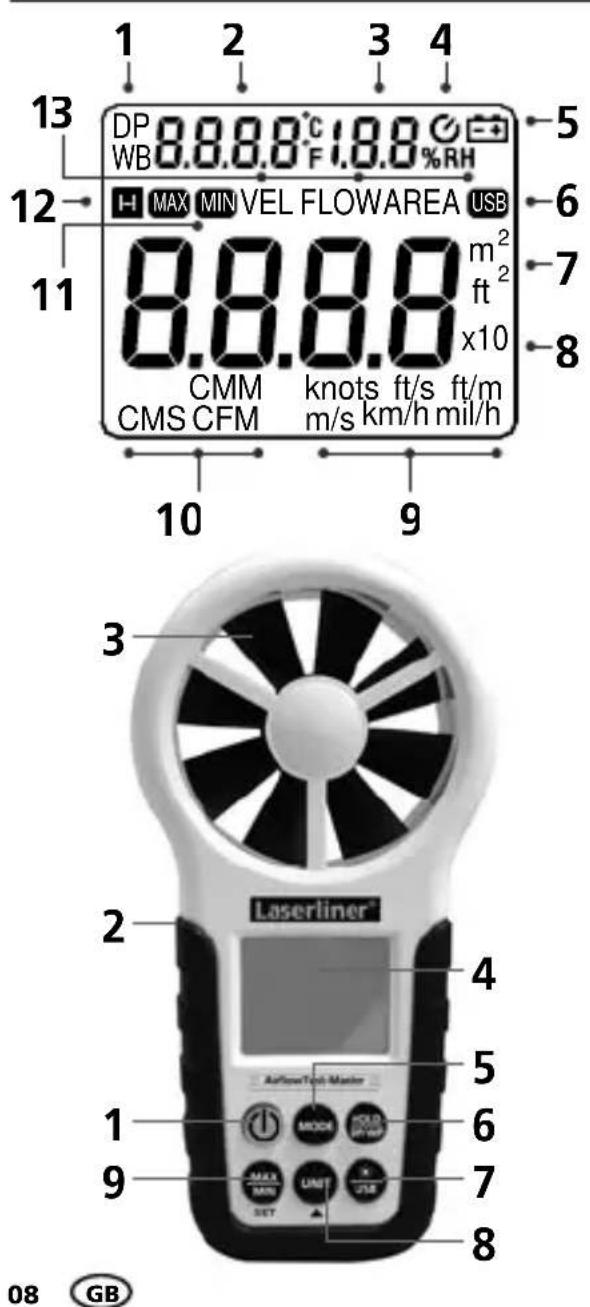
1 Dew point/wet-bulb temperature
2 Ambient temperature ^ C / ^
3 Relative humidity % rH
4 Auto Off function
5 Low battery charge
6 USB data transfer
7 Units of area
8 Measured value factor x10
9 Units of wind speed
10 Units of volumetric flow
11 MIN/MAX
12 Hold measured value
13 Functions
1 ON/OFF
2 1/4" tripod connection
3 Impeller
4 Illuminated LC display
5 Function
6 Hold / dew point / wet-bulb temperature
7 Display lighting / USB transfer
8 Unit of measurement
9 MIN-/MAX display
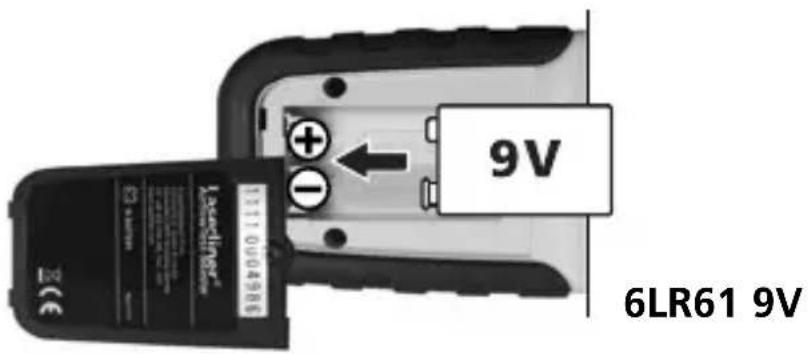
Trisbetjeg die Batteries
Open battery compartment and insert batteries corresponding to installation symbols. Ensure correct polarity.
ON/OFF
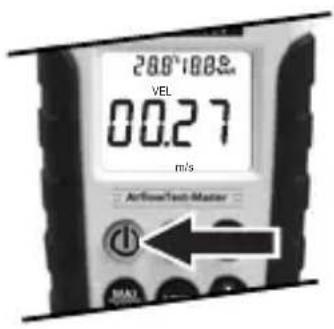
BAUTO-Off (20 min.)
4 Room climate
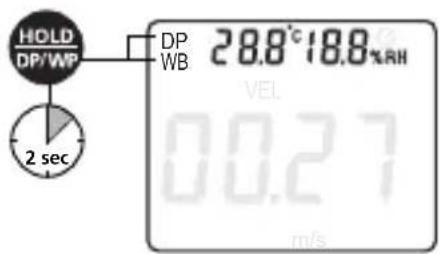
When switched on, the ambient temperature and relative humidity are permanently shown on the display. The dew point or wet-bulb temperature can also be set in place of the ambient temperature. Change between the different values by pressing and holding the „DP/WP" button.
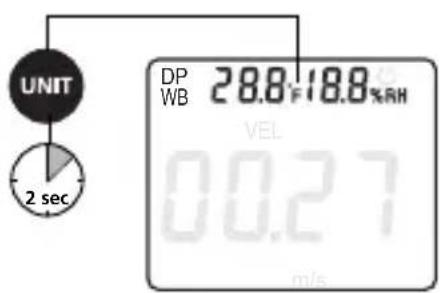
You can set the units ^ C / ^ by pressing and holding the "UNIT" button.
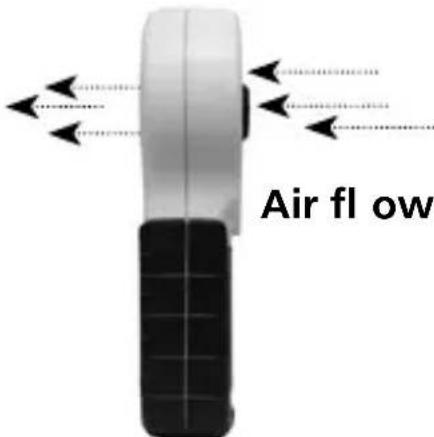
Please refer to the following instructions for use when determining wind speed or volumetric flow rate:
- Position the device parallel to the flow source
- Place the device as close as possible to the flow source
- Use the MAX function to determine the position with the strongest air flow
- Avoid direct sunlight during measurement
Wind speed
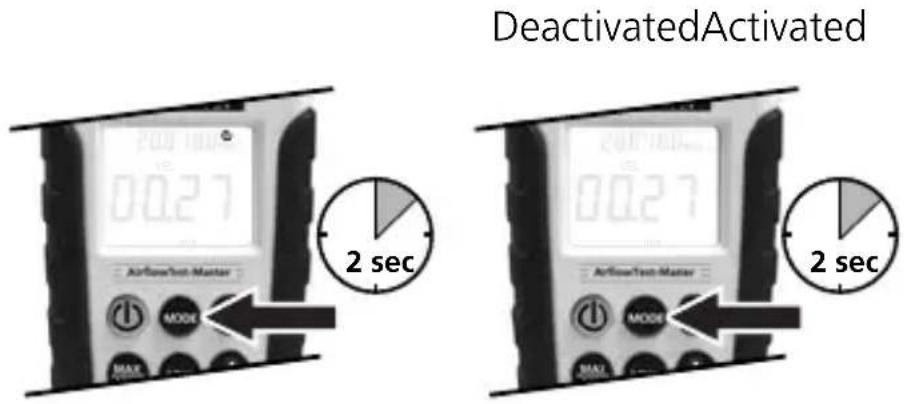
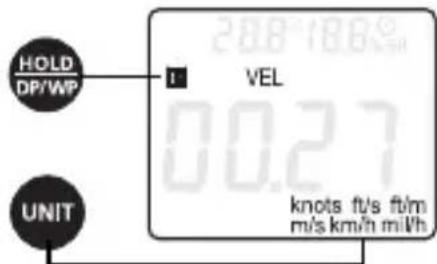
After switching on by pressing the MODE" button, activate the "VEL" function. Press the "UNIT" button repeatedly to change the units: m/s (metres per second), km/h (kilometres per hour), mil/h (miles per hour), ft/m (feet per minute), ft/s (feet per second), knots.
Press the MAX/MIN button to display the highest and/or lowest value during a measurement. As its name suggests, the HOLD button enables you to hold the current measured value.


The „MODE“, „UNIT“ and „MIN/MAX“ functions are deactivated while the „HOLD“ function is activated. These functions are available again after pressing the „HOLD“ button once more.
6 Volumetric flow
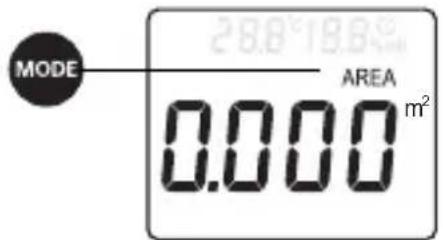
The outlet area of the flow source must first be defined before determining volumetric flow.
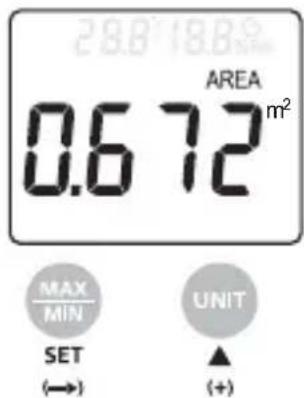
After switching on by pressing the MODE" button, activate the function for measuring volumetric flow until AREA" appears on the display. The first number begins to flash. Use the (+) and SET (change decimal place) buttons to enter the determined area.
The area can be set both in square metres (m^2) as well as in square feet (ft^2) . The end of the input is signalled by a double beep.
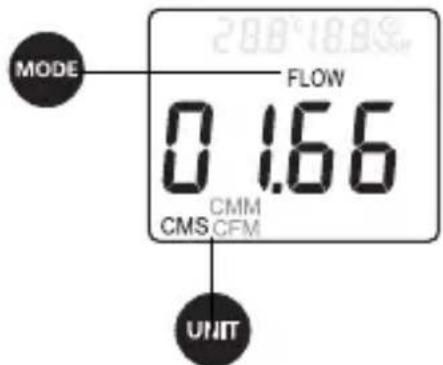
Activate the "FLOW" function by pressing the "MODE" button. After selecting the corresponding unit - CMM (cubic metres per minute), CFM (cubic feet per minute) and CMS (cubic metres per second) - press the "UNIT" button to determine the volumetric flow based on the set area.

The „MODE“, „UNIT“ and „MIN/MAX“ functions are deactivated while the „HOLD“ function is activated. These functions are available again after pressing the „HOLD“ button once more.
MIN/MAX/HOLD
The MAX function is activated by pressing the „MAX/MIN“ button. The measured value currently displayed corresponds to the largest measured value. Press the „MAX/MIN“ button again to activate the MIN function and show the smallest measured value. To deactivate „MAX/MIN“, press the button again until the value is no longer shown on the display.
Press the "HOLD" button to hold the current measured value on the display. Press the button again to deactivate this function.
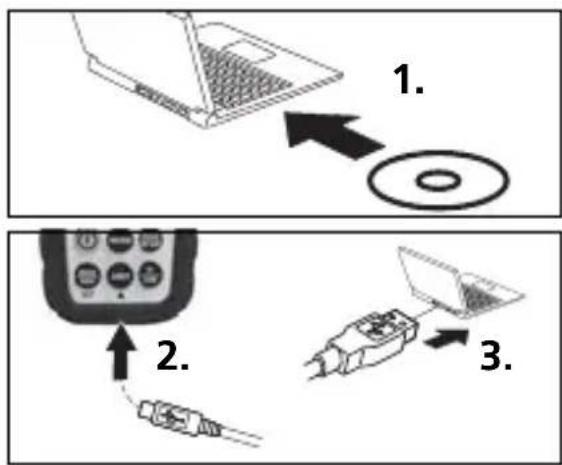
USB transfer
Measured values can be transferred to a PC in realtime via the integrated USB interface. The values can then be stored and documented using the supplied software. First install the software and the corresponding drivers from the CD to the terminal unit. Follow the instructions for the installation routine. Once you have successfully installed the software, connect the measuring instrument to the PC and set up a USB connection.
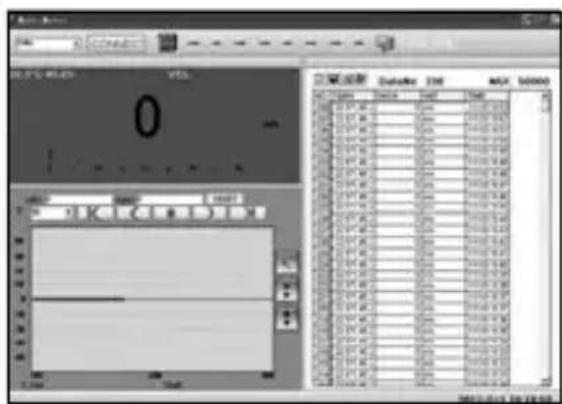
Start the software and activate the USB function by pressing and holding the "USB" button. The software now shows the measured values both in numerical as well as in graphic form.
For further information on how to use the software, refer to the Help function that contains a detailed description of the functions.
| Technical data | ||
| Measuring range Resolution Accuracy | ||
| Wind speed | ||
| 0.80...30.00 m/s 0.01 km/h ± (2,0 % + 50 digits) | ||
| 1.40...144.0 km/h 0.01 ft/s ± (2,0 % + 50 digits) | ||
| 1.30...98.50 ft/s 0.01 knots ± (2,0 % + 50 digits) | ||
| 0.80...58.30 knots 0.01 mil/h ± (2,0 % + 50 digits) | ||
| 0.90...67.20 mil/h 1 ft/m ± (2,0 % + 5 digits) | ||
| 78...5900 ft/m 1 ft/m ± (2,0 % + 5 digits) | ||
| Ambient temperature, dew point, wet-bulb | ||
| -10 °C...60 °C 0.1 °C ± 1,5 °C | ||
| Relative humidity | ||
| 20...80 %rH 0.1 %rH | ± 3% (25°C) | |
| <20 and >80 %rH 0.1 %rH | ± 5% (25°C) | |
| Measuring range Resolution Area | ||
| CMM, CFM, CMS | ||
| 0...99990 m3/min 1 m3/min | 0...9,999 | m2 |
| 0...99990 ft3/min | 1 ft3/min | 0...9,999 ft2 |
| 0...9999 m3/sec 1 m3/sec | 0...9,999 m | 2 |
| Power supply | 1 x 6F22 9V | |
| Operating temperature | 0 °C...40 °C | |
| Max. relative humidity | 85 % | |
| Dimensions (W x H x D) | 85 x 165 x 38 mm | |
| Weight | 200 g | |
Technical revisions reserved. 01.12
EU directives and disposal
This device complies with all necessary standards for the free movement of goods within the EU.
This product is an electric device and must be collected separately for disposal according to the European Directive on waste electrical and electronic equipment.
Further safety and supplementary notices at:
www.laserliner.com/info


Con性和 design of the program, the program is designed to be able to transmit data in a secure manner. The program is designed to be able to transmit data in a secure manner. This is possible by using a secure communication channel (SCCH) and a secure communication channel (SCCHC). The SCCH is a secure channel that can be used to transmit data from a computer to another computer. The SCCHC is a secure channel that can be used to transmit data from a computer to another computer. The SCCHC is a secure channel that can be used to transmit data from a computer to another computer. The SCCHC is a secure channel that can be used to transmit data from a computer to another computer. The SCCHC is a secure channel that can be used to transmit data from a computer to another computer. The SCCHC is a secure channel that can be used to transmit data to a computer.
Laserliner Innovation in Tools