LuxTestMaster - Lux meter Laserliner - Free user manual and instructions
Find the device manual for free LuxTestMaster Laserliner in PDF.

| Product Type | Lux Meter |
| Brand | Laserliner |
| Model | LuxTestMaster |
| Measuring Range | 20.00 lux; 200.0 lux; 2000 lux; 20,000 lux; 200,000 lux |
| Accuracy | 3 % V(λ), cosine correction 2 % |
| Sensor | Silicon photodiode, spectral range 320 nm to 730 nm |
| Display | LCD 3 1/2 digits with analog bar graph |
| Measurement Units | Lux (lx) and foot candle (FC) |
| Main Functions | Manual/Auto measuring range, relative measurement, Peak function, MAX/MIN, hold value (HOLD), zero alignment, auto power off (10 min), key tones enable/disable |
| Power Supply | 1 battery 6F22 9 V |
| Dimensions (L x H x D) | 89 mm x 190 mm x 42.5 mm |
| Weight | 250 g (including battery) |
| Operating Temperature | -10 °C to 50 °C |
| Max. Relative Humidity | 85 % (non-condensing) |
| Sampling Rate | ≥ 2 measurements per second |
| Standard | DIN 5032-7 type B |
| Maintenance and Cleaning | Clean with a soft, dry cloth. Avoid solvents and excessive moisture. |
| Safety | Electrical device conforming to EU standards. Disposal according to WEEE directive. |
| Spare Parts and Repairability | Replaceable battery (type 6F22). For any repair, contact Laserliner after-sales service. |
| General Information | Subject to technical modifications. See www.laserliner.com/info for additional notes. |
Frequently Asked Questions - LuxTestMaster Laserliner
User questions about LuxTestMaster Laserliner
0 question about this device. Answer the ones you know or ask your own.
Ask a new question about this device
Download the instructions for your Lux meter in PDF format for free! Find your manual LuxTestMaster - Laserliner and take your electronic device back in hand. On this page are published all the documents necessary for the use of your device. LuxTestMaster by Laserliner.
USER MANUAL LuxTestMaster Laserliner
Read the operating instructions and the enclosed brochure „Guarantee and additional notices" completely. Follow the instructions they contain. Safely keep these documents for future reference.
Function/application
The measuring instrument is used to measure illuminance in workplaces, offices, public buildings and in industry. The integrated photodiode determines the illuminance in lux and foot-candles. With the corresponding function, it is possible to carry out comparison and reference measurements as well as peak measurements for registering quick changes in light levels.
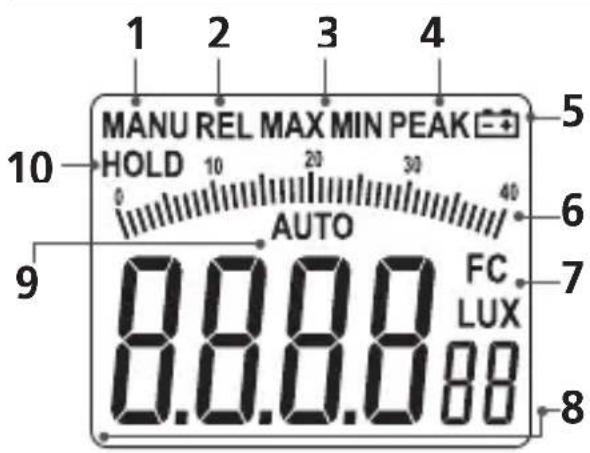
1 Manual measuring range
2 Relative measurement
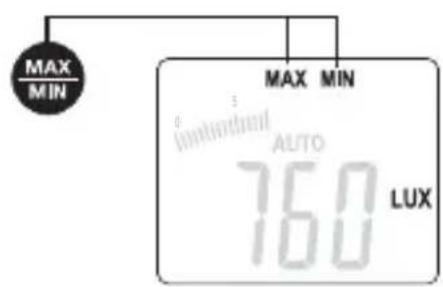
3 MAX/MIN function
4 PEAK function
5 Low battery charge
6 Analogue scale
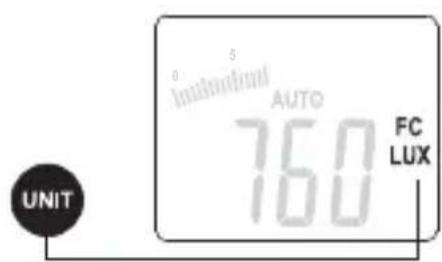
7 Units: Lux, foot-candle
8 Measured value
9 Automatic measuring range
10 Hold measured value
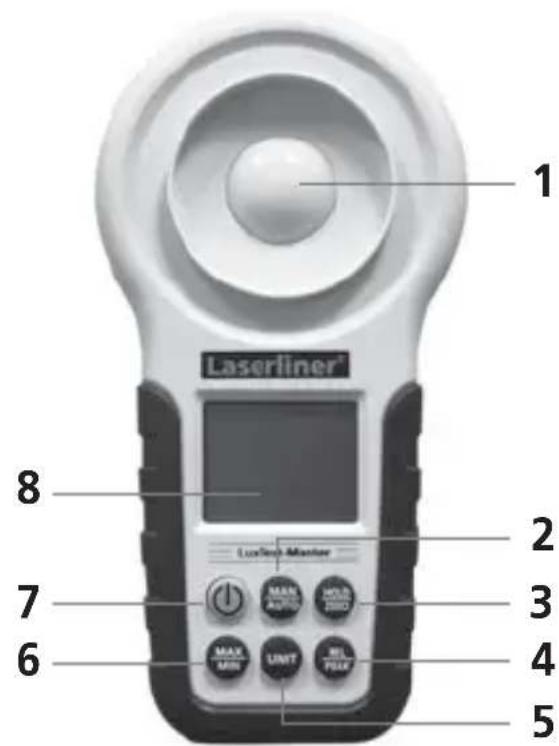
1 Light sensor
2 Manual/automatic measuring range
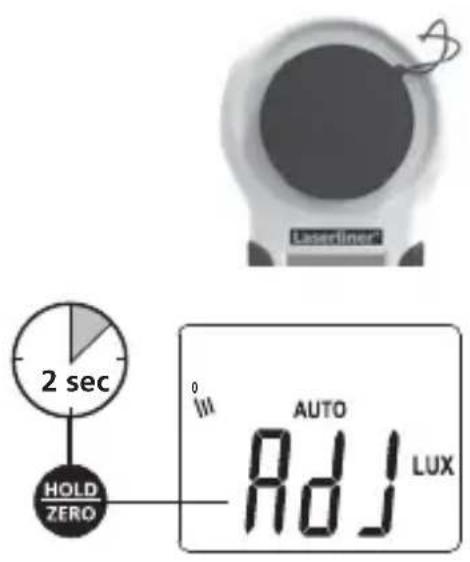
3 Hold measured value / zeroing function
4 Relative / peak measurement
5 Unit of measure
6 MAX/MIN function
7 ON/OFF / button tones
8 LC display
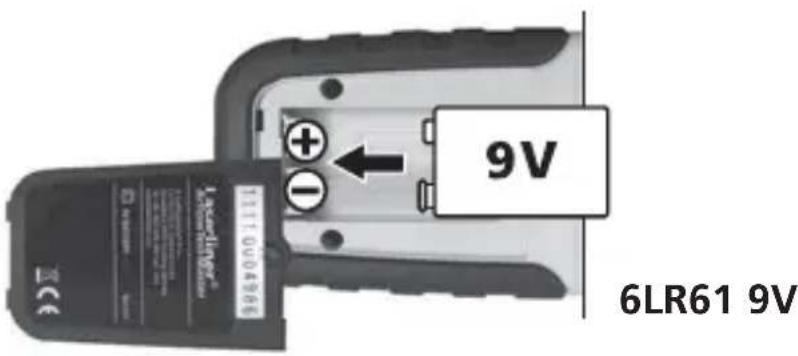
Inserting the batteries
Open battery compartment and insert batteries corresponding to installation symbols. Ensure correct polarity.
2 ON/OFF
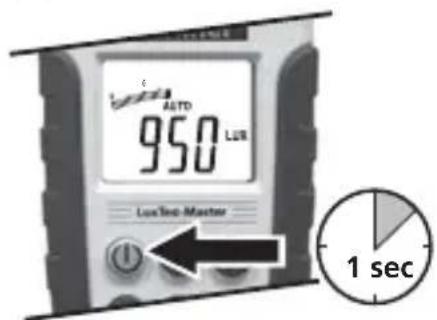
Automatic switch-off after 10 minutes.
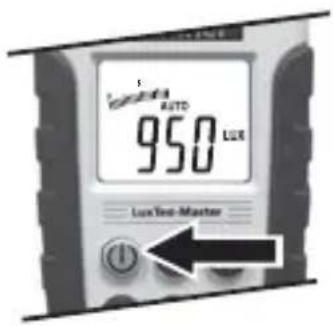
Button tones
With the device switched on, briefly press and hold the "ON/OFF" button to deactivate the button tones. Press the button again to reactivate the button tones.
Measuring range (manual/automatic)
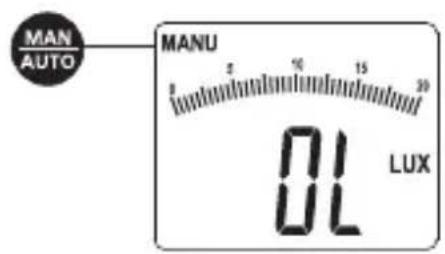
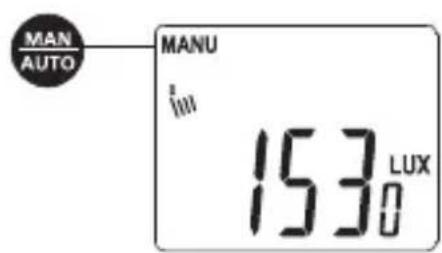
After being switched on, the measuring instrument always starts set to the automatic measuring range. Press the "MAN/AUTO" button to change over to manual measuring range. The measuring range, i.e. the decimal place (20.00 lux; 200.0 lux; 2,000 lux; 20,000 lux; 200,000 lux) changes with each additional press of the button. "OL" will appear in the display when the measured value is outside the measuring range. Press the "MAN/AUTO" button until the corresponding manual measuring range is set or until "AUTO" appears in the display, indicating that the automatic measuring range is set again.
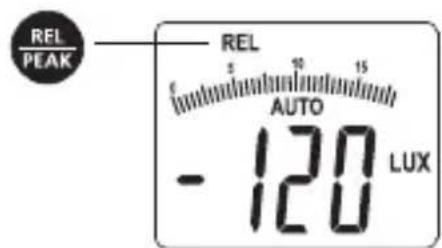
Relative measurement
After switching on the device, activate relative measurement by pressing the „REL/PEAK“ button. The value last displayed will be set as the reference value and it now shows the difference with respect to the set reference value. The relative measurement can be carried out both in the automatic as well as in the manual measuring range. This function is deactivated by pressing the „REL/PEAK“ button again.
Peak measurement
After switching on the device, activate peak measurement by pressing the „REL/PEAK“ button. This function increases the response of the sensor, thus enabling it to register quick changes in light levels. Peak measurement is only possible in the manual measuring range. Set the corresponding measuring range as described in Step 4. Press and hold the „REL/PEAK“ button to deactivate this function.
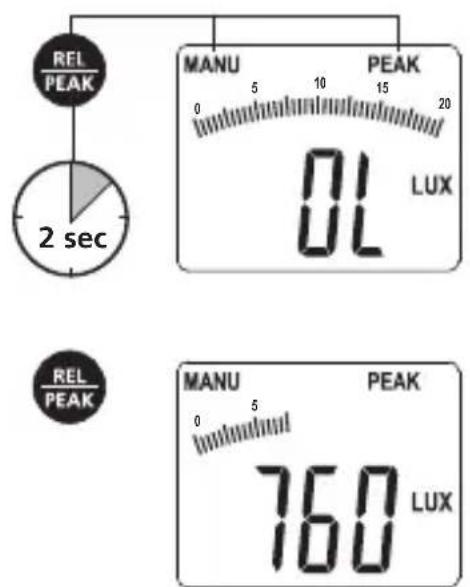

The peak value remains visible on the display. Measured values lower than the peak value will not be displayed.
Units of measure
The measured values can be displayed in Lux and FC (foot-candles). Press the "UNIT" button to change the unit of measure.
Zeroing function
The zero point of the sensor curve can be adjusted for optimum measurement results at low illuminance levels. After switching on the device, fit the protective cap in order to completely cover the sensor. Press and hold the "HOLD/ZERO" button to start the adjustment procedure. Wait until an acoustic signals sounds from the device to confirm successful adjustment. The value 0.00 lux appears on the display. Avoid strong sunlight while adjusting the device.
8 MAX/MIN
The MAX/MIN function is used to show the highest and lowest measured value during a measurement. To deactivate the function, press and hold the „MAX/MIN“ button until the required function appears on the display or until „MAX“ or „MIN“ is no longer visible.
Reference values for illuminance in indoor spaces
| Practical example Luminous intensity in lux | |
| Traffic areas, ancillary rooms | 20 |
| Corridors in buildings used by people | 50 |
| Sanitary facilities, machine rooms, staircases | 100 |
| Regularly occupied work stations within production facilities, canteens | 200 |
| Conference rooms, gyms | 300 |
| Offic ces, medical facilities (emergency unit) | 500 |
| Design and drawing rooms | 750 |
| Monitoring locations, assembly rooms, test stations | 1000 |
| Assembly rooms for small components | 1500 |
| Technical data | |
| Measuring range | 20.00 lux; 200.0 lux; 2,000 lux; 20,000 lux; 200,000 lux |
| Accuracy | 3% V(λ) adaptation 2% cosine correction |
| Sensor Silicon photodiode | |
| Spectral range 320 nm...730 nm | |
| LC display 3 1/2 positions with analogue bargraph | |
| Sampling rate ≥ 2 measurements/second | |
| Standard DIN 5032-7 Type B | |
| Voltage supply 1x 6F22 9V | |
| Operating temperature -10 °C ... 50 °C | |
| Max. relative humidity 85% (no condensation) | |
| Dimensions (W x H x D) 89 mm x 190 mm x 42.5 mm | |
| Weight 250 g (including batteries) | |
Technical revisions reserved. 02.12
EU directives and disposal
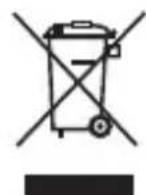
This device complies with all necessary standards for the free movement of goods within the EU.
This product is an electric device and must be collected separately for disposal according to the European Directive on waste electrical and electronic equipment.
Further safety and supplementary notices at: www.laserliner.com/info