USER MANUAL TT702 THOMSON
natural_image
Topograph of a vintage CD or DVD with open lid and stand (no visible text or symbols)
MODE D'EMPLOI
LISEZ COMPLÈTEMENT CE MANUEL D'UTILISATION AVANT
D'UTILISER CET APPAREIL ET CONSERVEZ CE LIVRET POUR VOUS
Y RÉFÉRER ULTÉRIEUREMENT.
Démarrage 2
natural_image
Technical line drawing of a CD or DVD disc assembly with components and mounting base (no text or symbols)
natural_image
Technical line drawing of a mechanical connector assembly (no text or symbols)
natural_image
Mechanical assembly diagram showing a shaft and housing with a rotating shaft (no text or symbols)
Réglage anti-skating :
Lire un disque :
natural_image
Pure diagram of two connected electrical connectors without any text or symbols

Blanc (G)
Rouge (D)


Rouge (D)
BELGIQUE, customerservice@bigben-interactive.be
NEDERLAND, customerservice@bigben-interactive.nl
ESPAÑA, sat@bigbenespana.es
ITALIA, support@bigbeninteractive.it
www.bigben.eu
THOMSON
EN
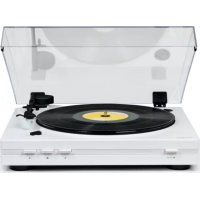
TT700
TT702
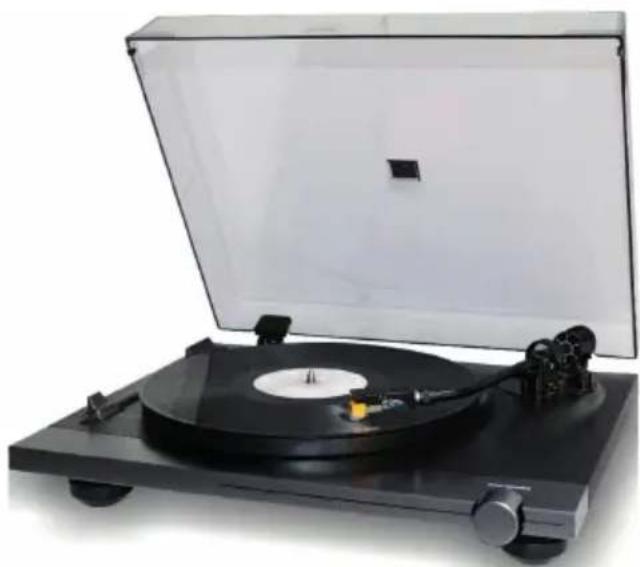
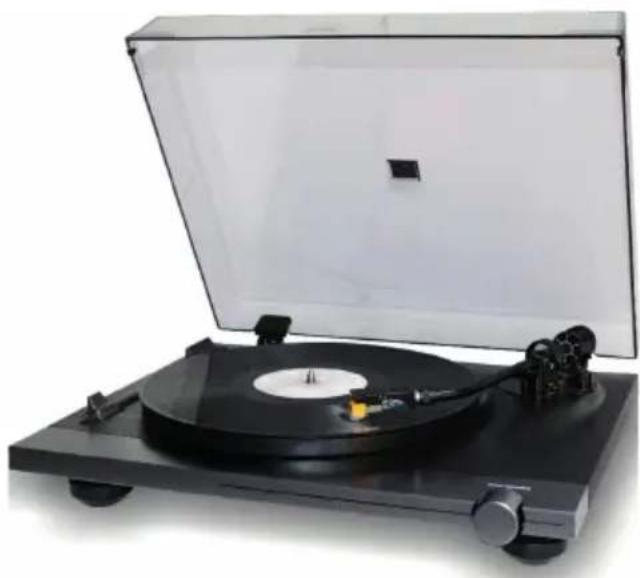
TURNTABLE

natural_image
Topograph of a vintage gramophone with open lid and stand (no visible text or symbols)
OPERATING INSTRUCTIONS
READ THIS USER MANUAL IN FULL BEFORE USING THIS DEVICE AND KEEP THIS BOOKLET FOR FUTURE REFERENCE.
Getting started 14
Warnings and safety instructions 14
Package contents 16
Precautions for use 16
Description of parts 17
Features and operation 18
Technical specifications 22
Looking after your product 23
Care of the environment 23
Additional information 23
Declaration of conformity 24
Getting started
• Take the device out of the box.
- Remove all packaging materials from the product.
- Place the packaging materials in the box or dispose of them safely according to the recycling instructions on the packaging of the device.
Warnings and safety instructions
You must read and understand all instructions before using this device. In the event of damage due to failure to follow the instructions, the warranty will not apply.

- Never remove the casing from this device.
- Never place this device on top of other electrical equipment.
-
Protect the power cord from being walked on or pinched, particularly at plugs, sockets and the point where they come out from the device. Check that the supply voltage corresponds to the voltage shown on the plate on the back of the device. When disconnecting the mains plug, always remove the plug from the socket. Never pull on the cord. Before plugging into the power outlet, make sure you have made all the other connections.
-
Use only equipment/accessories recommended by the manufacturer.
-
Leave all repairs to the device to qualified repairers. Repair is necessary when the device has been damaged in any way, including:
-
if the power cord is damaged;
- in the event of a liquid spill or objects being inserted into the device;
- if the device is exposed to rain or humidity;
- if the device does not operate normally;
-
or if the device has been dropped.
-
The type plate is located on the bottom of the device.
- Never block the ventilation holes.
- Make sure you have sufficient, stable space around the device for ventilation.
- This device should be used in a temperate environment, away from direct sunlight, naked flames or heat, heaters, stoves or any other device (including amplifiers) that generate heat. Do not install it near heat sources.
- Unplug the device before cleaning it. Do not lubricate any part of this device. Clean it with a soft cloth. Do not use abrasives or aggressive cleaners.
-
Make sure you always have easy access to the power cord, plug or adapter, so that you can unplug this device from the mains outlet if necessary.
-
Do not use this device near a water point. It must not come into contact with drops or splashes. Do not use this device in a humid or wet environment.
-
Unplug this device during lightning storms or when unused for long periods of time.
-
This device can be used by children aged 8 years and over, as well as by people with reduced physical, sensory or mental capacities or a lack of experience and knowledge, provided they are supervised or have received instructions on how to use the device safely and understand the risks involved. Children must not play with the device or cord (risk of strangulation). Cleaning and user maintenance must not be carried out by children without supervision.
-
This device must only be supplied with very low safety voltage corresponding to the marking on the device.
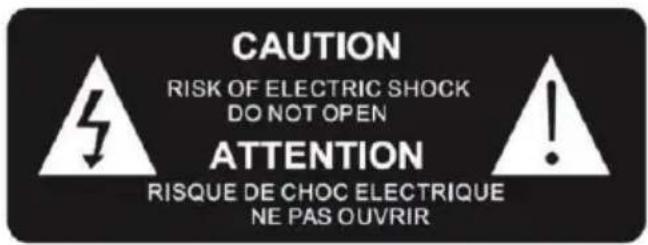
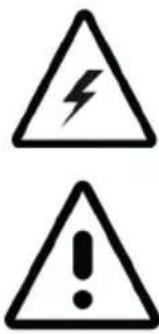
The lightning bolt symbol within an equilateral triangle alerts users to the presence of dangerous uninsulated electrical voltages inside the device that are strong enough to present a risk of electric shock.
The exclamation mark within a triangle indicates the presence of important instructions for operation and maintenance (repair) in the documentation that accompanies the device.
| Class II material | |
| Direct current | |
| Alternating current | |
| For indoor use only | |
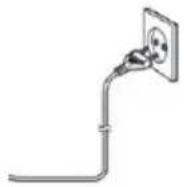
Place the unit in the desired position and unwind the power cable. Insert the cable into the power outlet and turn the power on if necessary.
Package contents
Check and identify the contents of the packaging:
- Main unit
- Turntable
- Counterweight
- Vinyl mat
- 45 rpm adapter
• Dust cover for the main unit
- Dual RCA male to dual RCA male cable
• Dual RCA female to 3.5mm stereo jack cable
• External power adapter
- Operating instructions
Precautions for use
- Do not place anything on the turntable cover. Objects placed on the cover may cause noise or fall due to vibration, especially when playing.
- Do not move or lift the device while in use. When playing, the record spins. Lifting or moving the device during operation could damage the record, arm, cartridge or unit. Always remove the record before moving the device. Lifting or moving the device with a record could damage the record, arm and cartridge, or cause it to malfunction.
Description of parts
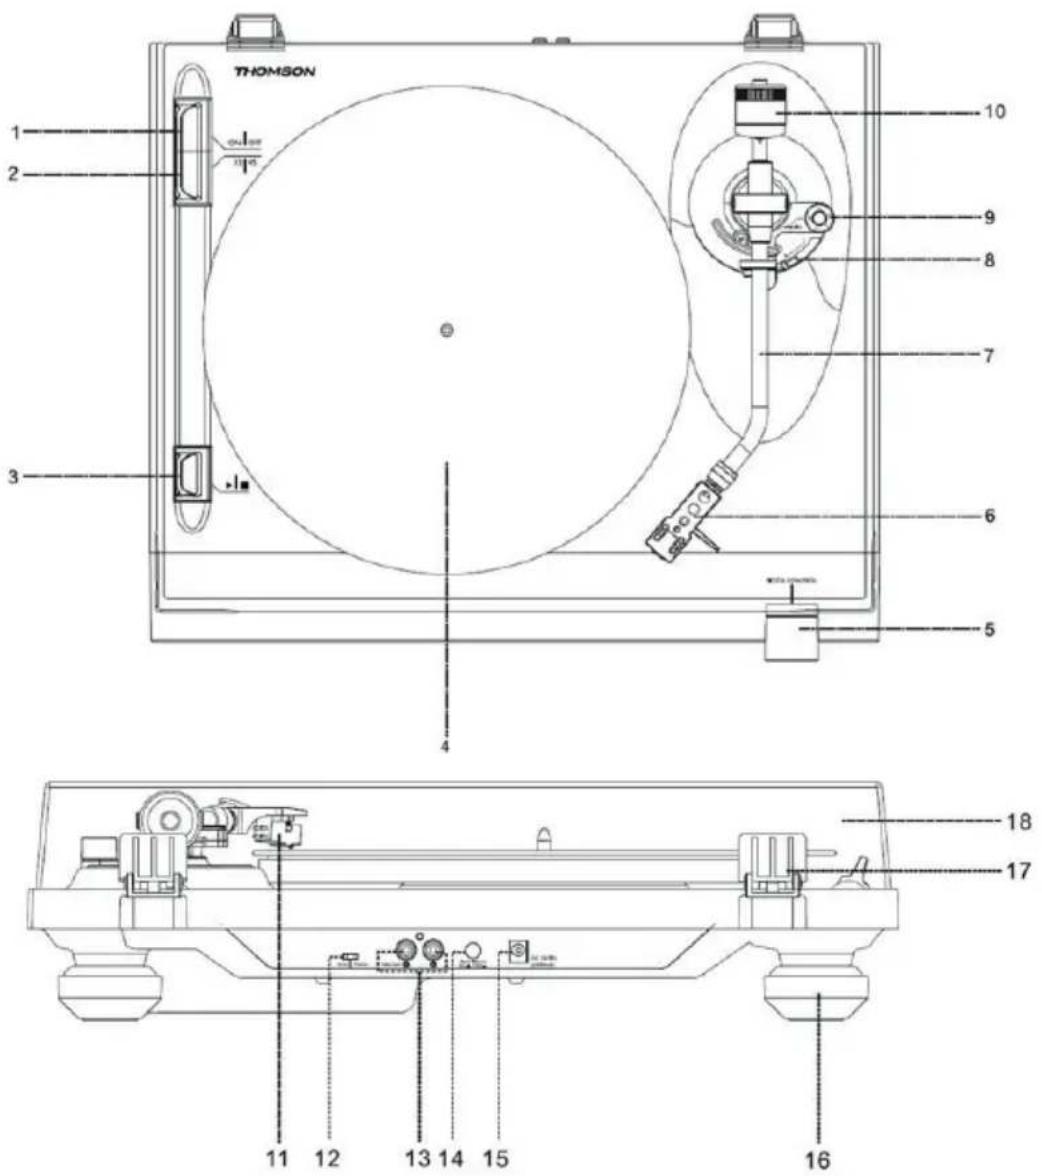
- ON / OFF button
- 33 / 45 rpm button
- ▶ On off button
- Platter
- Speed control knob
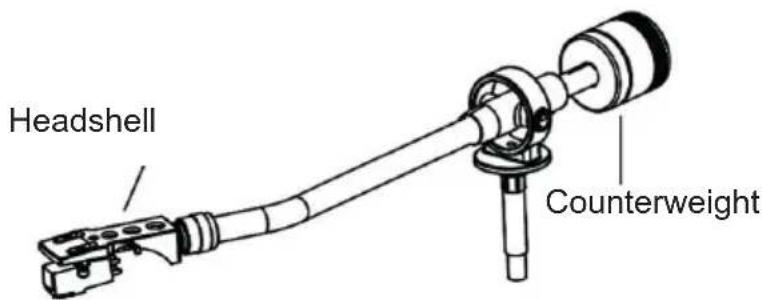
- Headshell
- Tone arm
- Lifting lever
- Anti-skating knob
- Counterweight
- Cartridge
- Phono/line selector
- RCA line-out socket
- Automatic return ON / OFF
- External power adapter jack
- Base
- Cover hinge
- Cover
Features and operation
Connection:
- Connect the external power adapter to the appropriate outlet.
- Connect the device to a suitable socket.
- Turn on the turntable using the ON/OFF button.
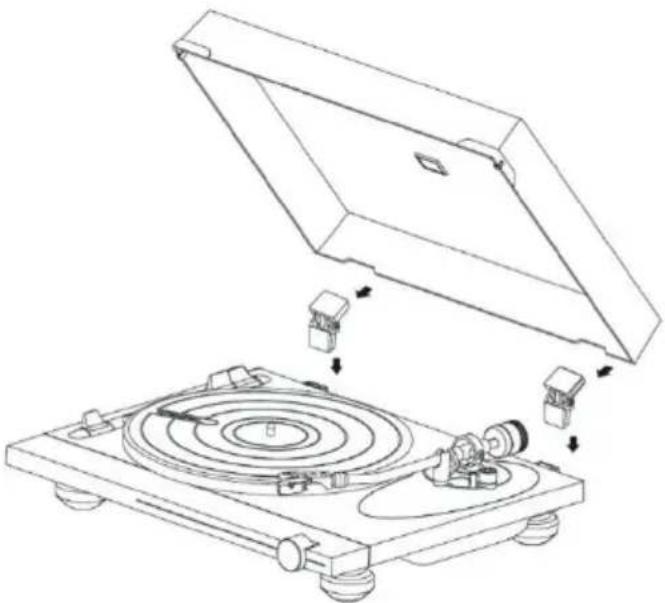
- Install the dust cover on the hinges at the top of the unit.
natural_image
Technical line drawing of a CD or DVD disc assembly with components and mounting base (no text or symbols)
Install the platter on the central axis:
- Attach the platter to the platform.
- Place the side of the platter marked "top" near the opening at the top.
- Place the vinyl mat on the turntable platter.

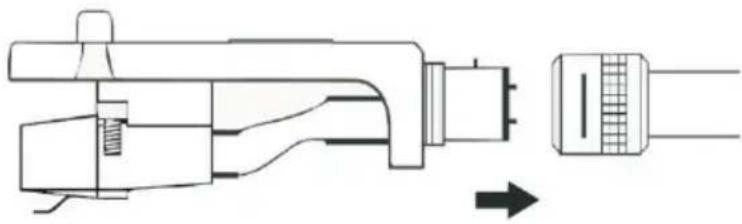
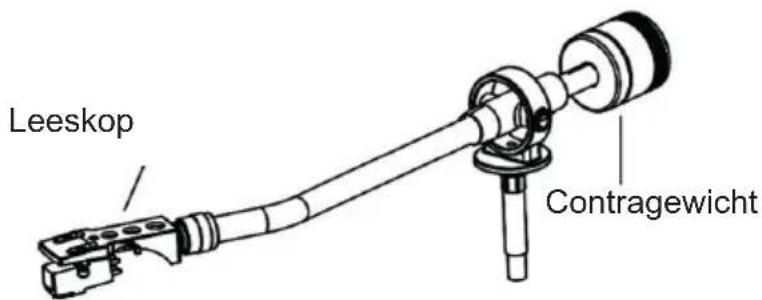
- Insert the headshell into the end of the tone arm, then tighten the lock nut, firmly holding the headshell horizontally.
natural_image
Technical line drawing of a mechanical connector assembly (no text or symbols)
-
Add weight to the tone arm. You'll find the weight in the paper packaging that holds the record player in place inside the box.
-
Turn the weight to the graduation mark.
-
Turn the dial to zero.
-
Turn the weight and dial anti-clockwise to position 1.
-
The weight is correctly adjusted.
-
If you are having trouble with playing, adjust the anti-skating control accordingly.
- Slide the counterweight into the tone arm. Turn it slightly and screw it (anti-clockwise) to the rear end of the tone arm. Each full turn of the graduated ring corresponds to approximately 5.0 grams (+/-0.5 grams).
- For the Audio-Technica AT-91 cartridge, turn the counterweight anti-clockwise until the graduated ring reaches the graduation at the back end of the tone arm.
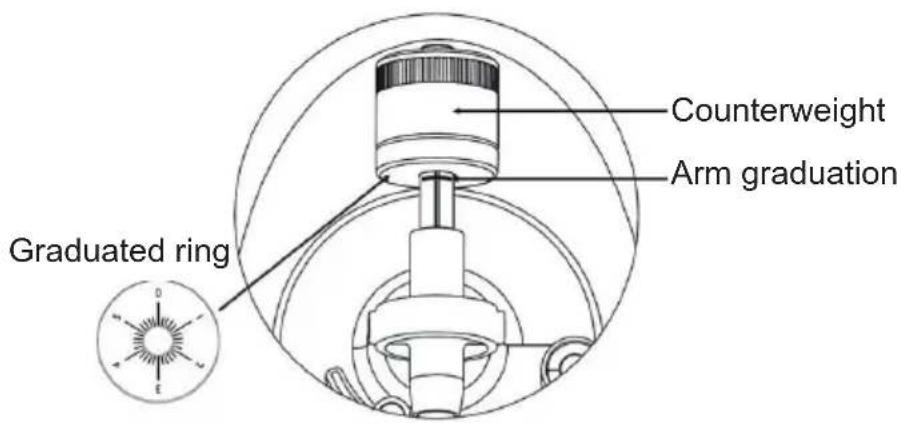
- Hold the counterweight with one hand, and with the other, turn the graduated ring to 0 on the scale of the arm, making sure not to rotate the counterweight.
- The Audio-Technica AT-91 cartridge supplied requires approximately 2.5 grams of tracking force. To achieve this tracking force, turn the counterweight anti-clockwise, to position 1 on the graduated ring. If you experience any skipping issues turn towards 1.5–2.
- There is a weight tolerance of approximately +/-0.5g . If necessary, turn the counterweight anti-clockwise to increase the tracking force, or clockwise to reduce it.
- If you're installing another cartridge, you can adjust the tracking force by turning the counterweight one way or the other, as required.
Adjusting the balance:
- Set the anti-skating knob to 0.
- Hold the cartridge support with one hand and balance the arm by turning the counterweight
one way or the other. Balance is achieved when the tone arm is parallel to the record on the platter, and the arm is not tilting toward the counterweight or toward the headshell.
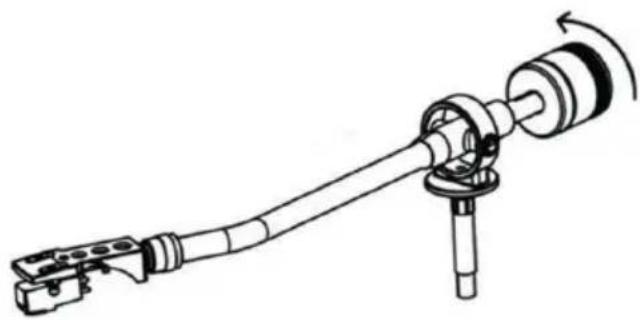
Well balanced arm:
The end carrying the counterweight is too heavy, so turn the counterweight anti-clockwise to balance it:
natural_image
Mechanical assembly diagram showing a shaft and housing with rotating shaft (no text or symbols)
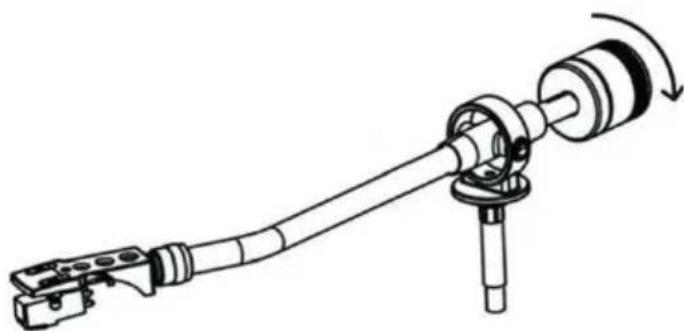
The end carrying the cartridge head is too heavy, so turn the counterweight clockwise to balance it:
natural_image
Mechanical assembly diagram showing a shaft and housing with a rotating shaft (no text or symbols)
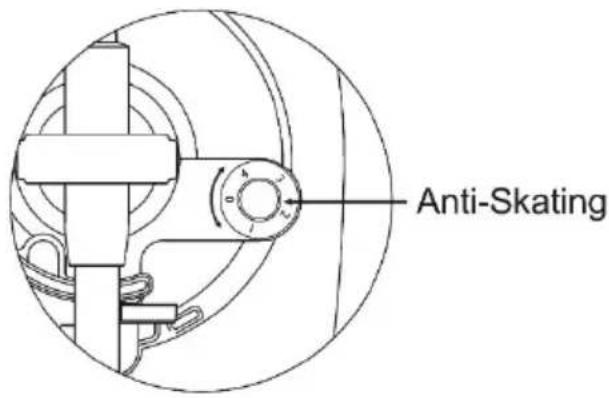
Anti-skating adjustment:
To adjust the anti-skating mechanism, you can turn the anti-skating knob anti-clockwise to reach 0 grams of tracking force. You can turn the anti-skating knob clockwise to achieve up to 4 grams of tracking force. You can adjust the anti-skating knob if the cartridge slips.
Phono/line choice:
- The phono/line selector is located on the rear of the device.
- If you select "phono", the audio signal will bypass the internal preamplifier, and the turntable needs to be connected to an external preamplifier to play your music.
- If you select "line", the audio signal will be processed by the internal preamplifier. The turntable can be connected directly to active speakers to play music.

Playing a record:
- Remove the protector from the stylus.
- Make sure the arm is fully detached from the arm rest before playing and placed back securely afterwards.
- Push the lift lever up to raise the arm, and carefully move it towards the record: the platter will begin to turn.
- Push the lift lever down to lower the arm and gently rest it on the record. The record starts playing.
- Push the lift lever up to raise the arm: the turntable continues to turn but the sound stops. To continue playing, lower the lift lever.
- Changing speed - 33/45 rpm: depending on the record, choose 45 or 33 rpm playing.
- Use the 45 rpm adapter if necessary.
- Start / stop button: stops or resumes platter rotation.
- An Auto-return on/off button is located on the back of the device to activate/deactivate the automatic return function of the arm. If the auto-return function is enabled, the arm will automatically return back into place when the record is finished playing.
NB: If one of your vinyl records does not play to the end due to the auto-return function, you can turn it off using the button on the back of the T700. Please note that the turntable will continue to turn even if the record is finished, so you need to manually lift and replace the tone arm.
Line output:
- This system can be connected to an external device (for example, an active external amplifier and speaker) via the RCA line output on the rear of the device.
- Use the dual RCA male to dual RCA male cable supplied to connect an external device.

- If necessary, use the dual female RCA to 3.5mm stereo jack cable supplied for connection to the 3.5mm jack of an external device.
Technical specifications
Turntable specifications:
| Operating voltage 12 V DC/1000 mA | |
| Power consumption 0.5 W on standby; 3 W | in operation |
| Dimensions (LxWxH) 450 x 125 x 395 mm | |
| Unit weight 4.5 kg | |
| Drive mode Belt drive | |
| Speed33-1/3 and 45 rpm | |
| S/N ratio 45 dB | |
| Cartridge type Moving magnet | |
| Cartridge model Audio-Technica AT-91 | |
| Turntable Wooden platter, 295mm diameter | |
External power adapter specifications:
| Manufacturer name or adapter brand KPTEC |
| Adapter model number K12V120100G | |
| Input voltage and frequency 100-240V / 50~60Hz |
| Voltage, current and output power | 12V 1A 12W |
| Average active efficiency | 82.96% |
| Efficiency at low load (10%) | 71% |
| Power consumption without load | 0.1W |
Looking after your product
• Always unplug the device when not in use and before cleaning it.
- Do not play music at excessive volume levels as this may damage your hearing or equipment.
- Do not use this device in a humid or wet environment.
- Unplug the device before cleaning it. If the surface of the unit is dirty, clean it with a soft, lint-free cloth moistened with a little diluted liquid soap. Allow the surface of the unit to dry completely before using it.
- Do not use abrasives or aggressive cleaners. Do not use wipes soaked in chemicals, solvents or the like, as they may damage the surface of the unit.
Care of the environment

Your product is designed and manufactured with high-quality materials and components, which can be recycled and reused.

When this crossed-out wheeled bin symbol features on a product, it means that the product is covered by European Directive 2002/96/EC. Please inquire about the local separate collection system for electrical and electronic products. Please act according to local rules and do not throw away your old products with household waste. By ensuring this product is disposed of correctly, you are also helping to prevent potentially negative consequences for the environment and human health.
- Automatic standby: when no music is being played by a connected device, the device automatically switches to standby if:
- no button is pressed for 10 minutes,
- no audio signal is output from a connected device for 10 minutes.
- The user must turn the device back on using the ON/OFF button.
- THOMSON is a registered trademark of TECHNICOLOR SA or its subsidiaries, used under licence by Bigben Interactive.
• Bigben Interactive hereby declares that the radio equipment type TT700/TT702 is in compliance with Directive 2014/53/EU. The full text of the EU declaration of conformity is available at the following internet address: https://www.bigben-interactive.co.uk/support/
Fabricant : Bigben Interactive FRANCE
396, Rue de la Voyette, C.R.T. 2, Fretin,
CS90414 - 59814 Lesquin Cedex, France
BELGIQUE, customerservice@bigben-interactive.be
NEDERLAND, customerservice@bigben-interactive.nl
ESPANA, sat@bigbenespana.es
ITALIA, support@bigbeninteractive.it
www.bigben.eu
THOMSON
ES
TT700
TT702
TOCADISCOS

natural_image
Black-and-white photo of a vintage flatform artist's gross with open lid and stand (no visible text or symbols)
natural_image
Technical line drawing of a CD or DVD disc assembly with components and mounting base (no text or symbols)
natural_image
Technical line drawing of a mechanical connector assembly (no text or symbols)
natural_image
Mechanical assembly diagram showing a shaft and housing with rotating components (no text or symbols)
natural_image
Mechanical assembly diagram showing a shaft and housing with a rotating shaft (no text or symbols)
Ajuste anti-skating:
Leer un disco:
BELGIQUE, customerservice@bigben-interactive.be
NEDERLAND, customerservice@bigben-interactive.nl
ESPAÑA, sat@bigbenespana.es
ITALIA, support@bigbeninteractive.it
www.bigben.eu
THOMSON
IT
TT700
TT702
GIRADISCHI

natural_image
Topograph of a vintage gramophone with open lid and stand (no visible text or symbols)
ISTRUZIONI PER L'USO
LEGGERE IL PRESENTE MANUALE CON ATTENZIONE PRIMA DI METTERE IN FUNZIONE IL DISPOSITIVO E CONSERVARLO PER UNA CONSULTAZIONE FUTURA.
natural_image
Technical line drawing of a CD or DVD disc assembly with mechanical components and mounting base (no text or symbols)
natural_image
Technical line drawing of a mechanical connector assembly (no text or symbols)
natural_image
Mechanical assembly diagram showing a shaft and housing with rotating components (no text or symbols)
natural_image
Mechanical assembly diagram showing a shaft and housing with a rotating shaft (no text or symbols)
Leggere un disco:
natural_image
Pure diagram of two connected electrical connectors without any text or symbols

Bianco (S)

Rosso (D)
BELGIQUE, customerservice@bigben-interactive.be
NEDERLAND, customerservice@bigben-interactive.nl
ESPANA, sat@bigbenespana.es
ITALIA, support@bigbeninteractive.it
www.bigben.eu
THOMSON
PT
TT700
TT702
GIRA-DISCOS
natural_image
Black-and-white photo of a vintage flatform artist's gross with open lid and stand (no visible text or symbols)
natural_image
Technical line drawing of a CD or DVD disc assembly with components and mounting base (no text or symbols)
natural_image
Technical line drawing of a mechanical connector assembly (no text or symbols)
natural_image
Mechanical assembly diagram showing a shaft and housing with rotating shaft (no text or symbols)
natural_image
Mechanical assembly diagram showing a shaft and housing with a rotating shaft (no text or symbols)
Ajuste anti-skating:
Ler um disco:
BELGIQUE, customerservice@bigben-interactive.be
NEDERLAND, customerservice@bigben-interactive.nl
ESPANA, sat@bigbenespana.es
ITALIA, support@bigbeninteractive.it
www.bigben.eu
THOMSON
DE
TT700
TT702
PLATTENSPIELER
natural_image
Topograph of a vintage gramophone with open lid and stand (no visible text or symbols)
BEDIENUNGSANLEITUNG
natural_image
Technical line drawing of a CD or DVD disc assembly with components and mounting base (no text or symbols)
natural_image
Technical line drawing of a mechanical component with no visible text or symbols
natural_image
Mechanical assembly diagram showing a shaft and housing with rotating shaft (no text or symbols)
natural_image
Mechanical assembly diagram showing a shaft and housing with a rotating shaft (no text or symbols)
BELGIQUE, customerservice@bigben-interactive.be
NEDERLAND, customerservice@bigben-interactive.nl
ESPAÑA, sat@bigbenespana.es
ITALIA, support@bigbeninteractive.it
www.bigben.eu
THOMSON
NL
TT700
TT702
PLATENSPELER

natural_image
Vintage typewriter with black and white sheet music, showing disc and stand (no visible text or symbols)
GEBRUIKSHANDLEIDING
DEZE GEBRUIKSAANWIJZING VOLLEDIG DOORLEZEN VOORDAT U DIT APPARAAT GEBRUIKT EN HET BOEKJE BEWAREN VOOR LATERE RAADPLEGING.
natural_image
Technical line drawing of a CD or DVD disc assembly with mechanical components and a top view (no text or symbols)
natural_image
Technical line drawing of a mechanical connector assembly (no text or symbols)
Arm in evenwicht:
natural_image
Mechanical assembly diagram showing a shaft and housing with rotating shaft (no text or symbols)
natural_image
Mechanical assembly diagram showing a shaft and housing with a rotating shaft (no text or symbols)
Anti-skating instelling:
Een plaat afspelen:
BELGIQUE, customerservice@bigben-interactive.be
NEDERLAND, customerservice@bigben-interactive.nl
ESPANA, sat@bigbenespana.es
ITALIA, support@bigbeninteractive.it
www.bigben.eu