WT 1090 BA - Cooker WHIRLPOOL - Free user manual and instructions
Find the device manual for free WT 1090 BA WHIRLPOOL in PDF.



| Brand | Whirlpool |
| Model | WT 1090 BA |
| Product type | Built-in induction hob |
| Number of cooking zones | 4 zones |
| Control type | Touch controls with sliders |
| Special functions | 6th SENSE (Simmer, Melt, Keep warm), Automatic boiling, FlexiCook, Power (Booster) |
| Timer | From 1 to 99 minutes per zone, with automatic shut-off |
| Child lock | Yes |
| Stop&Go function | Yes |
| Pan detection | Yes, automatic shut-off if absent or unsuitable |
| Residual heat indicator | Yes (display "H") |
| Power supply | 220-240 V, 50/60 Hz (depending on country) |
| Maximum total power | Up to 7 kW (with adjustable limitation from 2 to 7 kW) |
| Cooking surface | Ceramic glass |
| Recommended cleaning | Soft cloth, ceramic glass cleaner, scraper for residues |
| After-sales service | Contact Whirlpool customer service (number on warranty) or register at register.whirlpool.eu |
Frequently Asked Questions - WT 1090 BA WHIRLPOOL
User questions about WT 1090 BA WHIRLPOOL
0 question about this device. Answer the ones you know or ask your own.
Ask a new question about this device
Download the instructions for your Cooker in PDF format for free! Find your manual WT 1090 BA - WHIRLPOOL and take your electronic device back in hand. On this page are published all the documents necessary for the use of your device. WT 1090 BA by WHIRLPOOL.
USER MANUAL WT 1090 BA WHIRLPOOL
Download the complete instruction manual on http://docs.whirlpool.eu or call the phone number shown on the warranty booklet.
Before using the appliance, read these safety instructions. Keep them nearby for future reference. These instructions and the appliance itself provide important safety warnings to be observed at all times. The manufacturer declines any liability for failure to observe these safety instructions, for inappropriate use of the appliance or incorrect setting of controls.
⚠ WARNING: If the hob surface is cracked, do not use the appliance - risk of electric shock.
⚠ WARNING: Danger of fire: Do not store items on the cooking surfaces.
⚠️ CAUTION: The cooking process has to be supervised. A short cooking process has to be supervised continuously.
⚠ WARNING: Unattended cooking on a hob with fat or oil can be dangerous - risk of fire. NEVER try to extinguish a fire with water: instead, switch off the appliance and then cover flame e.g. with a lid or a fire blanket.
⚠ Do not use the hob as a work surface or support. Keep clothes or other flammable materials away from the appliance, until all the components have cooled down completely - risk of fire.
⚠ Metallic objects such as knives, forks, spoons and lids should not be placed on the hob surface since they can get hot.
⚠️ Very young children (0-3 years) should be kept away from the appliance. Young children (3-8 years) should be kept away from the appliance unless continuously supervised. Children from 8 years old and above and persons with reduced physical, sensory or mental capabilities or lack of experience and knowledge can use this appliance only if they are supervised or have been given instructions on safe use and understand the hazards involved. Children must not play with the appliance. Cleaning and user maintenance must not be carried out by children without supervision.
⚠️ After use, switch off the hob element by its control and do not rely on the pan detector.
⚠ WARNING: The appliance and its accessible parts become hot during use. Care should be taken to avoid touching heating elements. Children less than 8 years of age shall be kept away unless continuously supervised.
PERMITTED USE
⚠️ CAUTION: the appliance is not intended to be operated by means of an external switching device, such as a timer, or separate remote controlled system.
⚠ This appliance is intended to be used in household and similar applications such as: staff kitchen areas in shops, offices and other working environments; farm houses; by clients in hotels, motels, bed & breakfast and other residential environments.
⚠ No other use is permitted (e.g. heating rooms).
⚠ This appliance is not for professional use. Do not use the appliance outdoors.
INSTALLATION
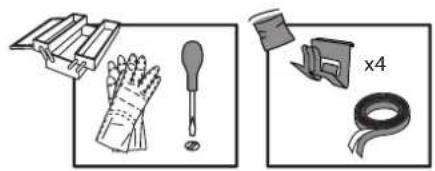
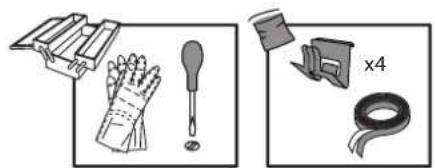
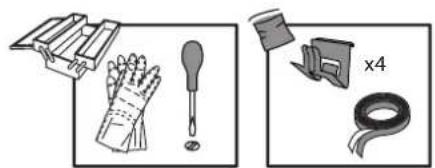
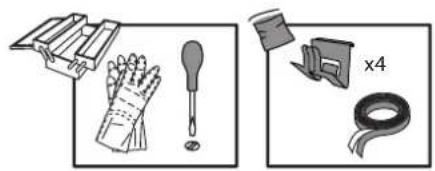
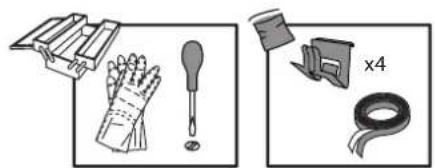
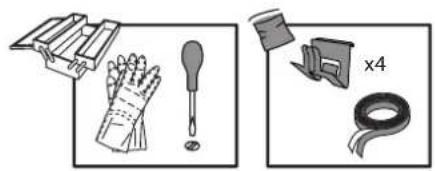
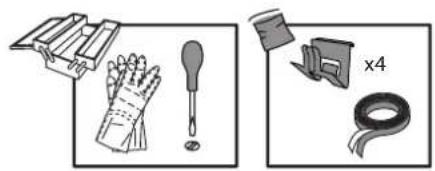
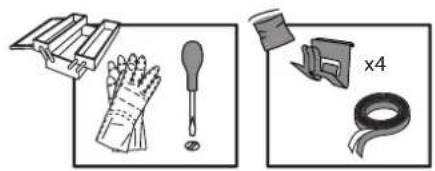
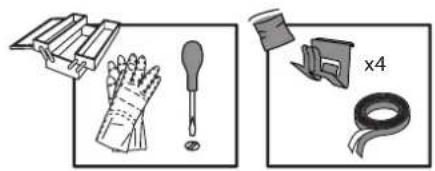
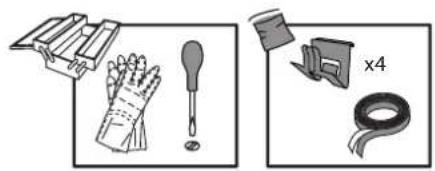
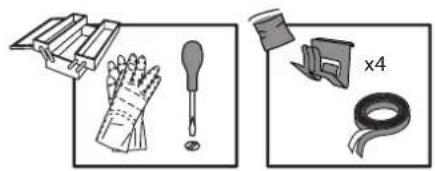
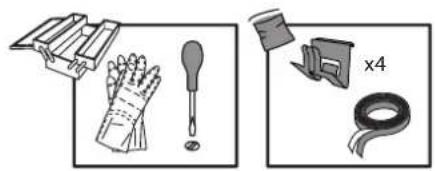
⚠ The appliance must be handled and installed by two or more persons - risk of injury. Use protective gloves to unpack and install - risk of cuts.
⚠️ Installation, including water supply (if any), electrical connections and repairs must be carried out by a qualified technician. Do not repair or replace any part of the appliance unless specifically stated in the user manual. Keep children away from the installation site. After unpacking the appliance, make sure that it has not been damaged during transport. In the event of problems, contact the dealer or your nearest After-sales Service. Once installed, packaging waste (plastic, styrofoam parts etc.) must be stored out of reach of children - risk of suffocation. The appliance must be disconnected from the power supply before any installation operation - risk of electric shock. During installation, make sure the appliance does not damage the power cable - risk of fire or electric shock. Only activate the appliance when the installation has been completed.
⚠️ Carry out all cabinet cutting operations before fitting the appliance and remove all wood chips and sawdust.
⚠️ If the appliance is not installed above an oven, a separator panel (not included) must be installed in the compartment under the appliance.
ELECTRICAL WARNINGS
⚠ It must be possible to disconnect the appliance from the power supply by unplugging it if plug is accessible, or by a multi-pole switch installed upstream of the socket in accordance with the wiring rules and the appliance must be earthed in conformity with national electrical safety standards.
⚠ Do not use extension leads, multiple sockets or adapters. The electrical components must not be accessible to the user after installation. Do not use the appliance when you are wet or barefoot. Do not operate this appliance if it has a damaged power cable or plug, if it is not working properly, or if it has been damaged or dropped.
⚠️ If the supply cord is damaged, it must be replaced with an identical one by the manufacturer, its service agent or similarly qualified persons in order to avoid a hazard - risk of electric shock.
DISPOSAL OF HOUSEHOLD APPLIANCES
The packaging material is 100% recyclable and is marked with the recycle symbol 📁. This appliance is manufactured with recyclable or reusable materials. Dispose of it in accordance with local waste disposal regulations. For further information on the treatment, recovery, and recycling of household electrical appliances, contact your local authority, the collection service for household waste, or the store where you purchased the appliance. This appliance is marked in compliance with European Directive 2012/19/EU, Waste Electrical and Electronic Equipment (WEEE) and with the Waste Electrical and Electronic Equipment regulations 2013 (as amended).
By ensuring this product is disposed of correctly, you will help prevent negative consequences for the environment and human health.
The ☒ symbol on the product or on the accompanying documentation indicates that it should not be treated as domestic waste but must be taken to an appropriate collection center for the recycling of electrical and electronic equipment.
ENERGY SAVING TIPS
Make the most of your hot plate's residual heat by switching it off a few minutes before you finish cooking.
The base of your pot or pan should cover the hot plate completely; a container that is smaller than the hot plate will cause energy to be wasted. Cover your pots and pans with tight-fitting lids while cooking and use as little water as possible. Cooking with the lid off will greatly increase energy consumption. Use only flat-bottomed pots and pans.
DECLARATION OF CONFORMITY
This appliance meets Ecodesign requirements of European Regulation 66/2014 and The Ecodesign for Energy-Related Products and Energy Information (Amendment) (EU Exit) Regulations 2019 in compliance with the European standard EN 60350-2.
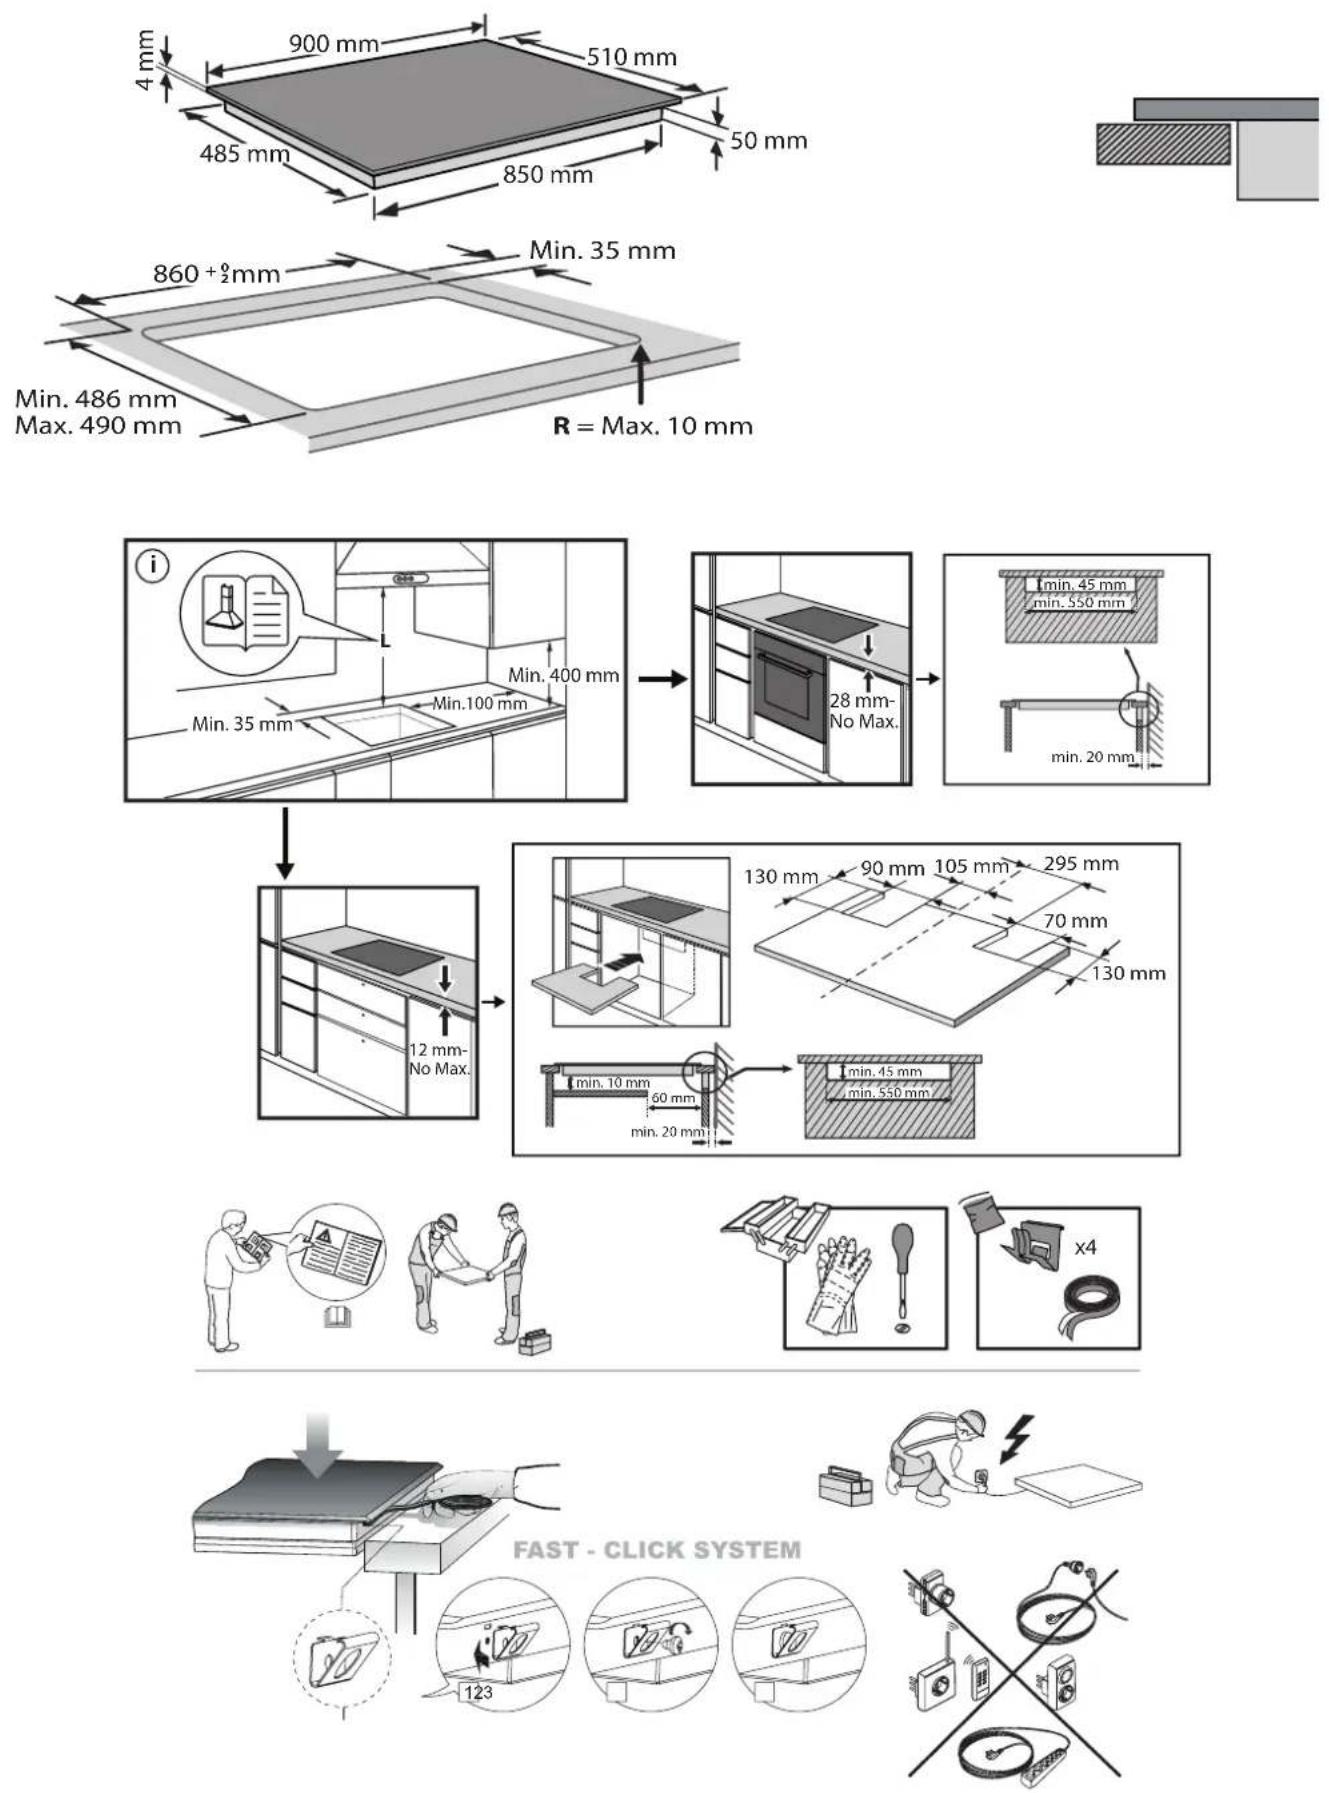
INSTALLATION
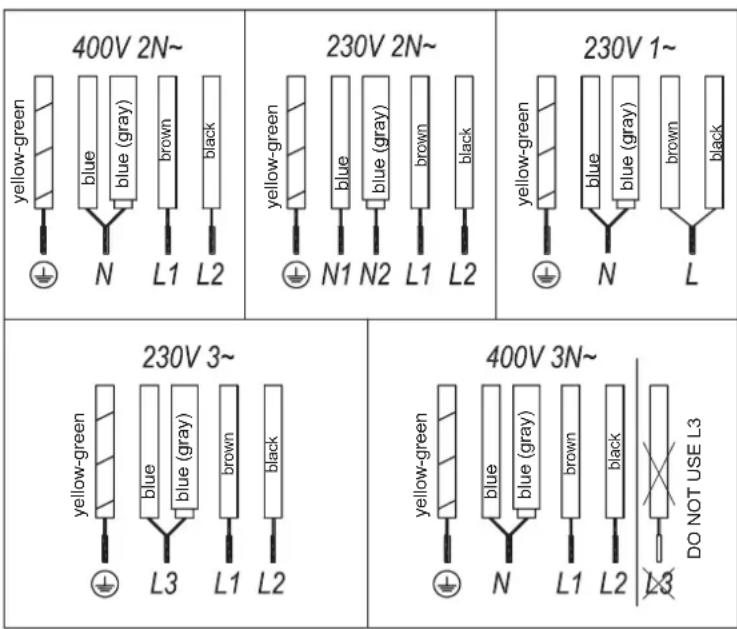
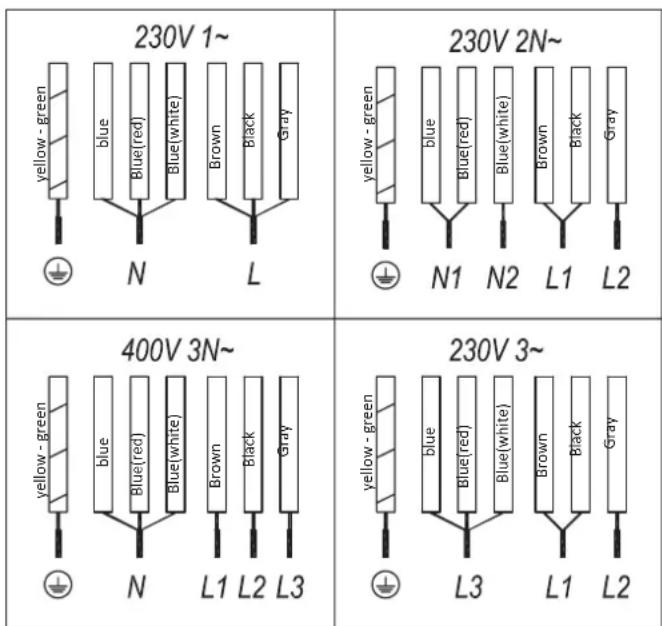
ELECTRICAL CONNECTION
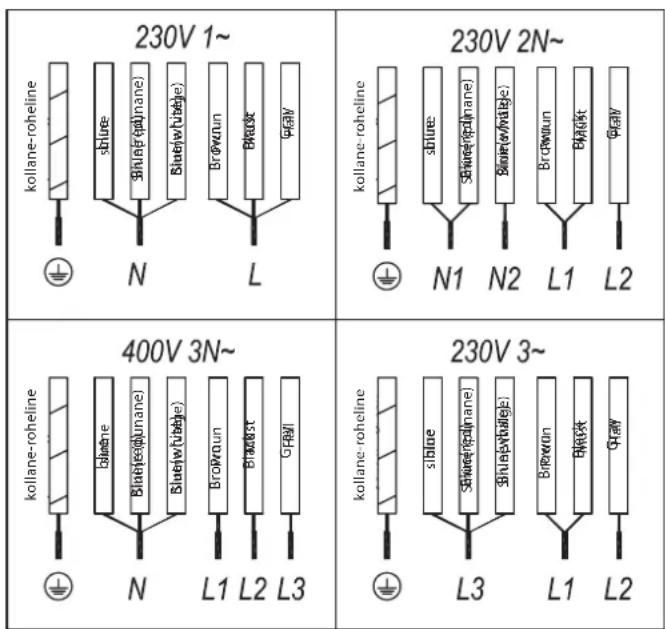
Electrical connection must be made before connecting the appliance to the electricity supply, check that the voltage and frequency match those specified on the stovetop nameplate, which is underneath it, and on the Guarantee Sheet, or if applicable on the technical data sheet, which you must keep together with this manual throughout the product's service life. Ensure that the inlet cable does not come into contact with the induction top housing or the oven housing, if it is installed in the same unit.
The electrical connection must be properly grounded, following current legislation, otherwise the induction hob may malfunction.
Installation must be carried out by qualified personnel who know the current safety and installation regulations. Specifically, installation must be carried out in compliance with the regulations of the local electricity supply company. Only the official technical service can handle or repair the appliance, including replacement of the power cable.
Make sure the voltage specified on the data plate located on the bottom of the appliance is the same as that of the home.
Regulations require that the appliance be earthed: use conductors (including the earth conductor) of the appropriate size only.
Warning:
⚠️ Unusually high power surges can damage the control system (like with any electrical appliance).
It is advised to refrain from using the induction hob during the pyrolytic cleaning function in the case of pyrolytic ovens, due to the high temperature that this type of device attains.
Before disconnecting the hob from the mains, we recommend switching off the cutoff switch and waiting for approximately 25 seconds before disconnecting from the mains. This time is required to allow for the complete discharge of the electronic circuitry and thus preclude the possibility of electric shock from the cable terminals.
Keep the Guarantee Certificate or the technical data sheet together with the instructions manual throughout the product's service life. These contain important technical information.
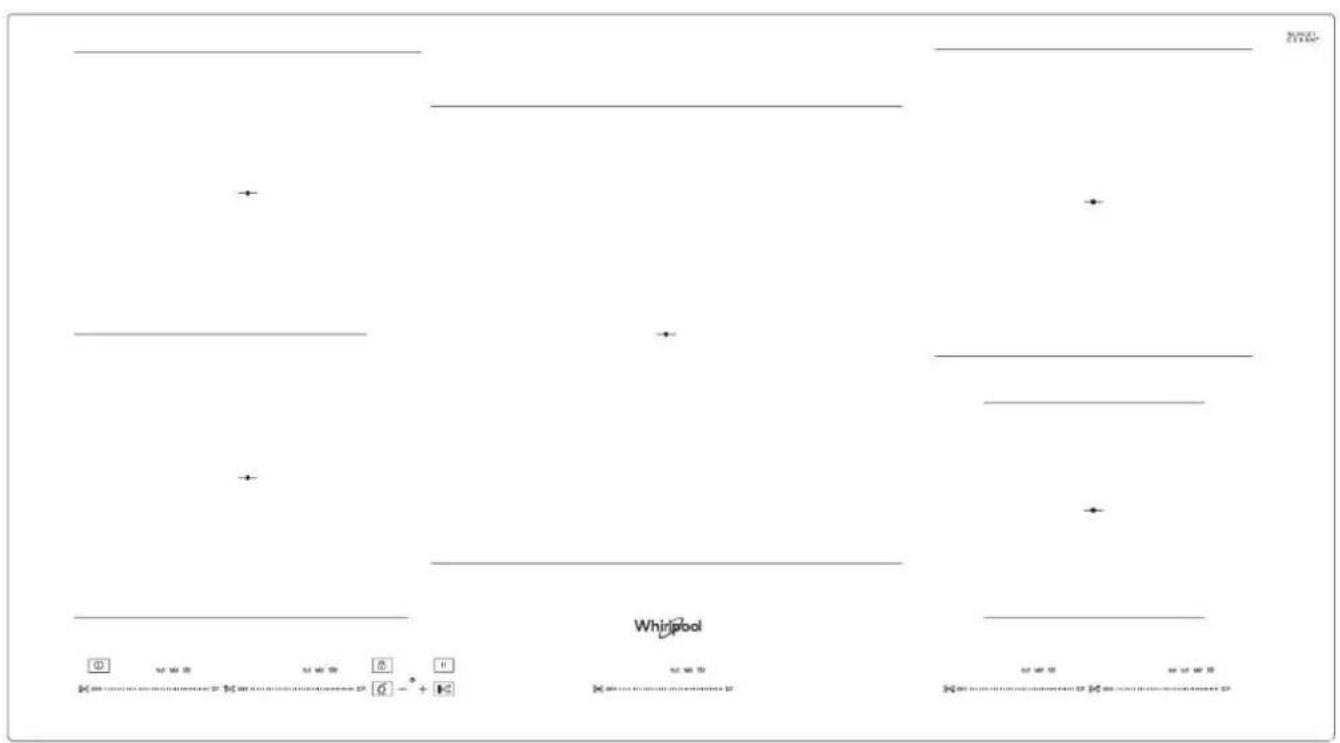
PRODUCT DESCRIPTION
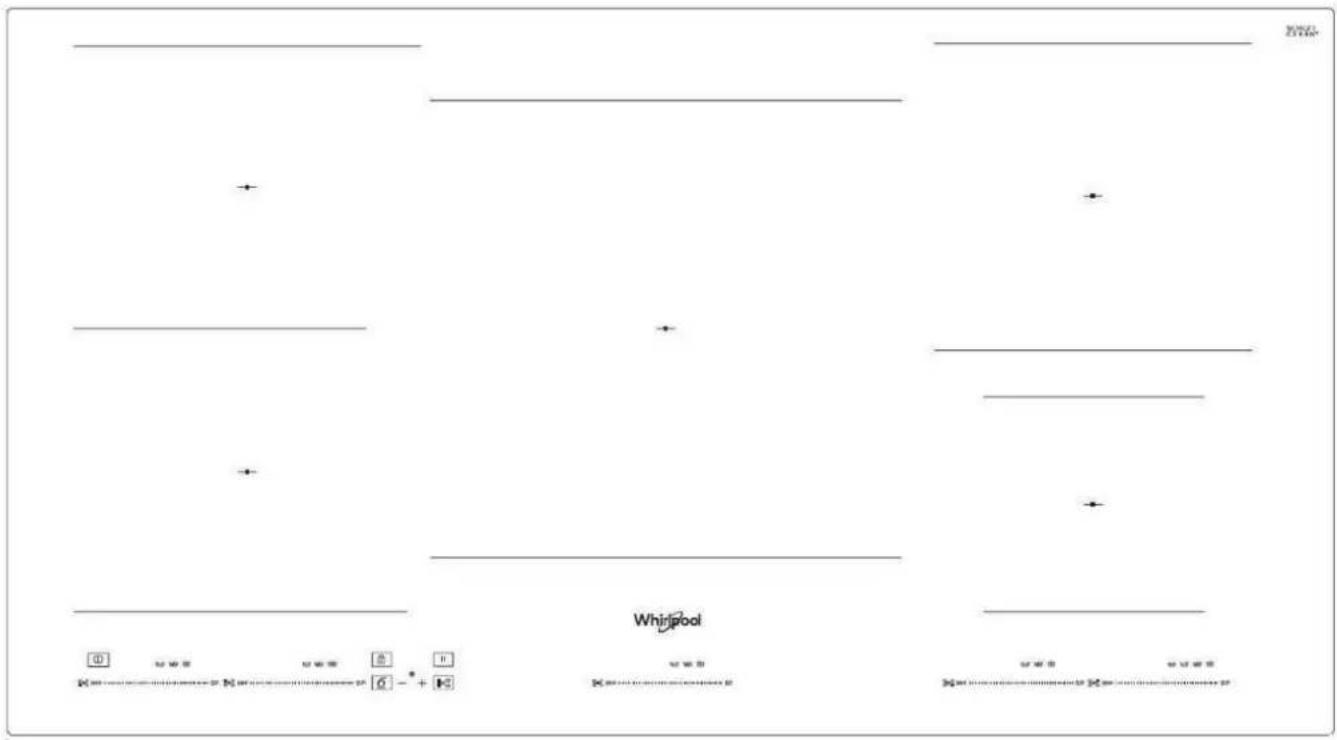
- Cooktop
- Control panel
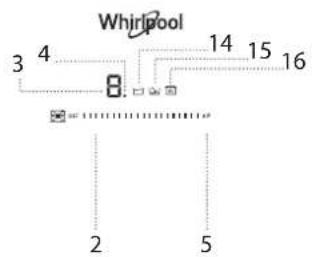
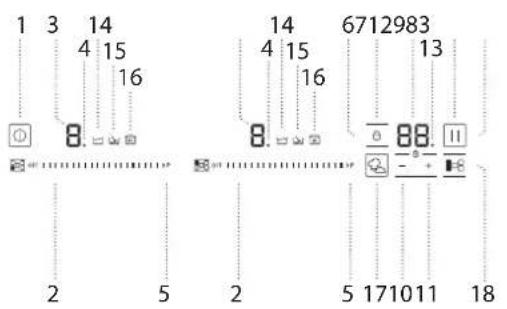
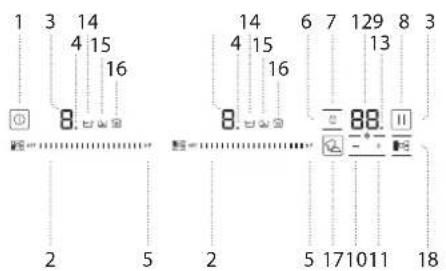
CONTROL PANEL
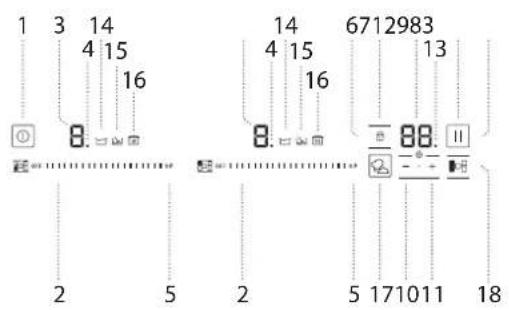
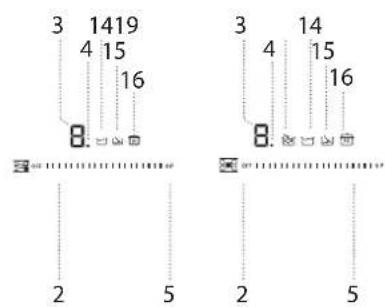
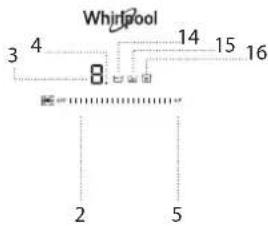
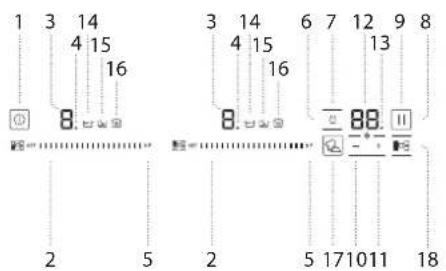
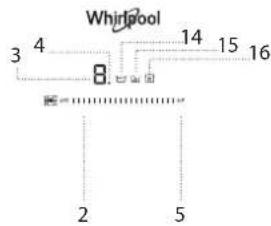
- General on/off sensor
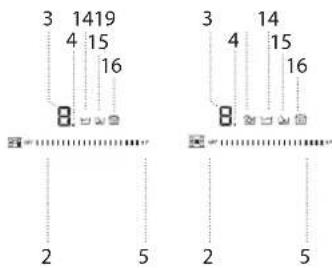
- Cursor slider for controlling power
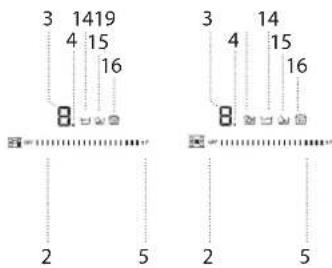
- Power and/or residual heat indicator
- Decimal dot of power and/of residual heat indicator.
- Direct access to "Power" function.
- Activation sensor for "Block" Function.
- Pilot indicator light "Block" function activated
-
Activation sensor for "Stop&Go" function
-
Pilot indicator light "Stop&Go" function activated
-
"Minus" sensor for timer.
- "Plus" sensor for timer.
- Timer indicator.
- Decimal dot of the timer
- Pilot indicator light "Simmering" function activated
-
Pilot indicator light" Melting" function activated
-
Pilot indicator light "Keep Warm" function activated
- Activation sensor for "6th SENSE" functions
- Activation sensor for "FlexiCook" function
- Pilot indicator light "Boiling" function activated
ACCESSORIES
POTS AND PANS
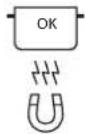
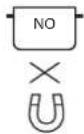
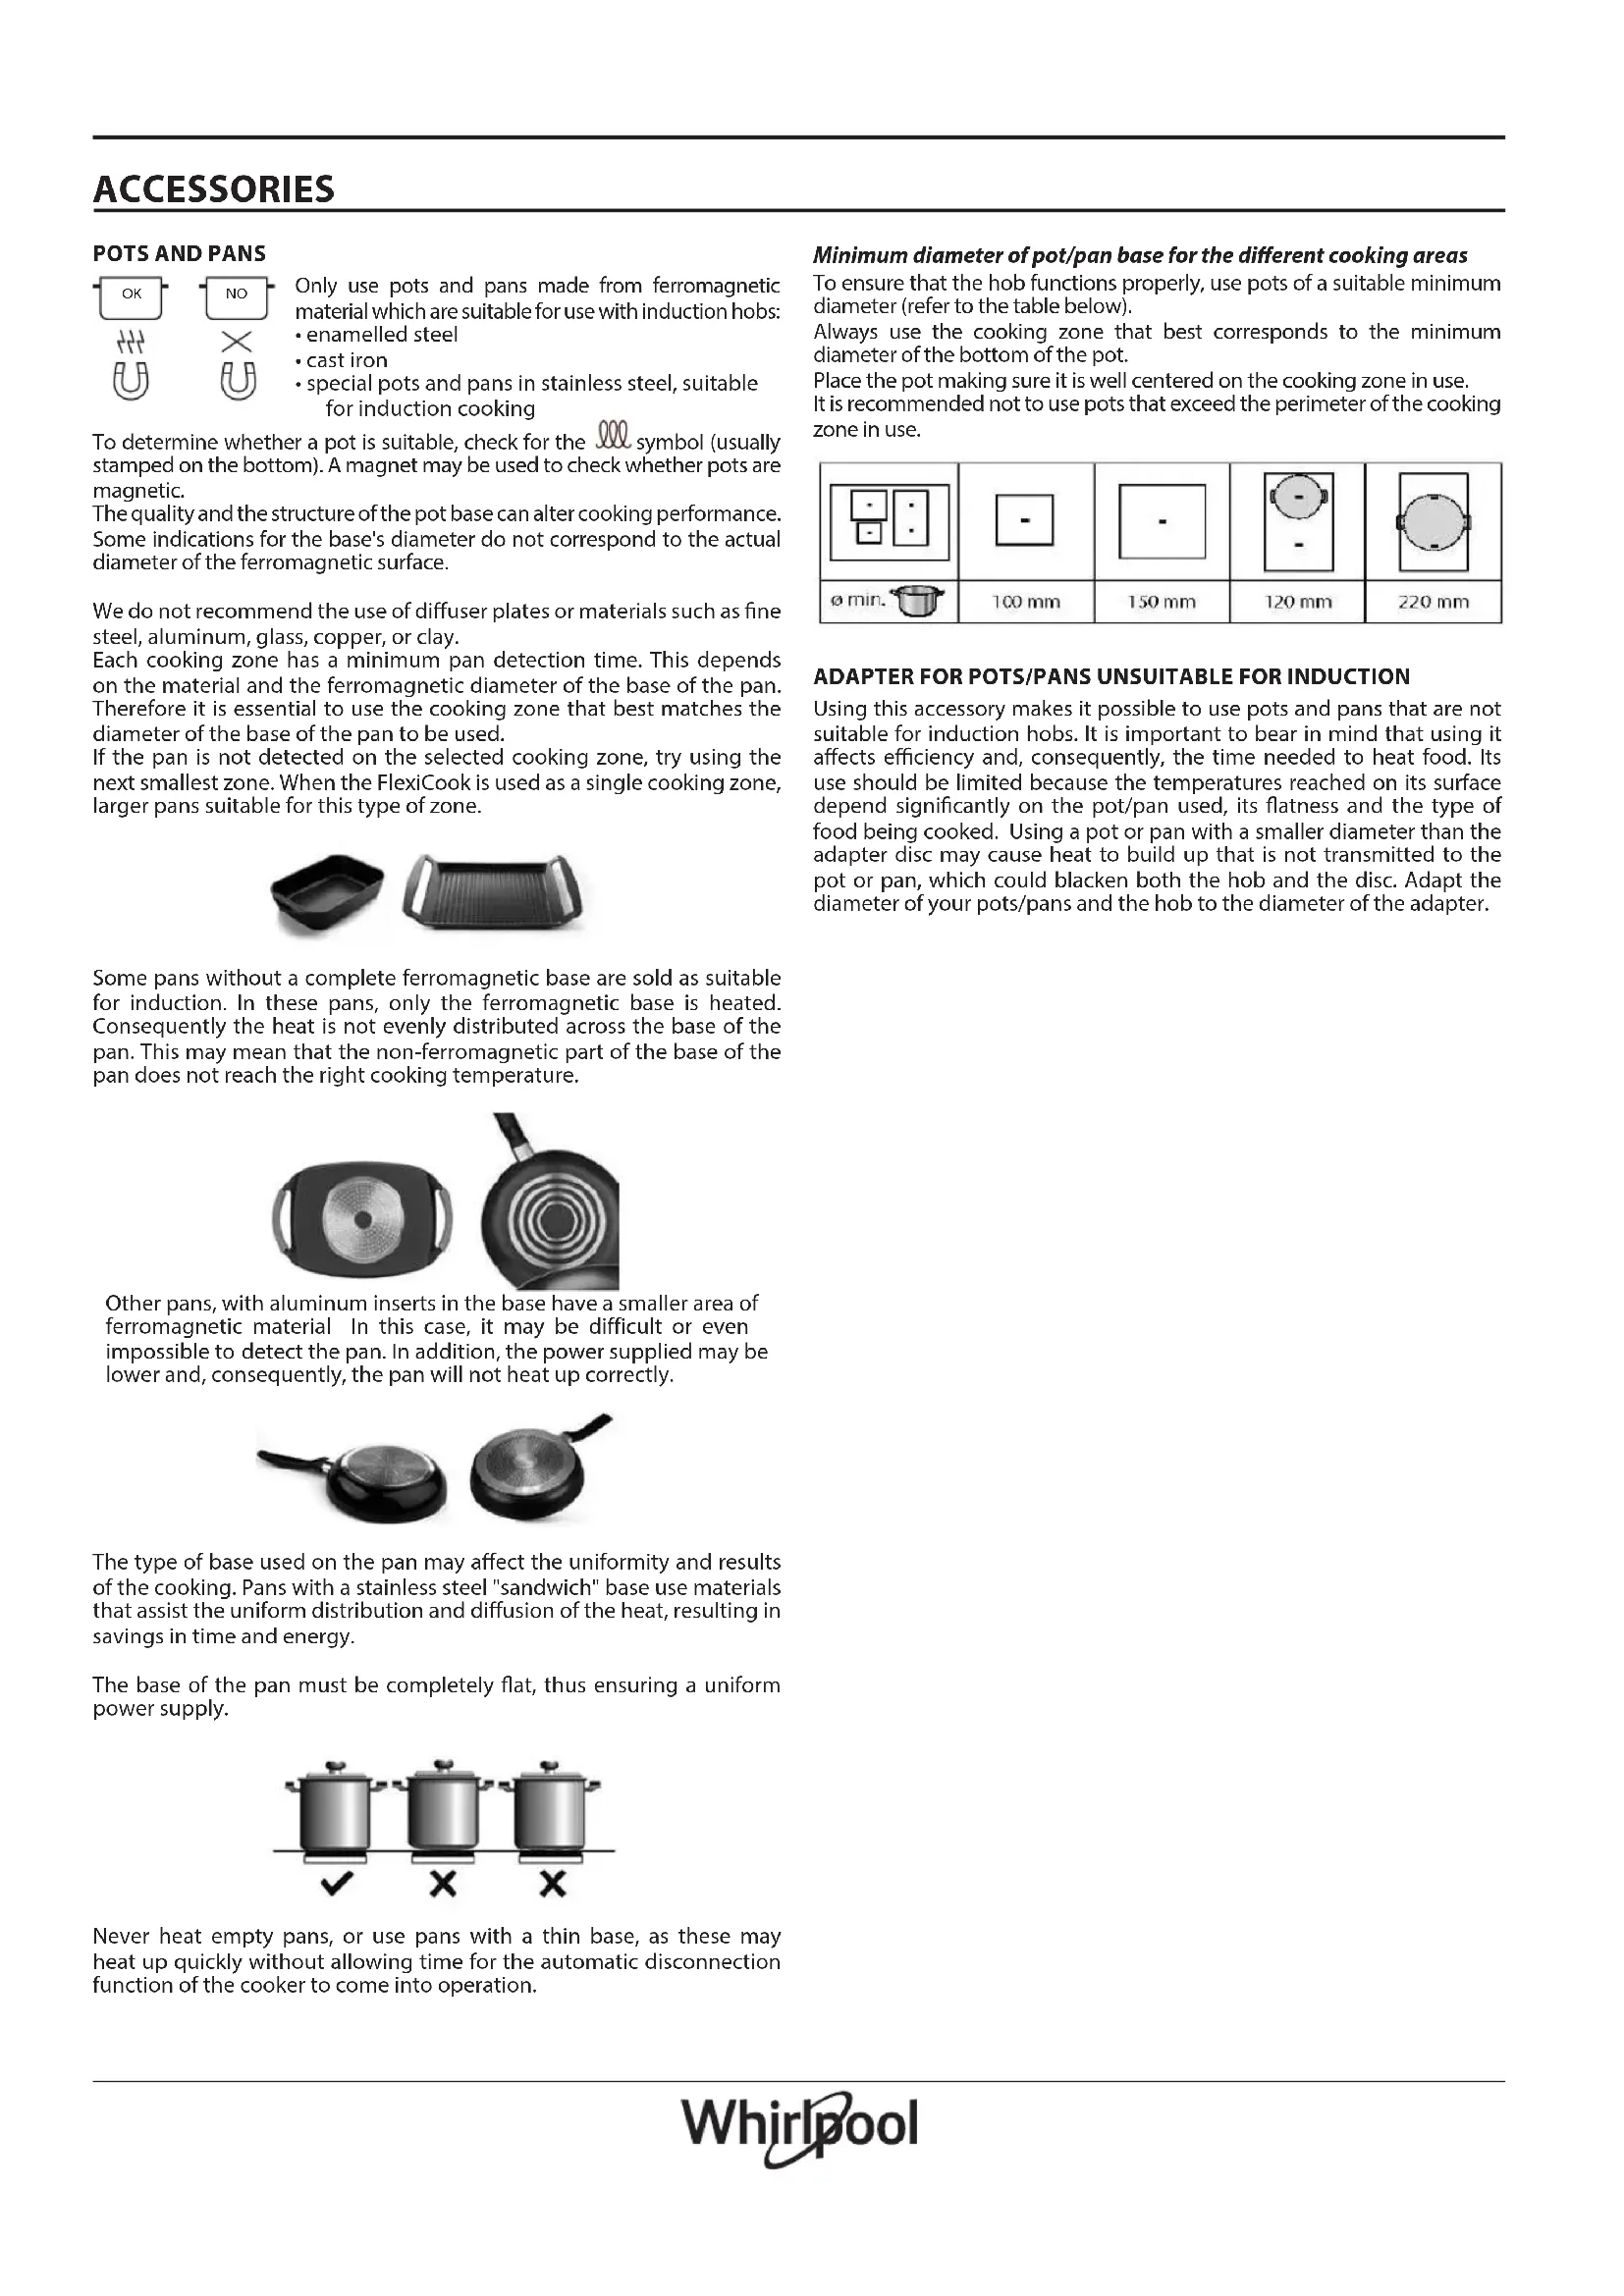
Only use pots and pans made from ferromagnetic
material which are suitable for use with induction hobs:
- enamelled steel
- cast iron
- special pots and pans in stainless steel, suitable for induction cooking
To determine whether a pot is suitable, check for the symbol (usually stamped on the bottom). A magnet may be used to check whether pots are magnetic.
The quality and the structure of the pot base can alter cooking performance. Some indications for the base's diameter do not correspond to the actual diameter of the ferromagnetic surface.
We do not recommend the use of diffuser plates or materials such as fine steel, aluminum, glass, copper, or clay.
Each cooking zone has a minimum pan detection time. This depends on the material and the ferromagnetic diameter of the base of the pan. Therefore it is essential to use the cooking zone that best matches the diameter of the base of the pan to be used.
If the pan is not detected on the selected cooking zone, try using the next smallest zone. When the FlexiCook is used as a single cooking zone, larger pans suitable for this type of zone.
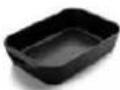
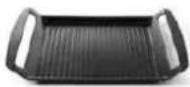
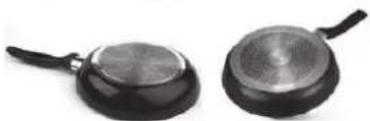
Some pans without a complete ferromagnetic base are sold as suitable for induction. In these pans, only the ferromagnetic base is heated. Consequently the heat is not evenly distributed across the base of the pan. This may mean that the non-ferromagnetic part of the base of the pan does not reach the right cooking temperature.
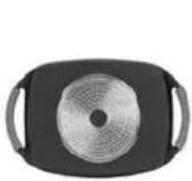
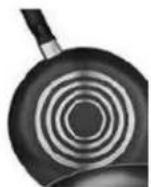
Other pans, with aluminum inserts in the base have a smaller area of ferromagnetic material. In this case, it may be difficult or even impossible to detect the pan. In addition, the power supplied may be lower and, consequently, the pan will not heat up correctly.
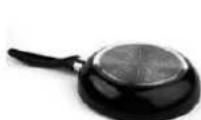
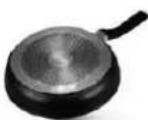
The type of base used on the pan may affect the uniformity and results of the cooking. Pans with a stainless steel "sandwich" base use materials that assist the uniform distribution and diffusion of the heat, resulting in savings in time and energy.
The base of the pan must be completely flat, thus ensuring a uniform power supply.
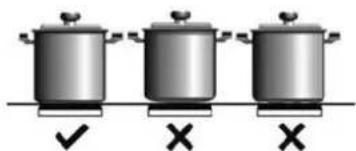
Never heat empty pans, or use pans with a thin base, as these may heat up quickly without allowing time for the automatic disconnection function of the cooker to come into operation.
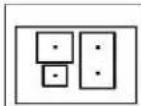
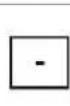
Minimum diameter of pot/pan base for the different cooking areas
To ensure that the hob functions properly, use pots of a suitable minimum diameter (refer to the table below).
Always use the cooking zone that best corresponds to the minimum diameter of the bottom of the pot.
Place the pot making sure it is well centered on the cooking zone in use. It is recommended not to use pots that exceed the perimeter of the cooking zone in use.
 |  | 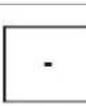 | 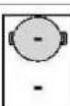 | 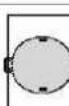 |
| ø min. | 100 mm | 150 mm | 120 mm | 220 mm |
ADAPTER FOR POTS/PANS UNSUITABLE FOR INDUCTION
Using this accessory makes it possible to use pots and pans that are not suitable for induction hobs. It is important to bear in mind that using it affects efficiency and, consequently, the time needed to heat food. Its use should be limited because the temperatures reached on its surface depend significantly on the pot/pan used, its flatness and the type of food being cooked. Using a pot or pan with a smaller diameter than the adapter disc may cause heat to build up that is not transmitted to the pot or pan, which could blacken both the hob and the disc. Adapt the diameter of your pots/pans and the hob to the diameter of the adapter.
FIRST TIME USE
POWER MANAGEMENT
Some models are equipped with a power limiting function (Power Management). This function allows the total power generated by the hob to be set to different values selected by the user. To do this, for the first minute after having connected the hob to the power supply, it is possible to access the power limiting menu.
- Press the (1) touch key for three seconds. The letter PL will appear on the timer indicator (12)
- Press the locking touch key ⑥. The different power values to which the hob can be limited will appear and these can be changed using the + (11) and - (10) sensors.
- Once the value has been selected, once again press the locking touch key (6). The hob will be limited to the chosen power value.
The power levels available are:
2 kW - 2.5 kW - 3 kW - 3.5 kW - 4 kW - 4.5 kW - 5 kW - 5.5 kW - 6 kW - 6.5 kW - 7 kW
If you want to change the value again, you must unplug the hob and plug it in again after a few seconds. Thus you will again be able to enter the power limiting menu.
Every time the power level of a hotplate is changed, the power limiter will calculate the total power the hob is generating. If you have reached the total power limit, the touch control will not allow you to increase the power level of that hotplate. The hob will beep and the power indicator (3) will blink at the level that cannot be exceeded. If you wish to exceed that value, you must lower the power of the other hotplates. Sometimes it will not be enough to lower another by a single level as this depends on the power of each hotplate and the level it is set at.
It is possible that to raise the level of a large hot plate that of several smaller ones must be turned down.
If you use the quick switch-on at maximum power function and the said value is above the value set by the limit, the hotplate will be set to the maximum possible level. The hob will beep and the said power value will blink twice on the indicator (3).
To set the power of the hob:
Only visible while running.
The manoeuvres are done by means of the touch keys. You do not need to exert force on the desired touch key, you only need to touch it with your fingertip to activate the required function
Each action is verified by a beep.
Use the cursor slider (2) to adjust power levels (0 - 9) by sliding your finger over it. Sliding towards the right increases the value, whereas sliding towards the left decreases it.
It's also possible to directly select a power level by placing your finger directly on a desired point of the cursor slider (2)
In order to select a plate on these models, directly touch the cursor slider (2).
SWITCHING ON THE DEVICE
1 Touch the On touch key ☐(1) for at least one second. The touch control will become active, a beep will be heard and the indicators (3) will light up displaying a “-”. If any cooking area is hot, the related indicator will flash an H.
If you do not take any action in the next 10 seconds the touch control will switch off automatically. When the touch control is activated, you can disconnect it at any time by touching the touch button (1), even if it has been locked (lock function activated). The touch button always has priority to disconnect the touch control.
ACTIVATING PLATES
Once the Touch Control is activated with sensor ① (1), any plate can be turned on by following these steps:
-
Slide the finger or touch in any position of one of the cursors "slider" (2). The zone has been selected and simultaneously the power level will be set between 0 and 9. That power value will be shown on the corresponding power indicator and its decimal dot (4) will keep light up during 10 seconds.
-
Use the cursor slider (2) to choose a new cooking level between 0 and 9.
As long as the plate is selected, in other words, with the decimal (4) dot light up, its power level can be modified.
TURNING OFF A PLATE
Using the touch slider key (2) lower the power to level 0. The hotplate will switch off.
When a hot plate is switched off an H will appear in its power indicator (3), if the glass surface of the related to the cooking area is hot and there is a risk of burns. When the temperature drops, the indicator (3) switches off (if the hob is disconnected), or otherwise a “-” will light up if the hob is still connected.
TURNING ALL PLATES OFF
All plates can be simultaneously disconnected by using the general on/off sensor (1). All plate indicators (3) will turn off. If the heating zone turned off is hot, its indicator shows an H.
PAN DETECTOR
Induction cooking zones have a built-in pan detector. This way, the plate will stop working if there is no pan present or if the pan is not suitable.
The power indicator (3) will show a symbol to designate "there is no pan" if, while the zone is on, no pan is detected or the pan is not suitable. If a pan is taken off the zone while it is running, the plate will automatically stop supplying energy and it will show the symbol for "there is no pan". When a pan is once again placed on the cooking zone, energy supply will resume at the same power level previously selected.
CONTROL PANEL LOCK
With the Block Function, you can block the other sensors, except for the on/off sensor (1), in order to avoid undesired operations. This function is useful as a childproof safety.
To activate this function, touch sensor (6) for at least one second. Once you have done so, the pilot (7) turns on indicating that the control panel is blocked. To deactivate the function, simply touch sensor (6) again.
If the on/off sensor ① (1) is used to turn off the appliance while the block function is activated, it won't be possible to turn the cooktop on again until it unblocks.
When the hob is on, if one presses the touch key + (11) and the locking touch key 🔒 (6) simultaneously for three seconds, the beep that accompanies each action will be deactivated. The time indicator (12) will display "OF". This deactivation will not be applied to all the functions, as for example the beep for on/off, the ending of the timer or the locking/unlocking of the touch keys always remain activated.
To once again activate all the beeps that accompany each action, again simultaneously press the touch key + (11) and the locking touch key (6) for three seconds. The time indicator (12) will display "On".
STOP&GO FUNCTION
This function puts the cooking process on pause. The timer will also be paused if it is activated.
Activating the Stop function.
Touch the Stop sensor | (8) for one second. The pilot (9) lights up and the power indicators will show the symbol // to indicate cooking has been paused.
Deactivating the Stop function
Touch Stop&Go sensor (8) again. The pilot (9) turns off and cooking resumes under the same power and timer settings that were established before the pause.
POWER FUNCTION
This function supplies “extra” power to the plate, above the nominal value. Said power depends on the size of the plate, with the possibility of reaching the maximum value permitted by the generator.
- Slide the finger above the corresponding cursor slider (2) until the power indicator (3) shows "9" and keep the finger pressed for one second, or touch directly on "P" and keep pressed the finger for one second.
- The power level indicator (3) will show the symbol 1, and the plate will start to supply extra power. The Power function has a maximum duration specified in Table 1. After this time, the power level will automatically adjust to 9. A beep sounds.
On activating the Power function in one hotplate, it is possible that the performance of some of the others may be affected, reducing its power to a lower level, in which case this will be displayed on its indicator (3).
Deactivation of Power Function, before it's working time passes, can be done either by means of touching cursor "slider" modifying its power level or repeating step 3.
TIMER FUNCTION (countdown clock)
This function facilitates cooking given that you don't have to be present: You can set a timer for a plate, and it will turn off once the desired time is up.
For these models, you can simultaneously program each plate for durations ranging from 1 to 99 minutes.
Setting a timer on a plate.
Once the power level is set on the desired zone, and while the decimal dot of the zone keeps on, the zone will be able to be timed.
To that end:
- Touch sensor (10) or (11).Timer Indicator (12) will show "00" and corresponding zone indicator (3) will show the symbol blinking alternately with its current power level.
- Immediately afterwards set a cooking time between 1 and 99 minutes, using the sensors - (10) or (11). With the first one the value will start at 60, whereas with the second it will start at 01. To cancel the timer function, the clock can be adjusted to value '00' using sensor - (10). A quicker way to do this is keeping sensors - (10) and (11)-pressed together. When there is less than one minute left, the clock will begin to countdown in seconds.
- When the timer indicator (12) stops flashing, it will start to countdown the time automatically. The indicator (3) relating to the timed hotplate will alternately display the selected power level and the symbol t
Once the selected cooking time has elapsed, the heating zone being timed is turned off and the clock emits a series of beeps for several seconds. To turn off the audible signal, touch any sensor. The timer indicator (12) will display a flashing 00 beside the decimal dot (4) of the selected zone. If the heating zone turned off is hot, its power indicator (3) will display alternately the H symbol and a “-”.
If you wish to time another hotplate at the same time, repeat steps 1 to 3.
If one or more zones are already timed, the timer indicator (12) will show by default the shortest remaining time to finish, showing a "t" on the related zone. Rest of timed zones will show on their corresponding indicator zones the decimal dot blinking. When the cursor "slider" of another timed zone is pressed, the timer will show the remaining time of that zone for a few seconds and its indicator will show its power level and the "t" alternately.
Changing the programmed time
For modifying programmed time, the cursor "slider" (2) of the timed zone has to be pressed. Then it will be possible to read and modify the time.
Through sensors (10) and (11) you can modify the programmed time.
Disconnecting the clock
If you wish to stop the clock before the programmed time is up, this can be done at any time by simply adjusting its value to '--'.
- Select the desired plate.
- Adjust the value of the clock to "00" by using the sensor (-10) . The clock is cancelled. This can also be done more quickly by pushing the "sensors — (10) and (-1) at the same time.
FUNCTIONS
6TH SENSE
These functions have pre-allocated power levels to make cooking easier, obtaining excellent results as the temperature of the pan is controlled continuously by sensors. When the target temperature for the function has been reached, it is automatically maintained without needing to change the power level.
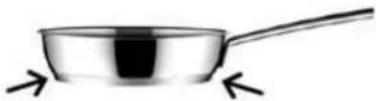
The 6th SENSE functions operate correctly with pans with the same ferromagnetic area on the base of the pan as the area of the cooking zone. In addition, for high temperature functions (above 100°C), pans must have a flat, even base (preferably "sandwich" type) as shown in the figure below
To ensure the correct operation of these functions, it is important that the pan and the cooking zone are not hot at the start of the process.
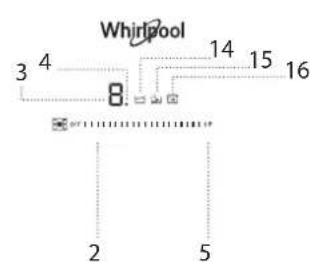
The Touch Control has special features that help the user to cook through the 6th SENSE sensor (17). These functions are available depending on the model.
To activate a special feature on a zone:
- First it should be selected; and then, the decimal point (4) will be active on the power indicator (3).
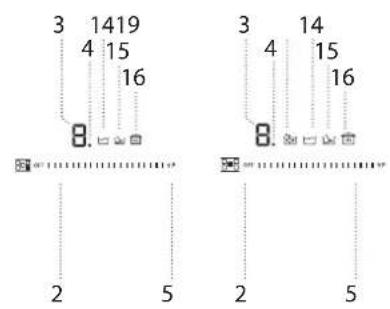
- Now click on the 6th SENSE sensor (17). The sequentially successive presses will go over all the 6th SENSE functions available in each zone one by one. These functions will show the activation with the corresponding leds (14) simmering, (15) melting, (16) keep warm.
If you want to cancel a special active function at any time, you should touch the "slider" cursor sensor (2) of the related zone to select it. The decimal point (4) of the power indicator (3) will light up. Then, touch again the "slider" (2) cursor to set a new power level or to power off the zone, or you can choose a different special function touching again on the 6th SENSE sensor (7).
SIMMERING FUNCTION
This feature allows you to keep it simmering. After the food is boiled, enable the plate by selecting it, and press the 6th SENSE sensor (17) until the led (14) located on the icon lights up. Once the function is activated, the symbol will appear on the power indicator (3).
You can override the function at any time by turning off the plate, by changing the power level or by choosing a different special function.
MELTING FUNCTION
This function maintains a low temperature in the cooking zone. Ideal for defrosting food or for slowly melting other food types such as chocolate, butter, etc.
To activate it, select the plate, and press on the 6th SENSE sensor (6) (17) until the led (15) located on the icon lights up. Once the function is activated, the symbol will appear on the power indicator (3). You can override the function at any time by turning off the plate, by changing the power level or by choosing a different special function.
KEEP WARM FUNCTION
This function automatically sets an appropriate power level to keep the cooked food hot. To activate it, select the plate, and press on the 6th SENSE sensor (7) until the led (16) located on the icon light up. Once the function is activated, the symbol will appear on the power indicator (3). You can override the function at any time by turning off the plate, by changing the power level or by choosing a different special function.
FLEXICOOK
Through this function, it is possible to enable two cooking zones to work together, and to select a power level and to activate the timer function for both zones.
To activate this function, press the sensor [18] . By doing so, the decimal points (4) of the linked plates will light up and the value "0" will be shown on their power indicators (3).
The clock timer indicator (12) will show three segments indicating the activated zones. In case your model has several zones with "FlexiCook", you can select the desired option by pressing the sensor [1-8] before assigning the power to the chosen zone. You will have a few seconds to perform the next operation; otherwise, the function will be disabled automatically.
After the "FlexiCook" is selected, you can assign the power by touching any of the "sliders" cursors (2) of one of the linked zones. The power level and its variations are displayed simultaneously on the power indicators (3) of both zones.
To disable this feature, you should select level '0' to one of the cooking zones. Also, when the function is disabled, the levels of powers and functions assigned to the related zones are cleared.
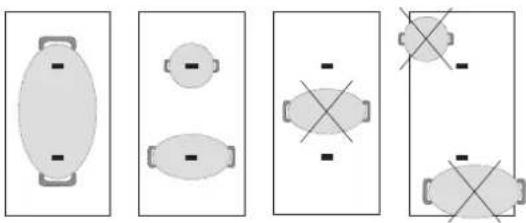
IMPORTANT: Place the pots in the center of the cooking zone so that they cover at least one of the reference points (as shown below).
natural_image
Five abstract geometric shapes with crosshair indicators, no text or symbols presentBOILING FUNCTION
This function enables the automatic boiling control, which is a great help for cooking pasta, rice, eggs, boiling some food, etc. It is available only in zones where the symbol appears.
Activation of the function
To activate the function, select the plate, and press the 6th SENSE sensor (17) until the led (19) located on the icon / lights up. Once the feature is activated, the sign will appear on the power indicator (3); a moving segment will appear, indicating that the cooking is under the system's control. When the system detects that it is about to start boiling, a first beep will be heard.
Take this opportunity to prepare your food for boiling or baking as desired. After 30 seconds, a second beep will be heard; if you have not already done so, it's time to pour the food in the pan. After the second beep, the system will activate the timer and stopwatch for you so that you can control how long the food is to be boiled.
30 seconds after activating the stopwatch, a third beep will sound to warn that from that moment on, the system will decrease the power supplied in order to maintain a gentle and continuous boil. The timer will remain active until the end of cooking.
If desired, you can disable the timer and set a time for the countdown and automatic shutdown of the plate (see section Timer Function).
Deactivation of the function
You can override the function at any time by turning off the plate, by changing the power level or by choosing a different special function.
SUGGESTIONS AND RECOMMENDATIONS
- Use pots or pans with thick, completely flat bottoms.
- Do not slide pots and pans over the glass because they could scratch it.
-
Although the glass can take knocks from large pots and pans without sharp edges, try not to knock it.
-
To avoid damaging the ceramic glass surface, do not drag pots and pans over the glass and keep the undersides of them clean and in good condition.
- Recommended diameters of the pot bottom (see "Technical Data Sheet" supplied with the product).
MAINTENANCE AND CLEANING

WARNING
• Do not use steam cleaning equipment.
• Before cleaning, make sure the cooking zones are switched off and that the residual heat indicator ("H") is not displayed.
Important:
- Do not use abrasive sponges or scouring pads as they may damage the glass.
• After each use, clean the hob (when it is cool) to remove any deposits and stains from food residue. - A surface that is not kept suitably clean may reduce the sensitivity of control panel buttons.
• Use a scraper only if residues are stuck to the hob. Follow the scraper manufacturer's instructions to avoid scratching the glass. - Sugar or foods with a high sugar content can damage the hob and must be immediately removed.
- Salt, sugar and sand could scratch the glass surface.
- Use a soft cloth, absorbent kitchen paper or a special hob cleaner (follow the Manufacturer's instructions).
• Spills of liquid in the cooking zones can cause the pots to move or vibrate.
• After cleaning the hob, dry thoroughly.
TROUBLESHOOTING
- Check that the electricity supply has not been shut off.
- If you cannot turn the hob off after using it, disconnect it from the power supply.
• If alphanumeric codes appear on the display when the hob is switched on, consult the following table for instructions.
Please note: The presence of water, liquid spilled from pots or any objects resting on any of the hob buttons can accidentally activate or deactivate the control panel lock function.
If something does not work
Before calling the technical service, perform the verifications described below.
The appliance does not work:
Ensure that the power cable is plugged in.
The induction zones do not produce heat:
The container is not appropriate (it does not have a ferromagnetic bottom or is too small). Check that the bottom of the container attracts a magnet, or use a larger container.
A humming is heard when starting to cook in the induction zones: With containers which are not very thick or not in one piece, the humming results from the transmission of energy directly to the bottom of the container. The humming is not a defect, but if you wish to avoid it anyway, reduce the power level slightly or use a container with a thicker bottom, and/or of one piece.
The touch control does not light up or, despite lighting, does not respond:
No heating zone has been selected. Be sure to select a heating zone before operating it. There is humidity on the sensors, and/or your fingers are wet. Keep the touch control surface and/or your fingers clean and dry. The locking function is activated. Unlock the controls.
The sound of a fan is heard while cooking, which continues even after cooking has ended:
The induction zones have a fan to keep the electronics cool. This only operates when the electronic circuits get hot. It stops again when the circuits cool whether the hob is turned on or not.
The symbol will appear on the power indicator of a hotplate: The induction system does not find a pot or pan on a hotplate or it is of an unsuited type.
The hotplate will switch off and the message:
| DISPLAY CODE DESCRIPTION POSSIBLE CAUSES SOLUTION | |||
| C81 or C82 Will appear on the indicators. | Excessive temperature in the electronics or on the glass. | Wait for a while for the electronics to cool down or remove the pot or pan so that the glass can cool. | |
| C85 | appears on the indicator of one of the hotplates. | The pot or pan used is of an unsuited type. | Switch off the hob, switch it on again and try with another pot or pan. |
| C90 | The appliance switches off and the message C90 appears on the power indicators (3). | The touch control detects on/off (1) sensor is covered and doesn't allow switching on the cooktop. | Remove the possible objects or liquids keeping the touch control surface, clean and dry until the message disappears. |
| C91 | The appliance switches off and the message C91 appears on the power indicators (3). | The touch control detects Stop&Go sensor (6) is covered and doesn't allow to handle the cooktop. | Remove the possible objects or liquids keeping the touch control surface clean and dry, then press twice Stop&Go (6) sensor for removing the message and return to normal operation. |
SOUNDS PRODUCED DURING OPERATION
Induction hobs may whistle or creak during normal operation.
These noises actually come from the cookware and are linked to the pan bottoms' characteristics (for example, when the bottoms are made from different layers of material or are irregular).
These noises may vary according to the type of cookware used and the amount of food it contains and not the symptom of something wrong.
AFTER-SALES SERVICE
To receive complete assistance, please register your product on www.whirlpool.eu/register.
BEFORE CALLING THE AFTER-SALES SERVICE:
-
See if you can solve the problem by yourself with the help of the TROUBLESHOOTING suggestions.
-
Switch the appliance off and back on again to see if the fault persists.
IF AFTER THE ABOVE CHECKS THE FAULT STILL OCCURS, GET IN TOUCH WITH THE NEAREST AFTER-SALES SERVICE.
To receive assistance, call the number shown on the warranty booklet or follow the website's instructions on www.whirlpool.eu.
When contacting our Client After sales service, always specify:
• a brief description of the fault;
• the type and exact model of the appliance;
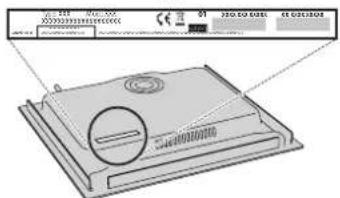
- the serial number (number after the word SN on the rating plate located under the appliance). The serial number is also indicated in the documentation;
SERVICE
SN 000000000000

- your full address;
- your telephone number.
If any repairs are required, please contact an authorized after-sales service (to guarantee that original spare parts will be used and repairs carried out correctly).
In the case of flush-mounted installation, call the After-Sales Service to request assembly of screws kit 4801 211 00112.
ISTRUZIONI PER LA SICUREZZA
IMPORTANTE: DA LEGGERE E OSSERVARE
natural_image
Illustration of cleaning tools including gloves, a pipette, and tape (no text or symbols)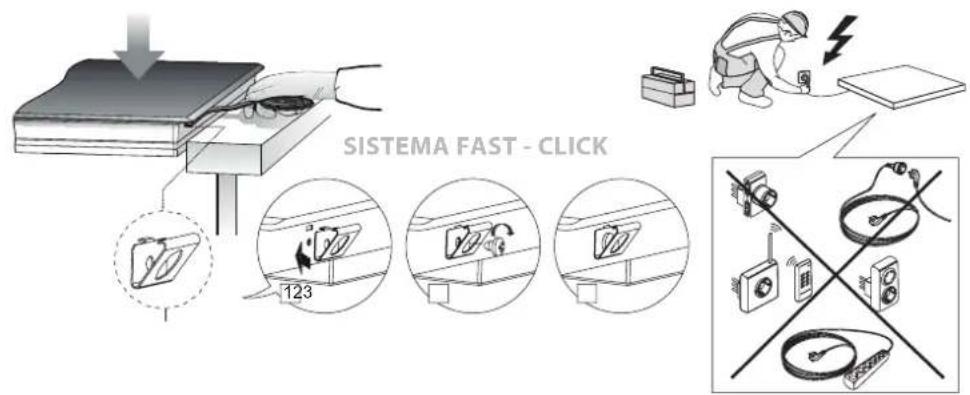
natural_image
Five abstract geometric shapes with varying internal and external cross patterns, no text or symbols present.FUNZIONE BOLLITURA
natural_image
Illustration of hand tools including gloves, a dropper, and a tape measure (no text or symbols)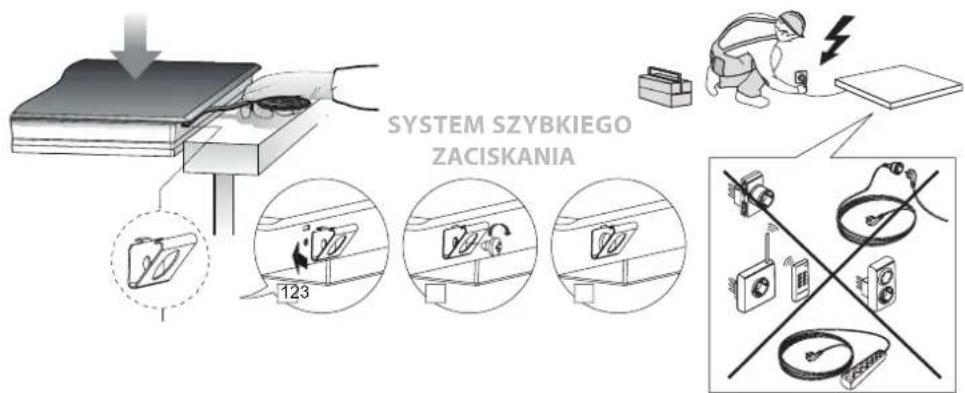
natural_image
Two views of a cooking pot with a lid and side pan, showing interior and exterior views (no text or symbols)natural_image
Two black cooking panes with handles, one open and one closed, shown against white background (no text or symbols)natural_image
Five abstract geometric shapes with cross and oval outlines, no text or symbols present
FUNKCJA WRZENIA
natural_image
Illustration of hand tools including gloves, a dropper, and a tape measure (no text or symbols)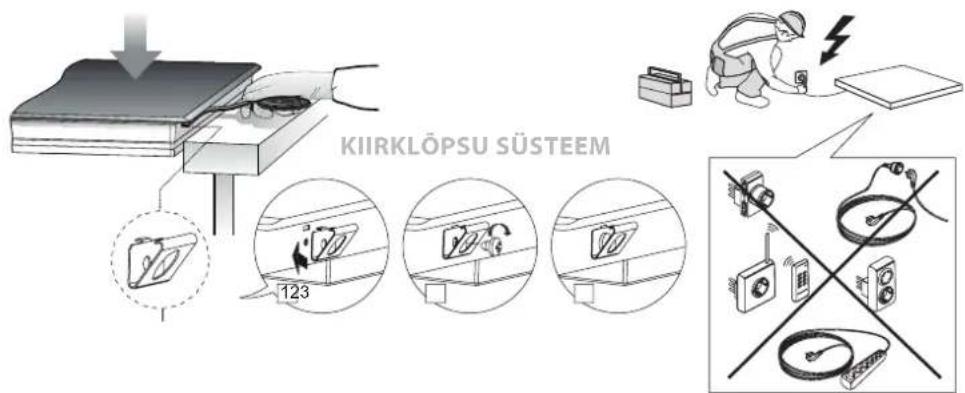
ELEKTRIÜHENDUS
natural_image
Two views of a cooking pan with a speaker and a circular vent (no text or symbols visible)natural_image
Two black frying panes with visible covers, placed side by side (no text or symbols)natural_image
Five abstract geometric shapes with varying internal and external cross patterns, no text or symbols present
KEETMISE FUNKTSIOON
natural_image
3D diagram of a computer monitor with a circular lens and control panel (no text or symbols)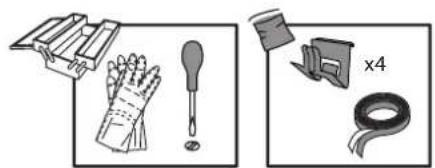
natural_image
Illustration of hand tools including gloves, a dropper, and a tape measure (no text or symbols)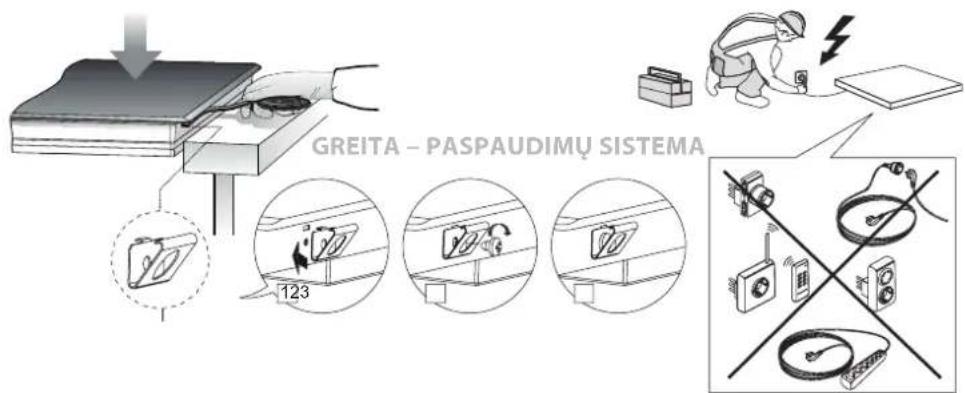
ELEKTROS IVADAS
natural_image
Five abstract geometric shapes with varying internal and external cross patterns, no text or symbols presentVIRINIMO FUNKCIJA
natural_image
Illustration of cleaning tools including gloves, a pipette, and tape (no text or symbols)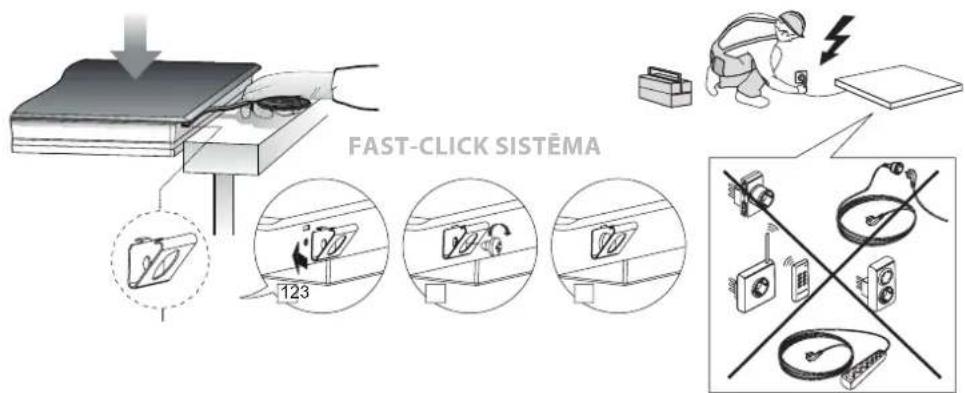
ELEKTRISKAIS PIESLĚGUMS
natural_image
Five abstract geometric shapes with varying internal and external cross patterns, no text or symbols present
VĀRĪŠANĀS FUNKCIJA
natural_image
Illustration of hand tools including gloves, a dropper, and a tape measure (no text or symbols)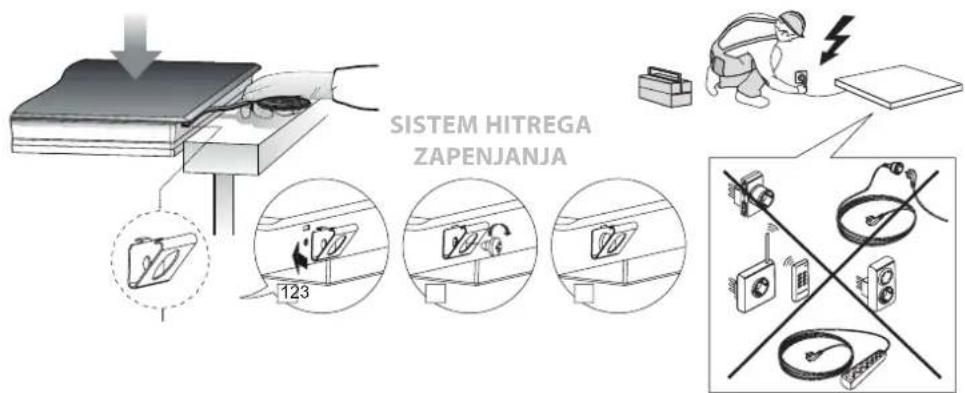
PRIKLJUČITEV NA ELEKTRIČNO OMREŽJE
natural_image
Two views of a cooking pan with a circular vent and lid (no text or symbols visible)natural_image
Two black cooking panes with handles, one open and one closed, shown against white background (no text or symbols)natural_image
Five abstract geometric shapes with varying internal and external cross patterns, no text or symbols present
FUNKCIJA VRETJA
natural_image
Technical illustration of a laptop with a magnified view showing the front panel and screen (no text or symbols present)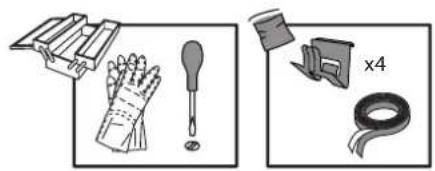
natural_image
Illustration of cleaning tools including gloves, a tool, and tape (no text or symbols)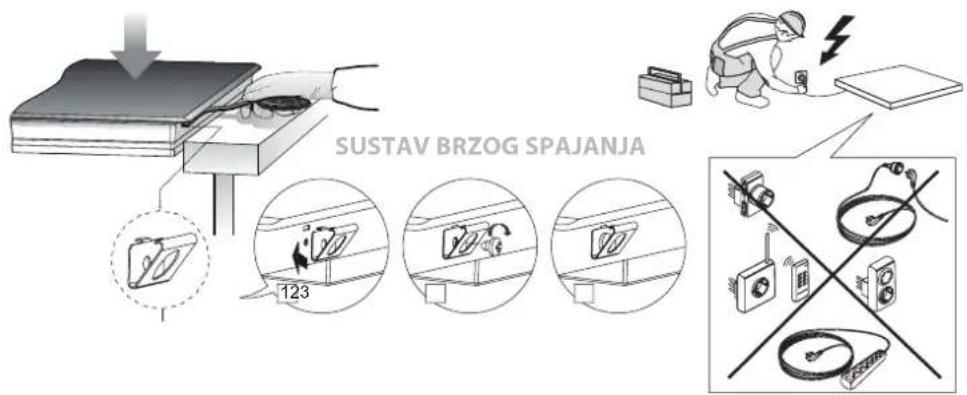
PRIKLJUČIVANJE NA ELEKTRIČNU MREŽU
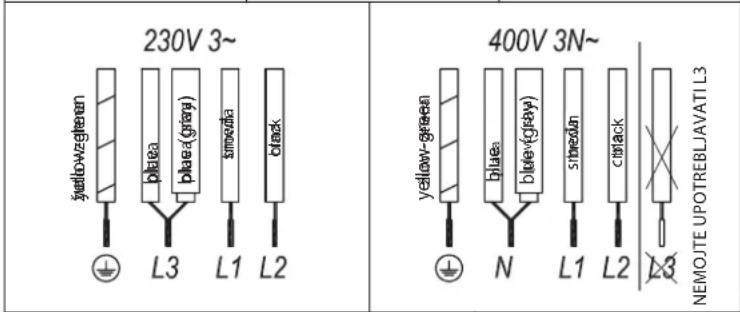
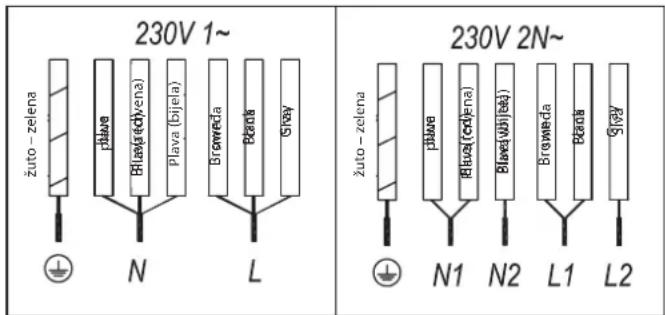
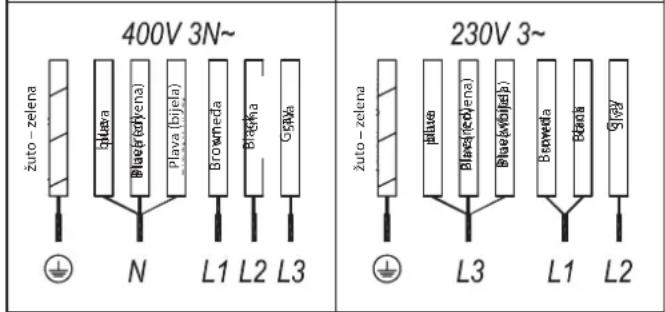
Priključivanje na električnu mrežu mora se obaviti prije priključivanja uređaja na električno napajanje, provjerite da napon i frekvencija odgovaraju onima navedenim na nazivnoj pločici ploče za kuhanje ispod koje se i nalazi i na jamstvenom listu ili, ako postoj, i na listu s tehničkim podacima koje morate čuvati zajedno s ovim priručnikom cijeli vijek upotrebe proizvoda. Provjerite da dolazni kabel ne dolazi u doticaj s gornjim kućištem indukcije ili kućištem pećnice, čak i ako je instaliran na istoj jedinici.
natural_image
Five abstract geometric shapes with varying internal and external cross patterns, no text or symbols present
FUNKCIJA VRENJA
Ova funkcija omogućuje automatsko upravljanje vrenjem što je velika pomoć prilikom kuhanja tjestenine, riže, jaja, kuhanja određenih namirnica do vrenja i slično. Dostupna je samo u zonama u kojima se prikazuje simbol
AKO JE NAKON GORE NAVEDENIH PROVJERA SMETNJA I DALJE PRISUTNA, OBRATITE SE NAJBLIŽEM POSTPRODAJNOM SERVISU.
Za pomoć nazovite broj u knjižici jamstva ili slijedite upute na webmjestu www.whirlpool.eu.
- serijski broj (broj iza riječi SN na nazivnoj pločici na dnu uređaja). Serijski je broj naveden i u dokumentaciji;
- svoju punu adresu;
- svoj telefonski broj.
ako je popravak potreban obratite se ovlaštenom Postprodajnom servisu (kako bi se jamčila uporaba originalnih rezervnih dijelova i ispravan popravak).
U slučaju upuštene montaže (u ravnini) nazovite servis i nabavite komplet vijaka 4801 211 00112.
BEZBEDNOSNA UPUTSTVA
VAŽNO JE DA SE PROČITAJU I POŠTUJU
Preuzmite kompletno uputstvo za upotrebu sa adrese http://docs.whirlpool.eu ili pozovite broj telefona koji je naveden u garantnoj knjižici.
natural_image
Illustration of cleaning tools including gloves, a tool, and tape (no text or symbols)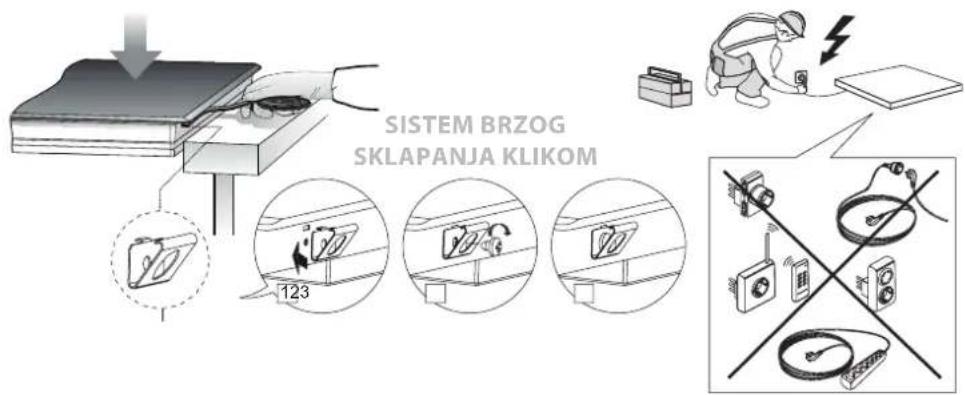
PRIKLJUČIVANJE NA ELEKTRIČNO NAPAJANJE
Pre priključivanja uređaja na električno napajanje mora se obaviti povezivanje sa električnom mrežom, proveriti da li napon i frekvencija odgovaraju navedenim na natpisnoj pločici šporeta, koja se nalazi ispod njega, kao i na garantnom listu ili, ako postoji, listu sa tehničkim podacima, koji morate čuvati zajedno sa ovim uputstvom tokom radnog veka uređaja. Proverite da li ulazni kabl dolazi u dodir sa gornjim kućištem indukcione ploče ili kućištem pećnice, ako je postavljen u istoj jedinici.
natural_image
Two views of a cooking pan with a circular vent and lid, shown from top and side (no text or symbols visible)Druge posude, sa aluminijumskim umecima u dnu imaju manju površinu feromagnetnog materijala. U tom slučaju, detektovanje posude može biti teško ili čak nemoguće. Osim toga, isporučena snaga može biti manja, a samim tim se ni posuda neće pravilno zagrejati.
natural_image
Two black cooking panes with handles, one open and one closed, shown against white background (no text or symbols)Tip dna iskorišćen za posudu može da utiče na ravnomernost i rezultate kuvanja. Posude sa „sendvič“ dnom od nerđajućeg čelika koriste materijale koji potpomažu ravnomernu raspodelu i širenje toplote, što dovodi do uštede vremena i energije.
Nikada ne zagrevajte prazne posude i nemojte koristiti posude sa tankim dnom, jer se one mogu brzo zagrejati i ne dopustiti aktiviranje funkcije za automatsko isključivanje šporeta.
natural_image
Five abstract geometric shapes with varying internal and external cross patterns, no text or symbols presentFUNKCIJA KLJUČANJE
natural_image
3D CAD model of a computer with a circular component and a magnified view (no text or symbols)- serijski broj (broj iza reči SN na pločici sa podacima koja se nalazi ispod uređaja). Serijski broj je takođe naveden u dokumentaciji;
- svoju punu adresu;
natural_image
Illustration of cleaning tools including gloves, a tool, and tape (no text or symbols)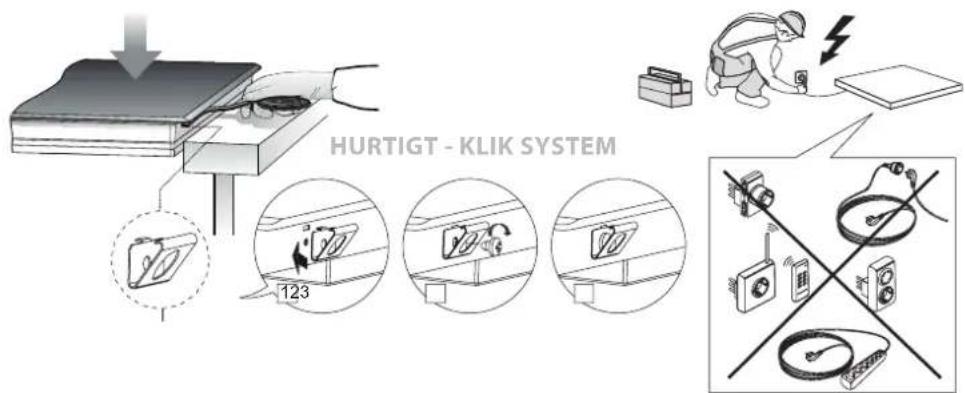
TILSLUTNING TIL STR∅MFORSYNINGEN
- Kogesektion
- Betjeningspanel
BETJENINGSPANEL
- Overordnet on/off-sensor
- skydemarkør til effektindstilling
- Effekt- og/eller restvarmeindikator
- Decimaltegn for effekt- og/eller restvarmeindikator.
- Direkte adgang til funktionen "Power" (effekt).
- Aktiveringssensor til funktionen "Block" (blokering).
- Kontrollampe for aktiveret "Block" funktion
-
Aktiveringssensor til funktionen "Stop&Go"
-
Kontrollampe for aktiveret "Stop&Go" funktion
-
"Minus" sensor til timer.
- "Plus" sensor til timer.
- Timerindikator.
- Timerens decimaltegn
- Kontrollampe for aktiveret "Simmering" (simre) funktion
-
Kontrollampe for aktiveret "Melting" (smelte) funktion
-
Kontrollampe for aktiveret "Keep Warm" (hold varm) funktion
- Aktiveringssensor til funktionen "6th SENSE"
- Aktiveringssensor til funktionen "FlexiCook"
- Kontrollampe for aktiveret "Boiling" (kogning)funktion
TILBEH∅R
GRYDER OG PANDER


natural_image
Illustration of a stainless steel cooking pan with a handle and two arrows pointing to it (no text or symbols)natural_image
Five abstract geometric shapes with varying internal and external cross patterns, no text or symbols present
KOGEFUNKTION
natural_image
Illustration of cleaning tools including gloves, a tool, and tape (no text or symbols)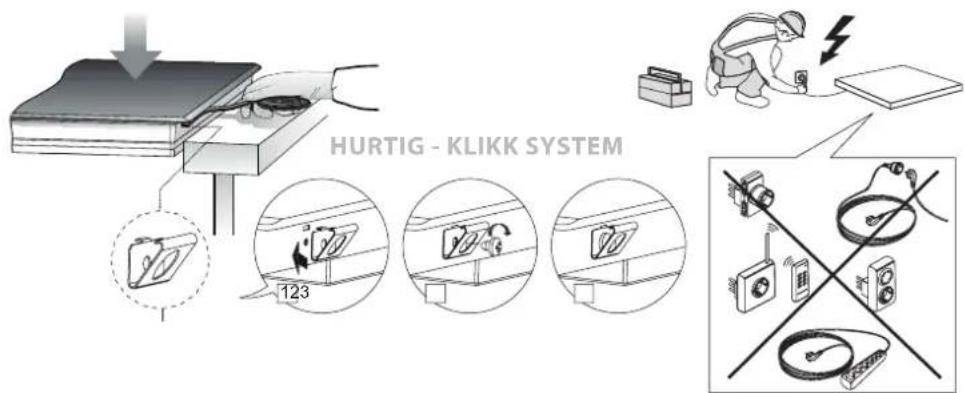
ELEKTRISK TILKOPLING
natural_image
Five abstract geometric shapes with varying internal and external markings, no text or symbols presentKOKEFUNKSJON
VEDLIKEHOLD OG RENHOLD

ADVARSEL
- serienummeret (nummeret etter teksten SN på typeskiltet under apparatet). Serienummeret indikeres også i dokumentasjonen;
- din fulle adresse;
• ditt telefonnummer.
natural_image
Illustration of cleaning tools including gloves, a tool, and tape (no text or symbols)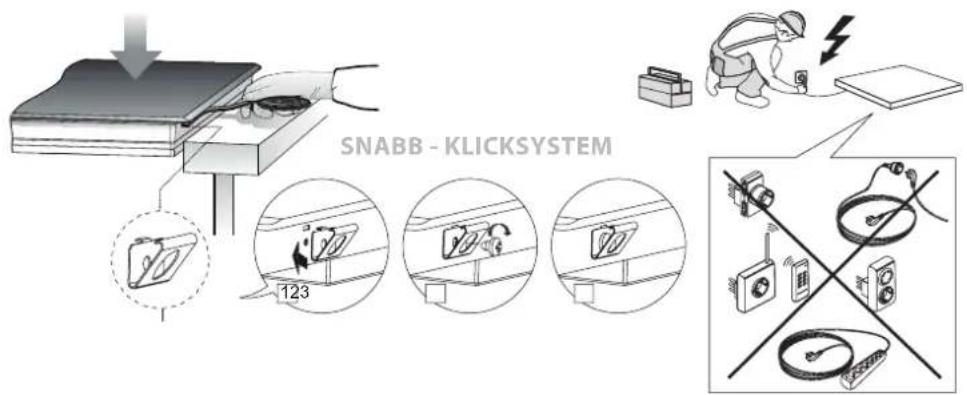
ELEKTRISK ANSLUTNING
Syns bara under drift.
natural_image
Five abstract geometric shapes with varying internal and external cross patterns, no text or symbols presentKOKNINGSFUNKTION
natural_image
Illustration of a computer monitor with a magnified view showing the screen area (no text or symbols present)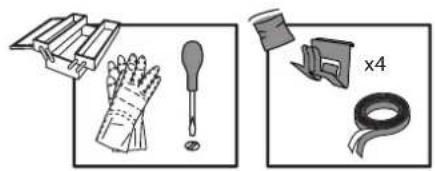
natural_image
Illustration of cleaning tools including gloves, a pipette, and tape (no text or symbols)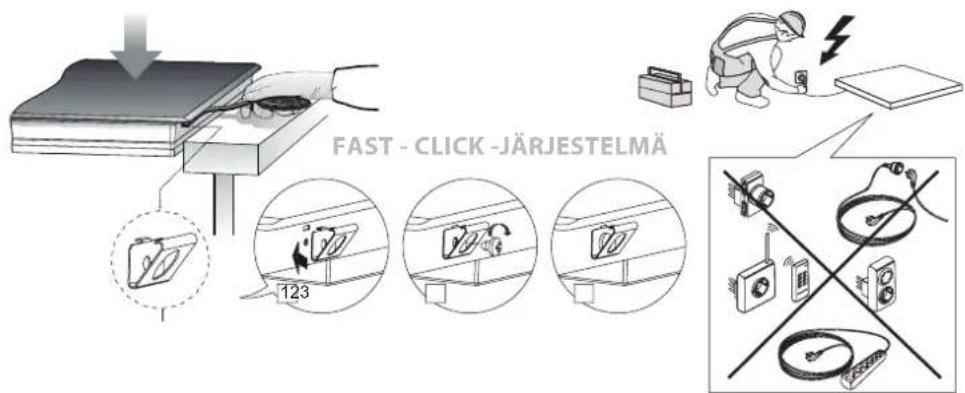
SÄHKÖLIITÄNTÄ
natural_image
Five abstract geometric shapes with varying internal and external markings, no text or symbols presentKIEHUMISTOIMINTO
natural_image
Illustration of hand tools including a glove, screwdriver, and tape (no text or symbols)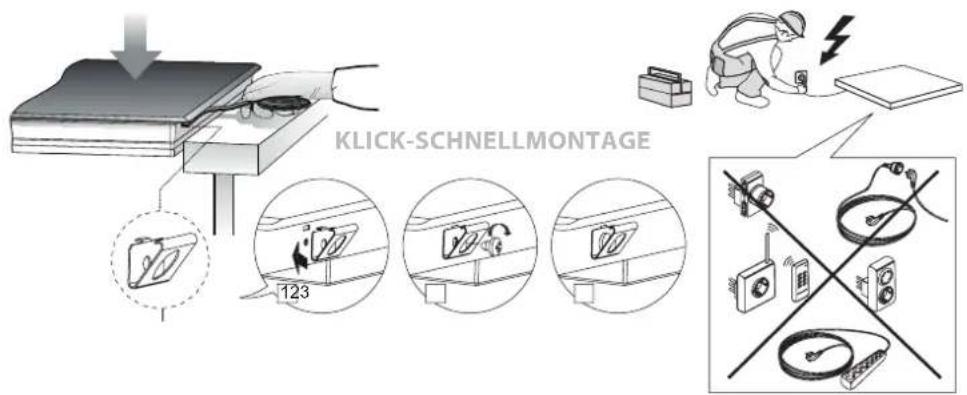
BEDIENFELD
natural_image
Two black frying panes with handles, one open and one closed, shown against white background (no text or symbols)natural_image
Five abstract geometric shapes with cross and oval outlines, no text or symbols presentSIEDEFUNKTION
DÉCLARATION DE CONFORMITÉ
natural_image
Illustration of cleaning tools including gloves, a pipette, and tape (no text or symbols)
RACCORDEMENT ÉLECTRIQUE
natural_image
Two views of a cooking pot with a speaker and coiled lid (no text or symbols visible)natural_image
Two black frying panes with curved handles, one open and one closed, shown against white background (no text or symbols)natural_image
Five abstract geometric shapes with varying internal and external cross patterns, no text or symbols presentFONCTION ÉBULLITION
SUGGESTIONS ET RECOMMANDATIONS
natural_image
Illustration of hand tools including a glove, dropper, and tape (no text or symbols)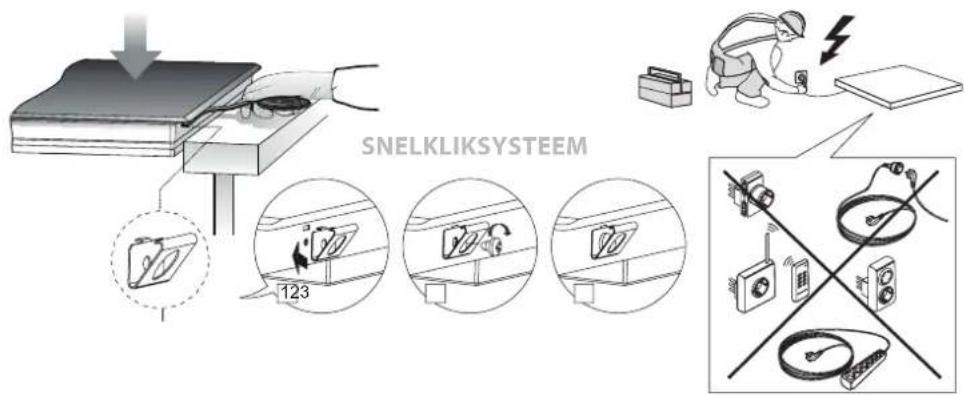
natural_image
Two black cooking panes with handles, one open and one closed, shown against white background (no text or symbols)HET APPARAAT INSCHAKELEN
natural_image
Five abstract geometric shapes with varying internal and external forms, no text or symbols present
KOOKFUNCTIE
- PERMITTED USE
- INSTALLATION
- ELECTRICAL WARNINGS
- DISPOSAL OF HOUSEHOLD APPLIANCES
- ENERGY SAVING TIPS
- DECLARATION OF CONFORMITY
- ELECTRICAL CONNECTION
- Warning:
- PRODUCT DESCRIPTION
- CONTROL PANEL
- ACCESSORIES
- POTS AND PANS
- Minimum diameter of pot/pan base for the different cooking areas
- ADAPTER FOR POTS/PANS UNSUITABLE FOR INDUCTION
- FIRST TIME USE
- POWER MANAGEMENT
- To set the power of the hob:
- SWITCHING ON THE DEVICE
- ACTIVATING PLATES
- TURNING OFF A PLATE
- TURNING ALL PLATES OFF
- PAN DETECTOR
- CONTROL PANEL LOCK
- STOP&GO FUNCTION
- Deactivating the Stop function
- POWER FUNCTION
- TIMER FUNCTION (countdown clock)
- To that end:
- Changing the programmed time
- Disconnecting the clock
- FUNCTIONS
- 6TH SENSE
- SIMMERING FUNCTION
- MELTING FUNCTION
- KEEP WARM FUNCTION
- FLEXICOOK
- BOILING FUNCTION
- Activation of the function
- Deactivation of the function
- SUGGESTIONS AND RECOMMENDATIONS
- MAINTENANCE AND CLEANING
- WARNING
- Important:
- TROUBLESHOOTING
- If something does not work
- The appliance does not work:
- The induction zones do not produce heat:
- SOUNDS PRODUCED DURING OPERATION
- AFTER-SALES SERVICE
- BEFORE CALLING THE AFTER-SALES SERVICE:
- IF AFTER THE ABOVE CHECKS THE FAULT STILL OCCURS, GET IN TOUCH WITH THE NEAREST AFTER-SALES SERVICE.
- ISTRUZIONI PER LA SICUREZZA
- IMPORTANTE: DA LEGGERE E OSSERVARE
- FUNZIONE BOLLITURA
- FUNKCJA WRZENIA
- ELEKTRIÜHENDUS
- KEETMISE FUNKTSIOON
- ELEKTROS IVADAS
- VIRINIMO FUNKCIJA
- ELEKTRISKAIS PIESLĚGUMS
- VĀRĪŠANĀS FUNKCIJA
- PRIKLJUČITEV NA ELEKTRIČNO OMREŽJE
- FUNKCIJA VRETJA
- PRIKLJUČIVANJE NA ELEKTRIČNU MREŽU
- FUNKCIJA VRENJA
- AKO JE NAKON GORE NAVEDENIH PROVJERA SMETNJA I DALJE PRISUTNA, OBRATITE SE NAJBLIŽEM POSTPRODAJNOM SERVISU.
- BEZBEDNOSNA UPUTSTVA
- VAŽNO JE DA SE PROČITAJU I POŠTUJU
- PRIKLJUČIVANJE NA ELEKTRIČNO NAPAJANJE
- FUNKCIJA KLJUČANJE
- TILSLUTNING TIL STR∅MFORSYNINGEN
- BETJENINGSPANEL
- TILBEH∅R
- GRYDER OG PANDER
- KOGEFUNKTION
- ELEKTRISK TILKOPLING
- KOKEFUNKSJON
- VEDLIKEHOLD OG RENHOLD
- ADVARSEL
- ELEKTRISK ANSLUTNING
- KOKNINGSFUNKTION
- SÄHKÖLIITÄNTÄ
- KIEHUMISTOIMINTO
- BEDIENFELD
- SIEDEFUNKTION
- DÉCLARATION DE CONFORMITÉ
- RACCORDEMENT ÉLECTRIQUE
- FONCTION ÉBULLITION
- SUGGESTIONS ET RECOMMANDATIONS
- HET APPARAAT INSCHAKELEN
- KOOKFUNCTIE
Brand : WHIRLPOOL
Model : WT 1090 BA
Category : Cooker