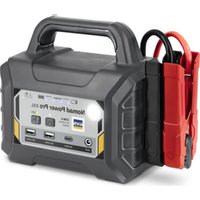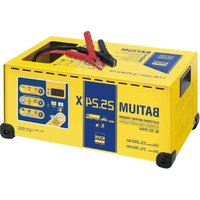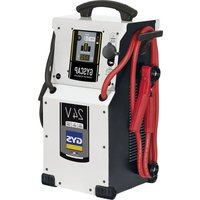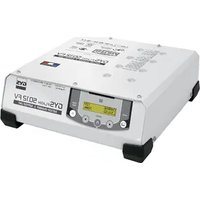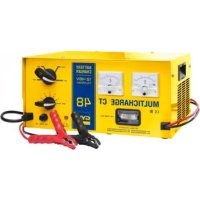
Multicharge CT 48 - Battery charger GYS - Free user manual and instructions
Find the device manual for free Multicharge CT 48 GYS in PDF.


| Product type | Battery charger |
| Brand | GYS |
| Model | Multicharge CT 48 |
| Charging voltages | 12 V, 24 V, 36 V, 48 V |
| Admissible battery capacity (12/24/36 V) | 90 Ah to 450 Ah |
| Admissible battery capacity (48 V) | 70 Ah to 360 Ah |
| Power supply | 230 V ~ 50/60 Hz, 1200 W max |
| Mains plug | CEE7/7 16 A with earth |
| Charging current | 15 A to 32 A depending on position (selectable) |
| Primary fuse protection | 8 A time-delay (Littelfuse 313008 MXP) |
| Secondary fuse protection | 40 A type BF1 (Littelfuse 142.5631.5402) |
| Display | Analog ammeter and voltmeter |
| Compatible battery type | Lead-acid with liquid electrolyte |
| Usage | Indoor only |
| Max ambient temperature | 50 °C |
| Recommended extension cable cross-section | 3 x 2.5 mm² |
| Maintenance | Regular dusting with a blow gun, cleaning with a dry cloth |
| Warranty | 2 years (parts and labor) |
| Compliance | CE, EAC, UKCA, CMIM |
| Thermal protection | Yes (automatic shutdown in case of overheating) |
| Reverse polarity protection | By fuse (replace if blown) |
Frequently Asked Questions - Multicharge CT 48 GYS
User questions about Multicharge CT 48 GYS
0 question about this device. Answer the ones you know or ask your own.
Ask a new question about this device
Download the instructions for your Battery charger in PDF format for free! Find your manual Multicharge CT 48 - GYS and take your electronic device back in hand. On this page are published all the documents necessary for the use of your device. Multicharge CT 48 by GYS.
USER MANUAL Multicharge CT 48 GYS
natural_image
Line drawing of a portable electronic device with analog meters, switches, and a door (no text or symbols)FR 2-8 / 49-52
EN 9-14 / 49-52
DE 15-21 / 49-52
ES 22-28 / 49-52
RU 29-34 / 49-52
NL 35-41 / 49-52
IT 42-48 / 49-52
MULTICHARGE CT 48
Charger for lead acid batteries
text_image
CE EAC UK CACONDITIONS DE GARANTIE
This manual includes guidelines on the operation of your device and the precautions to follow for your own safety. Ensure it is read carefully before first use and keep it handy for future reference. These instructions should be read and understood before anyone operates the product. Any modifications or maintenance that are not specified in the manual should not be undertaken. The manufacturer is not liable for any injury or damage due to non-compliance with the instruction manual. In case of problems or uncertainties, please consult a qualified person that is able to handle the device correctly. This device should only be used for charging within the limits indicated on the device and in the manual. The safety instructions must be followed. In case of improper or unsafe use, the manufacturer cannot be held responsible
Device suitable for indoor use only. Do not expose to rain or excessive moisture.
This device may be used by children from age 8 and by persons with reduced physical, sensory or mental capabilities or lack of experience and knowledge, provided that they are under supervision or have been told how to use the device safely and are aware of the potential risks. Children must not use the device as a plaything. Cleaning and servicing tasks may not be carried out by children unless they are supervised.
Do not use for charging non-rechargeable batteries
Do not operate the device with a damaged power supply cord or a damaged mains plug.
Do not use the device if the charging cable appears to be damaged or assembled incorrectly in order to avoid any risk of short circuiting the battery.
Never charge a frozen or damaged battery.
Do not cover the device
Do not place the device near a fire or subject it to heat or to longterm temperatures exceeding 50°C
Do not obstruct the cooling vents. Refer to the installation section before operating the machine.



Risk of explosion and fire!
A battery being charged can emit explosive gas.
- During the charge, the battery must be placed in a well ventilated area.
- Avoid flames and sparks. Do not smoke.
- Protect the electrical contacts of the battery against short-circuiting.

natural_image
Three black-and-white icons depicting safety symbols: a cigarette, gloves, and a test tube (no text or labels)


Do not leave a charging battery unattended for a long time.
Acid projection hazard!
- Wear safety goggles and protective gloves
- If your eyes or skin come into contact with battery acid, rinse the affected part of the body with plenty of water and seek immediate medical assistance.
Connection / disconnection:
- Disconnect the power supply before connecting/disconnecting the device to/from the battery
- The terminal of the battery that is not connected to the car frame must be connected first. The other connection must be made on the car frame, far from the battery and the fuel line. The battery charger must be connected to the power supply network.
- After the charging process, disconnect the battery charger from the power supply network and remove the connector from the car frame and then the connector from the battery, in this order.
Connection:
- This device must be connected to an earthed power supply
• This machine is fuse-protected - This equipment is intended for industrial environments (class A) and not for residential sites where the electric current is supplied by the public low-voltage power supply network. There may be potential difficulties in ensuring electromagnetic compatibility on these sites, because of the conducted interferences, as well as radiated radioelectrical frequency.
Maintenance:
- If the power supply cable is damaged, it must only be replaced by a cable specified or supplied by the manufacturer or its after-sales service.
• Service should be performed by a qualified person - Warning! Always remove the power plug from the wall socket before carrying out any work on the device.
- Regularly take off the cover and remove dust with an air gun. Take the opportunity to have a qualified person check the electrical connections with an insulated tool.
- Under no circumstances should solvents or other aggressive cleaning agents be used.
- Clean the device's surfaces with a soft, dry cloth.

text_image
CE EAC UK CARegulations:
- The device complies with European Directive. The certificate of compliance is available on our website.
• EAC conformity mark (Eurasian Economic Commission) - Equipment in compliance with British requirements. The British Declaration of Conformity is available on our website (see home page).
- Equipment in conformity with Moroccan standards.
- The declaration C_ (CMIM) of conformity is available on our website (see cover page).
Disposal:
This product should be disposed of at an appropriate recycling facility. Do not dispose of in domestic waste.
PRODUCT DESCRIPTION
CT 48 Multicharge is a battery charger with traditional technology. This charger is designed to charge liquid lead-acid batteries with voltages of 12V (6 elements), 24V (12), 36V (18), 48V (24) and within the ranges indicated below:
| Voltage Mini Maxi | |
| 12V 90Ah 450Ah | |
| 24V 90Ah 450Ah | |
| 36V 90Ah 450Ah | |
| 48V 70Ah 360Ah | |
POWER SUPPLY
The device must be placed so that the power socket is easily accessible. Supplied with a 16A plug, type CEE7/7. Must be connected to an earthed socket supplying 230V with a 50Hz / 60 Hz frequency and able to supply 1200 W with a 16A fuse.
Check that the power supply and protections are appropriate for the power required by the machine.
The recommended cross-section for an extension lead is: 3 × 2.5 mm^2 .
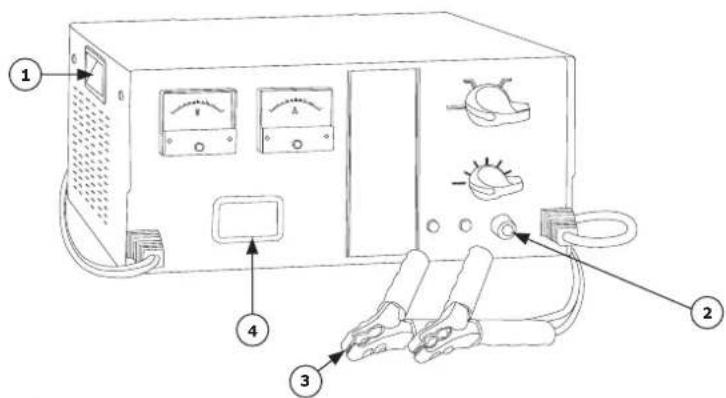
INTERFACE (CF P.44)
1 - Ammeter 5 - Fuse
2 - Voltmeter 6 – Charging leads + clamps
3 – Voltage selector switch 7 – Transport handles
4 – Size selection switch 8 – Power supply
USE IN CHARGER MODE
Additional precautions
| This machine is only designed to charge lead-acid batteries. Do not use the charger to charge lithium batteries. This charger does not have the required protections and features to charge this type of batteries. | |
| Disconnect any electronic system from the battery during the charge (do not charge the battery whilst it is connected to the vehicle). |
Charging several batteries simultaneously:

When charging several batteries at the same time (connected in series or parallel) the different batteries must be identical for the charger to work correctly and safely.
Charging batteries in series using this charger is only recommended if the batteries are part of a fixed system. For instance, in the case of a stationary or traction battery of 36V or 48V with several 12V batteries.
- Charging several batteries at the same time requires :
- Identical nominal voltage.
- For batteries connected in series, they must also:
- Have an identical charge level (same voltage) when the charge starts.
- Have the same capacity
- Be of the same type.
- Be all made by the same manufacturer.
- Entered service at the same time and be maintained in similar conditions throughout their life in order to guarantee a consistent condition among the different batteries.
- If several batteries no meeting the criteria listed above are charged simultaneously, the battery:
- with the lowest voltage,
- with the lowest capacity,
- the newest,
might suffer damage or even explode before completion of the charge.
- Avoid connecting batteries in series and parallel at the same time.
- For batteries connected in series, monitor them during the charge in order to ensure that charging levels are identical. If a battery has a different voltage level, charge it separately to prevent it from damaging the others.
- For this reason, when charging batteries in series using the Multicharge CT 48 (e.g. charging stationary batteries, traction batteries, 24V heavy-goods vehicle batteries made of 2 x 12V batteries etc.), it is essential to replace all batteries at the same time when they need replacing.

The no-load voltage of the charger can be important depending on the charging position.
Be careful not to touch the live extremity of the clamps when the machine is in use.
People wearing pacemakers should be careful.

Remove the battery caps (if applicable) and make sure that the liquid or gel level (electrolyte) is sufficient.
Otherwise add de-ionised water and clean the battery terminals and pods.
How to charge a battery
- Put switch on «OFF» position.
- Connect the clamps to the battery terminals and ensure good contact. Follow these steps :
- Connect red clamp to «+» battery terminal.
- Connect black clamp to vehicle frame as far as possible from the fuel system in order to avoid any risk of explosion. Or connect it to the «-» battery terminal.
- Connect the mains lead to a 230 V - 50/60 Hz mains supply.
- Select the correct output voltage based on the size of the battery being charged.
- Select charging speed and between normal or boost * modes according to the table below:
| Output voltage selection | Charge speed selection | |||||
| 1 2 3 4 5 6 | ||||||
| 12V 20 A 24 | A 25 A 28 A 29 A 32 | A | ||||
| 24V 20 A 22 | A 24 A 26 A 29 A 32 | A | ||||
| 36V 19 A 22 | A 24 A 26 A 28 A 30 | A | ||||
| 48V 15 A 17 | A 18 A 20 A 22 A 24 | A | ||||
* When used in «boost» mode, the thermal protections might kick in and stop the charge. The «boost» position is therefore suited for a fast but incomplete charge of the battery (for instance in order to start a vehicle).
User tips when charging a highly discharged battery (no-load voltage <10.5 V for a 12V battery)
- Choose a fast charge position (5 or 6)
- Regularly monitor and decrease the position when the current value gets near 0 A.
- Repeat the operation until reaching position 1 for the final charge.
Control and end of charge
- Ammeter and voltmeter show the CT 48 current and voltage output. These are therefore charger indicators. The charge can be interrupted when power get close to 0.
- Do not leave the machine connected to the battery over 24 hours.
- Once the charge is complete, in that order: change the position of the switch to «OFF», then disconnect the charger from the mains and finally disconnect the clamps from the (-) and then (+) terminals of the battery.
PROTECTIONS
MULTICHARGE CT 48 is a 48V charger which has several protections :
- Charging clamps are insulated.
- Protection against polarity reversal is ensured by the front fuse. It will need replacing when blown. Follow the fuse rating printed on the machine.
- The machine is protected by 2 fuses to avoid any risk in case of failure.
| 12 V - 24 V - 36 V - 48 V | |
| Primary fuse Cylindrical type | 6.35x31.75Slow blow T8ALittelfuse reference: 313008 MXP |
| Secondary fuse BF1 type 40A | Littelfuse reference: 142.5631.5402 |
- Thermal protection: the transformer is protected by thermostat. If the charger reaches its maximum duty cycle, it will go into thermal protection for 14 hour then start back to charge automatically.
TROUBLESHOOTING / CAUSES / SOLUTIONS
| Troubleshooting Causes Solutions | ||
| The ON/OFF button does not switch on when set to ON. | No mains voltage Check that the power | cord is plugged to a 230V 50/60Hz socket. Check the power supply network. |
| The machine's anmeter does not fluctuate . | Power supply problem. Check your mains power supply. | |
| Clamps in short circuit or polarity reversal. | Check that the fuses have not melted and that the circuit breaker has not tripped | |
| The battery that you are trying to charge is faulty. | Check the voltage at the terminal using a voltmeter. If this voltage jumps instantaneously to 2.5V per element, the battery may be sulfated or damaged. | |
| The output voltage selection is not in accordance with battery. | Check the output voltage switch is settled to the right voltage of the battery to charge. | |
| After intensive use over a prolonged period of time, your device has entered thermal protection mode. | Wait 1/4h for the device to cool down. | |
| The charger is properly connected but it does not charge the battery | Blown fuse Replace the fuse by a new one. | |
| Bad clamp connections. Clean the terminals and the clamps. Check the state of the cables and clamps. | ||
| Wrong charge settings Check that the selected voltage matches the battery voltage. | ||
| After intensive use over a prolonged period of time, your device has entered thermal protection mode. | Wait 1/4h for the device to cool down. | |
| Ammeter's needle gets over the maximum scale whereas the switch set up is into the minimum. | The battery is deeply discharged. Hold | the charge while selecting a low-er charging speed in order to avoid damaging the battery. Check that the current decreases during the charge and adjust the charging speed regularly during the charge. |
| Voltage error (12 -24V) Check that the | switch is on the right setting (12 or 24V) | |
| Your battery has elements in short circuit. | Battery damaged. Change the battery. | |
| The fuse blows every time it is replaced | Polarity reversal Connect the + clamp to the battery's (+) and the + clamp to the battery's (-). | |
| Starting the vehicle Do not attempt to jump start when the charger is connected. | ||
| Current overconsumption on the battery | Do not draw any of the battery's current during the charge | |
| The machine charges a battery that its voltage is lower than the charger's output nominal voltage. | Set up the output voltage switch on correct battery voltage. | |
| The battery is boiling. The output voltage selection is not consistent with the battery voltage. | Set up the output voltage switch on correct battery voltage. | |
| Your battery has elements in short circuit. | ||
| Sparks coming on battery terminals. Polarity is reversed at the clamps Connect the clamps to the battery terminal (black clamp to "-" and red clamp to "+"). | ||
WARRANTY
The warranty covers faulty workmanship for 2 years from the date of purchase (parts and labour).
The warranty does not cover:
- Transit damage.
- Normal wear of parts (eg. : cables, clamps, etc..).
- Damages due to misuse (power supply error, dropping of equipment, disassembling).
- Environment related failures (pollution, rust, dust).
In case of failure, return the unit to your distributor together with:
- The proof of purchase (receipt etc ...)
text_image
CE EAC UK CAtext_image
CE EAC UK CAtext_image
CE EAC UK CAOMSCHRIJVING VAN HET APPARAAT
text_image
CE EAC UK CA P Itext_image
Labeled diagram of an electronic device with numbered components including analog meters, switches, and a power outlet.SPÉCIFICATIONS TECHNIQUES / TECHNICAL SPECIFICATIONS / TECHNISCHE EIGENSCHAFTEN / ESPECIFICACIONES TÉCNICAS / ТЕХНИЧЕСКИЕ ХАРАКТЕРИСТИКИ / TECHNISCHE SPECIFICATIES / SPECIFICHE TECNICHE
| CT 48 | |
| Tension d'alimentation / Power supply voltage / Versorgungsspannung / Tensión de red eléctrica / Напряжение питания / Netspanning / Tensione d'alimentazione | 230 V - 50/60 Hz |
| Puissance nominale max / Maximum rated power / Maximale Nennleistung / Potencia nominal máxima / Макс. номинальная мощность / Maximaal nominaal vermogen / Potenza nominale max | 1200 W |
| Tension de charge / Charging voltage / Ladespannung / Tensión de carga / Напряжение зарядки / Laadspanning / Tensione di carica | 12 V / 24 V / 36 V / 48 V |
| Courant de charge / Charging current / Ladestrom / Corriente de carga / Ток зарядки / Laadstroom / Corrente di carica | 15 A / 32 A |
| Courbe de charge / Charging curve / Ladekurve / Curva de carga / График зарядки / Laadcurve / Curva di carica | Type W |
| Température de fonctionnement / Operating temperature / Betriebstemperatur / Temperatura de funcionamiento / Рабочая температура / Werktemperatuur / Temperatura di funzionamento | 0 – 35°C |
| Température de stockage / Storage temperature / Lagertemperatur / Temperatura de almacenado / Температура хранения / Opslagtemperatuur / Temperatura di stoccaggio | -20 °C – 80°C |
| Classe de protection / Protection class / Schuzklasse / Clase de protección / Степень защиты / Beschermingsklasse / Classe di protezione | IP 21 |
| Dimensions / Dimensions / Abmessungen / Dimensiones / Габариты / Afmetingen / Dimensioni | 190 X 390 X 260 cm |
| Poids / Weight / Gewicht / Peso / Bec / Gewicht / Peso 14,7 kg |
SCHÉMA ÉLECTRIQUE / ELECTRICAL DIAGRAM / SCHALTPLAN / ESQUEMA ELÉCTRICO / ЭЛЕКТРИЧЕСКАЯ СХЕМА / ELEKTRISCH SCHEMA / SCHEMA ELETTRICO
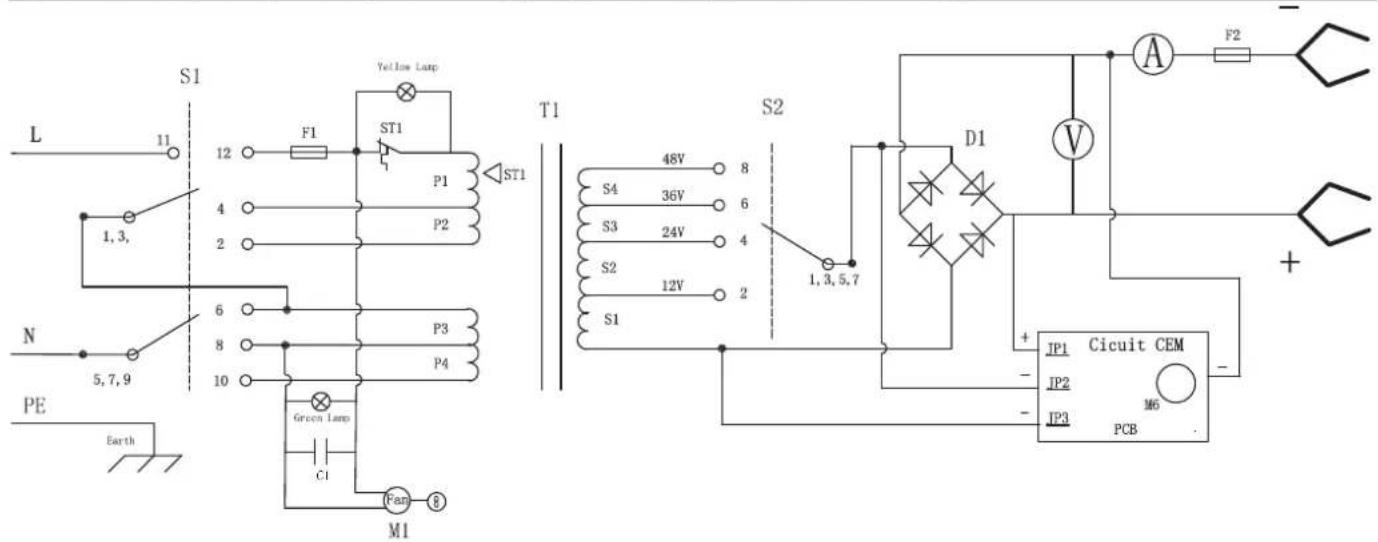
text_image
S1 L 11 12 F1 ST1 4 P1 2 P2 N 5,7,9 PE Earth Green Lamp C1 Fan 8 M1 Yellow Lamp T1 S2 48V 8 S4 36V 6 S3 24V 4 S2 12V 2 S1 D1 V A F2 - + IP1 Circuit CEM - JP2 -M6 PCB -PIÈCES DE RECHANGE / SPARE PARTS / ERSATZTEILE / PIEZAS DE RECAMBIO / ЗАПЧАСТИ / ONDERDELEN / PEZZI DI RICAMBIO
text_image
Diagram of an electronic device with labeled components including power supply, meters, and terminal connections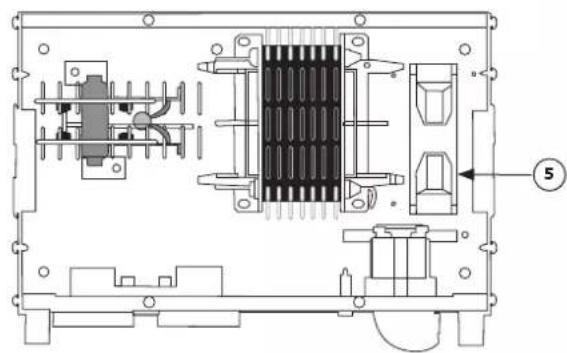
natural_image
Technical diagram of an electronic device internal structure with no visible text or symbolsDésignation / Designation / Bezeichnung / Designación / Наименование / Omschrijving / Denominazione
| 1 | Poignée / Handle / Griff / Mango / Ручка / Handvat / Impugnatura | 71515 |
| 2 Fusible primaire / Primary Fuse / Primäre Sicherung / Fusible primario / Первичный плавкий предохранитель / Primaire zekering / Fusibile principale | 53398 | |
| 53348 | ||
| 3 Pince rouge 60A / Red clamp 60A / Klemme - rot 60A / Pinza roja 60A / Красный зажим 60A / Rode klem 60A / Morsetto rosso 60A | 055537 | |
| 055520 | ||
| 4 Fusible secondaire / Secondary Fuse / Sekundäre Sicherung / Fusible secundario / Вспомогательный плавкий предохранитель / Secundaire zekering / Fusibile secondario | 054646 | |
| 53343 | ||
| 5 Ventilateur / Fan / Lüfter / Ventilador / Вентилятор / Ventilator / Ventilatore | 51023 | |
PICTOGRAMME / ICONES / PIKTOGRAMME / PICTOGRAMA / СИМВОЛЫ / PICTOGRAM / PICTOGRAMMA
 | - Produit recyclable qui relève d'une consigne de tri.- This product should be recycled appropriately.- Recyclingprodukt, das nicht über den Hausmüll entsorgt werden darf.- Producto reciclable que es objeto de una selección de residuos.- Этот аппарат подлежит утилизации.- Product recyclebaar, niet bij het huishoudelijk afval gooien.- Prodotto riciclabile soggetto a raccolta differenziata. |
| IP21 | - Protégé contre l'accès aux parties dangereuses avec un doigt, et contre les chutes verticales de gouttes d'eau- Protected against rain and against fingers access to dangerous parts- Schutz vor Eindringen von festen Fremdkörpern. Schutz gegen Berühren senkrecht fallendes Tropfwasser- Protegido contra el acceso a las partes peligrosas con un dedo, y contra la lluvia vertical de gotas de agua.- Защищен от доступа пальцев в опасные части, а также от попадения вертикальных капель водь- Beveiligd tegen de toegang tot gevaarlijke delen met een vinger, en tegen verticaal vallende waterdruppels- Protetto contro l'accesso alle parti pericolose con un dito, e contro cadute verticali di gocce d'acqua |
| < 70dB | Niveau de bruit / Noise level / Geräuschpegel / Nivel de ruido / Уровень шума / Geluidsniveau / Livello di rumore / Livello di rumore |