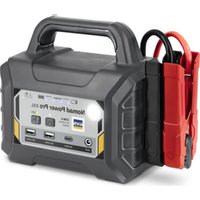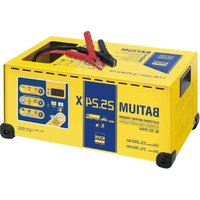
Gyscap 24V - Battery charger GYS - Free user manual and instructions
Find the device manual for free Gyscap 24V GYS in PDF.


User questions about Gyscap 24V GYS
0 question about this device. Answer the ones you know or ask your own.
Ask a new question about this device
Download the instructions for your Battery charger in PDF format for free! Find your manual Gyscap 24V - GYS and take your electronic device back in hand. On this page are published all the documents necessary for the use of your device. Gyscap 24V by GYS.
USER MANUAL Gyscap 24V GYS
natural_image
Technical line drawing of two industrial equipment enclosures, one with a spring-loaded handle and the other with a coiled spring and valve (no text or symbols present)| FR | 02-08 / 51-56 |
| EN | 09-15 / 51-56 |
| DE | 16-22 / 51-56 |
| ES | 23-29 / 51-56 |
| RU | 30-36 / 51-56 |
| NL | 37-43 / 51-56 |
| IT | 44-50 / 51-56 |
GYSCAP
INSTRUCTIONS DE SÉCURITÉ

Smart starter management system :
This manual contains safety and operating instructions, to be followed for your safety. Please read it carefully before using the device for the first time and keep it for future reference. Read and understand the following safety instructions before use. Any modification or updates that are not specified in the instruction's manual should not be undertaken. The manufacturer is not liable for any injury or damage caused due to non-compliance with the instructions featured in this manual. If there is any issue or uncertainty, please consult a qualified individual to operate the equipment correctly. This machine should only be used for starting operations comprised within the limits indicated on the machine and in the instruction manual. The operator must observe the safety precautions. In case of improper or unsafe use, the manufacturer cannot be held liable.
This unit can be used by children aged 8 or over and by people with reduced physical, sensory or mental capabilities or lack of experience or knowledge, if they are properly monitored or if instructions for using the equipment have safely been read and risks made aware of. Children must not play with the product. Cleaning and maintenance should not be performed by an unsupervised child.
Do not use to charge domestic batteries or non rechargeable batteries.
Do not cover the device.
Do not place the unit near a heat source/direct sunlight and durably high temperatures (above 60 °C)
Risk of explosion or acid splash if the clamps are short-circuited or if the 12 V booster is connected to a 24 V vehicle.
Protect the battery's electrical contact surfaces against short-circuits
Do not leave a battery being charged unattended for long periods of time.
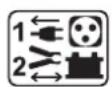
Connection / disconnection:
- The terminal of the battery that is not connected to the car frame must be connected first. The other connection must be made on the car frame, far from the battery and the fuel line.
- After the start-up operation, disconnect the booster. First remove the chassis connection and then the battery connection, in the order shown.


Connection:
- Class III device.
Maintenance:
- Maintenance should only be carried out by a qualified person.
- Do not use solvents or any agressive cleaning products.
- Clean the device's surfaces with a dry cloth.




Regulations:
• Equipment complies with European directives
- The declaration of conformity is available on our website.
• EAEC Conformity marking (Eurasian Economic Community).
- Material complies with British requirements.
The UK Declaration of Conformity is available on our website (see cover page).
• Device consistent with Moroccan standards.
- The declaration C_ (CMIM) of conformity is available on our website.
Waste management::
- This product should be disposed of in an appropriate recycling facility. Do not dispose of in domestic waste.
• This product should be recycled appropriately
GENERAL DESCRIPTION
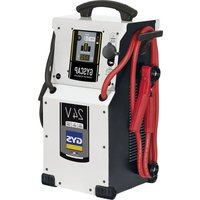
Designed for vehicles equipped with a 12 V (GYSCAP 680E) or 24 V (2x 12 V, GYSCAP 24V) battery, this autonomous starter
is equipped with supercapacitors. It uses the battery voltage of a running vehicle to recharge itself and within seconds it will start the engine of a broken down vehicle.
GYSCAP CHARGE STATUS
 | Press the Power button. |
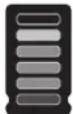 | The internal capacity status of the GYSCAP is displayed. |
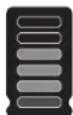
| [W7D] | The digital display shows a single bar: The capacity of GYSCAP is insufficient.Refer to the paragraph “Recharging the GYSCAP”. |
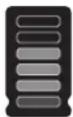 | The digital display shows four bars: The GYSCAP is not fully charged, but it is possible to start a vehicle.It is still recommended to charge it fully, see the «charging the GYSCAP». |
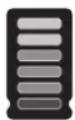
The digital display shows six bars: The GYSCAP is fully charged, so the starting capacity is optimal.
VEHICLE BATTERY'S STATE OF CHARGE
The GYSCAP's digital screen displays the voltage of the vehicle's battery or the voltage of the alternator if the vehicle is running.
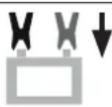
Connect the GYSCAP clamps to the battery, ensure that the polarity is correct.

Press the Power button.
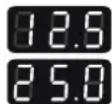
The voltage is displayed according to the condition of the vehicle.

If the voltage of the supercapacitors is lower than the voltage at the end of the clamps, the GYSCAP will recharge its supercapacitors up to 14 V (GYSCAP 680E - light vehicles) or 28 V (GYSCAP 24V - heavy vehicles) see “charging through the starting clamps”.
CHARGING THE GYSCAP
The GYSCAP can be charged in seconds by connecting directly to a 12V runnin vehicle (GYSCAP 680E) or 24V (GY-SCAP 24V).

The voltage of the supercapacitors will be at most equal to the voltage that the vehicle's alternator can supply. If the alternator voltage is lower than 14 V/28 V, the GYSCAP will not be fully charged.
CHARGE USING THE CLAMPS
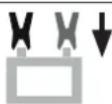
Connect the GYSCAP clamps to an operational vehicle suitable for the GYSCAP model used (12 V → GYSCAP 680E, 24 V → GYSCAP 24V) respecting the polarities.

Start the vehicle

Press the Power button.
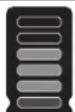
The bars on the digital display will increment and the battery voltage will be displayed.
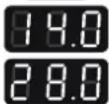
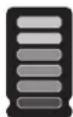
When all the bars are displayed the GYSCAP is ready for a new troubleshooting.
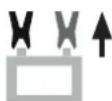
After switching off the GYSCAP with the button: ⏻ Disconnect the GYSCAP clamps from the vehicle. Wind up the cables and put them in the dedicated space.
CHARGING VIA CIGARETTE LIGHTER SOCKET
To facilitate charging, the GYSCAP is supplied with a cable that can be plugged directly into the vehicle's cigarette lighter socket. It is then possible to optimally charge the GYSCAP in approximately 30-40 min.

This is recommended for an extra charge. In case the GYSCAP is completely discharged, it is quicker to connect to the battery of an operational vehicle.

Connect the GYSCAP cigarette lighter cable to a started vehicle.
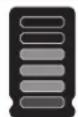
The bars on the digital display increment, the GYSCAP charges: • Recharging takes up to 30 minutes for both models.
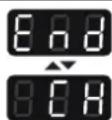
The digital display shows "End" and "CH" simultaneously. GYSCAP is ready to be used again.

The GYSCAP is charged.
Unplug the cigarette lighter socket to switch off the GYSCAP.
OPTION - RECHARGE WITH A GYSFLASH 4.12 (REF.029422 - UK version. 029521) + Acc. Gysflash (ref.029439)
It is possible to recharge your GYSCAP from the mains using the Supply mode of a GYSFLASH 4.12. To enter this mode, press the GYSFLASH button for 5 seconds. Once the mode is selected, the three blue mode selection indicators light up. After about 5 seconds, charging starts automatically (charging time: 1 hour max).
This is a one-time operation when the GYSFLASH 4.12 is used for the sole purpose of recharging the GYSCAP. If the charger is subsequently used in another mode (e.g. to charge a vehicle), the procedure must be repeated.
USE IN STARTER MODE
For regular interventions :
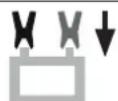
Connect the GYSCAP clamps to the battery, ensure that the polarity is correct.

Press the Power button.
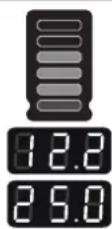
The digital display shows the GYSCAP voltage capacity.
Battery status display: voltage at the end of the clamps.

Press the start button. A 45 seconds countdown starts. If the polarity is reversed, the message "Er" appears and a continuous beep sounds.

Start the vehicle as quickly as possible before the capacity is transferred to the battery.
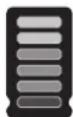

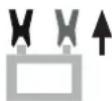
Wait for the GYSCAP to charge until the digital display shows (once charged, the GYSCAP is ready to be used again.
After switching off the GYSCAP with the button: ⏻
Disconnect the GYSCAP clamps from the vehicle.
Wind up the cables and put them in the dedicated space.

If the vehicle does not start after two attempts, the problem is probably not battery related. Locate the source of the problem prior to any other starting attempt.

Failure at the first attempt will discharge the GYSCAP.
Before any new attempts, charge the GYSCAP.
Check the section «charging the GYSCAP»
In the event of a particular breakdown: The vehicle battery is in deep discharge (< 1 V).
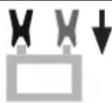
Connect the GYSCAP clamps to the battery, ensure that the polarity is correct.

The booster is no longer protected in this mode. In order not to damage the vehicle and the GYSCAP, avoid reversing the polarity at all costs.

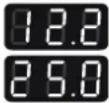
Press the Power button.
The digital display shows the GYSCAP voltage capacity.
Battery status display: voltage at the end of the clamps.

press 3s

Press the button for 3 seconds to perform a forced start. A 45 seconds countdown starts.
Start the vehicle as quickly as possible before the capacity is transferred to the battery.


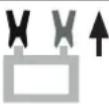
Wait for the GYSCAP to charge until the digital display shows (once charged, the GYSCAP is ready to be used again.
After switching off the GYSCAP with the button:
Disconnect the GYSCAP clamps from the vehicle.
Wind up the cables and put them in the dedicated space.
BYPASS MODE
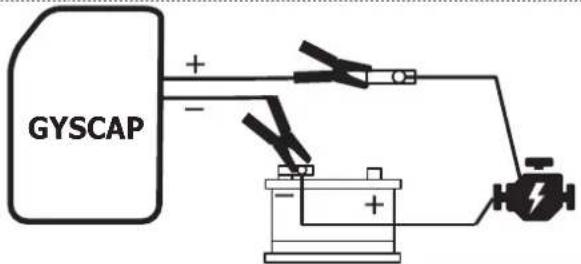
If starting has failed during standard troubleshooting and charging, the vehicle's on-board computer may not allow starting because the battery voltage. (of the vehicle) is < 8V at 12V and < 16V at 24V . In that case, follow the BYPASS steps.
text_image
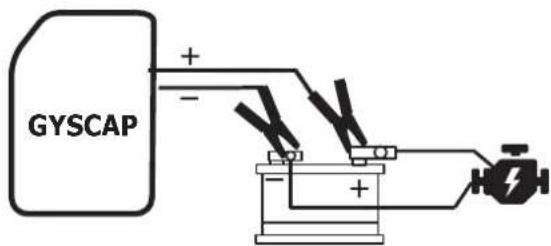
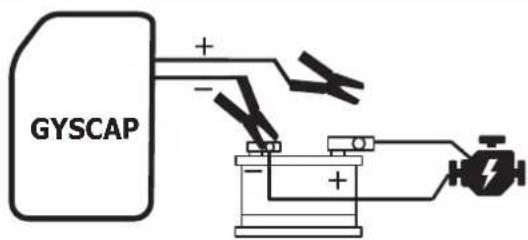
GYSCAPUnplug the (+) connector from your battery's terminal and connect the GYSCAP's red clamp (+) to it.
Connect the black clamp (-) of the GYSCAP to the (-) terminal on the battery.

Check the connections before proceeding to the next step. DO NOT REVERSE POLARITIES (protection is disabled).

Press the Power button.
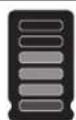
The digital display shows the GYSCAP voltage capacity.
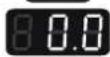
The display shows 0 because the battery voltage is not available in this mode.

Press the button for 3 seconds to perform a forced start. A 45 seconds countdown starts.
press 3s

Start the vehicle to be repaired as soon as possible before its capacity is transferred to the large consumers.
30s max
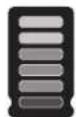
Wait for the GYSCAP to charge until the digital display shows (once charged, the GYSCAP is ready to be used again.

text_image
GYSCAPHand over the set: red (+) terminal and clamp on the (+) terminal of the battery.
text_image
GYSCAPRemove the red clamp (+) from the battery's (+) terminal.
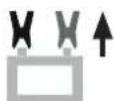
After stopping GYSCAP: Disconnect the GYSCAP clamps from the vehicle. Wind up the cables and put them in the dedicated space.
PROTECTIONS
Your device has been designed with maximum protection:
• The starting clamps are insulated.
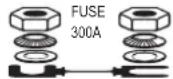
- It is protected by a 300 A fuse (054561: set of 2 fuses)
A fuse provides protection against operating errors. Replacing it requires manual intervention.
Smart starter management system:
- This device has a comprehensive and complete protection system, protecting the on-board electronics, the charger, the battery and the user.
- Protects against: polarity reversals (not in SOS mode) / clamps in short-circuit / deep discharges and voltage selection errors.
WARRANTY
The warranty covers defaults or manufacturing defects for 2 years from the date of purchase (parts and labour).
The warranty does not cover:
- Any other damage due to transport.
- Normal wear of parts (eg.: cables, clamps, etc..).
- Damages due to misuse (power supply error, dropping of the equipment, disassembling).
- Environment related failures (pollution, rust, dust).
In the event of a malfunction, return the unit to your dealer, enclosing:
- a dated proof of purchase (till receipt, invoice...)
- An explanatory note of the failure.
SICHERHEITSHINWEISE

Smart starter management system :
Smart starter management system :
Smart starter management system :
text_image
Technical diagram of a mechanical device with numbered components labeled 1, 2, and 3.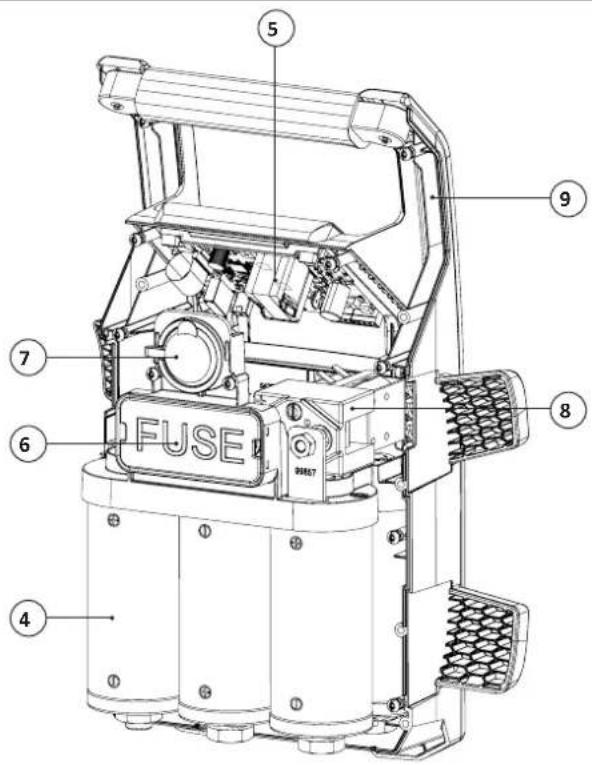
text_image
FUSE ⑤ ⑨ ⑦ ⑥ ⑧ ④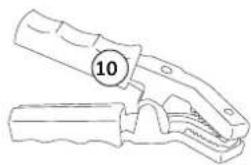
natural_image
Line drawing of a pliers with a circular badge labeled '10' (no text or symbols on the pliers or background)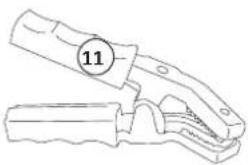
natural_image
Line drawing of a mechanical clamp or tool with a circular badge labeled '11' (no text or symbols on the clamp itself)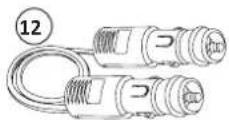
| 1 | Poignée / Handle / Handgriff / Mango / Ручка / Handvat / Impugnatura | 56153 | |
| 2 | Clavier / Keyboard / Tastatur / Teclado / Клавиатура / Toetsenbord / Tastiera | 51981 | |
| 3 | Coque arrière / Back casing / Gehäuserückseite / Carcasa trasera / Задний пластиковый корпус / Kast achter / Guscio posteriore | 56234 | |
| 4 | Supercondensateur / Supercapacitors / Superkondensator / Supercondensador / Суперконденсатор / Super condensator / Supercondensatore | Si fabrication avant 04/2021:If manufactured before 04/2021: | 63428 |
| Si fabrication après 04/2021:If manufactured after 04/2021: | 63427 | ||
| 5 | Circuit électronique / Circuit board / Steuerplatine / Circuito electrónico / Электронная плата / Elektrische circuit / Circuito elettrico | Si fabrication avant 10/2020:If manufactured before 10/2020: | 97471C + 65901+ 75011x5 |
| Si fabrication après 10/2020:If manufactured after 10/2020: | 97471C | ||
| Si fabrication pendant 10/2020:If manufactured between: | consulter SAVconsult SAV | ||
| 6 | Fusible 300 A / 300 A fuse / Sicherung 300A / Fusible 300 A / Плавкий предохранитель 300 A / Zekering 300A / Fusibile 300 A | 054561 | |
| 7 | Prise allume cigare / Cigarette lighter plug / Zigarettenanzünderanschluss / Conector del encendedor / Разъем для прикуривателя / Plug sigarettenaansteker / Presa accendisigari | 71255 | |
| 8 | Contacteur 12 V / Contactor 12 V / Schaltvorrichtung 12 V / Contactor 12 V / Контактор 12 B / Schakelaar 12V / Relé di avviamento 12 V | 51085 | |
| 9 | Coque avant / Front casing / Gehäusefront / Carcasa delantera / Передний пластиковый корпус / Kast voor / Guscio anteriore | 56233 | |
| 10 | Pince laiton rouge isolée 650 A / Red insulated brass red clamp 650 A / Isolierte Messingsklemme rot 650A / Pinza de latón roja aislada 650 A / Красный изолированный латунный зажим 650 A / Geïsoleerde rode messing klem 650 A / Morsetto ottone rosso isolato 650 A | 055551 | |
| 11 | Pince laiton noire isolée 650 A / Black insulated brass clamp 650 A / Isolierte Messingsklemme schwarz 650A / Pinza de latón negra aislada 650 A / Черный изолированный латунный зажим 650 A / Geïsoleerde zwarte messing klem 650 A / Morsetto ottone nero isolato 650 A | 055544 | |
| 12 | Câble allume-cigare / Car lighter cable / Autoanzünderkabel / Cable del encendedor del coche / Кабель для зажигалок / Autoaansteker-kabel / Cavo accendisigari per auto | 99783ST | |
GYSCAP 24V
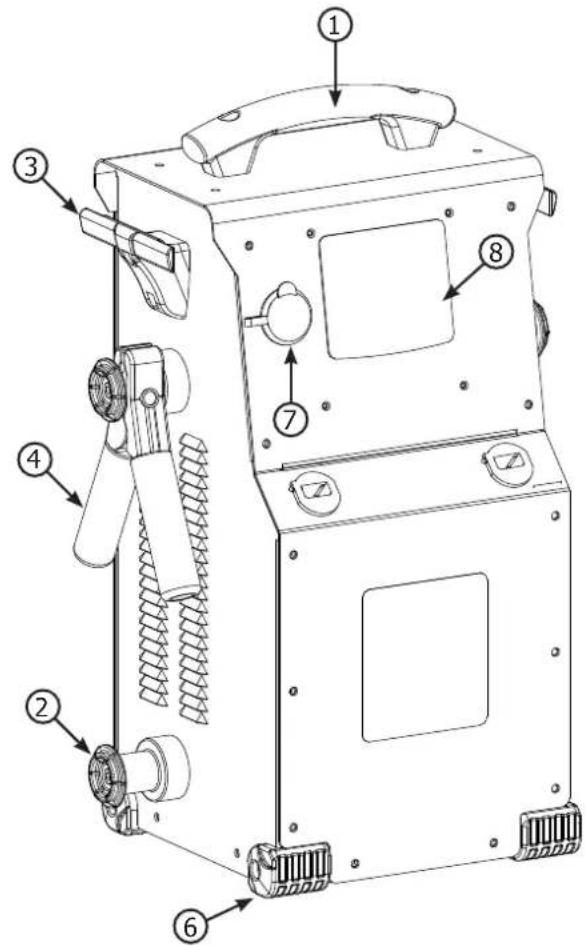
text_image
Technical diagram of a mechanical device with numbered components for identification
text_image
FUSE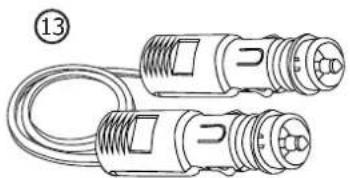
natural_image
Line drawing of two connected electrical connectors with a coiled cable (no text or symbols)| 1 | Poignée / Handle / Griff / Mango / Ручка / Handvat / Impugnatura | 56047 |
| 2 | Support pince rond / Round clamp holder / Runder Klemmenhalter / Soporte de pinza redondo / Поддержка для круглых зажимов / Houder ronde klem / Supporto morsetto rotondo | 56037 |
| 3 | Support pince / Clamp support / Klemmenhalter / Soporte de pinza / Держатель для зажима / Houder klem / Supporto morsetto | 72053 |
| 4 | Pince rouge / Red clamp / Rote Klemme / Pinza roja / Красный зажим / Rode klem / Morsetto rosso | 053779 |
| 5 | Pince noire / Black clamp / Schwarze Klemme / Pinza negra / Черный зажим / Zwarté klem / Morsetto nero | 053786 |
| 6 | Patin d'angle / Angle pad / Eckschuh / Soporte de angulo / Резиновые уголки / Hoekblokje / Cuscinetto angolare | 56163 |
| 7 | Prise allume-cigare / Cigarette lighter plug / Zigarettenanzünderbuchse / Encendedor de cigarros / Коннектор для прикуривателя / Plug sigarettenaansteker / Presa accendisigari | 71255 |
| 8 | Clavier / Keypad / Bedienfeld / Teclado / Панель управления / Bedieningspaneel / Tastiera | 51981 |
| 9 | Contacteur / Contactor / Schütz / Contactor / Замыкатель / Schakelaar / Contattore | 51090 |
| 10 | Carte électronique / Circuit board / Elektronische Platine / Tarjeta electrónica / Электронная плата / Elektrisch circuit / Scheda elettrica | E0037C |
| 11 | Porte fusible + fusible / Fuse holder + fuse / Sicherungshalter + Sicherung / Sujetador de fusibles + fusible / Держатель предохранителя + предохранитель / Zekeringhouder + zekering / Porta fusibile + fusibile | 94189 |
| Kit 2 fusibles / Kit 2 fuses / Satz mit 2 Sicherungen / Kit 2 fusibles / комплект из 2 x предохранителей / Kit 2 zekeringen / Kit 2 fusibili | 054561 | |
| 12 | Supercondensateur / Supercapacitor / Superkondensator / Supercondensador / Суперконденсатор / Supercondensator / Supercondensatore | 63427 |
| 13 | Câble allume-cigare / Cigarette lighter cable / Zigarettenanzünderkabel / Cable mechero / Кабель для прикуривателя 12В / Kabel sigarettenaansteker / Cavo accendisigari | 99783ST |
CIRCUIT DIAGRAM / SCHALTPLAN / DIAGRAMA ELECTRICO / ЭЛЕКТРИЧЕСКАЯ СХЕМА / ELEKTRISCHE SCHEMA / SCEMA ELETTRICO
GYSCAP 680 E
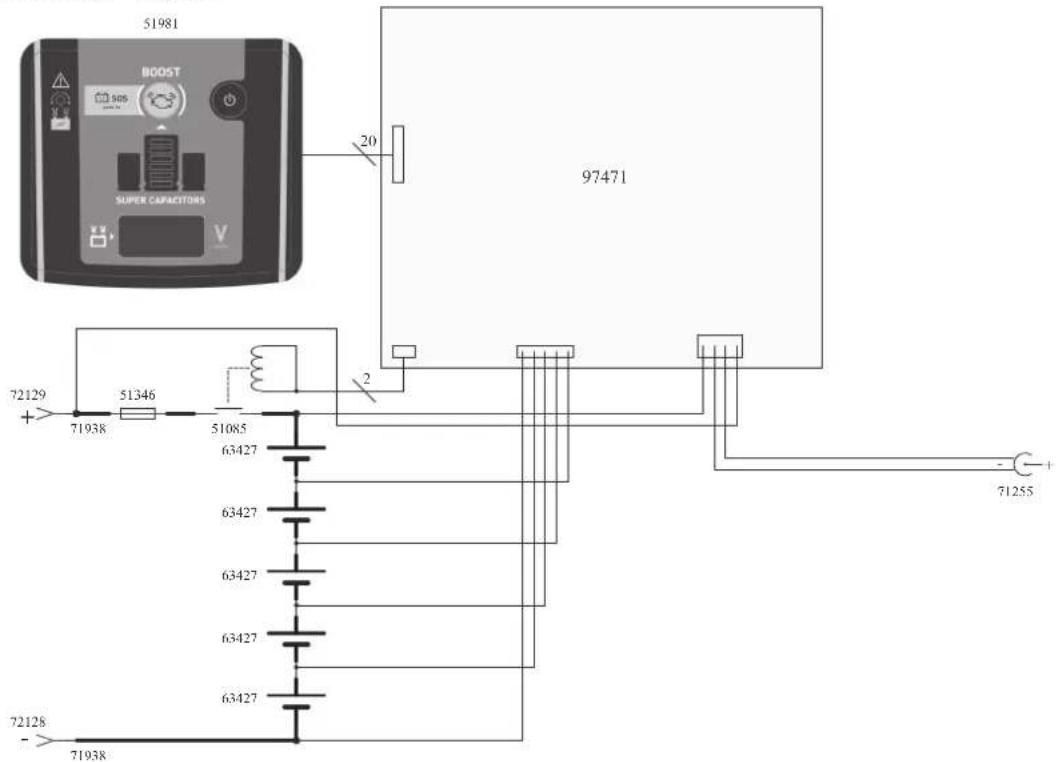
text_image
51981 BOOST SIDS SUPER CAPACITORS 20 97471 72129 + 71938 51346 51085 63427 63427 63427 63427 63427 71255 72128 - 71938GYSCAP 24V
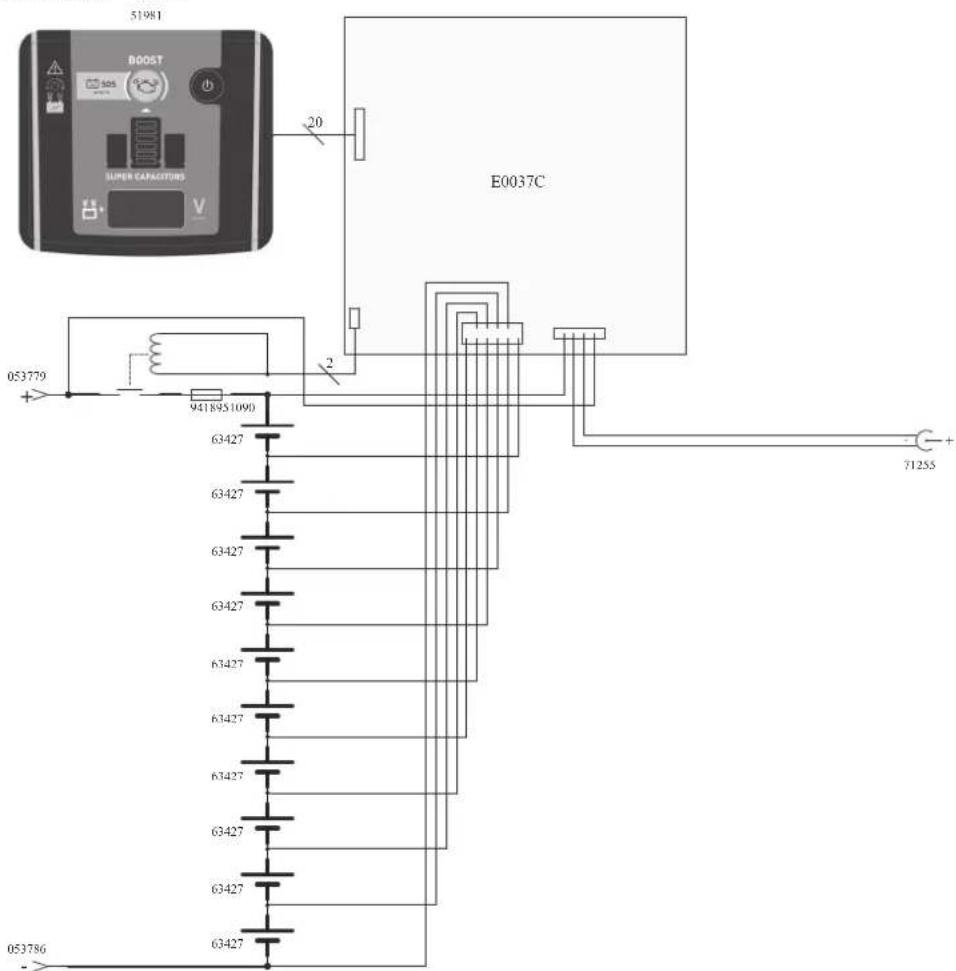
text_image
51981 E0037C 51981 BOOST SUPER CAPACITORS 20 053779 + 9418951090 63427 63427 63427 63427 63427 63427 63427 63427 63427 63427 63427 63427 63427 63427 63427 71255 053786TECHNICAL SPECIFICATIONS / TECHNISCHE DATEN / ESPECIFICACIONES TÉCNICAS / ТЕХНИЧЕСКИЕ СПЕЦИФИКАЦИИ / TECHNISCHE GEGEVENS / SPECIFICHE TECNICHE
| 680 E 24 V | ||
| Dimensions / Dimensions / Abmessungen / Dimensiones / Размеры / Afmetingen / Dimensioni | 35 x 44 x 19 cm 32 x 49 x 21,5 cm | |
| Poids / Weight / Gewicht / Peso / Bec / Gewicht / Peso 8,2 kg 12 kg | ||
| Nombre total de supercondensateurs / 5 x 3 000 F 10 x 3 000 F | ||
| Tension totale des supercondensateurs / 5 x 3 V 10 x 3 V | ||
| Start current / Startstrom / Opstartstroom / Corrente di avvio 1 600 A 2 500 A | ||
| Icc (Crancking current) 2 700 A 4 500 A | ||
| Courant de pointe / Peak current / Spitzenstrom / Corriente Instantánea / Piekstroom / Corrente di picco | 9 000 A 10 000 A | |
| Température de fonctionnement / Operating temperature / Betriebstemperatur / Temperatura de funcionamiento / Рабочая температура / Рабочая температура / Werktemperatuur / Temperatura di funzionamento | -40°C / + 60°C | |
| Température de stockage / Lagertemperatur / Temperatura de almacenamiento / Температура хранения / Opslagtemperatuur / Temperatura di stoccaggio | ||
| Température de recharge / | ||
| Longueur des câbles / Cable length / Länge der Kabel / Longitud de los cables / Длина кабелей / Kabellengte / Lunghezza dei cavi | 1,70 m 2 m | |
| Section de câbles / Cross section / Querschnitt des Kabels / Sección de cables / Сечение кабелей / Kabelsectie / Sezione cavi | 25 mm ^2 50 mm ^2 | |
| Courant maximum supporté par les pinces / Clamps' maximum current / Maximale Stromstärke vom Klemmen getragen / Corriente máxima soportada por las pinzas / Максимальный ток, выдерживаемый зажимами / De maximaal door de klemmen geaccepteerde stroom / Corrente massima supportata dai morsetti | 650 A 600 A | |
| Ouverture des pinces / Clamps jaw opening / Zangenöffnung / Abertura de las pinzas / Ширина размыкания зажимов / Opening van de klemmen / Apertura dei morsetti | 35 mm 40 mm | |
GYS France
Siège social / Headquarter