
AR29EU - Air purifier HOMEDICS - Free user manual and instructions
Find the device manual for free AR29EU HOMEDICS in PDF.

| Product Type | Air Purifier |
| Brand | Homedics |
| Model | AR29EU |
| Height | 71.12 cm |
| Weight | 5.67 kg |
| Power Supply | 220-240 V ~ 50-60 Hz, 65 W |
| Noise Level | < 60 dB |
| Number of Speeds | 3 (Low, Medium, High) |
| Timer | 2, 4, 8, 12 hours |
| Oscillation | Yes |
| UV-C Light | Yes, with replacement indicator |
| Remote Control | Yes, CR2025 battery included |
| Filter Type | 2 washable HEPA filters |
| Filter Cleaning Frequency | Every 480 hours of use (indicator) |
| HEPA Filter Replacement | Approximately every 18 months |
| UV-C Bulb Replacement | Replacement UV-C bulb (contains mercury) |
| Exterior Maintenance | Dry cloth, front grille cleanable with vacuum or damp cloth |
| Important Precautions | Unplug before cleaning, do not immerse, keep out of reach of children |
| Recommended Location | Firm and flat surface, 16 cm from walls, 1 m from heat sources |
| Use | Indoor only, do not use in a bathroom |
Frequently Asked Questions - AR29EU HOMEDICS
User questions about AR29EU HOMEDICS
0 question about this device. Answer the ones you know or ask your own.
Ask a new question about this device
Download the instructions for your Air purifier in PDF format for free! Find your manual AR29EU - HOMEDICS and take your electronic device back in hand. On this page are published all the documents necessary for the use of your device. AR29EU by HOMEDICS.
USER MANUAL AR29EU HOMEDICS
Oscillating HEPA+UV-C Tower Air Purifier
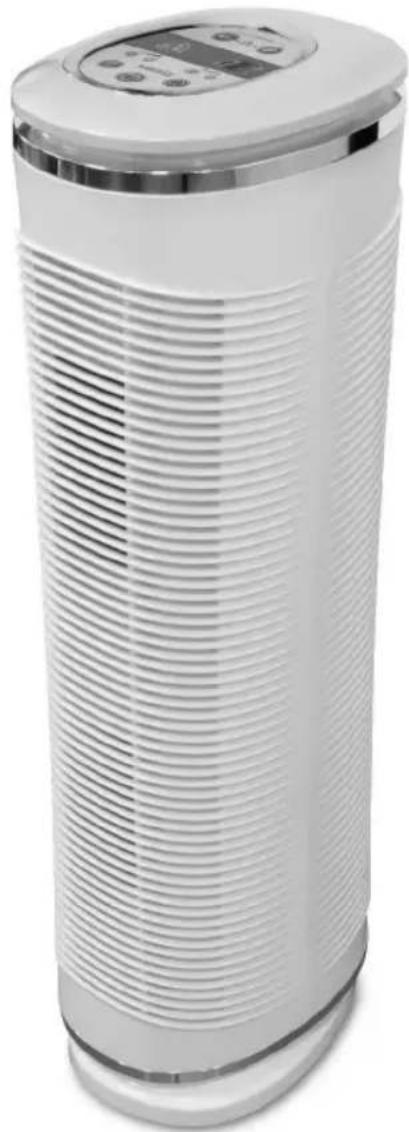
natural_image
White industrial air purifier with horizontal ridges and a digital display on top (no visible text or symbols)Instruction Manual
AR-29A-GB
AR-29A-EU
3 year guarantee
READ ALL INSTRUCTIONS BEFORE USE.
SAVE THESE INSTRUCTIONS FOR FUTURE REFERENCE.
IMPORTANT SAFEGUARDS:
WHEN USING ELECTRICAL PRODUCTS, ESPECIALLY WHEN CHILDREN ARE PRESENT, BASIC SAFETY PRECAUTIONS SHOULD ALWAYS BE FOLLOWED, INCLUDING THE FOLLOWING:
- ALWAYS unplug the appliance from the electrical outlet immediately after using and before cleaning. To disconnect, turn all controls to the 'OFF' position, then remove plug from outlet.
- NEVER leave an appliance unattended when plugged in. Unplug from the mains outlet when not in use and before putting on or taking off parts or attachments.
- This appliance is not intended for use by persons (including children) with reduced physical, sensory or mental capabilities, or lack of experience and knowledge, unless they have been given supervision or instruction concerning use of the appliance by a person responsible for their safety. Children should be supervised to ensure that they do not play with the appliance.
- DO NOT reach for an appliance that has fallen in water or other liquids. Switch off at the mains and unplug it immediately. Keep dry – DO NOT operate in wet or moist conditions.
• NEVER insert pins or other metallic fasteners into the appliance. - Use this appliance for the intended use as described in this booklet. DO NOT use attachments not recommended by HoMedics.
- NEVER operate the appliance if it has a damaged cord or plug, if it is not working properly, if it has been dropped or damaged, or dropped into water. Return it to the HoMedics Service Centre for examination and repair.
- Keep cord away from heated surfaces.
- Excessive use could lead to the product's excessive heating and shorter life. Should this occur, discontinue use and allow the unit to cool before operating.
- NEVER drop or insert any object into any opening.
• DO NOT operate where aerosol (spray) products are being used or where oxygen is being administered. - DO NOT operate under a blanket or pillow. Excessive heating can occur and cause fire, electrocution or injury to persons.
• DO NOT carry this appliance by the cord or use cord as a handle.
• DO NOT use outdoors.
• DO NOT crush. Avoid sharp folds.
• This product requires a 220-240 V AC power supply. - DO NOT attempt to repair the appliance. There are no user serviceable parts. For service, send to a HoMedics Service Centre. All servicing of this appliance must be performed by authorised HoMedics service personnel only.
- Never block the air openings of the appliance or place it on a soft surface, such as a bed or couch. Keep air openings free of lint, hair etc.
- Do not place or store appliance where it can fall or be pulled into a bath or sink. Do not place in or drop into water or other liquid.
- Failure to follow the above may result in the risk of fire or injury.
- Burns can result from improper use.
SAFETY CAUTIONS :
PLEASE READ THIS SECTION CAREFULLY BEFORE USING THE APPLIANCE.
• Always place the air cleaner on a firm, level surface.
- Always place the air cleaner at least 150mm away from walls and 900mm from heat sources such as stoves, radiators, or heaters.
• DO NOT use while bathing or in the shower.
- Keep dry - DO NOT operate in a wet or moist condition.
• This appliance is designed for personal, non-professional use only.
- Extreme caution is necessary when any air cleaner is used by or near children or invalids and whenever the air cleaner is left operating and unattended.
• Always unplug the air cleaner when not in use.
- Do not operate the air cleaner with a damaged cord or plug, or after the air cleaner malfunctions, has been dropped or damaged in any manner. Discard the air cleaner or return to HoMedics Consumer Relations for examination, electrical or mechanical adjustment, or repair.
- This air cleaner is not intended for use in bathroom, laundry areas and similar moist indoor locations. Never locate air cleaner where it may fall into a bathtub or other water container.
- Do not run cord under carpeting. Do not cover cord with throw rugs, runners or similar coverings. Do not route cord under furniture or appliances. Arrange cord away from traffic areas where it can be tripped over.
• To disconnect the air cleaner, first turn controls to the OFF position, then remove plug from outlet.
- Do not tilt or move the air cleaner while it is in operation. Shut off and remove plug from outlet before moving.
- Do not insert or allow foreign objects to enter any ventilation or exhaust opening as this may cause an electric shock or fire, or damage the air cleaner.
- To prevent a possible fire, do not block air intakes or exhaust in any manner. Do not use on soft surface, like a bed, where openings may become blocked.
- Use this air cleaner only for its intended use as described in this manual. Any other use not recommended by the manufacturer may cause fire, electric shock, or injury to persons.
• Always plug the air cleaner directly into a wall outlet/receptacle. Never use with an extension cord.
SAVE THESE IMPORTANT INSTRUCTIONS FOR EASY REFERENCE Technical Specifications
| Input voltage 220-240 V | |
| Rated Frequency 50-60 Hz | |
| Power 65 Watts | |
| Weight 5.67kg | |
| Noise Level <60 dB | |
| Unit Height 71.12cm | |
T This appliance is classified as suitable for use in tropical climates with an ambient temperature up to 40^ C.
Plug (MODEL AR-29A-GB ONLY)
If the plug on this appliance is damaged, it can be replaced with a BS 1363 plug, fitted with a 3A BS 1362 fuse. Only use a 3 amp fuse with this appliance. Care must be taken when changing the plug. If in doubt, contact a qualified electrician.

text_image
NEUTRAL, BLUE ON BLACK 3A FUSE 85 1362 LPG. BROWN/REDWEEE explanation
This marking indicates that this product should not be disposed with other household wastes throughout the EU. To prevent possible harm to the environment or human health from uncontrolled waste disposal, recycle it responsibly to promote the sustainable reuse of material resources. To return your used device, please use the return and collection systems or contact the retailer where the product was purchased. They can take this product for environmental safe recycling.
Battery Directive

This symbol indicates that batteries must not be disposed of in the domestic waste as they contain substances which can be damaging to the environment and health. Please dispose of batteries in designated collection points.
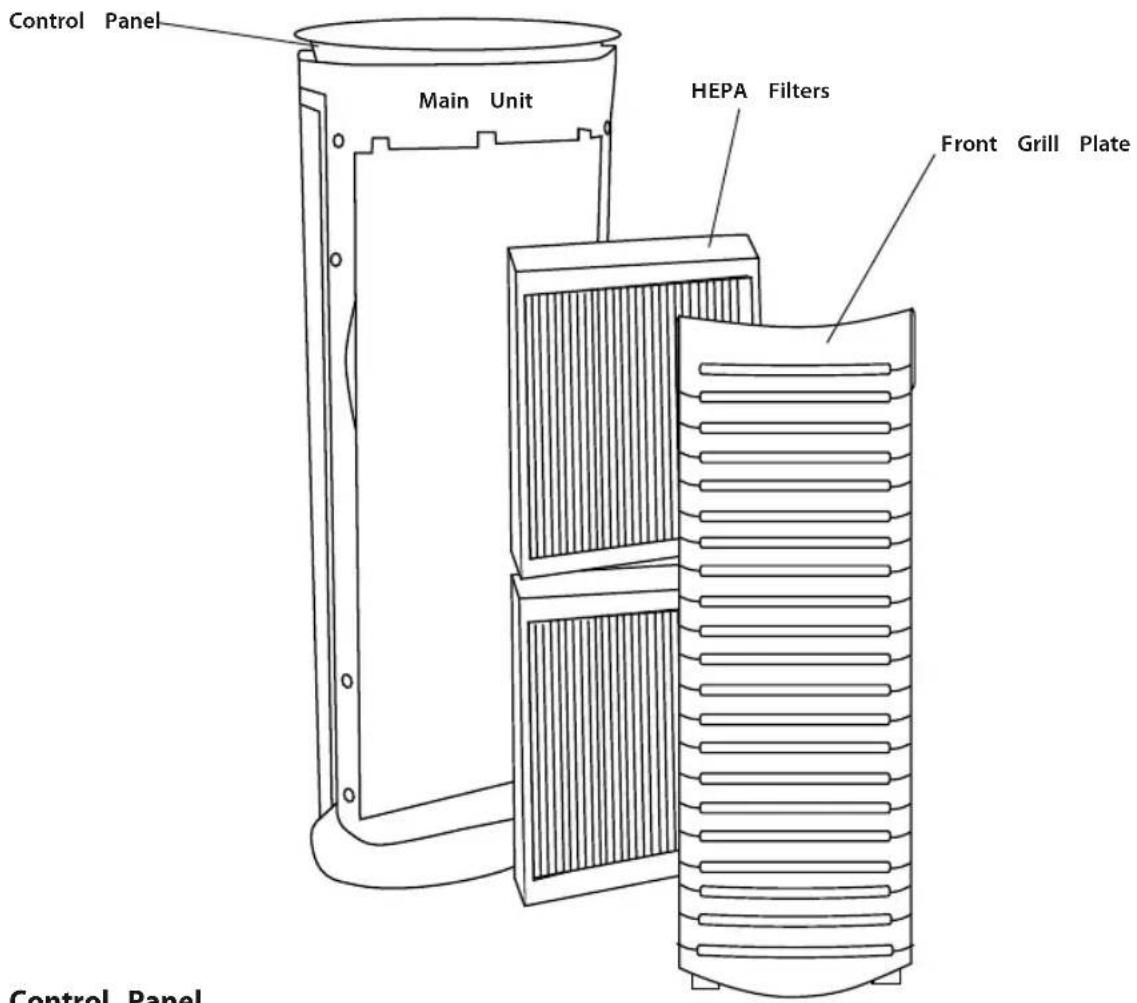
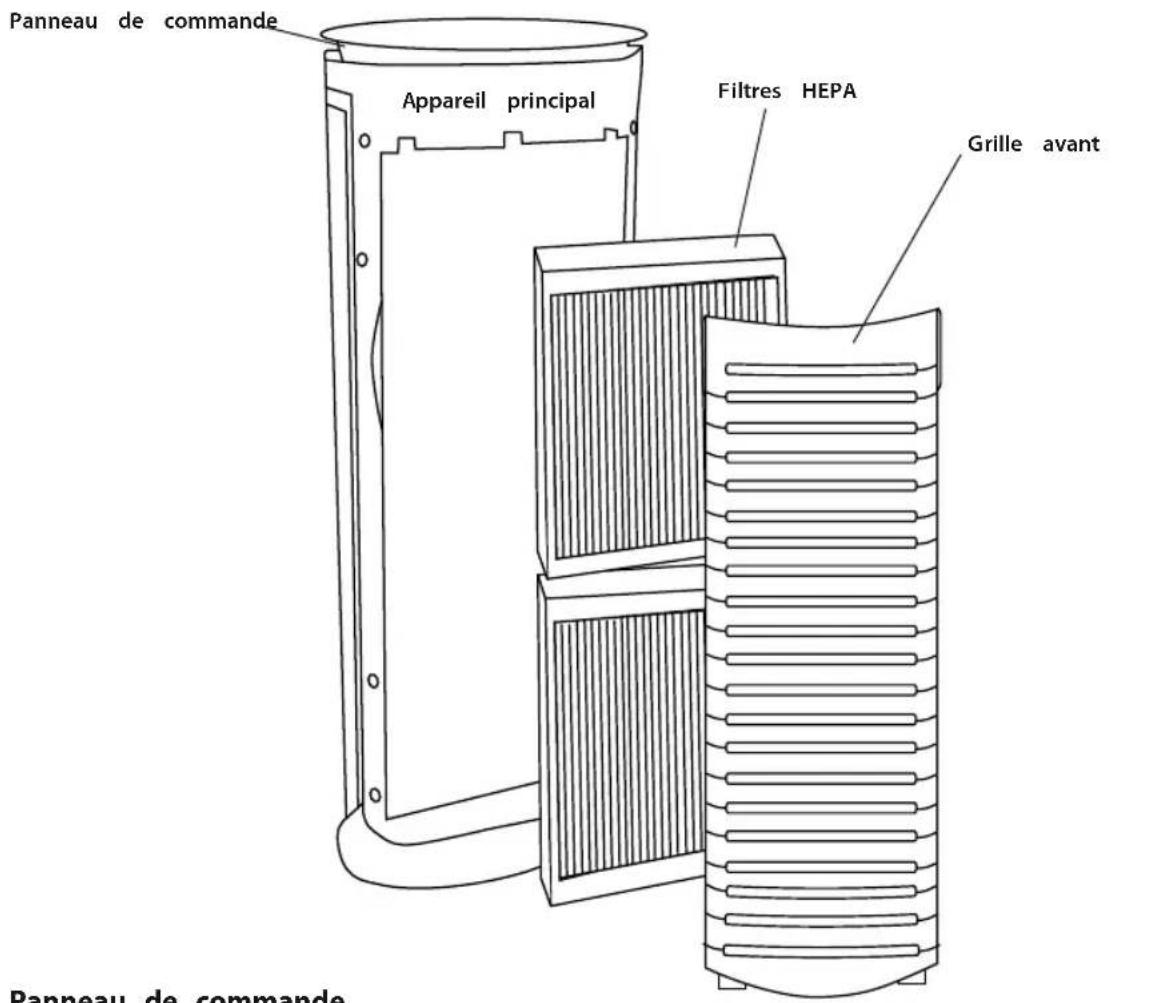
PRODUCT FEATURES:
text_image
Control Panel Main Unit HEPA Filters Front Grill Plate Control PanelControl Panel
text_image
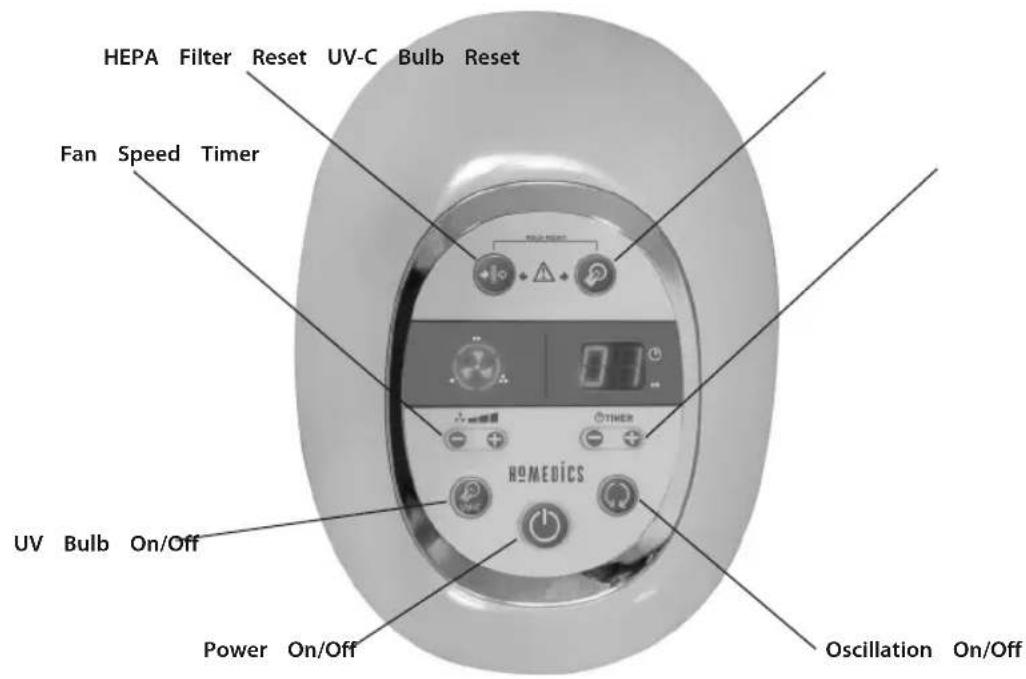
HEPA Filter Reset UV-C Bulb Reset Fan Speed Timer UV Bulb On/Off Power On/Off HOMEDICS OTHER Oscillation On/OffOPERATING INSTRUCTIONS
Turning the Unit On
Take the air cleaner out of the box and remove the clear protective plastic bag.
Place the air cleaner on a firm level surface.
Before turning the air cleaner ON, you need to confirm that the filters are firmly in place and did not become loose during shipping.

natural_image
Line drawing of a hand holding a container with layered contents (no text or symbols)Fig.1 Fig.2

natural_image
Technical line drawing of a mechanical component with threaded section (no text or symbols)
natural_image
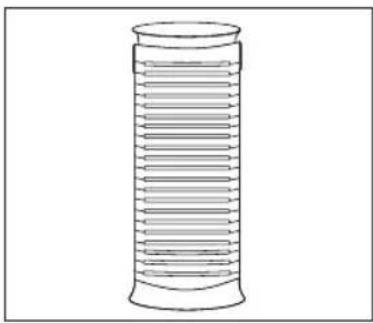
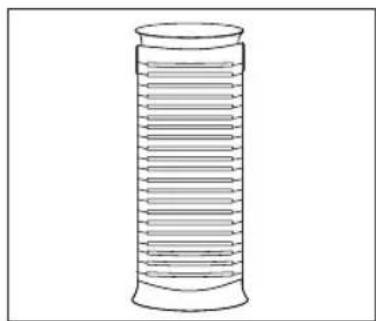
Simple line drawing of a cylindrical object with horizontal grooves (no text or symbols)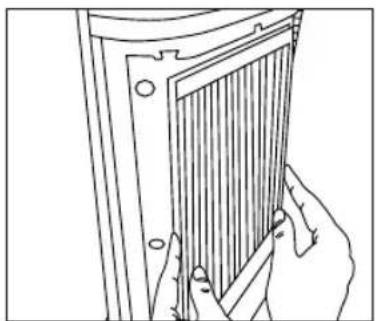
natural_image
Line drawing of hands holding a panel with vertical slats (no text or symbols)Fig.3 Fig.4
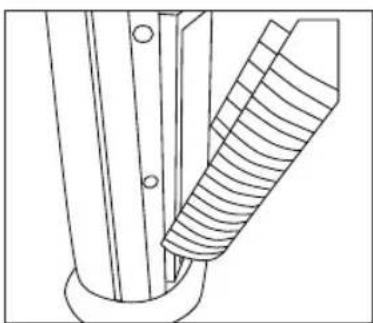
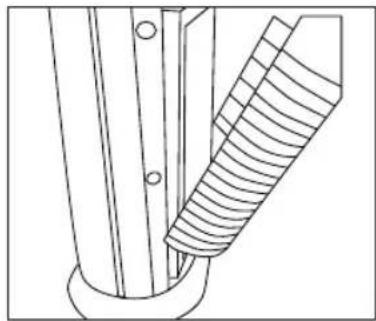
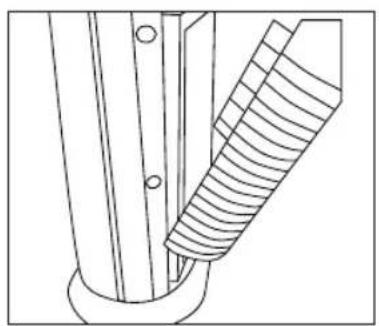
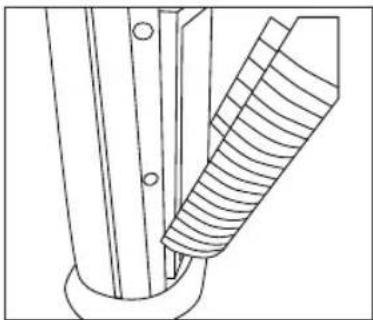
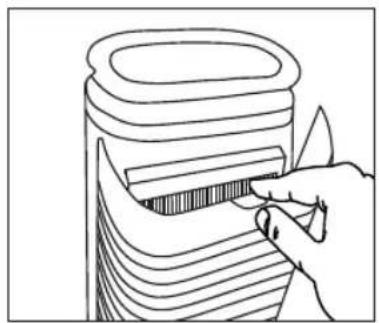
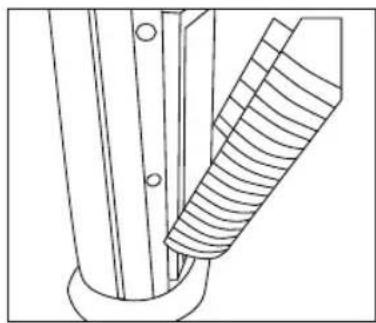
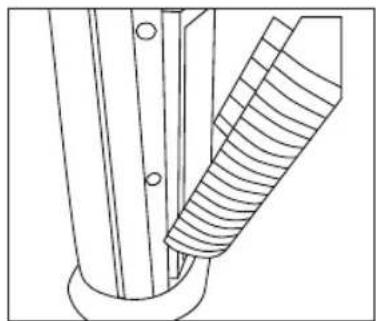
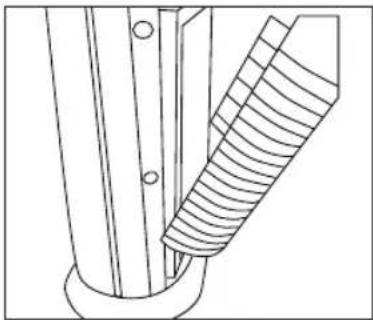
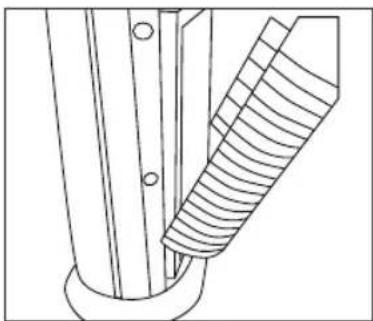
- To check filter, open the rear grill by gently pushing down on the release tab on the top of the rear grill (Fig 1).
- Open the plate outward until the tabs at the bottom of the grill plate easily slide away from the unit (Fig 2).
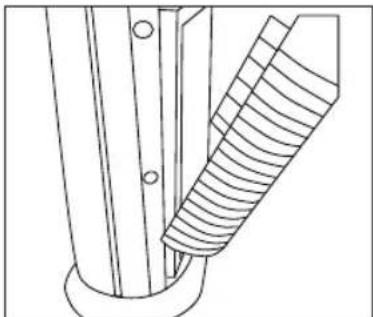
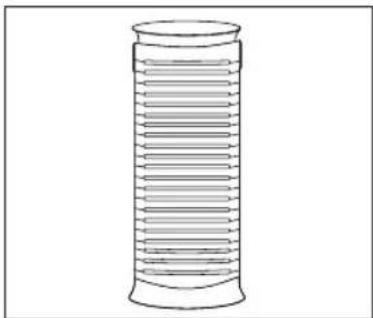
- The HEPA filters will be resting inside the unit. Make sure that the filters are firmly seated inside of the unit (Fig 3).
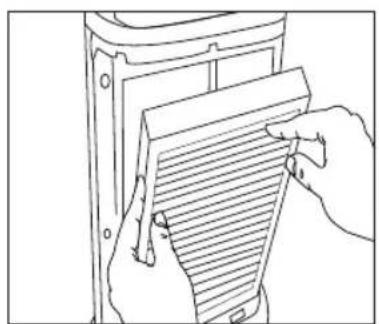
- Place the tabs at the bottom of the grill plate into the base of the unit. Gently push the grill plate back into place until you hear a click sound indicating that the grill is firmly latched.
Connect the power cord into a standard AC outlet (Fig 4).
NOTE: Unit will not operate unless filters and grill are properly installed.
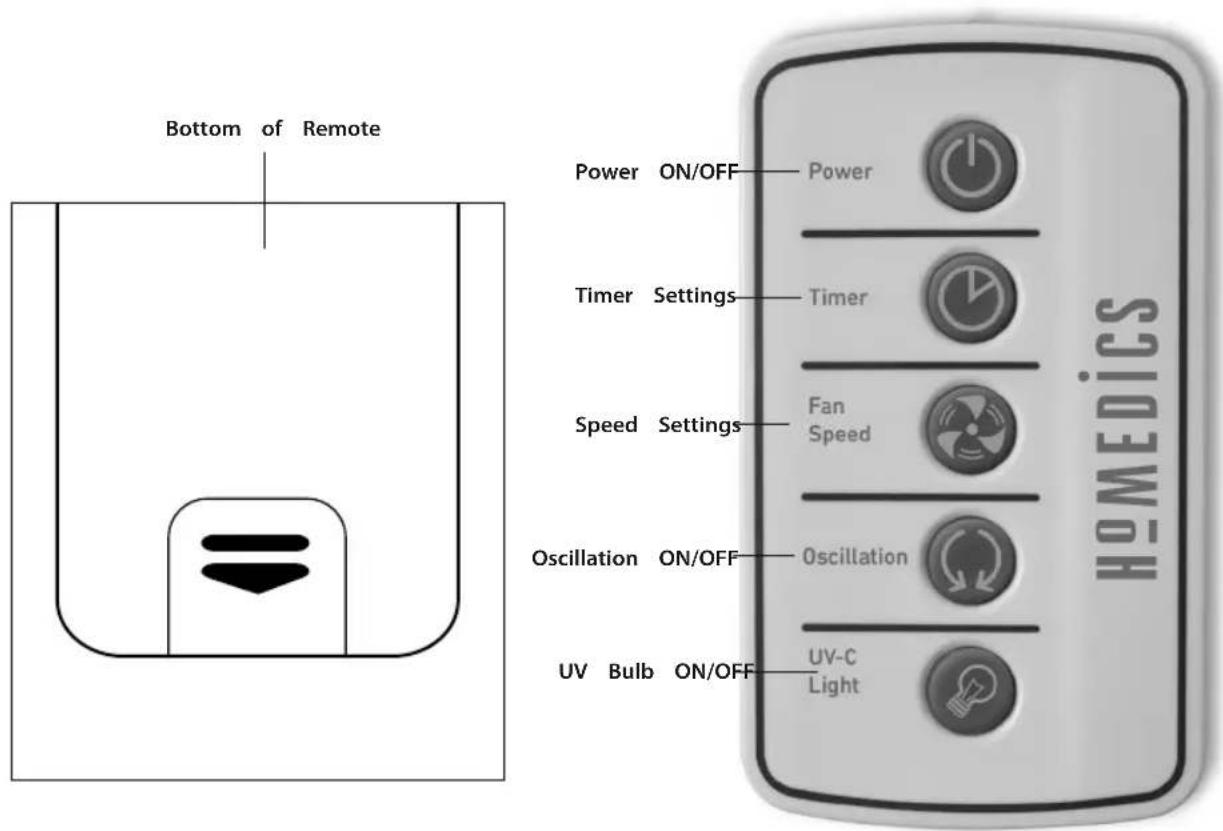
1. On/Off and Speed Settings
To turn the air cleaner on, press the ON/OFF ⏻ button on the control panel. When the air cleaner is on, the LED light in the ON/OFF button on the control panel will be lit and the air cleaner will start to operate on LOW speed.
Once the air cleaner is ON, press the + button to increase the fan speed to the MED. settings. Press the + again to increase the fan speed to HIGH setting. To decrease the fan speed, press the – button until your desired setting is reached. The fan speed setting is indicated by LED ring around the fan icon.
To turn the air cleaner OFF, simply press the ON/OFF ⏻ button on the control panel.
2. Timer
There are four possible timer settings: 2 (two) hours, 4 (four) hours, 8 (eight) hours, and 12 (twelve) hours. To activate the timer press the + button on the control panel under the TIMER LED screen. Each time the + button is pressed, it will display the successive settings. To return to a setting already passed, press the – button. Once a timer setting has been selected, it will remain displayed on the LED screen.
3. Oscillation
To activate the oscillation, press the ⏻ button. To stop oscillation, press the button a second time.
4. UV-C Bulb
To activate the UV-C bulb, press the UV-C button on the control panel. To turn the UV bulb off, press the button a second time.
USING THE REMOTE CONTROL
Battery Installation
One CR2025 3V battery is included with the remote control. To change the battery, remove the battery door at the back of the remote by squeezing the tab and pulling the door away from the back of the remote. Please insert the battery into the remote with the positive side up as shown on the drawer. NOTE: Always keep the battery and remote control out of the reach of children.
Battery note
- If the unit is not going to be used for a long period of time, remove batteries to prevent damage due to possible battery leakage.
- Clean the battery contacts and also those of the device prior to battery installation.
- Remove used batteries promptly.
- Dispose of properly in accordance with all state, province, and country regulations.
- Do not dispose of batteries in fire. Batteries may explode or leak.
text_image
Bottom of Remote Power ON/OFF Power Timer Settings Timer Speed Settings Fan Speed Oscillation ON/OFF Oscillation UV Bulb ON/OFF UV-C Light HOMEDICSCLEANING AND MAINTENANCE
We recommend that the air cleaner be cleaned at least once a month and before storage.
Turn the air cleaner OFF at the main switch and unplug it from the outlet before any cleaning or maintenance procedure.
Use a dry cloth to clean the external surfaces of the air cleaner.
The grill plate may be cleaned with a damp cloth or the brush attachment of your vacuum cleaner.
DO NOT USE WATER, WAX, POLISH OR ANY CHEMICAL SOLUTION.
Replace UV-C Bulb Indicator
The UV-C Bulb is equipped with a REPLACE UV-C BULB indicator to let the user know it is time to replace the bulb. When the bulb needs to be changed, the REPLACE UV-C BULB indicator will light up on the control panel. Once the UV-C bulb has been replaced, press and hold the REPLACE UV-C BULB button to reset the indicator until it beeps.
Replacing UV-C Bulb
Warning: take care as bulb may be hot.
- Open and remove the rear grill
- Remove the upper HEPA filter
- Use screwdriver to remove two screws and detach the metal UV bulb cover
- Grasp the UV bulb and pull it from the bulb socket
- Replace with new UV-C bulb and push it into the bulb socket
- Replace the metal UV bulb cover
- Replace the rear grill
NOTE: UV-C bulb contains Mercury (Hg). Dispose of at your local authority recycling station. Do not dispose of with general waste.
Clean Filter Indicator
The air cleaner is equipped with a CLEAN FILTER indicator to let the user know when it is time to clean the HEPA filter, about every 480 hours of use. When the HEPA filter is ready to be cleaned, the LED CLEAN FILTER indicator will light up on the control panel.
If the air cleaner is used daily, we recommend cleaning the HEPA filters more frequently.
Once the HEPA filter has been cleaned, press and hold the CLEAN FILTER button to reset the Indicator until it beeps.
Cleaning the HEPA Filter
Make sure that the air cleaner is turned OFF and unplugged from the outlet before cleaning.
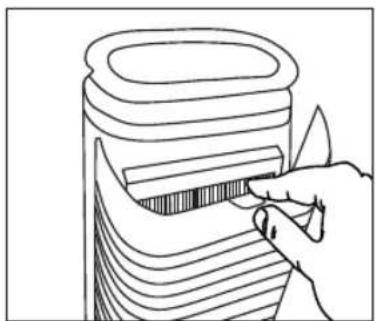
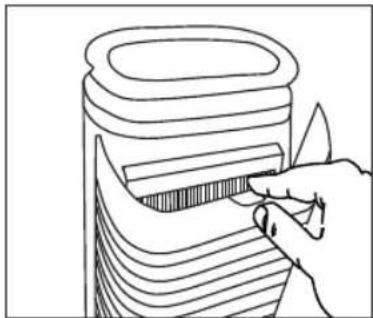
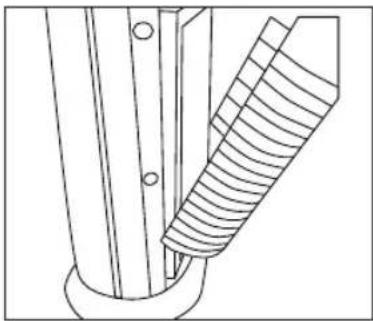
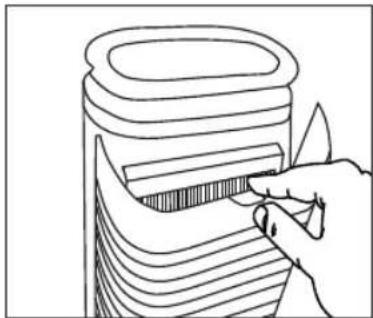
- Open the rear grill by gently pushing down on the tab on the top of the grill plate (Fig 5).
- Open the plate outward until the tabs at the bottom of the grill plate easily slide away from the unit (Fig 6).
- Remove the HEPA filters from the main unit (Fig 7).
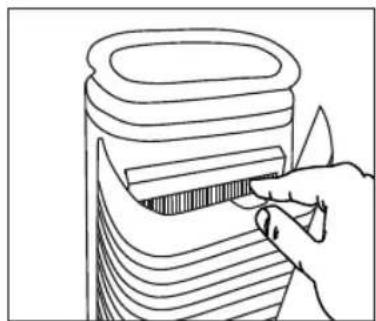
NOTE: There are two HEPA filters in this air cleaner. - Use the brush attachment with your vacuum cleaner. Run the attachment along both sides of the HEPA filters, cleaning thoroughly between the accordion folds of the filters (Fig 8).
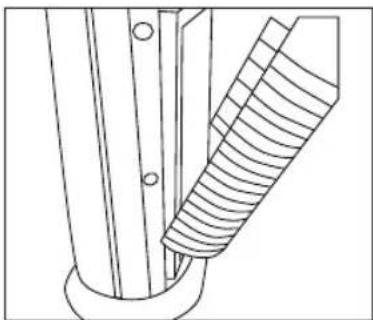
- Place the clean HEPA filters back in the main unit, making sure that it is firmly seated inside the unit (Fig 9).
- Place the tabs at the bottom of the grill plate into the base of the unit. Gently push the grill plate back into place until you hear a click sound indicating that the grill is firmly latched (Fig 10).
DO NOT USE WATER OR ANY HOUSEHOLD CLEANERS OR DETERGENTS TO CLEAN THE HEPA FILTER.
It is recommended that you replace the HEPA filter every 18 months to maintain the optimal performance of your air cleaner. To purchase the HEPA replacement filter, go back to your retailer (where you purchased your air cleaner) or visit www.homedics.com
natural_image
Line drawing of a hand inserting a packet into a container (no text or symbols)Fig.5 Fig.6

natural_image
Technical line drawing of a mechanical component with threaded end and flange (no text or symbols)
natural_image
Line drawing of hands holding a panel or bracket (no text or symbols)
natural_image
Line drawing of hands holding a sheet of paper with horizontal lines, next to a rectangular device (no text or symbols)Fig.7
natural_image
Line drawing of a hand holding a container with striped pattern (no text or symbols)Fig.10

natural_image
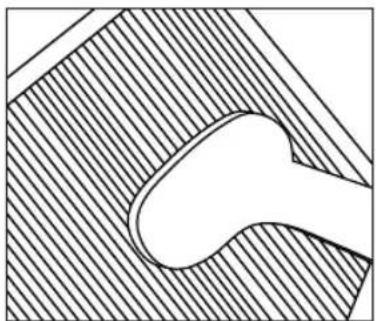
Abstract geometric diagram with diagonal hatching and a central oval shape (no text or symbols)Fig.8 Fig.9
TROUBLESHOOTING
| PROBLEM POSSIBLE | CAUSE SOLUTION | |
| Unit will not operate • Unit is not | • plugged in• No power at unit | • Plug unit in• Press the POWER button to turn the power on• Check circuits, fuses, try a different outlet |
| Reduced airflow or poor filtering | • The front grill may be blocked• HEPA filter may be clogged | • Check to make sure nothing is blocking the front grill and air outlet• Check and clean filter• Replace the filter |
| Excessive Noise | • The unit is not level | • Place the unit on a flat, even surface |
LIRE TOUTES LES INSTRUCTIONS AVANT UTILISATION. LES CONSERVER POUR POUVOIR LES CONSULTER ULTÉRIEUREMENT.
FONCTIONS DU PRODUIT :
natural_image
Line drawing of a hand holding a container with striped pattern (no text or symbols)Fig.1 Fig.2
natural_image
Technical line drawing of a mechanical component with threaded section (no text or symbols)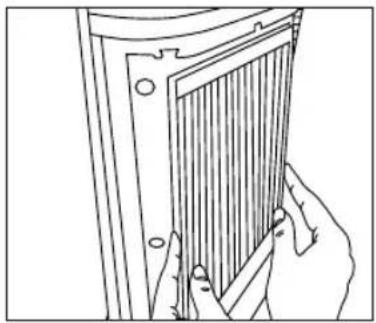
natural_image
Line drawing of hands installing or adjusting a panel with a grating (no text or symbols)Fig.3 Fig.4
natural_image
Simple line drawing of a cylindrical object with horizontal grooves (no text or symbols)natural_image
Line drawing of a hand using a tool to cut or spread a patterned object into a cylindrical container (no text or symbols)Fig.5 Fig.6

natural_image
Technical line drawing of a mechanical component with threaded section and flange (no text or symbols)
natural_image
Line drawing of hands installing or adjusting a vertical panel or panel (no text or symbols present)
natural_image
Pure diagram of a curved object inside a shaded rectangular area, no text or symbols presentFig.8 Fig.9

natural_image
Line drawing of hands holding a document with horizontal lines, no text or symbols presentFig.7

natural_image
Line drawing of a hand using a tool to cut or mark a striped object on a cylindrical container (no text or symbols)Fig.10
DÉPANNAGE
natural_image
Line drawing of a hand inserting a card into a stack of documents (no text or symbols)Abb. 1 Abb. 2
natural_image
Technical line drawing of a mechanical component with threaded end and flange (no text or symbols)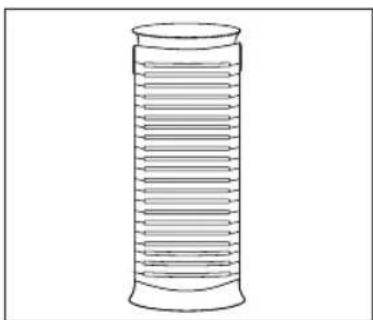
natural_image
Simple line drawing of a cylindrical object with horizontal grooves (no text or symbols)
natural_image
Line drawing of hands holding a panel with vertical bars, no text or symbols presentAbb. 3 Abb. 4
natural_image
Line drawing of a hand inserting a packet into a container (no text or symbols)Abb. 5 Abb. 6

natural_image
Technical line drawing of a mechanical component with threaded end and flange (no text or symbols)
natural_image
Line drawing of hands holding a panel or bracket (no text or symbols)
natural_image
Line drawing of hands holding a document with horizontal lines, no text or symbols presentAbb. 7

natural_image
Line drawing of a hand holding a tool interacting with layered materials (no text or symbols)Abb. 10

natural_image
Abstract geometric diagram with diagonal hatching and a central oval shape (no text or symbols)Abb. 8 Abb. 9
FEHLERSUCHE
natural_image
Line drawing of a hand inserting a packet into a container (no text or symbols)Fig.1 Fig.2
natural_image
Technical line drawing of a mechanical component with threaded section (no text or symbols)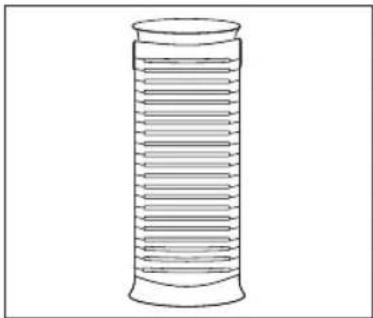
natural_image
Simple line drawing of a cylindrical object with horizontal grooves (no text or symbols)
natural_image
Line drawing of hands holding a panel with a grid pattern (no text or symbols)Fig.3 Fig.4
natural_image
Line drawing of a hand using a tool to cut or mark a layered object (no text or symbols)Fig.5 Fig.6
natural_image
Technical line drawing of a mechanical component with threaded section and flange (no text or symbols)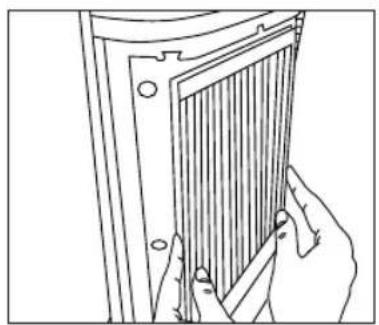
natural_image
Line drawing of hands holding a panel with a grid pattern (no text or symbols)
natural_image
Pure diagram of a curved object inside a shaded rectangular area, no text or symbols presentFig.8 Fig.9
natural_image
Line drawing of hands holding a document with horizontal lines, no text or symbols presentFig.7

natural_image
Line drawing of a hand using a tool to cut or mark a striped object on a cylindrical container (no text or symbols)Fig.10
natural_image
Line drawing of a hand inserting a card into a layered container (no text or symbols)Fig.1 Fig.2
natural_image
Technical line drawing of a mechanical component with threaded end and flange (no text or symbols)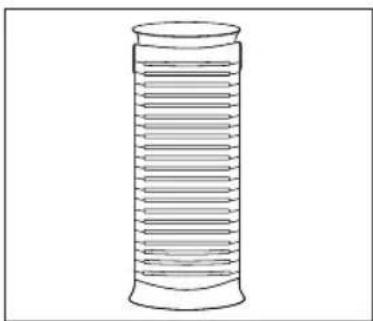
natural_image
Simple line drawing of a cylindrical object with horizontal grooves (no text or symbols)natural_image
Line drawing of a hand holding a panel with a grid pattern (no text or symbols)Fig.3 Fig.4
natural_image
Line drawing of a hand inserting a packet into a container (no text or symbols)Fig.5 Fig.6

natural_image
Technical line drawing of a mechanical component with threaded end and flange (no text or symbols)
natural_image
Line drawing of hands holding a panel or bracket (no text or symbols)
natural_image
Pure technical diagram of a mechanical component with hatched fill and central oval shape (no text or symbols)Fig.8 Fig.9

natural_image
Line drawing of hands holding a sheet of paper with horizontal lines, next to a rectangular device (no text or symbols)Fig.7

natural_image
Line drawing of a hand holding a container with a ruler inside, no text or symbols presentFig.10
RICERCA E RISOLUZIONE DEI PROBLEMI
natural_image
Line drawing of a hand inserting a rectangular object into a cylindrical container (no text or symbols)Fig.1 Fig.2
natural_image
Technical line drawing of a mechanical component with threaded end and flange (no text or symbols)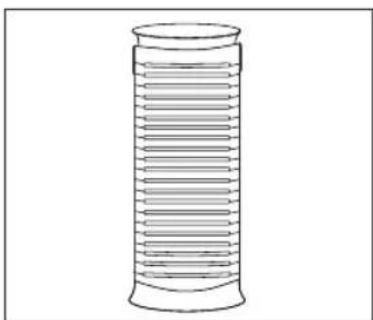
natural_image
Simple line drawing of a cylindrical object with horizontal grooves (no text or symbols)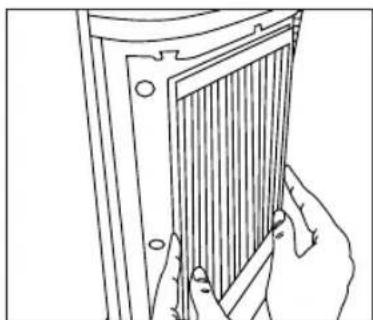
natural_image
Line drawing of hands installing or adjusting a vertical panel or panel (no text or symbols present)Fig.3 Fig.4
natural_image
Line drawing of a hand using a tool to cut or spread a patterned object into a cylindrical container (no text or symbols)Fig.5 Fig.6

natural_image
Technical line drawing of a mechanical component with threaded section and flange (no text or symbols)
natural_image
Line drawing of hands holding a panel with a grid pattern (no text or symbols)
natural_image
Pure diagram of a curved object inside a shaded rectangular area, no text or symbols presentFig.8 Fig.9

natural_image
Line drawing of hands holding a document with horizontal lines, no text or symbols presentFig.7
natural_image
Line drawing of a hand using a tool to cut or mark a striped object on a cylindrical container (no text or symbols)Fig.10
natural_image
Line drawing of a hand inserting a rectangular object into a layered container (no text or symbols)afb.1 afb.2

natural_image
Technical line drawing of a mechanical component with threaded end and flange (no text or symbols)
natural_image
Line drawing of hands holding a panel with vertical bars, no text or symbols presentafb. 3 afb. 4
natural_image
Simple line drawing of a cylindrical object with horizontal grooves (no text or symbols)Vervanging UV-C-gloeilamp
natural_image
Line drawing of a hand inserting a packet into a container (no text or symbols)afb. 5 afb. 6

natural_image
Technical line drawing of a mechanical component with threaded end and flange (no text or symbols)
natural_image
Line drawing of hands holding a panel or bracket (no text or symbols)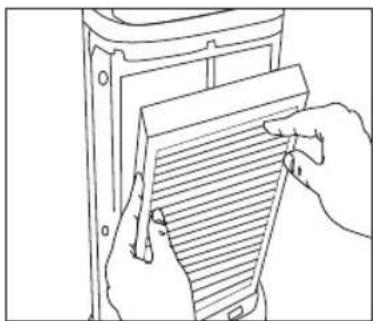
natural_image
Line drawing of hands holding a document with horizontal lines, no text or symbols presentafb.7

natural_image
Line drawing of a hand holding a tool interacting with layered materials (no text or symbols)afb. 10

natural_image
Abstract geometric diagram with diagonal hatching and a central oval shape (no text or symbols)afb. 8 afb. 9
PROBLEMEN OPLOSSEN
natural_image
Line drawing of a hand inserting a packet into a container (no text or symbols)Şekil 1 Şekil 2

natural_image
Technical line drawing of a mechanical component with threaded end and flange (no text or symbols)
natural_image
Simple line drawing of a cylindrical object with horizontal grooves (no text or symbols)natural_image
Line drawing of hands holding a panel with a grid pattern (no text or symbols)Şekil 3 Şekil 4
natural_image
Line drawing of a hand using a tool to cut or mark a layered object (no text or symbols)Şekil 5 Şekil 6

natural_image
Technical line drawing of a mechanical component with threaded section and flange (no text or symbols)
natural_image
Line drawing of hands installing or adjusting a vertical panel or panel (no text or symbols present)
natural_image
Line drawing of hands holding a document with horizontal lines, no text or symbols presentŞekil 7

natural_image
Abstract geometric diagram with diagonal hatching and a central oval shape (no text or symbols)Şekil 8 Şekil 9

natural_image
Line drawing of a hand using a tool to cut or mark a striped object on a cylindrical container (no text or symbols)Şekil 10
SORUN GİDERME
natural_image
Line drawing of a hand holding a tool interacting with layered material (no text or symbols)Σχ. 1 Σχ. 2

natural_image
Technical line drawing of a mechanical component with threaded end and flange (no text or symbols)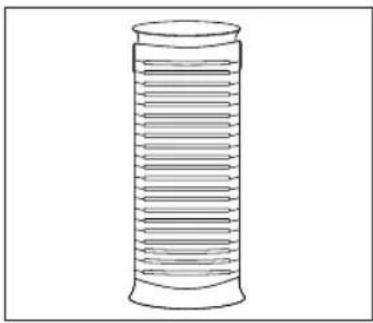
natural_image
Simple line drawing of a cylindrical object with horizontal grooves (no text or symbols)natural_image
Line drawing of hands installing or adjusting a vertical panel or panel (no text or symbols visible)Σχ. 3 Σχ. 4
natural_image
Line drawing of a hand inserting a packet into a container (no text or symbols)Σχ. 5 Σχ. 6

natural_image
Technical line drawing of a mechanical component with threaded end and flange (no text or symbols)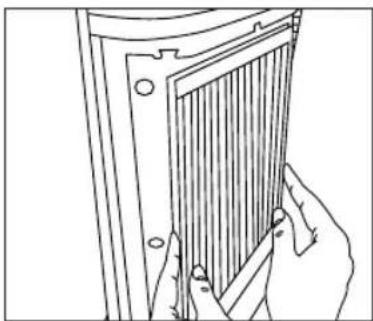
natural_image
Line drawing of hands holding a panel or bracket (no text or symbols)
natural_image
Line drawing of hands holding a document with horizontal lines, no text or symbols presentΣχ. 7
natural_image
Line drawing of a hand holding a container with striped pattern (no text or symbols)Σχ. 10

natural_image
Abstract geometric diagram with diagonal hatching and a central oval shape (no text or symbols)Σχ. 8 Σχ. 9
natural_image
Line drawing of a hand inserting a rectangular object into a container (no text or symbols)Рис. 1 Рис. 2
natural_image
Technical line drawing of a mechanical component with threaded end and flange (no text or symbols)
natural_image
Line drawing of hands holding a panel with vertical bars, no text or symbols presentРис. 3 Рис. 4
natural_image
Simple line drawing of a cylindrical object with horizontal grooves (no text or symbols)natural_image
Line drawing of a hand holding a container with striped pattern (no text or symbols)Рис. 5 Рис. 6

natural_image
Technical line drawing of a mechanical component with threaded end and flange (no text or symbols)
natural_image
Line drawing of a hand holding a panel or tool against a wall-mounted panel (no text or symbols)
natural_image
Line drawing of hands holding a document with horizontal lines, no text or symbols presentРис. 7

natural_image
Pure technical diagram of a mechanical component with hatched fill and central oval shape (no text or symbols)Рис. 8 Рис. 9

natural_image
Line drawing of a hand using a tool to cut or trim a curved object (no text or symbols)Рис. 10
ДИАГНОСТИКА НЕИСПРАВНОСТЕЙ
natural_image
Line drawing of a hand holding a container with striped pattern (no text or symbols)Rys. 1 Rys. 2

natural_image
Technical line drawing of a mechanical component with threaded end and flange (no text or symbols)
natural_image
Line drawing of hands holding a panel with vertical bars, no text or symbols presentRys. 3 Rys. 4
natural_image
Simple line drawing of a cylindrical object with horizontal grooves (no text or symbols)natural_image
Line drawing of a hand inserting a packet into a container (no text or symbols)Rys. 5 Rys. 6

natural_image
Technical line drawing of a mechanical component with threaded end and flange (no text or symbols)
natural_image
Line drawing of hands holding a panel or bracket (no text or symbols)
natural_image
Line drawing of hands holding a document with horizontal lines, no text or symbols presentRys. 7

natural_image
Line drawing of a hand holding a container with a ruler inside, no text or symbols presentRys. 10
natural_image
Abstract geometric diagram with diagonal hatching and a central oval shape (no text or symbols)Rys. 8 Rys. 9
ROZWIĄZYWANIE PROBLEMÓW
natural_image
Line drawing of a hand holding a container with striped pattern (no text or symbols)Fig.1 Fig.2

natural_image
Technical line drawing of a mechanical component with threaded end and flange (no text or symbols)
natural_image
Simple line drawing of a cylindrical object with horizontal grooves (no text or symbols)natural_image
Line drawing of hands holding a panel with vertical slats (no text or symbols)Fig.3 Fig.4
natural_image
Line drawing of a hand holding a container with striped pattern (no text or symbols)Fig.5 Fig.6

natural_image
Technical line drawing of a mechanical component with threaded end and flange (no text or symbols)
natural_image
Line drawing of a hand holding a panel or tool against a wall-mounted panel (no text or symbols)
natural_image
Line drawing of hands holding a document with horizontal lines, no text or symbols presentFig.7

natural_image
Pure technical diagram of a mechanical component with hatched fill and central oval shape (no text or symbols)Fig.8 Fig.9
natural_image
Line drawing of a hand using a tool to cut or trim a curved object (no text or symbols)Fig.10
FELSÖKNING
natural_image
Line drawing of a hand holding a container with striped pattern (no text or symbols)Fig.1 Fig.2
natural_image
Technical line drawing of a mechanical component with threaded end and flange (no text or symbols)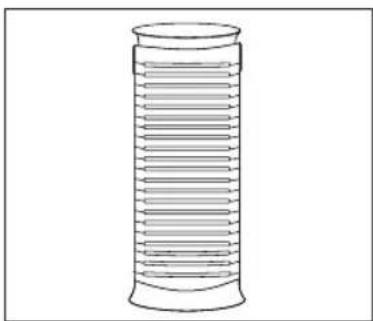
natural_image
Simple line drawing of a cylindrical object with horizontal grooves (no text or symbols)natural_image
Line drawing of hands holding a panel with vertical bars, no text or symbols presentFig.3 Fig.4
natural_image
Line drawing of a hand inserting a packet into a container (no text or symbols)Fig.5 Fig.6

natural_image
Technical line drawing of a mechanical component with threaded end and flange (no text or symbols)
natural_image
Line drawing of hands holding a panel or bracket (no text or symbols)
natural_image
Line drawing of hands holding a document with horizontal lines, no text or symbols presentFig.7

natural_image
Line drawing of a hand holding a container with a ruler inside, no text or symbols presentFig.10

natural_image
Abstract geometric diagram with diagonal hatching and a central oval shape (no text or symbols)Fig.8 Fig.9
PROBLEML∅SNING
natural_image
Line drawing of a hand holding a container with striped pattern (no text or symbols)Fig.1 Fig.2

natural_image
Technical line drawing of a mechanical component with threaded end and flange (no text or symbols)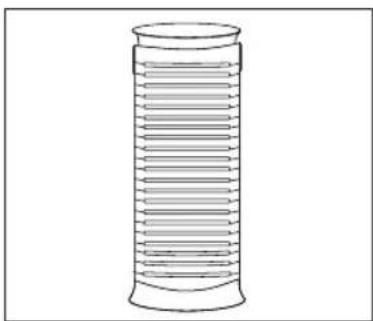
natural_image
Simple line drawing of a cylindrical object with horizontal grooves (no text or symbols)natural_image
Line drawing of hands holding a panel with vertical slats (no text or symbols)Fig.3 Fig.4
Indikator for rent filter
natural_image
Line drawing of a hand holding a container with striped pattern (no text or symbols)Fig.5 Fig.6
natural_image
Technical line drawing of a mechanical component with threaded end and flange (no text or symbols)
natural_image
Line drawing of a hand holding a panel or tool against a wall-mounted panel (no text or symbols)
natural_image
Line drawing of hands holding a document with horizontal lines, no text or symbols presentFig.7

natural_image
Pure technical diagram of a mechanical component with hatched fill and central oval shape (no text or symbols)Fig.8 Fig.9

natural_image
Line drawing of a hand using a tool to cut or trim a curved object (no text or symbols)Fig.10
FEILS∅KING
natural_image
Line drawing of a hand inserting a packet into a container (no text or symbols)Kuva 1 Kuva 2
natural_image
Technical line drawing of a mechanical component with threaded detail (no text or symbols)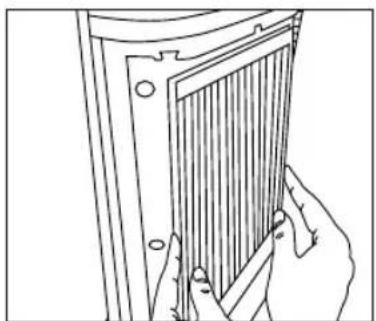
natural_image
Line drawing of hands holding a panel with vertical slats (no text or symbols)Kuva 3 Kuva 4
natural_image
Simple line drawing of a cylindrical object with horizontal grooves (no text or symbols)natural_image
Line drawing of a hand inserting a packet into a container (no text or symbols)Kuva 5 Kuva 6
natural_image
Technical line drawing of a mechanical component with threaded end and flange (no text or symbols)
natural_image
Line drawing of hands holding a panel or bracket (no text or symbols)
natural_image
Line drawing of hands holding a sheet of paper with horizontal lines, next to a rectangular device (no text or symbols)Kuva 7

natural_image
Line drawing of a hand holding a container with a ruler inside, no text or symbols presentKuva 10

natural_image
Abstract geometric diagram with diagonal hatching and a central oval shape (no text or symbols)Kuva 8 Kuva 9
ONGELMATILANTEET