HRA1782ND+BT - Radio ROADSTAR - Free user manual and instructions
Find the device manual for free HRA1782ND+BT ROADSTAR in PDF.
| Product type | Stereo radio with CD player, Bluetooth and DAB+/FM tuner |
| Brand | Roadstar |
| Model | HRA1782ND+BT |
| Power supply | AC 230 V ~ 50 Hz |
| Power consumption in standby | 0.33 W |
| Audio power | 2 x 15 W RMS |
| Tuner | DAB+/DAB (Band III) and FM (87.5 – 108 MHz) |
| Bluetooth | Yes, version 2.0, range < 10 m |
| CD playback | Yes, CD, CD-R/RW, MP3 |
| USB port | Yes, USB 2.0 (playback and direct encoding) |
| Auxiliary input | RCA jack (L+R) |
| Headphone output | 3.5 mm jack |
| Alarm | Yes, 2 independent timers with source selection |
| Sleep timer | Yes, adjustable (up to 120 min, Sleep OFF possible) |
| Equalizer | Presets: Flat, Pop, Classic, Rock, Jazz |
| Radio presets | 20 for DAB+ and 20 for FM |
| Direct USB encoding | From CD, DAB+, Bluetooth or AUX (real-time recording) |
| Additional functions | Radio information display (DLS, PTY), CD/MP3 programming (20/99 tracks), repeat and random playback |
Frequently Asked Questions - HRA1782ND+BT ROADSTAR
User questions about HRA1782ND+BT ROADSTAR
0 question about this device. Answer the ones you know or ask your own.
Ask a new question about this device
Download the instructions for your Radio in PDF format for free! Find your manual HRA1782ND+BT - ROADSTAR and take your electronic device back in hand. On this page are published all the documents necessary for the use of your device. HRA1782ND+BT by ROADSTAR.
USER MANUAL HRA1782ND+BT ROADSTAR
HRA-1782ND+BT HRA-1782ND+BK
User manual
Bedienungsanleitung
Manuel d'instructions
Manuale d'istruzioni
Manual de instrucciones
Manual de instruções
Gebruiksaanwijzing
Návod k použití
Návod na použitie
INDEX
English Page 1
Deutsch Seite 7
Français Page 13
Italiano Pagina 19
Español Página 25
Português Página 31
Nederlands Page 37
Čeština Strana 43
Slovenský Strana 50
- Your new unit was manufactured and assembled under strict ROADSTAR quality control. Thank-you for purchasing our product for your music enjoyment. Before operating the unit, please read this instruction manual carefully. Keep it also handy for further future references.
- INSTRUCTIONS - All the safety and operating instructions should be read before the radio is operated. The manual should be retained for future reference.
- HEED WARNINGS - All warnings on the appliance and in the operating instructions should be adhered to.
- WATER AND MOISTURE - The appliance should not be used near liquids or in rooms with a high level of humidity.
- VENTILATION - The appliance should be situated so that its location or position does not interfere with its proper ventilation.
- HEAT - The appliance should be situated away from heat sources such as radiators, stoves or other appliances that produce heat.
- POWER SOURCE - The radio should be connected to power supply only of the type described in the operating instructions or as marked on the appliance.
- POWER CORD PROTECTION - Power supply cord should be routed so that it is not likely to be walked on or pinched by items placed upon/against them.
- OBJECT AND LIQUID ENTRY - Care should be taken so that objects do not fall and liquids are not spilled into the enclosure through openings.
- SERVICING - The user should not attempt to service the appliance beyond that describe in the user operating instructions. All the servicing should be referred to qualified service personnel.
Note: If the display does not function properly or no reaction to any control may due to the electrostatic discharge. Switch off, disconnect AC cord then turn the power back on after a few seconds.
POWER SOURCES
AC POWER: To power your radio, plug the AC power cord into into a wall AC power outlet. Check that the rated voltage of your appliance matches your local voltage.
CLOCK AND DATE SETTING
When the radio is OFF:
- Press and hold [STOP] (14) to access to the menu;
- Press the [SKIP -/+] buttons (10/11) to select 12 or 24 h;
- Confirm with the [STOP] button (14);
- Press the [SKIP -/+] buttons (10/11) to adjust the hour;
- Confirm with the [STOP] button (14);
- Press the [SKIP -/+] buttons (10/11) to adjust the minutes;
- Confirm with the [STOP] button (14);
- Repeat steps 4 and 5 to set the date.
SETTING TIMER
- Press and hold [TIMER] button (22), "SET TIMER 1" flashes on display.
- Press [SKIP] buttons (10/11) to select TIMER 1 or 2.
- Press [TIMER] button (22) to confirm.
- Press [SKIP] buttons (10/11) to set ON TIME, the press [TIMER] button to confirm.
- Press [SKIP] buttons to set alarm source DAB/FM/CD/USB. then press [TIMER] button to confirm.
- Press [SKIP] button to set volume level. then press [TIMER] button to confirm.
- Once the TIMER 1 or 2 is set, Alarm 1 or 2 icon will be shown on display.
ACTIVATE / DEACTIVATE ALARM SETTINGS:
In standby mode, press repeatedly the [TIMER] button to select TIMER ON or TIMER OFF.
The alarm 1 or 2 icon will disappear when TIMER 1 or 2 is set to OFF.
SLEEP TIMER
The sleep timer switches the radio off automatically after an adjustable time.
When the radio is ON:
- Press and hold the [TIMER] button (22);
- Use the [SKIP -/+] buttons (10/11) to select the desired timer;
- Confirm with the [TIMER] button (22);
Note: To remove the sleep timer select "Sleep OFF".
NAVIGATE INTO THE MENU
- In DAB or FM mode, Press the [MENU] button (9) to access to the options;
- Use the [SKIP -/+] buttons (10/11) to navigate into the options;
- Press [ENTER] button (14) to select the options;
- Press [MENU] (9) to exit the menu.
FACTORY RESET
- Press [MENU] (9) to access to the menu;
-
Use the [SKIP -/+] button(10/11) to navigate into the options and select "System";
-
Confirm with the [ENTER] button (14);
- Use the [SKIP -/+] buttons (10/11) to select "Factory Reset";
- Confirm with the [ENTER] button (14);
- Use the [SKIP -/+] buttons (10/11) to select "yes";
- Confirm with the [ENTER] button (14).
TO USE THE RADIO
- Set the Mains [POWER SWITCH] (0) to ON;
- Press the [POWER] button (1) to power ON;
- (The first time you power on the radio, the radio will scan the DAB radio stations automatically. It will display and play the first station after the scan is done);
- Select the desired audio source by turning the [MODE] knob (1);
- (Please see detailed instructions for each Source in the following chapters);
- Adjust the volume with the [VOLUME KNOB] (2) to the desired level;
- To power OFF the radio, press the [POWER] button (1).
DAB RADIO OPERATION
- Select "DAB" mode by turning the [MODE] knob (1);
- Use the [TUNE -/+] buttons (10/11) to select the desired radio station.
Note: In case there is No DAB Service, press the [SCAN] button (12) to start scan.
Note: For a better reception reorient the antenna (17).
FM RADIO OPERATION
- Select "FM" mode by turning the [MODE] knob (1);
- Press the [TUNE -/+] buttons (10/11) to manually select the frequency or press and hold (2 seconds) to scan the next/previous available station.
Note: For a better reception reorient the antenna (17).
STORE RADIO STATIONS AUTOMATICALLY:
Press the [SCAN] button (12) and the radio will automatically scan the radio. During the scanning process, the radio will save the scanned stations sequentially into the memory.
PRESET
There are 20 presets available for DAB and 20 presets for FM.
- Set the desired radio station frequency as explained previously;
- Press and hold the [PRESET] button (15);
- Choose the number of preset using the [TUNE -/+ ] buttons (10/11);
- Confirm with the [ENTER] button (14).
RECALL A PRESET STATION
- Press the [PRESET] button (15);
- Select the desired preset using the [TUNE -/+] buttons (10/11);
- Confirm with the [ENTER] button (14).
INFO
When the radio station is playing, press the [INFO] button (8) repeatedly to cycle through the information broadcasted by the radio.
CD-MP3 OPERATION
- Select "CD" mode by turning the [MODE] knob (1);
- Press [OPEN/CLOSE] (7) to open the [CD DOOR] (6) and place a CD with the label
4
English
up in the CD compartment.
- Close the [CD DOOR] (6). Focus search is performed and playback will start automatically from the first track.
PROGRAMMING
Up to 99 tacks (MP3, 20 in CD) can be programmed and play in any order.
- Stop the playback by pressing [STOP] (14);
- Press [PROGRAM] (9), the display (5) will show the number of the track on the left side and the number of program on the right side.
- Select desired track by using [SKIP -/+] buttons (10/11);
- Press [PROGRAM] (9) to confirm desired track into the program memory;
- Repeat step 3 and 4 to enter additional tracks into the program memory.
- When all the desired tracks have been programmed, press [PLAY] (12) to play the disc in the order you have programmed.
Note: Press [STOP] (14) twice to terminate programmed play.
BLUETOOTH OPERATION
- Select "BT" mode by by turning the [MODE] knob (1);
- Connect your Bluetooth portable device to the ID Bluetooth tagged as "HRA-1782ND+BT";
- You can now transfer the music to the HRA-1782ND+BT.
Note: Music control (play, pause, etc) must be done from your external device.
AUX-IN OPERATION
- Use one male RCA to male 3.5mm jack cable (not included) to connect any external audio device to the [AUX-IN SOCKET] (18);
- Select "AUX" mode by turning the [MODE] knob (1).
Note: Music control (play, pause, etc) must be done from your external device.
USB OPERATION
- Select "USB" mode by turning the [MODE] knob (1);
- Plug an USB stick into the [USB PORT] (3);
- Playback will start automatically from the first track.
PROGRAMMING
The PROGRAMMING operation is the same as that of CD-MP3.
Notes:
- Some mp3 player may not be able to play via the usb socket. this is not a maul-function of the system.
• To avoid damage to USB memory, remove it only when the radio is turned off.
• The USB port is not designed for charging smartphones or other devices.
DIRECT USB ENCODING
Remark:
- Recording speed is 1:1.
- No song title will be recorded during encoding mode.
• To avoid damage to USB memory, remove it only when the radio is turned off.
ENCODE FROM DAB+, BLUETOOTH AND AUX:
- Plug the USB stick into the [USB PORT] (3);
- Perform normal playback of the source you want to encode & record;
- Press and hold the [RECORD] button (13) to start encoding. The display will show "REC";
- Once the record is finished, press the [STOP] button (14) to stop recording.
ENCODE FROM CD:
- Plug the USB stick into the [USB PORT] (3);
- Perform normal playback of the CD you want to encode & record;
- After focus search is completed, press and hold the [RECORD] button (13);
-
Press repeatedly the [SKIP -/+] button (10/11) to select the desired encoding option:
• REC-ONE: Select to record only the current track;
• REC-FOLDER: Select to record the whole folder;
• REC-ALL: Select to record all the tracks of the CD. -
Press the [RECORD] button (13) to confirm;
-
The playback will stop and restart automatically and on the display (5) "REC" will flash. Encoding is performing now;
-
Press the [STOP] button (14) to finish recording.
Note: After completing of encoding, unit will stop playback and encoding automatically.
DELETE TRACKS FROM USB
- Perform normal playback of the track you want to delete;
- During playback of the track you want to delete, press the [DELETE] button (13).
- Press repeatedly the [SKIP -/+] button (10/11) to select the desired encoding option:
• DEL-ONE: Select to record only the current track;
• DEL-FOLDER: Select to record the whole folder;
• DEL-ALL: Select to record all the tracks of the CD. - Press the [DELETE] button (13) to confirm.
REPEAT - RANDOM MODE
During playback, press repeatedly the [REPEAT] (8) to select:
- REP-ONE: The current track is played repeatedly.
- REP-FOLDER: The current folder is played repeatedly.
• REP-ALL: All tracks are played repeatedly.
- Random: Tracks are played randomly.
EQ OPERATIONS
In any mode, you may press & hold [EQ] button (20), then shortly press it repeatedly to select between FLAT / POP / CLASSIC / ROCK / JAZZ.
TECNICAL SPECIFICATIONS
Power Supply: AC 230V \~ 50Hz.
Power consumption in standby mode: 0.33W
Stand by time 15 min
Radio Frequency Coverage
DAB+ / DAB: BAND III 174.928MHz - 239.200MHz.
FM: 87.5 - 108 MHz.
Speaker
Output Power: 2 x 15 Watt RMS.
General
Headphones Out: 3.5mm jack plug.
BT Maximum radiated Power: < 4 dBm (2.5 mW).
USB Port Version: USB 2.0.
Specifications and design are subject to possible modifications without notice due to improvement.
WARNINGS


The exclamation point within the triangle is a warning sign alerting the user of important instructions accompanying the product.
The lightening flash with arrowhead symbol within the triangle is a warning sign alerting the user of “dangerous voltage” inside the unit.
To reduce the risk of electric shock, do not remove the cover. No user serviceable parts inside the unit. Refer all servicing to qualified personnel.
This unit operates on 230V \~ 50Hz. If the unit is not used for a long period of time, remove the plug from the AC mains.
Ensure all connections are properly made before operating the unit.
This unit must not be exposed to moisture or rain.
This unit should be positioned so that it is properly ventilated. Avoid placing it, for example, close to curtains, on the carpet or in a built-in installation such as a bookcase.
Do not expose this unit to direct sunlight or heat radiating sources.
natural_image
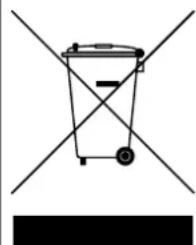
Simple line drawing of a trash bin with two crossed lines and a black rectangular bar below (no text or symbols)CORRECT DISPOSAL OF THIS PRODUCT
(Waste Electrical & Electronic Equipment)
This marking shown on the product or its literature, indicates that it should not be disposed with other household wastes at the end of its working life. To prevent possible harm to the environment or human health from uncontrolled waste disposal, please separate this from other types of wastes and recycle it responsibly to promote the sustainable reuse of material resources. Household users should contact the retailer where they purchased this product, or their local government office, for details of where and how they can take this item for environmentally safe recycling. Business users should contact their supplier and check the terms and conditions of the purchase contract. This product should not be mixed with other commercial wastes for disposal.
ORT DER BEDIENELEMENTE
- POWER SWITCH (ON/OFF STROMSCHALTER)
- POWER ON - OFF / MODE KNOB (POWER EIN - AUS / MODUS)
- VOLUME KNOB (LAUTSTÄRKE REGLER)
- USB PORT (USB-BUCHSE)
- SPEAKERS (LAUTSPRECHER)
- DISPLAY (LCD ANZEIGE)
- CD DOOR (CD LAUFWERK)
- OPEN / CLOSE CD DOOR (CD FACH ÖFFNEN / SCHLIESSEN)
- REPEAT-RANDOM / INFO (WIEDERHOLEN-ZUFALLS TASTE)
- MENU / PROGRAMMING (MENU / PROGRAMMIERUNG)
- TUNE- / SKIP-
- TUNE+ / SKIP+
- AUTOMATIC SCAN / PLAY-PAUSE (AUTOMATISCHE FUNKSUCHE)
- RECORD / DELETE (AUFNAHME / LÖSCHEN)
- ENTER / STOP (BESTÄTIGEN / STOP)
- PRESET (VOREINSTELLUNG)
- POWER CORD (NETZKABEL)
- ANTENNA SOCKET (ANTENNEN EINGANG)
- RCA AUX INPUT (L+R) (AUX-IN EINGANG)
- 3.5mm JACK HEADPHONES OUT (KOPFHÖRERAUSGANG)
- EQUALIZER
- NUMERIC KEYBOARD
- TIMER BUTTON
-
- 10 TRACK
STROMQUELLEN
BT Maximum radiated Power: < 4 dBm (2.5 mW).
natural_image
Simple line drawing of a trash bin with two crossed lines and a black bar below (no text or symbols)KORREKTE ENTSORGUNG DIESES PRODUKTS (Elektromüll)
natural_image
Simple line drawing of a trash bin with two crossed lines and a black bar below (no text or symbols)COMMENT ÉLIMINER CE PRODUIT
natural_image
Simple line drawing of a trash bin with two crossed lines and a blank bottom bar (no text or symbols)natural_image
Simple line drawing of a trash bin with two crossed lines and a black bar below (no text or symbols)VAN DAB+, BLUETOOTH EN AUX:
natural_image
Simple line drawing of a trash bin with two crossed lines and a blank bottom bar (no text or symbols)CORRECTE AFVALVERWERKING VAN HET PRODUCT (elektrisch en elektronisch afval)
natural_image
Simple line drawing of a trash bin with two crossed lines and a black bar at the bottom (no text or symbols)natural_image
Simple line drawing of a trash bin with two crossed lines and a black bar below (no text or symbols)Hereby, Roadstar Management SA declares that the radio equipment type HRA-1782ND+BT, HRA-1782ND+BK are in compliance with Directive 2014/53/EU. The full text of the EU declaration of conformity is available at the following internet address: http://roadstar.com/images/ce/HRA-1782ND+BT.pdf or by scanning the following QR Code.
text_image
QR code image containing encoded data, no visible human-readable textRoadstar®
INTERNATIONAL WARRANTY - INTERNATIONALE GARANTIE GARANTIE INTERNATIONALE - GARANZIA INTERNAZIONALE GARANTIA INTERNACIONAL - GARANTIA INTERNACIONAL ΔΙΕΘΝΗΣ ΕΓΓΥΗΣΗ
Serial No. Serien Nr. No. de série No. di serie No. de serie No. de série APIOMOΣ ΣΕΙΡΑ
Type of set Geräte Type d'appareil Tipo d'apparecchio Tipo de aparato Tipo de aparelho Túπος συσκευής
Purchase date Kaufdatum Date d'achat Data d'acquisto Fecha de compra Data de compra Ημερομηνία ογοράς
Dealer's Stamp / Händlerstampel / Timbre du négociant / Timbro del negoziente / Sello del establecimento vendedor / Carimbo da loja de Venda / Σφραγίδα του καταστήματος

natural_image
Abstract geometric logo design with stylized 'R' letters and circular elements (no text or symbols)Roadstar
is a registered Trademark of Roadstar S.A. - Switzerland. All rights reserved
members, please refer to the local law of each country. This warranty does not cover normal wear and tear of the product and/or its parts, any damage, failure, or loss caused by accident, misuse, and any other failure not directly related to a defect of the product. This warranty does not void consumer's rights in accordance with EU Directive99/44/CE. For further information please visit the website www.roadstar.com, or write to aftersa- sales@roadstar.com.
DEUTSCH
Allgemeine "Roadstar" Garantiebedingungen
Roadstar Warranty Terms and Conditions
Roadstar- by means of its sales organisation, representative or distributor- guarantees its products against manufacturing defects in material and/or workmanship throughout the period of warranty. Should the product fail to work or shows manufacturing defect within the warranty period, Roadstar- by means of its sales organisation, representative or distributor- will take the necessary actions to restore the perfect functioning of the product. To rep- to replace is at discretion of Roadstar or it's representative or distributor. The warranty period is in accordance with directive 99/44/CE of the European Union. For all non EU
PORTUGUES
Roadstar Management SA, via Passeggiata 7 CH 6883 Novazzano (Switzerland)