HG09090 - Gazebo Rocktrail - Free user manual and instructions
Find the device manual for free HG09090 Rocktrail in PDF.
| Brand | Rocktrail |
| Model | HG09090 |
| Product type | Gazebo (garden pavilion) |
| Dimensions (L x W x H) | approx. 295 x 295 x 250 cm |
| Weight | approx. 5.8 kg |
| Use | Outdoor, privacy and sun protection, not permanent |
| Recommended number of people for assembly | 4 people (minimum 2) |
| Package contents | 12 corner pole connectors, 4 roof pole connectors, 1 roof, 4 center poles, 4 upper corner poles, 4 lower corner poles, 1 roof cross connector, 4 corner connectors, 4 bases, 8 tent pegs, 4 guy ropes, 1 instruction manual |
| Roof material | Fabric with Velcro fasteners |
| Maximum wind resistance | 40 km/h (strong winds, disassemble beyond) |
| Care and cleaning | Damp cloth and mild detergent; do not use solvents |
| Storage | Dry and clean, at room temperature |
| Warranty | 3 years from date of purchase |
| After-sales service France | Phone: 0800904879, email: owim@lidl.fr |
| After-sales service Belgium/Luxembourg | Phone: 080071011 (BE), 80023970 (LU), email: owim@lidl.be |
| Product reference number (IAN) | 364728_2107 |
| Main safety instructions | Do not use in strong wind, rain or snow; keep guy ropes taut; do not leave children unattended; check before each use |
Frequently Asked Questions - HG09090 Rocktrail
User questions about HG09090 Rocktrail
0 question about this device. Answer the ones you know or ask your own.
Ask a new question about this device
Download the instructions for your Gazebo in PDF format for free! Find your manual HG09090 - Rocktrail and take your electronic device back in hand. On this page are published all the documents necessary for the use of your device. HG09090 by Rocktrail.
USER MANUAL HG09090 Rocktrail
text_image
PDF ONLINE www.lidl-service.com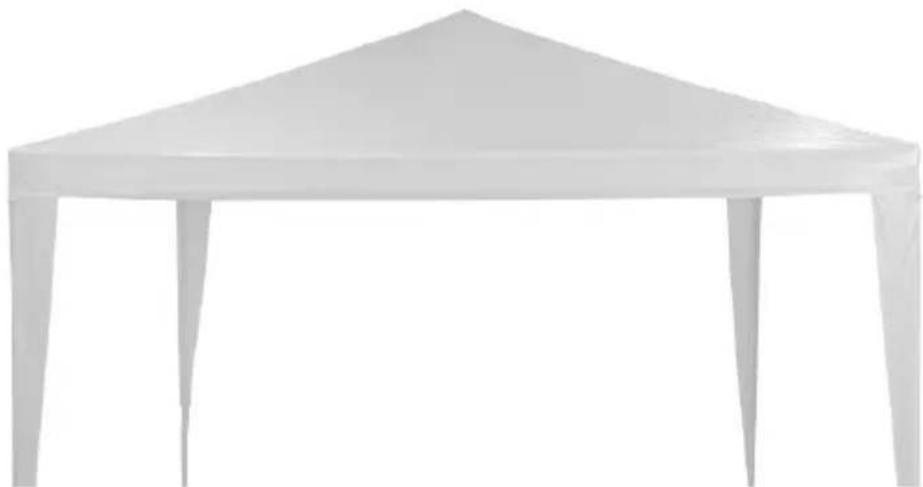
natural_image
Exterior view of a white outdoor tent or awning structure (no text or symbols visible)PAVILLON / GAZEBO / TONNELLE
DE AT CH
PAVILLON
Assembly and safety advice
FR BE
TONNELLE
We congratulate you on the purchase of your new product. You have chosen a high quality product. Familiarise yourself with the product before using it for the first time. In addition, please carefully refer to the operating instructions and the safety advice below. Only use the product as instructed and only for the indicated field of application. Keep these instructions in a safe place. If you pass the product on to anyone else, please ensure that you also pass on all the documentation with it.
- Contents (Fig A)
1 12x corner connector pole
2 4x roof connector pole
3 1x pavilion roof
4 4x centre pole
5 4x corner pole top
6 4x corner pole bottom
7 1x roof cross connector
8 4x corner connector
9 4x base
10 8x tent peg
11 4x guy rope
1x instructions for use
● Technical data
Dimensions : approx. 295 x
$$ 2 9 5 \times 2 5 0 \mathrm{cm} $$
$$ (L \times W \times H) $$
Weight: approx. 5.8 kg
● Proper use
This article has been designed for outdoor use to provide privacy and protection from the sun. It is not fully weather resistant and is therefore unsuitable for permanent installation outside. The article should not be used for commercial purposes.

Safety information
KEEP THESE INSTRUCTIONS IN A SAFE PLACE! WHEN PASSING THIS PRODUCT ON TO OTHERS; PLEASE INCLUDE ALL THE DOCUMENTS.
⚠️Danger to life!
■ Never allow children to play with the packaging material whilst unsupervised. There is a risk of suffocation.
⚠️Danger of injury!
The article must not be used in adverse weather conditions such as strong wind or heavy rain and snow.
■ Dismantle the pavilion if wind speeds are expected to exceed 40 km/h (brisk and clearly audible winds, larger branches and trees moving).
■ Disassemble the article if the wind begins to rise or if other adverse weather conditions occur.
■ Take particular care to avoid squashing your fingers whilst erecting and dismantling the article. This could cause injury in the form of contusions.
Place the article on a level surface.
■ Indicate the presence of the guy rope to other persons and warn them of the danger of tripping.
■ Make sure that the article is fully stretched out prior to use.
■ The article may only be used under the supervision of adults and is not designed as a toy.
- Check the article for damage or wear and tear prior to each use.
- Check that all elements have been properly installed before using the article. Incorrect assembly may reduce safety and functionality.
Do not use open fires, grills or patio heaters in or near the article. Leave the pavilion immediately in the event that it catches fire! Use a fire extinguisher or water to put out the blaze. Alert the fire brigade without delay if necessary.
■ Individual pavilions must not be connected or fixed to one another. A minimum distance of 3 metres must be maintained between individual pavilions. - Any build-up's of water must be removed!
The guy ropes must be used at their full length.
● Choice of location
The dimensions of the article 3 x 3 m, and additional space will be required for the guy ropes.
■ Wherever possible, place the article in an area where it is protected from the wind.
■ The ground should be level at should provide the tent pegs with sufficient stability.
Assembly
Note!
At least 2 persons are needed to erect the article. We recommend that assembly should be carried out by 4 persons.
Step 1 (Fig B)
Assemble the roof frame. Connect each of the centre poles 4 with two corner connector poles 1 and a corner connector 8. Please make sure that the locking mechanisms 1 click into place both visibly and audibly in the holes in the corner connector.
Step 2 (Fig C)
Insert the last four corner connector poles into the corner connector. Insert the four roof connector poles 2 and connect these to the roof cross connector 7. Please make sure that the locking mechanisms 1 click into place both visibly and audibly in the holes in the corner and connector.
⚠ Warning! Risk of trapping hands or fingers!
Step 3 (Fig D)
Insert the top corner poles 5 into the corner connector 8.
Step 4 (Fig E)
Pull the pavilion roof 3 over the frame. Fix the roof into place using the pre-installed velcro fasteners 3a on the roof frame.
Step 5 (Fig F)
Insert the bottom corner poles 6 into the top corner poles and the bases 9. Fasten the roof loops 3b into one of the drilled holes in the bottom corner pole.
⚠ Warning! Risk of trapping hands or fingers!
Step 6 (Fig G)
Anchor each foot with the help of the tent pegs 10. Use the openings in the feet for this purpose. Knot one end of each guy rope 11 to a roof loop 3b at the outer corners of the product.
⚠ Warning! Extend the guy ropes to their full length in order to achieve a high level of stability and attach the ends using one tent peg each.
⚠ Warning! Make sure the tent pegs are fixed securely.
● Disassembly
Step 1
Loosen the tent pegs holding the guy ropes and bases.
Step 2
Release the roof loops from the bottom corner poles. Remove the bases and bottom corner poles.
Step 3
Remove the roof and top corner poles.
Step 4
Disassemble the roof frame. Press on the locking mechanism to release the poles from the corner connectors.
⚠ Warning! Risk of trapping hands or fingers!
Step 5
Make sure that the article is clean and dry prior to storage.
● Cleaning and care
■ Clean the article using a damp cloth and a mild detergent.
- Do not use petrol, solvents or strong detergents.

Storage
In order to be able to enjoy the article for as long as possible, we recommend that it should always be stored in a dry and clean condition at room temperature when not in use.
● Disposal
The packaging is made entirely of recyclable materials, which you may dispose of at local recycling facilities.
Contact your local refuse disposal authority for more details of how to dispose of your worn-out product.
Warranty
The product has been manufactured to strict quality guidelines and meticulously examined before delivery. In the event of product defects you have legal rights against the retailer of this product. Your legal rights are not limited in any way by our warranty detailed below.
The warranty for this product is 3 years from the date of purchase. The warranty period begins on the date of purchase. Please keep the original sales receipt in a safe location. This document is required as your proof of purchase.
Should this product show any fault in materials or manufacture within 3 years from the date of purchase, we will repair or replace it – at our choice – free of charge to you. This warranty becomes void if the product has been damaged, or used or maintained improperly.
The warranty applies to defects in material or manufacture. This warranty does not cover product parts subject to normal wear, thus possibly considered consumables (e.g. batteries) or for damage to fragile parts, e.g. switches, rechargeable batteries or glass parts.
Warranty claim procedure
To ensure quick processing of your case, please observe the following instructions:
Please have the till receipt and the item number (IAN 364728_2107) available as proof of purchase.
You will find the item number on the rating plate, an engraving, on the front page of the instructions for use (bottom left), or as a sticker on the rear or bottom of the product.
If functional or other defects occur, please contact the service department listed either by telephone or by e-mail.
You can return a defective product to us free of charge to the service address that will be provided to you. Ensure that you enclose the proof of purchase (till receipt) and information about what the defect is and when it occurred.
Service
GB
Service Great Britain
Tel.:08000569216
E-Mail:owim@lidl.co.uk
IE
Service Ireland
Tel.:1800200736
E-Mail:owim@lidl.ie
TONNELLE
Introduction
Pooblaščeni serviser:
OWIM GmbH & Co. KG
Stiftsbergstraße 1
74167 Neckarsulm
NEMČIJA