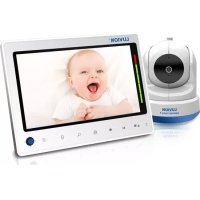
Icon Long Range - Baby monitors Luvion - Free user manual and instructions
Find the device manual for free Icon Long Range Luvion in PDF.
User questions about Icon Long Range Luvion
0 question about this device. Answer the ones you know or ask your own.
Ask a new question about this device
Download the instructions for your Baby monitors in PDF format for free! Find your manual Icon Long Range - Luvion and take your electronic device back in hand. On this page are published all the documents necessary for the use of your device. Icon Long Range by Luvion.
USER MANUAL Icon Long Range Luvion
- 3x rechargeable battery PRODUCT OVERVIEW Baby unit (Fig. 1)
2. Main channel number
8. Baby 1,2 or 3 check7
LUVION Premium Baby products INSTRUCTION MANUAL INTRODUCTIONThank you for purchasing the Luvion® Icon Long Range baby monitor. From now on you can always hear your baby. Make sure you always keep your original proof of purchase. For warranty cases you will always be asked to show a copy of your proof of purchase. For warranty claims you can contact the Luvion dealer or the local Luvion representative. More information can be found at www.luvion.com. This manual contains all the information you need, to be able to use this Luvion Icon Long Range baby monitor safely and with pleasure. Before using the baby monitor, we recommend that you read this manual carefully. We ask for your extra attention for the safety instructions.SAFETY INSTRUCTIONS
- WARNING: CHOKING HAZARD - Keep the adapter cable out of the reach of children! NEVER place the baby monitor or adapters within 1.5 meters of the crib / bed or a play-ground.• Keep in mind that the signal of your baby monitor may also be heard by other 446 MHz baby monitors, walkie-talkies or receivers than yours.• Use only the originally supplied adapters. Use only on standard (100 ~ 240 volts AC) power points.• If you travel abroad, check the voltage on your unit’s plugs match the local power output.• This product is not a toy. Don’t let children play with it.• The baby monitor is not suitable for use as a medical surveillance monitor.• The baby monitor is not a substitute for parental supervision.• Do not use the baby monitor in a damp environment or near water, such as in the bath-room, kitchen, laundry room or wet basement, etc.• It is important to rst check the range and condition of the baby monitor before rst use and then on a regular basis.• Test the connection well when the baby monitor is moved.• Use the baby monitor at a temperature between 10 °C and 40 °C, do not place the baby monitor in direct sunlight or at other heat sources such as radiators, candles, gas cooker, etc. Ensure there is suffi cient ventilation space around the baby monitor.
- Never dismantle the parent or baby unit yourself, this invalidates the warranty. This must be done by certi ed personnel, contact the seller of the local distributor for this.• Only replace the batteries with original Luvion batteries of the same type. Using the wrong batteries may damage your baby monitor.• Make sure that the parent unit is fully charged on rst use. This guarantees an optimum battery life.
- The use of this baby monitor is permitted in all countries of the EU. When bringing the Icon Long Range with you to countries outside the EU, rst check the local restrictions on the use of PMR446 equipment in the concerning country.• Never use the baby monitor during thunderstorms.• The Icon Long Range may not be used for any other purpose than for the detection of sounds within your own private surroundings; anybody that is or may be present in the room you’re listening to much be informed of the installed baby monitor. EN8 SETUP & USE
1.1 Place the Baby unit in a wall socket that cannot be reached by your baby or child.
Keep the Baby and parent unit outside direct sunlight and humid areas.
1.2 Installation Baby unit
1. Plug the Baby unit into A 230V wall socket and the baby unit switches on immedi-
The Parent unit is powered by the included rechargeable battery cells. For rst time use, charge the battery for at least 12 hours. Only use the supplied battery cells and the supplied power adaptor.
1. Insert a at screwdriver or a coin into the bottom of the battery door cap of the
2. Lift the battery cover as show on the gure.
3. Insert the battery cells into the unit, paying attention to the + and -.
4. Place the battery cover onto the parent unit and make sure to rmly close it.
Note: The Parent unit is still useable when the unit is connected to a power adapter. You may also leave the adaptor connected continuously, the charging voltage is controlled electronically to avoid any risk of overcharging.
1.4 Connecting parent unit to the power adapter for charging
1. Connect the power adaptor to the parent unit and plug the other end of the adap-
tor into a wall socket.
2. The battery cells are fully charged after 12 hours.
3. You can unplug the power adaptor and use it cordlessly when the batteries are9
LUVION Premium Baby products charged. 4. As soon as the battery runs out of power, every 30 seconds 2 short beeps are emit-ted. Connect the adaptor to recharge the batteries.2. HOW TO USE2 .1 Baby unit 1. Hold down the menu button(3) to power the Baby unit on or off .2.2 Parent unit Before switching on, make sure the Parent and Baby unit are at least one metre from each other. Any closer and you might get audio feedback sounds.1. Press a few seconds on the power button (10) to power on and off the parent unit. 2.3 Channel and Sub-CodeMake sure the Parent unit and the Baby units are set to the same channel and Sub-code (see chapter 4.3). 3. USING YOUR LUVION ICON LONG RANGE BABY MONITOR3.1 Listening to your baby 1. As soon as the Baby units detects any sound, it transmits this sound to the parent unit. The display on the baby unit shows ‘TX’ while it is transmitting. 2. As soon as the Parent unit receives this signal, the speaker is enabled and you will hear the sound from the baby room. ‘RX’ appears on the display of the parent unit while receiving. 3.2 Volume1. Repeatedly and brie y press the button on the Parent unit to increase the volume.2. Repeatedly and brie y press the button on the Parent unit to decrease the volume. 3. The volume level is indicated on the display.Note: While setting the volume a high tone is emitted. Upon reaching the minimum or maximum volume, a low tone is emitted. 3.3 Nightlight1. Brie y press the or button on the Baby unit to switch on the nightlight on the Baby unit.2. Brie y press the on the Baby unit. or button again to switch off the nightlight on the Baby unit. Note: When the nightlight is on, the display lighting of the Baby unit is switched on, but the display shows no further information. Only the nightlight icon is illuminated. While the nightlight is on, it is not possible to adjust any settings in the menu. 3.4 Flashlight 1. Brie y press the button on the Parent unit to switch the ashlight on (9). 2. Brie y press the button again to switch the ashlight off (9). Note: The ashlight only works when the Parent unit is switched on. EN10
Menu ow goes as follows for the baby unit once you push the menu button: Channel & Sub-code > VOX Sensitivity > Auto Monitor > Exit menu On the Baby unit, the following settings can be adjusted:
- Send channel: this is the frequency at which the baby unit transmits. You can choose from channel 1 ~ channel 8.
- Sub code: this option adds an extra code to the signal allowing you to only listen to your baby unit without interference from other transmitters on the same fre- quency.
- VOX: This allows you to determine how loud the baby must cry before the baby units starts transmitting to the parent unit. At VOX setting 1 the baby must cry loudly before the sound is transmitted to the parent unit. At VOX setting 4 also (very) soft baby sounds are transmitted. It will require some experimenting to nd your ideal VOX level.
- Auto monitor: see chapter 5.3 of this manual for the description of this function.
1. Insert the Baby unit into wall socket.
button and use the or button to set the send channel.
button and use the or button to set the send sub code.
button and use the or button to set the send the VOX sensitivity.
button to save your settings and to nish the setup. Note: When the nightlight of the baby unit is switched on, you CANNOT change the set- tings. First press the When the nightlight of the baby unit is switched on, you CANNOT change the set-
When the nightlight of the baby unit is switched on, you CANNOT change the set- button to switch o the nightlight. The setup menu will auto- matically disappear from the screen if you do not press a button for a while.
4.2 Additional Baby Unit #2 or #3
Use a diff erent channel for each Baby unit when using 2 or 3 baby units. The other set- tings can be freely adjusted.
You set up the parent unit as follows:
2. Brie y press the menu button (11) and choose to turn it ON or OFF by using the
Brie y press the menu button (11) and choose to turn it ON or OFF by using the button and then press menu brie y in order to set the same send channel as you have set for baby unit 1 by also using the button and then press menu brie y in order to set the same send channel
button and then press menu brie y in order to set the same send channel button.
3. Brie y press menu button (11) and use the
as you have set for baby unit 1 by also using the or button to set the same sub code as you have set for baby unit 1.
4. Brie y press menu button (11) to indicate whether baby unit 2 is present.
5. Brie y press the menu button (11) and choose to turn it ON or OFF by using the
Brie y press the menu button (11) and choose to turn it ON or OFF by using the button and then press menu shortly in order to set the same send channel as you have set for baby unit 2 by also using the button and then press menu shortly in order to set the same send channel as
button and then press menu shortly in order to set the same send channel as button.
6. Brie y press menu button (11) and use the
you have set for baby unit 2 by also using the or button to set the same sub code as you have set for baby unit 2.
8. Brie y press the menu button (11) and choose to turn it ON or OFF by using the
Brie y press the menu button (11) and choose to turn it ON or OFF by using the button and then press menu shortly in order to set the same send channel as you have set for baby unit 3 by also using the button and then press menu shortly in order to set the same send channel as
button and then press menu shortly in order to set the same send channel as button.9. Brie y press menu button (11) and use the you have set for baby unit 3 by also using the or button to set the same sub code as you have set for baby unit 3. 10. Brie y press the menu button (11) again, appears in the display (this is the connection check, see chapter 5.4 below in this manual for a description of this function. Use connection check, see chapter 5.4 below in this manual for a description of this
connection check, see chapter 5.4 below in this manual for a description of this button to switch this function on (ON) or off (OF). Note: If you indicate that there is no Baby unit 1 in step 1, then you will go to step 4 directly when pressing the menu button. If you indicate that there is no baby unit 2 in step 4, then go to step 10 when pressing the menu button. 5. OPERATION5.1 Baby UnitFor as long as the baby is sleeping and the baby unit is not picking up any sound, no signal is transmitted to the parent unit nor will the parent unit emit any sound. As soon as the baby starts making sound and the level of this sound exceeds the VOX sensitivity you have set, the baby unit will starts transmitting the sound to the parent unit. For as long as the baby is making sound, the baby unit will keep sending this sound to the parent unit. However because of legal requirements, transmitters on this frequency may not transmit longer than 3 minutes continuously. This is why the Baby unit takes a 5 seconds pause after 3 minutes of continuous transmissions and will then start transmitting again. 5.2 Parent unitWhen the Parent unit is receiving the signal from the Baby unit, the speaker is enabled and you will be able to hear the baby sounds. If the Parent unit is set to monitor multiple baby units, the parent unit switches be-tween baby unit every second. The is indicated in the display by the alternating icons tween baby unit every second. The is indicated in the display by the alternating icons 1 or tween baby unit every second. The is indicated in the display by the alternating icons 2 or tween baby unit every second. The is indicated in the display by the alternating icons
When one of the babies starts making sound, the parent unit stops alternation between baby units. The parent unit will now let you listen to the noise-making baby continuously. 5.3 Auto monitorIf you have enabled the ‘Auto Monitor’ function at the baby unit(s), the microphone of the baby unit switches on every 5 minutes for 10 seconds long, also when the baby is sleeping quietly. This gives you an extra assurance that your baby is still sleeping peacefully. 5.4 Connection checkEach minute the baby unit sends a connection check in the background to the par-ent unit. You cannot hear this signal, but you can verify that the baby unit sends this signal because ‘TX’ will be brie y illuminated in the upper left corner of the baby unit’s display. The parent unit receives this signal to verify whether that baby unit is enabled and still within range. If the parent unit does not receive this check signal for 3 minutes, the parent unit starts emitting 2 short alert beeps every minute while the icon starts ashing on the display of the parent unit.12 When using 2 or 3 baby units: If for example the connection with baby unit 2 is lost, the following starts alternating in the below part of the display: If for example the connection with baby unit 2 is lost, the following starts alternating in 1 remains lit / If for example the connection with baby unit 2 is lost, the following starts alternating in 2 ashes If you have selected the value OFF for the option during the setup of the Parent unit (i.e. no connection check), the Baby unit will still transmit the check signal every minute, but the parent unit will not indicate that the signal is being received. TROUBLESHOOTING Troubleshooting Doesn’t work • The batteries of the parent unit are exhausted, recharge or replace it.
- The baby unit is not (properly) connected to a wall socketor the wall socket isn’t live, check this. Poor or no reception • The channel setting or sub code set incorrectly (the sender and receiver must be set to the same channel, with the same sub code)
- The distance between the baby unit and par- ent unit is too large, decrease the distance White noise or other noises • Another sender is present, change the channel
- Interference from other devices, switch the other devices off (if possible) High whistle • The parent unit is too close to the baby unit or the volume of the parent unit is set too high, increase the distance or lower the volume Always first check whether the Luvion® Icon Long Range is functioning on a different location. If the problem isn’t solved, first remove the Baby unit from the wall socket and then re- move the batteries from the Parent unit. Reconnect everything after a minute. If this doesn’t solve the problem, please contact the Luvion® customer service department at www.luvion.com/contact CARE & MAINTENANCE Only clean the baby monitor with a dry cloth. Remove the Baby unit from the wall socket before cleaning. Prevent water, dust and/or sand from penetrating the units. Any modi cations of the electronics or antenna of the Baby unit are prohibited. Service may only be performed by techni- cians quali ed to do so.
DISPOSAL OF PRODUCT & BATTERIES
This product may not be discarded as normal household waste at the end of its life span. You must bring it to a collection point for recycling of electric and electronic devices. This is indicated by the display symbol on the product and in this manual. Exhausted bat- teries can be returned to the supplier of this baby monitor or you may bring them to your13 LUVION Premium Baby products local depot for small chemical waste. Never discard empty batteries as regular household waste. SPECIFICATIONSFrequency: 446,00625 MHz to 446,09375 MHz (8 channels) and 20 non-common sub-codes. RF power: 27 +/- 2 dBm Channel spacing: 12.5 Khz Power supply: Parent unit: 3 x rechargeable battery cells AAA, 3.6V, Ni-MH 600mAh Baby unit: 100-240V ~ 50/60Hz Adapter: In: 100~240V-50/60Hz 0.15A Out: DC 5.0V – 1000mA Range: Indoors: up to 300m Outdoor: up to 3km EU DECLARATION OF CONFORMITY Luvion® declares that the radio equipment type Luvion® Icon Long Range is in compliance with Directive 2014/53/EU. The full text of the EU declaration of conformity is available at: luvion.com/doc/icon-long-range EN14 INHOUD DOOS:
4.2 Extra Babyunit #2 of #3
- 3 piles rechargeables