HS 3820 - Hair Straightener GRUNDIG - Free user manual and instructions
Find the device manual for free HS 3820 GRUNDIG in PDF.
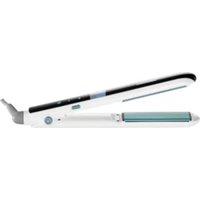
| Product type | Hair straightener / Curling iron (Curls & Volume Hairstyler) |
| Brand | Grundig |
| Model | HS 3820 |
| Mains voltage | 120 V / 230-240 V~, 50/60 Hz (switchable) |
| Power | 350-400 W depending on voltage |
| Functions | 2 temperature levels and airflow + cool air (cool shot) |
| Included accessories | Round brush Ø20 mm with soft bristles, large round brush Ø38 mm with ceramic coating |
| Brush type | Interchangeable, lock with button |
| Safety | Overheat protection, automatic shut-off (not specified) |
| Use | For domestic use only |
| Cable length | Approximately 1.8 m (estimate) |
| Weight | Approximately 350 g (estimate) |
| Dimensions (L x W x H) | Not specified |
| Housing material | Plastic |
| Maintenance | Clean with a soft, dry cloth; dust air intake grille with a soft brush |
| Repairability | Power cable replaceable by a professional; no user-serviceable parts |
| Environment | Recyclable, do not dispose of in household waste |
Frequently Asked Questions - HS 3820 GRUNDIG
User questions about HS 3820 GRUNDIG
0 question about this device. Answer the ones you know or ask your own.
Ask a new question about this device
Download the instructions for your Hair Straightener in PDF format for free! Find your manual HS 3820 - GRUNDIG and take your electronic device back in hand. On this page are published all the documents necessary for the use of your device. HS 3820 by GRUNDIG.
USER MANUAL HS 3820 GRUNDIG
natural_image
Close-up of a hairdryer with a spool, no visible text or symbolsDEEN FRI
PT
ES FL CS
TR
EL

natural_image
Abstract grayscale curved shape on white background (no text or symbols)
text_image
A B C D F E G 1 2DEUTSCH 05-20
ENGLISH 21-35
FRANÇAIS 36-50
ITALIANO 51-65
PORTUGUÊS 66-80
ESPAÑOL 81-95
POLSKI 96-110
ČESKY 111-124
TÜRKÇE 125-139
ΕΛΛΗΝΙΚΑ 140-154
natural_image
Prohibition sign showing a showerhead falling from a water body, enclosed in a circle (no text or symbols)natural_image
Stylized grayscale illustration of a tree with leaves emerging from its branches, enclosed in a circular frame (no text or symbols)natural_image
Close-up of a hairdryer with a downward arrow indicating compression or disassembly (no text or symbols visible)
natural_image
Close-up of a hairdryer brush with a control knob labeled 'PRYS' (no additional text or symbols visible)
text_image
3Anwendung
text_image
Prohibition sign with crossed-out trash bin and no text or symbolsPlease observe the following instructions when using the appliance:
- Keep the instruction manual for future use. Should a third party be given the unit, please ensure the instruction manual is included.
■ This appliance is intended for domestic use only.
■ Never use the appliance in the bathtub, shower, above a water-filled basin or with wet hands.

natural_image
Prohibition sign showing a prohibition symbol with a diagonal line crossing over water and a flag (no text)SAFETY
- Do not immerse the appliance in water or let it come into contact with water, even during cleaning.
- Do not use the appliance near water in bathtubs, wash basins or other vessels.
If the appliance is used in the bathroom, it is essential that the power plug is pulled out after use, as water close to the appliance can still pose a hazard, even if the appliance is switched off.
If not already present, for additional protection it is recommend to install a residual-current-operated protective device (RCD) with a rated residual operating current not exceeding 30 mA in the electrical circuit of your bathroom. Ask your electrician for advice.
■ Never place the appliance on soft cushions or blankets during operation.
■ Ensure that the air suction and exhaust openings are not covered during operation.
■ The appliance is equipped with an overheating protection system.
SAFETY
■ Pull out the power plug after use. Do not disconnect the plug by pulling on the cable.
■ Never use the appliance if it or the power cord is visibly damaged.
If the power cord is damaged, it must be replaced by the manufacturer, its service centre or a similarly qualified person to prevent danger arising.
- Keep the appliance out of the reach of children.
This appliance can be used by children aged from 8 years and above and persons with reduced physical, sensory or mental capabilities or lack of experience and knowledge if they have been given supervision or instruction concerning use of the appliance in a safe way and understand the hazards involved. Children shall not play with the appliance. Cleaning and user maintenance shall not be made by children without supervision.
SAFETY
- Do not open the appliance under any circumstances. No warranty claims are accepted for damage caused by incorrect handling.
Dear customer,
Congratulations on the purchase of your Curls & Volume HS 3820 hair styler. Read the following user instructions carefully to ensure you can enjoy your quality product from Grundig for many years to come.
A responsible approach!

natural_image
Stylized grayscale illustration of a tree with leaves growing from ground, enclosed in a circular frame (no text or symbols)GRUNDIG focusses on contractually agreed social working conditions with fair wages for both internal employees and suppliers. We also attach great importance to the efficient use of raw materials with continuous waste reduction of several tonnes of plastic every year. Furthermore, all our accessories are available for at least 5 years.
For a future worth living.
For a good reason. Grundig.
Controls
See the illustrations on page 3.
A Detachable brush (styling attachment)
B Catch for detaching the styling attachment
c Switches the appliance on and off. Regulator for two temperature/blower settings and the cold air setting ("cool shot")
D Switches between mains voltages of 120 V and 230 - 240 V
Air inlet grille
F Handle
G Power cord with rotatable cable joint
Accessories
1 Round brush ∅ 20 mm, with soft bristles
2 Round brush ∅ 38 mm, with ceramic coating
Settings
Your appliance has the following setting options:
Temperature/blower setting and cold air setting
- 0: off
- 1: gentle air flow and moderate temperature for gently drying and styling
- 2: stronger airflow and high temperature for fast drying and styling.
- ✱: interrupts the heating to supply a cold air flow
Putting on the styling attachment 1
1 Put the styling attachment 1 onto the markings (figure 1).
2 Press the ☐ locking button and turn the styling attachment to the right until both key symbols are facing one another (figure 2).
3 Release the B locking button.
- The styling attachment is secured.
Removing the styling attachment 1
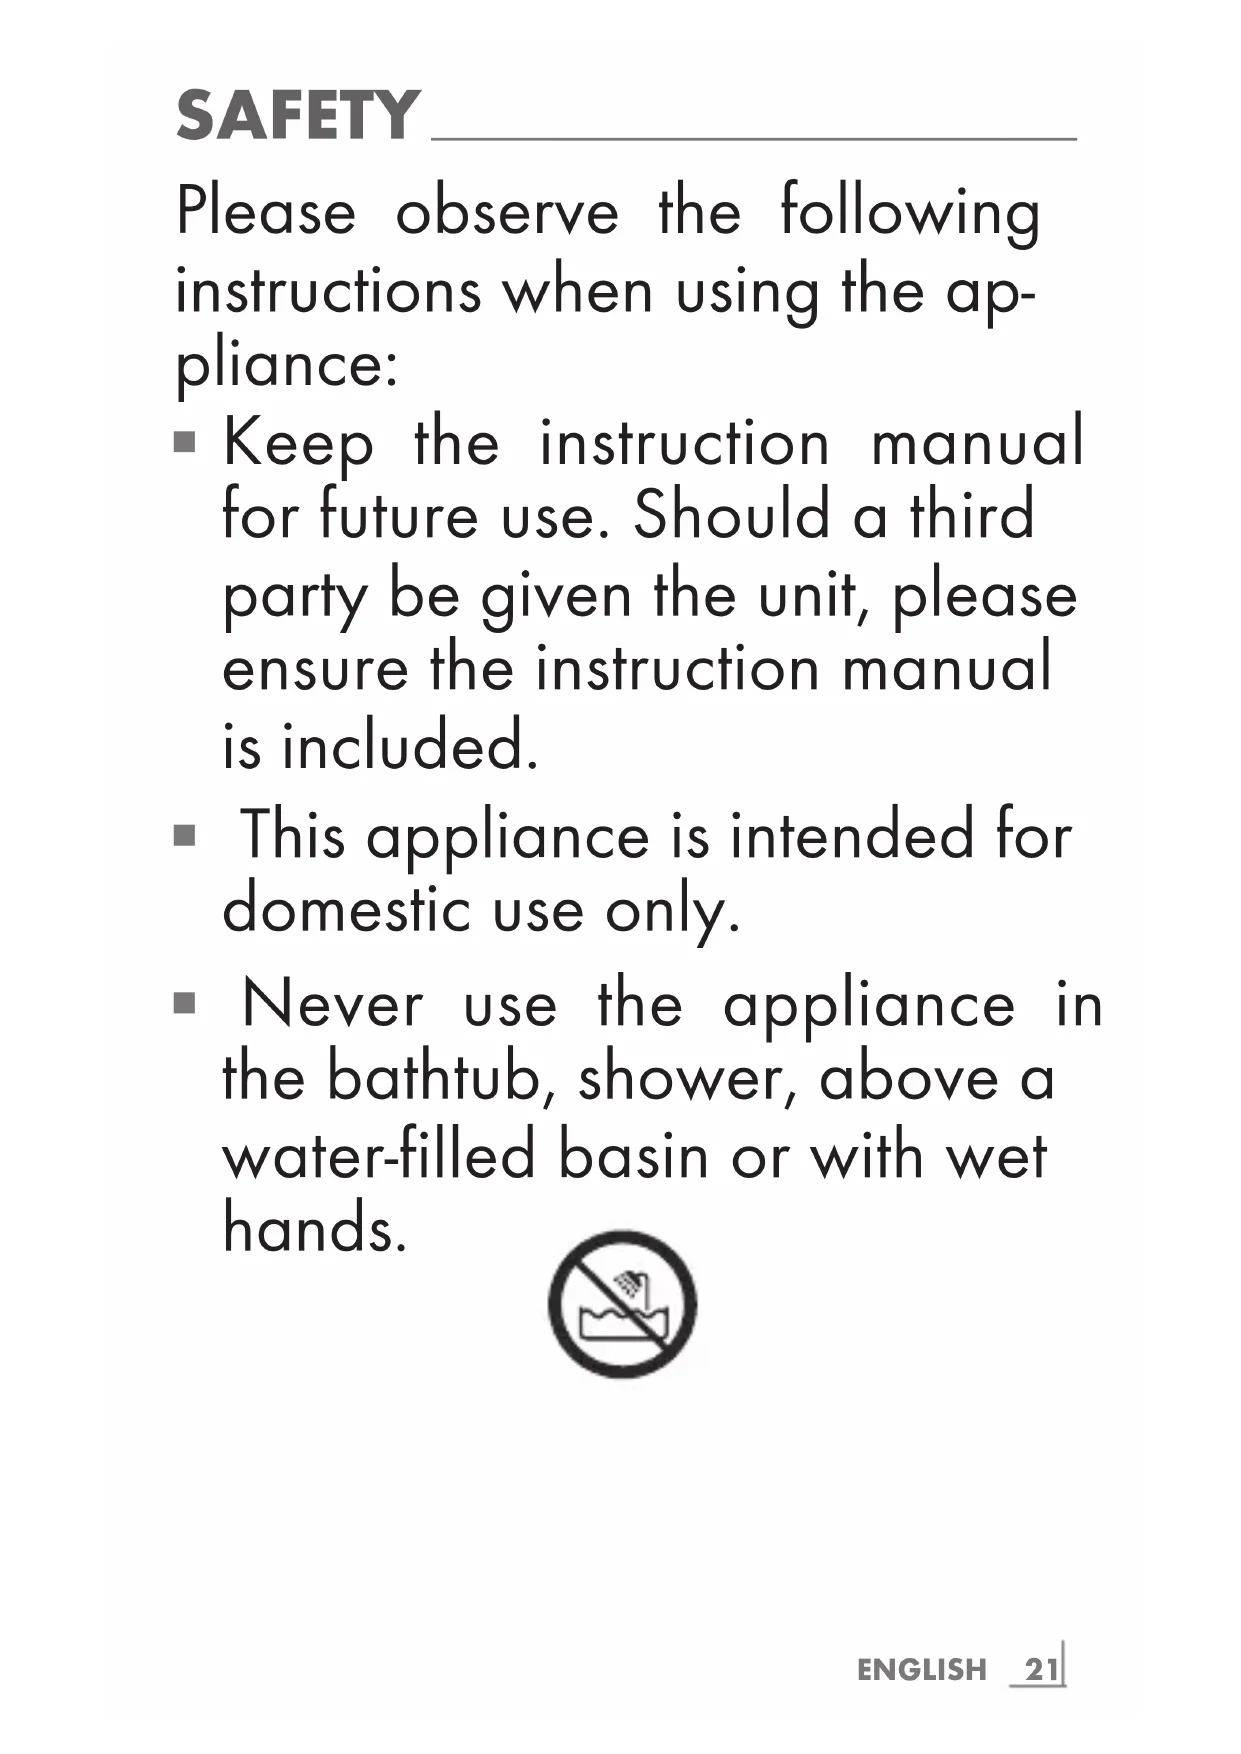
1 Press the B locking button and turn the styling attachment to the left until the key symbol on the attachment is facing the bar symbol on the appliance (figure 3).
2 Release the ☐ locking button and remove the attachment.

text_image
1 P2.55
text_image
2 FUSO
text_image
3Putting on the styling attachment 2
1 Put the styling attachment 2 onto the markings (figure 1).
2 Turn the styling attachment to the right until both key symbols are facing one another and the attachment clicks (figure 2).
- The styling attachment is secured.
Removing the styling attachment 2
1 Press the ☐ locking button and turn the styling attachment to the left until the key symbol on the attachment is facing the bar symbol on the appliance (figure 3).
2 Release the ☐ locking button and remove the attachment.

text_image
1 F5011
natural_image
Close-up of a hairdryer brush with a control knob and directional arrow (no text or symbols visible)
text_image
3 PASSUse
Check the on-site mains voltage and set the voltage to this specification with the switch D.
1 Towel dry your hair thoroughly after washing.
2 Plug the power cord G into the wall socket.
3 Turn on the appliance with the switch □ and set the temperature/blower level.
4 If desired, interrupt the heating by moving the switch ☐ to position ✝.
Note:
- The “cool shot” interrupts the heating to supply a flow of cold air. This allows you to fix your hairstyle better and more lastingly.
5 After use, switch off the appliance with the switch □ and pull the power cord G from the wall socket.
Important:
■ Never wind the power cord around the appliance, since this could lead to damage.
- Please regularly check the power cord and the appliance itself for visible damage.
Cleaning and care
Pull the plug out before cleaning.
Never submerge the appliance in water.
Use a soft, dry cloth to clean the housing. Remember to clean the air inlet grille E occasionally with a soft brush to remove hairs and dust.
Environmental note
This product was constructed from high-quality parts and materials which can be re-used and recycled.
text_image
Prohibition sign with crossed-out trash bin and no text or symbolsTherefore, do not throw the product away with normal household waste at the end of its service life. Take it to a collection point for recycling electrical and electronic devices. The symbol on the product, in the operating manual or on the packaging indicates recyclability.
Please consult your local authority for collection points in your area.
Help protect the environment by recycling used products.
Technical data

text_image
CEVoltage supply
120/230 - 240 V\~, 60/50 Hz
Power
400W/350 - 400 W
Technical and design modifications reserved.
text_image
Prohibition sign with pictogram of a shower above water and diagonal line, indicating no pollution or water release.natural_image
Stylized grayscale illustration of a tree with leaves and roots, enclosed in a circular frame (no text or symbols)natural_image
Close-up of a hairdryer with a downward arrow indicating compression or disassembly (no text or symbols visible)
natural_image
Close-up of a hairdryer brush with control knob and indicator lights (no text or symbols visible)
text_image
3Utilisation
text_image
Prohibition sign with crossed-out trash bin and no text or symbolsnatural_image
Prohibition sign showing a prohibition symbol with a hand holding a flag above water and waves (no text)natural_image
Stylized grayscale illustration of a tree with leaves and roots, enclosed in a circular frame (no text or symbols)natural_image
Close-up of a hairdryer with a downward arrow indicating a step, showing internal components and no visible text or symbols.
natural_image
Close-up of a hairdryer brush with a 'PRESS' button, showing no text or symbols on the brush itself.
text_image
3Impiego
text_image
Prohibition sign with crossed-out trash bin and no text or symbolstext_image
Prohibition sign showing a showerhead above water with no text or symbolsnatural_image
Stylized grayscale illustration of a tree with leaves and ground, enclosed in a circular frame (no text or symbols)natural_image
Close-up of a hairdryer with a downward arrow indicating compression or disassembly (no text or symbols visible)
natural_image
Close-up of a hairdryer brush with control knob and indicator lights (no text or symbols visible)
text_image
3Aplicação
text_image
Prohibition sign with crossed-out trash bin and no text or symbolstext_image
Prohibition sign with pictogram of a hand holding a device above water, enclosed in a circlenatural_image
Stylized grayscale illustration of a tree with leaves growing from its branches, enclosed in a circular frame (no text or symbols)natural_image
Close-up of a hairdryer with a downward arrow indicating compression or disassembly (no text or symbols visible)
natural_image
Close-up of a hairdryer brush with a control knob labeled 'PRYS' (no text or symbols on the brush itself)
text_image
3Uso
text_image
Prohibition sign with crossed-out trash bin and no text or symbolsnatural_image
Prohibition sign showing a prohibition symbol with a hand holding a spray over water (no text present)natural_image
Stylized grayscale illustration of a tree with leaves and roots, enclosed in a circular frame (no text or symbols)natural_image
Close-up of a hairdryer with a downward arrow indicating compression or disassembly (no text or symbols visible)
natural_image
Close-up of a hairdryer brush with control knob and indicator lights (no text or symbols visible)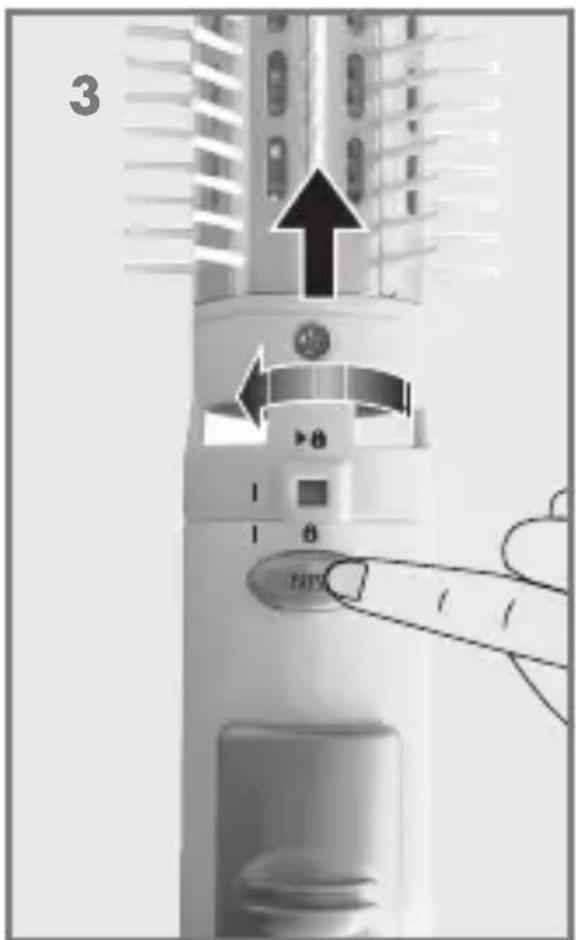
text_image
3 1 0 PATTStosowanie
text_image
Prohibition sign with crossed-out trash bin and no text or symbolsnatural_image
Prohibition sign showing a showerhead spraying water, no text presentnatural_image
Stylized grayscale illustration of a tree with leaves and ground, enclosed in a circular frame (no text or symbols)natural_image
Close-up of a hairdryer with a downward arrow indicating compression or disassembly (no text or symbols visible)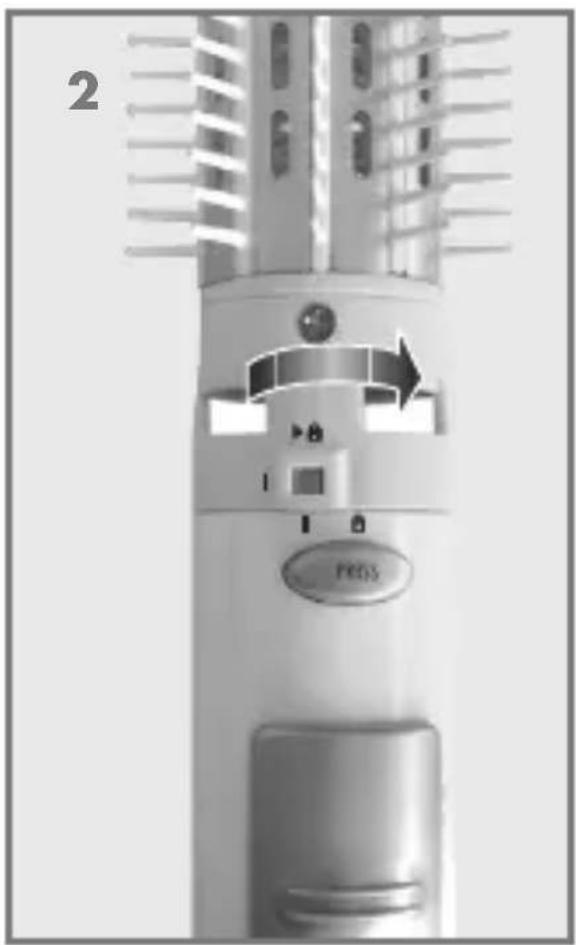
natural_image
Close-up of a white hairdryer with a control knob labeled 'PEGS' and a numbered section '2' (no text or symbols on the device itself)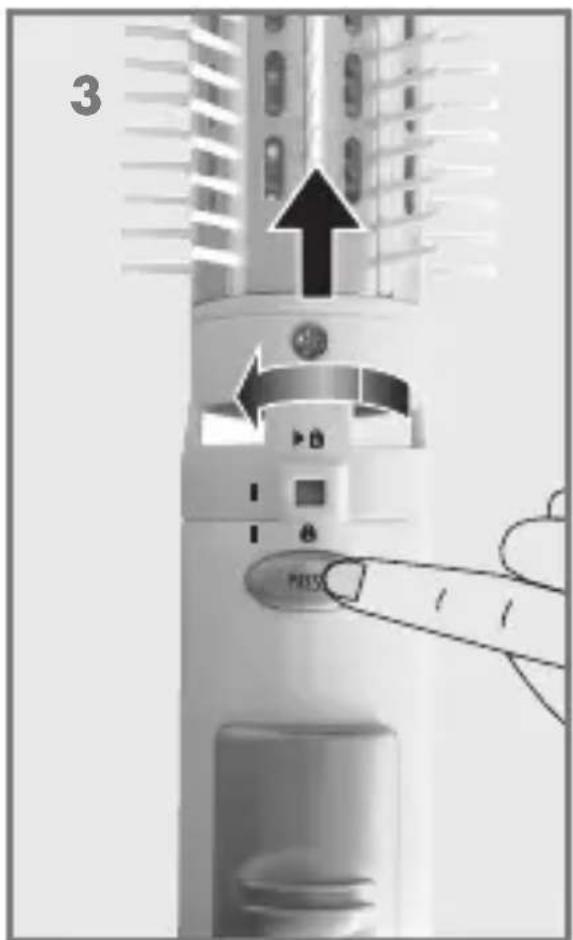
text_image
3 P453Použití
text_image
Prohibition sign with crossed-out trash bin and no waste symboltext_image
Prohibition sign with prohibition symbol and water droplet iconGÜVENLİK
natural_image
Stylized grayscale illustration of a tree with leaves and ground, enclosed in a circular frame (no text or symbols)natural_image
Close-up of a hairdryer with a downward arrow indicating a step, showing internal components and no visible text or symbols.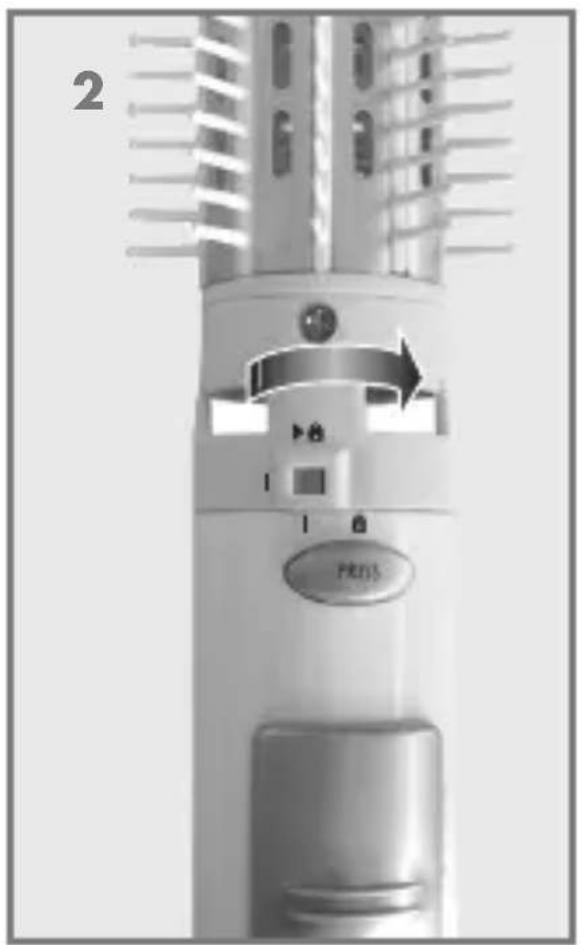
natural_image
Close-up of a hairdryer brush with a 'PRESS' button, showing no text or symbols on the brush itself.
text_image
3 1 0 PATTUygulama
text_image
Prohibition sign with crossed-out trash bin and no text or symbolstext_image
Prohibition sign with prohibition symbol and water droplet iconnatural_image
Stylized grayscale illustration of a tree with leaves emerging from its branches, enclosed in a circular frame (no text or symbols)natural_image
Close-up of a hairdryer with a downward arrow indicating compression or disassembly (no text or symbols visible)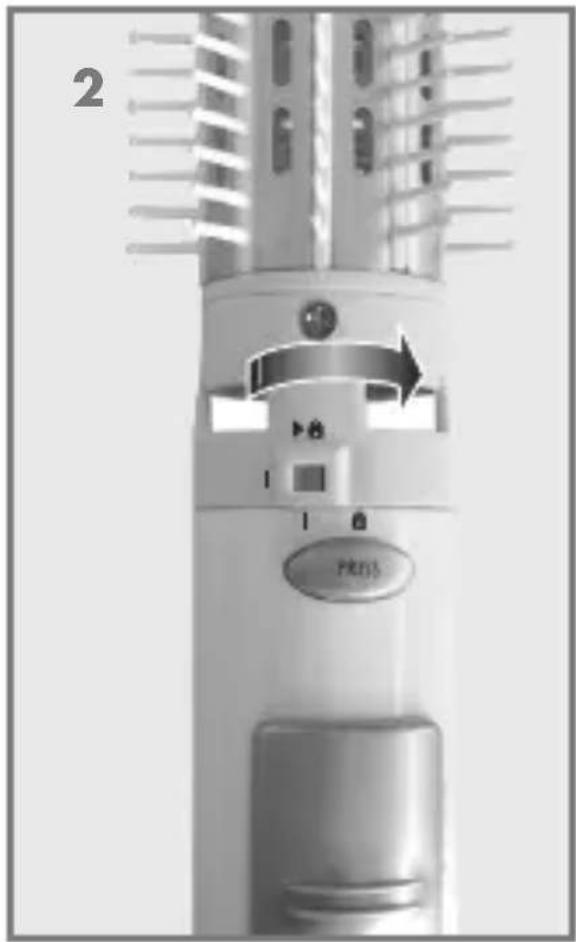
natural_image
Close-up of a hairdryer brush with control knob and indicator lights (no text or symbols visible)