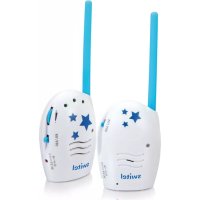
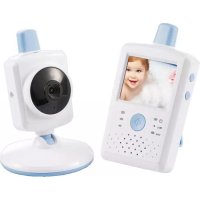
BCF989 - Baby monitors SWITEL - Free user manual and instructions
Find the device manual for free BCF989 SWITEL in PDF.
User questions about BCF989 SWITEL
0 question about this device. Answer the ones you know or ask your own.
Ask a new question about this device
Download the instructions for your Baby monitors in PDF format for free! Find your manual BCF989 - SWITEL and take your electronic device back in hand. On this page are published all the documents necessary for the use of your device. BCF989 by SWITEL.
USER MANUAL BCF989 SWITEL
One Camera
One Monitor
Two Power Adapters
Two Cable Clips
One Screw and One Wall Anchor
This User's Manual
Product Layout Camera (Fig. 1)
- Light sensor
- Microphone
- Lens
- Infrared LEDs
- Speaker
- Power adapter plug
- Power/Pairing button
- Antenna
- Temperature sensor
- Power indicator LED
Monitor (Fig. 2)
- LCD screen
- Volume indicator LEDs
- VOX indicator LED
- Power indicator LED
- Microphone
- Power ON/OFF switch
- Antenna
- Menu button
- Talkback button
- Holder
- Power adapter plug
- Speaker
Setup
1 Camera Setup
1.1 Power Supply - Using AC Power
- Plug one end of the provided power adapter into a wall outlet and the other end into the back of the camera. See Fig. 3.
Note : Use the adapter labeled OUTPUT: 5V DC with the camera.
- Press the POWER button and keep it around 3 seconds to turn on the camera. The LED on the camera will light up (green light). See Fig. 3.
Note : Press the POWER button and keep it around 3 seconds to turn off the camera.
1.2 Fine Tuning
Place the camera in a convenient location, point the lens toward the observation area.
1.3 Night Vision
The camera has eight high-intensity LEDs for picking up clear images in the dark. When the light sensor detects low ambient light levels, the LEDs will be automatically activated.
1.4 Room Temperature Measurement
Temperature sensor can measure room temperature on camera side and the room temperature indicator will be displayed on the screen of the monitor unit.
2 Monitor Setup
2.1 Power Supply - Using AC Power
The monitor has built in 3.7V 2200mAh (Li-ion) battery and uses household AC power current.
- Plug one end of the provided power adapter into a wall outlet and the other end into the monitor. See Fig. 4.
Note : Use the adapter labeled OUTPUT: 5V DC with the monitor.
- Slide the Power switch to "ON". See Fig. 4.
Note 1: When power on the monitor, "Power" LED will light up (green light). When battery is low, the red LED light will start blinking. When the battery is charging, the orange LED will light up.
Note 2: "Out of Range" will be displayed on the LCD screen if the monitor exceeds the range (unlink).
2.2 Talkback Function
Press the talkback button to speak through the camera unit, and the icon will then be displayed on the screen. See Fig. 5.
3 Hot Key Options
- Tap the screen and the Hot Key will display on the right side of the screen. See Fig. 6.
- Hot Key settings need to be completed within 5 sec. If over 5 sec, the system will return to the live view automatically.
3.1 Monitor Remote Control Function
The monitor can control the movement of the camera. The camera head has the ability to rotate up, down, right and left. Tap the up or down icons on screen to move the camera up or down. Tap the left or right icons on screen to move the camera left or to the right. See Fig. 7.
Note 1: Besides manual camera movement, the camera can also track moving objects using the auto tracking function. Auto tracking can be enabled or disabled in the menu.
Note 2: The audio will be muted when the motor rotates.
3.2 Music Function
You can play the music with the camera (three pieces of music).
Tap the music icon ±b , the camera will play music. See Fig. 8.
3.3 Zoom in Function
Tap the Zoom in icon on monitor once for a 2X zoom of image and tap again to change back to normal view. See Fig. 9.
Note : When the zoom in function is enabled, auto tracking will be disabled until the user zooms out.
3.4 Volume Setting
- Tap the volume setup icon to enter volume setup. See Fig. 10.
- Tap volume up or volume down icons to adjust volume level. See Fig. 10.
4 Menu Options
- Press the menu button on the monitor unit to display the main menu on the screen. See Fig. 11.
- The main menu contains 7 submenus.
4.1 Camera Selection(Camera Select)
In this submenu you can select between multiple cameras if the cameras have been paired. Also, you can tap the auto-scan icon for auto-scan function. An auto-scan feature will display images from each camera in eight-second intervals. See Fig. 12.
4.2 Feed Timer Setting (Feed Timer)
In this submenu you can set up feed timer to remind you the timing. See Fig. 13.
4.3 Temperature Setting (Temp. Setting)
- In this submenu you can choose the temperature unit between degrees Celsius or degrees Fahrenheit. See Fig. 14.
- You can set the temperature range of the temperature alert. If you select "Alert On" to enable the temperature alert and the temperature is outside the range, a warning sound will be emitted from the monitor unit. See Fig. 14.
4.4 Camera Setting (Camera Setting)
The system comes with a camera unit that has already been paired with the monitor unit. The "Cam Setting" function gives each baby unit a separate channel on the monitor unit. This is necessary for configuring additional camera units.
- If you want to add a new camera, please choose which number of cameras you want to add, and then select add camera icon (See Fig. 15). The screen will show a pairing picture, and then please also press and hold the power button less than 1 second on the camera side at the same time.
- If you want to delete a paired camera, please choose which number of cameras you want to delete, and then select delete camera icon to delete the camera (See Fig. 15).
4.5 Brightness Setting (Brightness)
In this submenu you can adjust brightness of the screen. See Fig. 16.
4.6 Auto Tracking Setting (Auto Tracking)
In the submenu you can select "On" to enable the auto tracking function or select "Off" to disable it. When auto tracking is enabled, the camera will track moving objects in the camera viewing range. Please see Fig. 17.
Note 1: The audio will be muted when motor rotates.
Note 2: When the zoom in function is enabled, auto tracking will be disabled until the user zooms out.
4.7 VOX Sensitivity(VOX Sensitivity)
This submenu lets you choose the VOX (voice activation) sensitivity level. When the level set to high, the screen will turn on by lower sounds.
See Fig. 18.
5 Status Information
The status bar will be displayed on the top of the screen. See Fig. 19.
- Signal strength indicator
- Camera number indicator
- Temperature alert on/off indicator
- Room temperature indicator
- Zoom in indicator
- Auto-scan indicator
- Feed timer
- Music indicator
- Auto tracking
10.Talkback indicator
11.Battery status/Charging indicator
Troubleshooting
You don't getting any signal at all
Make sure the camera and the monitor are turned on.
- Make sure the power plugs are pushed all the way in.
If the signal is poor, or there is interference
- If there is a microwave oven in use in the path between the camera and monitor, remove the microwave oven or turn it off.
- Make sure the camera and the monitor are within range of each other (range of approximately 500 feet; 150 meters in a clear line of sight).
- If the power LED is on but only voice signal input is detected, the monitor can be in voice-activated mode. Press the Menu button to turn on the screen.
Care and Maintenance
- Keep all parts and accessories out of children's reach.
- Fingerprints or dirt on the lens surface can adversely affect camera performances. Avoid touching the lens surface with your fingers.
- Should the lens become dirty, use a blower to blow off dirt and dust, or a soft, dry cloth to wipe off the lens.
- Keep the camera dry. Precipitation, humidity, and other liquids contain minerals will corrode electronic circuits.
- Do not use or store in dusty, dirty areas.
- Do not store in hot areas. High temperatures can shorten the life of electronic devices and warp or melt certain plastics.
- Do not store in very cold areas. When the system warms up (to its normal temperature), moisture can form inside the case, which may damage electronic circuit boards.
- Do not attempt to open the case. Non-expert handling of the device may damage the system.
- Avoid dropping or strong shocks.
- Operate this product using only with the power supply included or provided as an accessory.
- Do not overload electrical outlets or extension cords this can result in fire or electric shocks.
- Do remember that you are using public airwaves when you use the system and that sound and video may be broadcast to other 2.4 GHz receiving devices. Conversations, even from rooms near the camera, may be broadcast. To protect the privacy of your home, always turn the camera off when not in use.
FCC Statement
This equipment has been tested and found to comply with the limits for a Class B digital device, pursuant to Part 15 of the FCC Rules. These limits are designed to provide reasonable protection against harmful interference in a residential installation. This equipment generates, uses and can radiate radio frequency energy and, if not installed and used in accordance with the instructions, may cause harmful interference to radio communications. However, there is no guarantee that interference will not occur in a particular installation. If this equipment does cause harmful interference to radio or television reception, which can be determined by turning the equipment off and on, the user is encouraged to try to correct the interference by one or more of the following measures:
Reorient or relocate the receiving antenna
Increase the separation between the equipment and receiver
- Connect the equipment into an outlet on a circuit different from that to which the receiver is connected
- Consult the dealer or an experienced radio/TV technician for help
This device complies with Part 15 of the FCC Rules. Operation is subject to the following two conditions: (1) this device may not cause harmful interference, and (2) this device must accept any interference received, including interference that may cause undesired operation.
Caution
- To comply with FCC RF exposure compliance requirements, a separation distance of at least 20cm must be maintained between the antenna of this device and all persons.
- This Transmitter must not be co-located or operating in conjunction with any other antenna or transmitter.
Changes or modifications to this unit not expressly approved by the party responsible for compliance could void the user authority to operate the equipment.
C
Service hotline
In the case of technical problems, contact our Service hotline.
Switzerland: Tel. 0900 00 1675 (national charges, Swisscom at time
of going to print: CHF 2.60/min).
In the case of claims under the terms of guarantee, contact your sales outlet.
EuP2
Power adapter plug
Using the energy-efficient power adapter plug (input 100-240 VAC, output 5 VDC, 2 A) the zero load is approx. 0.18W. The average efficiency is approx. 74.02%. The maximum power consumption is approx. 13.2 W.
Guarantee
SWITEL equipment is produced and tested according to the latest production methods. The implementation of carefully chosen materials and highly developed technologies ensure trouble-free functioning and a long service life. The terms of guarantee do not apply to the batteries or power packs used in the products. The period of guarantee is 24 months from the date of purchase.
All deficiencies related to material or manufacturing errors within the period of guarantee will be redressed free of charge. Rights to claims under the terms of guarantee are annulled following tampering by the purchaser or third parties. Damage caused as the result of improper handling or operation, normal wear and tear, incorrect positioning or storage, improper connection or installation or Acts of God and other external influences are excluded from the terms of guarantee. In the case of complaints, we reserve the right to repair defective parts, replace them or replace the entire device. Replaced parts or devices become our property. Rights to compensation in the case of damage are excluded where there is no evidence of intent or gross negligence by the manufacturer. If your device does show signs of a defect within the period of guarantee, please contact the sales outlet where you purchased the SWITEL device, producing the purchase receipt as evidence. All claims under the terms of guarantee in accordance with this agreement can only be asserted at the sales outlet. No claims under the terms of guarantee can be asserted after a period of two years from the date of purchase and hand-over of the product.
Declaration of Conformity
This device fulfils the requirements stipulated in the Directive 1999/5/EC on radio equipment and telecommunications terminal equipment and the mutual recognition of their conformity.
Conformity with the above mentioned directive is confirmed by the CE mark on the device. To view the complete Declaration of Conformity, please refer to the free download available on our web site www.switel.com.