USER MANUAL EVL8E08Z ELECTROLUX
OBCJNYKBAHE HA KJINEHTN
BnHaHn n3noJ3BaIte opuHaJIHn pe3epBHN qactn.
Korato ce cBbP3BaTe c haun oToPn3npaH oTdeI „ObcnykBaHe“, Tp6Ba da nMaTe noD pBka cnEHaT a HOpmaun: MoJeI, PNC, cepneH Homep.
HOpmaTAtMOKe Da 6bDe OTkpuTa Ha Ta6Jkata C OCHOBn daHHN
IpeDynpexJeHne/BnMaHne-IVHOpMaun 3a6e3oNaChOCT
① O67a INΦopMaζη N CbBETN
HOpMaun3aOKoJHaTa cpea
3ana3BaMe cn npaBOTO Ha n3MeHeHn.
CbDbPjKAHNE
- INHΦOPMALÇIŋA 3A BE3ONACHOCT......3
1.1 Be3onacHocT 3a Deca n Xopa B HepaBHOCTOHO NOLOXKeHne... 3
1.2 067a 6e3onacnoct. 4
- INHCTPYKUN 3A BE3ONACHOCT....7
2.1 HcTanaa.. 7
2.2 EneKtpnuecko Cbbp3BaHe 8
2.3 N3noJ3BaHe 8
2.4 Prnka n nouchTbaHe 9
2.5 YnOTope6a Ha cTbKNeHa nocya...10
2.6BbtpeHNOOCBeTneHnE 10
2.7 O6cnykBaHe 10
2.8 IV3xBbPpIaHe 11
- ONICAHNE HA YPEDA 11
3.1 O6u npereiEi 11
3.2 Akcecoapn 11
- KAK DA BKJIHOBATE IN N3KJIIOHBATE ΦYPHATA 12
4.1 KoHTpOJIeH nAHeJ 12
4.2 EkpaH 13
- INPEДИ ПьРВА YNOTPEБА...14
5.1Пьрвонаалноочтван.....14
5.2 PpBO Cbbp3BaHe 14
- BCEKNIDHEBHA YNOTPEBA 14
6.1 KaKa Da HacTpOnte:Функци
HarpЯBaHe 15
6.2 KaK Da HacTpOnTe:ФункUn 3a HarpaBaHe C MmKpoBbLnH.. 15
6.3 Haunn Ha n3non3BaHe: BbP3 cTapT Ha MInKpoBbJHOBaTa... 16
6.4Kakda hactponTe: POMoU npn rotBeHe 16
6.5Функип 3a 3aToPnIHe...17
7.ФУнКЦИHA YACOBHиKA 20
7.1 Onncahne Ha yHKunTe Ha YacOBnka... 20
7.2 KaKa Da HacTpOnTe:Функци Na YacOBnka... 21
8. KAK DA CE N3NOJ3BA ПИHAДЛЕЖHOCTN 23
8.1 NocTabrHe Ha akcecoapn.. 23
9.ДОПьЛНITEЛНИФУHKЦИ...24
9.1 KaK da 3ana3nte: PpeNoHTaH..24
9.2 3akIIOUBaHe Ha yHKuY 25
9.3 ABTomaTnUHO n3KJIIOuBaHe 25
9.4 OxnaKdau BENTnlaTop 26
10. INPENOPbKN N CbBETN 26
10.1 Ppenopbkn 3a roTBeHe..26
10.2 Ppenopbkn 3a MmKpoBbJHOBO rotBeHe 26
10.3ПоIxOДЯиI ROTBapcN cБДОBE n MaTePnAIn 3a MmKpOBbIHOBa .27
10.4Прелорьчтелнн Habстpoин haMOцноctta 3a pa3лчн BИдовexpaHa... .28
10.5 Ta6n3a roTbeHe 3a n3nITBaunHCTNTyu..29
11. Глики и поочьбаresses... 31
11.1 Belejekn OTHOCHO
NouchTbaHeTo.. 31
11.2 HauHn Ha oTcpaHbAhe: Onopn haCKapata 31
11.3 KaK da noDMeHnte: lamna... 32
12. OTCTPAHRAHE HA HEN3ПРABHOCTN 33
12.1 KaKa Da noCTbNITe, aKO. 33
12.2 HauHn Ha ynpaBJIeHne: KoIObe 3a rpeuKa... 33
12.3ДаHHn 3a cepBn3Ho
obcnyKBaHe.. 34
13. EHEPIMHA EΦEKTUBHOCT 34
13.1 EheproceTbaa.. 34
14. CTPYKTPYA HA MEHIOTO 35
14.1 MeHIO 35
14.2 POnMeHIO 3a: Onu.. 36
14.3 POnMeHIO 3a: HacTpoNka... 36
14.4 NopMeHIO 3a: CepBn3... 36
15. JIECHO E! 37
16.ИЗБЕPETE KЛABИШ 3A БьР3 ДОCTыП! 38
17. ONA3BAHE HA OKOJIHATA CPEIa.... 39
1. UNHΦOPMAÇNЯ 3A BE3OПACHOCT
Ipei moHTnpaHTo n ynoTpe6aTa ha ypeDa BnMaTeJIHO npOyeTe IpeIOCTaBeHnte uHcTpyKcN. IpOn3BoDnteJIrT He e OTROBOpEn 3a HapaHbAHnI NII IOBpeDi B pe3yJITaT Ha HenpaBnHa IHCTaJaCnI NII yNoTpe6a. BuHaRn dpbXte INHcTpyKcNtE Ha 6e30NaCHO n JecHO DoCTbNHO MrcTO 3a cnpabKa B 6bDeSe.
1.1 Be3OpacHocT 3a Deca N Xopa B HepaBHOCTOHO NOJoxHe
To3n ypei moKe da 6bJe n3noJ3BaH OT deua Had 8- roDnshA Bb3paCT, KaKTo IOT JInca C HaMaJIeHN fN3nueckn,
CETINBHN I yMCTBeH N Bb3MOXHOCTN IJI N OT JIua 6e3 OINT IN PO3HaHnA, cAmO aKO Te Ca NOD HabJIODeHne IJI N bDaT IHCTpyKTHupaH N OTHOcHO 6e3OJaCHaTa YNoTpe6a Ha UpeDa N pa3bnpaT Bb3MOxHnTe PnCKOBe. Deua NOD 8-ROdUnHa Bb3pact N Xopa C TeKKn IJI NKOMPJIeKCHN YBpeJdaHn TpRA6Ba Da Ce DbpxKaT DaJIeU OT UpeDa, OCBeH aKO He ca NOD NOCToRHHo HabJIODeHne.
-ДeцаТгябВа Дa 6ьдАТ РОн Habиюдене,За Дa ce rapaHTnpa,Чe He Cn ИграТСурда.
-ДрьжTe BCnчКи ONaKOBKn ДалеYe OT Deça и ИЗXBbРпeTe ONaKOBKNTe NO MeCTHnte паВипа.
- ПРЕДУПЕЖДЕНЕ: Урети нееговпес Достьни чаши ce haropeeяват по Всeme на уnotpe6a. Паerte Deцату и domaшнite Лобимци далец OT урета, korato ce n3noJ3Ba n korato ce oxлajda.
- Ako ypeDbT nMa yCTpoiCtBO 3a DeTcKa 6e3OpaCHOCT, TTo Tp8Ba Da ce aKTHBnpa.
-Дeца He TpЯБВa Дa ИЗВьршВaТ почистваHe Или РODдрьЖka Ha урEDA, korato ca 6e3 hab3Op.
1.2 Ośza 6e3oNaChocT
To3n ypeE npedHa3NaueH cMo 3a rOTBeHe.
To3n ypeE npedHa3NaueH 3a domaunHa ynoTppe6a B 3aTBOpeHn NOMEeHn.
To3n ypei MoKe Da Ce n3NoJ3Ba B Oocn, CtaB XOTeI, CTaB MoteI, KbIu 3a TocTu IpyrN POnO6Hm MeCTa 3a HAcTaHЯBaHe, KbTeTO TOBa n3NoJ3BaHe He HaDbNtAba (cpeiHO) HnBOTo Ha DomaSha ynoTpe6a.
- Camo KBaInΦnCupaHo JInCe Tpr6Ba Da INHCTaJInpa ypeDa N da cMeHn Ka6eNa.
He n3noI3BaIte ypeDa, npeDn da ro IHCTaIInpaTe BbB BrpaDeHaTa KOHcTpyKzna.
- Прази ИЗВьршва themselves Ha KaKBaTO И за e РОДрьжka, ИЗКПЮчete ураза OT eLEKТpo3axpaHbaHeTo.
Ako 3axpaHbauT Ka6eI e NobpeDeH, TOn Tp8Ba Da ce CMeHN OT npOu3BOUnteJIa, HeROB OToPn3InpAH cepBn3eH ZeHTbp IIN KBAJINΦNcnpaHO JInCe, 3a Da Ce n36eRHe ONaCHOCT.
- ПРЕДУПЕЖДЕНЕ: Уверете сe, чу уретe взклочen, празда смени лamпата, за дa ИЗБернete eВЕNTуален TOKов удар.
- ПРЕДУПЕЖДEHNE: Урети Herobinte Дocьпни части ce haropeeяВат по Всeme Ha ynotpe6a. Тразва дa ce BнIMаВи дa ce n36ЯгвдOKOCBaHe Ha harpЯцInte ce eJIemENTI.
BnHa n3noJ3BaIte pKabuIz 3a cypHa npn n3BaJdaHe Inn noCTaBJeHa aKceCoApn IIn cBdoBe 3a neyeHe.
He aKTHBnpaIte MnkpoBbJIHOBaTa 0yHKcIg, KOraTo ypeIbTe npa3eH. MetaJIHnTe YactN BbB BbTpEshHaT aacrMOrat Da Cb3daDat eJeKtpnuecka Ibra.
- MeTaJIHn KOHTeHepn 3a XpaHa n HApNTKn He ce pa3pe7aBaT 3a rOTBeHe B MmKpOBbJHoBa. N3nCKBaHeTo He e npIIOxIMo, aKO pON3BOJTeJIa KOnKpeTn3Ipa pa3Mep I φOpMa Ha MeTaJIHnTe KOHTeHepn IOdXODJaIu 3a MmKpOBbJHoBa φypHa.
- ПЕДУПЕЖДЕHINE: Ако враза пп упьтеньята на враза са поврedingи, урedingн He Трябва дa paбOTи, дOKATO He Бдe поразовен OT KBалфицерано Лице.
- ПЕДУПЕЖDEHNE: Camo KBaIIINФИцрано Лице можеда n3BbPShn KaKBaTO n Дa e cepBn3Ha nIi peMOHTHaОпаця, КОТо BKJIIOUvBa OTCTpaHЯBaHe Ha KAnak, KoITOnOCNrypЯBa 3aIHTa CpeSv n3JaRaHe Ha MKNPOBbJHOBa eHeprna.
- ПЕДУПЕЖДЕHNE: He 3a rgяBaIte TeuHocTи IpyrN XpaHn B 3aTBOpEHN CbdoBe. Te MOraT da ekCpIIOnpaT.
-Използваite само сьдове, контса похори 3a ynotpeba в мнкровлнови Фурни.
- При заюл�е на Храна в пл actmacobи илхартуен Onakobkn,проверяbaite cheTo Фурнata,поради onасноCT ot 3anaIbaine.
- Upei bT e npedHa3NaueH 3a 3aToPJIHe Ha XpaHn I HApNTKn. CyseHcTo Ha XpaHa IIn dpexN HaarpBaHcTo Ha POnIrpRABauN PoJIOKKn, YexN, Tb6N, BnaXHN KbpN I DpyrN POnO6Hm MoKe Da DoBeEe Do pNCK OT HapaHraBaHe, 3aPaJIbAHe IIn NoJap.
- Ako ce OTdelenДIM, ИЗКЛЮЧеу урEDA ot KОнчETO ИЛN OT KOHTaKTA и ДрьжTe BpaTATA 3aTBOpeHa, 3aда NOTuShITE ПламьцNTe, aKO ИMa TAKINBa.
MnKpOBbJIHOBOTO 3aTOpJIHe Ha HAnITKn MoJce da DoBeJe do 3a6aBeHo epyNTuBHO KIneHe. Tp8Ba Da ce BHNMaBa npi pa6ota c KoHTeHepa.
CbIbpxaHneTo Ha 6ytNlKnTe 3a xpaHe He 6ypkaHnte 3a 6e6eShka XpHa ce pa36bPKBa IIn pa3Kna, KaTO TeMnpaTypata IM Tpy6Ba Da ce npOBepn npedn KOHCymaun, 3a Da ce n36erHaT n3rapaHn.
-Яиca c chepynka n zeJI N TBbpo CBapeHn yIza He Tpr6Ba Da ce 3aTOnPraT B ypeDa, Tb' KaTo MorAt da ekCpIIOnpaT, DOpN CJIeD npNKJIouYBaHe Ha 3aIrpRABaHeto B MmKPOBbJInHOBaTa QyPHa.
3a Да свашие НocачITE Ha paфта, пьрво n3дьрnaiteпразнata част Ha HocачITE, a cIeД TOBa I 3aДнЯ Край Ha HocачITE OT CTpaHnUHNTe CTeH. Пocтавete НocачITE Ha paФТаВ оБразна последовateЛноCT.
- YpeiBt TpIbBa Da ce nouNCTBa peIOBHO n Da ce OTCTpaHЯBaT OCTaTbUnte OT XpaHa.
He nouuctbaite ypea c napounctauka.
He n3noI3BaIte rpy6n, a6pa3NBHn, nouchTbau npenapatn nIIIOCTPN, MeaJIHN CTbprAJIKN 3a noUcTBAHe Ha cTBKnoto Ha BpaTaTa, 3aIoTO Te MOraT da NaIpaCKaT NOBbpxHOCTTa n TOBa Da IOBeDe Do CUYNBAHe Ha cTBKnoto.
- HenoДьрЖаHeTo Ha ypeDa B YnCTO CbCTOJHne MoKe Da DOBeDe Do BNoUaBaHe Ha NOBbPxHOCTTa, KOeTO MoKe Da
NOBIIe He6IaROpnTHO Ha JxNBota Ha ypeDa N eBeHTyaJIHNo Da DoBeDe Do OnaCha CNTYaau.
2.ИHCTPYKUN 3A BE3OJACHOCT
2.1Инстацnia

BHIMAHNE!
Cama KbaJnDnucpan HOBK MoKe Da N3BbPm MOHTaJa Ha ypeJa.
MaxheTe BCnUKN ONaKOBKn.
He MoHTnpaIte He H3nOJ3BaITe NOBpeJeH ypeJ.
CneDbaiTe HNCTpyKunTe 3a IHCTaInpaHe, npNJIOKeHN KbM ypeDa.
BHHaHn BHMaBaIte, Korato MeCTnte ypeDa, Tb' KaTo e TeKbK. BuHaR n3NoJ3BaITe npEJa3HN pKaBnU n 3aTBOpEnn o6yBKn.
- He nbpnaite ypea 3a npkka t.
- MoNTupaIte ypeDa Ha 6e3oNacHo I NOxOJaIcMoCTO, KOeTO OTROBapr Ha MOHTaJKHITe N3NUCKBAHn.
- Tp6Ba Da cna3BaTe MHHImaHnHO To pa3CTOHNHe Do npyri ypeNi ycTpoiCTBa.
-Ппдд моHTираTe урета, поверете даль враза Та Na Фурнata ce OTваря 6e3npo6nemHo.
- YpeIbTe o6OpyIbAH c eIeKTpIuecka cnCTema 3a oxJaXdaHe. TpIbBa da ce I3POn3Ba c eIeKTpO3axpaHbAHeTo.
Brrpaenr ypei Tp8bda otrobaa Ha n3nckBaHHa Ta 3a cta6nHocT Ha DIN 68930.
7.1 OnscaHne Ha yHKnIte Ha YacOBnka
Noctabete XpaHaTa Bbpy CtbKHeHaTa NIOUa Ha DbHOTo Ha MmKpOBbJIHaTa φypHa B DoJHaTa
Yact Ha BbTpewHOCTTa.
IocTaBeTe XpaHaTa Bbpxy YHHaB DoJHaTa YaCT Ha BbTpewHOCTTa.
O6bpe Te nn pa36bkpaTe xpaHaTa no CpeaTa Ha BpeMeTo 3a pa3Mpa3raBaHe nn rotBeHe.
OT Bpeme Ha Bpeme pa36bpkBaIte TeuHInTe JCTnA.
Pa36bpbKaIe XpaHaTa IpeDi cepBupaHe.
IokpnTe xpaHaTa npn rotBeHe n npetOnJHHe.
NocTabete JbKuncaTaNbM 6yTuNKaTa NNu YauaTa, KOrato 3aToNnTe HAnNTKn, 3a da ce rapaHTnpa No-do6po pa3nPpeJeHne Ha TOnnHaTa.
Noctabete xpaHATA BbB cyphata 6e3 onakOBKn. NaKeTnpaHnTe roTOBxpaHn MORa Tda 6bDaT NOCTaBeHn BbB cyphata cAmO, KOrato onakOBkata e nOdxOJa 3a MmKpOBbJHOBa cypha (npoYeTe INΦopMaunra TBApxy onakOBkata).

TOrBeHe B MmKpObBnHOBa φypHa
TOrBte B NOKpNT cBd. Ako nckate xpaHaTa da e xpynKaBa, rotBeTe 6e3 Kanak.
He npekajraBaiTe C rotBeHTo Ha JCTnTa, KaTO n36epTe npekajeHO BnCOka HAcTpoiKa Ha MOUHOCTTa N npekaneHO Dblro BpeMe. XpaHaTa MoKe da n3cbxHe, da n3ropn nn da npedn3Bnka noXap.
He n3non3BaIte cypHaTa 3a npnroTbHe Ha yuCa nnOxNIOBn C cepynKn, 3aIoTO Te Morat Da ce npbChaT. PpOdyuHcTe KblTbKa Ha NpBpKeHnte Rua, PpeDn Da rN npTeONnTe.
Ipei ngTBeHe npOdyuYte XpaHaTa C KOKa NIN KOPa HAKOJIKO NbTN.
HapekeTe 3eIeHcyuIte Ha napueHca c noIo6H pa3Mepn.
CneI KaTo I3KJIIOUHTe FpyHaTa, I3BaTeTe XpaHaTa IЯ ocTaBeTe Da npeCTOn HraKOJIko MInHyTu, KaTo Taka ToPnIHaTa ige ce pa3nPpeJen paBHomepHo.

Pa3mpa3raBaHe B MmKpoBbJIHOBa φypha
IocTaBeTe 3aMpa3eHaTaNHepa3OJaKOBaHa XpaHa Bbpxy MaJka Obphata HAO6paTHO YHnna CbC CbD NOd HeR, Ha NocTaBkata 3a pa3Mpa3BaHe NNPiactMaCOBO cNTO, 3a da ce cb6npa TeUHOCTTa OT pa3Mp3raVe.
Otctpahepepa3mpa3eHnTe napyeta nocJeobateJHo.
3a nprirotbIHe Ha nIOObe H 3eJeHcyuN 6e3 Da rpa3Mpa3BaTe, MoKe da n3nON3BATE MIKPOBbJIHOBaTa ypHa Ha NO-BNCOKa MOUHOCT.
10.3ПоIxODЯи roTbapcKn cIdoBe n MaTePnaJIn 3a MKNKPOBbJIHOBA
I3noJ3BaIte cAmo noJxOJaun roTbapckn cbIOBe n MaTePnaHn 3a MInKpoBbJIHOBaTa cypHa. I3noJ3BaIte dOnHata Ta6nua 3a cnpaVBka.
PpOBepeTe CneuKauuTe Ha cBIOBeTe 3a rotBeHe / MaTePnAna npeni ynoTpe6a.
YacOBHnKbT He e HAcTpOe HAcTpOte YacOBH

PeweHne
PpOBepTe daHn fypHaTa e Cbbp3aHa npaBUNHO KbM eJeKtpo3axpaHbAHeTo.
BpataHe e do6pe 3aTbopeHa. 3aTbopeTe nIbTHo BpaTaTa.
Ppea3nteIe n3ropaI. PpOBepeTe daII npE
Ia3nteIe npuHnHa
3a Hen3npabHocCTta. Ako npo6nembT ce noBn OTHOBO, obaTe ce Ha KBaINuIpuH TexHNK.
Функцята „3aцида 3a Deца" e BkHIOueHa. BuKt
rnaBa,Mehu",noMeHto3a:OnuN.

KOMNoHeHTN

OncanHe PeWeHne
Jaamnukkatae n3ropa. Cmehe Ta

3a npoDpo6HocTn
BIXTe rnaBa,ΓpIka nNouchTbaHe",Haun Ha noDMraHa: lamna.
12.2 HauHH ha ynpaBJIeHne: KodObe 3a rpeIka
Pn haJIyHe Ha coΦTyepHa rpeuKa Ha dinCnIe ce n3BexKa cbo6eHne 3a rpeuKa.
B To3n pa3dJI ue otKpHeTe cncsbK c npo6JIeMn, KOInTo MoKe da pa3peuHTe cam.
- ENERGETICKÁ UČINNOST 69
13.1 Uspora energia 69
- STRUKTURA NABIDKY 70
14.1 Nabidka 70
14.2 Dilci nabidka pro: Funkce....70
14.3 Dilić nabídka pro: Nastavení...... 71
14.4 Podnabidka pro: Obssluha....71
15.JE TO SNADNEI. 71
16. VYUŽIJTE ZKRATKUI... 73
17. POZNÁMKY K OCHRANE ZIVOTNIHO PROSTREDI 73
WE'RE THINKING OF YOU
Thank you for purchasing an Electrolux appliance. You've chosen a product that brings with it decades of professional experience and innovation. Ingenious and stylish, it has been designed with you in mind. So whenever you use it, you can be safe in the knowledge that you'll get great results every time.
Welcome to Electrolux.
Visit our website to:

Get usage advice, brochures, trouble shooter, service and repair information: www.electrolux.com/support

Register your product for better service: www.registerelectrolux.com

Buy Accessories, Consumables and Original spare parts for your appliance: www.electrolux.com/shop
CUSTOMER CARE AND SERVICE
Always use original spare parts.
When contacting our Authorised Service Centre, ensure that you have the following data available: Model, PNC, Serial Number.
The information can be found on the rating plate.
Warning / Caution-Safety information
i General information and tips
Environmental information
Subject to change without notice.
CONTENTS
1.SAFETY INFORMATION. 112
1.1 Children and vulnerable people safety 112
1.2 General Safety 113
2.SAFETYINSTRUCTIONS. 115
2.1 Installation 115
2.2 Electrical connection 116
2.3 Use 117
2.4 Care and cleaning. 118
2.5 Glassware use. 118
2.6 Internal lighting 118
2.7 Service 119
2.8 Disposal 119
3.PRODUCT DESCRIPTION. 119
3.1 General overview.. 119
3.2 Accessories 119
- HOW TO TURN OVEN ON AND OFF.... 120
4.1 Control panel 120
4.2 Display 121
- BEFORE FIRST USE 122
5.1 Initial Cleaning 122
5.2 First connection 122
6.DAILYUSE 122
6.1 How to set: Heating functions.....122
6.2 How to set: Microwave heating functions 123
6.3 How to use: Microwave quick start 12
6.4 How to set: Assisted Cooking....124
6.5 Heating functions 125
- CLOCK FUNCTIONS 128
7.1 Clock functions description....128
7.2 How to set: Clock functions 128
-
HOW TO USE: ACCESSORIES 130
8.1 Inserting accessories.. 130
-
ADDITIONAL FUNCTIONS 131
9.1 How to save: Favourites 131
9.2 Function lock 131
9.3 Automatic switch-off 132
9.4 Cooling fan 132
- HINTS AND TIPS 132
10.1 Cooking recommendations.....132
10.2 Microwave recommendations ...133
10.3 Microwave suitable cookware and materials 133
10.4 Recommended power settings for different kinds of food 134
10.5 Cooking tables for test institutes 135
- CARE AND CLEANING 137
11.1 Notes on cleaning. 137
11.2 How to remove: Shelf supports .137
11.3 How to replace: Lamp. 138
- TROUBLESHOOTING 138
12.1 What to do if 138
12.2 How to manage: Error codes....139
12.3 Service data 140
- ENERGY EFFICIENCY 140
13.1 Energy saving. 140
14.MENU STRUCTURE. 141
14.1 Menu 141
14.2 Submenu for: Options.. 141
14.3 Submenu for: Setup 142
14.4 Submenu for: Service 142
- IT'S EASY! 142
- TAKE A SHORTCUT! 143
- ENVIRONMENTAL CONCERNS. 144
Before the installation and use of the appliance, carefully read the supplied instructions. The manufacturer is not responsible for any injuries or damage that are the result of incorrect installation or usage. Always keep the instructions in a safe and accessible location for future reference.
1.1 Children and vulnerable people safety
- This appliance can be used by children aged from 8 years and above and persons with reduced physical, sensory or mental capabilities or lack of experience and knowledge if they have been given supervision or instruction concerning the use of the appliance in a safe way and understand the hazards involved. Children of less than 8 years of age and persons with very extensive and complex disabilities shall
be kept away from the appliance unless continuously supervised.
- Children should be supervised to ensure that they do not play with the appliance.
- Keep all packaging away from children and dispose of it appropriately.
- WARNING: The appliance and its accessible parts become hot during use. Keep children and pets away from the appliance when in use and when cooling down.
- If the appliance has a child safety device, it should be activated.
- Children shall not carry out cleaning and user maintenance of the appliance without supervision.
1.2 General Safety
- This appliance is for cooking purposes only.
- This appliance is designed for single household domestic use in an indoor environment.
- This appliance may be used in, offices, hotel guest rooms, bed & breakfast guest rooms, farm guest houses and other similar accommodation where such use does not exceed (average) domestic usage levels.
- Only a qualified person must install this appliance and replace the cable.
- Do not use the appliance before installing it in the built-in structure.
- Disconnect the appliance from the power supply before carrying out any maintenance.
- If the mains power supply cable is damaged, it must be replaced by the manufacturer, its Authorised Service Centre or similarly qualified persons to avoid an electrical hazard.
-
WARNING: Ensure that the appliance is switched off before replacing the lamp to avoid the possibility of electric shock.
-
WARNING: The appliance and its accessible parts become hot during use. Care should be taken to avoid touching heating elements.
- Always use oven gloves to remove or insert accessories or ovenware.
- Do not activate the microwave function when the appliance is empty. Metal parts inside the cavity can create electric arcing.
- Metallic containers for food and beverages are not allowed during microwave cooking. This requirement is not applicable if the manufacturer specifies size and shape of metallic containers suitable for microwave cooking.
- WARNING: If the door or door seals are damaged, the appliance must not be operated until it has been repaired by a qualified person.
- WARNING: Only a qualified person can carry out any service or repair operation that involves the removal of a cover which gives protection against exposure to microwave energy.
- WARNING: Do not heat liquids and other foods in sealed containers. They are liable to explode.
- Use only utensils that are suitable for use in microwave ovens.
- When heating food in plastic or paper containers, observe the appliance due to the possibility of ignition.
- The appliance is intended for heating food and beverages. Drying of food or clothing and heating of warming pads, slippers, sponges, damp cloth and similar may lead to risk of injury, ignition or fire.
- If smoke is emitted, switch off or unplug the appliance and keep the door closed in order to stifle any flames.
-
Microwave heating of beverages can result in delayed eruptive boiling. Care must be taken when handling the container.
-
The contents of feeding bottles and baby food jars shall be stirred or shaken and the temperature checked before consumption, in order to avoid burns.
- Eggs in their shell and whole hard-boiled eggs should not be heated in the appliance since they may explode, even after microwave heating has ended.
- To remove the shelf supports first pull the front of the shelf support and then the rear end away from the side walls. Install the shelf supports in the opposite sequence.
- The appliance should be cleaned regularly and any food deposits removed.
- Do not use a steam cleaner to clean the appliance.
- Do not use harsh abrasive cleaners or sharp metal scrapers to clean the glass door since they can scratch the surface, which may result in shattering of the glass.
- Failure to maintain the appliance in a clean condition could lead to deterioration of the surface that could adversely affect the life of the appliance and possibly result in a hazardous situation.
2. SAFETY INSTRUCTIONS
2.1 Installation

WARNING!
Only a qualified person must install this appliance.
- Remove all the packaging.
- Do not install or use a damaged appliance.
- Follow the installation instructions supplied with the appliance.
Always take care when moving the appliance as it is heavy. Always use safety gloves and enclosed footwear.
- Do not pull the appliance by the handle.
Install the appliance in a safe and suitable place that meets installation requirements.
- Keep the minimum distance from other appliances and units.
- Before mounting the appliance, check if the oven door opens without restraint.
- The appliance is equipped with an electric cooling system. It must be operated with the electric power supply.
- The built-in unit must meet the stability requirements of DIN 68930.
| Cabinet minimum height (Cabinet under the work-top minimum height) | 444 (460) mm |
| Cabinet width 560 mm | |
| Cabinet depth 550 (550) mm | |
| Height of the front of the appliance 455 mm | |
| Height of the back of the appliance 440 mm | |
| Width of the front of the appliance 595 mm | |
| Width of the back of the appliance 559 mm | |
| Depth of the appliance 567 mm | |
| Built in depth of the appliance 546 mm | |
| Depth with open door 882 mm | |
| Ventilation opening minimum size. Opening placed on the bottom rear side | 560x20 mm |
| Mains supply cable length. Cable is placed in the right corner of the back side | 1500 mm |
| Mounting screws 3.5x25 mm | |
2.2 Electrical connection

WARNING!
Risk of fire and electric shock.
- All electrical connections should be made by a qualified electrician.
- The appliance must be earthed.
- Make sure that the parameters on the rating plate are compatible with the electrical ratings of the mains power supply.
Always use a correctly installed shockproof socket.
- Do not use multi-plug adapters and extension cables.
- Make sure not to cause damage to the mains plug and to the mains cable. Should the mains cable need to be replaced, this must be carried out by our Authorised Service Centre.
- Do not let mains cables touch or come near the appliance door or the niche below the appliance, especially when it operates or the door is hot.
-
The shock protection of live and insulated parts must be fastened in such a way that it cannot be removed without tools.
-
Connect the mains plug to the mains socket only at the end of the installation. Make sure that there is access to the mains plug after the installation.
- If the mains socket is loose, do not connect the mains plug.
- Do not pull the mains cable to disconnect the appliance. Always pull the mains plug.
- Use only correct isolation devices: line protecting cut-outs, fuses (screw type fuses removed from the holder), earth leakage trips and contactors.
- The electrical installation must have an isolation device which lets you disconnect the appliance from the mains at all poles. The isolation device must have a contact opening width of minimum 3 mm.
- This appliance is supplied with a main plug and a main cable.
2.3 Use

WARNING!
Risk of injury, burns and electric shock or explosion.
- Do not change the specification of this appliance.
- Make sure that the ventilation openings are not blocked.
- Do not let the appliance stay unattended during operation.
- Deactivate the appliance after each use.
- Be careful when you open the appliance door while the appliance is in operation. Hot air can release.
- Do not operate the appliance with wet hands or when it has contact with water.
- Do not apply pressure on the open door.
- Do not use the appliance as a work surface or as a storage surface.
- Open the appliance door carefully. The use of ingredients with alcohol can cause a mixture of alcohol and air.
- Do not let sparks or open flames to come in contact with the appliance when you open the door.
- Do not put flammable products or items that are wet with flammable products in, near or on the appliance.
- Do not use microwave function to preheat the oven.

WARNING!
Risk of damage to the appliance.
- To prevent damage or discoloration to the enamel:
- do not put aluminium foil directly on the bottom of cavity of the appliance.
- do not put water directly into the hot appliance.
- do not keep moist dishes and food in the appliance after you finish the cooking.
- be careful when you remove or install the accessories.
- Discoloration of the enamel or stainless steel has no effect on the performance of the appliance.
- Use a deep pan for moist cakes. Fruit juices cause stains that can be permanent.
- Always cook with the appliance door closed.
- If the appliance is installed behind a furniture panel (e.g. a door) make sure the door is never closed when the appliance operates. Heat and moisture can build up behind a closed furniture panel and cause subsequent damage to the appliance, the housing unit or the floor. Do not close the furniture panel until the appliance has cooled down completely after use.
2.4 Care and cleaning

WARNING!
Risk of injury, fire, or damage to the appliance.
- Before maintenance, deactivate the appliance and disconnect the mains plug from the mains socket.
- Make sure the appliance is cold. There is the risk that the glass panels can break.
- Replace immediately the door glass panels when they are damaged. Contact the Authorised Service Centre.
- Be careful when you remove the door from the appliance. The door is heavy!
- Make sure the cavity and the door are wiped dry after each use. Steam produced during the operation of the appliance condensates on cavity walls and can cause corrosion.
- Clean regularly the appliance to prevent the deterioration of the surface material.
- Fat and food remaining in the appliance can cause fire and electric arcing when the microwave function operates.
- Clean the appliance with a moist soft cloth. Use only neutral detergents. Do not use abrasive products, abrasive cleaning pads, solvents or metal objects.
- If you use an oven spray, follow the safety instructions on its packaging.
2.5 Glassware use
Handling your glassware without an appropriate degree of care could result in breakage, chipping, cracking or severe scratching:
- Do not spill cold water or other liquids on the glassware because a sudden temperature drop may cause immediate breakage of the glass. Broken glass pieces may be extremely sharp and difficult to locate.
- Do not place hot glassware on a wet or cool surface, directly on countertop or metal surface, or in sink; or handle hot glassware with wet cloth.
- Do not use or repair any glassware that is chipped, cracked or severely scratched.
- Do not drop or hit glassware against a hard object or strike utensils against it.
- Do not heat empty or nearly empty glassware in microwave, or overheat oil or butter in microwave (use minimum amount of cooking time).
Allow hot glassware to cool on a cooling rack, a potholder or a dry cloth. Make sure that the glassware is cool enough before washing, refrigerating or freezing.
Avoid handling hot glassware (including ware with silicone gripping surfaces) without dry potholders.
Avoid microwave misuse (i.e. running the oven without any load or small load).
2.6 Internal lighting

WARNING!
Risk of electric shock.
- Concerning the lamp(s) inside this product and spare part lamps sold separately: These lamps are intended to withstand extreme physical conditions in household appliances, such as temperature, vibration, humidity, or are intended to signal information about the operational status of the appliance. They are not intended to be used in other applications and are not suitable for household room illumination.
- This product contains a light source of energy efficiency class G.
- Use only lamps with the same specifications.
2.7 Service
- To repair the appliance contact the Authorised Service Centre.
- Use original spare parts only.
2.8 Disposal

WARNING!
Risk of injury or suffocation.
- Contact your municipal authority for information on how to dispose of the appliance.
- Disconnect the appliance from the mains supply.
- Cut off the mains electrical cable close to the appliance and dispose of it.
- Remove the door catch to prevent children or pets from becoming trapped in the appliance.
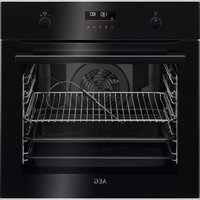
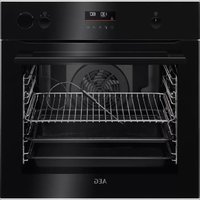
3.PRODUCT DESCRIPTION
3.1 General overview

Control panel
Display
Heating element
Microwave generator
Lamp
Fan
Shelf support, removable
Shelf positions
3.2 Accessories
Wire shelf
For cookware, cake tins, roasts.
Baking tray
For cakes and biscuits.


Microwave bottom glass plate
To prepare food in microwave mode.

4. HOW TO TURN OVEN ON AND OFF
4.1 Control panel

| 1 | ON / OFF Press and hold to turn the oven on and off. |
| 2 | Menu Lists the oven functions. |
| 3 | Favourites Lists the favourite settings. |
| 4 | Display Shows the current settings of the oven. |
| 5 | Lamp switch To turn the lamp on and off. |
| 6 | Fast Heat Up To turn on and off the function: Fast Heat Up. |
| 7 | Microwave quick start To turn on microwave function (1000 W and 30 seconds). |
| Press Move | ←→ | 3s
Press and hold |
| Touch the surface with finger-tip. | Slide fingertip over the surface. | Touch the surface for 3 seconds. |
4.2 Display
| 12:301
150°C
STARTS | After turning on, the display shows the main screen with the heating function and the default temperature. |
| 12:34 | If you do not use the oven for 2 minutes, the display goes to standby. |
| 12:301
150°C
11min·STOP | When you cook, the display shows the set functions and other available options. |
| A
12:30
150°C
START
E D C B | Display with key functions set.
A. Time of day
B. START/STOP
C. Temperature / Microwave timer
D. Heating functions
E. Timer |
| Display indicators |
| Basic indicators - to navigate on the display. |
| OK
To confirm the selection / setting. | <
To go one level back in the menu. | →
To undo the last action. | To turn the options on and off. |
| Sound alarm function indicators - when the set time of cooking ends, the signal sounds. |
| The function is on. | STOP
The function is on.
Cooking stops automatically. | Sound alarm is off. |
| Timer indicators |
| To set the function: Delayed start. | To cancel the setting. |
5. BEFORE FIRST USE

WARNING!
Refer to Safety chapters.
5.1 Initial Cleaning
| | |
| Step 1 Step 2 Step 3 | | |
| Remove all accessories and removable shelf supports from the oven. | Clean the oven and the accessories with a soft cloth, warm water and a mild detergent. | Place the accessories and the removable shelf supports in the oven. |
5.2 First connection
The display shows welcome message after the first connection.
You have to set: Language, Display brightness, Key tones, Buzzer volume, Time of day.
6. DAILY USE

WARNING!
Refer to Safety chapters.
6.1 How to set: Heating functions
| Step 1 Turn | on the oven. The display shows the default heating function. |
| Step 2 Press | the symbol of the heating function to enter the submenu. |
Take a shortcut!
| Step 3 | Select the heating function and press: OK the display shows: temperature. |
| Step 4 | Set: temperature. Press: OK |
| Step 5 | Press: START |
| STOP - press to turn off the heating function. |
| Step 6 Turn off the oven. |

6.2 How to set: Microwave heating functions
| Step 1 Remove all accessories and turn on the oven.Insert microwave bottom glass plate. |
| Step 2 Press the symbol of the heating function to enter the submenu. |
| Step 3 | Select the microwave heating function and press OK The display shows: microwave power. |
| Step 4 | Set: microwave power. Press OK |
| Step 5 | Press: START |
| STOP - press to turn off the function. |
| Step 6 Turn off the oven. |
The maximum time of microwave functions depends on microwave power you set:
| MICROWAVE POWER MAXIMUM TIME | |
| 100 - 600 W 59 minutes | |
| More than 600 W 7 minutes | |
| If you open the door, the function stops. To start it again, press START |
Take a shortcut!

6.3 How to use: Microwave quick start
| Step 1 | Press and hold: The microwave runs for 30 s. |
| Step 2 To | extend the cooking time: |
| Press on the running time value to go to the time settings. Set the cooking time. | Press +30 s. |
| The microwave can be switched on at any time with: Microwave quick start. |
6.4 How to set: Assisted Cooking
Every dish in this submenu has a recommended function and temperature. You can adjust the time and the temperature.
For some of the dishes you can also cook with:
Weight Automatic
| Step 1 Turn on the oven. |
| Step 2 Press: |
| Step 3 Press:Enter:Assisted Cooking. |
| Step 4 Choose a dish or a food type. |
| Step 5 Press:START |
Take a shortcut!

6.5 Heating functions
STANDARD
| Heating function Application |
| Grill | To grill thin pieces of food and to toast bread. |
| Turbo Grilling | To roast large meat joints or poultry with bones on one shelf position. To make gratins and to brown. |
| True Fan Cooking | To bake on up to two shelf positions at the same time and to dry food. Set the temperature 20 - 40 °C lower than for Conventional Cooking. |
| Frozen Foods | To make convenience food (e.g., french fries, potato wedges or spring rolls) crispy. |
| Conventional Cooking | To bake and roast food on one shelf position. |
| Pizza Function | To bake pizza. To make intensive browning and a crispy bottom. |
| Bottom Heat | To bake cakes with crispy bottom and to preserve food. |
SPECIALS
| Heating function Application |
| Preserving | To preserve vegetables (e.g., pickles). |
| Dehydrating | To dry sliced fruit, vegetables and mushrooms. |
| Plate Warming | To preheat plates for serving. |
| Dough Proving | To speed up the rising of the yeast dough. It prevents dough surface from drying and keeps the dough elastic. |
| Au Gratin | For dishes such as lasagna or potato gratin. To make gratins and to brown. |
| Slow Cooking | To prepare tender, succulent roasts. |
| Keep Warm | To keep food warm. |
| Bread Baking | Use this function to prepare bread and bread rolls with a very good professional-like result in terms of crispiness, colour and crust gloss. |
MICROWAVE
| Heating function Application |
| Microwave | Heating up, cooking, power range: 100 - 1000 W |
| Defrost | Defrosting meat, fish, cakes, power range: 100 - 200 W |
| Reheat | Heating up pre-prepared meals and delicate food, power range: 300 - 700 W |
| Liquid | Heating up drinks and soups, power range: 800 - 1000 W |
| Heating function Application |
| True Fan Cooking + MW | Baking on one shelf position. The function with MW boost. |
| Conventional Cooking + MW | Baking and roasting food on one shelf position. The function with MW boost. |
| Grill + MW | To cook food in a short time and to brown it. The function with MW boost. |
| Turbo Grilling + MW | To roast large pieces of meat on one level. To make gratins and to brown. The function with MW boost. |
7. CLOCK FUNCTIONS
7.1 Clock functions description
| Clock function Application |
| Cooking time To set the length of cooking. Maximum is 23 h 59 min.
Maximum for combined functions (microwave + standard) is 119 min 59 sec. |
| End action To set what happens when the timer ends counting. |
| Delayed start To postpone the start and / or end of cooking. |
| Time extension To extend cooking time. |
| Reminder To set a count down. Maximum is 23 h 59 min. This function has no effect on the operation of the oven. |
| Uptimer Monitors how long the function operates. Uptimer - you can turn it on and off. |
End action and Delayed start are not available for microwave functions.
7.2 How to set: Clock functions
| How to set the clock |
| Step 1 Press: Time of day. |
| Step 2 | Set the time. Press: OK |
| How to set cooking time |
| Step 1 Chose the heating function and set the temperature. |
| Step 2 | Press: ⋒ |
| Step 3 | Set the time. Press: OK |
Take a shortcut!
How to choose end option
Step 1 Choose the heating function and set the temperature.
Step 2 Press: .
Step 3 Set the cooking time.
Step 4 Press: .
Step 5 Press: End action.
Step 6 Choose the preferred: End action.
Step 7 Press: . Repeat the action until the display shows the main screen.
How to delay start of cooking
Step 1 Set the heating function and the temperature.
Step 2 Press:
Step 3 Set the cooking time.
Step 4 Press: .
Step 5 Press: Delayed start.
Step 6 Choose the value.
Step 7 Press: . Repeat the action until the display shows the main screen.
How to extend cooking time
When 10% of cooking time is left and the food seems not to be ready, you can extend cooking time. You can also change the heating function.
| How to extend cooking time |
| Press +1min to extend the cooking time. |
| How to change timer settings |
| Step 1 | Press: ⋒ |
| Step 2 Set the timer value. |
| Step 3 | Press: OK |
| You can change the set time during cooking at any time. |
8. HOW TO USE: ACCESSORIES
8.1 Inserting accessories
Use only suitable cookware and material. Refer to "Hints and tips" chapter, Microwave suitable cookware and materials.
A small indentation at the top increases safety. The indentations are also anti-tip devices. The high rim around the shelf prevents cookware from slipping of the shelf.
| Wire shelf:
Push the shelf between the guide bars of the shelf support and make sure that the feet point down. | |
| Baking tray:
Push the tray between the guide bars of the shelf support. | |
| Wire shelf, Baking tray:
Push the tray between the guide bars of the shelf support and the wire shelf on the guide bars above. | |
| Microwave bottom glass plate:
Use the microwave bottom glass plate only with microwave function. It is not suitable for combined microwave function (e.g. microwave grilling).
Put the accessory on the bottom of the cavity.
You can put the food directly on the microwave bottom glass plate. | |
9. ADDITIONAL FUNCTIONS
9.1 How to save: Favourites
You can save your favourite settings, such as the heating function, the cooking time, the temperature or the cleaning function. You can save 3 favourite settings.
| Step 1 Turn on the oven. |
| Step 2 Select the preferred setting. |
| Step 3 Press: Select: Favourites. |
| Step 4 Select: Save current settings. |
| Step 5 Press + to add the setting to the list of: Favourites. Press OK |
| - press to reset the setting.
- press to cancel the setting. |
9.2 Function lock
This function prevents an accidental change of the heating function.
| Step 1 Turn on the oven. |
| Step 2 Set a heating function. |
| Step 3 ☆,press at the same time to turn on the function. |
| To turn off the function repeat step 3. |
9.3 Automatic switch-off
For safety reasons the oven turns off after some time, if a heating function works and you do not change any settings.
| (℃) (h) | 1 |
| 30 - 115 12.5 | |
| 120 - 195 8.5 | |
| 200 - 230 5.5 | |
The Automatic switch-off does not work with the functions: Light, End time, Slow Cooking.
9.4 Cooling fan
When the oven operates, the cooling fan turns on automatically to keep the surfaces of the oven cool. If you turn off the oven, the cooling fan can continue to operate until the oven cools down.
10. HINTS AND TIPS
10.1 Cooking recommendations
| i |
| The temperature and cooking times in the tables are guidelines only. They depend on the recipes and the quality and quantity of the ingredients used.Your oven may bake or roast differently to the oven you had before. The hints below show recommended settings for temperature, cooking time and shelf position for specific types of the food.If you cannot find the settings for a special recipe, look for the similar one.For more cooking recommendations refer to cooking tables on our website. To find the Cooking Hints check the PNC number on the rating plate on the front frame of the oven cavity. |
10.2 Microwave recommendations
① Let's cook!
Place the food on the microwave bottom glass plate on the bottom of the cavity.
Place the food on a plate on the bottom of the cavity.
Turn or stir the food halfway through the defrosting and cooking time.
Stir liquid dishes from time to time.
Stir the food before serving.
Cover the food for cooking and reheating.
Put the spoon to the bottle or glass when heating drinks to ensure better heat distribution.
Put the food into the oven without packaging. The packaged ready meals can be put into the oven only when the packaging is microwave safe (check information on the packaging).

Microwave cooking
Cook food covered. If you want to keep a crust cook food without a cover.
Do not overcook the dishes by setting the power and time too high. The food can dry out, burn or cause fire.
Do not use the oven to cook eggs or snails in their shells, because they can burst. Pierce the yolk of fried egg before reheating it.
Pierce food with skin or peel several times before cooking.
Cut vegetables into similar-sized pieces.
After you turn off the oven, take the food out and let it stand for a few minutes to allow the heat distribute evenly.

Microwave defrosting
Put the frozen, unwrapped food on a small upturned plate with a container below it, or on a defrosting rack or plastic sieve so that the defrosting liquid can leak out.
Remove defrosted pieces subsequently.
To cook fruit and vegetables without defrosting them first, you can use a higher microwave power.
10.3 Microwave suitable cookware and materials
For the microwave use only suitable cookware and materials. Use below table as a reference.
Check the cookware / material specification before use.
| Cookware / Material | ※ | 图鉴 | 图鉴 |
| Ovenproof glass and porcelain with no metal components, e.g. heat-proof glass | ✓ | ✓ | ✓ |
| Non-ovenproof glass and porcelain without any silver, gold, platinum or other metal decorations | ✓ | X | X |
| Glass and glass ceramic made of ovenproof / frost-proof material | ✓ | ✓ | ✓ |
| Cookware / Material | ※ | 国語 | |
| Ovenproof ceramic and earthen-ware without any quartz or metal components and glazes which contain metal | √ | √ | √ |
| Ceramic, porcelain and earthen-ware with unglazed bottom or with small holes, e.g. on handles | XXXX | | |
| Heat-resistant plastic up to 200℃ | √ | √ | X |
| Cardboard, paper XX | √ | | |
| Clingfilm XX | √ | | |
| Microwave clingfilm X | √ | √ | |
| Roasting dishes made of metal, e.g. enamel, cast iron | XXXX | | |
| Baking tins, black lacquer or sili-con-coated | XXXX | | |
| Baking tray XXX | | | |
| Wire shelf XX | | | √ |
| Microwave glass bottom plate X | √ | √ | |
| Cookware for microwave use, e.g. crisp pan | X | √ | X |
10.4 Recommended power settings for different kinds of food
The data in the table is for guidance only.
| 700 - 1000 W |
| Searing at the start of the cooking process Heating liquids | |
| 500 - 600 W |
| Cooking vegetables | Cooking egg dishes | Simmering stews | Heating one-plate meals | Defrosting and heating frozen meals |
| 300 - 400 W |
| Melting cheese, chocolate, butter | Simmering rice | Heating baby food | Cooking / Heating delicate food | Continuing cooking |
| 100 - 200 W |
| Defrosting bread | Defrosting fruit and cakes | Defrosting cheese, cream, butter | Defrosting meat, fish |
10.5 Cooking tables for test institutes
Tests according to IEC 60705.
| Use wire shelf unless otherwise specified. |
| MICROWAVE FUNCTION | POWER (W) | (kg) | | (min) | i |
| Sponge cake 600 0.475 Bottom 7 | -9 Turn container | | around by 1/4, half-way through the cooking time. |
| Meatloaf 400 0.9 2 25 | -32 Turn container | | around by 1/4, half-way through the cooking time. |
| Egg custard 500 1 Bottom 18 - | | | |
| Meat defrosting 200 | 0.5 Bottom 7 | -8 Turn the meat up- | | side down halfway through the cooking time. |
| Use the wire shelf. |
| MICRO-WAVE COMBI FUNC-TION | | POWER (W) (°C) (min) | | | |
| Cake, 0.7 kg | Conven-tional Cook-ing + MW | 100 200 2 | 23 | -27 | Turn container | around by 1/4, halfway through the cooking time. |
| Potato gratin, 1.1 kg | True Fan Cooking + MW | 300 180 2 | 38 | -42 | Turn container | around by 1/4, halfway through the cooking time. |
| Chicken, 1.1 kg | Turbo Grill-ing + MW | 400 230 1 | 35 | -40 | Put the meat in | round glass container and turn it upside down half-way through the cooking time. |
11. CARE AND CLEANING

WARNING!
Refer to Safety chapters.
11.1 Notes on cleaning
| Cleaning Agents | Clean the front of the oven with a soft cloth with warm water and a mild detergent. |
| Use a cleaning solution to clean metal surfaces. |
| Clean stains with a mild detergent. |
| Everyday Use | Clean the cavity after each use. Fat accumulation or other residue may cause fire.
Clean the oven ceiling carefully from residue and fat. |
| Do not store the food in the oven for longer than 20 minutes. Dry the cavity with a soft cloth after each use. |
| Accessories | Clean all accessories after each use and let them dry. Use a soft cloth with warm water and a mild detergent. Do not clean the accessories in a dishwasher. |
| Do not clean the non-stick accessories using abrasive cleaner or sharp-edged objects. |
11.2 How to remove: Shelf supports
Remove the shelf supports to clean the oven.
| Step 1 Turn off the oven and wait until it is cold. |
| Step 2 Carefully pull the shelf supports up and out of the front catch. | | |
| Step 3 Pull the front end of the shelf support away from the side wall. | | |
| Step 4 Pull the supports out of the rear catch. | | |
Install the shelf supports in the opposite sequence.
11.3 How to replace: Lamp

WARNING!
Risk of electric shock.
The lamp can be hot.
Always hold the halogen lamp with a cloth to prevent grease residue from burning on the lamp.
| Before you replace the lamp: |
| Step 1 Step 2 Step | 3 | |
| Turn off the oven. Wait until the oven is cold. | Disconnect the oven from the mains. | Put a cloth on the bottom of the cavity. |
Top lamp
| Step 1 Turn the glass cover to remove it. |
| Step 2 Clean the glass cover. |
| Step 3 Replace the lamp with a suitable 300 °C heat-resistant lamp. |
| Step 4 Install the glass cover. |
12. TROUBLESHOOTING

WARNING!
Refer to Safety chapters.
12.1 What to do if...
| The oven does not turn on or does not heat up |
| ?Possible cause | ?Remedy |
| The oven is not connected to an electrical sup- ply or it is connected incorrectly. | Check if the oven is correctly connected to the electrical supply. |
| Possible cause | Remedy |
| The clock is not set. Set the clock, for details refer to "Clock Functions" chapter, How to set: Clock functions. |
| The door is not closed correctly. Fully close the door. |
| The fuse is blown. Make sure the fuse is the cause of the problem. If the problem recurs, contact a qualified electrician. |
| The oven Child Lock is on. Refer to "Menu" chapter, Submenu for: Options. |
| Components |
| Description Remedy | |
| The lamp is burnt out. Replace the lamp, for details refer to "Care and Cleaning" chapter, How to replace: Lamp. |
12.2 How to manage: Error codes
When the software error occurs, the display shows error message.
In this section, you will find the list of the problems that you can handle on your own.
| Code and description Remedy | |
| F240, F439 - the touch fields on the display do not work properly. | Clean the surface of the display. Make sure there is no dirt on the touch fields. |
| F908 - the oven system cannot connect with the control panel. | Turn the oven off and on. |
When one of these error messages continues to appear on the display, it means a faulty subsystem may have been disabled. In such a case contact your dealer or an Authorized Service Centre. If one of these errors occurs, the rest of the oven functions will continue to work as usually.
| Code and description Remedy | |
| F131 - the temperature of magnetron sensor is too high. | Turn the oven off and wait until it cools down.
Turn the oven on again. |
12.3 Service data
If you cannot find a solution to the problem yourself, contact your dealer or an Authorised Service Centre.
The necessary data for the service centre is on the rating plate. The rating plate is on the front frame of the oven cavity. Do not remove the rating plate from the oven cavity.
| We recommend that you write the data here: |
| Model (MOD.) | |
| Product number (PNC) | |
| Serial number (S.N.) | |
13. ENERGY EFFICIENCY
13.1 Energy saving
Make sure that the oven door is closed when the oven operates. Do not open the oven door too often during cooking. Keep the door gasket clean and make sure it is well fixed in its position.
Use metal cookware to improve energy saving (only when you use a non-microwave function). When possible, do not preheat the oven before cooking.
Keep breaks between baking as short as possible when you prepare a few dishes at one time. Cooking with fan
When possible, use the cooking functions with fan to save energy.
Residual heat
If a programme with the Duration or End Time selection is activated and the cooking time is longer than 30min , the heating elements automatically turn off earlier in some oven functions. The fan and lamp continue to operate. When you turn off the oven, the display shows the residual heat. You can use that heat to keep the food warm.
When the cooking duration is longer than 30min , reduce the oven temperature to minimum 3 - 10 min before the end of cooking. The residual heat inside the oven will continue to cook.
Use the residual heat to warm up other dishes.
Keep food warm
Choose the lowest possible temperature setting to use residual heat and keep a meal warm.
The residual heat indicator or temperature appears on the display.
Cooking with the lamp off
Turn off the lamp during cooking. Turn it on only when you need it.
Press open Menu.
| Menu item Application | |
| Assisted Cooking Lists automatic programmes. | |
| Favourites Lists the favourite settings. | |
| Options To set the oven configuration. | |
| Settings Setup To set the oven configuration. | |
| Service Shows the software version and configuration. |
| Submenu Application | |
| Light Turns the lamp on and off. | |
| Child Lock Prevents accidental activation of the oven. When the option is on, the text "Child Lock" appears on the display when you turn on the oven. To enable the oven use, choose the code letters in the alphabetical order. Access to the timer, the remote operation and the lamp is available with the Child Lock on. |
| Fast Heat Up Shortens heat up time. | It is available only for some of the oven functions. |
| Time indication Turns the clock on and off. | |
| Digital clock style Changes the format of the displayed time indication. |
| Submenu Description | |
| Language Sets the oven language. | |
| Display brightness Sets the display brightness. | |
| Key tones Turns the tone of the touch fields on and off. It is not possi-ble to mute the tone for:① |
| Buzzer volume Sets the volume of key tones and signals. | |
| Time of day Sets the current time and date. | |
| Submenu Description | |
| Demo mode Activation / deactivation | code: 2468 |
| Software version Information about software version. |
| Reset all settings Restores factory settings. |
15. IT'S EASY!
| Before first use you have to set: |
| Language | Display brightness | Key tones Buzzer volume Time of day |
| Familiarize yourself with the basic icons on the control panel and the display: |
| ①
ON / OFF Menu | =
Favourites | ☆ | ○
Timer | START / STOP |
| Start using the oven |
| Quick start Turn on the oven and start cooking with the default temperature and time of the function. | Step 1 Step 2 Step 3 | |
| Press and hold:
□. | □... - select the preferred function. | Press: START |
| Quick Off Turn off the oven, any screen or message at any time. | □- press and hold until the oven turns off. |
| MW quick start Start Microwave at any time with default settings: 30 sec / 1000W. | Press: ◆ |
| Start cooking |
| Step 1 Step 2 | Step 3 Step 4 Step 5 | | |
| ①
- press to turn on the oven. | □…
- select the heating function. | °C
- set the temperature. | OK
- press to confirm. | START
- press to start cooking. |
| Get to know how to cook quickly |
| Use the automatic programmes to prepare a dish quickly with the default settings: |
| Assisted Cooking | Step 1 Step 2 Step | 3 Step 4 | | |
| Press: Press: . Press: Assist- | Press: Assist- | ted Cooking. | Choose the dish. |
| Use quick functions to set the cooking time |
| 10% Finish assist
Use 10% Finish assist to add extra time when 10% of the cooking time is left. | To extend the cooking time press +1min. |
16. TAKE A SHORTCUT!
Here you can see all the useful shortcuts. You can also find them in the dedicated chapters in the user manual.
How to set: Heating functions

How to set: Assisted cooking

How to set: Cooking time

How to delay: Start and end of cooking

How to cancel: Set Timer

17. ENVIRONMENTAL CONCERNS
Recycle materials with the symbol . Put the packaging in relevant containers to recycle it. Help protect the environment and human health by recycling waste of electrical and electronic appliances. Do not dispose of appliances marked with the symbol with the household waste. Return the product to your local recycling facility or contact your municipal office.
PENSAMOS EN USTED
11.3 Comoonian: Bombilla

ADVERTENCIA!
7. SAAT FONKSIYONLARI