IAN 292987 - Lighting Livarno Lux - Free user manual and instructions
Find the device manual for free IAN 292987 Livarno Lux in PDF.
| Product type | Sensor ceiling light |
| Brand | Livarno Lux |
| Model | IAN 292987 |
| Article number | 9010.006.080 |
| Use | Indoor and outdoor (IP44) |
| Dimensions (lamp) | ∅ 27.5 cm x H 11.5 cm |
| Dimensions (base) | ∅ 25.5 cm, height 2.8 cm |
| Dimensions (glass) | ∅ 27.5 cm, height 10 cm |
| Weight | 1,200 g |
| Operating voltage | 220-240 V~, 50 Hz |
| Max. bulb power | 20 W (E27 socket) |
| Included bulb | LED 5.5 W, 3,000 K (warm white), 470 lumens, Ra ≥80 |
| Bulb lifespan | 25,000 hours |
| Switching cycles | 100,000 |
| Detection range | 1.2 m to 12 m (adjustable) |
| Detection angle | 360° (ceiling), 150° (wall) |
| Lighting duration | 5 s to 30 min (adjustable) |
| Ambient brightness | Adjustable (2 lux to 50 lux, can be disabled) |
| Protection rating | IP44 |
| Protection class | II |
| Maintenance | Disconnect power before cleaning, use a dry cloth |
| Safety | Installation by electrician, do not use if glass broken, do not immerse |
| Warranty | 3 years |
| Package contents | Ceiling light, LED bulb, mounting hardware, instruction manual |
Frequently Asked Questions - IAN 292987 Livarno Lux
User questions about IAN 292987 Livarno Lux
0 question about this device. Answer the ones you know or ask your own.
Ask a new question about this device
Download the instructions for your Lighting in PDF format for free! Find your manual IAN 292987 - Livarno Lux and take your electronic device back in hand. On this page are published all the documents necessary for the use of your device. IAN 292987 by Livarno Lux.
USER MANUAL IAN 292987 Livarno Lux
text_image
PDF online www.lidl-service.comSENSOR-DECKENLEUCHTE/CEILING LIGHT WITH MOTION SENSOR / PLAFONNIER À CAPTEUR
DE AT CH
SENSOR-DECKENLEUCHTE
Assembly, operating and safety instructions
NL BE
SENSOR-PLAFONDLAMP
Before reading, unfold the page containing the illustrations and familiarise yourself with all functions of the device.
FR BE
text_image
Technical diagram of a device with numbered parts, showing internal components and labeled parts.B
natural_image
3D diagram of a circular object with a central rod and mounting holes, labeled with number 9 (no text or symbols beyond the label)C
natural_image
Pure mechanical component diagram without any text, numbers, or symbolsD
natural_image
Technical diagram of a pipe fitting with internal components and directional arrows (no text or labels)E
natural_image
3D diagram of a mechanical component with a rotating arrow indicating rotation (no text or symbols)| 10% ca. 1,2 m | |
| 25% ca. 3 m | |
| 50% ca. 6 m | |
| 75% ca. 9 m | |
| 100% ca. 12 m |
| 456 | ||||
| I | ON | ON | ON | 5s |
| II | - | ON | ON | 30s |
| III | ON | ON | - | 90s |
| IV | - | - | ON | 3min |
| V | ON | ON | - | 20min |
| VI | - | - | - | 30min |
Intended Use Page 14
Scope of Delivery......Page 15
Parts Description......Page 15
Technical Data Page 15
Safety Page 15
Safety Notes......Page 15
Preparation Page 16
Required tools and materials......Page 16
Prior to installation Page 17
Initial use Page 17
Installing the light on the ceiling/wall....Page 17
Changing the lamp Page 17
Settings Page 17
Configuring the detection range....Page 18
Configuring the lighting duration....Page 18
Configuring ambient brightness....Page 18
Maintenance and Cleaning......Page 18
Disposal Page 18
Warranty and Service......Page 19
Warranty Declaration......Page 19
Service address......Page 19
Declaration of Conformity....Page 19
| List of Pictograms Used | |||
 | Please read the instructions for use! |  | Observe the warnings and safety notices! |
 | Volt (AC) Caution! Danger of electric sho |  | |
 | Hertz (frequency) For your safety! |  | |
 | Watt (effective power) | 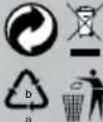 | Dispose of the packaging and device in an environmentally friendly manner! |
 | Protection class II |  | If the lamp glass is defective, stop using the light immediately. |
 IP 44 IP 44 | The light is protected from splashing water coming from all directions and is therefore suitable for outdoor use. | 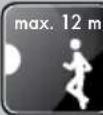 | Coverage area: max. 12 m |
 | Service life 25,000 hours | 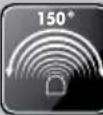 | Detection angle for wall installation: 150° |
 | 100,000 Switching cycles | 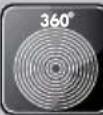 | Detection angle for ceiling installation: 360° |
 | This light is not suitable for dimmer or electronic switches. | ||
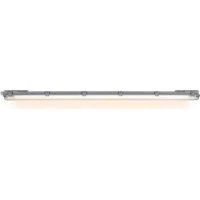
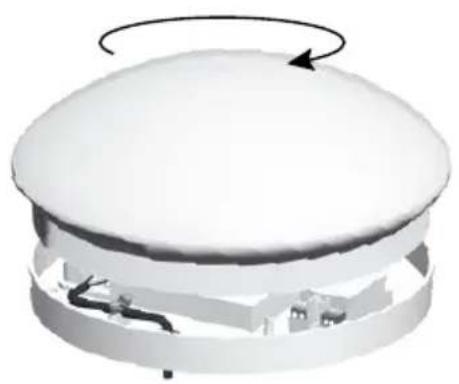
Ceiling Light With Motion Sensor
Introduction

Congratulations on the purchase of your new device. You have chosen a high-quality product. Please be sure to
carefully read all the instructions for use. Unfold the pages with the illustrations. These instructions are part of the product and contain important information on setup and handling. Always observe all safety instructions. Before using this product for the first time verify the correct voltage and that all parts are properly installed. If you have any questions or are unsure about using this device, please contact
your retailer or the service centre. Please keep these instructions in a safe place and include them when passing this product on to others.
IntendedUse
This light is suitable for indoor and outdoor use. The light can be mounted to any surface of normal flammability. The electrician installing the light must not install the light on a moist or conductive surface! This device is intended for private household use only.
- Scope of Delivery
Check that all the parts are present and that the device is in perfect condition immediately after unpacking.
1 Ceiling Light With Motion Sensor
1 LED lamp (5.5 W, E27) (not dimmable)
Mounting material (dowels and screws)
1 Set of instructions for use
Parts Description
1 Sensor ceiling light
2 Lamp shade made from satin glass
3 Light fixture
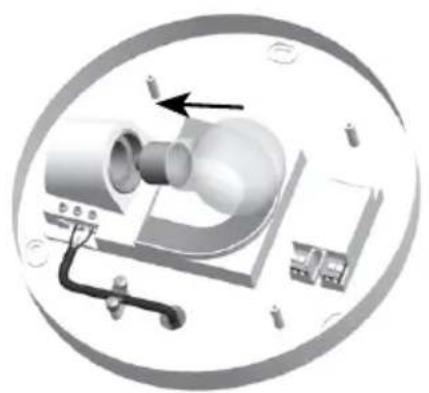
4 LED lamp (E27)
5 DIP switch
6 Mains connection cable
7 Mounting holes
8 Light connecting terminal
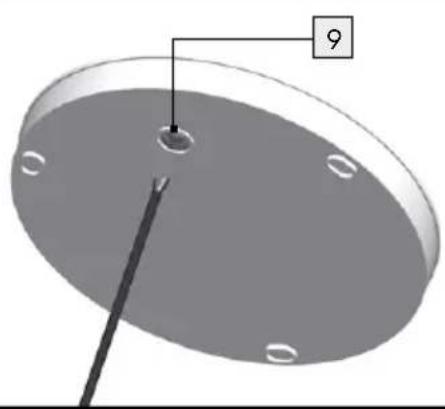
9 Drill hole
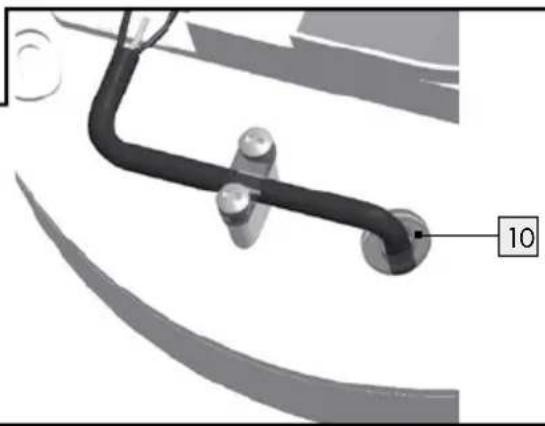
10 Gasket
- Technical Data
Item no.: 9010.006.080
Operating voltage: 220-240V\~, 50Hz
Dimensions:
Light: 27.5 x 11.5 cm (∅ x H)
Fixture: 25.5 cm, height 2.8 cm
Glass: 27.5 cm, height 10 cm
Weight: 1,200 g
Detection range: 1.2 m-max. 12 m (adjustable)
Detection angle: Ceiling installation: 360°, wall installation: 150°
Lighting duration: 5 seconds-max. 30 Minutes (adjustable)
Ambient
brightness: adjustable; can be deactivated
Socket: 1x E27, max. 20 W
| 1 LED lamp: | 5.5 W, 3,000 K(warm-white light) 470 LumenRa ≥ 80 100,000 switching cycles |
| Life: | 25,000 hours |
| Protection type: | IP44 |
Safety

Safety Notes
Damage due to failure to comply with these instructions for use will void the warranty! We assume no liability for consequential damages! We assume no liability for property damage or personal injury due to improper handling or failure to observe the safety instructions! Do not leave the light or packaging material lying unattended. Plastic film or bags, plastic parts, etc. can be dangerous for children to play with.

WARNING! DANGER TO LIFE AND RISK OF ACCIDENT FOR INFANTS AND CHILDREN!
Never leave children alone and unsupervised with the packaging material. The packaging material poses a suffocation hazard. Children frequently underestimate the dangers. Always keep children away from the product.
This product is not a toy and should be kept out of the reach of children. Children cannot recognise the risks associated with the use of the product.
This product may be used by children aged 8 years and up, as well as by persons with reduced physical, sensory or mental capacities, or lacking experience and knowledge, so long as they are supervised or instructed in the safe use of the product and understand the associated risks. Do not allow children to play with the product. Cleaning and user maintenance must not be performed by children without supervision.

Avoid the risk of fatal injury from electric shock
■ Have the electrical installation performed by an electrician or a person trained in electrical installation.
■ Always check the mains connection cable for damage before connecting it to the mains. Never use the light if it shows any signs of damage.
■ CAUTION! A damaged mains cable poses a danger to life due to electric shock. In the event of damage, repairs or other problems with the light, please contact the service centre or an electrician.
■ Remove the fuse or switch off the circuit breaker (0 setting) in the fuse box prior to installation.
Prior to installation, verify the mains voltage on site corresponds with the operating voltage required for the light (220–240 V\~, 50 Hz).
■ Never allow the light to come into contact with water or other liquids.
■ Never open the housing of the light or insert any objects into it. This will pose the risk of fatal injury from electric shock.
■ Only insert insert lamps of the correct type and do not exceed the maximum lamp output (max. 20W).
Broken safety glass must immediately be replaced by new safety glass. Contact the service centre.
■ Only parts provided by the manufacturer may be used.
- Replace defective lamps when they have cooled down.
- Do not install the light on a wet or conductive surface!

Prevent fire and injury hazards
- When the light is in operation, individual parts may become hot. Allow the light to cool down completely before performing any work.
Do not carelessly leave the light or packaging material lying around. Plastic film/bags, plastic parts, etc. are dangerous for children to play with.
■ To prevent a fire hazard do not operate the light in its packaging.
- Do not cover the light with objects. Excessive heat build-up can result in fire.

For your safety
■ Install the light so that it is protected from moisture and dirt.
■ Prepare the installation with care and allow sufficient time. First organise all parts or materials so they are easy to reach.
■ Always be attentive! Always pay attention to what you are doing and always proceed with caution.
■ Never install the light if you are having difficulty concentrating or do not feel well.
●Preparation
- Required tools and materials
The tools and materials specified are not included. This information and values specified are non-binding and are only provided as a reference. The nature of the material is determined by the individual local conditions.
- Pencil /marking tool
- Voltage tester
- Screwdriver
- Electric drill
- Drill
- Hammer
- Ladder
- Prior to installation
Important: The electrical connection must be performed by a trained electrician or a person instructed in electrical installation. This person must be familiar with the properties of the light and connection regulations.
Note: Remove all packaging material before first use.
- Familiarise yourself with all the instructions and diagrams in this manual, as well as with the light itself, before you install it.
Before installation ensure that the circuit to which the light will be connected is not energised. To do so, remove the fuse or switch off the circuit breaker in the fuse box (0 setting). - Use the voltage tester to verify it is de-energised.
Initialuse
• Installing the light on the ceiling/wall
Before installation ensure that the circuit to which the light will be connected is not energised. To do so, remove the fuse or switch off the circuit breaker in the fuse box (0 setting).
☐ Screw the lamp shade 2 counter-clockwise from the light fixture 3.
☐ Mount the light fixture 3 in the desired position. Bear in mind the drill hole 9 in the light fixture 3 through which the power cable will be inserted (see Fig. B). Mark the drill holes with a pencil.
Drill the holes and ensure that you do not damage the mains connection cable 6.
☐ Insert the dowels in the drilled holes. If necessary, use a hammer.
☐ Guide the house wiring 10 cable through the seal in the opening provided in the light fixture 3. (see Fig. B).
☐ Secure the house wiring cable under the cable bridge using two screws (see Fig. C).
Note: Ensure that you insert and screw down the individual house wiring cables according to the colours given in the lamp terminal 8: live
wire: black or brown, symbol L; neutral wire, blue, symbol N; protective earth wire: green-yellow).
Note: The sensor ceiling light features protective insulation. The protective conductor does not have to be connected and can remain loose in the sensor ceiling light 1.
☐ Screw the LED lamp 4 into the lamp socket in the light (see Fig. D)
☐ Screw the lamp shade 2 clockwise onto the light fixture 3 (see Fig. E).
☐ Replace the fuse or switch on the circuit breaker in the fuse box (I setting).
- Changing the lamp
Note: To prevent burns, only replace the lamp when the sensor ceiling light 1 has been disconnected from the power supply and the lamp has cooled down.
☐ Disconnect the sensor ceiling light 1 from the power supply by removing the fuse to interrupt the circuit.
☐ Wait approx. 3 minutes until the sensor ceiling light 1 has cooled down.
☐ Screw the lamp shade 2 counter-clockwise from the light fixture 3.
☐ Insert the new LED lamp.
☐ Screw the lamp shade 2 clockwise onto the light fixture 3 so that it is secure.
☐ Switch the fuse back on and check that the sensor ceiling light 1 functions.
Settings
You can configure sensor data for each specific application by selecting a combination on the DIP switch 5.
Settings / Maintenance and Cleaning / Disposal
- Configuring the detection range
☐ You can configure the detection range of the motion sensor in 5 stages using the DIP switch 5.
| 10% approx. 1 | 2 m |
| 25% approx. 3 | m |
| 50% approx. 6 | m |
| 75% approx. 9 | m |
| 100% approx. | 12 m |
| ON↑ | 123 | ||||
| I | ON | NON | 100% | ||
| II | - | ON | ON | 75% | |
| III | ON | ON | - | ||
| IV | - | - | ON | 25% | |
| V | - | - | - | 10% | |
- Configuring the lighting duration
☐ You can use the DIP switch 5 to configure the lighting duration of the sensor ceiling light 1 in 6 stages.
Note: The lighting duration refers to the duration of the sensor ceiling light 1 at 100 % illumination after motion has been detected.
| 456 | |||||
| I | ON | NON | 5s | ||
| II | - | ON | ON | 30s | |
| III | ON | ON | - | 90s | |
| IV | - | - | ON | 3min | |
| V | ON | ON | - | 20min | |
| VI | - | - | - | 30min | |
- Configuring ambient brightness
☐ You can use the DIP switch 5 to configure the sensor in 5 stages so that the sensor ceiling light 1 only illuminates at a determined ambient brightness threshold.
☐ If you select the setting "disable" (deactivated) the daylight sensor of the sensor ceiling light 1 will switch if motion has been detected, irrespective of the ambient light (50 lux, 30 lux: dusk operation, 10 lux, 2 lux: night operation).
| 7 | 8 | 9 | |||
| I | ONONON | 2lux | |||
| II | ONON | - | 10lux | ||
| III | - | ON | - | 30lux | |
| IV | ON | - | - | 50lux | |
| V | - | - | - | Disable |
● Maintenance and Cleaning
CAUTION! DANGER OF ELECTRIC
SHOCK! Disconnect the light from the power supply before cleaning. To do so, remove the fuse or switch off the circuit breaker in the fuse box (0 setting).
- Do not use solvents, petrol, etc. They could damage the light.
- Allow the light to cool down completely.
CAUTION! DANGER OF ELECTRIC
SHOCK! For electrical safety, never clean the light with water or other liquids, nor immerse it in water.
☐ Only clean with a dry, lint-free cloth.
■ Then replace the fuse or switch on the circuit breaker in the fuse box (I setting).
- Disposal

The packaging is made entirely of recyclable materials, which you may dispose of at local recycling facilities. The Green Dot is not valid for Germany.
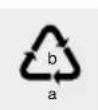
Observe the marking of the packaging materials for waste separation, which are marked with abbreviations (a) and numbers (b) with following meaning: 1-7: plastics / 20-22: paper and fibre-board/80-98: composite materials.

The product and packaging materials are recyclable, dispose of it separately for better waste treatment. The Triman logo is valid in France only.

Contact your local refuse disposal authority for more details of how to dispose of your worn-out product.

To help protect the environment, please dispose of the product properly when it has reached the end of its useful life and not in the household waste. Information on collection points and their opening hours can be obtained from your local authority.
- Service address
Action GmbH
Im Langel 6
DE-59872 Meschede
GERMANY
Tel.: +49 (0) 2903 / 449 555
Fax: +49 (0) 2903 / 449 48410
Please have your receipt and the item number (EAN 292987) ready as your proof of purchase when enquiring about your product.
● Warranty and Service
- Warranty Declaration
This device has a 3 year warranty from the date of purchase, which applies only to the original buyer and is non-transferable. Please keep your receipt as proof of purchase. The warranty applies to material or manufacturing defects only and does not cover wear parts or damage caused by improper use. Any modifications will void the warranty. This warranty does not limit your legal rights. Please phone the service centre for warranty claims. This is the only way to return your product free of charge. This device has been manufactured with care under strict quality control. During the warranty period we will remedy any defects in material or manufacture free of charge. In the event a defect arises during the warranty period, please return the device to the service address listed, specifying the following model number: 9010.006.080. Damage due to improper handling, failure to observe the instructions for use or unauthorised product modification, as well as wear parts, are excluded from warranty. Services performed under the warranty do not extend or renew the warranty period.
Declaration of Conformity CE
This product fulfils the requirements of the applicable European and national directives (RED directive 2014/53/EU, Ecodesign Directive 2009/125/EC, RoHS Directive 2011/65/EU). Conformity has been verified. The relevant declaration and documents are held by the manufacturer.
We hereby declare that the LED ceiling light 9010.006.080 complies with the provisions of 2014/53/EU. The full text of the EU declaration of conformity is available at: www.action-leuchten.de/service/konformitätserklärungen/
| ON↑ | 12 3 | ||||
| I | ON | NON | 100% | ||
| II | - | ON | ON | 75% | |
| III | ON | ON | - | ||
| IV | - | - | ON | 25% | |
| V | - | - | - | 10% | |
| 45 | 6 | |||
| I | ON | NON | 5s | |
| II | - | ON | ON | 30s |
| III | ON | ON | - | 90s |
| IV | - | - | ON | 3min |
| V | ON | ON | - | 20min |
| VI | - | - | - | 30min |
Fitting: 1x E27, max. 20 W
1 led-lichtbron: 5,5 W, 3.000 K (warm-wit licht) 470 lumen Ra ≥ 80 100.000 schakelcycli
| ON↑ | 123 | ||||
| I | ON | NON | 100% | ||
| II | - | ON | ON | 75% | |
| III | ON | ON | - | 50% | |
| IV | - | - | ON | 25% | |
| V | - | - | - | 10% | |