
Conga 2090 Vision - Robot vacuum CECOTEC - Free user manual and instructions
Find the device manual for free Conga 2090 Vision CECOTEC in PDF.
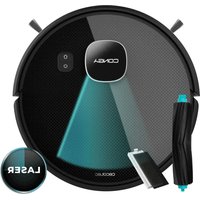
| Product Type | Robot vacuum |
| Brand | Cecotec |
| Model | Conga 2090 Vision |
| Reference | 05429 |
| Power supply (charging base) | 100-240 V~ 50/60 Hz |
| Battery | 14,8 V, 3200 mAh (Li-ion) |
| Navigation system | Gyroscopic + camera |
| Cleaning modes | Auto, Edges, Random, Twice, Intensive floor cleaning, Manual, Return to base, Spiral, Smart zone |
| Connectivity | Wi-Fi 2,4 GHz, Conga 2000 app, compatible with Google Assistant and Alexa |
| Control | Smartphone app, buttons on robot, remote control (optional) |
| Interactive map function | Yes (via app) |
| Central brush | Silicone and soft bristles, removable |
| Side brushes | 2 removable brushes |
| Filter | High efficiency (replace every 3 months) |
| Floor mopping function | Yes (mixed tank with mop cloth) |
| Sensors | Anti-drop, anti-collision, infrared, optical |
| Automatic return to base | Yes |
| Scheduling | Yes (via app) |
| Safety | Not suitable for children under 8 years; do not use on carpets in mopping mode |
| Maintenance | Regular cleaning of brushes, filter, sensors, and camera |
| Parts replacement | Central brush (6-12 months), side brushes (3 months), filter (3 months), battery (replaceable) |
| Warranty | Official Cecotec after-sales service |
| Manufacturing | Made in China, designed in Spain |
Frequently Asked Questions - Conga 2090 Vision CECOTEC
User questions about Conga 2090 Vision CECOTEC
0 question about this device. Answer the ones you know or ask your own.
Ask a new question about this device
Download the instructions for your Robot vacuum in PDF format for free! Find your manual Conga 2090 Vision - CECOTEC and take your electronic device back in hand. On this page are published all the documents necessary for the use of your device. Conga 2090 Vision by CECOTEC.
USER MANUAL Conga 2090 Vision CECOTEC
Robots aspiradores/ Robot vacuum cleaners
- Safety instructions 26
- Parts and components 27
- Before use 29
- Installation 29
- Operation 30
- Mobile App and Wi-Fi connection 31
7.Cleaning and maintenance 34
B.Troubleshooting 35
9.Technical specifications 38 - Disposal of old electrical appliances 38
- Technical support and warranty 38
SOMMAIRE
Fig./img/Abb/Afb/Rys/Obr.9
Fig./Img/Abb/Afb/Rys/Ohr.6
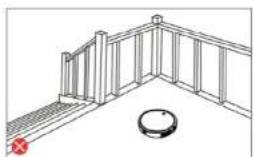
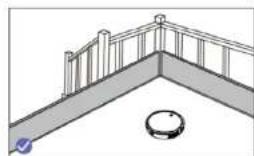
Fig./img/Abb./Afb./Rys./Obr.10
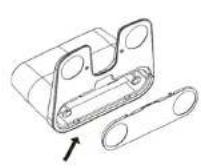
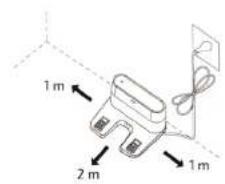
Fig./Img/Abb/Afb/Rys/Obr.11 Fig./Img/Abb/Afb/Rys/Obr.12
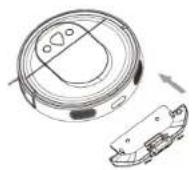
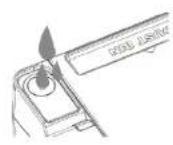
Fig./Img/Abb/Afb/Rys/Obr.17 Fig./Img/Abb/Afb/Rys/Obr.18
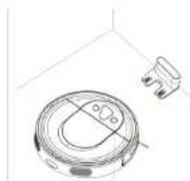
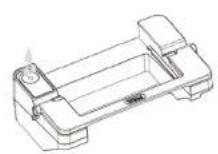


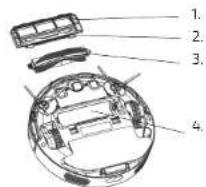
Fig./Img./Abb./Afb/Rys./Obr.19 Fig./Img./Abb./Afb/Rys./Obr.20
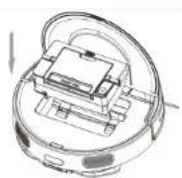
Fig./Img./Abb./Afb./Rys./Obr.13 Fig./Img./Aba./Afb./Rys./Obr.14
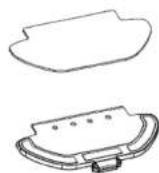
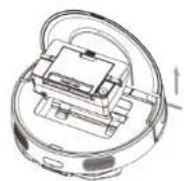
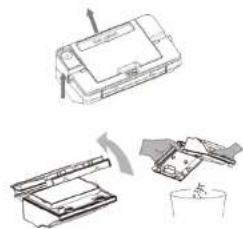
Fig./Img./Abb./Afp./Rys./Obr.15
Fig./Img./Abh./Afo./Rys./Chr.15
Fig./Img/Abb/Afb/Rys/Obr.21
Fig./Img./Abb./Afb./Rys./Obr.22
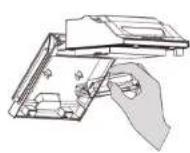
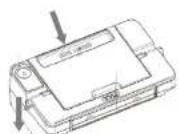
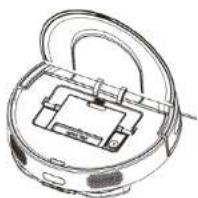
Fig./Img./Abb./Afa./Rys./Obr.23
Fig./Img./Abb./Afo./Rys./Obr.24
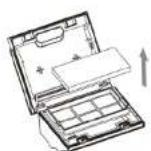
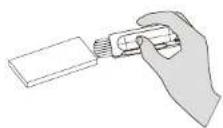
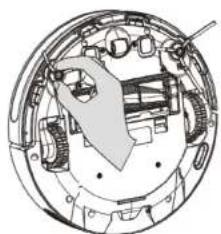
Fig./Img./Abb./Afb/Rys/0br.26
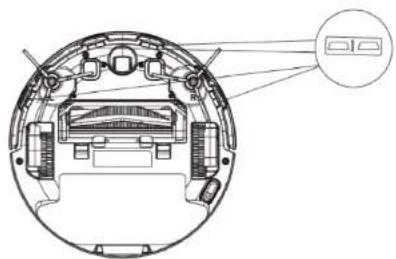
Fig./Img./Abb./Afb/Rys/Obr.27
Fig./img/Abb/Afb/Rys/Obr.25
ESPANOLESPANOL
6. APP MOVIL Y CONEXION WI-FI
1. SAFETY INSTRUCTIONS
Read these instructions thoroughly before using the appliance. Keep this instruction manual for future reference or new users. This product must be used in accordance with the directions in this instruction manual. Cecotec cannot be held liable or responsible for any damages or injuries caused by improper use.
Make sure that the mains voltage matches the voltage stated on the rating label of the appliance and that the wall outlet is grounded.
This product can only be disassembled by qualified personnel. Do not touch wires, power supplies or power adapters with wet hands.
Keep the robot away from clothing, curtains and any other similar materials.
Do not sit or place heavy or sharp objects on top of the appliance. Do not operate the appliance close to heat sources, flammable substances, wet surfaces where it can fall or be pushed into water or allow it to come into contact with water or other liquids. Do not use outdoors.
Do not use the charging base if it has a damaged cord or plug or if it is not operating properly. In case of fault or malfunction, contact the official Technical Support Service of Cecotec.
Do not operate the device on tables, chairs or other high surfaces where it could fall.
Do not operate the product in places where temperature is below 0^ or above 40^ .
The appliance can only be operated with the supplied battery and power adapter. The use of other components or accessories could cause risk of fire, electric shock or product damage.
Do not use the device to vacuum flammable or burning objects
such as cigarettes, matches or ash.
Before operating the robot, please remove any object on the floor such as clothing, papers, power cords or other items that may obstruct the device.
The appliance is not intended to be used by children under the age of 8.
It can be used by children over the age of 8, as long as they are given continuous supervision.
This appliance can be used by children aged 8 and above, and persons with reduced physical, sensory or mental capabilities or lack of experience and knowledge, as long as they have been given supervision or instruction concerning the use of the appliance in a safe way and understand the hazards involved. Do not allow children to play with the appliance.
Supervise children, they shall not play with the appliance. Close supervision is necessary when the appliance is being used by or near children.
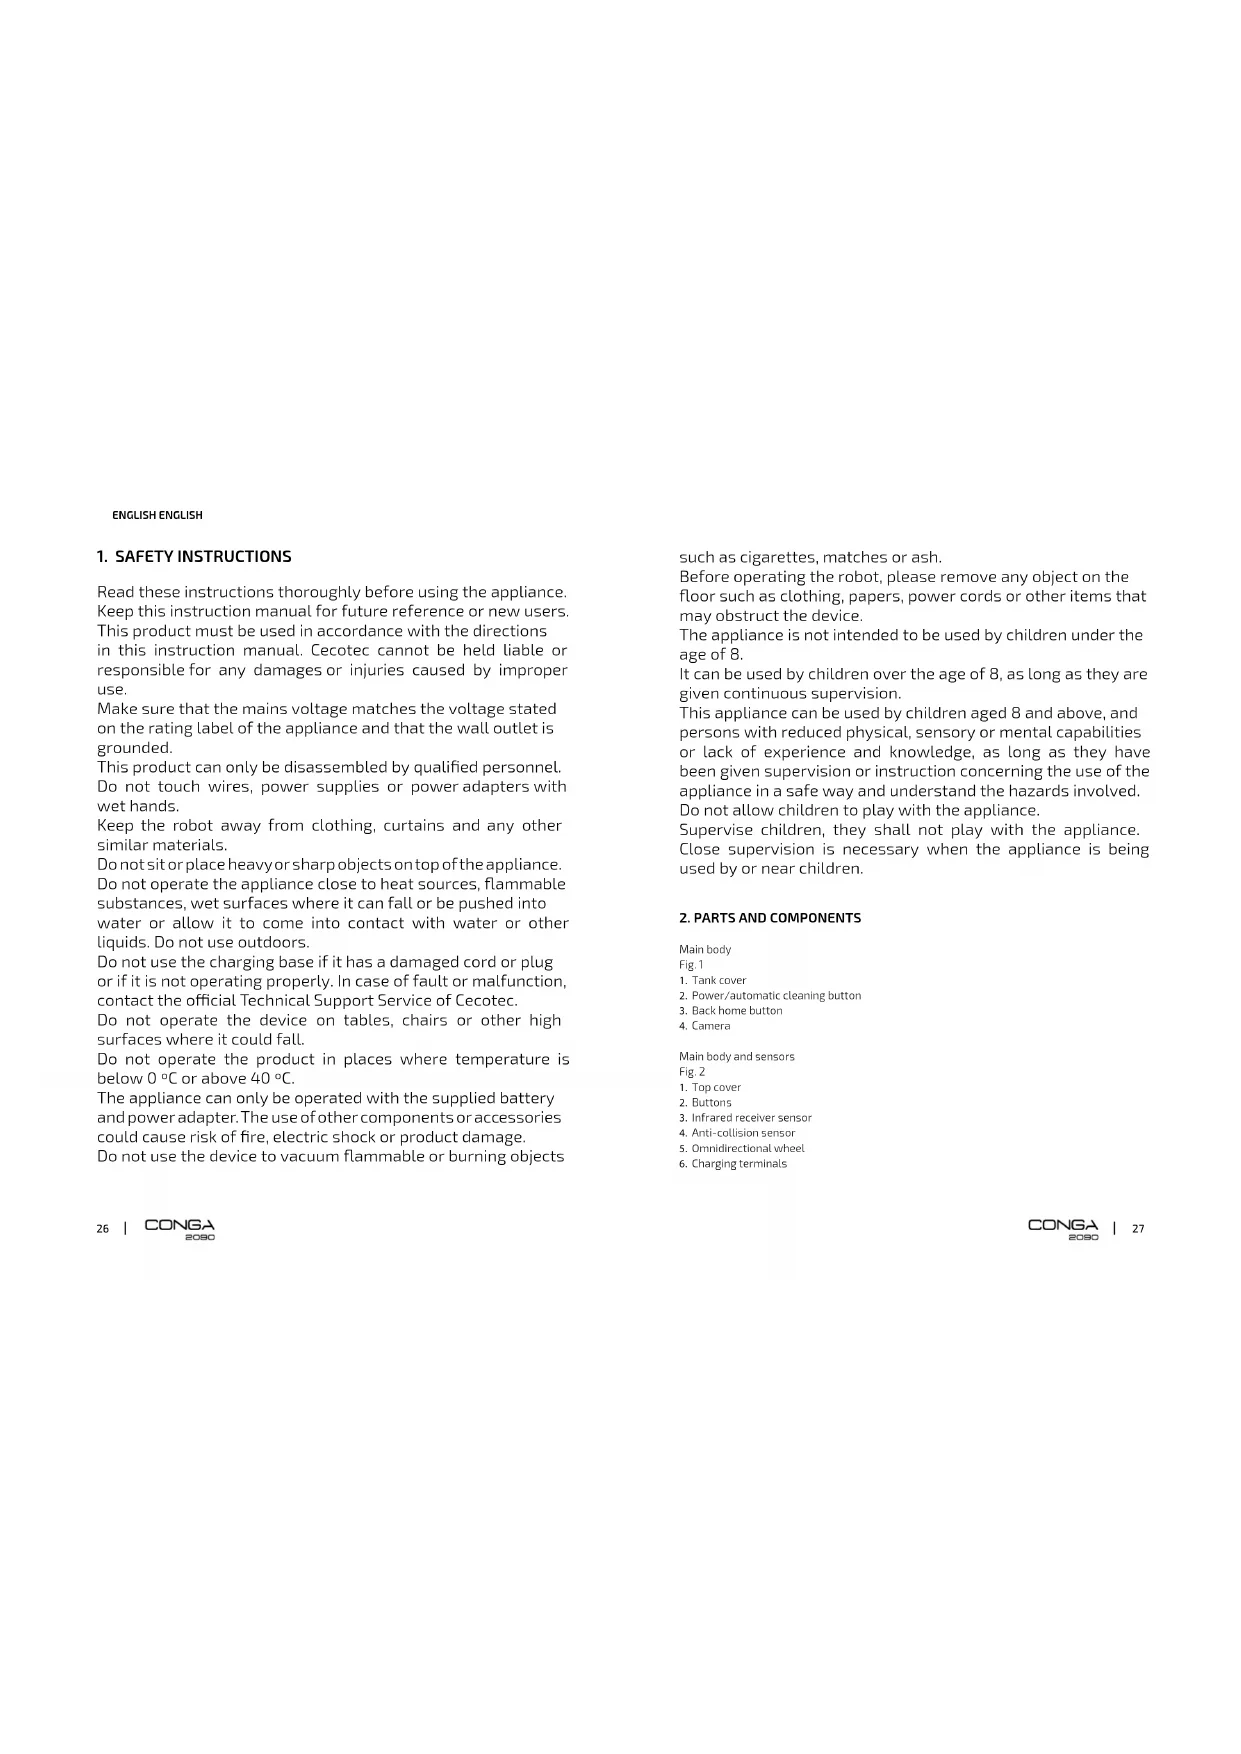
2. PARTS AND COMPONENTS
Main body
Fig.1
1. Tank cover
2. Power/automatic cleaning button
3. Back home button
4. Camera
Main body and sensors
Fig.2
1. Top cover
2. Buttons
3. Infrared receiver sensor
4. Anti-collision sensor
5. Omnidirectional wheel
6. Charging terminals
ENGLISH ENGLISH
- Battery
- Side brushes
- Free-fall sensor
- Main brush cover
- Main brush
12.Left side wheel - Right side wheel
- Optical sensor
Components
Wet&Dry tank
Fig.3
- Water compartment
2.Dust tank
Charging base
Fig.4
1. Signal transmission area
2. Charging terminal
3. Charge Indicator
4. Cable slot
5. Charging terminal
Map
Fig.5
1. Mo
2. Moab bracket
3. Velcro
4.C1p
Main brush
Fig.7
Brush made of silicone and bristles, designed to clean all types of surfaces.
Power adapter
Fig. 8
3. BEFORE USE
Take the product out of the box and remove all packaging materials.
Make sure all parts and components are included and in good conditions. If any sign of visible damage is observed, contact immediately with the official Technical Support Service of Cecotec
Warnings:
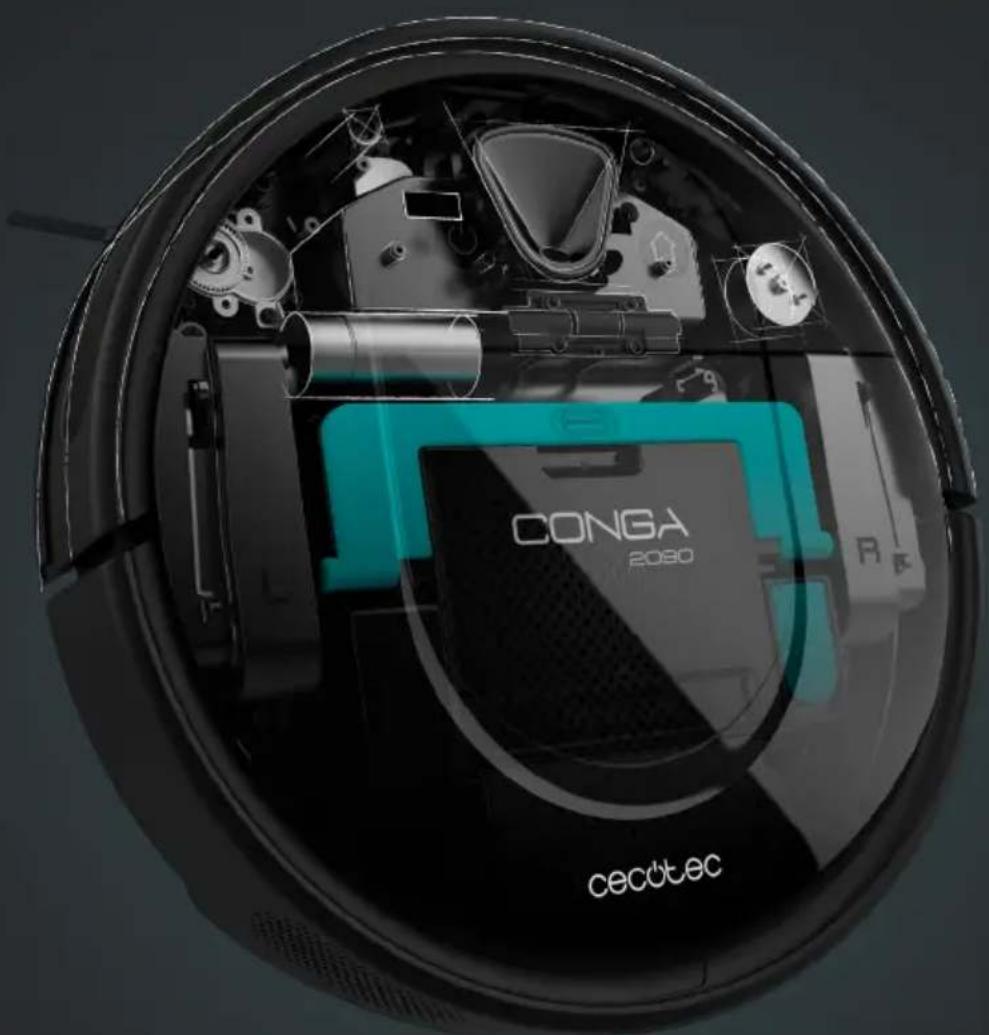
Remove all objects around the robot such as clothing, papers, cables, curtains or other fragile objects.
Fig.9
If the area to be cleaned has a balcony or stairs, a physical barrier must be placed in order to prevent product damage and ensure safe operation.
Fig. 10
4. INSTALLATION
Robot and charging base installation
Connect the charging base to a power supply and store the remaining cable. It is important to store the remaining cable at the bottom of the charging base to avoid it from being dragged and disconnected.
Fig. 11
Place the charging base against the wall, leaving the safety distance indicated in the below picture.
Fig. 12
Note: Ensure a space of at least 1 m on both the left and right side of the charging base, and a space of at least 2 m in front of it.
Warning: Do not expose the charging base to direct sun light.
Long press the power button for 3 seconds; when the light indicator turns on, place the robot on the charging base.
Fig. 13
Steady blue light: ON/operating
Oscillating orange light: Charging
Red Light blinks: Error
Note:
ENGLISH ENGLISH
Take the robot to the charging base if the battery is low. The robot might not turn on if the battery is very low.
The robot will automatically turn on when placed on the charging base.
The robot cannot be turned off during charging.
Wet dry tank installation
Recommendation: It is not suggested to use the scrubbing function for the first-time use.
Open the tank's blue silicone lid, fill the tank with water and close it again.
Fig. 14
Install the tank in the robot following the indicated direction. Make sure the clip is properly fastened.
Fig.15
Attach the mop to the bottom part of the mop bracket with the Velcro.
Fig. 16
Manually press the clicks on both sides of the Wet & dry tank and push it into its correct position. You will hear a click when it is properly fixed. To remove it, press the Wet & dry tank release button and pull from the Wet & dry tank.
Fig. 17
Note:
Do not use the scrubbing function while the robot is unattended.
Remove the Wet & dry tank when the robot is charging or not in use.
Add some cleaning agent if considered necessary.
Warning: Using cleaning agents in excess might block water outlets.
Recommendation: In order to achieve perfect scrubbing, it is suggested to moisten the mop before using it.
5. OPERATION
Once the robot's light indicator changes from blinking orange to steady blue, the battery is fully charged and the robot is ready to operate.
The robot cannot operate with low battery.
Remove all cables and obstacles from the floor before operating the robot in order to avoid accidents and damage.
Robot buttons
Auto mode
From the standby mode, press the power button on the robot, the remote control or on the App and the robot will automatically start operating. It will carry out a cleaning cycle in zigzag motion and then another one in Edge mode. Once it has finished, it will return to the charging base.
It is the most commonly used cleaning mode and it is used to clean the whole house's surface. The robot vacuums the floor's dust automatically, in and organized and efficient way, as it features memory and gyroscope navigation supported by its camera.
Moreover, it changes direction when it finds obstacles throughout its route and it returns to the charging base in a smart and direct way once the cleaning is over. It includes Total Surface function, through which the robot cleans the whole surface and, if necessary, returns to the charging base to recharge its battery and finish cleaning.
Back home mode
The Back home mode can be activated at any point of any cleaning cycle.
Once it is activated, the robot will automatically return to the charging base.
Warning: Make sure not to charge the robot with the Wet & dry tank installed when it contains water.
6. MOBILE APP AND WI-FI CONNECTION
In order to access all the robot's functions from wherever you are, it is suggested to download the Congo 2000 App. You will be able to control the robot in the most efficient way, enjoying the excellence of cleaning.
App advantages:
Control your robot in an easy and intuitive way.
Activate the cleaning process from any point.
Carry out settings and daily scheduling.
Choose between its different cleaning modes: Auto, Edge, Random, Twice, Scrubbing, Manual
Back home, Spiral, Spot and Smart Area.
View how the robot creates an interactive map as it is cleaning.
Check the cleaned surface and the time taken.
Check the cleaning history.
Fig.18
Configuration:
1. Download the Conga 2000 App from App Store or Play Store.
2. Create an account with your e-mail and a password.
3. Confirm login.
4.Add your Congarobot
S. Connect to Wi-Fi.
ENGLISH ENGLISH
Note:
The robot supports 2.4 G networks.
The Wi-Fi name and password cannot exceed 32 bits.
If the network configuration falls to connect, follow the below steps:
Press the power button for 5 seconds, the robot will enter sleeping mode and the Wi-Fi light indicator will blink fast indicating connection error. Retry connecting the robot again following the steps in the before section.
If the connection fails again, check if:
The robot is too far away from the router.
The Wi-Fi password is incorrect.
This Conga model is compatible with Alexa and Google Assistant virtual assistants.
The following modes can be activated from the App:
Auto cleaning mode:
From standby mode, press the Auto mode button on the App and the robot will automatically start operating. It will carry out a cleaning cycle in zigzag motion and then another one in Edge mode. Once it has finished, it will return to the charging base.
It is the most commonly used cleaning mode and it is used to clean the whole house's surface. The robot vacuums the floor's dust automatically, in and organized and efficient way, as it features memory and gyroscope navigation supported by its camera.
Moreover, it changes direction when it finds obstacles throughout its route and it returns to the charging base in a smart and direct way once the cleaning is over.
It includes Total Surface function, through which the robot cleans the whole surface and, if necessary, returns to the charging base to recharge its battery and finish cleaning.
Edge mode
Select this mode from the App or the remote control, the robot will clean along the edges and will return to the charging base through its smart technology once it has finished. If there is no charging base, the robot will return to the starting point.
Random mode
Select this mode from the App, the robot will start cleaning randomly and then will return to the charging base with its smart technology once it runs out of battery. The robot will not create any map under this mode.
Twicemode
Select this mode from the App, the robot will carry out 2 whole cleaning cycles. When the cycle is completed, it will return to the charging base with its smart technology.
Scrubbing mode
Select this mode from the App. When this mode is activated, the robot moves in a swaying motion, simulating real scrubbing moves. It starts off cleaning in zigzag motion, then in Edge mode, and finally returns to the charging base taking the straightest way and memorizing the route. If it runs out of battery before finishing, it will recharge and the resume cleaning until finished.
Use the App to enter the water intensity mode and select between low, medium or high.
Warnings:
Do not use the map outdoors.
Remove the carpets before operating the robot under this mode.
During operation, control the water level on the Wet & dry tank. If it empties, fill it up again before continuing scrubbing.
Take the Wet & dry tank and the mop out before charging the robot.
Note: In order to ensure perfect scrubbing, moisten the mop before starting scrubbing.
Manual mode
Use the direction buttons on the remote control or on the App to take the robot to the specific points where you want it to clean.
Back home mode
This mode can be activated from the robot, the App or the remote control at any point of any cleaning cycle.
Once it is activated, the robot will automatically return to the charging base.
Spiral mode
Select this mode for the robot to thoroughly clean a specific spot. It will start cleaning at a specific point and will move in an outward spiral motion. Then, it will return to the starting point in an inward spiral motion, and then will go to the charging base.
Smart Area mode
Once the home's map has been saved, select this mode for the robot to clean an area in zigzag motion. The robot will clean the selected area and then will return directly to the charging base. The robot will only clean the area selected on the map, therefore it will go to the point and return to the base without vacuuming.
Spot mode
Select this mode if you want to clean thoroughly point in the map, making the most of the robot's maximum power. The robot will clean the selected point in an outward spiral motion and then will return to the starting point. Then, it will return directly to the charging base when cleaning is completed. The robot will only clean the area selected on the map, therefore it will go to the point and return to the base without vacuuming.
ENGLISH ENGLISH
7. CLEANING AND MAINTENANCE
Main brush
- Turn the robot around and press the main brush's release button to take the cover out.
- Take the main brush out and clean the compartment.
- Clean the main brush with the provided tools and use water and soap if necessary.
- Place the main brush in its position and fasten the cover's clip.
Note: Replace the main brush every 6-12 months to ensure efficient operating (depending on the frequency and type of use).
Fig. 19
1. Main brush cover
2. Tal
3. Main brush
4. Compartment
WetG Dry tank
Open the robot's cover and take out the Wet & dry tank.
Fig. 20
Lift the handle, remove the dust compartment, open it and empty it.
Fig. 21
Clean the dust compartment with the cleaning brush and place it back in its position together with the water compartment
Fig. 22
Introduce the Wet & dry tank back into the robot and close the top cover.
Fig. 23
High-efficiency filter
Remove the high-efficiency filter, shake it to remove all the dust and clean it with the cleaning brush.
Fig. 24
Note:
Replace the high-efficiency filter every 3 months depending on the frequency and type of use. Clean the filter periodically with a brush to avoid blockage.
Side brushes
Remove and clean the side brushes regularly.
Fig. 25
Note: In order to ensure a perfect cleaning, it is suggested to replace the side brushes every 3 months.
Free-fall sensors
Clean the free-fall sensors with a soft cloth regularly.
Fig. 26
Recommendation: Clean the camera regularly with a soft cloth.
Warning: Always transport the product turned off and in its original package.
Battery replacement and charging
Do not use any other battery. power adapter or charging base than the one officially provided by Cecotec.
Do not use non-rechargeable batteries.
Do not remove, dismantle or attempt to repair the battery or the charging base.
Do not place the charging base near heat sources.
Do not use a wet cloth to wipe any of the parts of this product.
If the robot is not going to be used for a long time, remove the battery from the product and store it in a dry and safe place. It is suggested to charge the battery every month in order to avoid damage to the battery.
Do not dispose of waste batteries at will. It is suggested to hand them over to professional organizations for correct treatment.
8. TROUBLESHOOTING
| Problem Solution | |
| The robot does not start up or does not clean. | The robot cannot operate when the battery is low. Allow it to charge before operating it. The room temperature is below 0 °C or above 50 °C. Operate the robot in a room where the temperature is between the stated temperature range. |
ENGLISH ENGLISH
| The robot cannot charge or return to the charging base. | There are too many obstacles near the charging base, relocate the charging base to an area free of obstacles. Clean the charging terminals. Make sure the power switch is turned on. The robot is too far away from the charging base, place it closer and try again. There is very little free space around the charging base. Make sure the charging terminals are clean. |
| The robot does not work properly. Turn the robot off, switch it off and turn it on again. Once the robot is turned on and has left the charging base, hold down the Back home button on the robot until it beeps. Immediately after, let go the button and press it again until the robot beeps again. This way the robot will be restarted. | |
| The robot emits a strange noise during cleaning. | The main brush, side brush or omnidirectional wheel may have foreign matters tangled, stop the robot and clear it up. |
| The robot does not clean efficiently or dust leaks from the robot. | The dust tank is full. Empty it and clear the high-efficiency filter if it is blocked. The high-efficiency filter is blocked, clear it. The main brush is tangled with foreign matter, please clear it up. |
| The robot could not connect to Wi-Fi. The Wi-Fi signal is poor. Make sure the Wi-Fi signal is correct. The Wi-Fi connection is unstable. Reset the router, check if there are any App updates and try again. Make sure your device's mobile data are deactivated to improve the binding process. | |
| The robot did not carry out the scheduled cleaning task. | Check if the robot is in Night mode and switch mode. The robot does not carry out scheduled cleaning cycles under this mode. Make sure the robot is connected to the network, it will not be able to carry out scheduled cleaning tasks without being connected. |
| The robot does not return to the charging base after spot cleaning or after changing starting position. | The robot will map and calculate a new route after operating under spot cleaning or after having changed its starting position. If the charging base is very far away from the robot, it will not be able to charge back automatically. Put the robot back on the charging base manually. |
| The robot does not resume cleaning. Make sure the robot is not in Sleep mode. It will not resume cleaning under this mode. It won't resume cleaning when it is placed manually on the charging base. | |
| The robot is always off-line. Make sure the robot is successfully connected to the network and always in the range covered by the Wi-Fi signal. | |
| Connection between the mobile phone and the robot failed. | Make sure the robot and the charging base are in an area with good Wi-Fi signal, reset the router and try connecting them again. |
| Main brush error. Make sure there are no foreign objects entangled in the main brush. If there are, clean the brush. | |
| Left wheel error. Make sure there are no foreign objects entangled or blocking the left wheel. If there are, clean the wheel. | |
| Right wheel error. Make sure there are no foreign objects entangled or blocking the right wheel. If there are, clean the wheel. | |
ENGLISH ENGLISH
| Side brush error Make sure there are no for | ign objects entangled in the side brushes. If there are, clean them. |
| The anti-collision sensor is blocked. Press | the bumper several times in the middle and on each side to unlock it. |
| The free fall sensor is not operating correctly. | Wipe the free fall sensor and move the robot to a new location. |
9. TECHNICAL SPECIFICATIONS
Product reference: 05429
Product: Conga 2090 Vision
100-2/10V~50/60Hz
Battery:14,8V,3200mAh
Frequency bands: 2412-2.472 GHz
Maximum Transmission Power: 16 dBm
Made in China | Designed in Spain
10. DISPOSAL OF OLD ELECTRICAL APPLIANCES

The European directive 2012/19/EU on Waste Electrical and Electronic Equipment (WEEE), specifies that old household electrical appliances must not be disposed of with the normal unsorted municipal waste. Old appliances must be collected separately, in order to optimize the recovery and recycling of the materials they contain, and reduce the impact on human health and the environment.
The crossed out 'wheeled bin' symbol on the product reminds you of your obligation to dispose of the appliance correctly.
Consumers must contact their local authorities or retailer for information concerning the correct disposal of old appliances and/or their batteries.
11. TECHNICAL SUPPORT AND WARRANTY
This product is under warranty for 2 years from the date of purchase, as long as the proof of purchase is submitted. The product is in perfect physical condition and it has been given proper use, as explained in this instruction manual.
FRANÇAIS FRANÇAIS
1. INSTRUCTIONS DE SECURITÉ
6. APP E CONNECTION WI-FI
6.APP TLEMOVEL E CONEXAO WI-FI
Networkadapter Fig.8
3.VOOR U HET TOESTEL GEBRUIKT
Productreference:05429
Product: CONGA 2090 Vision
100.240V~50/60Hz
Batterl:14.8V,3200mAh
Frequenlbanden:2.412-2.472GHz
Maximaalemissievermogen:16dBm
Made in China | Ontworpen in Spanje
10. RECYCLAGE VAN ELEKTRISCHE APPARATEN

Program Powrot do staci
Program Powrot do staci
Program Spot (Presny)
Vyberte tento program pro vybsteni Jednoho msta na mapo do houkby. Vyuzlito maximalin sily robota. Robot vysti zvolené msto ve spirale smere rem ven a dovnilr, az skonica na pvodnir miste. Po dokoneni ulkidu zvolené oolasti se inteligentne vrati primo na nabijeci zakladnu. Aktvjuke ulki den ye vbranezone. Dojece na misto a vrti se na zakladnu bez ysvanoi.
7. CISTENI A UDRZBA
Centrálni kartáč
Quart de Poblet, Valencia (Spain)
YV02200206
- SOMMAIRE
- ESPANOLESPANOL
- APP MOVIL Y CONEXION WI-FI
- SAFETY INSTRUCTIONS
- PARTS AND COMPONENTS
- ENGLISH ENGLISH
- BEFORE USE
- INSTALLATION
- OPERATION
- MOBILE APP AND WI-FI CONNECTION
- Note:
- Edge mode
- Random mode
- Twicemode
- Warnings:
- Manual mode
- Back home mode
- Spiral mode
- Smart Area mode
- Spot mode
- CLEANING AND MAINTENANCE
- TROUBLESHOOTING
- TECHNICAL SPECIFICATIONS
- DISPOSAL OF OLD ELECTRICAL APPLIANCES
- TECHNICAL SUPPORT AND WARRANTY
- FRANÇAIS FRANÇAIS
- INSTRUCTIONS DE SECURITÉ
- APP E CONNECTION WI-FI
- 6.APP TLEMOVEL E CONEXAO WI-FI
- 3.VOOR U HET TOESTEL GEBRUIKT
- RECYCLAGE VAN ELEKTRISCHE APPARATEN
- CISTENI A UDRZBA
Brand : CECOTEC
Model : Conga 2090 Vision
Category : Robot vacuum