
Kolumbo - Steam cleaner Lavor - Free user manual and instructions
Find the device manual for free Kolumbo Lavor in PDF.
| Product type | Professional high-pressure steam cleaner |
| Brand | Lavor |
| Model | Kolumbo (also referenced as Major) |
| Power supply | 230-240 V single phase or 400-415 V three-phase (depending on version) |
| Maximum pressure | 10 bar |
| Maximum temperature | 190 °C |
| Water tank capacity | 25 L |
| Diesel tank capacity | 25 L |
| Detergent tank capacity | 2.4 L |
| Fuel type | Road diesel without additives |
| Steam adjustment | Wet/dry |
| Detergent distribution | Button on gun |
| Noise level | 75 dB(A) |
| Usage | Professional |
| Safety devices | Safety valve (12 bar), pressure switch, thermostat, gun safety stop |
| Included accessories | Steam gun, coupling hose, etc. |
| Sandblasting option | Kit available (sand not included) |
| Water supply | Mains connection or integrated tank |
| Max inlet water temperature | 40 °C |
| Max inlet water pressure | 1 MPa |
Frequently Asked Questions - Kolumbo Lavor
User questions about Kolumbo Lavor
0 question about this device. Answer the ones you know or ask your own.
Ask a new question about this device
Download the instructions for your Steam cleaner in PDF format for free! Find your manual Kolumbo - Lavor and take your electronic device back in hand. On this page are published all the documents necessary for the use of your device. Kolumbo by Lavor.
USER MANUAL Kolumbo Lavor
FR MANUEL D'INSTRUCTIONS
PROGRAMMA MANUTENZIONI PROGRAMMATE
- This appliance's performance and userfriendliness make it suitable for PROFESSIONAL use.
- The steam generator for industrial cleaning is used for the cleaning and disinfecting of any object in an easy and ecological way, also in the most difficult points with or without detergents.
> THECNICAL DATA
(see technical data plate)
SYMBOLS

WARNING: It is important to be careful of the following items.

IMPORTANT

LOCKED

OPEN

IF PRESENT

WARNING: do not touch. - a warning relative to the danger of heat - steam emissions;

WARNING: symbol do not inhale

Detergent tank

only water
steam.
WARNING: symbol, Danger from hot

- IT IS OBLIGATORY TO WEAR PROTECTIVE GLOVES WHEN USING THE MACHINE.

- IT IS OBLIGATORY TO WEAR PROTECTIVE GOGGLES WHEN USING THE MACHI
SAFETY PRECAUTIONS
- WARNING: It is important to be careful of the following items.
IMPORTANTWARNINGS
04 This machine has been designed for use with the cleaning agent supplied or recommended by the manufacturer. The use of other cleaning agents or chemicals may adversely affect the safety of the machine.
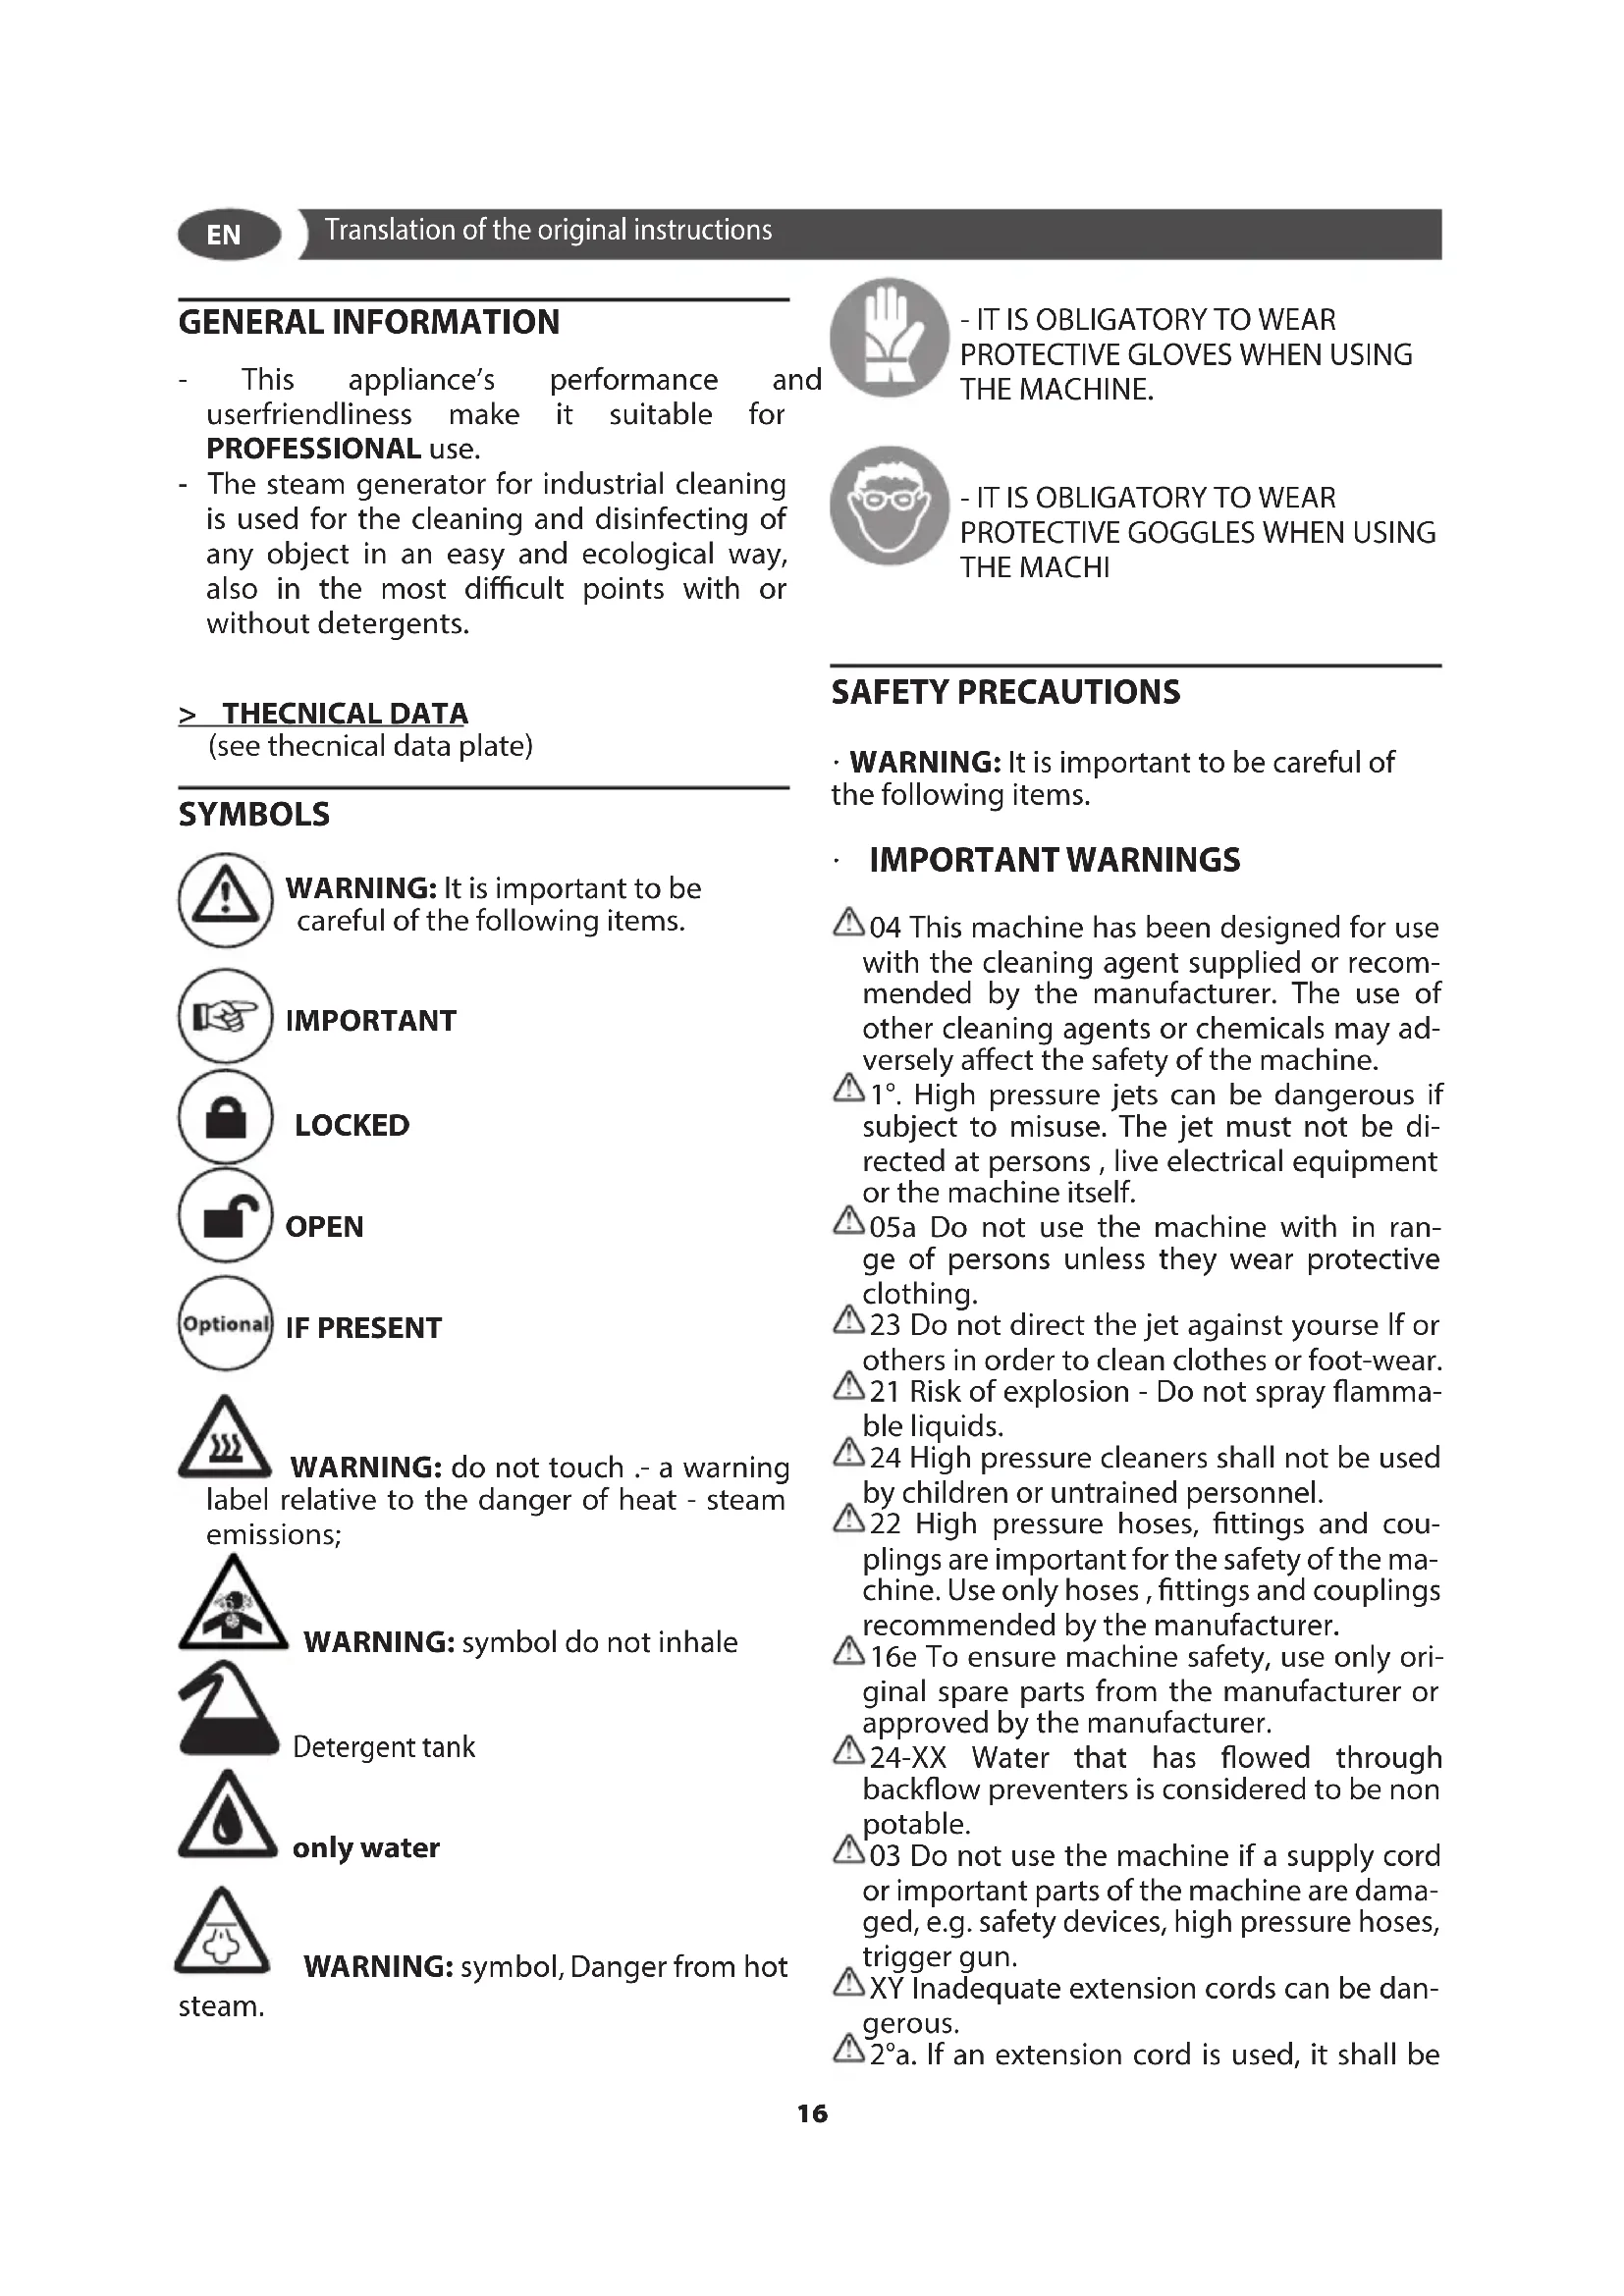
1. High pressure jets can be dangerous if subject to misuse. The jet must not be directed at persons, live electrical equipment or the machine itself.
05a Do not use the machine with in range of persons unless they wear protective clothing.
23 Do not direct the jet against yourse If or others in order to clean clothes or foot-wear.
21 Risk of explosion - Do not spray flammable liquids.
24 High pressure cleaners shall not be used by children or untrained personnel.
22 High pressure hoses, fittings and couplings are important for the safety of the machine. Use only hoses, fittings and couplings recommended by the manufacturer.
16e To ensure machine safety, use only original spare parts from the manufacturer or approved by the manufacturer.
24-XX Water that has flowed through backflow preventers is considered to be non potable.
03 Do not use the machine if a supply cord or important parts of the machine are damaged, e.g. safety devices, high pressure hoses, trigger gun.
XY Inadequate extension cords can be dangerous.
2^ . If an extension cord is used, it shall be
suitable for outdoor use, and the connection has to be kept dry and off the ground.
2^ It is recommended that this is accomplished by means of a cord reel which keeps the socket at least 60mm above the ground.
3^ . Do not use combustion engine powered machines indoors unless adequate ventilation is assessed by national labour authorities.
4. Ensure that any exhaust emissions are not in the vicinity of air intakes.
5^ .For gas or oil-heated machines it is important to provide adequate ventilation and make sure that the flue gases are properly discharged.
11 Always switch off the mains disconnecting switch when leaving the mach unattended.
XZ Incorrect fuels shall not be used as the y may prove hazardous.
>GENERALWARNINGS
- 01WARNING: This appliance is for outdoor use only.
- 02WARNING: Always disconnect the electricity and water supplies on completion of every job.
WARNING:
05b - Do not allow other people or animals within a range of 5m when operating the machine.
05c - Always wear suitable protective clothing in order to protect yourself against ricocheting parts.
05d - Do not touch the plug and the appliance with wet hands or when barefoot.
05e - Wear safety goggles and non-slip rubber footwear.
- IT IS OBLIGATORY TO WEAR PROTECTIVE GLOVES WHEN USING THE MACHINE.
- IT IS OBLIGATORY TO WEAR PROTECTIVE GOGGLES WHEN USING THE MACHINE.
- 06WARNING: Do not direct the nozzle toward mechanical parts containing lubricant grease, as the grease will dissolve and spread over the surrounding ground. Vehicle tyres/tyre valves may only be cleaned from a minimum distance of 30~cm otherwise the vehicle tyre/tyre valve could be damaged by the high-pressure jet. The first indication of this is a discoloration of the tyre. Damaged vehicle tyres/tyre valves can
be deadly dangerous.
07WARNING: High pressure jets can be dangerous if subject to misuse. The jet must not be
directed at persons,animal, live electrical equipment or the machine itself.
- 08WARNING: High pressure hoses, fittings and couplings are important for the safety of the machine. Use only hoses, fittings and couplings recommended by the manufacturer. (it is extremely important to protect these components against damage by avoiding their improper use and protecting them against bending, knocks and scratches).
- 12WARNING: Every machine is tested in its operating conditions, so it is normal for a few drops of water to be left inside it.
- 13WARNING: Take care not damage the electric cable. If the supply cord is damaged, it must be replaced by the manufacturer, its service agent or similarly qualified persons in order to avoid a hazard
14WARNING: Appliance with fluid under pressure. Keep a firm hold on the gun and be prepared to take the kickback pressure. Only use the high pressure nozzle provided with the appliance. - 16WARNING: This appliance is not intended for use by persons (including children) with reduced physical, sensory or mental capabilities, or lack of experience and knowledge, unless they have been given supervision or instruction concerning use of the appliance by a person responsible for their safety.
17WARNING: Children should be supervised to ensure that they do not play with the appliance.
18WARNING: Never start this appliance without first completely unwinding the high-pressure hose. - 19WARNING: When winding and unwinding the pipe take care not to cause this appliance to overturn.
- 20WARNING: Before unwinding or winding the hose, switch the machine off and release the pressure in the hose itself (switching off).
- XX WARNING: the machine shall be disconnected from its power source, by removing the plug from the socket-outlet, during cleaning or maintenance and when
EN
replacing spare parts
- XJ WARNING: If an extension cord is used, the plug and socket must be of watertight construction.
-WARNING: It is absolutely forbidden to use the machine in potentially explosive environments or areas.
·WARNING:
- NEVER EVER TOUCH THE MACHINE WITH WET HANDS OR BARE FEET.
- NEVER PULL THE POWER SUPPLY CABLE OR MACHINE IN ORDER TO DISCONNECT THE PLUG FROM THE SOCKET.
IF DURING FUNCTIONING THE POWER SUPPLY RUNS OUT, FOR SAFETY REASONS, TURN THE MACHINE OFF.
K1 All the maintenance and adjustment activities described in this handbook must be carried out only after stopping the machine (main switch turned to off) and disconnecting the power cord, if not clearly indicated that the operation must be carried out when the machine is on.
K2 All the adjustment and activities that are not described in this handbook must be carried out by qualified and skilled operators to avoid any accident or damage to the machine and to the operator.
K3 Carefully read this operating handbook before use.
It provides important information about a safe installation, use and maintenance of the machine.
K4 The non-compliance with the safety measures may entail serious injuries to the operator and damages to the machine.
- K5 Carefully keep this handbook for consultation purposes up to the machine final dismantling. The use and maintenance activities must be carried out correctly; otherwise, the builder cannot be held responsible for the damages to people, animals or things deriving from the non-compliance with the following instructions.
- K6 Check that both the machine and its components are undamaged when unpacking them. Contact your reseller in case of doubts.
K7 Make sure that the rating corresponds to the factory power line before energising the machine.
K8 De-energise the machine before any cleaning or maintenance activity.
K9 Never leave the machine energised if
unused. Turn the main switch off.
- K10De-energise the machine in case of failure and / or troubles. Do not tamper with its controls and equipment. Just contact the authorised after-sales service points for servicing purposes and always order original spare parts.
K11 The draining and loading pipes, the safety sheaths and the solenoid valves must not be cut and tampered with. De-energise the machine in case of damages
K12 Any use of the machine other than the one it has been built for represents an anomalous condition and can cause serious damages to the operating means and entail a serious risk for the operator using it. - K13 Never remove or hide the warning labels applied to the machine.
K14 The same instructions are valid for various models; some details may differ according to the machine model.
K15 Never touch or start the machine with wet hands or bare feet; - K16 Remove the casings and the doors of the electric boards only once the machine has been stopped and de-energised;
For fire-prevention purposes:
· K18 Keep all inflammable or combustible products away from the equipment area.
- K19 Obviously, the above-mentioned instructions are not sufficient to prevent all sorts of accidents; therefore, the user will have to be cautious.
K20 The machine must not be modified or changed in any way without the builder's written authorisation.
- WARNING: We recommend the use of de-mineralized water.
- WARNING: Never use the power cable or the gun cable to move it.
> SAFETY DEVICE
-WARNING: the gun is fitted with a safety catch. Whenever use of the machine is interrupted it is important to operate the safety catch to prevent accidental activation of the jet.

Safety features:
Safety valve
- Manostat
- Thermostat
- Pump with a by-pass valve or stopping device.
>STABILITY
- WARNING: The machine must be always kept on horizontal bases, in a safe and stable way.
> WATER SUPPLY
Water supply collection
Water supply from the water main
- Connect a supply hose (not included) to the water inlet of the unit and to the water supply.
- Open the water supply.

WARNING: (symbol) machine not suitable for connection to the potable water pipes.
The cleaner can only be connected to the water mains if the water mains is separated by a backflow preventer. Make sure that the hose is at least 0.13mm - 1 / 2 inch and that it is reinforced.
- WARNING: Water that has flown through backflow preventers is considered to be nonpatable.
IMPORTANT: Only clean or filtered water should be used for intake. The delivery of the water intake tap should be equal to the double of the maximum pump range.
Maximum intake water temperature: 40^ - Max inlet water pressure: 1Mpa
Place the machine as close to the water supply system as possible.
Failure to comply with the above conditions causes serious mechanical damage to the pump and the loss of warranty cover.
Water supply from the water tank build-in
- Switch off the unit.
- WARNING: We recommend the use of de-mineralized water.
> ELECTRICITY SUPPLY
The appliance's electrical connection must comply with the IEC 60364-1 standard.
IMPORTANT: Before connecting the appliance, make sure that the nameplate data are the same as those of the electrical mains and that the socket is protected by a differential security breaker with tripping sensitivity below 0.03 A - 30 ms.
- If the appliance's plug is not compatible with the socket, have the socket replaced with another of suitable type by professionally qualified staff.
- Never use the appliance in ambient temperatures below 0^ if it is equipped with a PVC (H VV-F) cable.
- XY WARNING: Inadequate extension cords can be dangerous.
- XJ WARNING: If an extension cord is used, the plug and socket must be of watertight construction.
Information for supply may also be obtained from the plug manufacturer.
| 230-240V | 400-415V |
| 3G 2,5 mm2 | 4G 2,5 mm2 |
| max 20 m | max 30 m |
USAGE
> UNPACKING
Remove the upper and the lower hooks retaining the cardboard box to the pallet, take the cardboard box off, place two wheels of the machine on ground and withdraw the pallet.
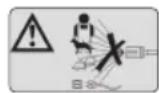
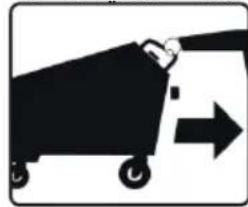
> Machine handling and transport
- Always use the handle supplied to move the machine.
- WARNINGS Never move the machine by using the power cable or steam hose.

> MACHINE DESCRIPTION
see fig.A B
① Detergent tank
② Handle
③ Steam gun connection plug
④ Electric cable
⑤ Water inlet
⑥ Diesel tank
⑦ Water tank
Switch detergent device
see fig. C
Model: Major
③ Steam gun connection plug
② Steam outlet valve, closed
see fig. D
⑧ dry steam / wet steam adjuster
Pressure gauge
10 Main switch ON/OFF
① Boiler switch
+temperature adjuster
⑬ - temperature adjuster
Thermo regulator display
see fig. A
⑤ Steam gun ^+ hose
16 Accessory
Detergent spray switch
see fig. E
18 inverter switch (mod. 12V)
18 battery pilot lights (mod. 12V)
> INSTALLATION AND START-UP
IMPORTANT: The machine installation environment should be kept at between 10^ and 35^ .
POSITIONING OF THE CHIMNEY FOR INDOOR APPLICATION
(see fig. M)
WARNING: In case of operation indoors, adequate ventilation and gas venting must be assured.
Sometimes a chimney is necessary to remove the exhausts from the pressure cleaner.
This problem hasn't to be faced when the machine operates outdoor, but when it's installed indoor, the following recommendations must be followed:
- The chimney path must be always in ascent, straight vertical if possible, and preferably not exceeding a 5 m lenght.
- The exit of the chimney must be sheltered to avoid the dripping of rain and to allow the exaust flow.
- The chimney section A must be 3 times the outlet chimney of the machine B and at distance of at least 20cm
It must be underlined that the above recommendations are extremely important to prevent the condensate from back dripping into the machine. The exausts contain sulphuric acid, condensing at a temperature of approximately 180^ . The condensation shall be avoid, but in any case the condensate from chimney shall not enter the machine.
The non observance of these recommendations may lead to the damage of the machine.
CHIMNEY SECTION: 3 times the area of chimney Chimney pipe diameter = 150mm
CHIMNEY SECTION FOR 2 BOILER: 6 times the area of chimney.
Chimney pipe diameter = 225mm
FUELLING
Information on the type of diesel fuel to be used:
Diesel for transport uses and without additives.
DIESEL
(see fig. A) 251
Fill the tank with the fuel indicated on the technical data plate (Diesel)
In order not to damage the fuel pump, ensure that the tank never empties while running.
- WARNING: Use of unsuitable fuel may result in dangerous situations.
DETERGENT
(see fig. A) 2,41
Fill the detergent tank with the product recommended for the task to be carried out.
-WARNING: Make use only of liquid detergent, do not absolutely use acid or too much alkaline products. We suggest you to make use of our products, which have been studied for the use with washer machines.
WATER
see fig. A) 251
see section on "WATER SUPPLY"
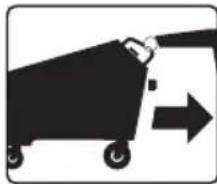
only model : Major
- Connect the hose ③⑤
- turn up the safety catch 2
- then open the steam tap 20.

WARNING: Danger from hot steam.
>1ST START-UP (BEFORE INITIAL USE)
12 V battery model
- Ensure that the main switch ⑩ is set to (0) OFF
see fig. E - Unscrew the 2 hand screws and lift the cover away
- Connect the plug to the inverter.
- Position the inverter switch to (I) ON 18
- The illuminating "LED" lights up.
- Lower the cover and screw the hand screws back up.
> Batteria
12 V battery model
- Check the battery charge level and recharge:
- 19 when the green "LED" is lit, the battery is charged
- 19 when the yellow "LED" is lit, the battery is at 50% charge
- 19 when the red "LED" is lit, the battery is discharged
To charge the battery:
- Place the switch to ⑩ (0) OFF
-
Connect the plug to the electricity supply
-
The charger charges the battery
IMPORTANT: The battery charger works also with the main switch 10 in position (I) (II) (0).
IMPORTANT: Follow the battery manufacturer use and safety manual.
> Sand blasting kit
only model "Graffiti Waster"
(see fig. FGH1)
Sand blasting work may be carried out with suitable accessories.
- Fill the container with sand (sand not supplied), sand for blasting, sand calibrated at 0.5mm .
IMPORTANT: use dry sand.
> Temperature adjustment
(see fig. D)
Adjust the temperature by means of the thermo regulator situated on the control panel.
This machine is equipped with an electronic thermo regulator to check and adjust the boiler temperature as well as the pressure from min. 5 bar to max. 10 bar.
- When turning the unit on, the display shows the temperature reading in the boiler. Adjust the temperature as follows:
- Hold the (+) and (-) buttons pressed simultaneously for a few seconds;
- Press the (+) button to increase the temperature, or the (-) button to decrease it. It is essential that the thermo regulator is set to 190^ in order to be able to work at 10 bar.
TABLE OF COMPARISON BETWEEN DEGREES CENTIGRADE AND STEAM PRESSURE EXPRESSED IN BAR
°Cbar
1525
1596
1657
1708
1759
180 10
WARNING:
The machine is pre-set at the max temperature of 190^
- For any adjustment, timing or replacement action not described in this handbook,
EN
contact qualified personnel at the manufacturer or resale outlet.
- Adjustments can be made to adapt the machineto various production requirements.
> Steam and water output adjustment
(see fig. D)
Adjust the steam and water output by using the two knobs situated on the the left hand side of the machine 8.

wet steam;

ry steam ;
> Electric controls
(Reference Description)
10 MAIN SWITCH: It is a 2-position selector that energises the machine if to (I)ON. the machine is de-energised if to (O) OFF.
12 V battery model:
10 - MAIN SWITCH:
(I) ON: machine works on mains power
(0) OFF: the machine is unpowered
(II) ON: machine works on battery power
⑪ BOILER ON button: press to turn the boiler on.
1213 THERMO REGULATOR: refer to paragraph
"Temperature adjustment".
14 Display:
- Temperature indicator
- Indicates "H2O" when water is missing from the tank.
- Indicates "GAS" when diesel is missing from the tank.
> Steam gun
Use of the steam gun
- Plug the lance jack into the appropriate socket and lock it with the two levers;
- To obtain a spray of steam, press the trigger on the pistol grip;
WARNING:
- For any subsequent adjustment, setting or replacement of parts not foreseen in this manual, please contact qualified personnel at the manufacturer or resale outlet.
- Before carrying out any replacement, ensure that the main switch is in the (0) OFF position.
> START-UP
Description of the start sequence
After carrying out all the connections and preventative inspections described in the previous chapters, start the machine according to the following instructions:
1) Before starting the generator, fill the tanks with water and DIESEL up to the set level.
| OPERATION | MACHINE PART | PERIODICITY | |
| 1 Boiler cleaning | 1 Remove limestone from the boiler 1 Clean the water level sensors | 1 Every year 1 Every three months | Authorized After Sales Service |
| 2 Visual checks | 2 Machinery + gun | 2 Every week | The user |
| 2 Electrical parts | |||
| 2 Integrity of the water and steam hoses and gun | 2 Every mont | The user | |
| 3 Cleaning the burner | 3 Ignition electrodes, Diesel nozzle | 3 Every year | Authorized After Sales Service |
| 4 General cleaning | 4 External cleaning | 4 Every week | The user |
2) Press the main switch situated on the control panel to the (1) ON ⑩ position-for working on mains power
or
(II) ON - for working on battery

IMPORTANT: the machine is battery operated with either the plug attached to the electrical mains or the machine operated with the plug disconnected from the electrical mains.
3) Press the BOILER ON button situated on the control panel to (1) ⑪.
6) If the display show H2O, it means that there is no water in the tank. Fill the tank (see "Filling the tanks with water and detergent")
TO SPRAY DETERGENT
To spray and mix the detergent with steam:
- Press button ⑦ on the pistol grip.
> Machine stop (at end of work)
At the end of the work shift, stop the machine in the following way:
1) Press boiler switch button to (0) OFF ⑪
2) Press main switch to (0) OFF 10.
3) Unplug the machine from the electrical power supply.
Boiler steam discharge
Follow the instructions below:
- A few minutes before the end of the work shift, turn off the boiler by pressing the BOILER START luminous green push-button, continuing to use the steam gun until the pressure gauge indicates a value of 0-1 bar;
see fig. F (Optional)
Follow the instructions below:
- Carefully open the boiler drain cock, situated on the machine right side and drain all the water from the boiler into a suitable container;

WARNING: Danger from hot steam.
IMPORTANT: Should it be necessary for any reason to de-activate the machine quickly, place the main switch on the control panel to the OFF position.
WARNING:
V15 While the machine is functioning, it is strictly forbidden to remove safety devices set by the Manufacturer for the purpose of protecting the operator against incidents.
- Only skilled and qualified operators must use the machine.
- Avoid aiming the steam lance towards personnel or delicate objects such as plastic, crystal or other materials which may melt or deteriorate with contact to steam at 180^ .
- Never leave the machine unattended.
Always remove the power supply from the machine before filling the tanks.
- We recommend the use of demineralized water.
CARE AND MAINTENANCE
SCHEDULED MAINTENANCE PLAN
Visit website and download the scheduled maintenance plan.

IMPORTANT: Before doing any work on the cleaner, discharge the pressure and disconnect the electricity and water supplies.
SEE ROUTINE MAINTENANCE TABLE
WARNING
Before any maintenance or replacement activity, remember to:
- stop the machine (MAIN SWITCH turned to OFF)
- unplug it.
- K1 Maintenance, replacement or servicing activities described in this handbook must be entrusted only to skilled operators familiar with the technology used on the machine.
K2 Consult qualified personnel at the manufacturer or sales outlet for any adjustment, tuning or replacement actions not included in this manual.
EN
The safety valve and accessories should be checked according to the provisions of DM 329/04 and the national regulations and laws.
Machine general cleaning
Once a week, remove all the dust from the machine using compressed air.
Clean the machine body externally with suitable detergents.
WARNING:
Always wear protective gloves when cleaning the machine.
TROUBLESHOOTING
(see table)
22WARNING: To ensure machine safety, use only original spare parts supplied or approved by the manufacturer.
Machine noise level
Determination of the resonant level: 75 dB (A)
IMPORTANT: the machine shows no adverse indications if used throughout the working day and complies with the provisions of Legislative Decree No. 277 of 15/8/91
WARRANTY CONDITIONS
All our machines are subjected to strict tests and are covered against manufacturing defects in accordance with applicable regulations. The warranty is effective from the date of purchase.
The following are not included in the warranty: - Parts subject to normal wear. - Rubber parts, charcoal, filters and the accessories and optional accessories. - Accidental damage, caused by transport, neglect or inadequate treatment, incorrect or improper use and installation failing - The warranty shall not cover any cleaning operations to which the operative components may be subjected, such as clogged nozzles and filter blocked due to limestones.

DISPOSAL (WEEE)
As the owner of electrical or electronic equipment, the law (in accordance with the EU Directive 2012/19/EU on waste from electrical and electronic equipment and the national laws of the EU Member States that have implemented this Directive) prohibits you from disposing of this product or its electrical / electronic accessories as municipal solid waste and obliges you to make use of the appropriate waste collection facilities. The product can be disposed of by returning it to the distributor when a new product is purchased. The new product must be equivalent to that being disposed of. Disposing of the product in the environment can cause great harm to the environment itself and human health.
The symbol in the figure indicates the urban waste containers and it is strictly prohibited to dispose of the equipment in these containers. Non-compliance with the regulations stipulated in the Directive 2012/19/EU and the decrees implemented in the various EU Member States is administratively punishable.
| TROUBLES CAUSES SOLUTIONS | ||||
| 1 | THE GENERATOR PRESSURE DOES NOT INCREASE | 1-Pressure switch1-Burner1-Resistance temperature detector PT100 | 1-Check the pressure switch1-Check electrodes, diesel nozzle1-Check that the temperature is at least 150°C | - Authorized After Sales Service- The user- The user |
| 2 | 2 THE PUMP CANNOT RUN2.1 It loads no water2.2 Sound allarm | 2.1 The water tank is empty2.1 Pump2.1 Clogged filter2.1 Water level sensors2.2 Lack of water in the tank2.2 Check the electronic level2.2 water solenoid valve | 2.1 Fill the tank2.1 Replace the pump2.1 Clean the filter2.1 Clean the water level sensors2.2 Fill the tank2.2 Replace the solenoid valve2.2 Check and eventually replace it | - The user- Authorized After Sales Service- The user- The user- The user- Authorized After Sales Service |
| 3 | 3 THE SAFETY VALVE OPENSE REPEATEDLY3.1 It keeps on loading water | 3.1 Boiler water level probe3.1 Pressure switch3.1 Safety valve | 3.1 Clean the water level sensors3.1Replace the pressure switch and check that the connection discharging tube is free from incrustations3.1Replace the safety valve | - Authorized After Sales Service- Authorized After Sales Service- Authorized After Sales ServiceThe safety valve can be replaced only by or qualified service center.Safety valve replacement must be set at 12 bar and be accompanied by certified PED as provided for category IV |
INDICATIONS GÉNÉRALES
> UTILISATION PRÉVUES
CONDITIONS DE GARANTIE
3HueCKMn, CEHCOPHBIMN yMCTBeHHbIMN BO3MOX-HOCTaMn, a TaKKe IuCaMn, He IMeIOUIMN COOTBeTCTByIOUeO ONbTa N HaBbIKOB, Do Tex NOP, NOKa IMN He 6ydt npoJdeHO COOTBeTCTByIOUee o6yueHN3 INHCTpyKTaK.
-17BHUMAHHE:He donyckaetca nCnoB3ObaHne Ⅲdennn DcTbMn dny irp daKe noD npncmOTpOM B3pocblx.
18BHUMAHNE: Hn B KOem Cnyae He BKIOuayTe annapaT dIy MOKN IOd daBHeHEm Do TORO, KaK pa3BepHyT WlaHr BbICOKOr DaBHeHn.
19BHIMAHNE: AkkypaTHo CBepHnTe n y6epnTe ⅢnaHr TaK, YTO6bI He nepeBepHyTb annapaT dJa MOIKN NOd DaBHeHnEM.
20BHMAHNE:KordaIaHaR pa3BopauNbaeTcnn CBopauNbaeTc aannapat DOnJKeH 6bITb BbIKIOUeH IN HEM He DOJXHO 6bITb OCTaTOUHOrO daBHeHra (CnyueHo).
-XX BHUMAHNE:Пелед ВьлОнHeHnEм KaKnx-ЛИбopa6OT NO TextHnueckOMy 06CnyxuBaHnIO NIN OUnCTKeOTKIIouHTe annapaT OT 3NeKTpUneCKO CETN.
-XY BHUMAHNE: HenoJxOJaIe ydInHnTeIIM MOryT npedCTaBnTb ONaCHOCTb.
XJ BHUMAHNE: Pnp nCnObn3OBaHmU ydnnHntEnb - Horo Ka6eIa WTeKeP u po3EtKa DoJIKhbl 6bItb BDOHe npoHnuaembIM;
BHUMAHNE: A6coIIOTHO 3aIpeaaeTcnoIb3OBA -Hne MaunHO B NOMEueHnX nIN 3oHaX, KlaaccnUncPOBaHHbIX KaK NOTeHuaJIbHo B3pbIOONaChIbe.
BHUMAHVE:
- HNKORDA HE IOTPAIIBAITECB IO APINAPA -TA MOKPbIMU PYKAMN INI BOCbIMN HORAMN.
HNKOTDA HE TAHNTE 3A UHYP 3JEKTPO NHTAHN, YTObBi BbIHytb UTENCEJIbHyIO BUNKY N3 PO3ETKN.
ECJIN BO BPEMRA6OTbI IODA4A 3JEKTPO - NITAHN BHE3ANHO INPEKPATnLAcb, BblKIOHTE YCTPOICTBOC UeJIbIO BE3ONACHOCTN.
K1 Bce onepaun no perynnpobke n texo6cnyxnbA -HIO, ONIcaHHbIe B daHHOM pyKOBOcTBe nO KcNlyaTaUN, DOJIckHbI BblIOHNrBcNCKIOUHTbHO NOCLe BbIKNoueHnMaUnHbI, KOrDa IraBHy BblIKNoUaTeNb 6yDet yCTaHOBnE H NIOXKeHne BblKn. (0), n 6yDet OTKIOUeH Ka6eNb PtAHn, ecn O TdJIbHo He yKa3aHo, YTO onepaun DoJxHa BblIOHNrTbCn PnBkIOUeH -HOJ MaunHe.
K2Bce onepaun no perynpOBke n 3amehe, he oni CaHHbE B daHHOM pyKOBOCTBe, DOJXHbI BblONHrTbc KBaINΦuNpOBaHHbIM I NOIROTOBHeHHbIM nepcoHaNoM BO u36eKaHne HeCuaCThIx Cnyaeb NnIOBpeKeHnO bOpUdoBaHnI HaHeCeHn TpaBM onepaTopy.
K3 Ppexde, yem npuctyntB K nCnoJb3Oba - HIO BaSei MaunHbI, BHNMaTeNbHO npoumtaiTe HNCTpyKuio.
B Hei BbI HaIeTe BaxHbIe yKa3aHnI NO 6e30 - NaCHO yCTaHOBKe, EKcNpyTaUuN I Texo6CnyXuBaHnIO.
K4Heco6nIeHne KaKnx-yn60 yka3aHn no o6ecne -yeHIO 6e3ONaChocTm MoKeT npNBecTn K nOlyeHIO TpaBM n HaHeceHIO cepBe3HbIX NobpeJdeHn O6OpydoBaHIO.
-K5BepexKHO xpaHnTb 3Tu INHCTpykCnIO DnI CnpaBOK NO IIO6bIM BONpOcAM Do yTINN3aun MaUNHbl.
K6 Nocne ChTn ynaKOBKn y6eDntbCBAeIOCTHOCTn arperata n Bcex erO KOMNKeTkyuux. B Cnyuea comHeHn O6paatbcra KIOCTABuNKy.
K7IpeoNIOKIOUeHEmMaUNHbIK CeTu y6eNTbcr, UTO daHHbIE Ha 3aBOOcKO Ta6nueKe COOTBeTCTBYOT daHHbIM CETn 3JIeKTPOCHa6XeHn.
K8 Ipeed BbIOnHeHem KaKux-1n6o onepaun no OuncTke n TexO6CnyXuBaHnIO OTKIIouHTb MaUNHy OT 3NeKTPOcETn.
K9 He octabnTb MaunHy BkIIOueHHoH 6e3 Hao6 - HOCTN. BbIKIOuHTb rnaBHBi BbIKIOUaTeJIb MaunHbl, KOrda OHa He nCNOJb3yETc.
K10B cnyae noIOMKn n/nn HeNCnPaBHOrO fynKUo -HnpOBaHnO tKIOuHTb OT cETn, He NOBpeJdA KHOKN ynpabHeHn I np6Opbl. JnpeMoHTa oBaPauTbcNCKIOHTeNbHO B cepBc TExNOMOUs, ABTOpN3POBaHHbI pON3BOIDTeJeM, N 3aIpocNTb NCNoJIb3OBaHne opunHaHbHbIX 3aNacteN.
V11 Tpy6Kn BbIBOda n BBoDa, npedoxpaHnteHbHbe o6 -WnBKn n 3JIeKtpoknanaHb HnB3a pe3aTb NOBpeKdaTb. B cnyae noBpeJdeHnna o6ecToHb MaunHy.
V12IIO6oe npmHeHne,OTnUHoe OT npedymoTpeH - HOrO,ABJIaETcAHOMaJIbHbIM yCIOBnEM M MoKTe PnBeCTN K NOBpeJKeHIO O6OpyIDOBaHnI N IOBeprHyTb cepbe3HOMy pncky onepaTopa.
K13 3aIpeaaetc ChMaTb NIN NOKpbIBaTb PpeDynpe - DnteHbHbe 3TNKeTKn, PpIKJIeeHHbc CpepeN I NO 6okam MaunHbl.
V14 INCHtpyKuIN OTHOCrTc K HeCKoNbKIM MOeJIaM, COOTBeTCTBeHHO,OTDeIbHbIe DeTaJIaM MOrY T OTNIuHaTbCRA B 3aBNCUMOCTN OT MOeJIaN.
V15 He Tporatb n He 3aynckaTb MaunHy,ecn y onepa Topa MOKpbie pyKn nn6ocbte HOrn.
K16 He chImMaTb 06uINBky n 3aunTHbIe NaHeIc 3neK - TpoUHTOB,ecn NepeJ 3TNM MaUNHa He 6bla BbIKIO- ueHa, a 7TeNCeHn He 6bln BbHyTb I3 po3eTOK;
K17 He TaHyTb 3a Ka6eNb NHTAHN, YTo6bI BbHyTb WTeNCeNb n3 pO3eTKn.
C zelbI npedynpeXdHn noXapOB B3pbIBOB:
K18 Y6paTb 30HbBOKpyo6OpydoBaHHa
RU
BocnnaMeHraUoIeCra IIN TropOuHe PpeMtebl N BeueCTBa.
K19 BbIeONcaHbIe INcTpkyCmN He MOryT npEynpeiNb BCE HeCyactHbIe CnyaN, B CBa3N C 3TnMHaNoB3OBaTeJIaIOXITcOTBETCTBeHHOCt b 3a BblNOHeHneJIIO6bIXdEInCTBnCMaKCmAlbHO OCToP0XHOCTbIO..
K20 3aIpeaaeTcMoIuHnUnpoBaTb MaunHy KaIM-JI6O 6pa3OM 6e3 INCbMeHHOro pa3peueHn npou3BOIDTeJI.
BHIMAHNE: Mbl pekomehnyem nCNOJb3OBaTb DEMHepaJIUN3OBaHHO BODbl.
BHIMMAHNE: HnKOrda He nepeBnRaTb arperaT, depXacb 3a Ka6eIb nHTaHn IIN Tpy6Ky nICTOJeta
> PINEOXPAHNTIELbHbIE YCTPOICTBA:
BHUMAHNE: TuctoneT-pacnbintenb cha6xeh npedeoxpaHntelbHO 6nOKn pOBKo.Bo n36exaHne CnyauHoro OTKpbITna ee cledyET BKNIOuATb npn KaXDOM nepepbBe B pa6Ote annapata.
BHUMAHNE:
PpeOxpaHHTeBhBie yCtpoNCTBa:
- PpeOxpaHHTeBHyI KnaanAH
-Давлие - TepMOCTaT
- Hacoc c nepenyckhoi Klaanah nnIO octaHOBKn yctpoiCTBa
> YCLOBNIA DJIY OBECEPUEHNA YCTOUYBOCTU
BHUMAHNE: YCTOJNUBOCTb np6opa rapaHTnpoBaHa TOJbKO B TOM Clyuae,ecn OH yCTaHOBJeH Ha POBHOI NOBepxHOCTN.
>IODAUABOdbI
IPOBOOyI NITbeBOrO BOIOCha6KeHnA.
TnDPOOuHCTNTeJIb MOXHO NODKIOUaTb HEnOCpeICTBeHHO K O6UeMy BOoONPOBOy NITbeBOrO BOIOChA6xHeHr TOnbKO Pn yCIOBHN, YTO B Tpy6oPpOBOE NOaH N BoDy UcTaHOBLeHO YCTPOINCTBO 3aUNTBOT O6paTHORO NtOKa C ONOPOXHeHEm, COOTBeCTByIOUe ee DeNCTBYIOUHM HOpMaTINBaM. Y6eINTecb B TOM, YTO WNaHr ycInen, a erO dNaMeTp coCTABJReT He MeHee 13 mm - 1/2 inch.
BHIMAHHE:Boa,koTopar npoxoNT uepe3 nPOTIBOTOK,CHTaeTcH He NITbeBOI
BAXHO: Ncnoj3ynt ToIbKO fInbTpObaHHyo nnuHCTyIO BDOy. Pa36OpHbI KpaH BObl DOJKeH oBeCNEuBaTb NOaCy, OObem KOtOpoi BDBOE npeBbIaET MaKcImaJIbHyIO pON3BOINTEbHOCTb HaOcA.
-MHIMMaIbHaN pOn3BODnTeJIbHOCTb:30J/MnH.
- MaKcMaJIbHa TEmpepaTypa BoI Ha BxOJe: 40^
- MakcimambHoe daBHeHne BObI Ha BXOe: 1Mpa
TnDPOOuNCTNTeB cNe dyEeT pa3MeuaTb KaK MOxHO
6JHXe K BOOChA6dNTEbHOn ceTI.
Heco6nOeHne BblweyKa3aHHbIX ycNoBn npNBOI NT K cepbe3HOMy MexAHueckOMy NOBpeKDeHNIO HacocA, a TAKKe K notepe rapaHTn.
IOnaay BOnbl OT BoDOnpOBoDnCetN
- PoiCoeHInTe r6Km IJnAHr NODaun BObl (He BXO -IIT B KOMPJIeKT NOCTABKN) K UTIyUepy IJN BODbl Ha annapape N K INTOUYHKY NODaun BObl.
- OTKpoIte KpaH.
Iopaa BObln3 OTKpbitoro 6aka
-Поверпг,Чтбь OCHOВHOB BBKIOUaTeJIb HAXO -ДИССВ ПОJOXKeHn "OFF;
-3aINtB6aK;
BHUMAHNE: Mbl pekomehnyem nCIOJIb3OBA Tb demHepaJIIN3OBAHHO BOIbl.
>CNCTEMA3JEKTPONNTAHN
-Подкlio ueHne annapaTа KэнeКТрocetиdoJxHo COOTBeTCTBOBaTb CTaHdApTy IEC 364.
BAXHO: PpexJe yem NOKIOUHTb annapaT K cTeN y6eIInTEcB B TOM, YTO daHHbIe Ha 0npMeHHoT Ta6nueKe COOTBETCTBYOT XapaKTepnCTnKaM 3JIeKTPnueCKo CETn N po3Etka 3aUNuEHa aBTOMaTnueCKIM npeOxpaHNTbHbIM BblKIIouaTeIeM, Cpa6aTbIBaIOUM npINOBJIeHN TOKA yTeuKN, C NOPOROBON YyBCTBHTbHOCTbIO HnJke O,03A - 30 MC.
- Ecn ceteBa BnIka annapata He noXoNT K
po3eTke,3aMeHHTe po3eTKy Ha NOxOJaIyU,ДЯ 3TOrO o6paTntecb K cneuaNtcy.
He nCnoJIb3OBA Tb annapat npn TemnepaType Hnke 0^ ,ecnn OH oCnaeH wlaHrom n3 nbx (H W-F).
-XY BHUMAHNE: HenoJxOJaIue ydHnHTeIN MOryt IpeDCTaBJIb Tb ONaCHOCTb.
XJ BHIMAHHE: Пр ИСПОЛБЗОВАнУДИНТЕЛБHOrO Ka6eЯ IшTeKep npo3eTKaДОЖнbl 6bITb BOdOHePOnHuaEmbIMn, a Ka6eIbДОЛжeH ИМeТь pa3Мерbl, пИВeDEHныEВ CNeDyUoIeY Ta6Nlue.
230-240V 400-415V
3G 2,5 mm2 4G 2,5 mm2
max 20 m max 30 m
3KCNJYATAU
CHATNEYNAKOBKN
ChrB bepxHne n HnXhne KpOKn, KOtOpbie 0KcnpyOT kopo6ky Ha naJIte. CTrHyTb kopo6ky, NOCTaBNTb MaunHy DByM Konecamn Ha 3emIIO n ChrB naJInet.
peKOMeHIOBaHHbIM MOUIM CpeCTBOM,
IPOXOJUZIMDJIaTINAMoIKN,KOTOpbHeo6xOJUMBbIOJHHTb.
BHIMAHHE: NcnoIb3yIe NCKJIIOUHTeIbHO XnIKne MOIOUIe CpeCDTBA, HN B KOeM Clyuae He npIMHeR KNCOTHbIe IIN UeOCHbIe pactBopbl. Mbl peKOMeHdyem NCNoIb3OBaTb Haun MOIOUIe CpeCDTBA, KOToPbIE 6bln CneuaJIbHO pa3pa6oTaHbI dIy npIMHeHry B 3TOM arperaTe.
Boda (cm.pnc.A) 251
cm.rnaBy:"IOAuaBODbI"
TolbKO B MOeJI:Major
-
NOIDCOeINHHTb JIaHr ③15,
-
nOdHATb 6e3OnaNCHoCTn C2
-
3aTeM OTKpoIte peryJrTOp napa 20.

Onacho: ropaun nap
>NEPED1-bIM3ANYCKOM
MoJeB c aKKymyTOpOM 12V
-y6eINtbcra, yTO rIaBbIy BblKIOUaTeJIb 10 yCTaHOBJeH Ha (0) OFF)
CM.PNC.
-OTBnHTnTb 2 KpyrIbIe pyuKn I ChaTb 3aIuTHyIO KpbIuKy
- NOДКЛЮЧИТ bITeNCEJIb K INHBepToPy.
- yCTaHOBnTb BbIKIIOuTaTeNb INHBeptTopa Ha (I) ON 18.
- OndHOBpeMeHHO 3aXKKeTcBcTeOIONoHbI INHdNKaTOP.
Onyctntb 3aunTHyo KpbuKy n npBnHTntb 2 pyKn.
> Akkymyntop
(MoIeNb c aKKymyTOpom 12 V)
-Проверпь уровьз 3ардкн akkyмлгета n npиступьк聪рзардкe:
-19 cBeTuaHc HnDkaTop LED 3eJeHbI aKkyMylrTop 3apJxKeH
- ⑨CBETAUNICNHNINKATOPLEDJKeNTbIaKKyMylTOp3apJKeHHa50%
-19CBETAUNICNHNKATOPLEDKpaCHbI AkkymyIaTOp pa3pJKeH
TTo6bl 3apAaNtB aKKymyIaTOp:
- YCTAHOBNTb BbIKNIOUaTeJIb 10 Ha (0) OFF
BCTaBnTb WTeNcEnb B 3JNeKtpuueckyU pO3eTKy
-Pexm3apnBKnBkIoueH.
BAXHO: Pekm 3apKn pa6oTaET npn TnaBHOM BbIKNIOUaTeNe 10 B IonoJKeHn (I) (II) (O)..
BAXHO: CneIOBaTb HNCTpyKUAM N3 pyKOBOdCTBa NO pIIMeHEnIO 6e3ONaCHOCTn aKKymyJrTOPOB.
> NeckoctpyHbI KOMnKeT
TolbKO B MOdeJIIN " Graffiti Waster"
(cm.pnc.FGHI)
Pn NOMOu COOTBETCTByoUx aKceccyapOB MOxHO BbINOJHrTb NeCKOcTpynHyu 6pa60TkY.
- HanonHntb 6ak dna necka (necoK B KOMnJIeKT He BXoNT) neckom dna neckoCTpyuHoi O6pa60TKc KaIb6pOBko 0,5 mm.
BAXHO: ncpnoj3yute tonbko cyxoi necok.
> PerynnpoBkA TeMnepaTpybl
(cm.pnc.D)
Дя ретулровки Temпературbl BOCNoIb3OBaTbcr TepmoperyIЯTopOM,pacnoIoxeHHbIM Ha NaHeHn ynpabLeHn.
JaHHa MaunHa cHa6KeHa 3NeKToHHbIM TepMopepyIaTOpom, N03BOJIAUIM
KOHTPoInpoBaTb n perynipoBaTb TemnepaTypy, a TAKKe daBHeHne B KOTNe OT MInH. 5 bar do MaKC. 10 bar.
-Пи ВКlioуенmoeHoro arperaTДИСнел NOKa3bIBAeT TemnepaTyP, CHTaHHyU B KOTNe.
I pyrnynpOBKn TempepaTypbI BbINOHHTb CneDyUoune onepaun:
-
HaKMnTe OndHOBpeMeHHo u ydepkBaHTe HeCKOJIbKO cekyHd (+) n (-)
-
Haxmnte Ha KhoNky(+)Дя NObIeHnЯ Tempepatpyi Ии Ha KhoNky(-)Дя ee NOHIXeHnY.
Дя pa60ы Ha 10 bar Heo6xOДIMо yCTaHOBnTb TepMoperyJrTOp Ha 190^
CBAR
CPABHNTIELHAR TABJNCA
1525
TPAyCOBUEJbCnI IN DABJIENI
1596
IAPA B BAPAX (BAR)
1657
1708
1759
180 10
BHUMAHNE:
- 3aandaHna MaKcImaJIbHra TempepaTpaMaunHbl
coCTaBnEeT 190^
-ПОВONPOCAM,CBЯ3AHHbIMCJIIO6bIMN ONEpaCnMnNopeYnIPOBKe,OTJaDKe N 3aMeHe DeTaneN,He ONUcaHHbIMN B DaHHOM pyKOBOdCTBe, KOHCyIbTInPOBaTbCRA C KBaINΦuNpOBAHHbIM NepCOHaJOM pON3BODHTeJI NII NOCTaBUnKa.
Bo3MOxHObBbINOpHeHpepa3HbIXperylnpOBOK TnTOro,TO6bMaunHaMOrnaOTBeuatb pa3NHybIM npON3BOcCTBeHHbIM Tpe6OBaHNm.
> PerynnpobKa KoJnueCTBa npa N BoDbl
(cm.pnc.D)
Дя BBINOJIHHeHЯ peryIuPObKn KOJNUeCTBa NOJaBAeMOrO npa n BOdBi Heo6xOJIMo NOKpyTITb pyKy ⑧.
HO
BlaJXbI Iap;

kənnap;
>3neKtpnueeCKNe KhoNKn ynpaBHeHna
(haimehoBaHne-onucahne)
10 -TJABHbI BblKJIIOUATEJIb:nepeKJIIOUaTeJIb C DByMn PO3NmMn, NOaOuMn B MaunHy 3JIeKTpUueCTBO,HaxoJcB NonoXeHN (I) ON. Ecn KHOJa B NoOxoHeHN (0) OFF, MaunHa OTKJIIOUaETcR.
MoJeB c AkKMyJrTOpom 12V:
10 -JIABHbI BbIKJIOUATEJIb:
(1) ON: ΦύнкύηουροBAHne Oτ ἀλεΚτροεHεργι
(0) OFF: MaunHa BbIKHouaETc
(II) ON: ΦύнкύονηροBAне отakкумлэТора
11-KhONka BKNIOUeyHNE KOTJIa:HaKImaeTcIyBKNIOUeyHNA KOTJIa.
1213 - TEPMOPEYJLANTOP: cmoTp naparpaP "PerynipOBKa TemnepaTypbl"
4-Диспел:
-Индикатop TemпаТурьI
-CunHan "H2O":KoIgBaB6ake3aKoHUnIacbBoVa.
-CnHnJ "GAS" -Korda B 6ake 3aKoHnIOcb nn3eJbHOe TOnJIuBO.
HENCNPABHOCTU IN CNOCObI INX CTPAHEHNA
TEXO6CJYXKNBAHNE IN PEMOHT
TEXOБСЛУЖИBAHINE
ПОНТРAMMA ПЛАHOBOTO TEXOBCLJXNBAHIN
3aɪdɪte Ha caɪtɪ n ckaʊaɪte nporpammy nlaHOBOrO Texo6cnyxuBaHnɪ.
BHIMAHHE:peed BbIOnHeHem KaKHX- 1n60 onepaun no Texo6cnyxuBaHNIO arperata cnYCTNTb DaBJeHne,OTKNIOHTb NCTOCHNK IODaUN BObl NJIeKTpONTuHIN.
TEXO6CJYKBAHNE
( CMOTPN TABNIUy ITO TEXO6CJYKINBAHNUO)
BHUMMAHNE:
Ipeed BbINONHeHnem KaKnx-Ni6o onepaun no Texo6cnyxuBaHNIO n 3ameHe DeTaleN, Bcerda NOMHHTb O Heo6XODMOCTN:
- BbIKIouHb MaunHy (nepeKlIOuateIb IABHbI BblKJIIOUATEIb B noJIOxHeHH OFF),
- OToeHHTb Ka6eJb 3NeKtpOnnTaHn.
K1 BbINOJIHeHne ONEpaun no TexO6cIyXnBAHnIO,3aMeHe IeTaJeN peMOHTy DonxHO NOpyuTbcra KBaINΦuNPoBaHHOMy TexHnueCKOMy nepcoHaJy,KOTopbl O3HaKOMJIeH C TexHOLOrUeCKM yCTPOINCTBOM MaUNHbl.
K2No Bonpocam, CB3aHHbIM C IIO6bIMN OepaunmnopeynpOBKe,OTnaKe N 3aMeHe DeTaJe, He ONuCAHbIMn BdaHHOM pyKOBOCTBe, KOHCyIbTnPOBaTbcra KBAJIΦnUPOBaHHbIM NepcoHaIOM npOn3BOIDTeJn INn NOCTabUzka.
-Прпnpоведен�чNTКmaшны BCERda HOCNTb 3auntHbIe nepuATkn.
IpeoXpaHnteJbHbI KJIaHaN IpyrNe akceccyapbl DOnJHbI nepnoDnueckn npOBepraTbcra B COOTBeTCTBmC HaUHOHaJbHbIMn CtaHdApTaMn HOpMaTnBaMn.DM 329/04.
067a oynctka MaunHbI
KaKdyu HeJeI npOBoNTb ONUCTKy MaunHy, ydaJra C Hee Nblb npn NOMOUs CkatoRO BO3dyxa. BbINOJIHTB BHeUHIO ONUCTKy KOpNyca MaunHbI npn NOMOUs COOTBeTCTByUOx MOUUX CpeDCTB.
(CMOTPN TAbNlNy)
22 BHIMAHHE: Дя обспесеня 6e3oNaChOCTn MaunHbI NCNoJIb3OBaTb NCKJIIOUHTeJIbHO OpiuHaJIbHbIe 3aPacTn, NocTAbJIeMbIe PpON3BOJNTeJIeM IIN Nm Odo6peHHbIe.
J (2003 27 CE/96/2002
i1i i 1i0o j0j j0i 120
jglall gay lal y jg aill jil
aill llll 1
ooa aaa aaal jall
J 1
jglg 1 jg jg jg jg jg jg jg
Aio calisill jall jlesll lgs Jellao

a + b = 1
a1y1 a1yii elai ayloal 1jla (s)
Jg 1
()
aBbBaaal aIy 22
aaii aai jao ge Jgaiy
i1
(A)-LpA 75 dB
aiai iieil gai y:pa
Lol Jolil Jolil jolil aill jaioll
pssssssssssssssssssssssssssss
1.19910815 277
jaiai bgaia
a
Lai ginaill 15
12a 1gaoall 1gai
1
alj:aiililciisll jaiill
jia gaoall 1 jaiy jia jiall jilil aie
aalalglal
jui 1i jui 1i li gai
JlJ 1 j 1 Jll j 1 a 1 1 1 1
iLac jg ailll g iis 1g j
aiaial yg aibll alilal gai
AR
y
ii 10
- joll wolld
iilllls 1200 gLs iJy1 J
S ginnn bnaal 1gall jiee 1
1234567890
gall gaoaill jie bcb cia 2
S OBC = S COD + S_ BOC
Sslll llll sbs on (1)
j
4yI -ON (II)
1 1
Jlll 2s
J 1
S = 26 ≤ 11
Jalilj jlllblaiy j jlc biai (3
1.11 (1) ≤ all ≤ ≤ ≤ ≤ ≤ ≤ ≤ ≤ ≤ ≥ ≥ ≥ ≥ ≥ ≥ ≥ ≥ 1 < 2 < 3 > , i < j < k > , i,j = 1,2·s n.
abian 2jgic
:12111104111111111
12 17 biai j jie bi
biinll 1
(jouillgj)
a 1
ii
11 (1)
"OFF" (0)
14 2
"OFF" (0)
J 3
AR
| 5 152 |
| 6 159 |
| 7 165 |
| 8 170 |
| 9 175 |
| 10 180 |
| 4 181 |
| a l l l l l l l l l l l l l l l l l l l l l l l l l l l l l l l l l l l l l l l l l l l l l l l l l l l l l l l l l l l l l l l l l l l l l l l l l l l l l l l l l l l l l l l l l l l l l l l l l l l ll l l l l l l l l l l l l l l l l l l l l l l l l l l l l l l l l l l l l l l l l l l l l l l l l l l l l l l l l l l l l l l l l l l l l l l l l l l l l l l l l l l l l l l l l l l l l l l l l l l l a b c d e f g h i k j l m n o p q r s t s u r s y m b o l y a l l l l l l l l l l l l l l l l l l l l l l l l l l l l l l l l l l l l l l l l l l l l l l l l l l l l l l l l l l l l l l l l l l l l l l l l l l l l l l l l l l l l l l l l l l l l l l l l l l l L |
| a l l l l l l l l l l l l l l l l l l l l l l l l l l l l l l l l l l l l l l l l l l l l l l l l l l l l l l l l l l l l l l l l l l l l l l l l l l l l l l l l l l l l l l l l l l l l l l l L |
| d e g r a d e r s y m b o l y a l l l l l l l l l l l l l l l l l l l l l l l l l l l l l l l l l l l l l l l l l l l l l l l l l l l l l l l l l l l l l l l l l l l l l l l l l l l l l l l l l l l l l l l l l l L |
| a l l l l I I I I I I I I I I I I I I I I I I I I I I I I I I I I I I I I I I I I I I I I I I I I I I I I I I I I I I I I I I I I I I I I I I I I I I I I I I I I I I I I I I I I I I I I I I I I I I I I I I I I L H2O |
| a b c d e f g h i k j l m n o p q r s t s u r s y m b o l y a l l l l l l l l l l l l l l l l l l l l l l l l l l l l l l l l l l l l l l l l l l l l l l l l l l l l l l l l l l l l l l l l l l l l L |
| d e g r a d e r s y m b o l y a l l l l l l l l l l l I I I I I I I I I I I I I I I I I I I I I I I I I I I I I I I I I I I I I I I I I I I I I I I I I I I I I I I I I I I I I I I I I I I I I I I I I I I I I I I I I I I I I I I I I I I I I I I L H2O a b c d e f g h i k j l m n o p q r s t s u r s y m b o l y a l l l l l l l l l l l l l l l l l l l l l l l l l l l l l l l l l l l l l l l l l l l l l l l l l l l l l l l l l l l l l l l l l l l L |
| a b c d e r s y m b o l y a l l l l l l l l l l l l l l l l l l l l l l l l l l l l l l l l l l l l l l l l l l l l l l l l l l l l l l l l l l l l l l l l l l l l l l l l l l l l l l l l l l l l l l l l L |
| d e g r a d er s y m b o | d e r s y m b o | d e r s y m b o | d e r s y m b o | d e r s y m b o | d e r s y m b o | d e r s y m b o | d e r s y m b o | d e r s y m b o | d e r s y m b o | d e r s y m b o | d e r s y m b o | d e r S |
| a b c d e r s y m b o | d e r s y m b o | d e r s y m b o | d e r s y m b o | d e r s y m b o | d e r s y m b o | d e r s y m b o | d e r s y m b o | d e r s y m b o | d e r s y m b o | d e r s y m b o | D |
| a b c d e r s y m b o | d e r s y m b o | d e r s y m b o | d e r s y m b o | d e r s y m b o | d e r s y m b o | d e r s y m b o | d e r s y m b o | d e r s y m b o | d e r s y m b o | d e r S |
| a b e r s y m b o | d e r s y m b o | d e r s y m b o | d e r s y m b o | d e r s y m b o | d e r s y m b o | d e r s y m b o | d e r s y m b o | d e r s y m b o | d e r s y m b o | d e r s y m b o | d de r s y m b o | d e r s y m b o | d e r s y m b o | d e r s y m b o | d e r s y m b o | d e r s y m b o | d e r s y m b o | d e r s y m b o | d e r s y m b o | d e r s y m b o | d e r s y m b o | d e d r s y m b o | d e r s y m b o | d e r s y m b o | d e r s y m b o | d e r s y m b o | d e r s y m b o | d e r s y m b o | d e r s y m b o | d e r s y m b o | d e r s y m b o | d e r s y m b o | d e p r e d r s y m b o | d e r s y m b o | d e r s y m b o | d e r s y m b o | d e r s y m b o | d e r s y m b o | d e r s y m b o | d e r s y m b o | d e r s y m b o | d e r s y m b o | d e r s y m b o | D |
| "Graffiti Waster" (F-G-H-I) (2015) |
| A. A. A. A. A. A. A. A. A. A. A. A. A. A. A. A. A. A. A. A. A. A. A. A. A. A. A. A. A. A. A. A. A. A. A. A. A. A. A. A. A. A. A. A. A. A. A. A. A. A. A. B. C. D. E. F. G. H. I. J. K. L. M. N. O. P. Q. R. S. T. U. V. W. W. W. W. W. W. W. W. W. W. W. W. W. W. W. W. W. W. W. W. W. W. W. W. W. W. W. W. W. W. W. W. W. W. W. W. W. W. W. W. W. W. W. W. W. W. W. W. W. W. . . . . . . . . . . . . . . . . . . . . . . . . . . . . . . . . . . . . . . . . . . . . . . . . . . . . . . . . . . . . . . . . . . . . . . . . . . . . . . . . . . . . . . . . . . . . . . . . . . . . . B. B. B. B. B. B. B. B. B. B. B. B. B. B. B. B. B. B. B. B. B. B. B. B. B. B. B. B. B. B. B. B. B. B. B. B. B. B. B. B. B. B. B. B. B. B. B. B. B. B. B. C. C. C. C. C. C. C. C. C. C. C. C. C. C. C. C. C. C. C. C. C. C. C. C. C. C. C. C. C. C. C. C. C. C. C. C. C. C. C. C. C. C. C. C. C. C. C. C. C. C. C. D. D. D. D. D. D. D. D. D. D. D. D. D. D. D. D. D. D. D. D. D. D. D. D. D. D. D. D. D. D. D. D. D. D. D. D. D. D. D. D. D. D. D. D. D. D. D. D. D. D. D. E. E. E. E. E. E. E. E. E. E. E. E. E. E. E. E. E. E. E. E. E. E. E. E. E. E. E. E. E. E. E. E. E. E. E. E. E. E. E. E. E. E. E. E. E. E. E. E. E. E. E. F. F. F. F. F. F. F. F. F. F. F. F. F. F. F. F. F. F. F. F. F. F. F. F. F. F. F. F. F. F. F. F. F. F. F. F. F. F. F. F. F. F. F. F. F. F. F. F. F. F. F. . . . . . . . . . . . . . . . . . . . . . . . . . . . . . . . . . . . . . . . . . . . . . . . . . . . . . . . . . . . . . . . . . . . . . . . . . . . . . . . . . . . . . . . . . . . . . . . . . . G. G. G. G. G. G. G. G. G. G. G. G. G. G. G. G. G. G. G. G. G. G. G. G. G. G. G. G. G. G. G. G. G. G. G. G. G. G. G. G. G. G. G. G. G. G. G. G. G. G. G. H. H. H. H. H. H. H. H. H. H. H. H. H. H. H. H. H. H. H. H. H. H. H. H. H. H. H. H. H. H. H. H. H. H. H. H. H. H. H. H. H. H. H. H. H. H. H. H. H. H. H. I. I. (II) (III) (IV) (V) (VI) (VII) (VIII) (IX) (X) (XI) (XII) (XIII) (XIV) (XV) (XVI) (XVII) (XVIII) (XIX) (XXX) (XXY) (XYX) (XYZ) (XYZ) (XZX) (XZX) (XZYZ) (XZXZ) (XYZZ) (XZXZ) (XYZZ) (XZXZ) (XYZZ) (XZXZ) (XYZZ) (XZXZ) (XYZZ) (XZXZ) (XYZZ) (XZXZ) (XYZZ) (XZXZ) (XYZZ) (XZXZ) (XYZZ) (XZXZ) (XYZZ) (XZXZ) (XYZTZ) (XZXZ) (XYZTZ) (XZXZ) (XYZTZ) (XZXZ) (XYZTZ) (XZXZ) (XYZTZ) (XZXZ) (XYZTZ) (XZXZ) (XYZTZ) (XZXZ) (XYZTZ) (XZXZ) (XYZTZ) (XZXZ) (XYZTZ) (XZXZ) (XYZ TZ) (XZXZ) (XYZTZ) (XZXZ) (XYZTZ) (XZXZ) (XYZTZ) (XZXZ) (XYZTZ) (XZXZ) (XYZTZ) (XZXZ) (XYZTZ) (XZXZ) (XYZTZ) (XZXZ) (XYZTZ) (XZXZ) (XYZTZ) (XZXZ) (XYZtz) (XZXZ) (XYZtz) (XZXZ) (XYZtz) (XZXZ) (XYZtz) (XZXZ) (XYZtz) (XZXZ) (XYZtz) (XZXZ) (XYZtz) (XZXZ) (XYZtz) (XZXZ) (XYZtz) (XZXZ) (XYZtz) (XZXZ) (XYZatz) (XZXZ) (XYZatz) (XZXZ) (XYZatz) (XZXZ) (XYZatz) (XZXZ) (XYZatz) (XZXZ) (XYZatz) (XZXZ) (XYZatz) (XZXZ) (XYZatz) (XZXZ) (XYZatz) (XZXZ) (XYZatz) (XZXZ) (XYZutz) (XZXZ) (XYZutz) (XZXZ) (XYZutz) (XZXZ) (XYZutz) (XZXZ) (XYZutz) (XZXZ) (XYZutz) (XZXZ) (XYZutz) (XZXZ) (XYZutz) (XZXZ) (XYZutz) (XZXZ) (XYZutz) (XZXZ) (XYZatz) (XZXZ) (XYZatz) (XZXZ) (XYZatz) (XZXZ) (XYZatz) (XZXZ) (XYZatz) (XZXZ) (XYZatz) (XZXZ) (XYZatz) (XZXZ) (XYZatz) (XZXZ) (XYZatz) (XZXZ) (XYZitz) (XZXZ) (XYZitz) (XZXZ) (XYZitz) (XZXZ) (XYZitz) (XZXZ) (XYZitz) (XZXZ) (XYZitz) (XZXZ) (XYZitz) (XZXZ) (XYZitz) (XZXZ) (XYZitz) (XZXZ) (XYZitz) (XZXZ) (XYZtz) (XZXZ) (XYZtz) (XZXZ) (XYZtz) (XZXZ) (XYZtz) (XZXZ) (XYZtz) (XZXZ) (XYZtz) (XZXZ) (XYZtz) (XZXZ) (XYZtz) (XZXZ) (XYZtz) (XZXZ) (XYZ TZ) (XZXZ) (XYZTZ) (XZXZ) (XYZTZ) (XZXZ) (XYZTZ) (XZXZ) (XYZTZ) (XZXZ) (XYZTZ) (XZXZ) (XYZTZ) (XZXZ) (XYZTZ) (XZXZ) (XYZTZ) (XZXZ) (XYZ TZ) (XZXZ) (XYZ TZ) (XZXZ) (XYZTZ) (XZXZ) (XYZTZ) (XZXZ) (XYZTZ) (XZXZ) (XYZTZ) (XZXZ) (XYZTZ) (XZXZ) (XYZTZ) (XZXZ) (XYZTZ) (XZXZ) (XYZTZ) (XZXZ) (XYZtz) (XZXZ) (XYZTZ) (XZXZ) (XYZTZ) (XZXZ) (XYZTZ) (XZXZ) (XYZTZ) (XZXZ) (XYZTZ) (XZXZ) (XYZTZ) (XZXZ) (XYZTZ) (XZXZ) (XYZTZ) (XZXZ) (XYZTZ) (XZXZ) (XYZSZ) (XZXZ) (XYZSZ) (XZXZ) (XYZSZ) (XZXZ) (XYZSZ) (XZXZ) (XYZSZ) (XZXZ) (XYZSZ) (XZXZ) (XYZSZ) (XZXZ) (XYZSZ) (XZXZ) (XYZSZ) (XZXZ) (XYZSZ) (XZXZ) (XYZsz) (XZXZ) (XYZSZ) (XZXZ) (XYZSZ) (XZXZ) (XYZSZ) (XZXZ) (XYZSZ) (XZXZ) (XYZSZ) (XZXZ) (XYZSZ) (XZXZ) (XYZSZ) (XZXZ) (XYZSZ) (XZXZ) (XYZSZ) (XZXZ) (XYZSz) (XZXZ) (XYZSZ) (XZXZ) (XYZSZ) (XZXZ) (XYZSZ) (XZXZ) (XYZSZ) (XZXZ) (XYZSZ) (XZXZ) (XYZSZ) (XZXZ) (XYZSZ) (XZXZ) (XYZSZ) (XZXZ) (XYZSZ) (XZXZ) (XYZ SZ) (XZXZ) (XYZSZ) (XZXZ) (XYZSZ) (XZXZ) (XYZSZ) (XZXZ) (XYZSZ) (XZXZ) (XYZSZ) (XZXZ) (XYZSZ) (XZXZ) (XYZSZ) (XZXZ) (XYZSZ) (XZXZ) (XYZSZ) (XZXZ) (XYZTZ) (XZXZ) (XYZTZ) (XZXZ) (XYZTZ) (XZXZ) (XYZTZ) (XZXZ) (XYZTZ) (XZXZ) (XYZTZ) (XZXZ) (XYZTZ) (XZXZ) (XYZTZ) (XZXZ) (XYZTZ) (XZXZ) (XYZZZ) (XZXZ) (XYZZZ) (XZXZ) (XYZZZ) (XZXZ) (XYZZZ) (XZXZ) (XYZZZ) (XZXZ) (XYZZZ) (XZXZ) (XYZZZ) (XZXZ) (XYZZZ) (XZXZ) (XYZZZ) (XZXZ) (XYZZZ) (XZXZ) (XYZzz) (XZXZ) (XYZzz) (XZXZ) (XYZzz) (XZXZ) (XYZzz) (XZXZ) (XYZzz) (XZXZ) (XYZzz) (XZXZ) (XYZzz) (XZXZ) (XYZzz) (XZXZ) (XYZzz) (XZXZ) (XYZzz) (XZXZ) (XYZZZ) (XZXZ) (XYZzz) (XZXZ) (XYZzz) (XZXZ) (XYZzz) (XZXZ) (XYZzz) (XZXZ) (XYZzz) (XZXZ) (XYZzz) (XZXZ) (XYZzz) (XZXZ) (XYZzz) (XZXZ) (XYZZZ) (XZXZ) (XYZZZ) (XZXZ) (XYZZZ) (XZXZ) (XYZZZ) (XZXZ) (XYZZZ) (XZXZ) (XYZZZ) (XZXZ) (XYZZZ) (XZXZ) (XYZZZ) (XZXZ) (XYZZZ) (XZXZ) (XYZ ZZ) (XZXZ) (XYZZZ) (XZXZ) (XYZZZ) (XZXZ) (XYZZZ) (XZXZ) (XYZZZ) (XZXZ) (XYZZZ) (XZXZ) (XYZZZ) (XZXZ) (XYZZZ) (XZXZ) (XYZZZ) (XZXZ) (XYZZZ) (XZXZ) (XYZZ) (XZXZ) (XYZZZ) (XZXZ) (XYZZZ) (XZXZ) (XYZZZ) (XZXZ) (XYZZZ) (XZXZ) (XYZZZ) (XZXZ) (XYZZZ) (XZXZ) (XYZZZ) (XZXZ) (XYZZZ) (XZXZ) (XYZZZ) (XZXZ) (XYZSS) JL 10 10 10 10 10 10 10 10 10 10 10 10 10 10 10 10 10 10 10 10 10 10 10 10 10 10 10 10 10 10 10 10 10 10 JL 10 10 10 10 10 10 10 10 10 10 10 10 10 10 10 10 10 10 10 10 10 10 10 10 10 10 10 10 10 10 10 10 JL10 10 10 10 10 10 10 10 10 10 10 10 10 10 10 10 10 10 10 10 10 10 10 10 10 10 10 10 10 10 10 10 10 20 10 20 10 20 10 20 10 20 10 20 10 20 10 20 10 20 10 20 10 20 10 20 10 20 10 20 10 20 10 20 10 20 11 20 11 20 11 20 11 20 11 20 11 20 11 20 11 20 11 20 11 20 11 20 11 20 11 20 11 20 11 20 11 20 11 20 JL10 10 10 10 10 10 10 10 10 10 10 10 10 10 10 10 10 10 10 10 10 10 10 10 10 10 10 10 10 10 10 10 JL11 10 10 10 10 10 10 10 10 10 10 10 10 10 10 10 10 10 10 10 10 10 10 10 10 10 10 10 10 10 10 10 10 10 JL11 10 10 10 10 10 10 10 10 10 10 10 10 10 10 10 10 10 10 10 10 10 10 10 10 10 10 10 10 10 10 10 11 20 11 20 11 20 11 20 11 20 11 20 11 20 11 20 11 20 11 20 11 20 11 20 11 20 11 20 11 20 11 20 10 20 10 20 10 20 10 20 10 20 10 20 10 20 10 20 10 20 10 20 10 20 10 20 10 20 10 20 10 20 10 20 JL11 10 10 10 10 10 10 10 10 10 10 10 10 10 10 10 10 10 10 10 10 10 10 10 10 10 10 10 10 10 10 10 JL11 9 9 9 9 9 9 9 9 9 9 9 9 9 9 9 9 9 9 9 9 9 9 9 9 9 9 9 9 9 9 9 9 9 9 9 9 9 9 9 9 9 9 9 9 9 9 9 9 9 9 20 20 20 20 20 20 20 20 20 20 20 20 20 20 20 20 20 20 20 20 20 20 20 20 20 20 20 20 20 20 20 20 20 20 JL11 9 9 9 9 9 9 9 9 9 9 9 9 9 9 9 9 9 9 9 9 9 9 9 9 9 9 9 9 9 9 9 9 9 9 9 9 9 9 9 9 9 9 9 9 9 9 20 20 88 88 88 88 88 88 88 88 88 88 88 88 88 88 88 88 88 88 88 88 88 88 88 88 88 88 88 88 88 88 88 88 88 88 JL11 9 9 9 9 9 9 9 9 9 9 9 9 9 9 9 9 9 9 9 9 9 9 9 9 9 9 9 9 9 9 9 9 9 9 9 9 9 9 9 9 9 9 9 9 9 9 9 JL11 9 9 9 9 9 9 9 9 9 9 9 9 9 9 9 9 9 9 9 9 9 9 9 9 9 9 9 9 9 9 9 9 9 9 9 9 9 9 9 9 9 9 9 9 9 9 9 JL11 9 9 9 9 9 9 9 9 9 9 9 9 9 9 9 9 9 9 9 9 9 9 9 9 9 9 9 9 JL11 9 9 9 9 9 9 9 9 9 9 9 9 9 9 9 9 9 9 9 JL11 9 9 9 9 9 9 9 9 9 9 9 9 9 9 9 9 9 JL11 9 9 9 9 9 9 9 9 9 9 9 9 9 9 9 JL11 9 9 9 9 9 9 9 9 9 9 9 9 JL11 9 9 9 9 9 9 9 9 9 9 JL11 9 9 9 9 9 9 9 9 JL11 9 9 9 9 9 9 9 JL11 9 9 9 9 9 9 JL11 9 9 9 9 JL11 9 JL11 JL11 JL11 JL11 JL11 JL11 JL11 JL11 JL11 JL11 JL11 JL11 JL11 JL11 JL11 JL11 JL11 JL11 JL11 JL11 JL1 JL1 JL1 JL1 JL1 JL1 JL1 JL1 JL1 JL1 JL1 JL1 JL1 JL1 JL1 JL1 JL1 JL1 JL1 JL1 JL1 JL1 JL1 JL1 JL1 J L J L J L J L J L J L J L J L J L J L J L J L J L J L J L J L J L J L J L J L J L J L J L J L J L J L J L J L J L J L J L J L J L J L |
g g j
山
251(A
iiil 100
()
y 1
J 1
y
.0000
a#i#
2,41(A
gaiiie 1jia i jia
g j 1
y 1
yglall yllc gllll g aiaaaal lllaaill lalba
i 1
i 150000000000000000000000000000000000000
251(A
"olally 15x y j" : Jaiil jaiil
Major:
15 ③
C2 C7
20 1
1j jalll jilll jyill jbs:4
a
12 12
100
"OFF" 25! (0) a.e.(0)
E k_1 all
eBc 1
在 Rt ABN 中:
.inverterJy slll
a a a a a a a a a a a a a a
a1 < b1 < 1
(124
jgmal ic ie
19
JSLIy
y
Jzill Jill iia 0j
<
- 271 ≤ 3 ≤ 9 即 2 ≤ x ≤ 9
4
4.1:
biinllnss

jg21
j_i A - B
abial ①
biinl juaa jia jia ③
4
olao ⑤
6
a
C. 的
Major:
biiai juaa juaigisi ③
20
D. 即 = 1
山
bein
ON/OFF 1
A
i#
i ③
y
A
J+
16
alial jgi plao bilisi j ①
E j_k 到
(12)inverter
(12)
Jz.
1
35 10
y
AR
aill bia aizill (aiy) y) n aiai jg ggi - 45 45 45 45 45 45 45 45 45 45 45 45 45
- a5 = a1 + 3d a_5 = 13
olalilj
11 111111111111111111111111
2j = 1
中
. jolll ie jiia olal pialiy
ai a ai 分母最小值为 k .
j j j j j j j j j j j j j j j j j j j j j j j j j j j j j j j j j j j j j j j j j j j
.1EC 60364-1 a
jss jssjj jssjj jss
aai gao clll lglg 1g 1g 1
gol
gao 1
a jaiy iie 100000000000000000000000000000000000000000000000000000000
biinall uadl 2aie yie gie pii

iXg jolal gjol gabj 1
$$ \begin{array}{l} - i \omega_ {1} p _ {\mathrm {o u t}} \ - b a i n \Delta y \ - \therefore \lim _ {j \rightarrow 0} \frac {\sin^ {2} j}{\cos^ {2} j} \ \end{array} $$
j BY-PASS 1
· = 0
1g<
Mpa 1 : yda clal baid
olal 1s i j sso jso jj jie all
A. + = 0
Clllglg jgl0a glgclpa
aaii aiee iie eae ee eae
J 1
AR
y
e aall glll gll lal lal
1y jg jgl 2a aal 5j
i 1
ylaal l jia g Jaaill g jai K11
y 1
l_手 : y = - 12x^2 + 14x + 3
1 1
1
12
y1
y
e 15
Jie will Jole 10
K13
cji jai jaijiaolai jao soalai jaiai aaiolai
1
K14
y
Eji jia jia jia jia jia jia k17
- | x - 2| = 52 .
a 1
:la
iiyabaiial abial cljIg IaK18
jaiy jaiiuiu aiai ciuaia iiai
Cui 0e i j Sii dai li j y i k19
A
y 1
.011111111
K20
J5y1 Jx Jx yIgilaIg I
Jg 1
ii
aai 4
JusjLsLoisioa12iA
1
an + 1 = 22 - an
j_L = 小
OFF("gaiiaaataaaa aai
a. ( \downarrow \downarrow \downarrow \downarrow ,\;g.\;g.\;g.\;g.\;g.\;g.\;g.\;g.\;g.\;g.\;g.\;g.\;g.\;g.\;g.\;g.\;g.\;g.\;g.\;g.\;g.\;g.\;g.\;g.\;g.\;g.\;g.\;g.\;g.\;g.\;g.\;g.\;g.\;g.\;
aill bll lac gai K1
i 1
jill 2010
(0)-OFF" 1
1
a
aJl Joc aij jaiy aaii ciiaai yai jai
K2
Jae pili 100
y
Jai jai jai jai jai jai jai
K3
olil 13a 15g
i 1
sill aLwgl jgta
aillalglaaswgl
iiiai i 1j 1 1 1 K4
1
i 1
jIeJI 00S Cuii, j
K5
aaiia aiee 1
Leia
K6
a 1000
lg : lig ≤ 0
Jg
.
K7
aIbIi clll lgl g oJgaiil llll j
y
ED = 2GD
K8
ii 1
Pc 10
e1
iie 2yly yolal yogaoell jill lio
i5y1 p1234567890
K10
y
G
AR
17 1
J 18.
19
jai 1
4g j 2j g l pLioic:4ii1 20
()
Jilgssjy 2. jzjj 21
Juaa
a 22
aiiis 5jill jiei
.
diLi bgeiaill 4g y 2: aii1 23
y 1 y
jglal 24
e 1
yill aalu jol y wS
j 111 j111 j111 Jx
jll jll llo 0e jll
i
Jl aIb! 1u g 1xj xj
= all
102
aie clll lill
alaa lba jaoai 03
J 1
jia jie 1ai jaoai ai jai jai jai jai jai
i
11...lll baiil
jai jai 04
0000 1
aill 1
aaii iiaii aiee
albiia 1y plisw2 y. g 1lll alll
1 1
jL = 2( l0 - l_1)
j05a
a
aaiiaaiiaaiiaaiiaaiiaaiiaaiiaaiiaaiiaaiiaaiiaaiiaaiiaaiiaaiiaaiiaaiiaaiiaaiiaaiiaaiiaaiiaaiiaaiiaaiiaaiiaaiiaaiiaaiiaaiiaaiiaaiiaaiiaaiiaaiiaaiiaaiiaaiiaaiiaaiiaaiiaaiiaaiiaai
yj jg jia jao 05b
jai 5i aalu uui jui y iui y
jIi
auii iuiuui 10000000000000000000000000000000000000000000000000000000000000
a 1
100 100
all
Jg 05d
a
-05e
Jbua
1j 1i jy jy jiy jiy jiy jiy
A
A
aaii aiaaiolai 4000 06
j
y
12 ÷ 5 = 3
2 B = 1
i 1
jolal oai jll cdoa.
4.1.14
iIoo
aegaaal
- 9^ ( -2, ,0)
1 1
- ( 12 + 13 - 13) + 2 = 0
1 1
g
i
aLil
()
jg
1

a_0 = 1


y:4i11 1
guiu 2 :jor4
ai = bi
bog


1
1
g cull ic ayolll l jss
i 1
DIESEL
1
paaaab1gajgl aegjUgo L
15guguguugulglgul
aalaoa
(MJkljbl)
aill uol lal 1j 0
.1J 11 J 11 11 11 11
2gao jokogoujgljol1jol51daiiaol0a
(5)
olui aJrnnl Ublnlln
J 1 Jg g g 1 1 1 1 1 1 1 1
j105 jgljy1g
JU JU JU JU JU JU JU JU JU JU JU JU JU JU JU JU JU JU JU JU JU JU JU JU JU
29 1
.aisolulgjiljlc
aaii j 1 gbi ai i aai i aai i gki
jgjj jg j0 xj y j4y
Jaw20jc Joo y aIomega logi
J 1 J 1 1 0 1 1 0 1 1 0 1 1 0 1 1 0 1 1
aaii oolaljgai jds aillbgaow no jna
yIuU uuuu uuuu uuuu
g aessg e 1s sgs
Jusll 1g. a gio a 180 J! Jaa oJra d
jIJI JJI JUJ UJ UJ UJ UJ UJ UJ UJ
JgJ 10 Jg
jLJIy cIg 100000000000000000000000000000000000000
yaa 8g
:osollwugjai
aiaiollg jyjdyjdlalol 3
150=U
iYSLQoSLQIOWg
aissollg yjdyd jdoLoo 6
225 1
a.o.
aolalj
gj jgl jdl lol ge plu wul aui 004
a. a. i. 1olge pluovil j! .davabla fll 40 gogbl
45 45 joo J (OFF" 10 " aagg
a 0g0
Giancarlo Lanfredi (Legal Representative Lavorwash S.p.A.)
LpA 75 dB (A)
Livello pressione acustica
EN Acoustic pressure
FR Niveau de pression acoustique
DE Schalldruckpegel
ES Nivel deruido
Tc Ses basinc seviyesi
UyPOBHeb 3ByKOBOrO DaBLeHnA
LwA 88dB(A) K (uncertainty) 3dB(A)
Livello di potenza sonora misurato
EN Acoustic power measured
FR Niveau du puissance sonore mesure
DE Abgemestes Schalleistungsiveau
Nivel de potencia acústica mesurado
TR Olçulen akustik gü seviyesi
Akyctnuecka N3MepeHHa MOHOCtB
LwA 91dB(A)
Livello di potenza sonora garantito
EN Acoustic power granted
FR Niveau du puissance sonore garanti
DE Garantiertes Schalleistungsiveau
Nivel de potencia acústica garantido
TR Garanti edilen akustik guc seviyesi
RU Akyctnuecka MOnuHcTb IpTeIOCTabIeHO


- PROGRAMMA MANUTENZIONI PROGRAMMATE
- > THECNICAL DATA
- SYMBOLS
- SAFETY PRECAUTIONS
- IMPORTANTWARNINGS
- >GENERALWARNINGS
- WARNING:
- EN
- ·WARNING:
- For fire-prevention purposes:
- > SAFETY DEVICE
- >STABILITY
- > WATER SUPPLY
- > ELECTRICITY SUPPLY
- USAGE
- > UNPACKING
- > Machine handling and transport
- > MACHINE DESCRIPTION
- see fig.A B
- see fig. C
- Model: Major
- see fig. D
- see fig. A
- see fig. E
- > INSTALLATION AND START-UP
- FUELLING
- DIESEL
- (see fig. A) 251
- DETERGENT
- WATER
- >1ST START-UP (BEFORE INITIAL USE)
- > Batteria
- > Sand blasting kit
- > Temperature adjustment
- > Steam and water output adjustment
- > Electric controls
- (Reference Description)
- > Steam gun
- Use of the steam gun
- > START-UP
- Description of the start sequence
- TO SPRAY DETERGENT
- > Machine stop (at end of work)
- Boiler steam discharge
- see fig. F (Optional)
- CARE AND MAINTENANCE
- SCHEDULED MAINTENANCE PLAN
- SEE ROUTINE MAINTENANCE TABLE
- WARNING
- Machine general cleaning
- WARNING:
- TROUBLESHOOTING
- Machine noise level
- WARRANTY CONDITIONS
- DISPOSAL (WEEE)
- INDICATIONS GÉNÉRALES
- > UTILISATION PRÉVUES
- CONDITIONS DE GARANTIE
- BHUMAHVE:
- RU
- > PINEOXPAHNTIELbHbIE YCTPOICTBA:
- BHUMAHNE:
- > YCLOBNIA DJIY OBECEPUEHNA YCTOUYBOCTU
- >IODAUABOdbI
- IOnaay BOnbl OT BoDOnpOBoDnCetN
- Iopaa BObln3 OTKpbitoro 6aka
- >CNCTEMA3JEKTPONNTAHN
- 3KCNJYATAU
- CHATNEYNAKOBKN
- Onacho: ropaun nap
- >NEPED1-bIM3ANYCKOM
- > Akkymyntop
- > NeckoctpyHbI KOMnKeT
- > PerynnpoBkA TeMnepaTpybl
- > PerynnpobKa KoJnueCTBa npa N BoDbl
- >3neKtpnueeCKNe KhoNKn ynpaBHeHna
- (haimehoBaHne-onucahne)
- HENCNPABHOCTU IN CNOCObI INX CTPAHEHNA
- TEXO6CJYXKNBAHNE IN PEMOHT
- TEXOБСЛУЖИBAHINE
- ПОНТРAMMA ПЛАHOBOTO TEXOBCLJXNBAHIN
- 3aɪdɪte Ha caɪtɪ n ckaʊaɪte nporpammy nlaHOBOrO Texo6cnyxuBaHnɪ.
- TEXO6CJYKBAHNE
- ( CMOTPN TABNIUy ITO TEXO6CJYKINBAHNUO)
- BHUMMAHNE:
- 067a oynctka MaunHbI
- (CMOTPN TAbNlNy)
- AR
- aalaoa
- a.o.
- aolalj
- LpA 75 dB (A)
- LwA 88dB(A) K (uncertainty) 3dB(A)
- LwA 91dB(A)
Brand : Lavor
Model : Kolumbo
Category : Steam cleaner