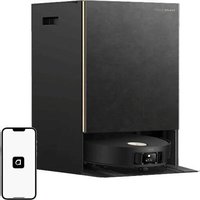
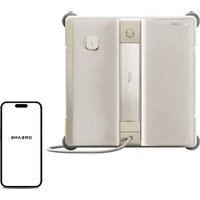
Bot D9 Pro - Robot vacuum DREAME - Free user manual and instructions
Find the device manual for free Bot D9 Pro DREAME in PDF.
| Product type | Robotic vacuum cleaner |
| Brand | Dreame |
| Model | Bot D9 Pro (RLS5-BL0) |
| Battery | Lithium-ion 5200 mAh (rated capacity) |
| Charging time | Approx. 6 hours |
| Rated voltage | 14.4 V |
| Rated power | 40 W |
| Wireless connectivity | Wi-Fi IEEE 802.11b/g/n 2.4 GHz |
| Station power supply | Input 100-240 V ~50/60 Hz 0.5 A, output 19.8 V 1 A |
| Cleaning modes | Silent, standard, strong, turbo; spot cleaning, scheduled |
| Mopping function | Yes, with water tank and mop cloth |
| Sensors | Drop, edge, laser distance, return to base |
| Compatible app | Mi Home / Xiaomi Home |
| Maintenance | Dust bin, filter, brushes, mop cloth, sensors |
| Battery replacement | Only by a qualified technician |
| Safety | Drop detection, automatic shutdown, Do Not Disturb mode |
| Operating temperature range | 0 °C to 40 °C |
| Country of origin | China (Dreame Technology brand) |
Frequently Asked Questions - Bot D9 Pro DREAME
User questions about Bot D9 Pro DREAME
0 question about this device. Answer the ones you know or ask your own.
Ask a new question about this device
Download the instructions for your Robot vacuum in PDF format for free! Find your manual Bot D9 Pro - DREAME and take your electronic device back in hand. On this page are published all the documents necessary for the use of your device. Bot D9 Pro by DREAME.
USER MANUAL Bot D9 Pro DREAME
The word "dreams" is the abbreviation of Dreame Technology Co., Ltd. and its subsidiaries in China, it is the transliteration of the company's Chinese name " Dream," which means striving for excellence in every endeavor and reflects the company's vision of continuous pursuit, exploration and search in technology.
For more information, please visit www.dreame-technology.com Manufactured by: Dreame Trading (Tianjin) Co., Ltd. Made in China
RL55-BLO-EU-RCO
Dreame Bot D9 Pro
Robot Vacuum and Mop User Manual
natural_image
Line drawing of a robotic vacuum cleaner with control panel and mounting feet (no text or symbols)Read this manual carefully before use and keep it for future reference.
dreame
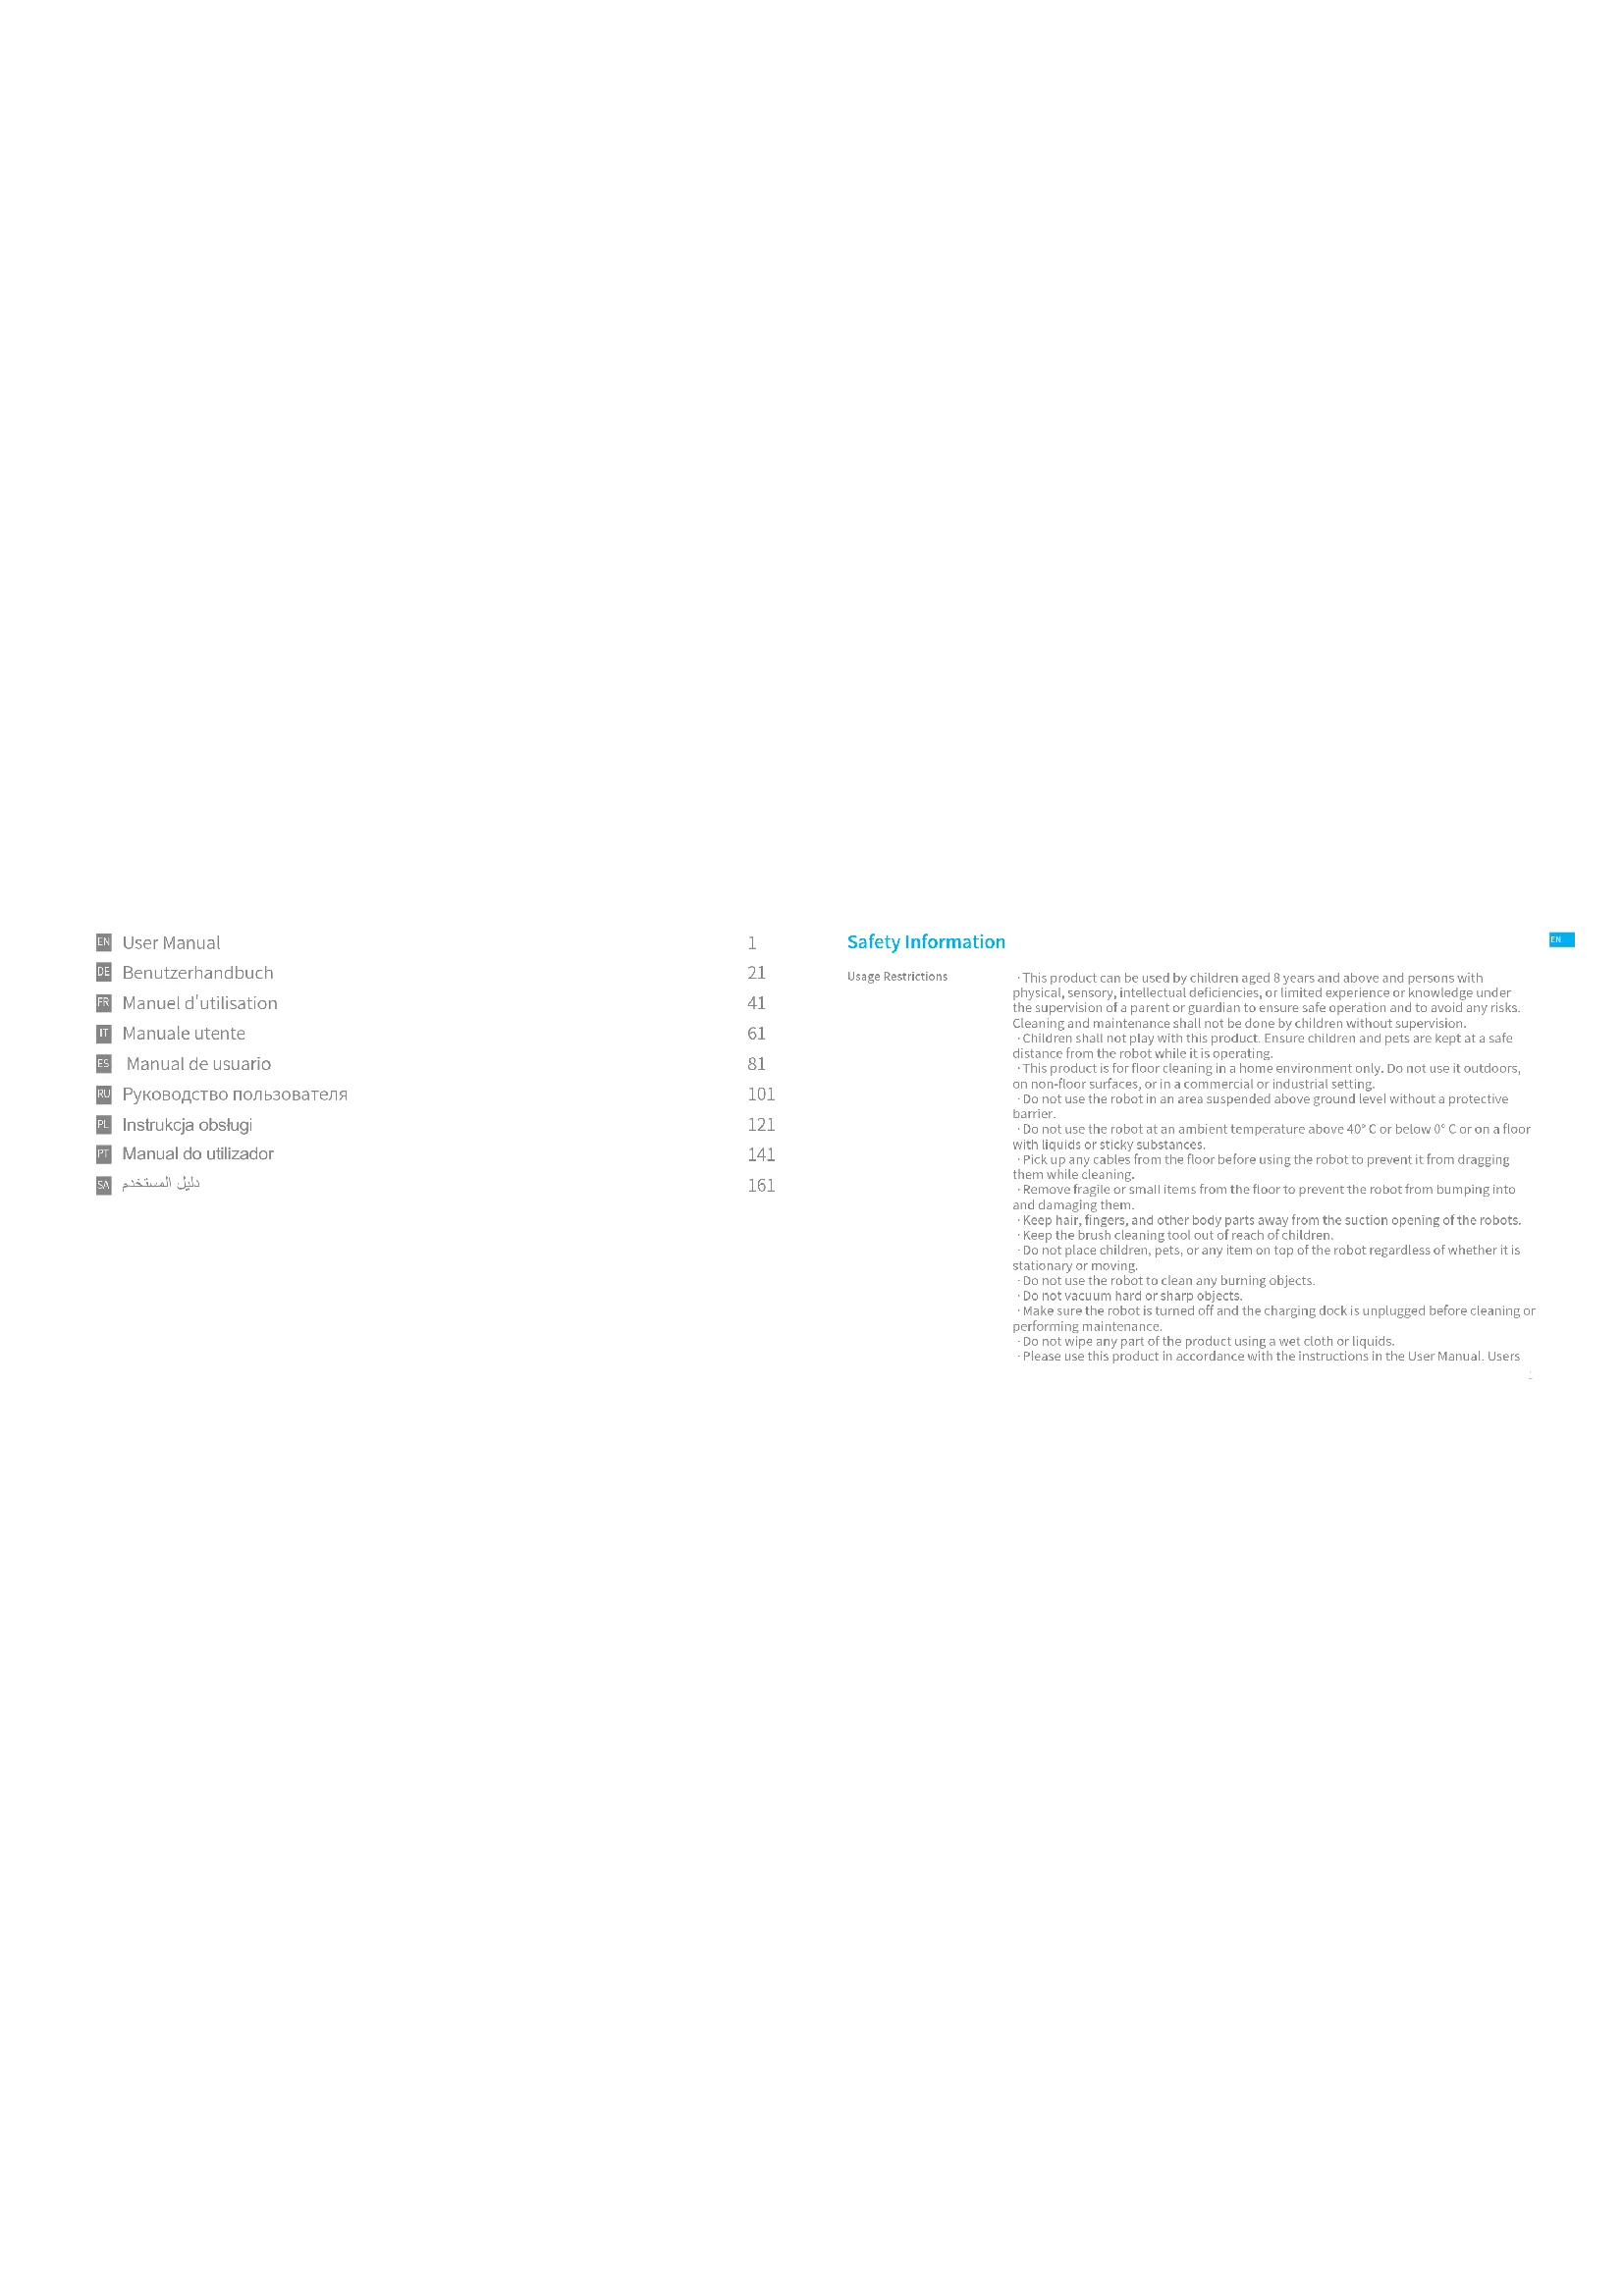
EN User Manual 1
DE Benutzerhandbuch 21
FR Manuel d'utilisation 41
Manuale utente 61
FS Manual de usuario 81
RU Руководство пользователя 101
PL Instrukcja obsługi 121
Manual do utilizador 141
161
دليل المستخدم
Safety Information
Usage Restrictions
- This product can be used by children aged 8 years and above and persons with physical, sensory, intellectual deficiencies, or limited experience or knowledge under the supervision of a parent or guardian to ensure safe operation and to avoid any risks.
Cleaning and maintenance shall not be done by children without supervision. Children shall not play with this product. Ensure children and pets are kept at a safe distance from the robot while it is operating.
This product is for floor cleaning in a home environment only. Do not use it outdoors, on non-floor surfaces, or in a commercial or industrial setting. - Do not use the robot in an area suspended above ground level without a protective barrier.
- Do not use the robot at an ambient temperature above 40°C or below 0°C or on a floor with liquids or sticky substances.
- Pick up any cables from the floor before using the robot to prevent it from dragging them while cleaning.
- Remove fragile or small items from the floor to prevent the robot from bumping into and damaging them.
- Keep hair, fingers, and other body parts away from the suction opening of the robots.
- Do not place children, pets, or any item on top of the robot regardless of whether it is stationary or moving.
Do not use the robot to clean any burning objects. - Do not vacuum hard or sharp objects.
- Make sure the robot is turned off and the charging dock is unplugged before cleaning or performing maintenance.
- Do not wipe any part of the product using a wet cloth or liquids.
- Please use this product in accordance with the instructions in the User Manual. Users

Safety Information
are responsible for any loss or damage that arise from improper use of this product.
Batteries and Charging
- Do not use any third-party battery, charger, or charging dock. Use only with RCSO supply unit.
- Do not attempt to disassemble, repair, or modify the battery or charging dock on your own.
- Do not place the charging dock near a heat source.
- Do not use a wet cloth or wet hands to wipe or clean the dock's charging contacts.
Do not improperly dispose of old batteries. Unneeded batteries should be discarded at an appropriate recycling facility.
- If the power cord becomes damaged or broken, stop using it immediately and contact after-sales service.
• Make sure the robot is turned off when being transported and kept in its original packaging if possible.
- If the robot will not be used for an extended period, fully charge it, then turn it off and store in a cool, dry place. Recharge the robot at least once every 3 months to avoid over-discharging the battery.
- This product contains batteries that can only be replaced by qualified technicians or after-sales service.
Heroby, Dreame Trading (Tianjin) Co., Ltd. declares that the radio equipment type RLS5 BLG is in compliance with Directive 2014/53/EU. The full text of the EU declaration of conformity is available at the following Internet address: www.dreame-technology.com
For detailed e-manual, please go to https://www.dreame-technology.com/pages/user-manuals-and-faqs
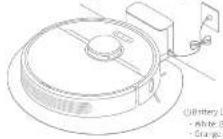
Product Overview
Accessories

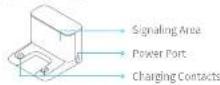
Charging Dock

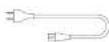

Side BrushCleaning Tool Power Co
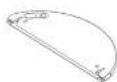
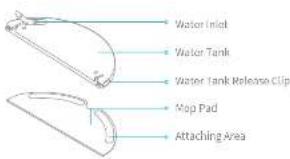
Water Tank
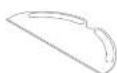
Map Pad

Damp-proof Pad
Note: The illustrations in this manual are for reference only. Please refer to the actual product.

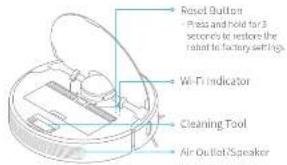
Product Overview
Robot
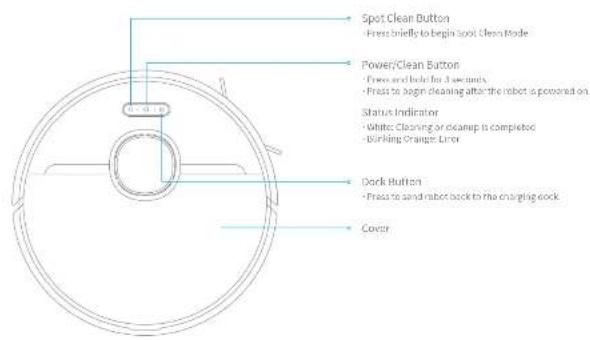
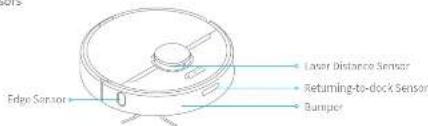
Product Overview
Robot
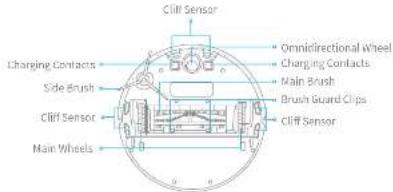
Robot Sensors

Product Overview
Dust Bin

Charging Dock Damp-proof Pad
Mapping Module
Clearing Home Environment
natural_image
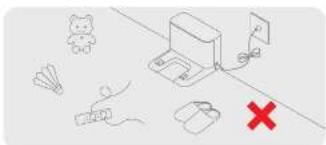
Illustration of a playground equipment setup with a red X mark and icons (no text or symbols)To improve the working efficiency of your robot, put away any loose cords (including the power cord of the charging dock), rags, slippers, toys, etc.
natural_image
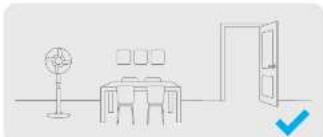
Simple line drawing of a meeting room with a table, lamp, and door (no text or symbols)Open the door of the room to be cleaned, and put the furniture in its proper place to make more space.
natural_image
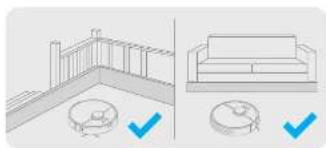
Architectural line drawing showing exterior wall and side view of a sofa with checkmarks indicating inspection points (no text or symbols)Before cleaning, place a physical barrier at the edge of the stairs and sola to ensure safe and smooth operation of the robot.
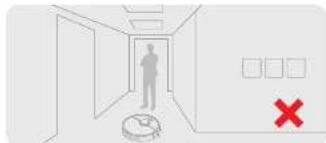
To prevent the robot from not recognizing the area to be cleaned, do not stand in the front of the robot, threshold, hall way, or narrow places.

Preparation Before Use
-
Remove the protective matter

-
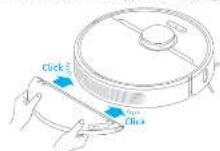
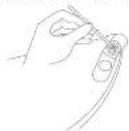
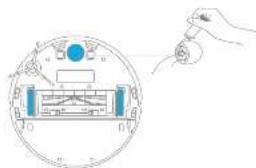
Install the side brush
Note: install the side brush until it clicks into place.
3. Fasten the damp-proof pad
Select a clean location to place the charging dock. Tear off the adhesive tape at the bottom of the damp-proof pad, and stick the pad on the ground as shown in the figure.
Kobe:
- It is recommended that the damp-proof pad be fastened on the wooden floor.
- If you need to remove the damp-proof pad, please remove it slowly to avoid adhesive residue.
Preparation Before Use
- Connect to a power outlet 5. Start recharging
Place the charging dock on the level ground against the wall and connect it to a power outlet.
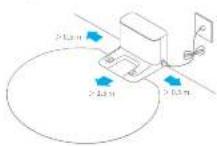
Note:
- Keep the immediate area 1.5m in front of the charger and 0.5m in both sides of the charging dock clear at objects.
- To ensure you can connect to the robot with your phone well, make sure the robot and charging dock are within will range.
- Do not place the charging dock in an area with direct sunlight or when other objects might block the signal, as this may hinder the robot from returning to the charging dock.
Place the robot onto the charging dock to recharge. The robot will turn on automatically and begin recharging.
Note: It is recommended to fully charge your robot before first-time use.


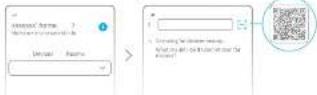
Connecting with Mi Home/Xiaomi Home App
This product works with the Mi-Home/Xiaomi Home app. * Use the Mi-Home/Xiaomi Home app to control your device and to interact with other smart home devices.
- Download the Mi Home/Xiaomi Home App
Scan the QR code to download and install the app. You will be directed to the connection setup page if the app has been installed already. Alternatively, search "MI Home/Xiaomi Home" in the app store to download and install it.

2. Add Device
Open the MI Home/Misami Home app, and tap "●" in the upper right. Then tap "○" in the top right corner, scan the QR code, add "Dreame Bot D9 Pro", and follow the prompts to finish the connection.
Note:
- Only 2.4GHz WiFi is supported. The version of the app might have been updated, please follow the instructions based on the current app version.
1.1
- Reset Wi-Fi
Simultaneously press and hold the buttons and until you hear a voice say, "Waiting for the network configuration." Once the Wi-Fi indicator is blinking slowly, the Wi-Fi has been successfully reset.
Wi-Fi Indicator
- Drinking slowly: To be connected - Drinking quickly: Connecting - On: W-F connected
Note: If your robot cannot connect to the app successfully, reset the WiFi and send the device again.
How to Use
- Tum On/Off 3. Cleaning Mode
Press and hold the button for 3 seconds to turn on the robot. Once the power indicator turns solid white, the robot is in standby mode. To turn off the robot, press and hold the button for 3 seconds when the robot is not moving. Turning off the robot will end the current cleaning task.
[Non-Text]
- Start Cleaning
Press the button briefly to turn on the robot. Upon activation, the robot will accurately map out a route, methodically clean each room along the edges and walls, then finish by cleaning in an S-shaped pattern to ensure a thorough job.
Note:
Before a cleaning task, make sure the robot is fully charged and starts from the charging dock. Do not move the charging dock while the robot is cleaning. If the battery is too low, the robot will automatically return to the dock to charge. It will resume unfinished cleaning tasks after charging to the necessary battery level. The low-point continuous cleaning function must be enabled on the app in advance.
Dreamie Bet LIO S has four cleaning modes: Quiet, Standard, Strong and Turbo. The default mode is Standard. You can specify the cleaning mode in the MI Home/Xiaomi Home app.
- Pause/Sleep Mode
Pause: Press any button to pause the robot during cleaning. Sleep Mode: The robot will automatically enter Sleep Mode after 10 minutes of inactivity, then the power and charging indicators will go off. To wake up the robot, press any button.
- The robot will turn off automatically if left in Sleep Mode for more than 12 hours. - When the robot is paused, placing it onto the charging clock will end the current cleaning task.
- Do Not Disturb Mode
Do Not Disturb Mode prevents the robot from automatically starting cleaning tasks, and the power indicator remains off. You can enable Do Not Disturb Mode or modify its hours in the app. (The mode is on by default from 22:00 to 08:00.)
Scheduled cleaning tasks will still be carried out during the OND period. The robot will continue cleaning after the OND period ends.

How to Use
6. Spot Clean Mode 7. Scheduled Cleaning
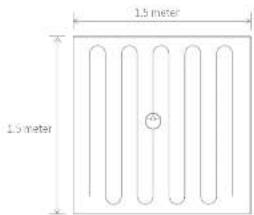
When the robot is paused or in Standby Mode, press and hold the button (or 3 seconds to start Spot Clean Mode. In this mode, it will clean a square-shaped area of 1.5 × 1.5 meters directly around the robot. When the spot cleaning is done, the robot will automatically return to its original location and power off.
Note: When the robot is paused, placing it onto the charging deck will end the current cleaning task.
12 13
You can schedule cleaning time in the MI Home/Xiaomi Home ago. The robot will automatically start cleaning at the designated time and then return to the charging dock to recharge when the cleaning is done.
8. Additional App Functions
Follow the instructions on the app interface to use more functions. The version of the app might have been updated; please follow the instructions based on the current app version.
How to Use
9. Use the Mopping Function
It is recommended that all floors are vacuumed at least three times before the first mopping session to achieve a better cleaning effect. 1) Dampon the mop pad and wring out excess water. Slide the pad all the way into the slot of the water tank until it is securely in place.
21 Open the water tank lid, fill the tank with water, then securely close the lid.
Note: Do not use detergent or disinfectant.
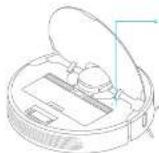
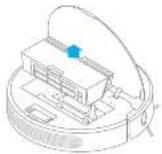
3) Align the mapping module as indicated by the arrow, then slide it into the back of the robot until it clicks into place. Press the button or use the MI Home/Xiaomi Home app to start cleaning.
Note:
- It is not recommended to use the mapping function on carpets. - Use the app to adjust the water flow as required.
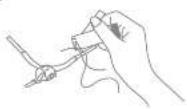
4) Press the two side clips inwards and slide the water tank backwards to separate it from the robot.
Note: When the robot is charging or not in use, remove the mooping module, pour out all the remaining water in the tank, and clean the map pad to prevent mildness or odor.

Routine Maintenance
Clean the Dust Bin and Filter
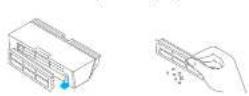
- Open the robot cover, then press the dust bin clip to remove the dust bin.
- Open the dust bin cover as indicated by the diagram.
14
- Remove the filter and tap its basket gently.
Note: Do not attempt to clean the filter with a brush or finger.
- Rinse the dust bin and filter with water until they are clean.
oroughly dry the filter before re-installing.
Note:
- Only clean water should be used to clean the filter. Do not use detergent. - Keep it in a well-ventilated or ventilated.
Routine Maintenance
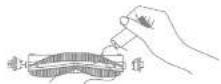
Clean the Mopping Module
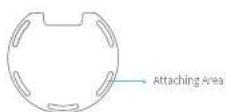
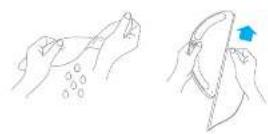
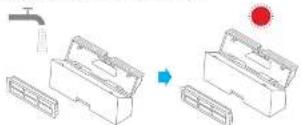
- Press the two release clips on the side of water tank, remove the mopping module and pull the mop pad off the mopping module.
natural_image
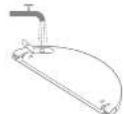
Line drawing of a robotic vacuum cleaner with a handle and control knob, alongside a close-up of its tip (no text or symbols)- Pour out the water in the tank, Clean with water only and leave to air dry before re-installing.
Note: Do not expose the tank to the sun directly.
- Clean the mop pad with water only and leave to air dry before re-installing.

Note:
- Remove the pad from the mopping module before cleaning it, and make sure dirty water does not flow back into the water outlet to avoid clogging. - For optimal performance, it is recommended to replace the map pad every 3 to 6 months.
- If slow water flow occurs, or the volume is not well-distributed, please clean the air hole in the cover of the water tank.


Routine Maintenance
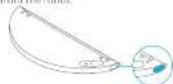
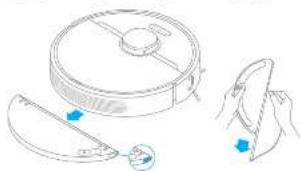
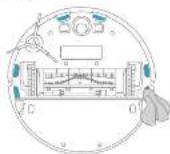
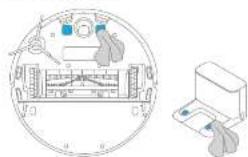
Clean the Main Brush Clean the Side Brush
Press the brush guard clips inwards to remove the brush guard and lift the brush out of the robot.
Full out the brush cover as shown in the diagram. Use the included cleaning tool to remove any hairs tangled in the brush.
Note: Do not pull out the hair extensively to avoid damaging the main brush when the hair is tightly tangled in the main brush.
15
Fall out the side brush and use the included cleaning tool to remove any hair tangled on the brush.
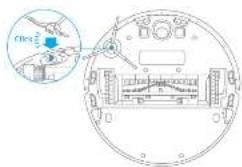
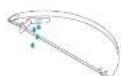
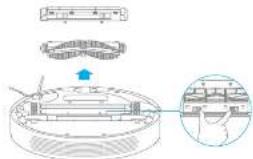
Clean the Main Wheel/Omnidirectional Wheel
natural_image
Diagram of a hand inserting a component into a circular device with internal components (no text or symbols)Note: Use a tool such as a small screwdriver to separate the axle and the tire.
Routine Maintenance
Note: Wet cloths can damage sensitive elements within the robot and charging deck. Please use dry rags for cleaning.
Clean the Laser Distance Sensor; Returning-to-dock Sensor; Edge Sensor
Clean the Cliff Sensor
Clean the Charging Contact
Robot Restarting
If the robot stops responding or cannot be turned off, press and hold down the button 5or 10 seconds to forcefully turn it off. Then press and hold the button 5or 3 seconds to turn the robot on.
Battery
The robot contains a high-performance lithium-ion battery pack. Please ensure that it remains well charged for daily use to maintain optimal battery performance. If the robot is not used for an extended period of time, turn it off and put it away. To prevent damage from over discharging, the robot should be recharged at least once every three months.

FAQ
| Problem Type Solution | |
| Robot does not turn on | The battery level is low. Recharge the robot at the charging dock, then try again.The ambient temperature is too low (below 0°C) or too high (above 40°C). The operating temperature of the robot is 3°C to 40°C. |
| Robot does not recharge | The charging dock is not receiving power. Please confirm that both ends of the power cord are plugged in correctly.Poor contact. Clean the charging contacts of the charging dock and the robot. |
| Robot does not return to charging dock | There are too many instructions around the charging dock. Place the charging dock in a more open area.Please clean the dock's signaling area |
| Robot is malfunctioning. Turn off the robot and then reactivate it. | |
| Robot is making a strange noise. | A foreign object may be caught in the main brush, side brush, or one of the main wheels. Stop the robot and remove any debris. |
| Robot no longer cleans efficiently or leaves dust behind | The dust bin is full. Please clean it.The filter is blocked. Please clean it.A foreign object is caught in the main brush. Please clean it. |
| Robot cannot connect to Wi-Fi | There is something wrong with the Wi-Fi connection. Reset the Wi-Fi and download the latest version of the Mi Home/Xiaomi Home app, then try reconnecting.Location permission is not open. Please ensure the location permission on the Mi Home/Xiaomi Home app is enabled.Wi-Fi is partial to weak. Make sure the robot is in an area with good Wi-Fi coverage.5GHz Wi-Fi is not supported. Please ensure your robot contacts to 2.4GHz Wi-Fi.The username or password of Wi-Fi is incorrect. Please enter the correct username and password. |
| Robot does not perform scheduled cleaning | The robot has low battery. Scheduled cleaning will not start unless the robot has been recharged in time. |
因
FAQ
| Problem Type Solution | |
| Does leaving the robot on the charging dock consume power if it is already fully charged? | Leaving the robot on the charging dock after it's fully charged consumes very little electricity and helps maintain optimal battery performance. |
| No water comes out of the mopping module, or only a little bit comes out | Confirm that the water tank is filled with water, and clean the mop paid if necessary.Clean the mop if it becomes dirty.Make sure the mop pad is installed correctly according to the user manual.Clean the blowhole on the top of the water tank. |
| Robot doesn't resume cleaning after charging | Make sure the robot is not set to Do Not Disturb Mode, which will prevent it from resuming cleaning.The robot does not resume cleaning when it is manually recharged or placed onto the charging deck. |
| Robot doesn't return to charging stock after being moved | Moving the robot may cause it to re-position itself or re-map its surroundings. If the robot is too far from the charging dock, it might not be able to automatically return on its own, in which case you need to manually place the robot onto the charging dock. |

Specifications
Robot Charging Dock
| Model RLS5-BL0 | |
| Battery 5200 mAh (Battery Nominal Capacity) | |
| Wireless Connectivity | Wi-Fi IEEE 802.11b/g/n 2.4 GHz |
| Charging Time Approx. 6 hours | |
| Rated Voltage 14.4 V | --- |
| Rated Power 40 W | |
| Operation Frequency | 2400-2483.5 MHz |
| Maximum Output Power | < 20 dBm |
| Model RCS0 | |
| Rated Input 100-240 | V~50/60 Hz 0.5 A |
| Rated Output 19.8 V | 1 A == |
Under normal use of condition, this equipment should be kept a separation distance of at least 20cm between the antenna and the body of the user.
WEEE Information

All products bearing this symbol are waste electrical and electronic equipment (WEEE as in directive 2012/19/EU) which should not be mixed with unsorted household waste. Instead, you should protect human health and the environment by handing over your waste equipment to a designated collection point for the recycling of waste electrical and electronic equipment, appointed by the government or local authorities. Correct disposal and recycling will help prevent potential negative consequences to the environment and human health. Please contact the installer or local authorities for more information about the location as well as terms and conditions of such collection points.
natural_image
Simple line drawing of a dining table with a lamp and door, no text or symbols presentnatural_image
Architectural diagram showing two views of a balcony and a sofa with checkmarks indicating selection (no text or symbols present)natural_image
Diagram showing a faucet and a red circular object interacting with a mechanical device (no text or symbols)Eimacis
natural_image
Line drawing of a robotic vacuum cleaner with a handle and blue indicator lights, alongside a close-up of its tip (no text or symbols)natural_image
Diagram of a hand inserting a component into a circular device (no text or symbols visible)
Tampora and humidity
natural_image
Illustration of a safety or emergency response setup with icons including a bear, shuttlecock, hand, and medical equipment (no text or symbols)natural_image
Simple line drawing of a meeting room with a desk, lamp, and door (no text or symbols)natural_image
Architectural diagram showing two views of a building facade with windows and a sofa, both marked with blue checkmarks (no text or symbols present)natural_image
Diagram showing a water tap and a red circular object interacting with a mechanical device (no text or symbols)Shanghai
natural_image
Line drawing of a robotic vacuum cleaner with a close-up view of its lid and handle (no text or symbols)natural_image
Diagram of a hand inserting a component into a circular device (no text or symbols visible)natural_image
Illustration of a small electronic device with a red X mark and scattered icons (no text or symbols)natural_image
Simple line drawing of a meeting room with a table, lamp, and door (no text or symbols)natural_image
Architectural line drawing showing exterior wall and side view of a sofa with floor markers (no text or symbols)Address: W-B (E-mail: 123)
natural_image
Line drawing of a robotic vacuum cleaner with a handle and control knob, alongside a close-up of its tip (no text or symbols)natural_image
Simple line drawing of a dining area with a table, lamp, and door (no text or symbols)natural_image
Architectural diagram showing two views of a building facade with a circular detail and a sofa, both marked with blue checkmarks (no text or symbols present)natural_image
Diagram showing a mechanical assembly with a faucet and a red circular component, no text or symbols presentNote:
natural_image
Line drawing of a vacuum cleaner with a handle and control panel, alongside a close-up of hands holding a device (no text or symbols)natural_image
Diagram of a hand inserting a component into a circular device (no text or symbols visible)natural_image
Diagram of a circular device with internal components and a separate printer (no text or symbols)natural_image
Simple line drawing of a dining area with a table, lamp, and door (no text or symbols)natural_image
Architectural line drawing showing a balcony and sofa with checkmarks indicating selection (no text or symbols)natural_image
Diagram showing two mechanical components with a valve and a red circular component, no text or symbols presentПриногашис.
natural_image
Line drawing of a robotic vacuum cleaner with a handle and control panel, alongside a close-up of its tip (no text or symbols)natural_image
Illustration of a device with a switch and a red X mark, surrounded by icons including a bear, fan, and battery (no text or symbols)natural_image
Simple line drawing of a dining area with a table, lamp, and door (no text or symbols)natural_image
Architectural diagram showing two views of a balcony and a sofa with checkmarks indicating selection (no text or symbols present)natural_image
Diagram showing a mechanical assembly with a faucet and a red circular component, no text or symbols presentUnivizi
natural_image
Line drawing of a robotic vacuum cleaner with a handle and control panel, accompanied by a close-up of its handle (no text or symbols)natural_image
Diagram of a hand holding a small object through a circular device with labeled ports (no text or symbols present)Para consultant a manual dataattack arrive, while https://www.drama-technology.com/pages/user-manuals-and-facs
142 43
natural_image
Illustration of a playground equipment setup with a red X mark, no text or symbols presentnatural_image
Simple line drawing of a dining table with a lamp and door, no text or symbols presentnatural_image
Architectural line drawings showing exterior wall and side view of a sofa with checkmark indicators (no text or symbols)natural_image
Diagram showing a mechanical assembly with a faucet and a red circular component, no text or symbols presentNote: