
SI 4 EasyFix Iron - Iron Kärcher - Free user manual and instructions
Find the device manual for free SI 4 EasyFix Iron Kärcher in PDF.
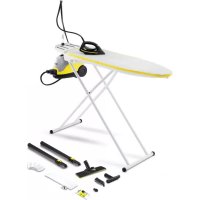



| Product type | Steam cleaner with iron |
| Brand | Kärcher |
| Model | SI 4 EasyFix Iron |
| Supply voltage | 220-240 V ~ 50-60 Hz |
| Total power | 2000 W |
| Iron power | 700 W |
| Maximum working pressure | 0.35 MPa |
| Water tank capacity | 0.8 L |
| Boiler capacity | 0.5 L |
| Continuous steam flow | 50 g/min |
| Maximum steam flow (peak) | 110 g/min |
| Heat-up time | 4 min |
| Dimensions (L x W x H) | 350 x 280 x 270 mm |
| Weight (without accessories) | 4 kg |
| Protection class | I |
| Protection rating | IPX4 |
| Removable water tank | Yes |
| Automatic iron shut-off | Yes (5 minutes inactivity) |
| Child safety | Yes (steam flow selector) |
| Included accessories | Jet nozzle, round brushes (small and large), Power nozzle, hand suction nozzle, floor nozzle, carpet glider, steam iron, 2 extension tubes, microfiber cloths, descaling agent |
| Recommended descaling | Every 50 to 100 fills depending on water hardness |
| Use | Steam cleaning and ironing |
Frequently Asked Questions - SI 4 EasyFix Iron Kärcher
User questions about SI 4 EasyFix Iron Kärcher
0 question about this device. Answer the ones you know or ask your own.
Ask a new question about this device
Download the instructions for your Iron in PDF format for free! Find your manual SI 4 EasyFix Iron - Kärcher and take your electronic device back in hand. On this page are published all the documents necessary for the use of your device. SI 4 EasyFix Iron by Kärcher.
USER MANUAL SI 4 EasyFix Iron Kärcher
Environmental protection 11
Accessories and spare parts. 12
Scope of delivery. 12
Warranty. 12
Safety devices. 12
Description of the device 12
Installation 13
Operation 13
Important application instructions. 14
How to use the Accessories 14
Care and service 16
Troubleshooting guide. 17
Technical data 17
General notes

Read these original operating instructions and the enclosed safety instructions before using the device for the first
time. Proceed accordingly.
Keep both books for future reference or for future owners.
Intended use
Only use the appliance in private households. The appliance is intended for cleaning with steam and can be used with appropriate accessories as described in these operating instructions. Detergents are not required. Observe the safety instructions.
Environmental protection

The packing materials can be recycled. Please dispose of packaging in accordance with the EN 24010 environmental regulations.

Electrical and electronic appliances contain valuable, recyclable materials and often components such as batteries, rechargeable batteries or oil, which - if handled or disposed of incorrectly - can
pose a potential threat to human health and the environment. However, these components are required for the correct operation of the appliance. Appliances marked by this symbol are not allowed to be disposed of together with the household rubbish.
Notes on the content materials (REACH)
Current information on content materials can be found at: www.kaercher.com/REACH
Accessories and spare parts
Only use original accessories and original spare parts. They ensure that the appliance will run fault-free and safely.
Information on accessories and spare parts can be found at www.kaercher.com.
Scope of delivery
The scope of delivery for the appliance is shown on the packaging. Check the contents for completeness when unpacking. If any accessories are missing or in the event of any shipping damage, please notify your dealer.
Warranty
The warranty conditions issued by our relevant sales company apply in all countries. We shall remedy possible malfunctions on your appliance within the warranty period free of cost, provided that a material or manufacturing defect is the cause. In a warranty case, please contact your dealer (with the purchase receipt) or the next authorised customer service site.
(See overleaf for the address)
Safety devices
CAUTION
Missing or modified safety devices
Safety devices are provided for your own protection.
Never modify or bypass safety devices.
Symbols on the device
(according to type of appliance)
| Risk of burns, surface of appliance becomes hot during operation | |
| Risk of scalding from steam | |
| Read operating instructions |
Pressure controller
The pressure controller keeps the pressure in the steam boiler as constant as possible during operation. The heating is switched off when the maximum operating pressure is reached in the steam boiler and is activated if there is a pressure drop in the steam boiler as a result of a steam removal.
Safety thermostat
The safety thermostat prevents the device from overheating. If the pressure regulator and the boiler thermostat fail and the unit overheats, the safety thermostat switches the unit off. Before resetting of the safety thermostat, contact the responsible KÄRCHER Customer Service.
Boiler thermostat
The boiler thermostat switches off the heating in the event of a fault; for example, if there is no water in the steam boiler and the temperature in the steam boiler rises.
As soon as you refill the water, the device is ready for use again.
Maintenance lock
The maintenance lock seals the steam boiler from the steam pressure present. The maintenance cap is also a pressure relief valve. If the pressure regulator is defective and the steam pressure in the steam boiler rises, the pressure relief valve opens and steam escapes through the lock.
Prior to restarting the device, contact the responsible KÄRCHER Customer Service.
Description of the device
The maximum amount of equipment is described in these operating instructions. Depending on the model used, there are differences in the scope of delivery (see packaging).
For the illustrations, refer to the graphics page Illustration A
Device socket with cover 2 Water reservoir 3 Filling hole, water reservoir 4 Switch - On 5 Switch - Off 6 Indicator light (green) - heating 7 Indicator light (red) - water shortage 8 Carrying handle 9 Holder for accessories 10 Holder for accessories 11 Maintenance lock 12 Mains connection cable storage compartment 13 Park bracket for floor nozzle 14 Mains connection cable with mains plug 15 Non-driven wheels (2 x) 16 Steering roller 17 Steam gun 18 Steam lever 19 Unlocking button 20 Selector switch for steam volume (with child lock) 21 Steam hose 22 Steam connector 23 Spotlight nozzle 24 Round brush (small) 25** Power nozzle 26** Round brush (large) 27 Manual nozzle 28 Manual nozzle microfibre cover 29 Extension tubes (2 x) 30 Unlocking button 31 Floor nozzle 32 Hook and loop fastener
3 Microfibre floor cloth (1 x) 34** Microfibre floor cloth (2 x) 35** Carpet glider 36 Descaler 37 Steam pressure iron 38 Indicator light (orange) - heating 39 Steam switch (bottom) 40 Steam connector
** optional
Installation
Installing accessories
- Insert and engage the steering roller and non-driven wheels.
Illustration B
- Open the cover on the device socket.
Illustration E
- Connect the steam connector to the device socket so that the steam connector audibly engages.
Illustration E
- Push the open end of the accessory onto the steam gun so that the unlocking button on the steam gun engages.
Illustration J
- Push the open end of the accessory onto the spotlight nozzle.
Illustration K
- Connect the extension tubes with the steam gun.
a Push the first extension tube onto the steam gun so that the unlocking button on the steam gun engages.
The connection pipe is connected.
b Push the second extension tube onto the first extension tube.
The connection pipes are connected.
Illustration L
- Push the accessory and/or the floor nozzle onto the free end of the extension tube.
Illustration M
The accessory is connected.
Disconnecting accessories
- Set the selector switch for the steam volume to the rear. The steam lever is locked.
- Push the cover on the device socket down and disconnect the steam connector from the device socket.
- Push the unlocking button and pull the parts apart. Illustration R
Operation
Filling water
The water reservoir can be removed at any time for filling or be filled directly at the device.
ATTENTION
Damage to the device
Unsuitable water can block the nozzles or damage the water level indicator.
Do not fill in pure distilled water. Use a maximum of 50% distilled water mixed with tap water.
Do not use condensation from the clothes dryer for filling.
Do not use collected rain water for filling.
Do not use cleaning agents or other additives (e.g., scents) for filling.
Remove the water reservoir for filling.
- Pull the water reservoir vertically upwards. Illustration C.
- Fill the water tank vertically with tap water or a mixture of tap water and no more than 50% distilled water up to the "MAX" mark.
- Insert the water reservoir and press downwards until it locks into place.
Filling the water reservoir directly on the device.
- Fill tap water or a mixture of tap water and no more than 50% distilled water from a vessel into the filling hole of the water reservoir up to the "MAX" mark.
Illustration D.
Switching on the device.
Note.
If there is no or too little water in the steam boiler, the water pump starts to run and pumps water from the water reservoir into the steam boiler. The filling process can take several minutes.
Note.
The device briefly closes the valve every 60 seconds causing an audible soft click. Closing prevents the valve from clogging. This does not affect the steam output.
- Place the device on a firm surface.
- Insert the mains plug into a socket.
Illustration F
- Press the ON switch.
The green heating indicator light flashes.
Illustration G
- Wait until the green heating indicator stays on.
Illustration H
- Press the steam lever.
Illustration I
Steam leaks out.
Regulating the steam volume
The expelled steam volume is regulated using the selector switch for steam volume. The selector switch has 3 positions:
| Maximum steam volume | |
| Reduced steam volume | |
| No steam - child lock Note In this position, the steam lever cannot be operated. |
- Set the selector switch for the steam volume to required steam volume.
- Press the steam lever.
- Before starting cleaning, point the steam gun at a cloth until steam is expelled evenly.
Refilling water
If there is not enough water, the water shortage indicator lamp flashes red and a signal tone sounds.
Note
The water pump fills the steam boiler at intervals. If the filling is successful, the red water shortage indicator lamp goes out.
Note
If there is no or too little water in the steam boiler, the water pump starts to run and pumps water from the water reservoir into the steam boiler. The filling process can take several minutes.
ATTENTION
Damage to the device
Unsuitable water can block the nozzles or damage the water level indicator.
Do not fill in pure distilled water. Use a maximum of 50% distilled water mixed with tap water.
Do not use condensation from the clothes dryer for filling.
Do not use collected rain water for filling.
Do not use cleaning agents or other additives (e.g. scents) for filling.
- Fill the water tank with tap water or a mixture of tap water and no more than 50% distilled water up to the "MAX" mark.
The device is ready for use.
Switching off the device
- Press the OFF switch. Illustration P. The device is switched off.
- Press the steam lever until no more steam flows out. Illustration Q. The steam boiler is depressurized.
- Set the child lock (selector switch for steam volume) to the rear. The steam lever is locked.
- Pull the mains plug out of the socket.
- Drain the water reservoir.
Rinsing out the steam boiler
Rinse the device's steam boiler out after every tenth filling of the tank.
- Switch the device off; see Chapter "Switching off the device".
- Allow the device to cool down.
- Drain the water reservoir.
- Remove the accessory/accessories from the accessory holders.
- Open the maintenance lock. To do this, place the open end of an extension tube on the maintenance lock, insert it into the guide so it engages, and open it.
Illustration U
- Fill the steam boiler with water and swing it around vigorously. Lime residue that has been deposited on the bottom of the steam boiler will be released as a result.
- Drain the water completely out of the steam boiler.
Storing the device
- Connect the extension tubes to the large mounts for accessories.
- Connect a manual nozzle and spotlight nozzle to each extension tube.
- Fasten the large round brush to the spotlight nozzle.
- Connect the small round brush and nozzles to the medium-sized mount for accessories.
- Hang the floor nozzle in the park bracket. Illustration S
- Wind the steam hose around the extension tube and connect the steam gun to the floor nozzle. Illustration T
- Wind the mains cable around the extension tube.
- Stow the mains cable in the accessory compartment.
- Store the device in a dry location that is protected from frost.
Important application instructions
Cleaning the floor areas
We recommend sweeping or vacuuming the floor before using the appliance. This will clear the floor of dirt and loose particles before wet cleaning.
Freshening up textiles
Before using the appliance, always check the compatibility of the textiles at a concealed point: steam the textile, allow it to dry, and then check for any change in color or shape.
Cleaning coated or painted surfaces
ATTENTION
Damaged surfaces
Steam can loosen wax, furniture polish, plastic coatings, or paint, and edge band from edges.
Do not direct the steam at glued laminated edges as the edge band may loosen.
Do not use the appliance for cleaning unsealed wood or parquet floors.
Do not use the appliance for cleaning painted or plastic coated surfaces such as kitchen or living room furniture, doors, or parquet.
- To clean these surfaces, steam a cloth briefly and use it to wipe over the surfaces.
Glass cleaner
ATTENTION
Glass breakages and damaged surfaces
Steam can damage sealed points of the window frame and, at low outside temperatures, lead to tension on the surface of window panes and hence to glass breakages. Do not direct the steam at sealed points on the window frame.
At low outside temperatures, heat up the window panes by gently steaming the full surface of the glass.
- Clean the window area with a manual nozzle and cover. To remove the water, use a squeezegee or wipe the surfaces dry.
How to use the Accessories
Steam gun
The steam gun can be used for the following applications without accessories:
- For removing slight creases from hanging clothing items: Steam the clothing item from a distance of 10-20 cm.
- For wiping damp dust: Steam a cloth briefly and use it to wipe over the furniture.
Spotlight nozzle
The spotlight nozzle is suitable for cleaning areas, joins, fittings, drains, sinks, WCs, blinds, or radiators that are difficult to access. The closer the spotlight nozzle is to the soiled area, the greater the cleaning efficiency will be, as the temperature and steam volume are at their highest at the nozzle opening. Larger lime deposits can be treated before steam cleaning with a suitable detergent. Allow the detergent to soak in for approximately 5 minutes and then steam it off.
- Slide the spotlight nozzle onto the steam gun.
Illustration J
Round brush (small)
The small round brush is used for cleaning stubborn dirt. Stubborn dirt can be removed more easily by brushing.
ATTENTION
Damaged surfaces
The brush may scratch sensitive surfaces.
It is not suitable for cleaning sensitive surfaces.
- Fit the round brush to the spotlight nozzle.
Illustration K
Round brush (large)
The large round brush is suitable for cleaning large rounded surfaces, e.g. wash basin, shower tray, bath tub, kitchen sink.
ATTENTION
Damaged surfaces
The brush may scratch sensitive surfaces.
It is not suitable for cleaning sensitive surfaces.
- Fit the large round brush to the spotlight nozzle.
Illustration K
Power nozzle
The power nozzle is used for cleaning stubborn dirt, blowing down corners, joins etc.
- Install the power nozzle onto the spotlight nozzle according to the round brush.
Illustration K
Manual nozzle
The manual nozzle is used for cleaning small areas that can be washed down, shower cubicles and mirrors.
- Push the manual nozzle onto the steam gun according to the spotlight nozzle.
Illustration J
- Pull the cover over the manual nozzle.
Floor nozzle
The floor nozzle is used for cleaning washable wall and floor coverings e.g. stone floors, tiles and PVC floors.
ATTENTION
Damage due to build-up of steam
Heat and moisture can lead to damage.
Check the heat resistance and steam effect on an inconspicuous area using a minimal volume of steam prior to use.
Note
Detergent residue or care emulsions on the surface to be cleaned can lead to streaks during steam cleaning, which will disappear however once these have been used several times.
We recommend sweeping the floor or vacuum cleaning it before using the device. In this way the floor will be cleared of dirt and loose particles before the wet cleaning commences. Work slowly on surfaces that are heavily soiled so that the steam has longer to take effect.
- Connect the extension tubes with the steam gun. Illustration L
- Push the floor nozzle onto the extension tube. Illustration M
- Fasten the floor cleaning cloth to the floor nozzle. a Place the floor cleaning cloth with the hook and loop fastener strips pointing upwards on the floor. b Place the floor nozzle onto the floor cleaning cloth, applying slight pressure.
Illustration N
The floor cleaning cloth will stick to the floor nozzle of its own accord due to the hook and loop fastener.
Removing the floor cleaning cloth
- Place one foot on the bottom corner of the floor cleaning cloth and lift the floor nozzle up. Illustration N
Note
Initially, the floor cleaning cloth's hook and loop fastener strip is very strong and cannot be removed from the floor nozzle easily. After the floor cleaning cloth has been used several times and washed, it is easier to remove from the floor nozzle and it has reached the optimum adhesion.
Parking the floor nozzle
- Hang the floor nozzle in the park bracket during breaks in work. Illustration S
Carpet glider
The carpet glider is used for freshening up carpets.
ATTENTION
Beware of damaging the carpet glider and carpet
Contamination on the carpet glider, as well as heat and moisture penetration, can result in the carpet being damaged.
Prior to the application, also check the heat resistance and impact of steam on the carpet at an insignificant spot using as small an amount of steam as possible.
Observe the cleaning instructions from the carpet manufacturer.
Prior to using the carpet glider, make sure that the carpet has been vacuumed and that stains have been removed.
Prior to application and following operating pauses, remove any possible water accumulation (condensate) in the appliance by means of evaporating the condensate into a drain (without floor cleaning cloth / with accessories).
Only use the carpet glider with a floor cleaning cloth on the floor nozzle.
Steam clean with a weak steam stage when using the carpet glider.
In order to prevent too much moistening and to avoid the risk of damage due to temperature effects, do not direct the steam continuously onto one spot (maximum 5 seconds).
Do not use the carpet glider on deep-pile carpets.
Fastening the carpet glider to the floor nozzle
- For fastening the floor cleaning cloth to the floor nozzle, please refer to chapter Floor nozzle. Illustration N
- Using a little force, allow the floor nozzle to slide into the carpet glider and engage there. Illustration O
- Start cleaning the carpet.
Removing the carpet glider from the floor nozzle
CAUTION
Beware of burns to your feet
The carpet glider can heat up during the steaming process.
Do not operate or remove the carpet glider bare-footed or using open sandals.
Only operate or remove the carpet glider using suitable footwear.
- Press the strap on the carpet glider downwards using your toecap.
- Lift the floor nozzle upwards.
Illustration O
Iron steam pressure
Note
We recommend using the KÄRCHER ironing board with active steam suctioning. This ironing board is optimally matched to the device you have acquired. It facilitates and speeds up the ironing process. In any case, the ironing board used should have a steam-permeable, grid-like ironing base surface.
Note
It should be noted that in the case of an ironing board without steam extraction, it is possible for an ironing board cover to become wet if condensate accumulates.
Initial startup of steam pressure iron
ATTENTION
Ironing may cause condensation to drip on the floor and damage sensitive floor coverings.
If possible, perform ironing tasks on a floor covering which is insensitive to condensation (e.g. tiles/stone).
For sensitive floor covering, ensure that the area on which condensation can drip is adequately protected (e.g. water-impermeable floor mat).
Note
The iron plate must be hot to prevent steam from condensing on the sole plate and dripping onto the ironing laundry.
- Ensure that tap water or a mixture of tap water and no more than 50% distilled water is in the steam boiler of the steam cleaner.
- Insert the steam plug of the iron into the unit plug until it clicks into place.
- Putting the steam cleaner into operation, see chapter Switching on the device.
- Wait until the steam cleaner is ready for use.
- The iron is ready for use as soon as the indicator light (orange) has gone out.
- The warning light comes on during use, when the iron is reheating. The application must not be interrupted during reheating.
Steam ironing
ATTENTION
Damage to garments
Failure to observe the ironing information in the garment may result in damage.
Observe the ironing information in the garment.
Note
With the fixed, optimal temperature setting, all ironable textiles can be ironed without additional temperature setting.
Smooth delicate fabrics and imprints on the back with steam without direct contact with the iron. Steaming the
fabrics at a distance of 2 to 3 cm will gently straighten the fibres.
Note
The iron is fitted with an automatic switch-off which switches off the device if it has not been moved for more than 5 minutes. This automatic shut-off increases safety and saves energy as the iron does not heat up continuously. The iron will switch back on as soon as it is moved and start heating up.
Note
The iron can be held vertically for steaming curtains, dresses, etc.
- As soon as the heating indicator light (orange) of the iron goes out, ironing can be started.
- Press the steam switch on the handle below. Steam emits as long as the switch is pressed.
- Before ironing and after pauses in the ironing process, direct the blast of steam onto a cloth until the steam flows evenly.
Dry ironing
ATTENTION
Damage to the device
Water shortage in the steam boiler leads to damage to the device
Make sure that there is water in the steam boiler.
ATTENTION
Damage to garments
Failure to observe the ironing information in the garment may result in damage.
Observe the ironing information in the garment.
Note
With the fixed, optimal temperature setting, all ironable textiles can be ironed without additional temperature setting.
Delicate fabrics and prints should not be dry ironed.
- Wait until the heating indicator light (orange) of the iron goes out.
The iron is ready for ironing.
Care and service
Descaling the steam boiler
Note
Since lime can clog the appliance, we recommend descaling it based on the number of times the water reservoir is filled, as specified in the table (TF = tank fillings).
| Hardness range °dH | mmol/l TF | |||
| soft 0 | 7 0-1.3 100 | |||
| I Medi | um 7-14 | 1.3-2.5 | 90 | |
| II Hard | 14-2 | 1 2.5-3.8 | 75 | |
| V | Very hard >21 | >3.8 | 50 | |
Note
Your water board or municipal utilities authority can provide information on the hardness of tap water.
ATTENTION
Damaged surfaces
The descaler may corrode sensitive surfaces.
Fill and empty the appliance carefully.
- Switch off the device; see chapter "Switching off the device".
- Allow the device to cool down.
- Drain the water reservoir.
- Remove the accessory/accessories from the accessory holders.
- Open the maintenance lock. To do this, place the open end of an extension tube on the maintenance lock, insert it into the guide so it engages, and open it.
Illustration U
- Drain the water completely out of the steam boiler. Illustration V
ATTENTION
Appliance damage due to descaler
An unsuitable descaler or incorrect dosing of the descaler may damage the appliance.
Only use KÄRCHER descaler.
Use 1 dosing unit of the descaler for 0.5I water.
- Apply descaler solution to the descaler according to the details.
- Fill the descaler solution into the steam boiler. Do not seal the steam boiler.
- Allow the descaler solution to take effect for approx. 8 hours.
- Drain descaler solution completely out of the steam boiler.
- Repeat the descending process if necessary.
- Rinse the steam boiler 2-3 times with cold water in order to drain all the descaler solution residue.
- Drain the water completely out of the steam boiler.
- Dry the mounting for the grid connection cable.
- Close the maintenance lock with an extension tube.
Care of accessories
(Accessories - depending on scope of delivery)
Note
The micro fibre cloths are not suitable for dryer.
Note
When washing the cloths, observe the instructions on the washing tag. Do not use any liquid softeners as this will affect the ability of the cloths to pick up dirt.
- Wash the floor cleaning cloths and covers at a max. temperature of 60°C in the washing machine.
Troubleshooting guide
Malfunctions often have simple causes that you can remedy yourself using the following overview. When in doubt, or in the case of malfunctions not mentioned here, please contact your authorised Customer Service.
WARNING
Risk of electric shock and burns
Trying to eliminate faults while the appliance is connected to the mains or has not yet cooled down is always dangerous.
Remove the mains plug.
Allow the appliance to cool down.
The water shortage indicator light flashes red and a signal tone sounds
No water in the tank.
- Fill the water reservoir up to the "MAX" marking.
The water shortage indicator light is lit in red
No water in the steam boiler. The pump's overheat protection has triggered.
- Switch the device off; see Chapter Switching off the device.
- Fill the water reservoir.
- Switch on the device; see Chapter Switching on the device. The water tank is not inserted correctly or is calcified.
- Remove the water reservoir.
- Rinse the water reservoir.
- Insert the water reservoir and press downwards until it locks into place.
The steam lever cannot be pressed
The steam lever is locked with the child lock.
- Set the child lock (selector switch for steam volume) to the front.
The steam lever is released.
Long heating-up time
The steam boiler is scaled.
- Descale the steam boiler.
High water output
The steam boiler is scaled. - Descale the steam boiler.
The steam pressure iron "spits" water
- Rinse or descale the steam boiler of the steam cleaner; see Chapter Descaling the steam boiler
After ironing breaks, water droplets come out of the steam pressure iron
During longer ironing breaks, steam can condense in the steam line. After pauses in the ironing process, direct the blast of steam onto a cloth until the steam flows evenly.
Technical data
| Electrical connection | ||
| Voltage | V | 220-240 |
| Phase ~ 1 |
| Frequency Hz 50-60 |
| Degree of protection IPX4 |
| Protection class I |
Device performance data
| Heating capacity W | 2000 | ||
| Heating capacity of iron | W | 700 | |
| Maximum operating pressure | MPa | 0.35 | |
| Heating-up time | Minutes | 4 | |
| Continuous steaming | g/min | 50 | |
| Maximum steam blast | g/min | 110 |
Filling quantity
| Water reservoir | 1 | 0.8 |
| Steam boiler | 1 | 0.5 |
Dimensions and weights
| Weight without accessories | kg | 4 |
| Length | mm | 350 |
| Width | mm | 280 |
| Height | mm | 270 |
Subject to technical modifications.
Content
General remarks. 18
No water in the tank.
(alt after machine type)
Znua otic emipaviecs
HBoupoia npoei va npokaleo i ypatouvi e EuaiOnteEpiavie
AkataaIyioiaTovKathetaoioeuaiOthwvEtnipaveiwv.
- ToTOnTeTn mKpn OtpoyuAn BoUptOa oTo akpoquio Oneiaakns δeouns.
Figure K
Type of protection IPX4
Protection category I
Wall thickness of the device
The green heater control lamp lights up.
Figure G
Using the accessories 93
Maintenance and technical service 96
Troubleshooting 96
Technical specifications 97
General instructions


Before first use of the device, familiarize yourself with the original instruction manual for
operation and the attached safety instructions. Act in accordance with them.
Keep both booklets for further
use by the next owner.
Intended use
The device is intended solely for domestic use. The device is intended for steam cleaning and can be used with suitable accessories in accordance with the description in this instruction manual for operation. No chemical agents are required. It is necessary to follow the safety instructions.
Environmental protection

Packaging materials are recyclable. Dispose of the packaging in an environmentally friendly manner
environment.

Electrical and electronic devices often contain valuable materials, suitable for recycling, and also components such as batteries,
Components that, if handled improperly or disposed of incorrectly, may pose a potential hazard to health and the environment. Nevertheless, these components are necessary for the proper operation of the device. Devices marked with this symbol are prohibited from being disposed of together with household waste.
Information on ingredients (REACH) For current information on ingredients, see www.kaercher.com/REACH
Read the operating instructions
Pressure regulator
The pressure regulator keeps the pressure in the steam reservoir as constant as possible during operation. The heating system heats up to the maximum operating pressure
in the steam reservoir, then switches off and switches back on again when the pressure in the reservoir drops due to steam extraction.
Safety thermostat
The safety thermostat prevents the device from overheating. In the event of a failure of the pressure regulator or the reservoir thermostat due to malfunction and overheating of the device, the safety thermostat will switch off the device. To reset the safety thermostat, contact the KARCHER service department.
Reservoir thermostat
The reservoir thermostat switches off the heating in the event of a fault, for example when there is no water in the steam reservoir or when the temperature in the reservoir rises.
After adding water, the device is ready for operation again.
Maintenance lock
The maintenance lock closes the steam reservoir, which is under pressure. The maintenance lock is also a safety valve. In the event of a malfunction of the pressure regulator and an increase in pressure in the steam reservoir, the safety valve opens and steam escapes through the maintenance lock. Before resuming operation of the device, contact the KARCHER service department.
Device description
These operating instructions describe the device with the maximum equipment. The equipment varies depending on the model (see packaging). Figures are on the pages with figures, Figure A
1 Device body with lid 2 Water filling openings 3 Water tank 4 Switch "On" 5 Switch "Off" 6 Indicator lamp (green): "Heating" 7 Indicator lamp (red): "No water" 8 Handle for carrying 9 Accessory holder 10 Accessory holder 11 Lock for the spray opening 12 Storage place for the power cord 13 Parking holder for the soleplate 14 Power cord with plug 15 Wheels (2 pcs.) 16 Guide roller
17 Steam pistol 18 Trigger 19 Unlock button 20 Steam flow regulator (with child lock) 21 Steam hose 22 Steam nozzle 23 Pointed nozzle 24 Round brush (small) 25 **Power nozzle 26 **Round brush (large) 27 Hand nozzle 28 Microfiber mop attachment 29 Extension tubes (2 pcs.) 30 Unlock button 31 Floor nozzle 32 Hose connection 33 Adapter for water from microfiber (1 pc.) 34 **Adapter for water from microfiber (2 pcs.) 35 **Sliding nozzle for floors 36 Cleaning agent 37 Steam iron 38 Indicator lamp (orange): "Heating" 39 Steam regulator (bottom) 40 Steam nozzle **as an option
Assembly
Installing the nozzle
- Insert and secure the guide roller and the working wheels. Figure B
- Open the lid of the device's socket. Figure E
- Insert the steam supply nozzle into the device's socket until it clicks. Figure E
- Slide the open end of the accessory onto the steam pistol until the unlock button of the steam pistol locks. Figure J
- Slide the open end of the accessory onto the pointed nozzle.
Figure K
- Connect the extension tubes to the steam pistol.
a Slide the first extension tube until the unlock button of the steam pistol locks.
The extension tube is connected.
b Slide the second extension tube onto the first extension tube.
The extension tubes are connected.
Do not pour collected rainwater into the device.
Do not pour cleaning agents or other additives (e.g., aromatizers) into the device.
Removing the water tank for filling
- Pull the water tank vertically upward. Figure C
- In the vertical position, fill the water tank with a mixture of tap water and distilled water, with a maximum of 50% distilled water. Fill up to the "MAX" mark.
- Install the water tank on the device and push it until it clicks into place.
Filling the tank directly on the device
- Through the filling opening, fill the tank with a mixture of tap water and distilled water, with a maximum of 50% distilled water. Fill up to the "MAX" mark. Figure D
Switching on the device
Note
If the water in the reservoir is missing or too low, the water pump starts and pumps water from the tank into the water reservoir. The filling process may take a few minutes.
Note
The device closes the valve briefly every 60 seconds, and a clicking sound is heard. The closing prevents
the valve from getting stuck. No water leaks during this process.
- Install the device on a solid foundation.
- Insert the plug into the socket. Figure F
- Press the switch "ON". The green control lamp for heating lights up. Figure G
- Wait until the green control lamp for heating goes out and then stays off. Figure H
- Press the steam lever.
Figure I
Steam comes out.
Adjusting the amount of steam
Using the switch for the amount of steam, the amount of steam supplied is adjusted. The switch has 3 positions:
| Мakсимальhoe колочью па Б Орразишиные колочью па В Одд Т Д Б С Д Б С Д Б С Д Б С Д Б С Д Б С Д Б С Д Б С Д Б С Д Б С Д Б С Д Б С Д Б С Д Б С Д Б С Д Б С Д Б С Д B O P M N O P S T U V W X Y Z A B C D E F G H I J K L M N O P Q R S T U V W X Y Z A B C D E F G H I J K L M N O P Q R S T U V W X Y Z A B C D E F G H I J K L M N O B C D E F G H I J K L M N O B C D E F G H I J K L M N O B C D E F G H I J K L M N O B C D E F G H J K L M N O B C D E F G H I J K L M N O B C D E F G H I J K L M N O B C D E F G H I J K L M N O B G H I J K L M N O B C D E F G H I J K L M N O B C D E F G H I J K L M N O B C D E F G H I J K L M B C D E F G H I J K L M N O B C D E F G H I J K L M N O B C D E F G H I J K L M N O B C D E F G H Ⅰ Ⅱ Ⅲ Ⅳ Ⅴ Ⅵ Ⅶ Ⅷ Ⅸ Ⅹ Ⅺ Ⅻ Ⅼ Ⅽ Ⅾ ⅱ ⅲ ⅳ ⅴ ⅵ ⅶ ⅷ ⅸ ⅹ ⅺ ⅔ ⅸ ⅹ ⅺ ⅻ ⅼ ⅽ ⅾ ⅿ ⅷ ⅸ ⅹ ⅺ ⅻ ⅼ ⅽ ⅾ ⅿ ⅷ ⅸ ⅹ ⅺ ⅻ ⅼ ⅽ ⅾ ⅿ ⅷ ⅸ ⅹ ⅺ ⅱ ⅲ ⅳ ⅴ ⅵ ⅶ ⅷ ⅸ ⅹ ⅺ ⅱ ⅲ ⅳ ⅴ ⅵ ⅶ ⅷ ⅸ ⅹ ⅺ ⅱ ⅲ ⅳ ⅴ ⅵ ⅶ ⅷ ⅸ ⅹ ⅺ ⅱ ⅲ ⅳ ⅴ ⅵ ⅶ ⅷ ⅸ ⅹ |
- Set the steam amount switch to the desired position.
- Press the steam lever.
- Before ironing, direct the steam jet at the fabric until the steam comes out evenly.
Water filling
When the water level is low, the control lamp flashes red and an audible signal sounds.
Note
The water pump turns on automatically at set intervals. After a successful filling of the tank, the control lamp goes out.
Note
If the water in the steam reservoir is absent or too little, the water pump starts, which supplies water from the tank to the steam reservoir. The filling process may take several minutes.
ATTENTION
Device maintenance
When using water of unsuitable quality, clogging of the valves and damage to the water level indicator may occur.
Do not fill with distilled water only.
Use a maximum of 50% distilled water in a mixture with tap water.
Do not fill with condensate water from a tumble dryer.
Do not fill with collected rainwater.
Do not fill with cleaning agents or other additives (e.g., fragrances).
- Fill the water tank up to the "MAX" mark with tap water or a mixture consisting of tap water and max. 50% distilled water. The device is ready for use.
Switching off the device
- Press the "Off" switch. Figure P The device is switched off.
- Press the steam lever until steam stops coming out. Figure Q The steam reservoir is empty.
- Set the steam quantity switch to the rear position to protect against children. The steam button is locked.
- Pull the mains plug out of the socket.
- Empty the water tank.
Rinsing the steam reservoir
Rinse the steam reservoir of the device at least after every tenth filling.
- Switch off the device, see chapter Switching off the device.
- Let the device cool down.
- Empty the water tank.
- Remove the accessories from the holders.
- Open the maintenance lock. To do this, set the open end of the extension tube on the maintenance lock, fix it in the guide and turn it. Figure U
- Fill the steam reservoir with water and shake it vigorously. This is necessary to remove any limescale deposits that have settled on the bottom of the steam reservoir.
- Pour all the water out of the steam reservoir. Figure V
Storing the device
- Insert the extension tube into the holder for large accessories.
- Attach the hand nozzle and the pointed nozzle to the extension tubes.
- Use a soft brush to clean the device.
- Insert the small round brush into the crevice nozzle.
- Place the device on a flat surface. Figure 5
- Wrap the hose around the extension tubes and insert the steam nozzle into the hose holder. Figure 7
- Wrap the power cord around the extension tubes.
- Insert the power cord into the accessory compartment.
- Store the device in a dry place protected from frost.
Important usage instructions
Floor cleaning
Before using the device, we recommend vacuuming or sweeping the floor. Thanks to this, the floor will be free of dirt and debris before wet cleaning.
Textile care
Before treating with the device, be sure to check the textile for colorfastness: treat the textile with steam, let it dry, and then check for changes in color or shape.
Cleaning surfaces with coating or paint
CAUTION
Painted surfaces
Do not aim the steam at wax, furniture polish, painted surfaces or varnish on frames. Do not direct steam at glued edges, as this may cause the varnish to peel off. Do not use the appliance for cleaning unvarnished wooden or parquet floors. Do not use the appliance for cleaning painted or plastic-coated surfaces, such as kitchen and bathroom furniture, doors and parquet.
- For such surfaces, briefly treat with steam and then wipe the surface dry.
Cleaning glass
CAUTION
Glass and damaged surfaces
Steam can damage varnished areas of the window frame, and at low outside temperatures it can cause stress on the surface of the window panes, leading to their breakage.
Do not direct steam at varnished areas of the window frame.
At low outside temperatures, warm up the window panes by briefly treating the surface with steam.
Clean the window with a hand nozzle, then remove the water with a squeegee or wipe the surface dry.
Using accessories
Steam nozzle
The steam nozzle can be used without accessories in the following cases:
- Removing small wrinkles on hanging items of clothing: treat the item of clothing with steam from a distance of 10-20 cm. Damp dusting: briefly treat the cloth with steam and wipe the furniture with it.
Point jet nozzle
The point jet nozzle is intended for cleaning hard-to-reach places, joints, mixers, drains, sinks, toilets, radiators. The closer the point jet nozzle is to the dirty spot, the higher the cleaning efficiency. This is because the temperature
The amount of maximum steam output from the nozzle. Hard lime deposits can be treated with a suitable cleaning agent before steam cleaning. The cleaning agent's exposure time is about 5 minutes, after which steam cleaning can be performed.
- Attach the pointed steam nozzle to the steam cleaner.
Figure J
Round brush (small)
The small round brush is suitable for removing stubborn dirt. Treating the brush makes it easier to clean surfaces from stubborn dirt.
CAUTION
Damaged surfaces
The brush may scratch delicate surfaces.
It is not suitable for cleaning delicate surfaces.
- Mount the small round brush onto the pointed steam nozzle.
Figure K
Round brush (large)
Damaged surfaces
The brush may scratch delicate surfaces.
It is not suitable for cleaning delicate surfaces.
- Mount the large round brush on the thin jet nozzle.
Figure K
Powerful jet
Powerful jet for cleaning heavily soiled surfaces, joints, corners, seams, etc.
- Mount the powerful brush in the same way as the large brush on the thin jet nozzle. Figure K
Hand nozzle
The hand nozzle is intended for cleaning small surfaces, such as mirrors.
- Slide the hand nozzle onto the thin jet nozzle on the steam gun.
Figure J
- Put on the hand nozzle.
Nozzle for floors
The floor nozzle is intended for cleaning washable surfaces such as stone floors, ceramic tiles, and PVC coverings.
CAUTION
Damage due to the effect of
High temperature and humidity can cause damage.
Before using, it is necessary to check the tightness and operation in a place with a minimum amount of steam.
Note
Residues of cleaning agents and emulsions for care on the painted surface during steam treatment may become a source of stains, which, however, disappear after a few uses.
Before using the device, we recommend cleaning the floor thoroughly. Thanks to this, the floor will be freed from coarse dirt before steam cleaning. To allow the steam to act longer on heavily soiled surfaces, work slowly enough.
- Connect the extension tubes to the steam nozzle.
Figure L
- The nozzle for the floor must be pushed onto the extension tube.
Figure M
Device maintenance
Lack of water in the steam reservoir leads to damage to the device.
Monitor the water level in the steam reservoir and replenish its supply.
ATTENTION
Ironing clothing
Failure to follow the ironing instructions given on the clothing labels may lead to damage to the clothing.
Follow the ironing instructions on the clothing.
Attention
The optimal thermostat setting is fixed for ironing any fabrics suitable for ironing, without additional adjustment. Delicate fabrics and prints should not be ironed dry.
- Wait until the control lamp of the iron's heating element goes out (orange).
Iron ready for use.
Maintenance and technical service
Removing scale from the steam reservoir
Attention
Considering the formation of scale in the appliance, it is recommended to remove the scale when the number of tank fillings indicated in the table is reached (TF = tank fillings).
Damaged surfaces
The descaling solution may damage delicate surfaces.
Fill or empty the appliance promptly.
- Switch off the appliance, see chapter Switching off the appliance.
- Let the appliance cool down.
- Empty the water tank.
- Remove the accessory from its holder.
- Open the lock for maintenance. To do this, install the open end of the extension tube on the maintenance lock, secure it in the guide, and turn.
Figure U
- Drain all water from the steam reservoir. Figure V
CAUTION
Damage to the device due to descaling agent
Using an unsuitable descaling agent and incorrect dosage can lead to damage to the device.
Use only KARCHER descaling agent.
Use 1 dose of descaling agent per 0.5 l of water.
- Prepare the descaling solution according to the instructions on the agent.
- Pour the descaling solution into the steam reservoir. Do not close the steam reservoir.
- Leave the solution to act for approx. 8 hours.
- Drain all descaling solution from the steam reservoir.
- If necessary, repeat the descaling process.
- Rinse the steam reservoir 2-3 times with cold water to remove all residues of the descaling solution.
- Drain all water from the steam reservoir.
- Method for storing the network cable. 15. Close the lock with the service key.
Accessory care
- The fabric bag should be washed in the machine at a temperature not exceeding 60°C.
Troubleshooting
Most malfunctions have simple causes, so with the help of the following overview they can be eliminated independently. In case of doubt or if the malfunctions described here occur, contact the authorized customer service.
WARNING
Danger of electric shock and burns
Repairing a faulty device that is connected to the power supply or disassembled is dangerous.
Pull out the mains plug.
Let the device cool down.
The low water level indicator light flashes
Red light, acoustic signal sounds
There is no water in the tank.
- Fill the tank with water up to the "MAX" mark.
The low water level indicator light glows red
There is no water in the water reservoir. The pump overheat protection has been activated.
- Turn off the device, see the chapter Turning off the device.
- Fill the water tank.
- Turn on the device, see the chapter Turning on the device.
Never ignore or neglect the device warnings.
Symbols on the device
(translation)
Do not fill the water tank with fuel.
Do not use medications or other additives (e.g., aromatics).
Filling the water reservoir with water
- The water reservoir must be placed vertically. Fig.
- In vertical position of the water reservoir, fill it up to the "MAX" marking with tap water or a mixture of tap water and up to 50% distilled water.
- Place the water reservoir on the base and check for leaks.
Filling the water reservoir directly
- Pour tap water or a mixture of tap water and up to 50% distilled water into the filling opening of the water reservoir up to the "MAX" marking.
Figure D
Instruction
If the steam iron is used with water or water mixed with tap water, the water pump will be activated and water will be drawn from the water reservoir into the steam iron. The pumping process cannot last more than a few minutes.
Instruction
Press the steam button briefly for a short burst of steam, while doing so, the iron should be held horizontally. The button prevents the steam from escaping. The release of steam is not affected by this.
- Place the iron on a stable base.
- Plug the cord into the outlet.
Figure F
- Press the steam button.
The green control lamp for heating is on. Inside G
4. After a while, the green control lamp for heating will start to light continuously.
Figure H
- Press the steam button.
Steam is released.
Quantity of steam adjustment
The quantity of steam is regulated by the steam quantity selector.
The selector has three positions:
| Мakсимално колочьо на паразу | |
| Hamално колочьо на паразу | |
| Бez пара - зашита за.Deça УказанUE В моза пожение постум за пapама не може за Быde Задец�ан. |
- Set the selector to the required quantity of steam.
- Press the button for steam.
- Press the steam button until the steam flows evenly from the steam nozzle.
Filling with water
If there is no water, the water shortage indicator light will turn red and an audible signal will sound.
Note
The water pump fills the steam generator at certain intervals. If the filling is successful, the water shortage indicator light goes out.
Note
If the steam generator has no water or the water level is too low, the water pump will switch off and water will be drawn from the water reservoir into the steam generator. The filling process may take a few minutes.
WARNING
The device is intended for use with cold water only, according to the manufacturer's instructions.
Do not use the device without water.
Use a maximum of 50% distilled water, mixed with tap water.
Do not fill with water from the dryer. Do not use waste water.
Do not add cleaning agents or other additives (e.g., fragrances).
- Fill the water reservoir up to the "MAX" marking with tap water or a mixture of tap water and a maximum of 50% distilled water.
Check the device for leaks.
Draining the device
- Press the drain button.
Figure P
The device is drained.
- Pull the handle to the right until it stops.
Figure Q
Turn the kettle over to empty it completely.
- Backup for devices (request for selection of the number of rights) back.
Post for accessories.
- Call the contacts.
- Prepare for the device.
Draining the steam iron.
Drain the steam iron thoroughly after every 10 fillings of the reservoir.
- Turn off the device, see Chapter IV. Turn off the device.
- Leave the device to cool. 3. Empty the water reservoir.
- Remove the accessories from the accessory holders.
- Open the inspection valve. For now, place the opening cap of the steam hose over the inspection valve, immerse it in water and fill it.
Figure U
- Fill the steam iron with water and tilt it slightly. In this way, the remaining water will drain.
The remaining water will drain from the steam iron.
- Drain the water from the steam iron. Figure V
Storage of the device
- Insert the flexible tubes into the openings of the accessories.
- Place the nozzle onto the tube and press it firmly until it clicks into place.
- Attach the large brush to the telescopic tube.
- Insert the small brush and nozzle into the openings for accessories.
- Insert the crevice nozzle into the parking slot. Figure 5
- Press the parking mark near the flexible tubes and insert the crevice nozzle into the parking slot. Figure 7
- Press the cable clips near the flexible tubes.
- Insert the cable clips into the compartment for accessories.
- Keep the device dry and clean it from dirt.
Important instructions for use
Cleaning the floor surfaces
Before using the device, check that the floor is free of objects that could be sucked up. This way, the floor will be cleaned of loose dirt.
Cleaning textiles
Before treating with the device, check the colorfastness of the textiles on a hidden area: dampen the textile, let it dry, and then check for changes in color or shape.
Hard surfaces
Do not use abrasive sponges, metal scrapers, artificial coatings or anything similar that could scratch the furniture.
Do not press the steam iron against the furniture surfaces, as this could damage them.
Do not use steam for cleaning painted or varnished surfaces.
Do not use steam for cleaning surfaces with artificial coating, such as kitchen and steel furniture, doors or parquet.
- For cleaning these surfaces, briefly wipe with a soft cloth and then dry the surfaces with a dry cloth.
Cleaning the glass
ATTENTION
Cleaning the glass and the intermediate surfaces
The steam may damage the areas around the glass frame and at low temperatures may cause stress on the
glass surface, which could lead to cracking of the glass.
Do not press the steam iron against the areas around the glass frame.
At low temperatures, preheat the glass surface, then wipe with a soft cloth on the glass surface.
- Clean the glass surface with a soft cloth and cover. To remove water, use the glass scraper or wipe the surfaces dry.
Using the accessories
Steam iron
The steam cleaner can be used without any special skills.
Removing stubborn stains: Spray steam at the stain from a distance of 10-20 cm. To remove dust: Briefly wipe with a dry cloth and then vacuum the furniture.
Steam jet nozzle
The steam jet nozzle is suitable for cleaning hard-to-reach places, corners, fittings, hoses, sinks, toilets, and radiators. The closer the steam jet nozzle is to the surface to be cleaned, the higher the cleaning effect, as the temperature and amount of steam are highest at the nozzle outlet. Before cleaning with steam, remove loose dirt with a suitable cleaning agent. Leave the cleaning agent to act for about 5 minutes and then steam it off.
- Attach the steam jet nozzle to the steam cleaner.
Figure J
Small round brush
The small round brush is suitable for cleaning stubborn dirt. Stubborn dirt can be removed more easily with brushing.
CAUTION
Delicate surfaces
The brush may scratch delicate surfaces.
It is not suitable for cleaning delicate surfaces.
- Attach the small round brush to the steam jet nozzle.
Figure K
Round brush (large)
TolmaTKeBraeKae nOxOJa3a 3nocTbaHe Ha rolemn 3aoBneHn NobpXHOCTn, HAp. yMBAJIHnCn, DywoBe, BAHN, KxHHeCN MNBKn.
WARNING
Surface preparation
The brush can damage the surface.
Not suitable for cleaning the surface.
- Mount the wing brush on the jet nozzle.
Figure K
Foam nozzle
The foam nozzle is suitable for cleaning stubborn dirt, blowing out dirt, dust, etc.
- Mount the foam nozzle analogously to the wing brush on the jet nozzle. Figure K
Dirt nozzle
The dirt nozzle is suitable for cleaning small areas and surfaces, such as corners and edges.
- The rear nozzle is analogous to the jet nozzle on the spray gun. Figure J
- Slide the cover onto the dirt nozzle.
Iodoba pose
The head pose is suitable for cleaning walls and floors, e.g. stone floors, PVC floors.
WARNING
Check the operation of the steam before use.
Strong steam and moisture can cause damage.
Before using, check the stability of the steam mop and the operation of the steam on an inconspicuous place with the same amount of steam.
Note
Residues of cleaning agents or floor care products on the floor surface, which are not cleaned, can lead to stains when cleaning with steam, which are avoided with repeated application.
Before using the device, the floor should be vacuumed or swept. Thus, before wet cleaning, the floor is freed from dust and loose parts. Strong soiling of the surface should be treated longer, so that the steam acts longer.
- Insert the extension tube into the steam mop.
Figure L
- Place the floor nozzle on the extension tube.
Figure M
- Attach the handle for the floor to the floor nozzle.
Place the foot pedal on the floor in front of the device.
b With the foot pedal, place the pedal base on top of the device.
Figure N
Thanks to the locking with the device foot pedal, the pedal is automatically attached to the pedal base.
Connecting the foot pedal
- Place one hook on the service bracket with the hook of the foot pedal, then lift the pedal base up.
Figure N
Note
In the initial operation of the foot pedal, it is very strong and the pedal base may be released. After repeated use and after the foot pedal is worn in, the pedal can be released from the pedal base and the optimal adhesion is achieved.
Parking the pedal base
- When finishing work, place the pedal base in the parking position.
Figure S
Book holder
With the book holder, books can be held.
WARNING
Do not attach to the chimney and the flue.
The attachment to the chimney, as well as the flue pipe and the flue gas, can lead to damage to the chimney.
Before use, check the stability of the flue pipe and the effect of the steam on the chimney of the unglazed stove with a small amount of steam.
Take into account the instructions for cleaning the chimney.
Make sure that before using the attachment for the chimney, the flue pipe and the chimney are cleaned.
Before use and after work pauses, remove any condensate that has collected in the device through the outlet in the channel (without the cap for the accessory).
Use the attachment for the chimney only with the cap for the appropriate dose.
When using the attachment for the chimney, clean it with a low steam level.
Do not direct the steam at one place (no more than 5 seconds), to avoid strong overheating and the risk of damage due to temperature shock.
Do not use the attachment for the chimney on the chimney of the unglazed stove.
Attaching the attachment for the chimney to the base dose
- Attach the cap for the dose to the base dose, see chapter Base dose. Figure N
- With light pressure, insert the base dose into the attachment for the chimney and let it fix. Figure O
- Insert the chimney cleaner.
Removing the attachment for the chimney from the base dose
When working with the ironing board, it can become very hot.
Do not work with and do not place the ironing board on flammable or open surfaces.
Work with the ironing board only with suitable shoes.
- With the sole of the shoe, press the board of the ironing board down. 2. The heating plate heats up slowly.
Figure O
Description of use
Note
It is required to use the KARCHER ironing board with active steam extraction. This ironing board is optimally matched to the purchased device. It accelerates and improves the ironing process.
In any case, the ironing board used must have a steam-permeable, resistant base for ironing.
Note
It must be checked that with the ironing board without steam extraction, it is possible for moisture to penetrate the board of the ironing board, if condensate collects.
Start-up in operation Description of use
ATTENTION
It is possible that when operating from above, condensate water may drip onto the device, so it is recommended to install a protective cover.
If possible, perform work on the top of the device, where it is not exposed to condensate water (e.g., from pipes/walls).
When installing the device, make sure that the area above it, where condensate water could drip, is sufficiently protected (e.g., by means of a waterproof cover).
Warning
The base of the chimney must be higher to prevent steam from condensing and to ensure safe operation.
- Make sure that the steam generator device has water from the water supply or distilled water. 50% distilled water.
- Connect the steam generator hose to the water supply device, until it is fully connected.
- Put the steam generator device into operation, i.e., turn on the device. 4. Wait until the steam generator is ready for operation.
- The device is ready for use when the control lamp (orange) lights up.
- During use, the control lamp lights up when the device is heating up additionally. The additional heating during use should not be interrupted.
First operation
ATTENTION
Injury hazard
Failure to follow the safety instructions, especially those regarding the device, may lead to injuries. Follow the safety instructions, especially those regarding the device.
Instruction
With the help of an iron, the temperature settings can be adjusted to suit all types of fabrics, without the temperature needing to be set too high. Place the delicate materials and prints on the reverse side with the help of a cloth, without direct contact with the iron. By ironing at a distance of 2-3 cm from the material, the creases are smoothed out.
Instruction
The iron is equipped with a special automatic system that automatically switches off when the iron is left in a vertical position for more than 5 minutes. This automatic system increases
safety and saves energy, as the iron does not overheat unnecessarily. The iron
switches on again when it is picked up and continues heating.
Instruction
For ironing curtains, drapes, etc., the iron can be held vertically.
- The water tank (orange) - filling the tank - the iron may be used with tap water.
- Press the steam button for the soleplate. The steam comes out while the button is pressed.
- The steam stops during pauses in ironing. Direct the steam towards the fabric, while the steam button is pressed evenly.
Dry ironing
ATTENTION
Before use
The lack of water in the tank is indicated by a light that turns on when the water level is low.
WARNING
Damage due to scale
Failure to follow the instructions for use, the iron's accessories, may lead to damage.
Follow the instructions for use and the iron's accessories.
Note
With the constant, optimal temperature setting, you can iron delicate fabrics without having to adjust the temperature further. Delicate materials and prints should not be ironed dry.
- Wait until the control lamp (orange) goes out. The iron is ready for ironing.
Ironing surface
Cleaning the limescale from the kettle
Note
If the appliance is used to descale, we recommend that you clean it of scale according to the instructions in the table for the amount of water in the reservoir (NP = amount in the reservoir).
| Ниво на Тьрдост | dH | mmol/l | ПР | |
| Мека | 0-7 0-1,3 100 | |||
| II | среда | 7-14 | 1,3-2,5 | 90 |
| III | Тьрda | 14-21 | 2,5-3,8 | 75 |
| IV | MHOrо Тьрда | >21 | >3,8 | 50 |
Note
The water supply company or the authority can provide information about the hardness of the water from the water supply network.
WARNING
NoepedeHu noebpxHocmu
Pa3meOpb m 3a noucmbahe Ha bapobka Moke da pa3rde yecmbumHume noebpxhocmu.
Hantbnaume u u3npa3eaune ypeda bhumamenho.
- ɪnʌkɪnjuːte ypeəda, Bʌk.ɪnʌbaɪnʌkɪnjuːeəhe haɪypeəda.
- OctabeTe ypeDa da ce oxlaan.
3.ИзпраЗHeTe pe3eрBoара 3a ВОДа. 4. Cbane npHaJnEeKHOCTTa ot Ibpxa 3a npHaJnEeKHOCTN. 5. OTBOpTe peBn3NOHHTO Kanaue. 3a ceIta NOCTABeTe OTBOpEHnKpaHa yDbJnxITeHa Tpb6a BbPxy peBn3NOHHTO Kanaue, qKcnpaTe Ro BB BOJaU N rO 3aBnTe. U 6. I3neIte HAnbJInHO BODaTA O T napoctpyHnKOTeJI. ΦIrypa V
BHIMAHNE
Iopepu Ha ypea om cpedcmeo 3a noucmeane Ha eapoeuka
Henodxodao cpedcmeo 3a noucmbahe Ha cepouka, kaKMO u HnpaunHomo do3upaHe Ha cpedcmeo 3a noucmbahe Ha cepouka moKe da nopedu ypeda.
I3non38aume camo cpedcmbomo 3a noucmehe Ha cepoek Ha KARCHER.
I3non38aume 1 do3a om cpedcmbomo 3a noucmebahe ha bapoeuka 3a 0,5 I eoda.
- Пплагаите pa3твора за поочистваши на варовикабгласно уka3aанята,дадени Вьрху сретстботона поочистваши на варовиka.
- CnneTe B napoctpyHnH KOTen pa3TbOp 3a nouchTBaHe Ha BapOBnKa. He 3aTbApJrTe napoctpyHnH KOTen.
- Octabete pa3TBopa 3a nouicTbaHe Ha BapOBnka da noDeiCTBa OKoNo 8 Yaca. 10.ИЗнеле habлino pa3tBopa 3a nouchteBaHe Na BapOBnka ot napoctpyHnKOTeJ.
- Пи НeoбхоДИМОСТ NOВТОРЕ ПОUCEСА на поисвае на Варовиka. 12.ИЗплakн elect napoctpyHnHЯ KOTe 2-3 nbTn cBc CtydeHa BODa,3a Da OTCTpaHInTe BCNCHN OCTaTBuO IT pa3TBopa 3a NOUINCTBaHe Ha BapOBnKa. 13.ИЗнТЕНПНОВODaTo OT napoctpuHnKoTeJ. 14.Подсушete МястOTOа CBхранене Ha 3axpaHbauиka6eJ. 15.3aBHTepeBn3HOnHToKanayeKbM ydbjNKeJIHa Tpb6a.
Installing the device
Weight without accessories kg 4
Length mm 350
Width mm 280
Height mm 270
Current information about components can be found at: www.kaercher.com/REACH
Spare parts
Only use original accessories and original spare parts. They ensure the safe and trouble-free operation of the device.
Information about accessories and spare parts can be found at www.kaercher.com.
Scope of delivery
The accessories supplied with the device are indicated on the packaging. When unpacking the device, check that the contents are complete. In case of missing accessories or
damage incurred during transport, please contact your dealer.
Warranty
In each country, the warranty conditions published by our responsible sales company apply. We will rectify possible faults on the device free of charge within the warranty period, provided that the cause of the fault is due to material defects or manufacturing faults. In the event of a warranty claim within the warranty period, please contact your dealer or the nearest authorized customer service center, presenting the proof of purchase.
(See Fig. B. On the reverse side)
Safety devices
CAUTION
Missing or modified safety devices
Safety devices are intended for your own protection. Modifying or disabling safety devices is prohibited.
Symbol on the device
(Device type designation)

Danger of burns! The device surface heats up during operation
Danger of burns from steam

Do not fill above the maximum fill line.
Do not add any other substances to the water (e.g., fragrances).
Filling the water tank
1. Pull the water reservoir vertically upward.
Figure C
- Fill the tank vertically with water, either tap water or distilled water, up to a maximum of 50% of the distilled water capacity up to the "MAX" mark.
- Install the tank for water and press on it until it is fixed.
Filling the tank is done directly on the device.
1. To fill with water, connect the device to the water supply system with a maximum of 50% distilled water from the «MAX» mark.
Figure D
Turning on the device
Indicator
If there is no water in the reserve tank or it is too low, the water pump will start working, which supplies water from the reserve tank. The filling process may take several minutes.
Indicator
When the 60-second timer is short, close the valve, and the valve will close quietly.
Closing the valve prevents the valve from locking. The outlet is not provided when the water is closed.
- Place the device on a flat surface.
- Insert the plug into the socket. Figure F
- Press the «ON» button. The green control lamp «Heating» will light up.
Figure G
- Wait until the green control lamp «Heating» goes out constantly.
Do not use more than 50% distilled water, mixed with tap water.
Do not pour condensate water from the drying machine.
Do not pour collected water into the water tank.
It is forbidden to add water or other substances to other additives (for example, aromatizers).
- Fill the tank with tap water or distilled water with a maximum of 50% used water before the "MAX" mark. The device is ready for use.
Turning off the device
- Press the "Off" button.
Figure P
- Check that the valve is not closed, and that the steam inlet is open.
Figure 1
There is no pressure in the steam reservoir.
- The protection against overpressure (steam quantity switch) must be set to the required position; the steam supply is blocked.
- Disconnect the device from the outlet. 5. Rinse the tank.
Flushing the steam reservoir
Flush the steam reservoir with the device after every 10th filling.
- Turn off the device, see the chapter "Turning off the device".
2. Let the device cool down. 3. Rinse the tank. 4. Drain the device. 5. Open the inspection valve. Insert the end of the flushing hose into the inspection valve, secure it in the clamp and press.
Figure 2
- Fill the steam reservoir with water and shake it vigorously from side to side. This will help remove any scale deposits that have settled on the bottom of the steam reservoir.
- Drain the water from the steam reservoir.
Figure 3
Storage of the device
- Insert the flexible tube into the large holder for the device.
- Install the nozzle with a thin stream onto the surface tubes.
- Close the large round hole on the nozzle with a thin stream.
- Insert the small round hole and nozzle into the middle holder for the device.
- Install the nozzle for the blow gun onto the surface clamp.
Figure 5
- Wrap the hose around the surface tubes and insert the tip into the nozzle for the blow gun.
Figure 7
- Wrap the cable around the surface tubes.
- Insert the cable into the device.
- Store the device in a dry place, protected from frost.
Important instructions for use
Cleaning the upper part
We recommend checking the device before cleaning the upper part with a brush or vacuum cleaner. This will allow you to remove dust and small particles from it before cleaning with steam.
Cleaning the lower part of the fabric
The device is intended for checking the color fastness of fabrics to non-permanent factors: treat the fabric sample, let it dry, and then check the item for color change or shape.
Surfaces with lacquer or other coatings
ATTENTION
Damage to surfaces
Steam can damage varnish, furniture polish, synthetic coatings, and fabrics, as well as stickers on edges.
Do not direct steam at the edges of the furniture, as this may cause damage to the stickers.
Do not use the device for cleaning veneered wooden or parquet floors.
Do not use the device for cleaning surfaces with lacquer or synthetic coatings.
Coatings, especially furniture made of veneer or parquet, may be damaged.
- To clean such surfaces, apply a small amount of steam to the fabric, then wipe the necessary surfaces.
Cleaning
ATTENTION
Risk of damage to surfaces
Steam can damage the adhesive joints of the window frame, and at low ambient temperatures it can cause stress on the surface of the window glass and even lead to cracking.
Do not direct steam at the adhesive joints of the window frame.
The steam temperature of the heated surface should be checked before cleaning.
Clean the window surface with a hand sprayer and a cloth. Wipe the water from the glass using a window squeegee or dry with a cloth.
Application
Steam pistol
The steam pistol can be used for the intended tasks without any additional accessories:
- Removing light stains on glass, such as fingerprints: spray directly from a distance of 10-20 cm. To control the steam amount: press the steam trigger and wipe the glass with a cloth.
Nozzle with concentrated jet
The nozzle with concentrated jet is designed for cleaning hard-to-reach areas, joints, fittings, drain pipes, sinks, toilets, radiators, and heating elements. The closer the nozzle with concentrated jet is to the dirty area, the better the cleaning efficiency, because at the nozzle outlet the steam temperature and amount are maximum. Strong deposits can be treated before cleaning with steam using a suitable cleaning agent. Leave the cleaning agent on the surface for about 5 minutes, then remove it with steam.
- Attach the nozzle with concentrated jet to the steam pistol.
Figure J
Do not clean varnished surfaces.
- Attach the large round brush to the nozzle with concentrated jet.
Figure K
Nozzle with powerful jet
The nozzle with powerful jet is designed for cleaning stubborn dirt, blowing out corners, joints, and similar areas.
- Install the nozzle with a narrow stream to the round nozzle with a point stream.
Figure K
Hand sprayer
The hand sprayer is designed for cleaning small surfaces that are difficult to reach, such as cabinets and drawers.
- Install the nozzle according to the point stream nozzle on the steam cleaner.
Figure J
- Pull the hand sprayer out.
Nozzle for floors
The floor nozzle is designed for cleaning floor coverings that can be washed (parquet, laminate, tiles, and floors made of PVC).
ATTENTION
Damage possible only when
High temperatures can cause damage.
Before use, check the resistance and suitability for steam on an inconspicuous area with the least amount of steam.
Instructions
Protective agents or cleaning agents for the surface to be cleaned during cleaning can lead to the formation of vapors that are hazardous to health.
We recommend using the device only with a steam iron or steamer. This will allow you to remove dirt and stubborn stains before steam cleaning. On heavily soiled surfaces, work thoroughly, allowing the steam to contact the surface longer.
1. Attach the extension hose to the steam pistol.
Figure L
- Install the nozzle onto the extension hose.
Figure M
- Close the cap of the water tank on the water tank.
a. Place the water tank cap on the tank and secure it with the latches at the top.
b. Place the water tank cap and the hose, pressing lightly.
Figure N
The cleaning pad is secured to the base with the fasteners.
Removing the hose from the base
- Place your foot on the hose release pedal and lift the base.
Figure O
Note
The hose release pedal is very tight and the hose is difficult to remove from the base. After repeated use, the hose will come off easily and with minimal effort.
1. During the first operation, install the nozzle for ironing on the ironing board. Figure 5
Steam brush
With the steam brush, you can improve the appearance of clothes.
WARNING
Position of the brush and steam brush
Blockage of the steam brush, as well as high temperature and humidity, can damage the brush. In addition, before use, check the resistance of the brush to water and steam on an inconspicuous area with a small amount of steam. Follow the instructions provided by the brush manufacturer.
Make sure that before using the steam brush, the brush was cleaned with a vacuum cleaner and dried.
Before use and after operation, it is necessary to thoroughly ventilate the room (without people or animals / with additional equipment) to avoid condensation in the device.
Use the steam brush only with the fabric attachment for the ironing board on the ironing board.
When using the steam brush, use only the lowest power level of the iron.
Do not direct the steam at one place for a long time (no more than 5 seconds) to avoid strong heating and risk of damage due to high temperature.
Do not use the steam brush on clothes with high lint.
Attaching the steam brush to the ironing board
- Attach the fabric of the ironing board to the ironing board, see the chapter "Ironing board attachment". Figure 6
- JERKIM HAITNCKAHHREM BBeCTNI 3aΦikcyBaTN HacaIky IJIpiNOrn B po3rJaKyBauch KINIMIB. ManIOHOK O
- P03noaTu OuHueHH KInnMa.
3HimAHnpo3rJaXyBaayKaKJNIMIB3HaCAdKnIpy NiDnOrn
OBEPEXHO
Oniku Hie
Iid yac o6p6ku npoio po3aadxyea Kullimbo Moke Haepieamuc.
He eukopucmoeybamu u He 3Himamu po3aadkyaeu kunumie 6ocohix a6o y eikpumux cahdanx.
Bukopucmoeyamu 3himamu pozanaadxyea kunumie nuue y npudamHomy 83ymmi.
- Hockom B3yTTHaTnCHyTN BnH3 Ha φikcatop po3rnaJkyBaay KINIMIB. 2.ПДнги Hacdky dny nDnorn. ManHOK O
NapoBa npacka
Bka3i8ka
Pekomehoyemo bukopucmoyeamu anadunbhu cmn KARCHER 3 cuscmemo iHmeHCUBHOO biocmokmyaehna napu. Ceu aadunbhu cmn onmmalno nacye do npudbaHO zo npucmpoIO. BIn cnpuE noneaueHHIO ma npuckopeHHIO npouecy npacyaHH. IadunbHu cmn, 0o Bukopucmoeyemcbra, 3aekdu noBuHeH Mamu rpaumacmy noeepxHIO dner npacyaHH, 0o nponycka napy.
Bka3ie8ka
CniD 3aHaumu, uo kuo e anadunbHo2o cmona eidcymna cucmemaa iideBeHn npu, moxnuee npomokanHryoxla zadunbHo2o cmona e pa3i hakonuehn KOHDcamy.
BVeDeHnB EeknIyataciIO napoBoI npackn BnCOKOrO TnCKy
YBARA
MamepiJIbHa uKoDa yepe3 KOHDeHcAm/eNoSy
Iid qac npacyeaHnMoKnuee nompannHn KaohcamyHa nioaoy i nowkodxeHHa deikamHo2o nidno2o02o nokpumma.
Kaio moKnueo, eukohyme npacyeaHna Hidnozoobomy nokpummi, cmiKOMy do ymbopeHna KOHeHCamy (HaPpuKnad, nnumka /kamih).
3a HaReHocmi yvmueo2o ndo2o2o nokpmmn nepekoHaumecra, o do iinHka, H aky moKe kanamu KOHDcAm, e HanexKHum uHOM 3axuueHO (HanpuKnad, odoHepnoHKHM KJumkOM).
Bka3ieka
Iidowea npacku Ma6 bymu zapraho, uo6 npapa He KOHdeHcyeanacb Ha niodwei ma He Kanana Ha 6iu3ny, kky npacyomb.
- YneBnHnTcB, IIO B npoBoMy pe3epByapi npooUncnka 3HaxOOnIbCra BOOpnoBiHa BOa Ch cymiu BOOpnoBIHOI BOi 3 MaKc. 50% dNCTINbOBaHOI BOi.
- BctabTuIuTekep npn npackn B po3eKy npncTpoIO do KnaJauHHa.
- 3aynctntn napoouchnk, nVB. rnaBy YeimKHeHH npucmpoio. 4.ДоуЕкатия,нокп napooочинк He 6удe roTOBndopo6oTu.
- 阿尼升iHnKATOp (nomapauHcEbn) 3rache, npacka rTOBa DO BnKOpNCtAHH. 6.Пдчасpo6otnpackn iHdkatopKoKHOpoa3y 3aropaeTbcra, KOI npacka DoDAtKOBO po3irpiBaTbcra.ПдчасnoBtophoroHarpiBaHHa npacky MoKHa npOdoBkyBaTN BkOpNCTOByBatn.
PpacyBaHHnapOM
YBFA
3iCyBaHHnOyay
Hedompumahnhi hcmpkyi iodo npacyeaHH Ha oday moke npuzecmu do uo2o 3incyeaHH. Dompumyeamucb ihcmpkyi uodo npacyeaHH Ha oday3i.
Fixed optimal temperature setting should be selected for the type of fabric being ironed, suitable for processing with steam, without additional regulation.
Fabrics and their prints should be ironed on the reverse side, without direct contact with steam. Fibers carefully
treated with steam at a distance of 2-3 cm from the fabric.
The iron is equipped with an automatic shut-off system that turns off the appliance if it has not been moved for more than 5 minutes. This automatic shut-off system ensures safety and saves energy, preventing continuous steam emission. The iron turns on as soon as it is moved, and steam emission resumes.
For vertical steaming of curtains, suits, or fabrics, the iron can be held vertically.
1. Check the heating indicator light (orange) – when it is on, you can start ironing. 2. Press the steam button on the handle downwards. Steam will come out as long as the button is pressed. 3. Before starting ironing and after each pause in ironing, direct the steam jet onto a cloth until the steam supply becomes even.
Dry ironing
WARNING
Damage to the appliance
Do not use water and steam reservoir without water, as this may lead to damage to the appliance. Make sure the steam reservoir is filled with water.
WARNING
Descaling
Improper use may lead to damage. Follow the instructions for use carefully.
Insert
The fixed optimal temperature setting is suitable for ironing fabrics intended for processing without additional steaming.
Delicate fabrics or fabrics with prints should not be ironed dry.
Wait until the control indicator light (orange) goes out.
The iron is ready for use.
Care and maintenance
Removing the kettle from the steam reservoir
Insert
Since scale builds up in the device, we recommend filling the tank with water after each use (F = filling the tank), as indicated in the instructions, to remove scale from the device.
- Fabrics with this symbol can be ironed at a temperature not exceeding 60°C.
Troubleshooting
Malfunctions often have a simple cause that can be eliminated independently with the help of the instructions provided below. If in doubt or in case of unidentified malfunctions, contact an authorized service center.
WARNING
Risk of electric shock and burns
If the device is not used for a long time or is not cooled, proceed to eliminate the malfunction immediately.
Unplug the device.
Let the device cool down.
The control lamp «No water» lights up with a red light and a sound signal.
Turn off the device.
- Fill the water tank up to the «MAX» mark.
The control lamp «No water» lights up with a red light.
No water in the reservoir. The protection against pump overheating is triggered.
- Turn off the device, see the section «Turning off the device».
- Fill the water tank.
- Turn off the device, see the section «Turning off the device».
The water tank is installed incorrectly or its lid is closed with a slant.
- 1. Remove the water tank. 2. Rinse the water tank. 3. Install the water tank and press on it until it clicks.
The water level sensor is no longer pressed.
The water level sensor is blocked by protection from ice.
Set the steam quantity switch (steam quantity adjustment) to the forward position. The valve closes when disassembled.
Prolonged heating
Scale in the steam reservoir. Remove the scale from the steam reservoir.
Large steam outlet
Scale in the steam reservoir. Remove the scale from the steam reservoir.
Steam spray splashes water
- Cleaning the steam reservoir of the steam generator or removing scale from it — see the section on removing scale from the steam reservoir.
After a break in use, water droplets appeared from the steam spray.
During prolonged breaks in use, steam may condense in the steam pipe. After a break in use, direct the steam jet onto a cloth until it becomes uniform.
Technical specifications
Electrical connection
Voltage V 220-240
Phase ~ 1
Frequency Hz 50-60
Protection class IPX4
Working characteristics of the device
Thermal power consumption W 2000
Thermal power of the iron W 700
Maximum working pressure MPa 0.35
Heating time
Steam treatment rate 50
Maximum steam output g/min 110
Water tank capacity
- Use the device only for its intended purpose.
Figure L
- Before using the device, read the instructions carefully.
Figure M
- Before using the device, check the appliance.
a) Before connecting the appliance, check that the voltage matches the power supply. b) Before using the device, check the appliance and the cord.
Figure N
The food prepared for the child should be given to the child.
The food prepared for the child is ready
- After preparing the food, place the prepared food in a bowl, then place the prepared food in the refrigerator.
Figure N
Instruction
At the beginning, the food prepared for the child should be given to the child in a suitable form, and it should be protected from contamination. If the food is not consumed within a certain time, the food and the container should be properly disposed of, and the child should be given fresh food.
For the container, use
- For storage, use a container suitable for the food container.
Figure S
Prepared food
The prepared food can be used for feeding the child.
CAUTION
Prepared food and storage containers
Prepared food should be stored in containers, and it is possible to store the food in the refrigerator at low temperatures and high temperatures.
Before starting the device, carefully read the instructions for use and all safety warnings.
Keep the instructions for future reference.
If the device is passed on to a third party, the instructions for use must be handed over together with the device.
Before starting and during operation, keep a distance of at least 1 meter (3.3 ft) from people or animals to avoid possible injury.
Do not use the device with a damaged power cord.
The power cord must only be replaced by a qualified specialist using an original spare part.
To avoid overheating and fire, do not cover the device (e.g., with a towel).
Only use the device with the power cord provided.
Do not replace the power cord with a non-original one.
- To replace the power cord with a non-original one, see the following: Original power cord.
Fig. N
- Do not replace the power cord with a non-original one; always use the original.
Fig. O.
- Do not operate the device.
Do not replace the power cord with a non-original one.
Before using the device, check the confirmation for completeness.
If the device is not used for a long time, remove the battery.
If the device is used frequently, check the battery and replace it.
- Check the confirmation before using the device and press the button.
- Remove the confirmation before using the device. Figure 1
This warning sign
Caution
There is a risk of electric shock. Consult the operating instructions before use. This operating instructions must be followed carefully. The operating process must be carried out correctly. When using the device, the safety instructions must be observed.
Caution
When the operating instructions are started, the device must be checked for possible damage before use.
This short instruction is for starting
ATTENTION
The device must be closed with the cover.
Before cleaning the condenser, make sure it is possible to close the lid.
If possible, clean the condenser without removing it from the housing (e.g., with a brush/vacuum).
For cleaning the housing, do not use sharp objects or aggressive cleaning agents (e.g., water jets) that could damage the protective coating.
Instructions
For this condenser to function properly and be cleaned, the water tap must be open.
- In this case, tap water or distilled water with up to 50% alcohol can be used for cleaning.
- After cleaning, wipe the exterior with a dry cloth.
- For this device, refer to the cleaning instructions.
- Do not use this device if it is damaged.
- The indicator light (red/yellow) should be off after the device has been turned off.
- When the device is turned on, the indicator light will be on. If it is on, it is necessary to stop operation.
Turning off
CAUTION
Closing the lid
It is possible to install the cleaning instructions before closing the lid.
Kuiime meiinae HxncbipmacbHdaBlyymikmey 6oubiHwa HyckaynapMeH maHbcblHb3.
Hycay
BenzineHEn, ohmauIbI memnepamypa
napamempimh bapnbik ymikmelemin
MamepuandapdbI KocbIMwa meMnepamypa opHamnaYmikmeyze 6onaDbI.
H3ik Mamanap MeH canbIHraH cypermepoi apmKbl XarbIHah 6yMeH, ymkmiH mikeneu XaHaCybIHcbI3 ymikmei3. MamadaH 2-3 cmKaawbIKmbikma manwbiKmap 6yMeH eHdey apkbnbl Mykura mYsemineDi
Hycay
Ymik 5 Muhymmah apmbik ya kibim 6o bki Ko3rMaCA, KypbInfbHb cHdpemih aemomammbi eWipyMeH Ka6dbikmanrah. Byn aemomammbi eWipy ymik y3dkci3 Kb136aumtbHbikman Kayinc3dkmi apmmbipadbi Kahe Kyammbl yhemdeudi. Ymik Ko3raIraHHaH KeuiH KaumadaH KocInbIn, Kb13a 6acmaDbI.
Hycay
Tymac nepdeenepi, Keunekmepoi kHe m.6. 6ymeniHEn eHoey yuiH ymiKmi miin Hcmyra 6oJadbl.
- Te3 apada YtikTih Kbi3dbipy HnDnKaTOp 7aMb (Kbi3fbint capbl) euken 6oJa, ytkteyre kipicyre 6oana.
- By 6epinyiH axbipatkbltBeMeHderi TyTKaHaH 6acblbl3.Axbpatkbl6acblnTpyfHa,6y 7bifa 6epei.
- Ytikteydi 6actamac 6ypbH 6ydbH 6yifapblnybi H 6ybepeke 6afblTan, 6y Teric 6yifapblMaBihwa Kytih3.
KypraKyTikTey
HA3AP AYdAPbIHbl
KypbIFBihb1 3aKbImday
By Ka3aHbIHOb cydbIn XemKinikci3 MeIwepi KpybINbHbIN 3aKbIMdanybHa eKeenei By Ka3aHbIHOb cy bap eKeHiHe Ke3 XemKi3iHi3.
HA3AP AYdAPbIHbI
Kuimdi 3aKbImday
Ymikmey boBuHwa HyckaynapdbI ycmaHbay KuIMHi3aKbIMdanybHa eKenyi MymKiH.
KuiMe meinaeH kancbipmacbHdaBlyymikmey 6oubiHwa HcckaynapMeH maHbcih3.
HycKay
BenzeneH, OHmaJIbI memnepamypa npamempimE 6apblk ymikmenemih
MamepuanapdbI KocbIMua meMpamypa opHamna ymikmeyze bonaDbI.
Həsik mama nap MeH caJIbIHraH cypemmepdi KypraK KyuiHde ymikmeyze 6onmaudbl.
YtIKTHKbI3Dbpy INHdNKATOPwaMbI (KbI3fblNT capbl) eWKeHwe Kytih3.
Ytikytikteye daaBH.
Kytim XaHe TexHnKaIbIK KbI3MeT Kepcety
By Ka3aHbIHdaI KaKTbI Ta3aJAY
Hycay
Installation and operation manual for the generator, installation and operation instructions for the generator set (TF = generator set).
| Катульkin ay KBIMBI | dH | Мольь/л | TF |
| Жумсak 0-7 0-1,3 10 | 0 | ||
| II | орташa | 7-14 | 1,3-2,5 |
| III | kaTTbl | 14-21 | 2,5-3,8 |
| IV | эТe KaTTbl | >21 | >3,8 |
Attention
Before starting the generator, read the safety instructions carefully.
ATTENTION
Safety instructions
It is possible to use the generator for other purposes than its intended use.
The generator must be installed and operated by qualified personnel.
- Do not operate the generator without proper ventilation.
- Do not touch the generator with wet hands.
- Do not use the generator in explosive atmospheres.
- Dispose of the packaging materials properly.
- Use the generator only for its intended purpose. Do not use it for any other purpose, as this may cause damage or injury. See Figure V
- Do not use the generator with any other fuel. See Figure V
ATTENTION
Do not use the generator with any other fuel.
Each tap connected to the device must be checked for leaks. Check each tap connected to the device. Use each tap connected to the device for 1 minute and 0.5 liters of water per day. 7. Connect the tap connected to the device to the service line. 8. Connect the tap connected to the device to this generator. Turn on this generator. 9. Leave the tap connected to the device open for 8 hours. 10. Connect the tap connected to the device to this generator with a hose. 11. If necessary, repeat the procedure. 12. To drain all water from the tap connected to the device, turn this generator on and off 2-3 times. 13. Drain all water from this generator. 14. Do not place the device in a place where it can be splashed with water. 15. Use the device only for its intended purpose.
Instructions for users
Help in case of malfunctions
If malfunctions occur that are not listed in this table, contact the authorized service center.
WARNING
Device safety and electrical safety
When connecting or disconnecting the device, turn off the device.
Remove the plug from the socket. Turn off the device.
If the water level indicator lights up red, there is not enough water.
Fill the water tank.
The water level indicator is lit red.
There is no water in the boiler. The red indicator is lit.
- Turn on the device, see the indicator: turn on the device.
- Fill the water tank.
- Turn off the device, see the indicator: turn off the device.
Use the device only as intended.
- Use the device carefully.
- Use the device correctly.
- Use the device properly, following the instructions.
This device is not a toy.
This device is not intended for use by children.
Keep the device away from children (this device is not a toy). Do not use this device as a toy.
Do not use it near water.
Do not immerse this generator in water.
Do not place this generator in water.
Do not use it with wet hands.
Do not immerse this generator in water. Do not place this generator in water.
Do not use this device near water.
- Do not place this device in water or immerse it in water. See the safety instructions in this manual.
If the device is used improperly, it may cause injury.
It is possible to use the device in accordance with the manufacturer's instructions.
- Before using the device, carefully read the instructions for use and keep them for future reference.
Technical data
Device description
7
7
Figure 8
10
11
100
13...all jol
14..aS.ull al
15.
Figure 1
J
a2al awlio cunl 1/1/aa 1
s
Jus Jusuill 0sui y dssuill lclc
Sai ju/lll pio p12w/pc. wia/9 log all
.0g>0gaa bLwllblai//o gwaal
aJwJ 60
- g
Jds d> aIb> 0dlaal
Lgcll lckabwUulUuU UuU 1000000000000000000000000000000000000000000000000000000000000000000
.0202
j219 a45 40al j0eill jbs
aill alljgl jzll bll jzll jzll
jIyllc jolulkill aIj JaiJbai aio
- : a x,y,z\
.7
V a>la|o
∴ jL = j1| k2 + 1|
.1
Ogswlo jlc baijll aaiiog gssll aiil Jb>2.
.1JgU|aJbuauU|
aill jll cio le ool o xwol olw
Jolal jIaIIg oR aIJIaIJI JI.4
.
JJI Jol> aiojU iao jaiu 5.
S a>la|o
Jg aJIbawU oJg> Jg> Jg
Uul
T a>la| o,gw
16 ÷ 14 = 10( k)
KARCHER.
90 A
jgl-(uaU)psll2a ⑥
clll ( 0,1) - ( 0,1/2)
Jaa 8
laolJol ⑨
laol Jol ⑩
aalaa ①
J
194.
194.
- aiwla
194.
194.
194.
194
194.
193
193
192.
191.
190.
189.
189.
www.kaercher.com

THANK YOU!
MERCI! DANKE! GRACIAS!

Register your product and benefit from many advantages.
www.kaercher.com/welcome


Rate your product and tell us your opinion.
www.kaercher.com/dealersearch
Alfred Kärcher SE & Co. KG
Alfred-Karcher-Str. 28-40
71364 Winnenden (Germany)
Tel.: +49 7195 14-0
Fax: +49 7195 14-2212


- GENERAL NOTES
- INTENDED USE
- ENVIRONMENTAL PROTECTION
- NOTES ON THE CONTENT MATERIALS (REACH)
- ACCESSORIES AND SPARE PARTS
- SCOPE OF DELIVERY
- WARRANTY
- SAFETY DEVICES
- CAUTION
- MISSING OR MODIFIED SAFETY DEVICES
- SYMBOLS ON THE DEVICE
- PRESSURE CONTROLLER
- SAFETY THERMOSTAT
- BOILER THERMOSTAT
- MAINTENANCE LOCK
- DESCRIPTION OF THE DEVICE
- FOR THE ILLUSTRATIONS, REFER TO THE GRAPHICS PAGE ILLUSTRATION A
- INSTALLATION
- INSTALLING ACCESSORIES
- ILLUSTRATION B
- ILLUSTRATION E
- ILLUSTRATION J
- ILLUSTRATION K
- ILLUSTRATION L
- ILLUSTRATION M
- DISCONNECTING ACCESSORIES
- OPERATION
- FILLING WATER
- ATTENTION
- DAMAGE TO THE DEVICE
- REMOVE THE WATER RESERVOIR FOR FILLING
- FILLING THE WATER RESERVOIR DIRECTLY ON THE DEVICE
- ILLUSTRATION D
- SWITCHING ON THE DEVICE
- NOTE
- ILLUSTRATION F
- ILLUSTRATION G
- ILLUSTRATION H
- ILLUSTRATION I
- REGULATING THE STEAM VOLUME
- REFILLING WATER
- SWITCHING OFF THE DEVICE
- RINSING OUT THE STEAM BOILER
- STORING THE DEVICE
- IMPORTANT APPLICATION INSTRUCTIONS
- CLEANING THE FLOOR AREAS
- FRESHENING UP TEXTILES
- CLEANING COATED OR PAINTED SURFACES
- DAMAGED SURFACES
- GLASS CLEANER
- GLASS BREAKAGES AND DAMAGED SURFACES
- HOW TO USE THE ACCESSORIES
- STEAM GUN
- SPOTLIGHT NOZZLE
- ROUND BRUSH (SMALL)
- ROUND BRUSH (LARGE)
- POWER NOZZLE
- MANUAL NOZZLE
- FLOOR NOZZLE
- DAMAGE DUE TO BUILD-UP OF STEAM
- ILLUSTRATION N
- REMOVING THE FLOOR CLEANING CLOTH
- PARKING THE FLOOR NOZZLE
- CARPET GLIDER
- BEWARE OF DAMAGING THE CARPET GLIDER AND CARPET
- FASTENING THE CARPET GLIDER TO THE FLOOR NOZZLE
- REMOVING THE CARPET GLIDER FROM THE FLOOR NOZZLE
- BEWARE OF BURNS TO YOUR FEET
- ILLUSTRATION O
- IRON STEAM PRESSURE
- INITIAL STARTUP OF STEAM PRESSURE IRON
- STEAM IRONING
- DAMAGE TO GARMENTS
- DRY IRONING
- CARE AND SERVICE
- DESCALING THE STEAM BOILER
- ILLUSTRATION U
- APPLIANCE DAMAGE DUE TO DESCALER
- CARE OF ACCESSORIES
- TROUBLESHOOTING GUIDE
- WARNING
- RISK OF ELECTRIC SHOCK AND BURNS
- THE WATER SHORTAGE INDICATOR LIGHT FLASHES RED AND A SIGNAL TONE SOUNDS
- THE WATER SHORTAGE INDICATOR LIGHT IS LIT IN RED
- THE STEAM LEVER CANNOT BE PRESSED
- LONG HEATING-UP TIME
- HIGH WATER OUTPUT
- THE STEAM PRESSURE IRON "SPITS" WATER
- AFTER IRONING BREAKS, WATER DROPLETS COME OUT OF THE STEAM PRESSURE IRON
- TECHNICAL DATA
- CONTENT
- ZNUA OTIC EMIPAVIECS
- FIGURE K
- WALL THICKNESS OF THE DEVICE
- FIGURE G
- GENERAL INSTRUCTIONS
- PRESSURE REGULATOR
- RESERVOIR THERMOSTAT
- DEVICE DESCRIPTION
- ASSEMBLY
- INSTALLING THE NOZZLE
- REMOVING THE WATER TANK FOR FILLING
- FILLING THE TANK DIRECTLY ON THE DEVICE
- FIGURE I
- ADJUSTING THE AMOUNT OF STEAM
- WATER FILLING
- DEVICE MAINTENANCE
- RINSING THE STEAM RESERVOIR
- IMPORTANT USAGE INSTRUCTIONS
- FLOOR CLEANING
- TEXTILE CARE
- CLEANING SURFACES WITH COATING OR PAINT
- PAINTED SURFACES
- CLEANING GLASS
- GLASS AND DAMAGED SURFACES
- USING ACCESSORIES
- STEAM NOZZLE
- POINT JET NOZZLE
- FIGURE J
- POWERFUL JET
- HAND NOZZLE
- NOZZLE FOR FLOORS
- FIGURE L
- FIGURE M
- IRONING CLOTHING
- MAINTENANCE AND TECHNICAL SERVICE
- REMOVING SCALE FROM THE STEAM RESERVOIR
- FIGURE U
- DAMAGE TO THE DEVICE DUE TO DESCALING AGENT
- ACCESSORY CARE
- TROUBLESHOOTING
- DANGER OF ELECTRIC SHOCK AND BURNS
- THE LOW WATER LEVEL INDICATOR LIGHT FLASHES
- RED LIGHT, ACOUSTIC SIGNAL SOUNDS
- THE LOW WATER LEVEL INDICATOR LIGHT GLOWS RED
- FILLING THE WATER RESERVOIR WITH WATER
- FILLING THE WATER RESERVOIR DIRECTLY
- INSTRUCTION
- QUANTITY OF STEAM ADJUSTMENT
- FILLING WITH WATER
- DRAINING THE DEVICE
- DRAINING THE STEAM IRON
- STORAGE OF THE DEVICE
- IMPORTANT INSTRUCTIONS FOR USE
- CLEANING THE FLOOR SURFACES
- CLEANING TEXTILES
- HARD SURFACES
- CLEANING THE GLASS
- CLEANING THE GLASS AND THE INTERMEDIATE SURFACES
- USING THE ACCESSORIES
- STEAM IRON
- STEAM JET NOZZLE
- SMALL ROUND BRUSH
- DELICATE SURFACES
- SURFACE PREPARATION
- FOAM NOZZLE
- DIRT NOZZLE
- IODOBA POSE
- FIGURE N
- CONNECTING THE FOOT PEDAL
- PARKING THE PEDAL BASE
- BOOK HOLDER
- DO NOT ATTACH TO THE CHIMNEY AND THE FLUE
- ATTACHING THE ATTACHMENT FOR THE CHIMNEY TO THE BASE DOSE
- REMOVING THE ATTACHMENT FOR THE CHIMNEY FROM THE BASE DOSE
- DESCRIPTION OF USE
- START-UP IN OPERATION DESCRIPTION OF USE
- FIRST OPERATION
- INJURY HAZARD
- BEFORE USE
- DAMAGE DUE TO SCALE
- IRONING SURFACE
- CLEANING THE LIMESCALE FROM THE KETTLE
- NOEPEDEHU NOEBPXHOCMU
- BHIMAHNE
- IOPEPU HA YPEA OM CPEDCMEO 3A NOUCMEANE HA EAPOEUKA
- INSTALLING THE DEVICE
- SPARE PARTS
- SYMBOL ON THE DEVICE
- FILLING THE WATER TANK
- FIGURE C
- FILLING THE TANK IS DONE DIRECTLY ON THE DEVICE
- FIGURE D
- TURNING ON THE DEVICE
- INDICATOR
- TURNING OFF THE DEVICE
- FIGURE P
- FIGURE
- FLUSHING THE STEAM RESERVOIR
- CLEANING THE UPPER PART
- CLEANING THE LOWER PART OF THE FABRIC
- SURFACES WITH LACQUER OR OTHER COATINGS
- DAMAGE TO SURFACES
- CLEANING
- RISK OF DAMAGE TO SURFACES
- APPLICATION
- STEAM PISTOL
- NOZZLE WITH CONCENTRATED JET
- NOZZLE WITH POWERFUL JET
- HAND SPRAYER
- INSTRUCTIONS
- REMOVING THE HOSE FROM THE BASE
- FIGURE O
- STEAM BRUSH
- ATTACHING THE STEAM BRUSH TO THE IRONING BOARD
- HIMAHNPO3RJAXYBAAYKAKJNIMIB3HACADKNIPY NIDNORN
- OBEPEXHO
- ONIKU HIE
- NAPOBA NPACKA
- BKA3I8KA
- BKA3IE8KA
- BVEDEHNB EEKNIYATACIIO NAPOBOI NPACKN BNCOKORO TNCKY
- YBARA
- MAMEPIJIBHA UKODA YEPE3 KOHDEHCAM/ENOSY
- BKA3IEKA
- PPACYBAHHNAPOM
- YBFA
- ICYBAHHNOYAY
- DAMAGE TO THE APPLIANCE
- DESCALING
- INSERT
- CARE AND MAINTENANCE
- REMOVING THE KETTLE FROM THE STEAM RESERVOIR
- THE CONTROL LAMP «NO WATER» LIGHTS UP WITH A RED LIGHT AND A SOUND SIGNAL
- THE CONTROL LAMP «NO WATER» LIGHTS UP WITH A RED LIGHT
- THE WATER LEVEL SENSOR IS NO LONGER PRESSED
- PROLONGED HEATING
- LARGE STEAM OUTLET
- STEAM SPRAY SPLASHES WATER
- AFTER A BREAK IN USE, WATER DROPLETS APPEARED FROM THE STEAM SPRAY
- TECHNICAL SPECIFICATIONS
- ELECTRICAL CONNECTION
- WORKING CHARACTERISTICS OF THE DEVICE
- THE FOOD PREPARED FOR THE CHILD IS READY
- FOR THE CONTAINER, USE
- FIGURE S
- PREPARED FOOD
- DO NOT REPLACE THE POWER CORD WITH A NON-ORIGINAL ONE
- FIG. N
- FIG. O
- THIS WARNING SIGN
- THIS SHORT INSTRUCTION IS FOR STARTING
- THE DEVICE MUST BE CLOSED WITH THE COVER
- TURNING OFF
- CLOSING THE LID
- HYCAY
- KYPRAKYTIKTEY
- HA3AP AYDAPBIHBL
- KYPBIFBIHB1 3AKBIMDAY
- HA3AP AYDAPBIHBI
- KUIMDI 3AKBIMDAY
- HYCKAY
- KYTIM XAHE TEXHNKAIBIK KBI3MET KEPCETY
- BY KA3AHBIHDAI KAKTBI TA3AJAY
- SAFETY INSTRUCTIONS
- DO NOT USE THE GENERATOR WITH ANY OTHER FUEL
- INSTRUCTIONS FOR USERS
- HELP IN CASE OF MALFUNCTIONS
- DEVICE SAFETY AND ELECTRICAL SAFETY
- THIS DEVICE IS NOT A TOY
- DO NOT USE IT NEAR WATER
- DO NOT USE IT WITH WET HANDS
- DO NOT USE THIS DEVICE NEAR WATER
- IF THE DEVICE IS USED IMPROPERLY, IT MAY CAUSE INJURY
- JDS D> AIB> 0DLAAL
- ∴ JL = J1| K
- J
- THANK YOU
- MERCI! DANKE! GRACIAS
Brand : Kärcher
Model : SI 4 EasyFix Iron
Category : Iron