Belle Epoque 1912 - Turntable Auna - Free user manual and instructions
Find the device manual for free Belle Epoque 1912 Auna in PDF.

User questions about Belle Epoque 1912 Auna
0 question about this device. Answer the ones you know or ask your own.
Ask a new question about this device
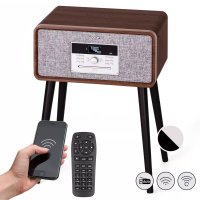
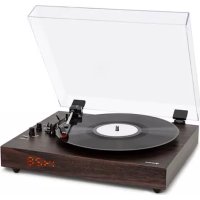
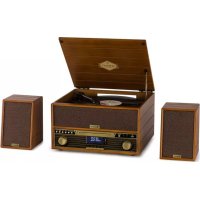
Download the instructions for your Turntable in PDF format for free! Find your manual Belle Epoque 1912 - Auna and take your electronic device back in hand. On this page are published all the documents necessary for the use of your device. Belle Epoque 1912 by Auna.
USER MANUAL Belle Epoque 1912 Auna
www.auna.multimedia.com

The lighting flash and arrow head within the triangle is warning sign alerting you of dangerous voltage inside the product
CAUTION
RISK OF ELECTRIC SHOCK DO NOT OPEN
CAUTION:TO REDUCE THE RISK OF ELECTRIC SHOCK DO NOT REMOVE COVER (OR BACK).NO USER SERVICIABLE PARTS INSIDE.REFER SERVICING TO QUALIFIED SERVICE PERSONNEL.

The excclamation point within the triangle is a warning sign alerting you of important instructions accompanying the product
9 3.5mm KOPFHÖRER-BUCHSE
20 POWER-LED
10 FUNKTIONSTASTE (DAB/FM/ CD/USB/PHONO/AUX)
21 DAB-MENU-TASTE
11 FERNBEDIENUNGSSSENSOR
22 DAB-INFO-TASTE
12 CD-FACH
23 DAB-SCAN-TASTE
13 PLAYE/PAUSE
Member of Berlin Brands Group
Handwerkerstr. 11
15366 Dahlwitz-Hoppegarten
Deutschland
Congratulations on purchasing this equipment. Please read this manual carefully and take care of the following hints to avoid damages. Any failure caused by ignoring the items and cautions mentioned in the instruction manual are not covered by our warranty and any liability. Scan the QR code to get access to the latest user manual and other information about the product.

CONTENTS
Technical Data 21
Safety Instructions 23
Overview 25
Remote Control 28
Prepare for Use 30
DAB Mode 31
FM Mode 31
CD Operation 32
Playing Vinyls Records 33
Aux in Operation 34
USB Operation 34
BT Operation 35
Disposal Considerations 36
Declaration of Conformity 36
TECHNICAL DATA
| Item number 10034402 | |
| Power input 230 V~ 50/60 Hz | |
| RMS power 2x2.5W | |
| Turntable speed 33/45/78 RPM | (Record size 17.5/25/30 cm) |
| Playable CD formats CD/CD-R/CD-RW/MP3 | |
| Playable files from USB MP3 | |
WARNING
| CAUTION RISK OF ELECTRIC SHOCK DO NOT OPEN | |
| CAUTION: TO REDUCE THE RISK OF ELECTRIC SHOCK AND SERIOUS PERSONAL INJURY, DO NOT REMOVE ANY COVER. NO USER-SERVICABLE PARTS INSIDE. REFERServICING TO QUALIFIED SERVICE PERSONNEL ONLY. WARNING. TO REDUCE THE RISK OF FIRE OR ELECTRICAL SHOCK, DO NOT EXPOSE THIS PRODUCT TO WATER, RAIN OR MOISTURE. | |
| 4 | Triangle with lightning plus explanation as follows: DANGEROUS VOLTAGE: The lightning flash with arrowhead symbol within the equilateral triangle is intended to alert the user to the presence of uninsulated dangerous voltage within the product's enclosure that may be of sufficient magnitude to constitute a risk electric shock to persons. |
| ! | Triangle with exclamation point plus explanation as follows: ATTENTION: The exclamation point within the equilateral triangle is intended to alert the user to the presence of important operating and maintenance (servicing) instructions in the literature accompanying this product. |
To reduce the risk of electric shock do not use this plug with an extension cord or receptacle.
SAFETY INSTRUCTIONS
Read these instructions. All uses guidelines must be read before using the device. Keep the instructions for future use.
- Attention, use and security guidelines must be respected.
- The device must not be used near water or be put in contact with moisture.
- Make sure has no liquid is spilled on device and device openings.
- Move device carefully, avoid shocks.
- Do not block the breakdown of the device outputs.
- Do not place the device near from a heat source (e.g. radiator). Do not expose it to the Sun.
- Plug the device as indicate on this information form.
- This device has a connection with overload protection. Replacement should only be done bt an experienced technician or the device manufacturer.
- For cleaning the device, please follow the recommendations of the notice.
- The power cord should be unplugged when not using for a long period of time.
Device shall be repaired by a qualified person when:
a. the power cord is damaged,
b. objects have fallen into the apparatus or a liquid has been spilled into device,
c. device was exposes to the rain,
d. device does not work correctly without notable exterior change,
e. device is broken.
- The user shall not try to maintain device beyond that which is described in this information form.
- The apparatus shall not be exposed to dripping or splashing and that no objects filled with liquids, such as vases, shall be placed on apparatus.
- To be completely disconnect the power input, the mains plug of apparatus shall be disconnected from the mains." as the disconnect devices is the mains plug of apparatus.
- The mains plug of apparatus should not be obstructed OR should be easily accessed during intended use.
- Battery shall not be exposed to excessive heat such as sunshine, fire or the like.
-
Excessive sound pressure form earphones and headphones can cause hearing loss.
-
Minimum distance (8 cm) around the apparatus for sufficient ventilations;
- The ventilation should not be impeded by covering the ventilation opening with items such as newspaper, table-cloths, curtain etc;
- No naked flame sources such as lighted candles should be placed on the apparatus;
- Attention should be drawn to the environmental aspects of battery disposal;
- The use of apparatus in moderate climates.
- Danger of explosion if battery is incorrectly replaced.
- Replace only with the same or equivalent type.
The main plug shall remain readily operable.
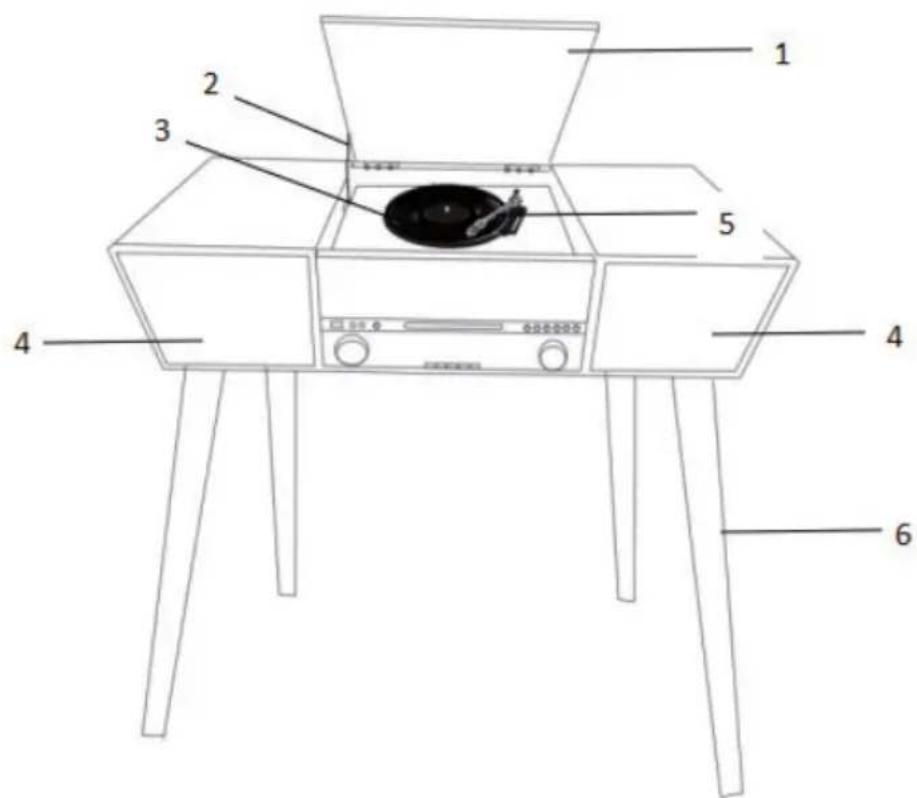
OVERVIEW
-
Dust cover
-
Speakers
-
Cover mechanism
-
Tone arm
-
Turntable
-
Wood leg
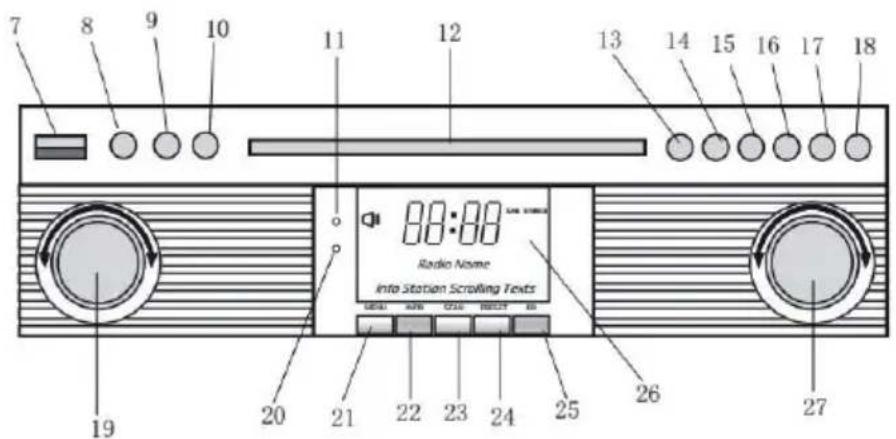
Front panel
Rear view
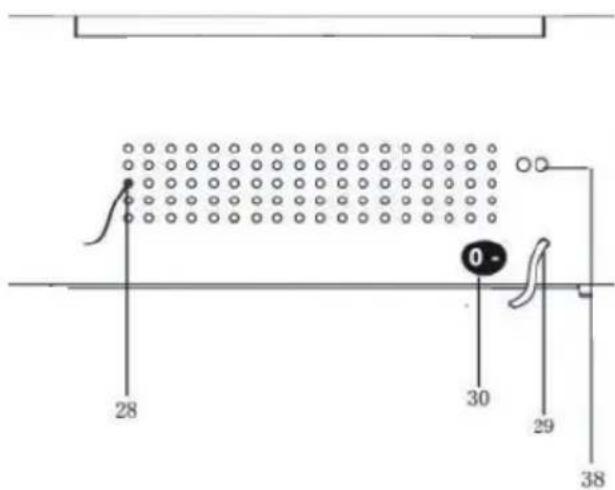
7 USB socket
8 Aux-in
9 3.5Mm headphone jack
10 Function button (DAB/FM/CD/USB/Phono/AUX)
11 Remote sensor
12 CD door
13 Play/pause
14 Stop button
15 Dn/f-r
16Up/f-f
17 Rec/del (record button/delete button)
18 CD door open/close button
19 Volume knob/ power stanby
20 Power led
21 DAB menu button
22 DAB info button
23 DAB scan button
24 DAB preset button
25 DAB enter
26 LCD display
27 Tuning botton/play.Mode
28 FM/DAB antenna
29 AC cord
30 On/off switch
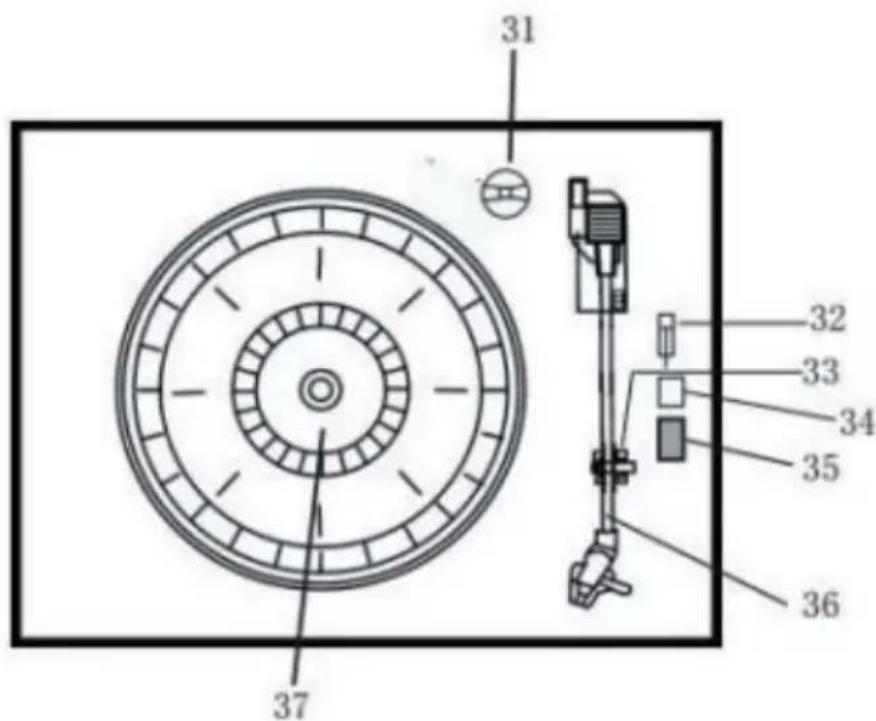
31 Adaptor
32 Turntable pause switch
33 PICK-UP HOLDER
34 AUTO STOP ON/OFF
35 33/45/78 RPM speed selector
36 Tone arm
37 Turntable
38 LINE OUT
REMOTE CONTROL
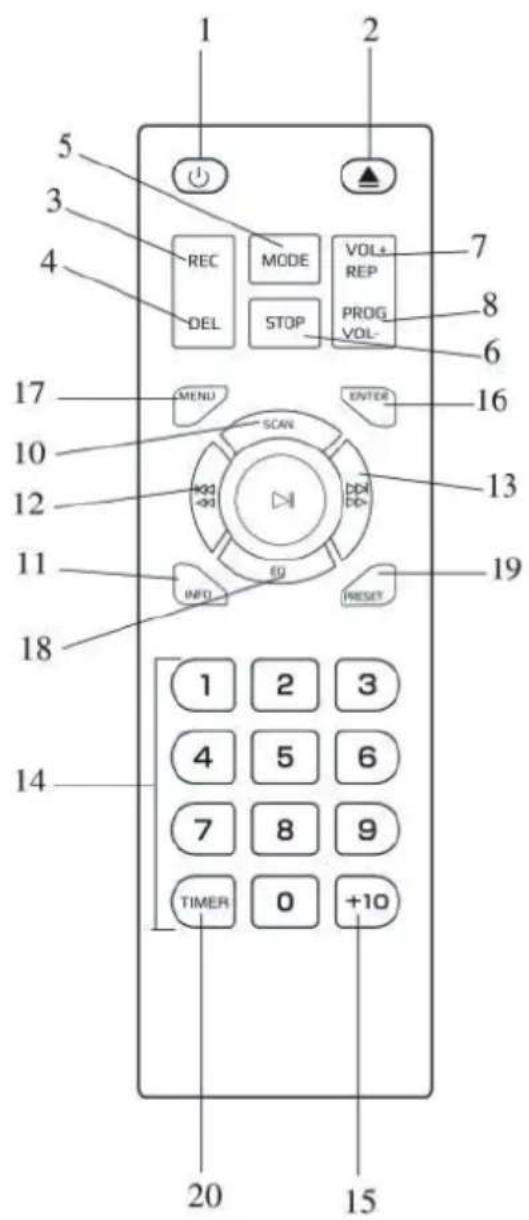
1 Power on/off
2 CD door open/close button
3 Record button
4 Delete button5.Mode button
5 Stop button
6 Mode button
7 Repeat button/vol+
8 Program button/vol
9 Play/pause button
10 DAB scan button
11 Info
12 Skip-button/fast forward button
13 Skip+ button/rewind button
14 Numeric keyboard
15 +10
16 Enter
17 Menu
18 EQ
19 Preset
20 Timer
Remote battery installation
The infrared remote control requires 2 PCS UM-4 R03, AAA (3V) Battery. Battery excluded.
Power on/off
- Press POWER to turn the system on. The power indicator lights up.
- Press the function selector buttons (DAB/FM/CD/USB/PHONO/AUX IN) to select the desired function.
- Start to adjust the volume by using the volume control button.
- When finished listening press POWER again to turn off the system. The power indicator goes off.
Remark: The unit is comply with ERP2, the unit will turn to Standby mode if there is no operation on the unit after 15 mins, please press POWER button 2 times if you want to re-start the unit.
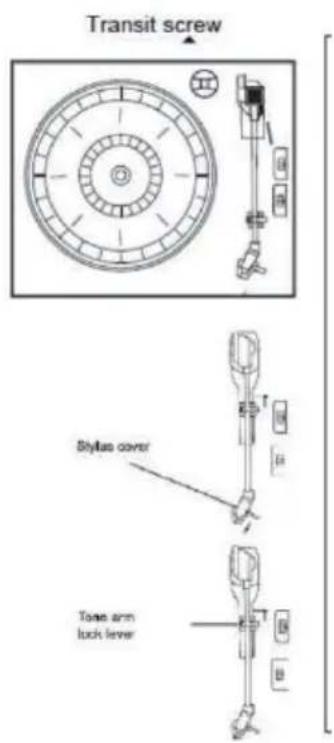
PREPARE FOR USE
- Carefully remove the unit from the carton and remove all packing material from the unit.
- Unwind the AC power cord and extend it to its full length.
- Unwind the FM Antenna wire and extend to it to its full length.
- Remove the twisted wire that was attached to the tone arm for transport.
- Remove the opaque white plastic stylus cover from the phonograph stylus by sliding it in the direction of the arrow.
- Please pay attention to the stylus during operation because stylus damage is not covered by the warranty.
- Remove the the twist-tie that was used to secure the tone arm during shipment.
- Release the tone arm lock lever.
DAB MODE
Press function button (10) (5 on remote) repeatedly to select DAB mode. Press SKIP + / - (16/15) (12/13 on remote) to search the program
DAB menu
Press MENU (21) (17 on remote) to access to the options.
- Full Scan: select this option to perform a full scan of the available DAB programs. You can press SCAN (23) to perform the same action.
- Manual Tune: select this option to select manually the DAB frequency.
- DRC: select this option to choose between DRC low, DRC high and DRC off.
- Prune: select this option to choose between PRUNE stations on or off.
DAB preset
You can program a maximum of 20 preset radio stations.
- Press and hold PRESET (24) (19 on remote). PRESET STORE will appear on display. Press SKIP+/- (16/15) (12/13 on remote) to select the preset number. Press ENTER (9) (16 on remote) to confirm.
- Press PRESET (24) (19 on remote) to navigate through the presets.
DAB INFO
- Repeatedly press INFO (22) (18 on remote) to see the following information: NAME/KBPS/DATE /TIME.
FM MODE
Press function button (10) (5 on remote) repeatedly to select FM mode. Turn the TUNING KNOB (27) to manually select the frequency
FM menu
Press MENU (21) (17 on remote) to access to the options.
- Scan Setting: select this option to choose between scanning all stations or only the strong stations.
- Audio Setting: select this option to choose between forcing mono audio or allowing stereo sound.
FM preset
See DAB PRESET instructions.
FM info
Repeatedly press INFO (22) (18 on remote) to see the following informations: KIND OF PRO-GRAM/FREQUENCY/AUDIO/DATE/TIME.
CD OPERATION
- Press the CD/USB button to enter CD mode, the "---" and 'DISC' icon will
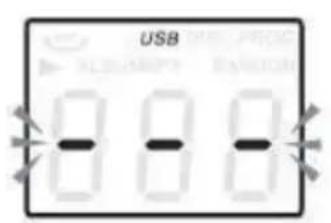
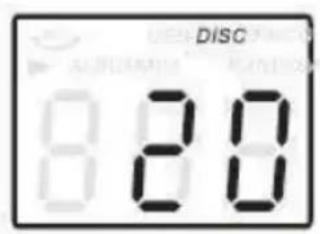
be shown on the screen. The unit can play CD, CD-R and CD-RW. Press the OP/CL button top open the CD drawer.
- Place your disc in the CD drawer with the label side facing up.
- Press the OP/CL button again to close the CD drawer. Playback will automatically start from the first track.
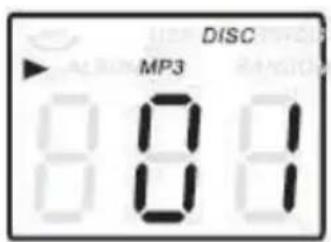
- MP3 icon will be shown if MP3 file is detected in the disc.
PLAYING VINYLS RECORDS
The system includes a full-size, 3 speed, belt-drive turntable. You can play 33, 45 and 78rpm records.
- Press POWER to turn the system on.
- Press the PHONO button to enter the PHONO mode.
- Make sure you have removed the stylus cover from the stylus and have released the tone arm lock that secured the tone arm to the tone arm rest. 5. Set the turntable speed selector to appropriate speed 33, 45 or 78rpm. If you are playing 45 rpm singles, place the 45rpm adapter on the centre spindle.
- Place your record on the the centre spindle.
- Raise the cue lever to lift the tone arm of its rest. Move the tone arm to the edge of the record. The turntable starts automatically. Use the cue lever to gently lower the tone arm onto the record.
- Adjust the volume control to the desired level.
- When the tone arm reaches the end of the record it automatically returns to the tone arm rest and the record player stops.
- Press POWER again to turn the system off. The POWER indicator goes OFF.
Note: Do not turn or stop the turntable manually. Moving or jarring the turntable without securing the tone arm clamp could result in damage to the tone arm.
AUX IN OPERATION
Connect the audio system into the AUX IN jack on the rear panel, Press the PHONO/AUX IN button. Start playing from the connected device.
USB OPERATION
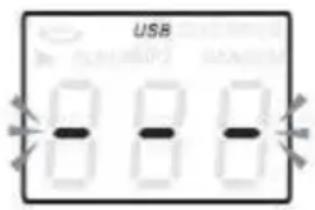
- Press the CD/USB button first and the FUNCTION button to enter USB mode. The '---' and USB icon will be shown.
- Insert a USB flash device into the USB socket.
- PLAY/PAUSE, DN/UP and stop functions are the same as CD functions.
Note: You may press the FUNCTION on the panel or long press PLAY/PAUSE button on the remote control for 2 seconds to change the playing mode between CD and USB.
Playing in MP3 Mode (CD/USB)
- Press PLAY/PAUSE button to start or pause playback selected track.
- While playing the song, the song number and folder number of the selected track will be shown in the display.
- You can stop the playback at any time by pressing the STOP button.
TRACK SKIP AND HIGH SPEED TRACK SEARCH IN CD/USB MODE During CD/USB playback press UP/F.F () or DN/F.R () button on the unit front panel or on the remote control repeatedly to change track. To rapidly search forward or backwards within a track press and hold UP/F.F (press UP/F.F () or DN/F.R () button. To skip 10 tracks back or forth then press TRACK-10 or TRACK+10 on the remote control.
USB Recording
1. CD recording
Insert USB flash drive into the USB socket. Then press CD/USB button. Place CD into tthe CD drawer and play the track which will be recorded. Press RECORD button twice to start recording. If all CD is played, Then all tracks will be recorded. NOTE: Recording will fail if pressing STOP button during recording
2. MP3 DISC recording
Insert USB flash drive into the USB socket. Then press CD/USB button. Place CD with MP3 files into the CD drawer and play the MP3 track which will be recorded. Press RECORD button twice to start recording. If all MP3 files is played, Then all tracks will be recorded. NOTE: Recording will fail if pressing STOP button during recording
3. Vinyl recording
Insert USB flash drive into the USB socket. Then press PHONO/AUX IN button. Play the vinyl and press RECORD button twice to start recording. Press STOP button to stop recording.
4. AUX IN recording
Insert USB flash drive into the USB socket. Connect the external audio device into the AUX jack on the rear panel. Then press PHONO/AUX IN button and play audio and press RECORD button twice to start recording.
Delete tracks from USB disc
Press CD/USB button on the front panel or long press PLAY/PAUSE on remote control to select USB mode. Select the track and press delete for 2 seconds and the track is deleted.
BT OPERATION
Power on the unit and press the FUNCTION button to select the BT function. Search for a BT device with the ID "Auna Belle" and connect to this device.
If there is a legal regulation for the disposal of electrical and electronic devices in your country, this symbol on the product or on the packaging indicates that this product must not be disposed of with household waste. Instead, it must be taken to a collection point for the recycling of electrical and electronic equipment. By disposing of it in accordance with the rules, you are protecting the environment and the health of your fellow human beings from negative consequences. For information about the recycling and disposal of this product, please contact your local authority or your household waste disposal service.
This product contains batteries. If there is a legal regulation for the disposal of batteries in your country, the batteries must not be disposed of with household waste. Find out about local regulations for disposing of batteries. By disposing of them in accordance with the rules, you are protecting the environment and the health of your fellow human beings from negative consequences.
DECLARATION OF CONFORMITY

Manufacturer:
Chal-Tec GmbH, Wallstrasse 16, 10179 Berlin, Germany.
Importer for Great Britain:
Berlin Brands Group UK Ltd PO Box 1145 Oxford, OX1 9UW United Kingdom
The complete declaration of conformity of the manufacturer can be found at the following link: use.berlin/10034402
Chere cliente, cher client,
The lighting flash and arrow head within the triangle is warning sign alerting you of dangerous voltage inside the product
CAUTION
RISK OF ELECTRIC SHOCK DO NOT OPEN
CAUTION:TO REDUCE THE RISK OF ELECTRIC SHOCK DO NOT REMOVE COVER (OR BACK).NO USER SERVICIABLE PARTS INSIDE.REFER SERVICING TO QUALIFIED SERVICE PERSONNEL.
The exclamation point within the triangle is a warning sign alerting you of important instructions accompanying the product
ATTENTION: POUR RÉDUIRE LES RISQUES DE CHOCS ÉLECTRIQUES, NE DEMIONTEZ AUCUN Cache. L'APPAREIL NE CONTIEN AUCUNE PIECE À ENTRETENIR. ADRESSEVOUS UNIQUÉMENT À DES PERSONNELS QUALIFIÉS POUR LA MAINTENANCE. MISE EN GARDE / POUR RÉDUIRE LE RISQUE D'INCENDIE ET DE CHOC ÉLECTRIQUE, NE PLONGEZ PAS L'APPAREIL DANS L'EAU ET NE L'EXPOSEZ PAS À LA PLUIE OU À L'HUMIDITÉ
The lighting flash and arrow head within the triangle is warning sign alerting you of dangerous voltage inside the product
CAUTION
RISK OF ELECTRIC SHOCK DO NOT OPEN
CAUTION:TO REDUCE THE RISK OF ELECTRIC SHOCK DO NOT REMOVE COVER (OR BACK).NO USER SERVICIABLE PARTS INSIDE.REFER SERVICING TO QUALIFIED SERVICE PERSONNEL.

The exclamation point within the triangle is a warning sign alerting you of important instructions accompanying the product
ATENCION: NO ABRA LA CARCASA PARA EVITAR DESCARGAS ELECTRICAS Y LESIONES GRAVES. EN EL INTERIOR NO HAY COMPONENTES A MANTENER POR EL CLIENTE. PONGASE EN CONTACTO UNICAMENTE CON ESPECIALISTAS CUALIFICADOS. ADVERTENCIA. PARA REDUCIR EL RIESGO DE INCENDIO O DESCARGA ELECTRICA, NO EXPONGA EL APARATO AL AGUA, LA LLUVIA O LA HUMEDAD.
Berlin Brands Group UK Ltd
PO Box 1145
Oxford, OX1 9UW
United Kingdom
The lighting flash and arrow head within the triangle is warning sign alerting you of dangerous voltage inside the product
CAUTION
RISK OF ELECTRIC SHOCK DO NOT OPEN
CAUTION:TO REDUCE THE RISK OF ELECTRIC SHOCK DO NOT REMOVE COVER (OR BACK).NO USER SERVICIABLE PARTS INSIDE.REFER SERVICING TO QUALIFIED SERVICE PERSONNEL.

The exclamation point within the triangle is a warning sign alerting you of important instructions accompanying the product
ATTENZIONE: NON APRIRE L'ALLOGGIAMENTO, IN MODO DA EVITARE FOLGORAZIONI E SERIE LESIONI. ALL'INTERNO NON CI SONO COMPONENTI CHE NECESITANO DELLA MANUTENZIONE DA PARTE DELL'UTENTE. RIVOLGERSI ESCLUSIVAMENTE A TECHNICI QUALIFICATI. AVVERTENZA: PER RIDURE IL RISCHIO DI INCENDI E FOLGORAZIONI, NON ESPORRE IL DISPOSITIVO A PIOGGIA, ACQUA O UMIDITA.