Sarah Ann DAB - Turntable Auna - Free user manual and instructions
Find the device manual for free Sarah Ann DAB Auna in PDF.

User questions about Sarah Ann DAB Auna
0 question about this device. Answer the ones you know or ask your own.
Ask a new question about this device
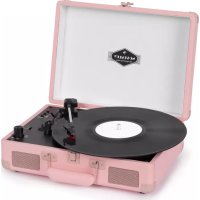
Download the instructions for your Turntable in PDF format for free! Find your manual Sarah Ann DAB - Auna and take your electronic device back in hand. On this page are published all the documents necessary for the use of your device. Sarah Ann DAB by Auna.
USER MANUAL Sarah Ann DAB Auna
INHALTSVERZEICHNIS

natural_image
Close-up of a mechanical component with a black handle and metallic housing, against a red background (no visible text or symbols)natural_image
Close-up of gloved hands holding a small mechanical component (no visible text or symbols)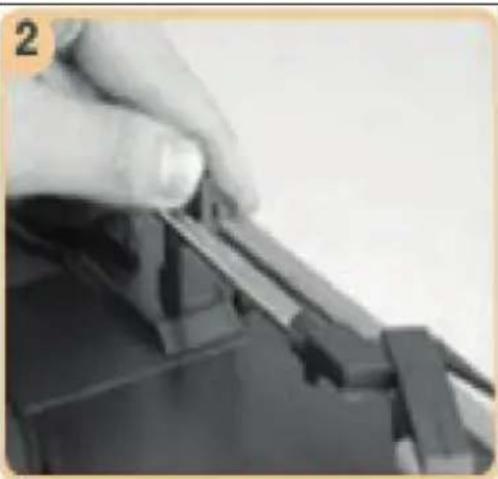
natural_image
Close-up of a hand pressing down on a mechanical component (no visible text or symbols)flowchart
graph TD
    A["Set Time (Hour, Minute)"] --> B["Set Source (DAB/FM/Buzzer)"]
    B --> C["Set Repetition (Once/Daily/Weekdays/Weekends)"]
    C --> D["Set Volume (Vol 5 ~ Vol Max)"]
    D --> E["Set ON/OFF"]
    E --> F["SAVED"]
PFLEGE UND WARTUNG
Reinigung
natural_image
Close-up of a hand pressing down on a mechanical component (no visible text or symbols)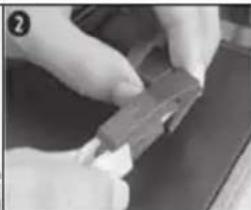
natural_image
Close-up of hands holding a small electronic component (no visible text or symbols)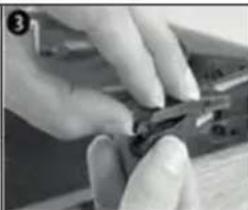
natural_image
Close-up of hands using a tool to cut or apply a small object (no visible text or symbols)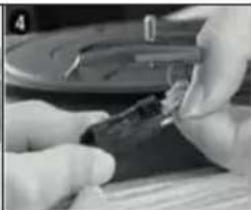
natural_image
Close-up of hands holding a small dark object with a metallic component, possibly a tool or device (no visible text or symbols)Member of Berlin Brands Group
Handwerkerstr. 11
15366 Dahlwitz-Hoppegarten
Deutschland
natural_image
Symbol of a trash bin crossed with a diagonal line, representing no waste or discharge (no text or labels)Congratulations on purchasing this equipment.
Please read this manual carefully and take care of the following hints to avoid damages. Any failure caused by ignoring the items and cautions mentioned in the instruction manual is not covered by our warranty and any liability. Scan the QR code to get access to the latest user manual and other information about the product:

CONTENT
Safety Instructions 22
Product Overview 23
Attaching the Legss 26
Initial Set-Up 26
Usb Music Playback 28
BT Control 29
AUX in Mode 29
DAB Mode 30
Care and Maintenance 32
Troubleshooting 34
Technical Data 35
Disposal Considerations 36
Declaration of Conformity 36
SAFETY INSTRUCTIONS
- Observe all notes listed in the operating instructions.
- Do not use the unit near water or in a humid environment.
- Make sure that no liquid is spilled over the unit and the unit openings.
- Move the unit carefully to avoid damaging it.
- Do not block the device outputs.
- Do not place the unit near heat sources (e.g. heating). Do not expose the device to direct sunlight.
- Plug the power plug of the unit into the power outlet in the manner intended.
- The device is equipped with overload protection. Should this need to be replaced, contact customer service or a similarly qualified person.
- Unplug the unit from the wall outlet if it will not be used for a long period of time.
- Do not attempt to service or repair the unit yourself. In this case, the warranty expires.
- The mains plug is used to disconnect the device from the mains after it has been switched off. Make sure that the mains plug is always freely accessible.
- Do not expose the device to splash water or place objects filled with liquid, such as vases, on the device.
- Do not expose the batteries to extreme heat such as sunlight or fire.
- Do not obstruct the ventilation of the unit by blocking the ventilation openings with objects such as newspapers, tablecloths, curtains, etc..
- Ensure that a minimum distance of 5 mm to all sides of the unit is maintained.
- Do not place sources of open flame ignition, such as lit candles, on the unit.
- Dispose of used batteries in an environmentally friendly manner.
- Use the device only in temperate climate, not in tropical climate.
This device may be only used by children 8 years old or older and persons with limited physical, sensory and mental capabilities and / or lack of experience and knowledge, provided that they have been instructed in use of the device by a responsible person who understands the associated risks.
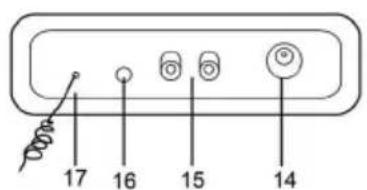
PRODUCT OVERVIEW
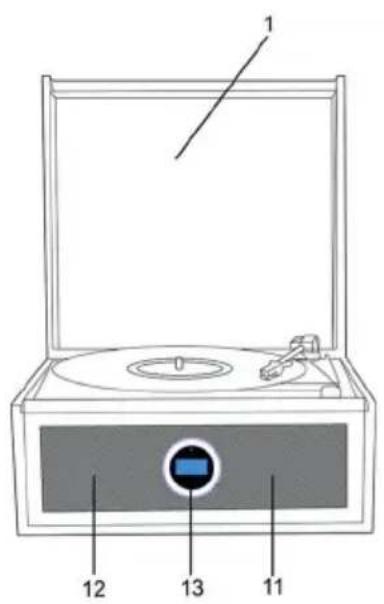
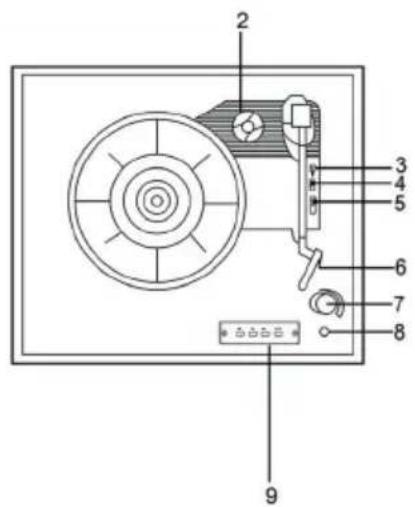

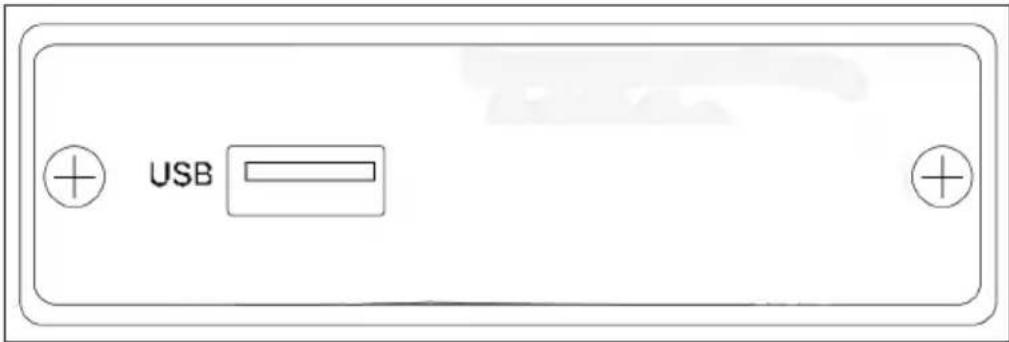
| 1 Dust cover 10 USB interface | |||
| 2 | 45 RPM adapter (use this when playing 45 RPM records with cut out center) | 11 | Speaker-right (full range dynamic speaker) |
| 3 Tone-arm lift-lever 12 | Speaker-Left (full range dynamic speaker) | ||
| 4 Auto-stop control 13 Remote-control receiver | |||
| 5 | Speed selection (choose from three speeds: 33, 45, 78 rpm) | 14 DC power inlet (5V,1500mA) | |
| 6 Cartridge 15 RCA lineout (R&L) | |||
| 7 | Power switch / Volume control (the knob has selected function by rotating it.) | 16 AUX in (3.5mm) | |
| 8 Aux out / Headphone 17 FM antenna | |||
| 9 | Operation panel (Pre/FF, PLAY/ PAUSE, NEXT/FR, MODE) | ||
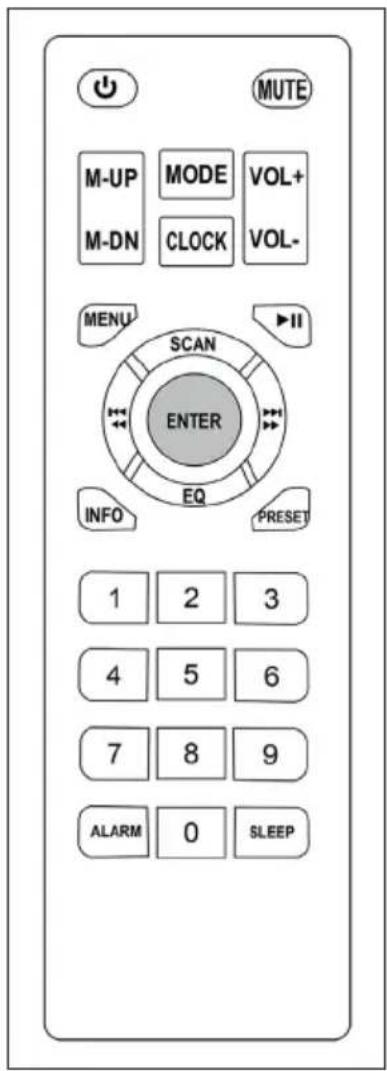
Remote Control and Key Functions
 | Standby: Press this button to toggle the unit between ON and standby. |
 | MUTE: Press this button to mute or un-mute |
 | MODE: Press to switch between USB/AUX in/PHONO/DAB/FM/BT in mode. |
 | CLOCK: Press to setup time and date. |
  | VOL+/ VOL-: Press to set volume up or down. |
  | M-UP/U-DN: Press to select stored radio stations |
 | MENU: Press for system setup |
 | INFO: In DAB, FM mode, while receiving a broadcast signal, press this button to display queue information |
 | PLAY/PAUSE: Press to play or Pause during Bluetooth device playback. |
 | PRESET: In DAB, FM mode, press to store the radio stations |
 | ENTER: Press this button to confirm or enter to next menu. |
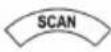 | SCAN: Press to do full scan station at DAB mode/ Press to scan for next station at FM mode |
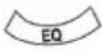 | EQ: Press to select or setup required music style (Flat/Rock/Classic/Jazz/Pop/Bass/Custom-Bass&Treble).For navigation of the menu in difference mode. Press to select DAB station and FM frequency |
| ALARM | ALARM: Press this button to set an alarm |
| SLEEP | SLEEP: Press the button for sleep time setup |
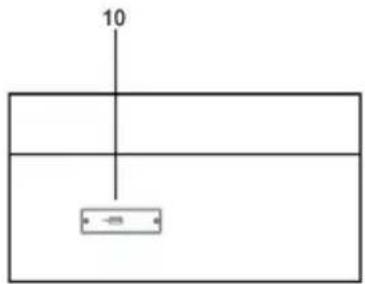
ATTACHING THE LEGS
The turntable comes with its own legs so it can stand alone. Alternatively, the legs can be removed and it can sit on an existing table or shelf. To attach the legs to the turntable, screw each individual leg to the metal plate on the rear of the unit. See diagram below for more details

natural_image
Close-up of a mechanical component with a black cylindrical shaft and metallic housing, mounted on a red background (no visible text or symbols)Note: If placing the turntable on a surface, attach the included rubber feet.
INITIAL SET-UP
Power supply
- Ensure that the mains voltage (100-240V, 50/60Hz) of your home
- corresponds to the operating voltage of the adapter.
- Connect the power adapter to the wall outlet.
- Connect the DC connector to the "DC IN" (5V 1A) jack on the rear of the unit.
Amplifier Connection (if required)
You can listen to your new turntable using the built-in speakers or you may wish to connect it to your existing Hi-Fi system. Connect the "line out" RCA ports to the "line input" on your mixer or amplifier using an RCA cable (not supplied)
• Red plug into the right channel input
• White plug into left channel input
Playing a record
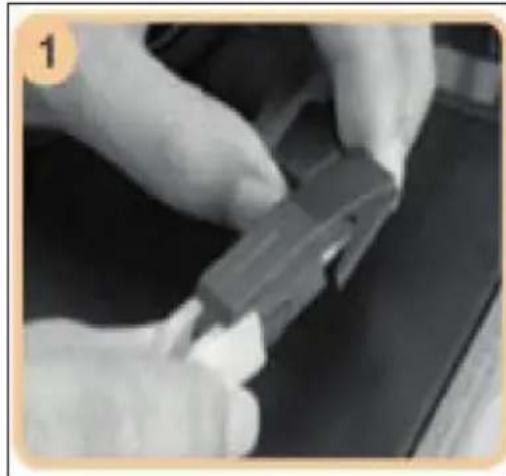
- Open the latches on the side of the unit, then lift up the lid and be sure to secure the arm support.
- Remove the protective cover from the stylus cartridge. (See image1.)
- Place a record on the turntable. If required, place the 45 RPM adaptor on the record spindle.
- Choose the desired playing speed (33, 45 or 78 rpm) by using the speed selection switch.
- Turn on the power switch (the knob also controls volume). Then press MODE key to PHONO mode.
• Release the tone-arm lock (See image 2). - Raise the arm using the cue lever and move the arm away from its holder. This will prompt the turntable to start spinning automatically.
- Use the lift-lever to slowly place the stylus down onto the record's groove.
- If the AUTO STOP switch is set to ON, the record will stop automatically. If it is set to OFF, the record will not stop automatically.
natural_image
Close-up of gloved hands holding a small mechanical component (no visible text or symbols)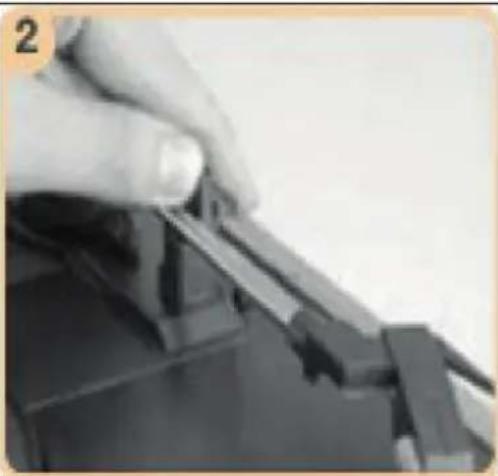
natural_image
Close-up of a hand holding a small object, possibly a tool or component, with no visible text or symbols.Note: If your record stops before the last track finishes, set the AUTO STOP switch to OFF. Your record will now play to the end, but you will have to stop the turntable rotation manually.
Auto Stop
- When a record finishes playing, it can be controlled by the auto-stop ON/OFF switch.
- Lift up the tone arm and put it on the rest when finished.
- Replace the protective cap on the stylus and close the tone arm lock.
• Turn off the power at the mains.
USB MUSIC PLAYBACK
This function part allows user play music from inserted USB flash drive. Turn on the power, USB is default mode, or press MODE on unit or remote control till USB mode. Short press to select among USB, AUX in, PHONO, DAB, FM, BT in mode
| SKIP BACK: shot-press for previous music or long-press for fast back of the current track. |
| SKIP FORWARD: shot-press for next music or long-press for fast forward of the current track |
| PLAY/PAUSE: during playback: short press to pause or continue the paly action, Long press it to stop it totally, press it once again playing will start from the first track. (same operation on remote control) |
BT CONTROL
Under BT in mode, unit will start to scan surrounded mobile device, then user could find the device name and match it, then unit will pair it automatically.
Then operation same as USB mode.
AUX IN MODE
At this mode, user just need to connect auxiliary play device onto the unit via a 3.5mm audio cable which is not included in the package. The operate ways refers to BT in or USB mode.
Press MUTE key on remote control to make paying in mute.
FM MODE
The FM station frequency range is from 88.10MHz to 108.00MHz, shot-press PRE/NEXT keys to increase or reduce 0.05MHz each time till a cleared radio station.
Or user could long-press the keys, then the product will scan and search the station automatically till a correct station.
To have a cleared radio station or sound quality, user need to adjust the telescopic antenna to the backside of the product.
DAB MODE
Frequency range: 5A (174.928 MHz) \~13F (239.200 MHz)
In DAB mode, use the PRE/NEXT to select Station Scan/Preset/System set and press ENTER to choose it accordingly.
- Station Scan: there are Full Scan and Manual tune two options, user could choose the liked ways via PRE/NEXT keys and press ENTER key to confirm.
- Press PRE/NEXT or VOL± on remote to search the station manually. Or user can select Station Scan or press SCAN on remote to search the station automatically.
- Preset: The item could also be settled through the PRESET key on remote control directly.
- System: under this item, there are subitems like Time/Alarms/Backlight/Factory reset/SW version. Or user could also press the MENU key on remote control to set it directly.
EQ Set
Press EQ key on remote to choose FLAT/ROCK/CLASSIC/JAZZ/POP/BASS/CUSTOM via PRE/NEXT buttons. Press ENTER button at CUSTOM mode to set the bass/treble value between -14\~14 dB
Menu Set Items
There are SYTEM (TIME SETUP)/ALARMS/BACKLIGHT/FACTORY RESET/SW VERSION items if press MENU button on remote.
System Set
Press MENU button and select SYSTEM item for TIME/CLOCK setup. In same way, PRE/NEXT buttons on remote or MENU/select knob on main unit for selection. Press ENTER button on remote for confirmation.
Alarm Set
Press MENU button on remote control and choose the ALARMS item or Press ALARM button directly to set the alarms. Press PRE/NEXT button on remote or rotate the Menu/Select on the main unit to adjust the setting, the press ENTER button or Menu/Select to confirm and go to next setup item.
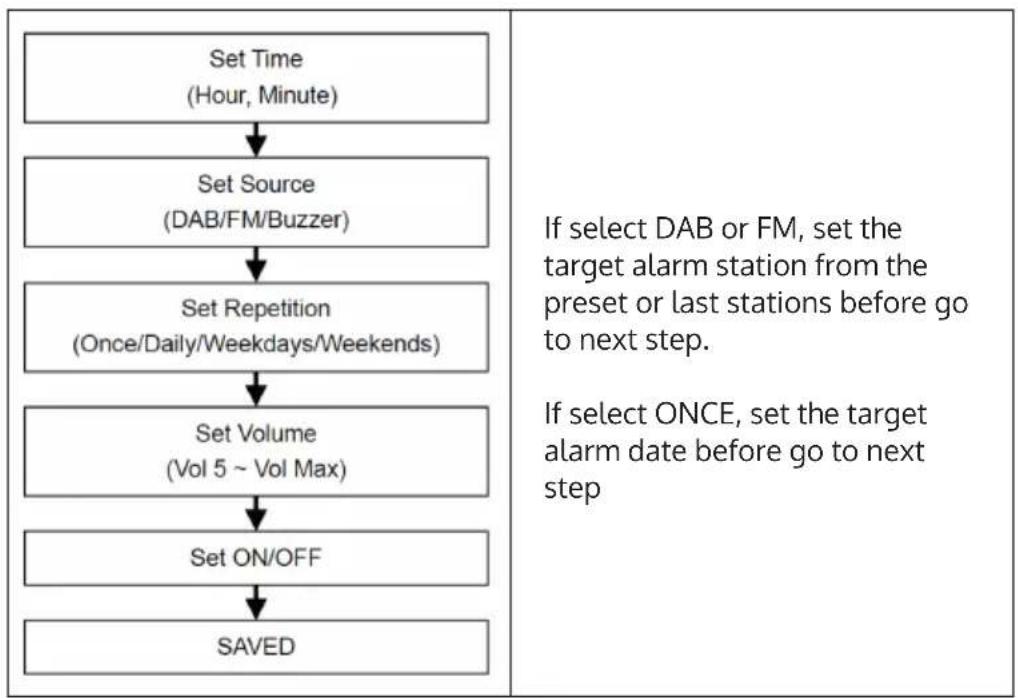
flowchart
graph TD
    A["Set Time (Hour, Minute)"] --> B["Set Source (DAB/FM/Buzzer)"]
    B --> C["Set Repetition (Once/Daily/Weekdays/Weekends)"]
    C --> D["Set Volume (Vol 5 ~ Vol Max)"]
    D --> E["Set ON/OFF"]
    E --> F["SAVED"]
    G["If select DAB or FM, set the target alarm station from the preset or last stations before go to next step."] --> H["If select ONCE, set the target alarm date before go to next step"]
CARE AND MAINTENANCE
Cleaning
- When opening or closing the turntable cover, handle it gently.
- Do not touch the needle tip with your fingers; avoid bumping the needle against the turntable platter or record edge.
- Frequently clean the needle tip-use a soft brush in a "back-to-front" motion only.
• If you must use a needle cleaning fluid, use very sparingly.
• Gently wipe the turntable player housing with a soft cloth. Use only a small amount of mild detergent to clean the turntable player. - Never apply harsh chemicals or solvents to any part of the turntable system.
Replacing the stylus
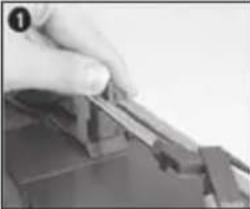 | 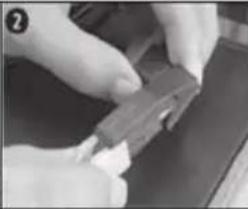 | 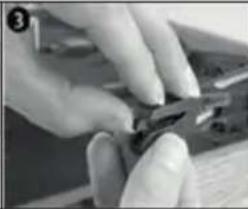 | 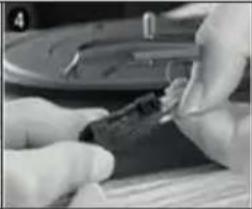 |
| Push the arm lock to release the tone-arm. | Take off the cap of the cartridge to expose the needle. | Separate the cartridge from the cartridge holder. | Gently pull the audio-lines from the cartridge, taking care to pull from the terminal connector and not the wire itself. |
Installing a new stylus cartridge
To fit a new cartridge, perform steps 5-8 below.
Note: Please take extreme care whilst performing this operation to avoid damaging the tone arm and audio wires.
| 5 | 6 | 7 | 8 |
| Carefully insert the audio-lines. | Make sure the audio-lines are not touching each other. | Carefully slide the cartridge into the cartridge holder. | Gently clip the cartridge into the cartridge holder. |
Transport
When transporting your record player do not forget to:
- Place the protective cap on the stylus
- Put the rest clip into the pick-up arm
TROUBLESHOOTING
| Problem Possible cause and suggested solution | |
| The device does not work. Make sure | the power cord is plugged into a suitable wall outlet and the wall outlet is turned on. |
| There is no sound. Turn the POWER/VOLUME knob clockwise to increase the volume. | |
| The vinyl disc is not playing. Make sure | you have selected the correct speed (33, 45 or 78 rpm). |
| Make sure the AC adapter is plugged in correctly. | |
| There is no playback via the AUX OUT connection. | make sure the cable is securely connected and check that your external device is clean and undamaged. |
| There is no sound through the stereo cinch connector. | Check the volume of your amplifier or other device. |
TECHNICAL DATA
| Item number 10034096 | |
| Power supply | Input: 110-240 V~ 50/60 HzOutput: 5 V= 1500 mA |
| Loudspeakers 2 x 3 W Stereo speakers | |
| RPM 33 / 45 / 78 | |
| Supported record size | 7" (17.7 cm)10" (25.5 cm) SP12" (30 cm) LP |
| Output AUX / Headphones (3.5 mm) | / RCA |
| RadioFMDAB | 87.5–108 MHz174.9–239.2 MHz |
| BT specificationsFrequency bandMaximum radio-frequency power | 2402–2480 MHz4 dBm |
DISPOSAL CONSIDERATIONS

natural_image
Symbol of a trash bin crossed with a diagonal line, representing no waste or discharge (no text or labels)If there is a legal regulation for the disposal of electrical and electronic devices in your country, this symbol on the product or on the packaging indicates that this product must not be disposed of with household waste. Instead, it must be taken to a collection point for the recycling of electrical and electronic equipment. By disposing of it in accordance with the rules, you are protecting the environment and the health of your fellow human beings from negative consequences. For information about the recycling and disposal of this product, please contact your local authority or your household waste disposal service.
This product contains batteries. If there is a legal regulation for the disposal of batteries in your country, the batteries must not be disposed of with household waste. Find out about local regulations for disposing of batteries. By disposing of them in accordance with the rules, you are protecting the environment and the health of your fellow human beings from negative consequences.
DECLARATION OF CONFORMITY

Manufacturer:
Chal-Tec GmbH, Wallstrasse 16, 10179 Berlin, Germany.
Importer for Great Britain:
Berlin Brands Group UK Ltd
PO Box 1145
Oxford, OX1 9UW
United Kingdom
Hereby, Chal-Tec GmbH declares that the radio equipment type Sarah Ann is in compliance with Directive 2014/53/EU. The full text of the EU declaration of conformity is available at the following internet address: use.berlin/10034096
For Great Britain: Hereby, Chal-Tec GmbH declares that the radio equipment type Sarah Ann is in compliance with the relevant statutory requirements. The full text of the declaration of conformity is available at the following internet address: use.berlin/10034096
Estimado cliente:
ÍNDICE
natural_image
Close-up of a mechanical component with a black cylindrical body and metallic housing, mounted on a red background (no visible text or symbols)natural_image
Close-up of gloved hands assembling a mechanical component (no visible text or symbols)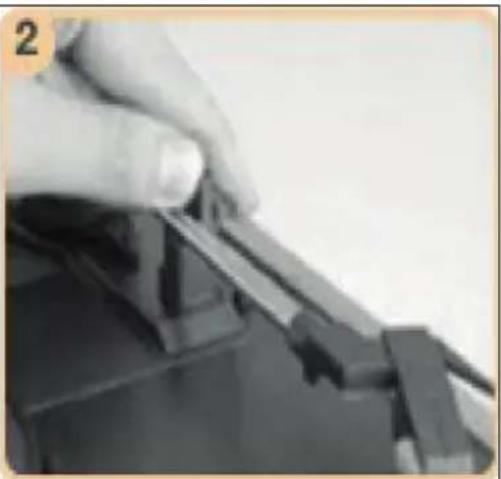
natural_image
Close-up of a hand holding a small object, possibly a mechanical component or tool, with no visible text or symbols.flowchart
graph TD
    A["Set Time<br>(Hour, Minute)"] --> B["Set Source<br>(DAB/FM/Buzzer)"]
    B --> C["Set Repetition<br>(Once/Daily/Weekdays/Weekends)"]
    C --> D["Set Volume<br>(Vol 5 ~ Vol Max)"]
    D --> E["Set ON/OFF"]
    E --> F["SAVED"]
LIMPIEZA Y CUIDADO
Limpieza
natural_image
Symbol of a trash bin crossed out by a diagonal line, with no text or labels present.Berlin Brands Group UK Ltd
PO Box 1145
Oxford, OX1 9UW
United Kingdom
SOMMAIRE
natural_image
Close-up of a mechanical component with a black cylindrical body and a metallic housing, against a red background (no visible text or symbols)natural_image
Close-up of gloved hands holding a small mechanical component (no visible text or symbols)
natural_image
Close-up of a hand holding a small object, possibly a tool or component, with no visible text or symbols.flowchart
graph TD
    A["Set Time (Hour, Minute)"] --> B["Set Source (DAB/FM/Buzzer)"]
    B --> C["Set Repetition (Once/Daily/Weekdays/Weekends)"]
    C --> D["Set Volume (Vol 5 ~ Vol Max)"]
    D --> E["Set ON/OFF"]
    E --> F["SAVED"]
ENTRETIEN ET MAINTENANCE
Nettoyage
natural_image
Symbol of a trash bin crossed out by a diagonal line, with no text or labels present.DÉCLARATION DE CONFORMITÉ

Fabricant :
Chal-Tec GmbH, Wallstraße 16, 10179 Berlin, Allemagne.
Berlin Brands Group UK Ltd
PO Box 1145
Oxford, OX1 9UW
United Kingdom
INDICE
natural_image
Close-up of a mechanical component with a black cylindrical shaft and a hexagonal base, against a red background (no visible text or symbols)natural_image
Close-up of gloved hands holding a small mechanical component (no visible text or symbols)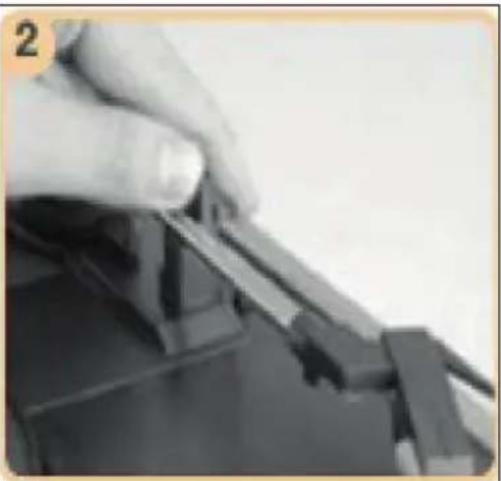
natural_image
Close-up of a hand using a tool to adjust or install a mechanical component (no visible text or symbols)flowchart
graph TD
    A["Set Time (Hour, Minute)"] --> B["Set Source (DAB/FM/Buzzer)"]
    B --> C["Set Repetition (Once/Daily/Weekdays/Weekends)"]
    C --> D["Set Volume (Vol 5 ~ Vol Max)"]
    D --> E["Set ON/OFF"]
    E --> F["SAVED"]
natural_image
Close-up of a hand pressing down on a mechanical component (no visible text or symbols)natural_image
Close-up of hands holding a small mechanical component (no visible text or symbols)natural_image
Close-up of hands using a pliers to cut metal (no visible text or symbols)natural_image
Close-up of gloved hands holding a small object, possibly a tool or device, with no visible text or symbols.natural_image
Symbol of a trash bin crossed with a diagonal line, representing no waste or discharge (no text or labels)Berlin Brands Group UK Ltd
PO Box 1145
Oxford, OX1 9UW
United Kingdom