
E6WHPED4 - Furniture with drawer ELECTROLUX - Free user manual and instructions
Find the device manual for free E6WHPED4 ELECTROLUX in PDF.
| Product Type | Stacking cabinet with drawer |
| Brand | Electrolux |
| Model | E6WHPED4 |
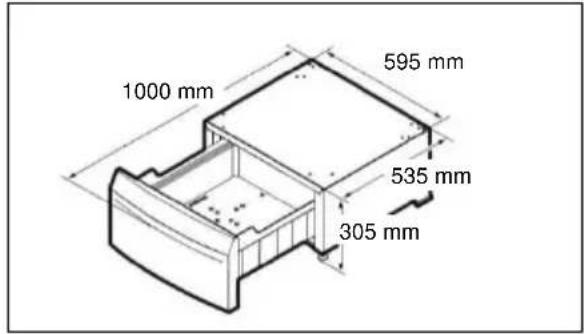
| Dimensions (W x D x H) | 600 x 600 x 820 mm |
| Weight | 20 kg |
| Main Material | Steel with anti-corrosion coating |
| Maximum Load Capacity | Maximum recommended total load: 150 kg (washing machine and dryer combined) |
| Included Accessories | 2 front metal brackets, 2 rear brackets for washing machine, 2 rear brackets for dryer, 10 screws, 1 adjustment key, 2 additional drawers (if included), 2 rear fixing screws |
| Intended Use | Stacking compatible Electrolux washing machine and dryer |
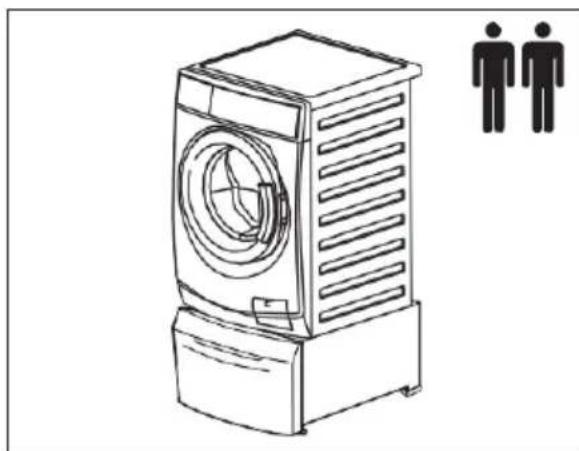
| Installation | Requires at least two people for setup; strictly follow the fixing instructions to prevent tipping |
| Safety | Do not install two appliances on the same base; always secure the locking brackets; check stability before use |
| Maintenance | Clean with a soft, dry cloth; do not use abrasive products |
| Repairability | Spare parts available on request; Electrolux technical support |
| Environmental Information | Recyclable packaging; product bears recycling symbol; do not dispose with household waste |
Frequently Asked Questions - E6WHPED4 ELECTROLUX
User questions about E6WHPED4 ELECTROLUX
0 question about this device. Answer the ones you know or ask your own.
Ask a new question about this device
Download the instructions for your Furniture with drawer in PDF format for free! Find your manual E6WHPED4 - ELECTROLUX and take your electronic device back in hand. On this page are published all the documents necessary for the use of your device. E6WHPED4 by ELECTROLUX.
USER MANUAL E6WHPED4 ELECTROLUX
Installation Instruction 2
HCTpyKzna 3a MoHTax 8
Pokyny k instalaci 14
HCTpyKcnn no yctaHOBke 122
Safety Information Product & Accessories

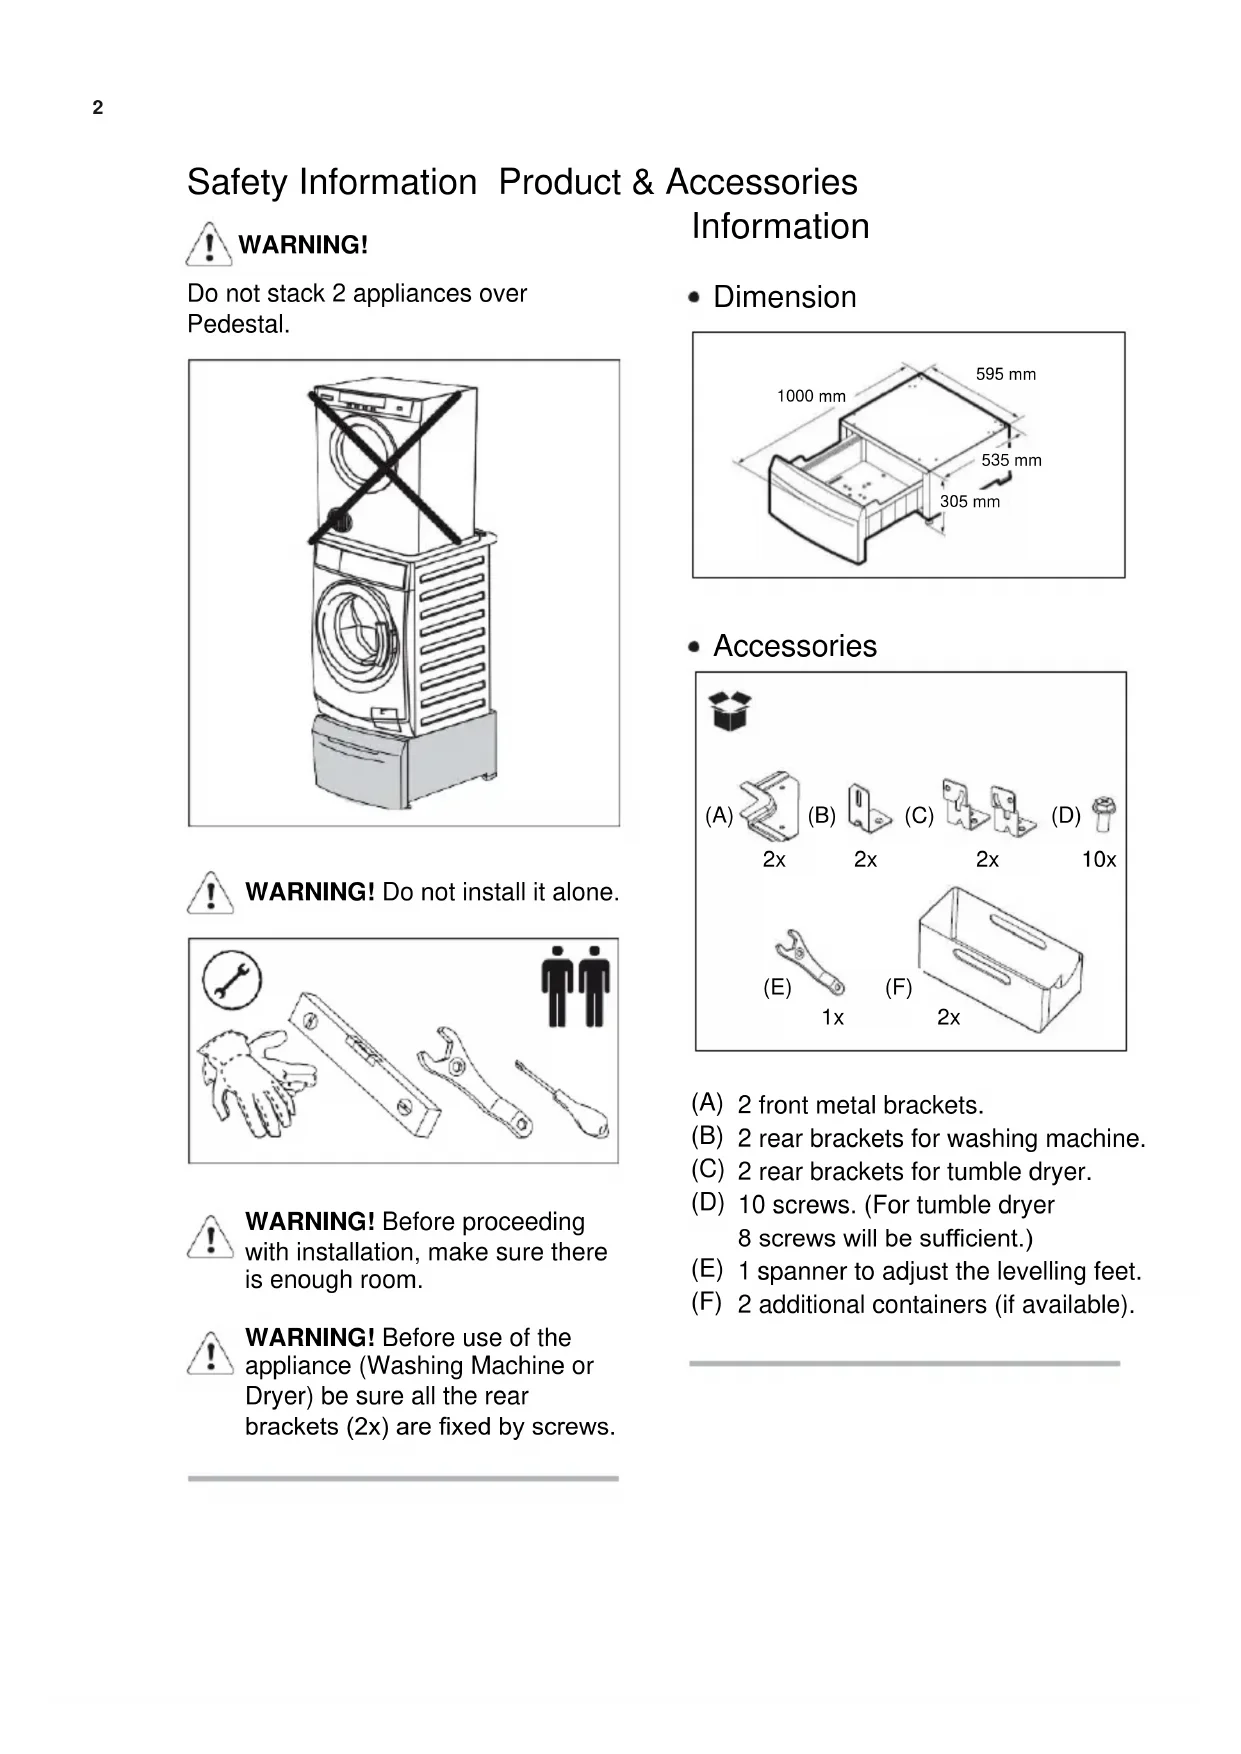
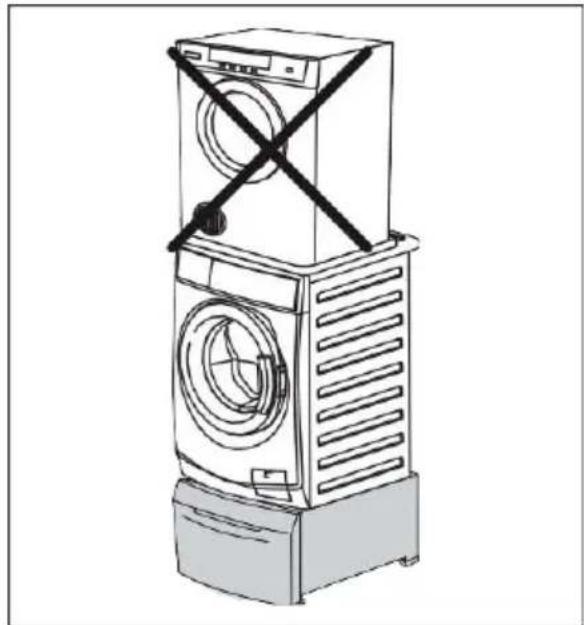
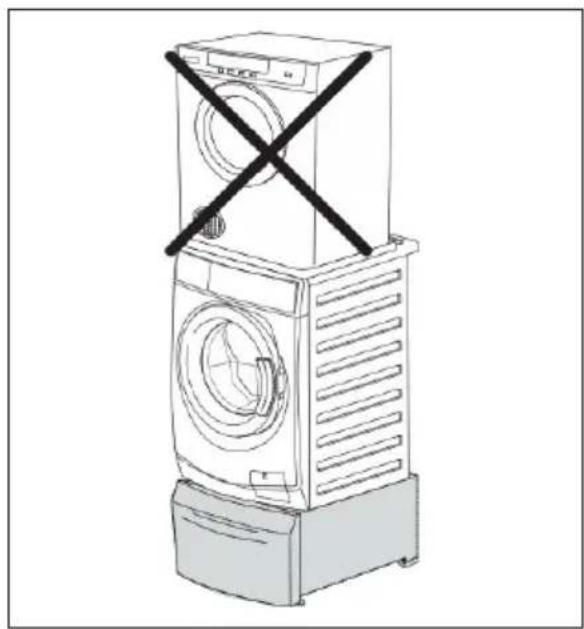
WARNING!
Do not stack 2 appliances over Pedestal.

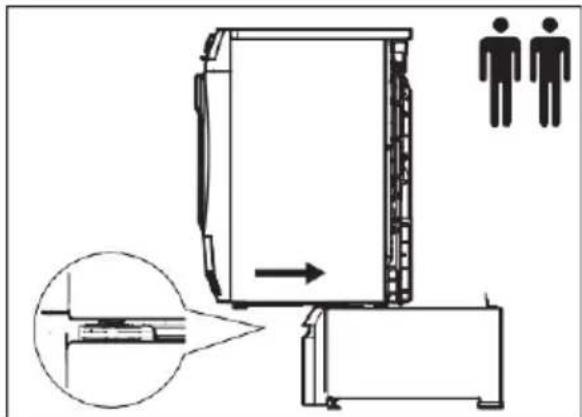
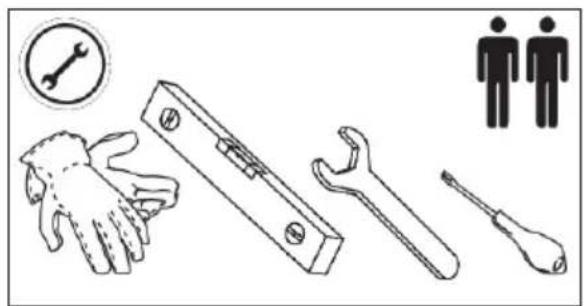
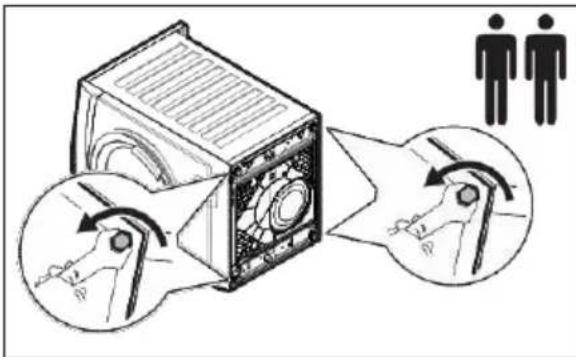
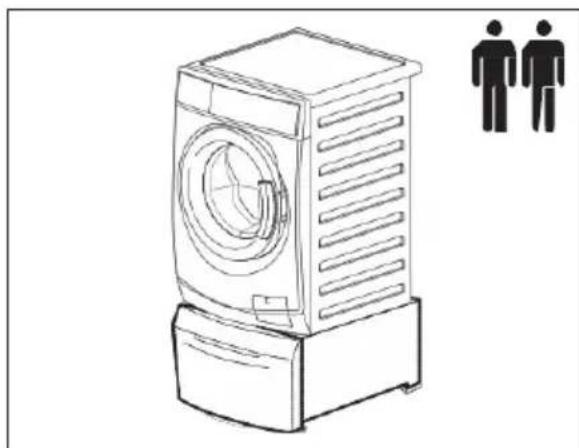
WARNING! Do not install it alone.
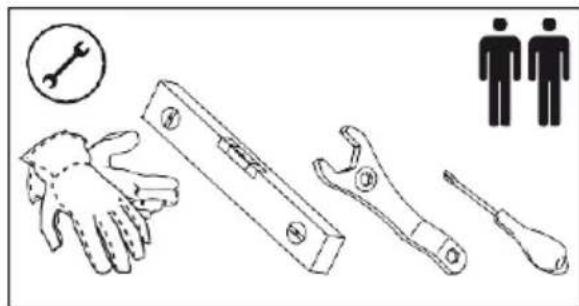

WARNING! Before proceeding with installation, make sure there is enough room.

WARNING! Before use of the appliance (Washing Machine or Dryer) be sure all the rear brackets (2x) are fixed by screws.
Information
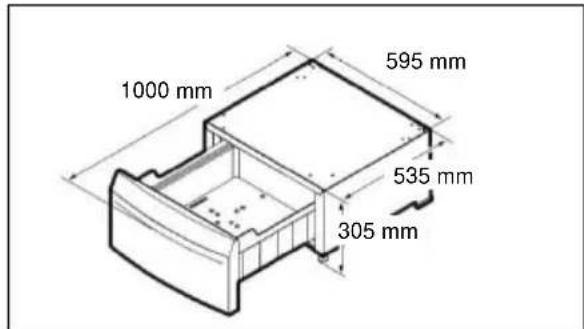
Dimension
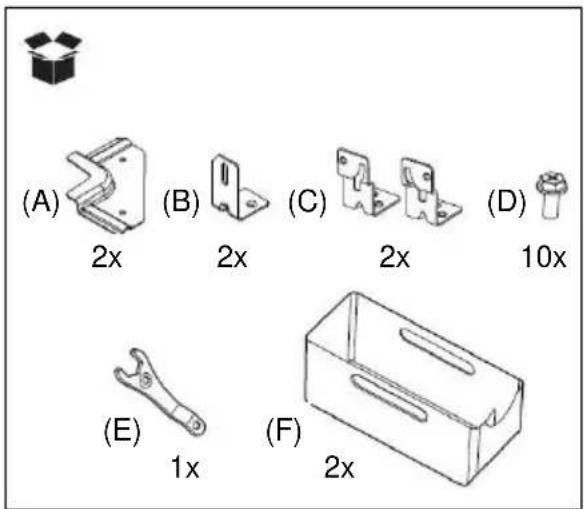
- Accessories
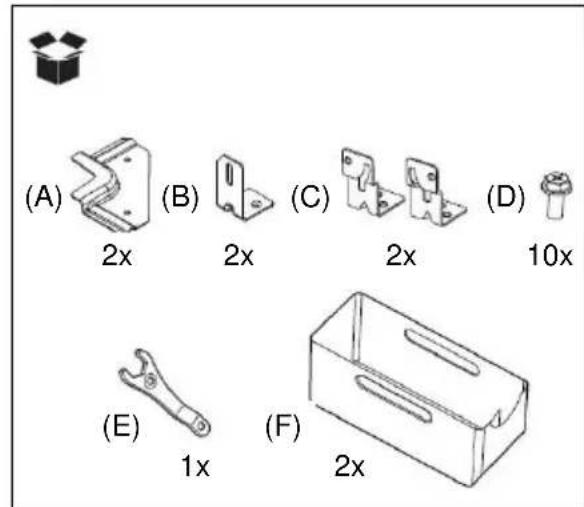
(A) 2 front metal brackets.
(B) 2 rear brackets for washing machine.
(C) 2 rear brackets for tumble dryer.
(D) 10 screws. (For tumble dryer 8 screws will be sufficient.)
(E) 1 spanner to adjust the levelling feet.
(F) 2 additional containers (if available).
Installation Procedure
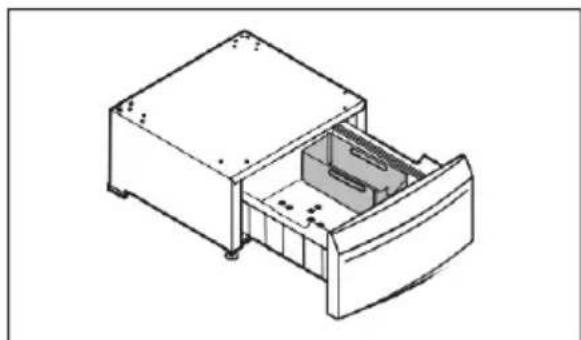
- Remove the pedestal and all accessories from the box.
- Make sure that the rear rubber feet are mounted.

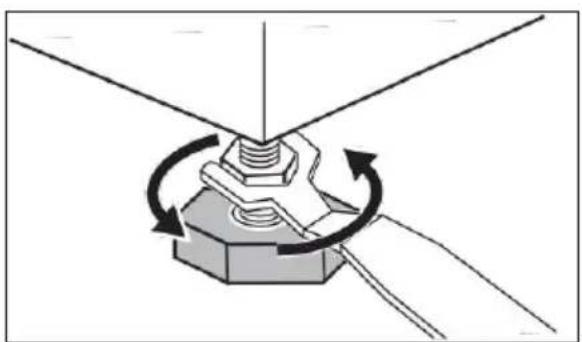
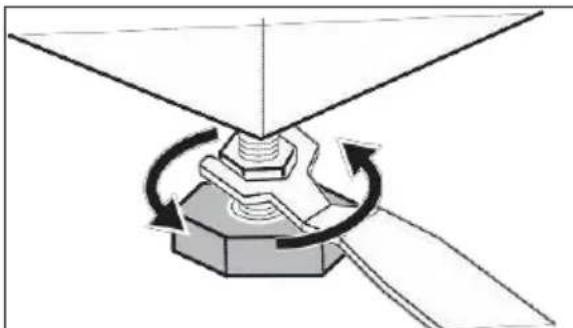
- Adjust the front adjustable feet to make the pedestal stable.
- If you install the pedestal under a brand new appliance, unpack the appliance as indicated in the instructions supplied with it and then proceed with step 6.
-
If the appliance is already connected:
-
Disconnect the mains plug from the mains socket.
- For washing machine. Close the water tap.
-
For washing machine. Disconnect the inlet hose(s) form the water tap and let the water flow out from the inlet hose(s) and the drain hose and collect it in a shallow basin.
-
For tumble dryer. Empty the water container in a wash basin or, if available, activate the direct drain system to let the water flow out.
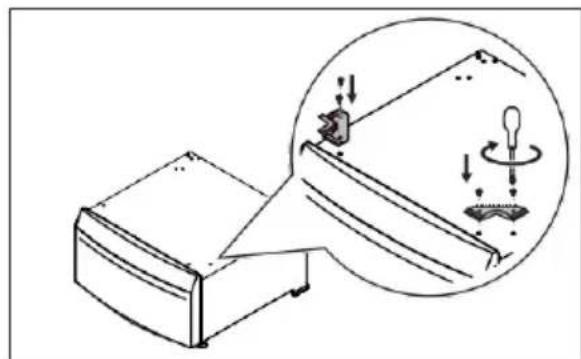
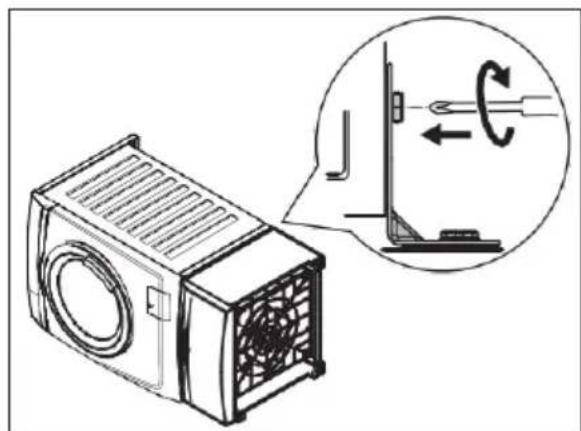
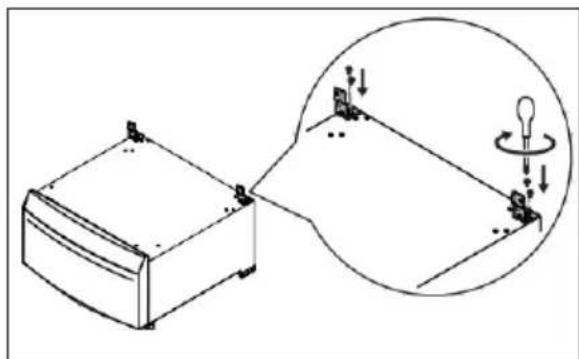
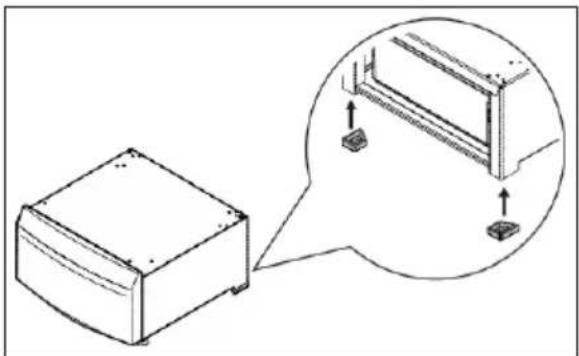
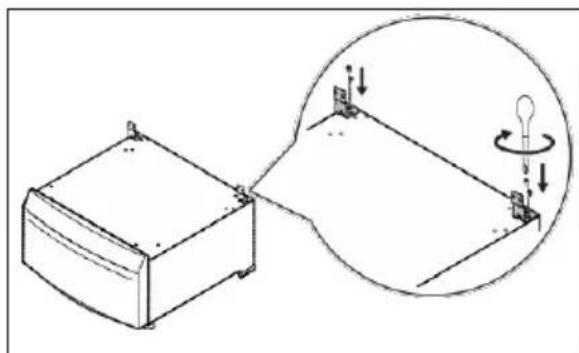
- Screw the front brackets on the pedestal.
- For washing machine. Gently lay the washing machine on its detergent dispenser side.

Lay it on a cardboard or on a piece of polystyrene to avoid scratching the cabinet.
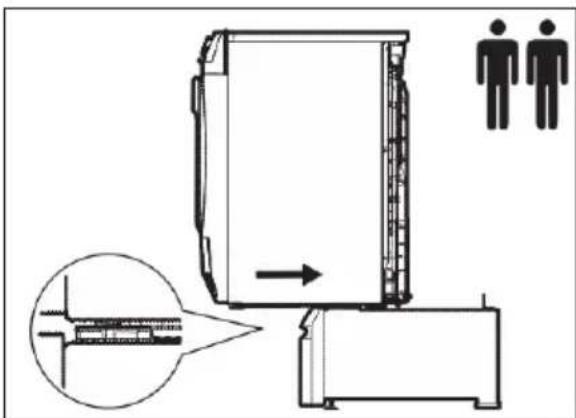
- For washing machine. Adjust the appliance adjustable feet at a suitable height to allow it to slide under the foot locking brackets.

- For washing machine. Lay the pedestal on the same side and slide it forward so that the appliance front feet slides under foot locking brackets.
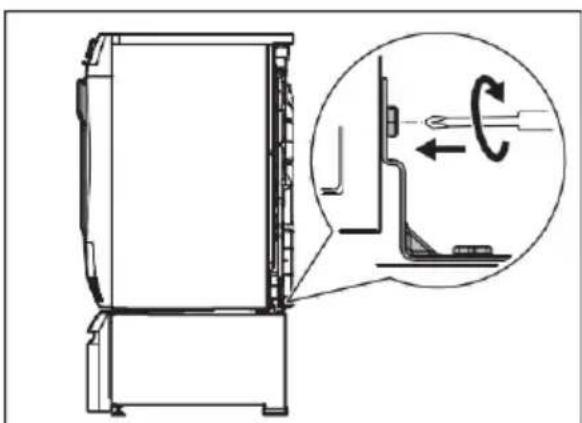
- For washing machine. Use the screws supplied to secure the rear brackets (B) on both the washers and the pedestal.
- For washing machine. Put the pedestal and appliance in vertical position. If necessary, adjust the appliance feet and go to step 16. Check that the screws are firmly crewed.
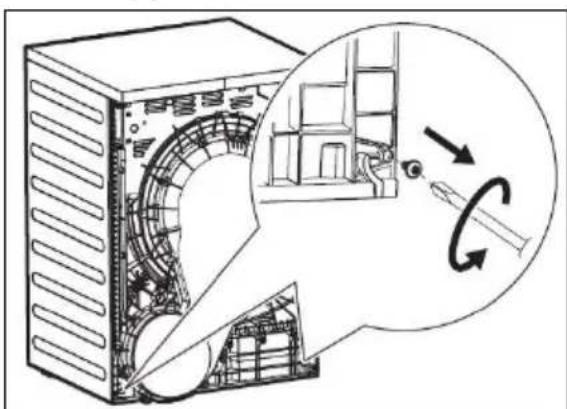
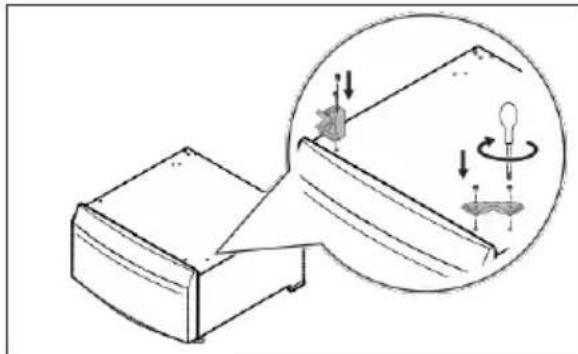
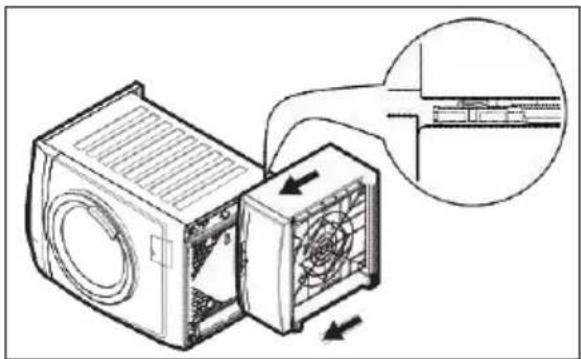
- For tumble dryer. Unscrew the two bottom screws from the back of the appliance.
- For tumble dryer. Screw the rear brackets (C) on the pedestal by using the screws supplied in the stand box.
- For tumble dryer. Lift the appliance and slide backwards so that the appliance front feet slides under foot locking brackets.
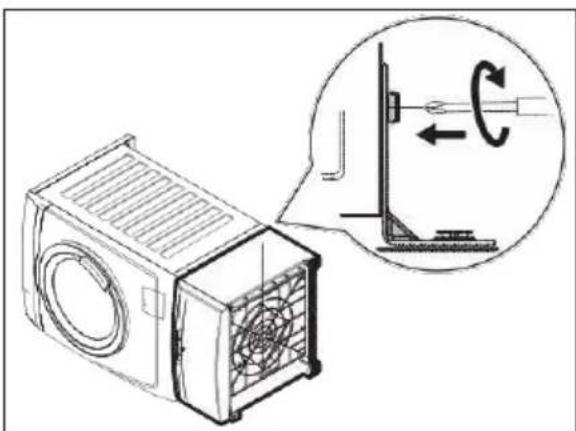
- For tumble dryer. Screw the rear brackets (C) to the back of the appliance by using the screws removed in step 12 and adjust the appliance feet if required.
- Move the Pedestal/Appliance assembly to its permanent location. Use a spirit level to check if the assembly is properly leveled. If not leveled, adjust feet to level properly.

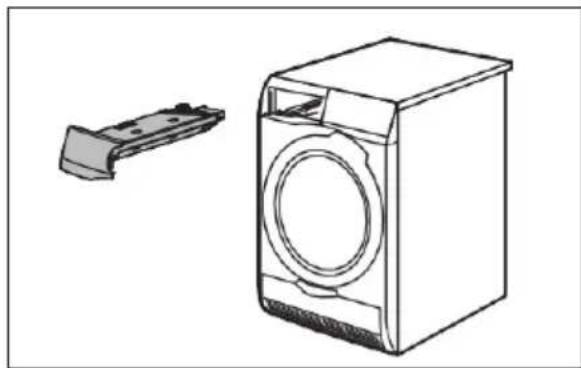
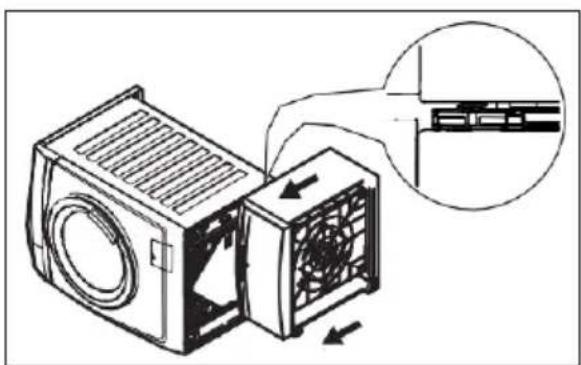
- If available, you can insert the additional container (F).
- Connect the appliance as indicated in the instructions supplied with the appliance.
Environmental Concerns
Recycle the materials with the symbol .Put the packaging in applicable containers to recycle it. Help protect the environment and human health and to recycle waste of electrical and electronic appliances.
Do not dispose appliances marked with the symbol with the household waste.
Return the product to your local recycling facility or contact your municipal office.
Note
HΦopMaζη 3a 6e3oNaCHOCT PpOуK T n akceCoapn HΦopMaζη

BHIMAHNE!
He ckaaTe 2 ypeHa nAd noCTaBkata.

BHUMAHNE! He mONTpaTe NOCTaBkata cam.

BHHMAHNE!празда
PnCTbNTe KbM MOHTaJa, Ce yBepTe, Ye NMa DoCTaTbUHO MRCTO.

BHIMAHNE!прдда
n3no3BaTe ypeda (nepaHa MaunHa nIc cyuHnH, yBepTe ce, ye BCnKn 3aHn cko6n (2X) ca qnknpaHn C BnHTOBe.
Pa3Mep
- Akcecoapn
(A) 2 npeHn MeTaHn ckO6n.
(B) 2Зади скоби за nepалина машина.
(C) 23aHn cKo6n 3a cyuHnJ.
(D) 10 BnHTa. (3a cyuHnH ye 6bDat DOCTaTBuHn 8 BNHTa.)
(E) 1 raeuen KIIOU 3a perynipane Ha HnBeNIPAuNTe KpaueTa.
(F) 2doJIbHnTeHn KOHTeHepa (KOrato ca BKnIOUeHN).
(G) 2 BnHTa 3a cKcnpaHe Ha nepaHrTa OT 3aHaTa cTpaHa.
I3roTOBJIeHO B KInTae.
PpoeDypa BCTaHOBJIeHHa
- BnIMtB nIDCTaBky Ta Bci akcecyapn 3 Kopo6kn.
- IpekeHaiTecA,IO BCTaHOBHeHO 3aHi rMoBi HIXKn.
- BiDperynIte nepedhi peryIbObaHI nIXKn, 0o6 niIcTAbKa 6yna cTiKOIO.
4.ПиВCTaHOBJIeHHI nIDCTaBKn nIO HOBIM npILAdom po3nakyIte npILA3rINO Bka3IBOK B IHCTpyKci, 1O NOCTaUaETbcra pa3OM i3 Hm, a NOTIM nepexoDbTe Do KpOKy 6.
5. RaKo npuIad Bxke nID'edHaHO:
BntarHitb Bnky 3 eJektpnHoi po3eTK.
Дяпральб hoI Maшин. 3akpniTe BODonpoBiDn KpaH.
-Дпя npaNBoi MaunHn. BiD'eHaIte WNaHr noaHi BOn BID BOOpOBiHOrO KpaHy Ta 3aueKaIte, DOKN 3i WNaHry Noadayi BoN Ta 3JINBHoro WNaHry BVteYe BcR BODa (36epitb ii y mInky nocyDnHy).
ДясушньHoro6apabany. CnopoxHITb KOHTeHepДЯ BOHy paKOBHy a60,3a HAreBHOCTi,aKTuByIte CNCTeMy npramoro 3JHy,Uo6do3BOHTN BOi CTeKTH.

- Ппкрт iTb nepeHi ckobnHa nIDCTaBky.
- Дя паль ho' Maшини.
Обекно полади npалыну Maшини на 6ik, 3якого 3нхODNTbсдо3aTOp дя MИючOrO 3acOby.

Knaitb II Ha Kaptoh a6o
ImaToK nonictnpoly, a6n He
noDpNaTn Kopnyc.
8.ДЯ npaIbHOI MaunHn. BiDperynIOte peryIbOBAHI hIXKn npnaIaNy Ha BiINOBiNDHy BnCOTy,ДЯ npocyBaHHN iD cKO6amN 6JOKyBaHHN HiKOK.
9.ДЯ npaIbHOI MaunHn. PoknaIITb niIcTaBky Ha Toi camN 6ik Ta nocyHbTe BnepeD, abn nepeDiHi HIXKn npuJaDy npoIshn Ni d cKO6amn 6JOKyBaHHa HIXOK.
10.ДЯ npaIbHoiMaunHn. BnkOpncTOByTe rBnHTn (G) DЯ φikcaui 3aHix cko6 (B)Ha npaIbHi MaunHi Ta rBnHTn (D)ДЯ niIDCTaBKn.
11.ДЯ npaIbHOI MaunHn. NocTaBTe NiIcTaBky Ta npuJa y BepTkaJIbHe noIoKeHHy.3a Heo6xIdNocti BiDperyIIOte HixKn npuJaTy Ta nepeiDiTb Do KpOky 16. PepeKaHaTecr, IIO rBNHTn HaIIMHo 3akpyeHi.
12.ДЯ cyuINbHoro 6apabany. BiKpyITb Dba HxKHi TBnHTn i3 3aHboi YactHH npuJaY. BiKnaditb ix.

13.ДЯсушиьног6apabany. PnKpyTITb 3aHcI cko6n (C)do nIDCTABKN, BnKOpNCTOBYUOuN TBnHTN, IIO NOCTaHaOTbcra y KOMnJIeKTI.
14.ДЯ cyuHbHoro 6apabany. IiHimItb npuaT Ta nocyHbTe Ha3aI, a6n nepeHi HIXKn npunaIy npoiuNn iD cKObamn 6NoKYBaHHra HIXOK.
Brand : ELECTROLUX
Model : E6WHPED4
Category : Furniture with drawer