PAT 12 B2 - Screwdriver PARKSIDE - Free user manual and instructions
Find the device manual for free PAT 12 B2 PARKSIDE in PDF.
| Product type | Cordless job site radio |
| Brand | Parkside |
| Model | PAT 12 B2 |
| Radio frequency bands | FM (87.5-108 MHz), DAB+ (174.928-239.200 MHz) |
| Connectivity | Bluetooth 5.0, USB (FAT32 up to 64 GB), AUX input (3.5 mm jack) |
| USB audio formats | MP3, WAV, APE, FLAC |
| Speaker power | 2 x 5 W stereo |
| Power supply | Parkside X 12 V TEAM or X 20 V TEAM battery (not included) or included 12 V/2 A mains power adapter |
| Compatible battery types | PAP 20 A1/A2/A3, PAPK 12 A1/A2/B1/B2 |
| Battery life with 12 V/2 Ah battery | Approx. 5 hours |
| Battery life with 12 V/4 Ah battery | Approx. 10 hours |
| Dimensions (L x W x H) | 226 x 170 x 305 mm |
| Weight (without battery) | Max. 2.5 kg |
| Protection rating (with covers closed) | IP65 (dust-tight and protected against water jets) |
| Display | LCD screen with adjustable backlight |
| Special functions | TWS (True Wireless Stereo), Memory for 30 DAB+ and 30 FM stations, DRC (Dynamic Range Control), adjustable clock |
| Operating temperature | -5 °C to 45 °C |
| Cleaning | Dry cloth or brush; do not immerse or use cleaning agents |
| Warranty | 3 years (France and Belgium) |
| Identification number (IAN) | 356478_2004 |
Frequently Asked Questions - PAT 12 B2 PARKSIDE
User questions about PAT 12 B2 PARKSIDE
0 question about this device. Answer the ones you know or ask your own.
Ask a new question about this device
Download the instructions for your Screwdriver in PDF format for free! Find your manual PAT 12 B2 - PARKSIDE and take your electronic device back in hand. On this page are published all the documents necessary for the use of your device. PAT 12 B2 by PARKSIDE.
USER MANUAL PAT 12 B2 PARKSIDE
Translation of the original instructions
NL BE
Before reading, unfold the page containing the illustrations and familiarise yourself with all functions of the device.
FR BE
11 NEXT-Taster/Vor-Taster
12 Tune-Taster/Shuffle-Taster
13 Lautstarkeregler
14 Mute-Taster/ Play&Pause-Taster
15 PREV - Taster / Zurück - Taster
Digital Audio Broadcasting
Bluetooth
The Bluetooth® word mark and logos are registered trademarks owned by Bluetooth SIG, Inc. and any use of such marks by Grizzly Tools GmbH & Co. KG is under license. Other trademarks and trade
names are those of their respective owners.

General description. 23
Scope of delivery 23
Overview 23
Description of functions. 24
Technical data 24
Safety information 25
Graphical symbols 25
General Safety Instructions for Power Tools 26
Initial start-up 26
Removing/inserting the battery (12 V and 20 V) 26
Checking the charge level of the rechargeable battery (12 V) 27
Checking the charge level of the rechargeable battery (20 V) 27
Operating with mains power 27
Switching on/off 27
Operation 27
Setting the volume 27
Switching playback mode 28
Operating as a radio (FM) 28
Station search (FM) 28
Saving stations to the preset list.28
Retrieving stored stations from the preset list 29
Retrieving station information. 29
Mute 29
Special settings for FM 29
Search settings 29
Audio settings 29
Operating as a radio (DAB+).....29
Station search. 30
Retrieving saved stations 30
Saving stations to the preset list.....30
Retrieving stored stations from the preset list 30
Retrieving station information. 30
Mute 31
Special settings for DAB+ ....31
Inactive stations 31
Setting Dynamic Range Control (DRC) 31
Operating via the 3.5 mm jack socket.. 31
Connecting via 3.5 mm jack socket on the front panel 31
Connecting via the 3.5 mm jack socket in the battery compartment... 32
Mute 32
Operating via USB 32
Connecting via USB 32
Pausing/continuing playback 32
Selecting tracks 32
Activating/deactivating Shuffle mode 32
Operating via Bluetooth®............32
Connecting via Bluetooth 32
Pausing/continuing playback 33
Selecting tracks. 33
TWS - True Wireless Stereo 33
System settings for all modes.....33
Setting the backlighting. 34
Setting the date/time. 34
Setting the language 34
Restoring factory settings. 34
Software version 34
Cleaning and servicing. 34
Cleaning. 35
Maintenance 35
Transport 35
Storage. 35
Disposal / Environmental protection 35
Replacement parts/Accessories..35
Guarantee 36
Repair Service. 37
Service-Center 37
Importer 37
Troubleshooting 38
Translation of the original EC declaration of conformity ....166
Introduction
Congratulations on purchasing your new device. You have chosen a high-quality device. This device was quality-tested and subjected to a final inspection during production, therefore ensuring proper functioning of your device.
The instruction manual forms part of this device. It contains important information on safety, use and disposal. Before using the device, you should familiarise yourself with all operating and safety instructions. Use the device only as described and for the stated fields of application.
Store the instruction manual carefully and ensure that all documents are handed over in the event that the device is passed on to another user.
Proper use
The device is designed to play radio and external playback media via Bluetooth, USB and AUX.
Any other use not expressly approved in the present instruction manual can damage the device and thus present a substantial risk for the user.
The manufacturer is not liable for damage caused by improper use or incorrect operation. This device is not suitable for commercial use. The warranty is void in the case of commercial use.
General description
The device is part of the Parkside X 12 V TEAM and X 20 V TEAM series and can be operated using Parkside X 12 V TEAM or X 20 V TEAM series batteries. The batteries may only be
charged using chargers from the Parkside X 12 V TEAM or X 20 V TEAM series.
An illustration of the most important functional components can be found on the front fold-out page.
Scope of delivery
Unpack the device, remove all transport protection film and packaging material from the device and check for completeness:
- Cordless jobsite radio
Power adapter
- Instruction manual

The rechargeable battery and charger are not included in delivery. (See chapter "Disposal and environmental protection"
Overview

1 Carrying handle
Battery compartment cover
3 Antenna
4 Speaker
3.5 mm Jack socket (front)
USB port(front)
DC input
8 Display
Info/advanced button
Power button
NEXT button / Forward button
Tune button / Shuffle button
Volume control knob
Mute button / Play & Pause button
PREV button / Back button
Source button
Preset/TWS button
GB E
18 Battery compartment lock
19 3.5 mm Jack socket (battery compartment)
20 USB port (battery compartment)
21 Power adapter
21a DC connector
22 Rechargeable battery
22a Release button
22b Guide rail
23 Charger
24 3.5 mm Jack cable (not included in delivery)
25 Signal display
26 Bluetooth display
27 Time display
28 Battery indicator
Description of functions
The cordless jobsite radio has an LCD display, an antenna and a carrying handle. The available radio frequency bands are FM and DAB.
In addition, the device has a connection option for a power adapter, two USB ports, two AUX sockets, and a Bluetooth interface.
Please refer to the descriptions below for information on how the operating elements work.
Technical data
Rugged Radio ....... PBRA 20-Li A1
Nominal input voltage U1
Battery type: PAP 20 A1, PAP 20 A2,
PAP 20 A3 20 V=
Nominal input voltage U2
Battery type: PAPK 12 A1, PAPK 12 A2,
PAPK 12 B1, PAPK 12 B2. 12 V=
Nominal input voltage U3
External plug-in power adapter
from scope of delivery 12 V; 2 A
Protection type IP65
Weight (without battery)......max. 2.5 kg Speaker power . . . . . . . . . . . . . . . . . . . . . . . . . . . . . . . . . . . . . . . . . . . . . . . . . . . . . . . . . . . . . . . . . . . . . . . . . . . . . - 1000 W Stereo - 1000 W Stereo - 1000 W Stereo - 1000 W Stereo - 1000 W Stereo - 1000 W Stereo - 1000 W Stereo - 1000 W Stereo - 1000 W Stereo - 1000 W Stereo - 1000 W Stereo - 1000 W Stereo ...
Frequency range FM.87.5-108 MHz Frequency range
DAB+ 174.928 - 239.200 MHz Operating time with battery
(12V,2Ah) 5 hours
Operating time with battery (12 V, 4 Ah) 10 hours
Operating time with battery (20 V, 2 Ah) .5 hours
Operating time with battery (20 V, 4 Ah) .10 hours Bluetooth version 5.0
Supported Bluetooth® profile.A2DP, AVRCP
Frequency band. 2.402 - 2.480 GHz Transmission power .Class 2
Bluetooth® transmission range Standard...approx. 10 m under optimal conditions ...max. 30 m
Integrated station memory DAB+ 30 VHF. 30
Dimensions (L× W× H) 226x170x305mm USB port USB1.1
Temperature. max. 50^ Operation .-5-45°C Storage. -5-50°C Humidity: .. < = 75%

Caution! An up-to-date list of battery compatibility can be found at: www.lidl.de/akku
Power adapter....XH1200-2000WG
Nominal input voltage U 220-240 V~; 50 Hz, 0,8 A
Output power.....12 V; 2.0A; 24.0W
Protection type . IPX0
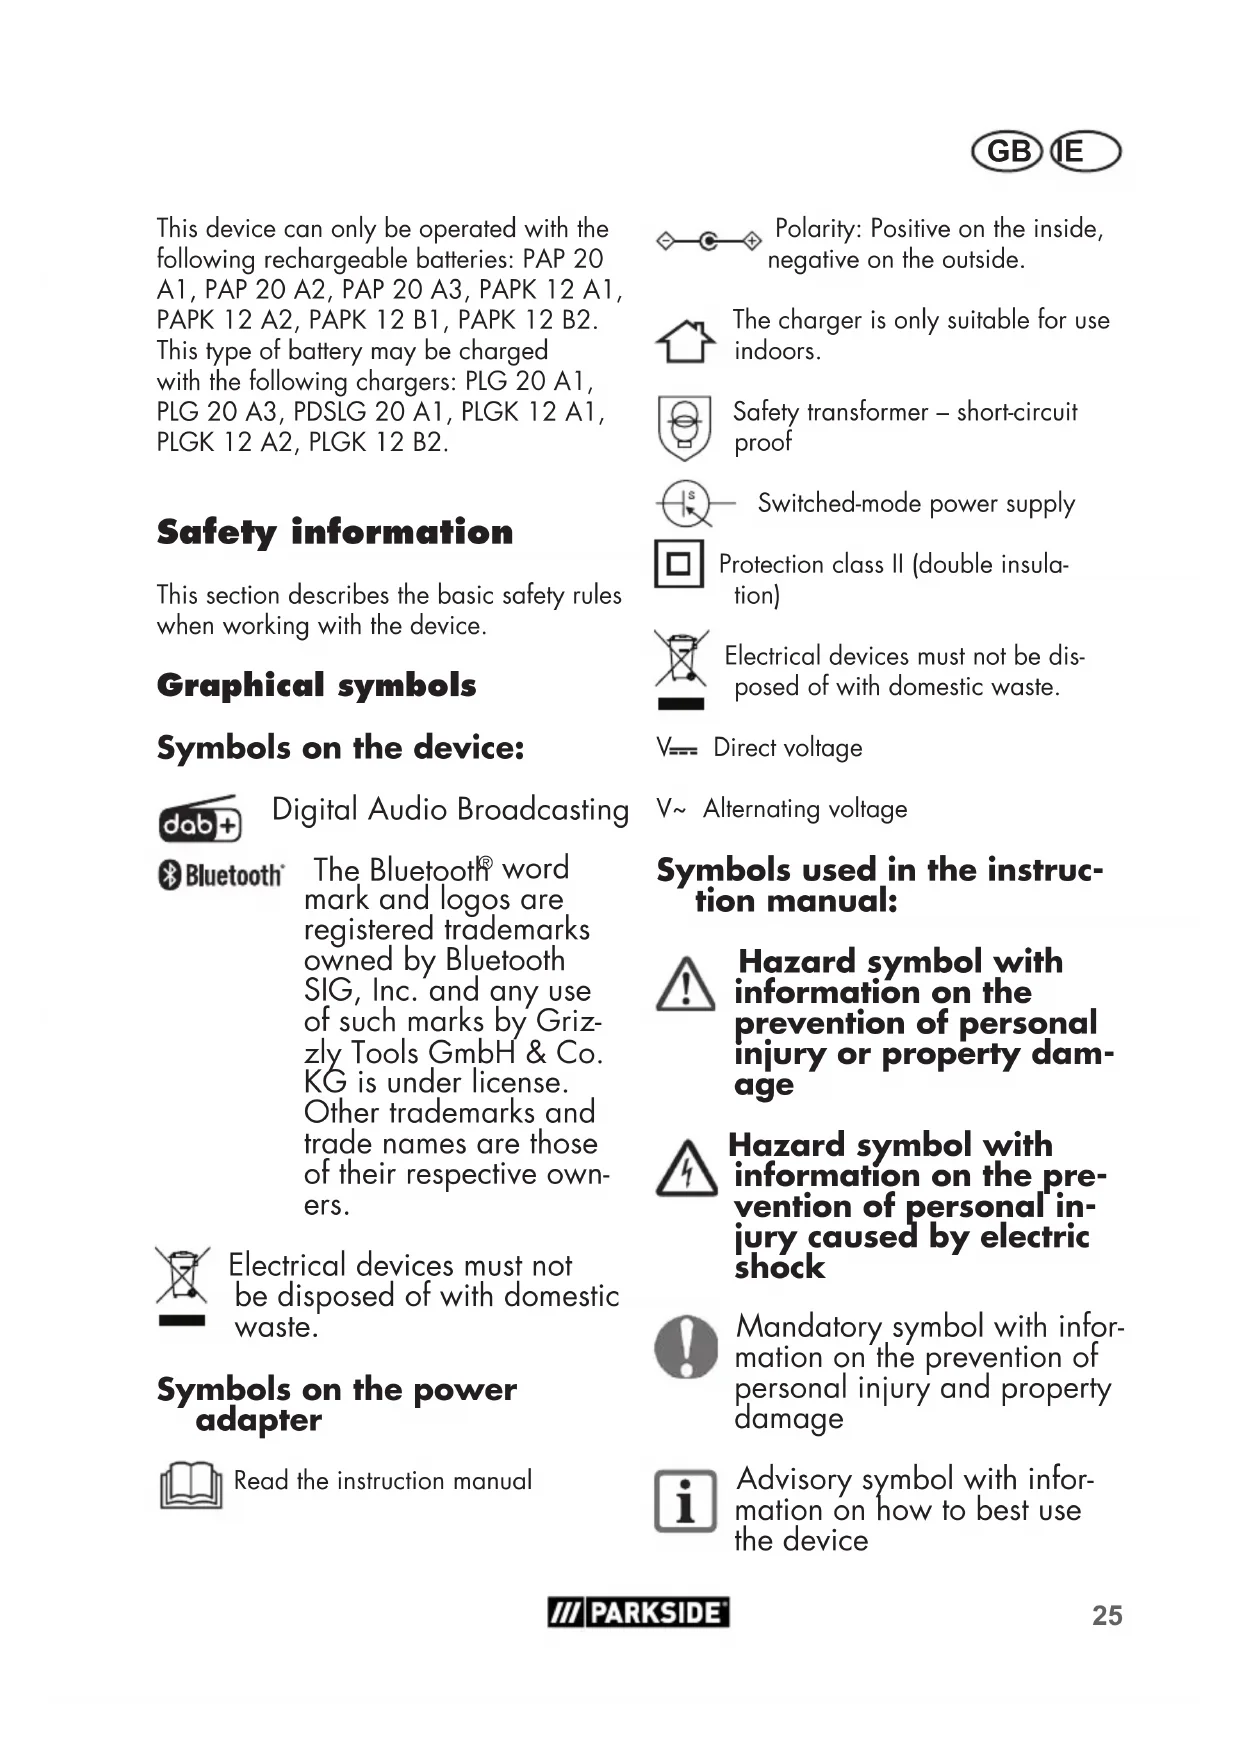
This device can only be operated with the following rechargeable batteries: PAP 20 A1, PAP 20 A2, PAP 20 A3, PAPK 12 A1, PAPK 12 A2, PAPK 12 B1, PAPK 12 B2. This type of battery may be charged with the following chargers: PLG 20 A1, PLG 20 A3, PDSLG 20 A1, PLGK 12 A1, PLGK 12 A2, PLGK 12 B2.
Safety information
This section describes the basic safety rules when working with the device.
Graphical symbols
Symbols on the device:

Digital Audio Broadcasting
Bluetooth
The Bluetooth® word mark and logos are registered trademarks owned by Bluetooth SIG, Inc. and any use of such marks by Grizzly Tools GmbH & Co. KG is under license. Other trademarks and trade names are those of their respective owners.

Electrical devices must not be disposed of with domestic waste.
Symbols on the power adapter

Read the instruction manual

Polarity: Positive on the inside, negative on the outside.

The charger is only suitable for use indoors.

Safety transformer - short-circuit proof

Switched-mode power supply

Protection class II (double insulation)

Electrical devices must not be disposed of with domestic waste.
V---
Direct voltage
V~
Alternating voltage
Symbols used in the instruction manual:

Hazard symbol with information on the prevention of personal injury or property damage

Hazard symbol with information on the prevention of personal injury caused by electric shock

Mandatory symbol with information on the prevention of personal injury and property damage

Advisory symbol with information on how to best use the device
General Safety Instructions for Power Tools
- The packaging material is not a toy. It poses a danger to life from suffocation.
- Children, individuals with limited physical, sensory or mental capabilities, those with insufficient experience or knowledge or individuals who are not familiar with the instructions must never be permitted to use the device. Local regulations may specify a restricted age limit for the user.
- In battery mode and with closed covers, dust-proof and protection against water jets (nozzle) according to IP65.
LCD screens contain liquids that can cause skin irritation and poisoning. In case of contact with eyes, mouth or skin, rinse the affected sites with water and seek medical attention. - Unplug the device from the mains during a lightning storm or when not in use for long periods of time.
- Do not install near any heat sources such as radiators, heaters or other appliances that produce heat.
- Do not use the device at a high volume for long periods of time. Select an appropriate volume to avoid hearing damage.
- Do not use the device near open flames (e.g. candles). This can result in fire.
- Prevent foreign objects from entering the device.
- Do not open the device or the plug-in power supply.
Always place the device on an even, stable surface. Avoid subjecting the device to vibration. -
Do not pull on the cable. Instead, grasp the plug by the insulated grip surface.
-
LCD screens contain liquid that can cause skin irritation and poisoning. In case of contact with the eyes, mouth or skin, rinse the affected areas with water and seek medical attention.
- Do not use any accessories that are not recommended by PARKSIDE. This can result in electric shock or fire.

Observe the safety information and notes on charging and proper use as shown in the instruction manual for your battery and charger from the Parkside X 20 V Team or X 12 V Team series. A detailed description of the charging process and further information can be found in the separate operating instructions.
Initial start-up
Removing/inserting the battery (12 V and 20 V)
1 Loosen the lock of the battery compartment (18).
2. Open the battery compartment cover (2).
3. To remove the battery (22) from the device, press the release button (22a) on the battery and pull the battery (22) out.
4. To insert the battery (22), push the battery (22) along the guide rail (22b) into the device. You will hear it click into place.
5. Close the battery compartment cover (2).
6. Lock the lock of the battery compartment (18).

Caution: Be careful not to pinch your fingers when opening and closing the battery compartment cover.
Checking the charge level of the rechargeable battery (12 V)
Charge level indicator on the display
The battery indicator (28) on the display shows the charge status of the battery.
Checking the charge level of the rechargeable battery (20 V)
Charge level indicator on the battery
The battery charge level indicator signalises the state of charge of the battery.
The charge level of the battery is indicated by illumination of the corresponding LED light. To see this, press the soft button of the battery charge level indicator.
3 LEDs illuminated (red, orange and green): Battery charged
2 LEDs illuminated (red and orange): Battery partially charged
1 LED illuminated (red): Battery needs to be charged
Charge level indicator on the display
The battery indicator (28) on the display shows the charge status of the battery.
Operating with mains power
- Connect the DC connector (21a) of the power adapter (21) to the DC input (7) on the front of the radio.
- Insert the power adapter (21) into a wall socket.
When operating with mains power, the battery is automatically disconnected. Connected batteries do not charge when the device is operating with mains power.

Switching on/off
Switching on the device
- Press the Power button (10). The display (8) lights up.
Switching off the device
- Press the Power button (10). All playbacks stop and the display (8) switches off.
Operation

Ensure that the ambient temperature does not exceed 50^ or fall below -20^ during operation.
Setting the volume
When switching on/off and changing the playback mode, the volume automatically changes to a preset value.
Increasing the volume
- Turn the volume knob (13) in a clockwise direction.
Reducing the volume
- Turn the volume knob (13) in an anticlockwise direction.
Switching playback mode
Press the Source button (16) repeatedly. The radio will now cycle through the available playback modes (DAB+, FM and Bluetooth®).
AUX and USB are only available for selection if a playback medium is connected via the AUX sockets (5/19) or the USB port (battery compartment) (20).
Operating as a radio (FM)
Pull up the antenna (3) so that it is vertical.
Press the Source button (16) repeatedly until the time display (27) shows "FM".
The signal indicator (25) on the display (8) shows the signal strength. If this is low, it is advisable to initiate a channel search
Station search (FM)
Automatic search
-
Press and hold the Tune button (12) for approx. 2 seconds. All stored stations are deleted and the radio now automatically scans the frequency band for up to 30 receivable signals.
-
Press the Preset button (17). The signals which have been found are now shown on the display.
-
Press the NEXT / PREV button (11/15) to scroll through the list entries.
Alternatively, you can also scroll through the list by turning the volume control knob (13).
- Push the volume control knob (13) to confirm the station selection.
Semi-automatic search
Semi-automatic search Press and hold the NEXT button (11). The radio now automatically searches for the next receivable signal.
If you press the NEXT button (11) again during the search, the search will stop early.
Setting stations manually
-
Press the volume control knob (13) briefly once.
-
Change the frequency by turning the volume control knob (13).
-
Push the volume control knob (13) to save the setting and to re-enable the volume control.
Or: Press the NEXT / PREV buttons (11/15) briefly once.

The frequency changes in 5 MHz increments.
Saving stations to the preset list
-
Press and hold the Preset button (17) for approx. 2 seconds.
-
Using the NEXT / PREV buttons (11/15), select a memory location to overwrite to.
Alternatively, you can also scroll through the list by turning the volume control knob (13).
- Push the volume control knob (13) to overwrite the selected station to the memory location.
Retrieving stored stations from the preset list
- Press the Preset button (17) briefly once.
- Scroll through the list using the NEXT/PREV buttons (11/15) or the volume control knob (13).
- Push the volume control knob (13) to change to the selected station.
Retrieving station information
- Press the Info/Advanced button (9).
- Press the Info/Advanced button (9) to scroll through the station information
| Frequency band | retrievable station information |
| FM (RDS) Station | name Frequency Radio text Programme genre Time/date Mono/stereo Signal strength |
Mute
The Mute function deactivates the sound output while playback continues.
To activate this, press the Mute button (14). To deactivate this, press the Mute button (14) again.
Special settings for FM
- Press and hold the Info/Advanced button (9) for approx. 2 seconds to access the Settings menu.
-
Scroll using the NEXT / PREV buttons (11/15) or the volume control knob (13).
-
Push the volume control knob (13) to confirm the selection.

The settings in the "System" menu are described in the chapter "System settings"
Search settings
- Select "Search settings" in the menu.
- Using the NEXT / PREV buttons (11/15) or the volume control knob (13), select "All stations" to obtain a full list of stations or "Only strong stations" to obtain only stations with a strong signal.
- Press the volume control knob (13) to confirm the settings.
Audio settings
- Select "Audio settings" in the menu.
- Using the NEXT / PREV buttons (11/15) or the volume control knob (13), select "Stereo possible" to play back stereo signals when available or "Mono only" to play back mono signals only.
- Press the volume control knob (13) to confirm the settings.
Operating as a radio (DAB+)
Pull up the antenna (3) so that it is vertical.
Press the Source button (16) repeatedly until the time display (27) shows "DAB".
The signal indicator (25) on the display (8) shows the signal strength. If this is low, it is advisable to initiate a channel search
Station search
Press and hold the Tune button (12) for approx. 2 seconds. The radio now automatically searches for receivable stations.
Once the search is complete, a station list is generated which can be retrieved using the NEXT / PREV buttons (11/15).
Favourite stations can be stored in an additional preset list in the desired order.
Alternative
- Press and hold the Info/Advanced button (9) for approx. 2 seconds.
- Using the NEXT / PREV buttons (11/15) or the volume control knob (13), scroll to the list entry "Complete search".
- Push the volume control knob (13) to confirm the selection.
Once the search is complete, a station list is generated which can be retrieved using the NEXT / PREV buttons (11/15).
Favourite stations can be stored in an additional preset list in the desired order.
Setting stations manually
- Press and hold the Info/Advanced button (9) for approx. 2 seconds.
- Using the NEXT / PREV buttons (11/15) or the volume control knob (13), scroll to the list entry "Set manually".
- Change the frequency by turning the volume control knob (13).
- Press the volume control knob (13) to save the setting and to re-enable the volume control.
Retrieving saved stations
- Scroll through the list using the NEXT/PREV buttons (11/15).
- Push the volume control knob (13) to change to the selected station.
Saving stations to the preset list
- Press and hold the Preset button (17) for approx. 2 seconds.
- Using the NEXT / PREV buttons (11/15), select a memory location to overwrite to.
Alternatively, you can also scroll through the list by turning the volume control knob (13).
3. Push the volume control knob (13) to overwrite the selected station to the memory location.
Retrieving stored stations from the preset list
- Press the Preset button (17) briefly once.
- Scroll through the list using the NEXT/PREV buttons (11/15) or the volume control knob (13).
- Push the volume control knob (13) to change to the selected station.
Retrieving station information
- Press the Info/Advanced button (9).
- Press the Info/Advanced button (9) to scroll through the station information
| Frequency band | retrievable station information |
| DAB Station name | Programme genre Multiplex name Time/date Frequency/channel Bitrate/audio type Signal strength Radio text |
Mute
The Mute function deactivates the sound output while playback continues. To activate this, press the Mute button (14). To deactivate this, press the Mute button (14) again.
Special settings for DAB+
- Press and hold the Info/Advanced button (9) for approx. 2 seconds to access the Settings menu.
- Scroll using the NEXT/PREV buttons (11/15) or the volume control knob (13).
- Push the volume control knob (13) to confirm the selection.

The settings in the "System" menu are described in the chapter "System settings"

The settings in the "Complete search" and "set stations manually" menus are described in the chapter "Operating as a radio (DAB+)".
Inactive stations
- Select "Inactive station" in the menu.
- Using the NEXT / PREV buttons (11/15) or the volume control knob (13), select "Yes" to delete inactive stations or "No" to return to the Settings menu.
- Press the volume control knob (13) to confirm the settings.
Setting Dynamic Range Control (DRC)

This function is only available if DAB+ is selected.
DRC ensures that quiet passages are amplified and can therefore be heard in noisy environments.
- Select "DRC" in the menu.
- Select the desired DRC setting using the NEXT/PREV buttons (11/15) or the volume control knob (13).
There are three possible options: off - No amplification of quiet passages low - Moderate amplification of quiet passages high - Maximum amplification of quiet passages
- Press the volume control knob (13) to confirm the settings.
Operating via the 3.5 mm jack socket
Connecting via 3.5 mm jack socket on the front panel
- Plug the jack cable (24) into the jack socket (5) on the front panel of the device.
GB E
- Connect the jack cable (24) to a storage medium.
- Press the Source button (16) repeatedly until the time display shows "AUX2 Input".
Connecting via the 3.5 mm jack socket in the battery compartment
- Plug the jack cable (24) into the jack socket (19) in the device's battery compartment.
- Connect the jack cable (24) to a storage medium.
- Press the Source button (16) repeatedly until the time display shows "AUX1 Input".
Mute
The Mute function deactivates the sound output while playback continues. To activate this, press the Mute button (14). To deactivate this, press the Mute button (14) again.
Operating via USB
Connecting via USB
- Insert the USB storage medium (not included in delivery) into the USB port (20) in the device's battery compartment.
i Only external devices can be charged via the USB port (6) on the front panel. This USB port (6) cannot be used to play back audio.
i Playback of audio from mobile phones is not possible via USB. Use Bluetooth or AUX for this.
i Only USB sticks in FAT32 format up to a maximum size of 64 GB can be used.
Audio files in the following formats can be played back: MP3, WAV, APE, FLAC.
Pausing/continuing playback
Pausing playback
- Press the Play & Pause button (14) during playback.
Continuing playback
- Press the Play & Pause button (14).
Selecting tracks
- Press the NEXT button (11) to move to the next track.
- Press and hold the PREV button (15) for approx. 2 seconds to reset the current track to the beginning.
- Press the PREV button (15) briefly once to go back to the previous track.
Activating/deactivating Shuffle mode
Activating Shuffle mode
- Press the Tune button (12) briefly once. This will activate the Shuffle mode.
Deactivating Shuffle mode
- Press the Tune button (12) briefly once. This will deactivate the Shuffle mode.
Operating via Bluetooth®
Connecting via Bluetooth®
-
Press the Source button (16) repeatedly until the time display shows "Bluetooth".
-
The display will flash.
- Connect your external Bluetooth®-en-abled device to the radio. Select "PBRA 20-Li A1" from the list.
- As soon as the device is connected, a beep will sound, the display will stop flashing and the device will display "Connected".
Pausing/continuing playback
Pausing playback
- Press the Play & Pause button (14) during playback.
Continuing playback
- Press the Play & Pause button (14).
Selecting tracks
- Press the NEXT button (11) to move to the next track.
- Press and hold the PREV button (15) for approx. 2 seconds to reset the current track to the beginning.
- Press the PREV button (15) briefly once to go back to the previous track.
TWS - True Wireless Stereo
With the Bluetooth® speaker, you can use the new TWS feature to connect two speakers together to form a stereo pair. This will allow you to enjoy a perfectly synchronised stereo sound.
- Press the Source button (16) repeatedly until the time display shows "Bluetooth".
- Press the TWS button (17) once on each device. The TWS indicator will flash on the display (8).
-
The devices will connect with one another and the TWS indicator on the display (8) of one device will stop flashing.
-
The device on which the TWS indicator continues to flash is the master device. The mobile phone is now connected to this device as described in the chapter "Operating via Bluetooth®".
- To cancel the connection between the two speakers, press the TWS button (17) once.
System settings for all modes

Information on special settings for the different playback modes can be found in the corresponding chapters
In Radio mode (FM and DAB+)
- Press and hold the Info/Advanced button (9) for approx. 2 seconds to access the Settings menu.
- Scroll to the list entry "System" using the NEXT / PREV buttons (11/15) or the volume control knob (13).
- Push the volume control knob (13) to confirm the selection.
- Scroll to the desired entry using the NEXT/PREV buttons (11/15) or the volume control knob (13).
- Push the volume control knob (13) to confirm the selection.
When playing back external media (USB, AUX and Bluetooth®)
- Press and hold the Info/Advanced button (9) for approx. 2 seconds to access the Settings menu.
- Scroll to the desired entry using the NEXT/PREV buttons (11/15) or the volume control knob (13).
- Push the volume control knob (13) to confirm the selection.
Setting the backlighting
- Select "Lighting" in the System menu.
- Scroll through the list using the NEXT/PREV buttons (11/15) or the volume control knob (13).
- Push the volume control knob (13) to confirm the selected list entry.
Setting the date/time
- Select "Time" in the menu.
Setting the time automatically
- Select "Autom. Update" in the Time menu.
- Select the desired update behaviour using the NEXT / PREV buttons (11/15) or the volume control knob (13).
- Push the volume control knob (13) to confirm the selection.
There are four possible options:
No update - time and date do not update automatically
Update all - time and date update automatically via FM and DAB
Update via FM - time and date update automatically via FM
Update via DAB - time and date update automatically via DAB
If the automatic update is active, the time and date will always update when the radio is in the corresponding playback mode.
Setting the time manually
- Select "Set time/date" in the Time menu.
- Set the time and date using the NEXT/PREV buttons (11/15) or the volume control knob (13). Press the
volume control knob (13) to confirm the settings.
Setting the language
- Select "Language" in the System menu.
- Scroll through the list using the NEXT/PREV buttons (11/15) or the volume control knob (13).
- Push the volume control knob (13) to confirm the setting.
Restoring factory settings
- Select "Factory settings" in the System menu.
- Select "Yes" in the Factory settings menu. The radio will now automatically restore the factory settings.
Software version
- Select "SW version" in the System menu.
- This will display the installed software version.
- Press the Preset button (17) to return to the Main menu
Cleaning and servicing

Switch off the device and remove the battery before carrying out any maintenance work and unplug the power adapter.

You should have any repair and maintenance work that is not described in these instructions carried out by our Service Centre. Only use original parts.
Cleaning

The device must not be sprayed with water or placed in water. Otherwise there is a risk of electric shock.

Do not use any cleaning agents or solvents. They could damage the device irreparably. Chemical substances may attack the plastic parts of the machine.
- Keep the ventilation slits, speaker and carrying handle of the device clean. Use a dry cloth or brush to do this.
Maintenance
The device is maintenance free.
Transport
Fold in the antenna (3) before transporting the device
Storage
Always store devices and accessories so that they are:
-dry.
clean.
- protected against dust.
- out of the reach of children.
-
Remove the rechargeable battery from the device before storing the device (see the separate operating instructions for the battery and charger).
-
The storage temperature for the rechargeable battery and the device is between -5^ and 50^ . Avoid extreme cold or heat during storage to ensure the battery output is not adversely affected.
Disposal / Environmental protection
Remove the battery from the device and recycle the device, battery, accessories and packaging in an environmentally-friendly manner. Please observe the regulations for disposal that are applicable in your area.

Electrical devices do not belong in domestic waste.
- Take the device to a recycling plant. The plastic and metal parts used on your device can be properly sorted according to materials and grades and efficiently recycled. Please contact our Service Centre for more information.
We will dispose of any defective devices that you send to us free of charge.
Replacement parts/ Accessories
Spare parts and accessories can be obtained at www.grizzlytools-service.eu
If you have issues ordering, please use the contact form.
If you have any other questions, contact the "Service-Center" (see page 37).
Guarantee
Dear Customer,
This equipment is provided with a 3-year guarantee from the date of purchase. In case of defects, you have statutory rights against the seller of the product. These statutory rights are not restricted by our guarantee presented below.
Terms of Guarantee
The term of the guarantee begins on the date of purchase. Please retain the original receipt. This document is required as proof of purchase.
If a material or manufacturing defect occurs within three years of the date of purchase of this product, we will repair or replace - at our choice - the product for you free of charge. This guarantee requires the defective equipment and proof of purchase to be presented within the three-year period with a brief written description of what constitutes the defect and when it occurred.
If the defect is covered by our guarantee, you will receive either the repaired product or a new product. No new guarantee period begins on repair or replacement of the product.
Guarantee Period and Statutory Claims for Defects
The guarantee period is not extended by the guarantee service. This also applies for replaced or repaired parts. Any damages and defects already present at the time of purchase must be reported immediately after unpacking. Repairs arising after expiry of the guarantee period are chargeable.
Guarantee Cover
The equipment has been carefully produced in accordance with strict quality guidelines and conscientiously checked prior to delivery.
The guarantee applies for all material and manufacturing defects. This guarantee does not extend to cover product parts that are subject to normal wear and may therefore be considered as wearing parts (e.g. rechargeable battery, push button) or to cover damage to breakable parts (e.g. display, antenna).
This guarantee shall be invalid if the product has been damaged, used incorrectly or not maintained. Precise adherence to all of the instructions specified in the operating manual is required for proper use of the product. Intended uses and actions against which the operating manual advises or warns must be categorically avoided.
The product is designed only for private and not commercial use. The guarantee will be invalidated in case of misuse or improper handling, use of force, or interventions not undertaken by our authorised service branch.
Processing in Case of Guarantee
To ensure quick handling of you issue, please follow the following directions:
-
Please have the receipt and item number (IAN 356478_2004) ready as proof of purchase for all enquiries.
-
Please find the item number on the rating plate.
-
Should functional errors or other defects occur, please initially contact the service department specified below by telephone or by e-mail. You will then receive further information on the processing of your complaint.
-
After consultation with our customer service, a product recorded as defective can be sent postage paid to the service address communicated to you, with the proof of purchase (receipt) and specification of what constitutes the defect and when it occurred. In order to avoid
acceptance problems and additional costs, please be sure to use only the address communicated to you. Ensure that the consignment is not sent carriage forward or by bulky goods, express or other special freight. Please send the equipment inc. all accessories supplied at the time of purchase and ensure adequate, safe transport packaging.
Repair Service
For a charge, repairs not covered by the guarantee can be carried out by our service branch, which will be happy to issue a cost estimate for you.
We can handle only equipment that has been sent with adequate packaging and postage.
Attention: Please send your equipment to our service branch in clean condition and with an indication of the defect.
Equipment sent carriage forward or by bulky goods, express or other special freight will not be accepted.
We will dispose of your defective devices free of charge when you send them to us.
Service-Center

Service Great Britain
Tel.: 0800 404 7657
E-Mail: grizzly@lidl.co.uk
IAN 356478_2004

Service Ireland
Tel: 1890 930 034
(0,08 EUR/Min., (peak))
(0,06 EUR/Min., (off peak))
E-Mail: grizzlyy@lidl.ie
IAN 356478_2004
Importer
Please note that the following address is not a service address. Please initially contact the service centre specified above.
Switch off the device and remove the battery before carrying out any maintenance work and unplug the power adapter.
| Problem Possible cause | Error correction | |
| Machine does not start | Battery (A22) not inserted | Insert the battery (A22) (see "Inserting/removing the battery") |
| Rechargeable battery (A22) discharged | Charge the battery (22) (observe the separate operating instructions for the rechargeable battery and charger) | |
| On/Off button (A10) is faulty. | Repairs must be carried out by our Customer Service depart-ment. | |
| Device works with interruptions | Internal loose contact | Repairs must be carried out by our Customer Service depart-ment. |
| On/Off button (A10) is faulty. | ||
| Faltering playback Noise during play-back | Poor signal | (FM and DAB+ only) Adjust antenna (3) |
| (FM and DAB+ only) Adjust the frequency (see "Manual search" in the chapter "Station search (FM))" | ||
| Place the radio where there is a better signal. | ||
| Transmission range for Blue-tooth connection exceeded | Place the connected device near the radio. Transmission ranges of up to 30 m are possible. The optimal range is approx. 10 m. |
Sommaire
Introduction 40
Digital Audio Broadcasting

Bluetooth
The Bluetooth® word mark and logos are registered trademarks owned by Bluetooth SIG, Inc. and any use of such marks by Grizzly Tools GmbH & Co. KG is under license. Other trademarks and trade names are those of their respective owners.

V~ Tension alternative
Chere cliente, cher client,
Digital Audio Broadcasting

Shuffle modus activeren/de-activeren
Shuffle modus activeren
Digital Audio Broadcasting

Nastaveni Dynamic Range Control (DRC) 105
The Bluetooth® word mark and logos are registered trademarks owned by Bluetooth SIG, Inc. and any use of such marks by Grizzly Tools GmbH & Co. KG is under license. Other trademarks and trade names are those of their respective owners.

Nastaveni Dynamic Range Control (DRC)

Doba chodu's akumulatorom
(12 V, 2 Ah) 5 hodin
Doba chodu's akumulatorom
(12 V, 4 Ah) 10 hodin
Doba chodu's akumulatorom
(20 V, 2 Ah) 5 hodin
Doba chodu's akumulatorom
(20 V, 4 Ah) 10 hodin
Verzia Bluetooth 5.0
Podporované profily Bluetooth® ......A2DP, AVRCP
Frekvençné pásmo....2,402 - 2,480 GHz Vysielaci vykon. trieda 2
Dosah radiosho systemu Bluetooth®
Standard. cca 10 m
Digital Audio Broadcasting

The Bluetooth® word mark and logos are registered trademarks owned by Bluetooth SIG, Inc. and any use of such marks by Grizzly Tools GmbH & Co. KG is under license. Other trademarks and trade names are those of their respective owners.

Stationssogning (FM) 136
Lagring af stationer pa Preset-listen.. 136
Digital Audio Broadcasting
Bluetooth
The Bluetooth® word mark and logos are registered trademarks owned by Bluetooth SIG, Inc. and any use of such marks by Grizzly Tools GmbH & Co. KG is under license. Other
trademarks and trade names are those of their respective owners.

Stationssogning (FM)
Automatisk søgning
- Tryk på Tune-knappen (12) og hold den trykket i ca. 2 sekunder. Alle gemte stationer slettes, og radioen soger nu automatisk i frekvensbandet after op til
Indstilling of Dynamic Range Control (DRC)
Deaktivering of shuffle-tilstand
- Tryk kort på Tuner-knappen (12) - dette deaktiverer shuffle-tilstanden.
Drift via Bluetooth®
Forbindelse via Bluetooth®
Ajustar Dynamic Range Control (DRC) 157
Digital Audio Broadcasting

Ajustar Dynamic Range Control (DRC)

Estamericano.
| Translation of the original EC declaration of conformity | |
| We hereby confirm that the Rugged Radio PBRA 20-Li A1 series Serial number 000001 - 030000 conforms with the following applicable relevant version of the EU guidelines: | |
| 2009/125/EC • 2019/1782(EU) • 2011/65/EU* | |
| In order to guarantee consistency, the following harmonised standards as well as national standards and stipulations have been applied: | |
| EN 50563:2011+A1:2013 • EN 62087:2012-04 IEC 60529:1989+A1:1999+A2:2013 • EN 62368-1:2014+AC:2017 IEC 82079-1:2013 • EN ISO/IEC 17050-1:2010 EN ISO/IEC 17050-2:2005 | |
| This declaration of conformity is issued under the sole responsibility of the manufacturer: | |
| CE Grizzly Tools GmbH & Co. KG Stockstädter Straße 20 63762 Großbostheim, Germany, 05.02.2021 | Christian Frank Documentation Representative |
- The object of the declaration described above satisfies the provisions of Directive 2011/65/EU of the European Parliament and the Council of 8 June 2011 on limiting the use of certain harmful substances in electrical and electronic appliances.