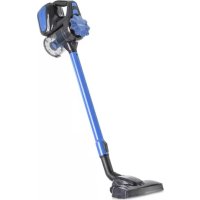
Cleanbutler 2G - Vacuum Cleaner OneConcept - Free user manual and instructions
Find the device manual for free Cleanbutler 2G OneConcept in PDF.
User questions about Cleanbutler 2G OneConcept
0 question about this device. Answer the ones you know or ask your own.
Ask a new question about this device
Download the instructions for your Vacuum Cleaner in PDF format for free! Find your manual Cleanbutler 2G - OneConcept and take your electronic device back in hand. On this page are published all the documents necessary for the use of your device. Cleanbutler 2G by OneConcept.
USER MANUAL Cleanbutler 2G OneConcept
Congratulations on purchasing this equipment. Please read this manual carefully and take care of the following hints on installation and use to avoid technical damages. Any failure caused by ignoring the items and cautions mentioned in the operation and installation instructions are not covered by our warranty and any liability.
Contents
Technical Data 10
Safety Instructions. 11
Device Description 12
Assembly 13
Maintenance. 16
Troubleshooting Guide 17
Disposal Considerations 17
Declaration of Conformity. 17
Technical Data
Item number 10030087 10030088
Rated voltage and frequency power adapter 220-240 V~ 50/60 Hz
Rated voltage and frequency device 22.2 V battery
Power input 130 watts
Suction power 25 W
Dust capacity 0.5 litres
Lithium battery
Capacity 1500 mAH/2200 mAH
Charging time 3.5 hours
Working time 15-25 minutes
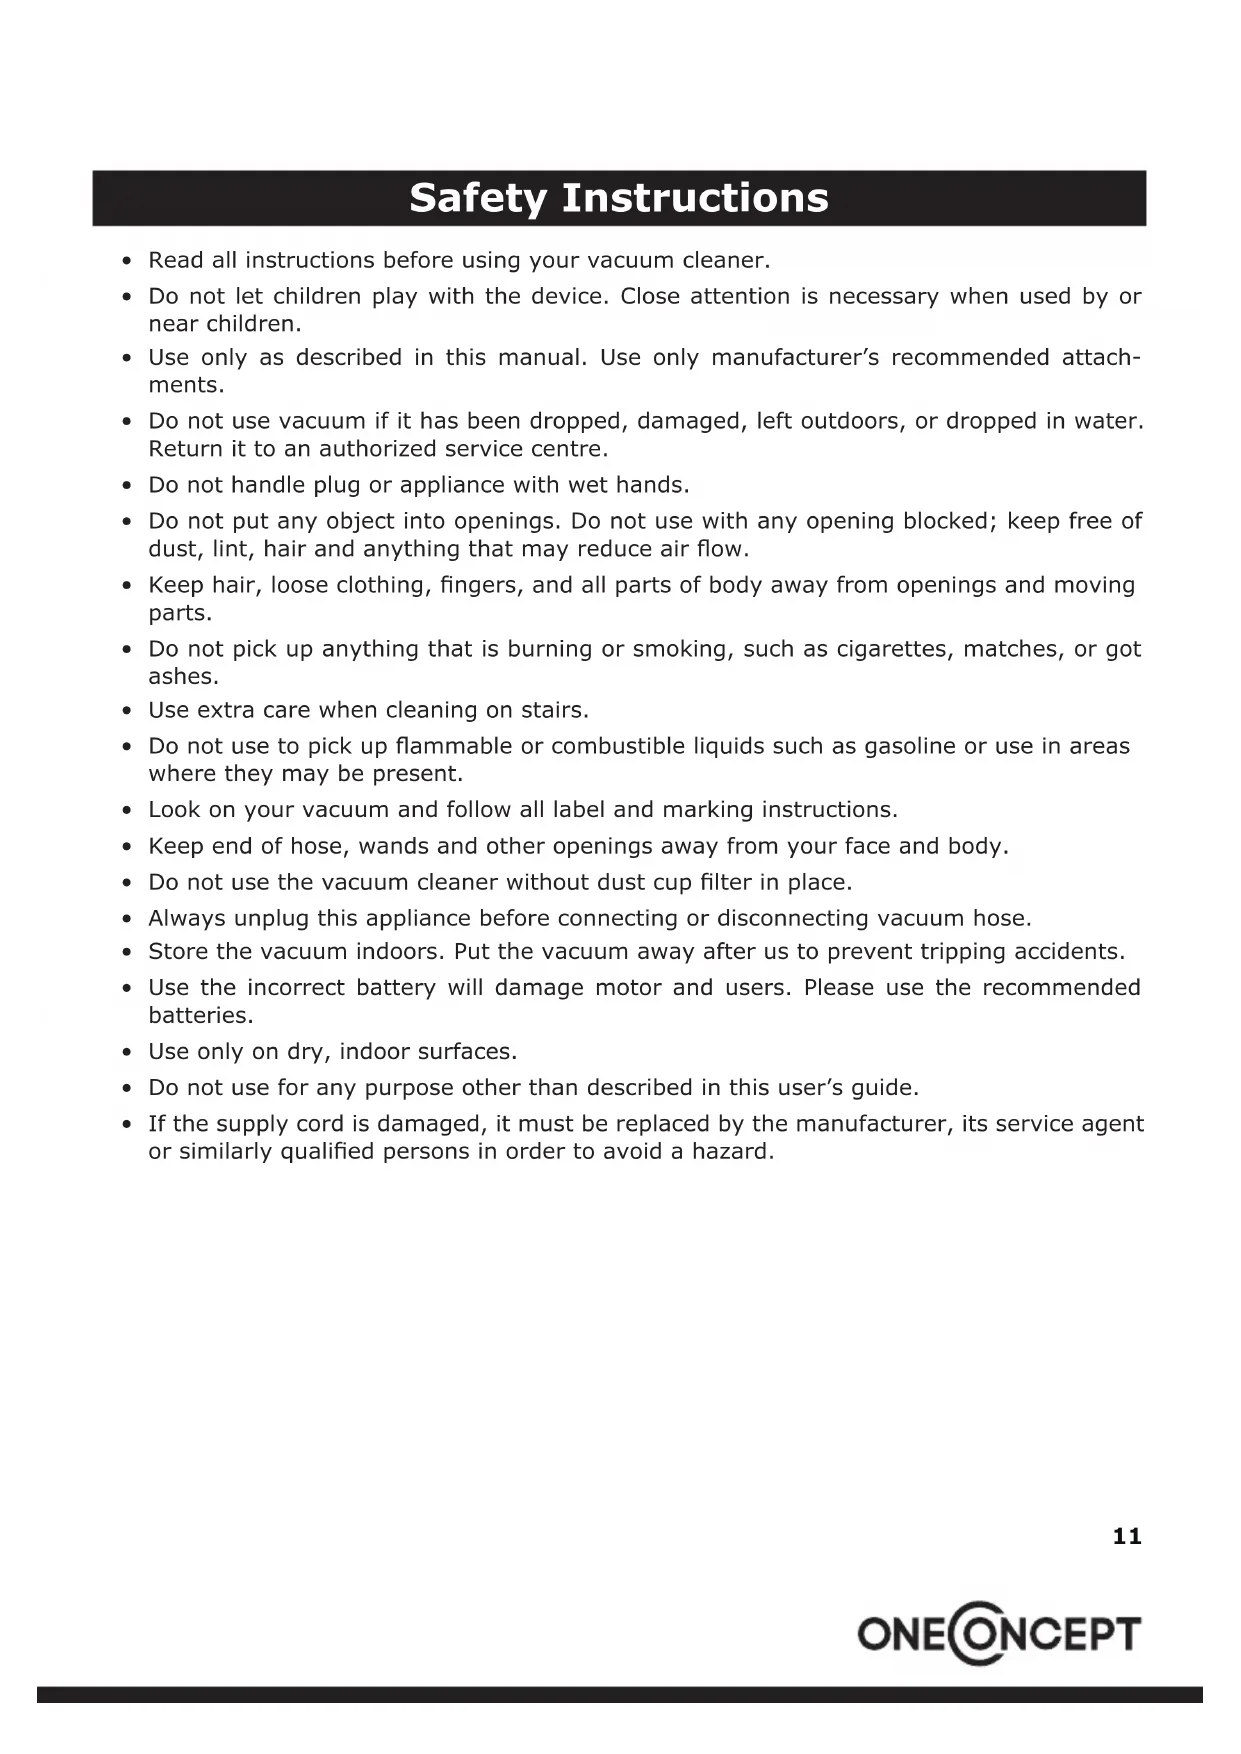
Safety Instructions
- Read all instructions before using your vacuum cleaner.
- Do not let children play with the device. Close attention is necessary when used by or near children.
- Use only as described in this manual. Use only manufacturer's recommended attachments.
- Do not use vacuum if it has been dropped, damaged, left outdoors, or dropped in water. Return it to an authorized service centre.
- Do not handle plug or appliance with wet hands.
- Do not put any object into openings. Do not use with any opening blocked; keep free of dust, lint, hair and anything that may reduce air flow.
- Keep hair, loose clothing, fingers, and all parts of body away from openings and moving parts.
- Do not pick up anything that is burning or smoking, such as cigarettes, matches, or got ashes.
- Use extra care when cleaning on stairs.
- Do not use to pick up flammable or combustible liquids such as gasoline or use in areas where they may be present.
- Look on your vacuum and follow all label and marking instructions.
- Keep end of hose, wands and other openings away from your face and body.
- Do not use the vacuum cleaner without dust cup filter in place.
- Always unplug this appliance before connecting or disconnecting vacuum hose.
- Store the vacuum indoors. Put the vacuum away after us to prevent tripping accidents.
- Use the incorrect battery will damage motor and users. Please use the recommended batteries.
- Use only on dry, indoor surfaces.
- Do not use for any purpose other than described in this user's guide.
- If the supply cord is damaged, it must be replaced by the manufacturer, its service agent or similarly qualified persons in order to avoid a hazard.
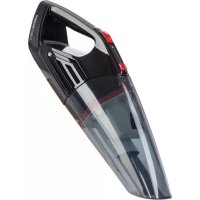
Device Description

1 air turbo brush
2 aluminum tube
3 tube release button
4 body release button
5 indicator light
6 powerswitch
7 dustcup
8 dust tank upper part release button
9 dust tank bottom release button
10 multi crevice nozzle
11 transformation joint
12 charger
13 chargingseat
14 sponge, HV cotton
Assembly
Install the main brush
If you want to use the main brush shown in the picture on the right connection.


Install the connecting joint
Insert the 2-in-1 crevice/brush tool into the connecting joint. It does not click into place. Insert the connecting joint into the main body until you hear an audible clicking noise.
To disassemble the 2-in-1 crevice/ brush tool from the pole, pull the 2-in-1 tool straight out from the connecting joint. Press the red pole attachment release button then remove the connecting joint.

Remove and install the dust cup
You can use the aluminium tube to extend the head (when you have heard a click during installation, the installation has been successful), and then the other side of the connect accessories in the pipe (right), so that it can be used as vertical vacuum cleaner.

Remove and install the dust cup
(a) Remove dust cup from body: push the release button of dust cup. Then take out the dust cup from body.
(b) Install dust cup on body: first make the underside of dust cup to connect with the body. (Please pay attention to the fitting position and direction). Then push the dust cup to close with the body. The dust cup will be locked after hearing clicking noise.
Installation and remove the battery pack
(a) Remove
Slide and hold the red battery release button located on the bottom of the main body. Then the battery slides out of place.
(b) Insert
According to the direction along the guide into the battery pack, heard a loud "crack" the sound of the dust cup lock.

Brush roller disassembly and installation
(a) Disassembly; First of all, as shown in the picture on the right will lock on to brush marks over counter-clockwise to the open position, remove the roller cover plate is placed at a side. Then on synchronous belt (shadow), remove the roller.


How to drop dust and clean the dust cup
- Remove the dust cup from body.
- Press the dust cup bottom release button, then the dust will fall down automatically. Usually you may only do like this to drop the dust.
- If find the plastic filter system too dirty, please press the dust cup cover (for air exhaust) release button, take out the filter assembly out of the dust cup, then you can clean them with soft brush or wash them with water. You should dry them completely before you use again.
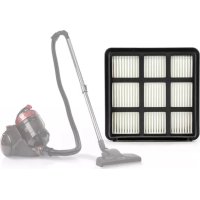
Change or cleaning the sponge and HV cotton filter
- Remove the dust cup from body.
- Rotate the dust cup cover anticlockwise from "close" to "open", take out the dust cup cover. Draw out the sponge and HV cotton filter set. (fig. A)
- Pull up the knob of the filter frame, and pull out the sponge filter and HV cotton filter from the case box. Cleaning the Sponge and HV cotton filter by soft brush or rinse it in lukewarm water and dry them completely before use again.
- All the filters are washable. We recommend you to clean the filters when feeling the suction power becoming weak.
- The above filters should be equipped in correct places when work the vacuum machine.
Charging products
When charging, please put the machine in charge inside, then put the charger connected to the outlet in the home. Charging a place near the corner edge, lest produce harm such as tripping.


Troubleshooting Guid
| PROBLEM POSSIBLE REASON POSSIBLE SOLUTION | ||
| Machine does not work. Battery may have no electricity. | Check the battery for electric or change the battery. | |
| The machine cannot suck ash or suction is very weak | 1. The dust cup is full. 2. Lack of battery power | 1. Empty dust cup. 2. Connect the charger. |
| Dust escaping from vacuum. | 1. Dust cup is full. 2. The dust filter dust cup cup bottom there may not be assembled. | 1. Empty dust cup. 2. Check to see if the dust at the bottom of the cup lock button. |
| Vacuum brushes will not pick-up. | Dust cup is full. Empty and clean dust cup container. | |
Disposal Considerations

According to the European waste regulation 2002/96/EC this symbol on the product or on its packaging indicates that this product may not be treated as household waste. Instead it should be taken to the appropriate collection point for the recycling of electrical and electronic equipment. By ensuring this product is disposed of correctly, you will help prevent potential negative consequences for the environment and human health, which could otherwise be caused by inappropriate waste handling of this product. For more detailed information about recycling of this product, please contact your local council or your household waste disposal service.
Your product contains batteries covered by the European Directive. 2006/66/EC, which cannot be disposed of with normal household waste. Please check local rules on separate collection of batteries. The correct disposal of batteries helps prevent potentially negative consequences on the environment and human health.
Declaration of Conformity

Producer: Chal-Tec GmbH, Wallstraße 16, 10179 Berlin. Germany
This product is conform to the following European Directives:
2004/108/EC (EMC)
2011/65/EU (RoHS)
2006/95/EC (LVD)