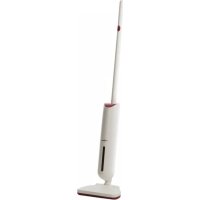
Clean Master - Vacuum Cleaner OneConcept - Free user manual and instructions
Find the device manual for free Clean Master OneConcept in PDF.
User questions about Clean Master OneConcept
0 question about this device. Answer the ones you know or ask your own.
Ask a new question about this device
Download the instructions for your Vacuum Cleaner in PDF format for free! Find your manual Clean Master - OneConcept and take your electronic device back in hand. On this page are published all the documents necessary for the use of your device. Clean Master by OneConcept.
USER MANUAL Clean Master OneConcept
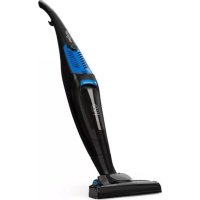
Cyclonic vacuum cleaner
Aspiradora Cyclonic
text_image
QR code image containing encoded data, no visible human-readable textINHALTSVERZEICHNIS
Technische Daten 3
natural_image
Close-up of a black vacuum cleaner with an arrow pointing to the handle (no text or symbols visible)natural_image
Two black cylindrical objects with a grid pattern, one being shifted and the other tilted (no text or symbols visible)natural_image
Diagram of a vacuum cleaner with attached cable, showing internal components and airflow direction (no text or labels)natural_image
Close-up of a curved pipe or tube with a downward arrow indicating compression or dislocation (no text or symbols)natural_image
Close-up of a metallic mechanical component with no visible text or symbolsnatural_image
Technical line drawing of a mechanical device with no visible text or symbolsREINIGUNG
natural_image
Technical line drawing of a mechanical component with no visible text or symbolsnatural_image
Hand holding a transparent cleaning device with a mesh chamber and handle, showing internal structure (no text or symbols visible)natural_image
Symbol of a trash bin crossed with a diagonal line, representing no waste or discharge (no text or labels)Congratulations on purchasing this equipment. Please read this manual carefully and take care of the following hints to avoid damages. Any failure caused by ignoring the items and cautions mentioned in the instruction manual is not covered by our warranty and any liability. Scan the QR code to get access to the latest user manual and other information about the product:

text_image
QR code image containing encoded data, no visible human-readable textCONTENT
Technical Data 11
Declaration of Conformity 11
Safety Instructions 12
Product Overview 13
Assembly 14
Cleaning 15
Troubleshooting 17
Hints on Disposal 18
TECHNICAL DATA
| Item number 10033030 | |
| Power supply 220-240 V ~ 50/60 Hz | |
| Power (Watt) 700 W | |
| Accessories: filter (item number) 10033031 | |
DECLARATION OF CONFORMITY
Producer:
Chal-Tec GmbH, Wallstraße 16, 10179 Berlin, Germany.

This product is conform to the following European Directives:
2014/30/EU (EMC)
2014/35/EU (LVD)
2013/666/EU (ErP)
2011/65/EU (RoHS
SAFETY INSTRUCTIONS
- Read all instructions before using the vacuum cleaner and save for future reference. To reduce the risk of personal injury or damage to your vacuum, use only recommended accessories.
- Do not leave vacuum unattended when it is plugged in and/or operating. Unplug unit when not in use.
- Never operate this unit when flammable materials or when vapors are present because electrical devices produce arcs or sparks that can cause a fire or explosion.
- Always disconnect the plug from the wall outlet before removing the tank cover.
- Do not allow to be used as a toy. Close attention is necessary when vacuum is in use by or near children.
- Use only as described in this manual. Use only manufacturer's recommended attachments.
- Do not use with a damaged cord, plug, or other parts.
- If your vacuum is not working as it should, has missing parts, has been dropped, damaged, left outdoors, or dropped into water, call customer service.
- Sparks inside the motor can ignite flammable vapors or dust. To reduce the risk of fire or explosion, do not use near combustible liquids, gases, dusts, gasoline or other fuels, lighter fluid, cleaners, oil-based paints, natural gas, coal dust, magnesium dust, grain dust, aluminum dust or gun powder.
- Do not pull or carry the appliance by cord, close a door on cord, or pull cord around sharp edges or corners.
- Do not unplug by pulling on cord. To unplug, grasp the plug firmly.
- Do not handle plug or appliance with wet hands.
- Do not put any object into ventilation openings. Do not vacuum with any ventilation openings blocked; keep free of dust, lint, hair, or anything that can reduce air flow.
- Keep hair, loose clothing, fingers, and all parts of body away from openings and moving parts.
- Turn off the control before unplugging.
- Use extra care when cleaning stairs.
- Do not use to pick up flammable or combustible liquids such as gasoline or use in areas where they may be present.
- Do not pick up anything that is burning or smoking, such as cigarettes, matches, or hot ashes.
- Do not use without filters in place.
- Always unplug this appliance before connecting or disconnecting vacuum hose.
- Store the vacuum indoors. Put the vacuum away after use to prevent tripping accidents.
PRODUCT OVERVIEW

text_image
Carrying handle Cable rewind button On/Off switch (also suction regulator) Air outlet plate Wheel Upper cover Cover lock Dust bin handle Dust bin Lower cover Suction opening Basis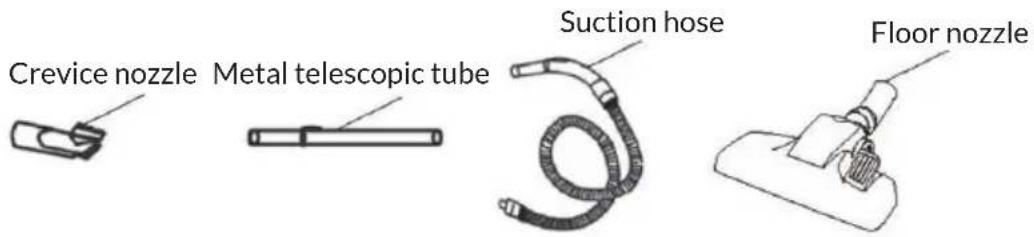
text_image
Crevice nozzle Metal telescopic tube Suction hose Floor nozzleSuction Nozzles
Note: Always turn off the vacuum cleaner first before changing the nozzles.
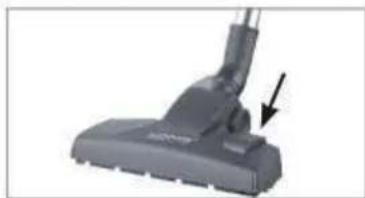
1/Floor nozzle
natural_image
Close-up of a black vacuum cleaner's head and lever, showing no text or symbols on the device itselfThe floor nozzle is suitable both for carpets and smooth floors, with the foot switch; you can switch between floor and carpet. A brush is deployed on the device bottom for smooth floors.
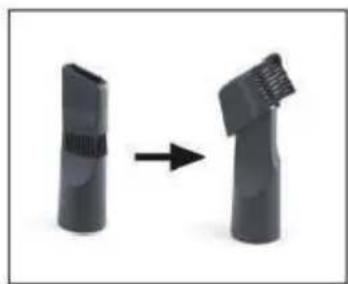
2/Crevice and brush nozzle
natural_image
Two black plastic cylindrical objects with a right-pointing arrow indicating transformation (no text or symbols)Fold over the end piece in the direction of the arrow to convert the crevice nozzle into a brush nozzle. The crevice nozzle is suitable for upholstery, cleaning the inside of cars and for all nooks and crannies that cannot be reached with the other nozzles. The brush nozzle is suitable for all uneven objects, furniture, lamps, profiles, and skirting boards, window ledges, etc.
ASSEMBLY
Unpacking the product contents
- Unpack all parts and make sure that the scope of delivery is complete and check for any damages from transport.
- If you identify damages to the components, do not use them.
- If necessary, remove any piece of paper or sticker etc. from the dust bin.
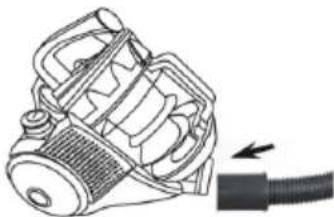
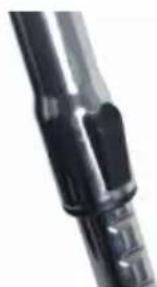
Inserting /removing the hose
- Insert the suction hose connector into the suction opening on device (see arrow). It must audibly lock into place.
- To remove the suction hose push the knob on the connector and pull the suction hose out.
natural_image
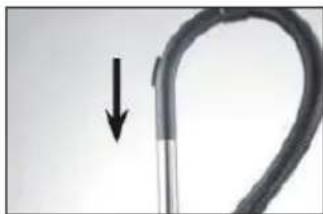
Technical line drawing of a mechanical device with a black cable and arrow indicating motion (no text or symbols)Inserting/removing the telescopic tube
- Insert the open end of the handle into the corresponding opening on the telescoping tube. In the process, turn the handle back and forth somewhat. Check to make sure that the connection is secure.
- To remove the telescoping tube pull it off of the handle.
natural_image
Close-up of a curved mechanical component with a downward arrow indicating motion (no text or symbols)Adjusting the length of the telescopic tube
- Push the slider on the telescoping tube down and set the desired length.
- Release the slider and move the tube forward until it locks into place.
Mounting/removing suction nozzles
- Insert the open end of the telescoping tube in one of the enclosed suction nozzles up to the stop. Turn the nozzle back and forth slightly in the process.
- The suction nozzles can also be attached directly to the suction hose without the telescoping tube for more flexibility.
• To remove a suction nozzle pull it off.
natural_image
Close-up of a black mechanical component with no visible text or symbolsRemoving/inserting the dust bin
- Removal: Push the release button on the dust bin and take it out of the device by the handle.
- Insertion: Take the dust bin by the handle and first place the bottom of the bin in the device (the bottom is facing down and handle is facing up). Then push the handle against the device housing until the dust bin audibly locks into place. Hold the device by the handle and lift it to check whether the dust bin is properly seated.
natural_image
Technical line drawing of a mechanical device with no visible text or symbolsCLEANING
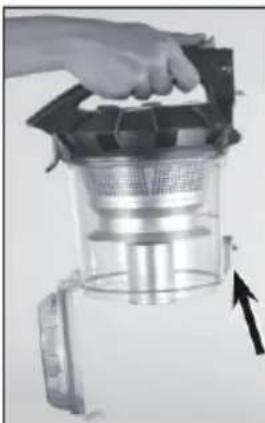
Emptying the dust bin
1 Push the release button on the dust bin and pull it out of the device by the handle.
natural_image
Technical line drawing of a mechanical component with no visible text or symbols2 Hold the dust bin over an open garbage bin. The dust bin should be as close as possible to the garbage bin so that dust from the dust bin only falls into the garbage bin and is not dispersed in the surrounding area.
natural_image
Hand holding a glass kitchen grater with a mesh filter and handle, showing internal structure (no text or symbols visible)3 Push the button to open the dust bin. The bottom of the dust bin will open and the dirt will fall out.
4 Shut the bottom of the dust bin again. The fastener must audibly lock into place.
5 Insert the dust bin in the device: Take hold of it by the handle and insert the bottom of the bin in the device first. Then push the handle against the device housing until the dust bin audibly locks into place. Hold the device by the handle and lift it to check whether the dust bin is properly seated.
Cleaning the dust filter
The dust filter is located in the dust bin.
1 Remove the suction hose from the dust bin.
2 Push the release button on the dust bin and pull it out of the device by the handle.
3 Turn the dust bin cover to remove it.
Note: Orientation marks for the removal and placement of the cover are provided on the cover and dust bin. You can remove the cover when the mark on the dust bin is pointing towards the open lock symbol on the cover.
4 Pull the dust bin cover with the dust filter out.
5 Open the dust bin cover by using the lever to push it up.
6 Take out the dust filter and the foam dust filter. If necessary, rinse the foam dust filter out thoroughly with clean, lukewarm water.
Note: Do not in any case clean the filter in the washing machine or dishwasher! Then shake off any remaining water and let the filter air dry completely before reinstalling it.
7 Place the dust filter back in the dust bin cover and close it. The lever must audibly lock into place.
8 Place the dust filter cover with the dust filter back in the dust bin and turn it until firmly tightened. The cover is properly in place when the mark on the dust bin is pointing towards the closed lock symbol on the cover.
Note: Insert only dry filters into the unit.
TROUBLESHOOTING
Note: If your device no longer functions properly, exhibits damages or requires a spare part, please contact the customer service. For your own safety, do not perform any repairs yourself.
The following table gives you tips on how to resolve minor problems yourself.
| Problems Potential | causes Solutions/tips | |
| The suction power is weak. | Is the auxiliary air valve on the handle open? | Close it. |
| Is the dust bin too full? Empty the bin. | ||
| Are the filters very dirty? Clean the filters. | ||
| Is the nozzle, telescoping tube or suction hose plugged? | Turn the device off, pull the mains plug out of the socket and remove the obstruction. | |
| The vacuum cleaner has no suction power. | Is the mains plug not correctly connected with the socket? | Correct the position of the mains plug. |
| Is the socket defective? Try another socket. | ||
| Has the fuse blown or is it defective? | Check the fuse for your mains connection. | |
| Are the filters plugged? Clean the dust and exhaust filter. | ||
| The device emits dust when vacuuming. | Has the dust bin not been closed properly and/or is it not (properly) inserted in the device? | Correct this. |
| The power cord cannot be wound up completely. | The cord has not been properly wound up in the device. | Pull it out somewhat and then push the button for engaging the cord winder again. |
| An unpleasant odour develops when vacuuming. | Are you using the device for the first time? | An odour often develops when using new devices for the first time. The odour should disappear once you have used the device a few times. |
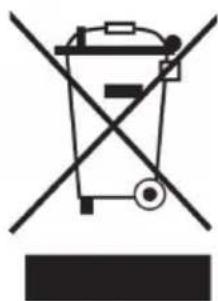
HINTS ON DISPOSAL
natural_image
Symbol of a trash bin crossed with a diagonal line, no text or labels presentAccording to the European waste regulation 2012/19/EU this symbol on the product or on its packaging indicates that this product may not be treated as household waste. Instead it should be taken to the appropriate collection point for the recycling of electrical and electronic equipment. By ensuring this product is disposed of correctly, you will help prevent potential negative consequences for the environment and human health, which could otherwise be caused by inappropriate waste handling of this product. For more detailed information about recycling of this product, please contact your local council or your household waste disposal service.
Chère cliente, cher client,
text_image
QR code image containing encoded data, no visible human-readable textSOMMAIRE
Fiche technique 19
DÉCLARATION DE CONFORMITÉ

Fabricant :
Chal-Tec GmbH, Wallstraße 16, 10179 Berlin, Allemagne.
natural_image
Close-up of a black vacuum cleaner with an arrow pointing to the handle (no text or symbols visible)natural_image
Two black cylindrical objects with a grid pattern, connected by an arrow indicating transformation (no text or symbols)natural_image
Technical line drawing of a mechanical device with a cable, showing internal components and a directional arrow (no text or symbols)natural_image
Close-up of a curved pipe with a downward arrow indicating compression or dislocation (no text or symbols)natural_image
Close-up of a metallic mechanical component with no visible text or symbolsnatural_image
Technical line drawing of a mechanical device with no visible text or symbolsnatural_image
Technical line drawing of a mechanical component with no visible text or symbolsnatural_image
Hand holding a transparent kitchen appliance with a handle and internal filter (no visible text or symbols)natural_image
Symbol of a trash bin crossed with a diagonal line, no text or numbers presenttext_image
QR code image containing encoded data, no visible human-readable textÍNDICE
Datos técnicos 27
natural_image
Close-up of a black vacuum cleaner with an arrow pointing to the handle (no text or symbols visible)natural_image
Two black cylindrical objects with a right-pointing arrow indicating transformation (no text or symbols)natural_image
Diagram of a mechanical device with a cable and arrow indicating direction (no text or symbols)natural_image
Close-up of a curved mechanical component with a downward arrow indicating motion (no text or symbols)natural_image
Close-up of a metallic cylindrical mechanical component with no visible text or symbolsnatural_image
Line drawing of a mechanical device with a black arrow indicating direction (no text or symbols)LIMPIEZA
natural_image
Technical line drawing of a mechanical device with no visible text or symbolsnatural_image
Close-up of a hand holding a transparent cylindrical device with a mesh chamber and an arrow pointing to it (no visible text or symbols)natural_image
Symbol of a trash bin crossed with a diagonal line, no text or numbers presenttext_image
QR code image containing encoded data, no visible human-readable textINDICE
Dati tecnici 35