Clean Tower - Vacuum Cleaner OneConcept - Free user manual and instructions
Find the device manual for free Clean Tower OneConcept in PDF.

| Brand | OneConcept |
| Model | Clean Tower |
| Product Type | Canister Vacuum Cleaner |
| Power Supply | 220-240 V~ 50/60 Hz |
| Rated Power | 800 W |
| Article Number | 10033271 / 10033272 |
| Included Nozzle | Carpet and hard floor nozzle with change lever |
| Collection Type | Dust Collector Bin |
| Bin Capacity | "Full bin" mark (approx. 1.5 L) |
| Filters | Internal filter (washable) |
| Cable Length | Approx. 5 m (estimate) |
| Cable Rewinder | Yes, rewinding support |
| Handle | Removable upper handle |
| Weight | Approx. 4.5 kg (estimate) |
| Dimensions (L × W × H) | Approx. 30 × 25 × 40 cm (estimate) |
| Noise Level | Approx. 75 dB (estimate) |
| Intended Use | Household use only |
| Safety | Automatic shut-off when bin full? (not specified, omitted) |
| Maintenance | Empty the bin after use, clean the filters regularly |
| Included Accessories | Floor nozzle, handle, vacuum body |
| Warranty | 2 years (standard) |
Frequently Asked Questions - Clean Tower OneConcept
User questions about Clean Tower OneConcept
0 question about this device. Answer the ones you know or ask your own.
Ask a new question about this device
Download the instructions for your Vacuum Cleaner in PDF format for free! Find your manual Clean Tower - OneConcept and take your electronic device back in hand. On this page are published all the documents necessary for the use of your device. Clean Tower by OneConcept.
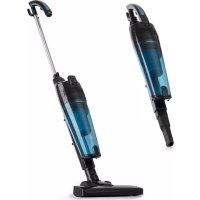
USER MANUAL Clean Tower OneConcept
Bagless Vacuum Cleaner
Aspirateur sans sac
Congratulations on purchasing this equipment. Please read this manual carefully and take care of the following hints to avoid damages. Any failure caused by ignoring the items and cautions mentioned in the instruction manual are not covered by our warranty and any liability. Scan the QR code to get access to the latest user manual and other information about the product.

CONTENTS
Technical Data 13
Safety Instructions 14
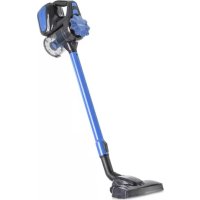
Product Overview 15
Assembling Cleaner 16
Operation 18
Maintenance 19
Troubleshooting 20
Disposal Considerations 20
TECHNICAL DATA
| Item number 10033271 1003 | 3272 |
| Power supply 220-240 V~ 50/60 Hz | |
| Power input 800 W | |
SAFETY INSTRUCTIONS
- Read all instructions before using the vacuum cleaner and save for future reference. To reduce the risk of personal injury or damage to your vacuum, use only recommended accessories.
- Do not leave vacuum unattended when it is plugged in and/or operating. Unplug unit when not in use.
- Never operate this unit when flammable materials or when vapors are present because electrical devices produce arcs or sparks that can cause a fire or explosion.
- Always disconnect the plug from the wall outlet before removing the tank cover.
- Do not allow to be used as a toy. Close attention is necessary when vacuum is in use by or near children.
- Use only as described in this manual. Use only manufacturer's recommended attachments.
- Do not use with a damaged cord, plug, or other parts.
-
If your vacuum is not working as it should, has missing parts, has been dropped, damaged, left outdoors, or dropped into water, call customer service.
-
Sparks inside the motor can ignite flammable vapors or dust. To reduce the risk of fire or explosion, do not use near combustible liquids, gases, dusts, gasoline or other fuels, lighter fluid, cleaners, oil-based paints, natural gas, coal dust, magnesium dust, grain dust, aluminum dust or gun powder.
-
Do not pull or carry the appliance by cord, close a door on cord, or pull cord around sharp edges or corners.
- Do not unplug by pulling on cord. To unplug, grasp the plug firmly.
- Do not handle plug or appliance with wet hands.
- Do not put any object into ventilation openings. Do not vacuum with any ventilation openings blocked; keep free of dust, lint, hair, or anything that can reduce air flow.
- Keep hair, loose clothing, fingers, and all parts of body away from openings and moving parts.
- Turn off the control before unplugging.
- Use extra care when cleaning stairs.
- Do not use to pick up flammable or combustible liquids such as gasoline or use in areas where they may be present.
- Do not pick up anything that is burning or smoking, such as cigarettes, matches, or hot ashes.
- Do not use without filters in place.
Always unplug this appliance before connecting or disconnecting vacuum hose. - Store the vacuum indoors. Put the vacuum away after use to prevent tripping accidents.
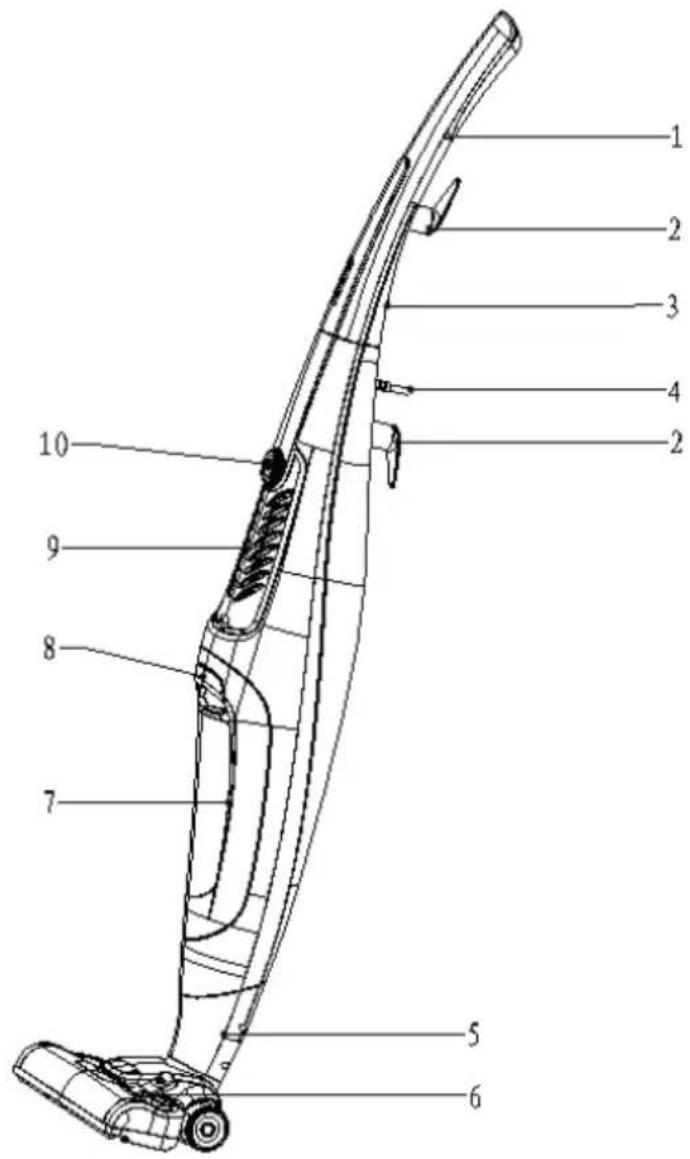
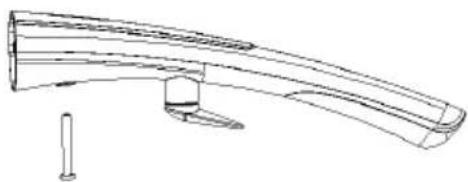
1 Upper handle
2 Cord hook
3 Bolt
4 Power cord
5 Carep/hard floor nozzle
6 Alternative lever
7 Dust cup
8 Dirt cup release button
9 Exhaust fence
10 On/of button
ASSEMBLING CLEANER
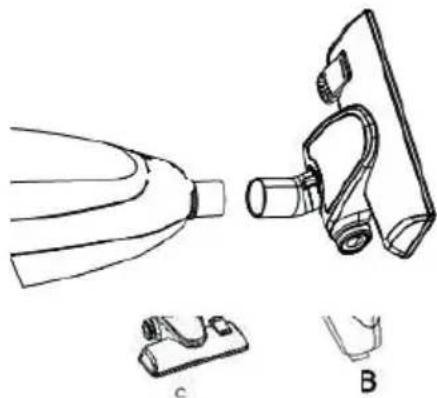
Carton contents
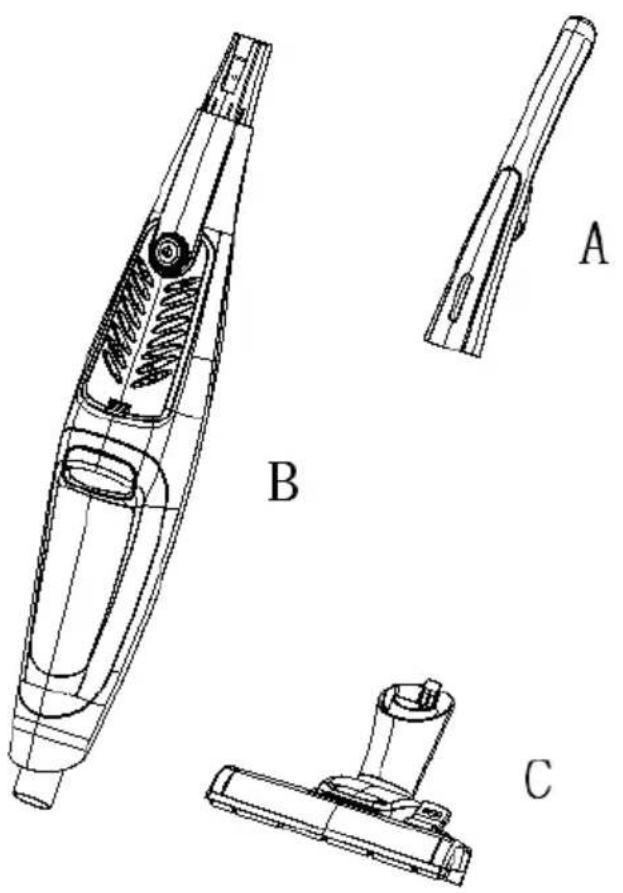
A Handle section
B Vacuum cleaner body
C Carpet / hard floor nozzle
- Remove cardboard (A) and (B). Insert Handle assembly into the cleaner body (Fig. below). Slide handle section onto the main housing. Tighten the fixed handle with bolt.
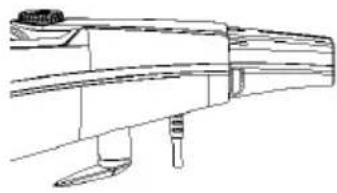
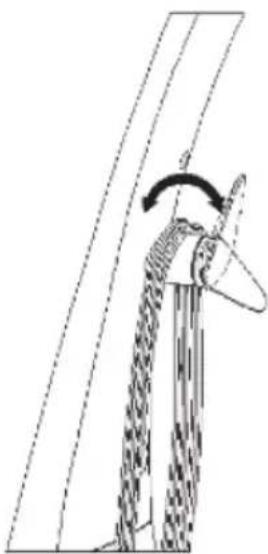
- Wrap the power cord by rotating the Handle cord hooker, and plug the power cord.
- Carefully insert the carpet / hard floor nozzle into the cleaner body.
OPERATION
Notes
- Operate cleaner only at voltage specified on rating label on back of the cleaner.
- This cleaner is intended for household use. Not intended for commercial use in any household or for any other commercial purpose.
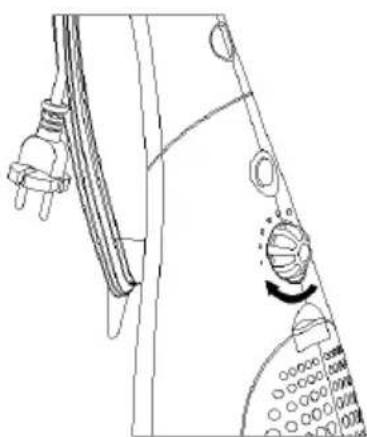
Power on
Switch the vacuum on at the power switch.
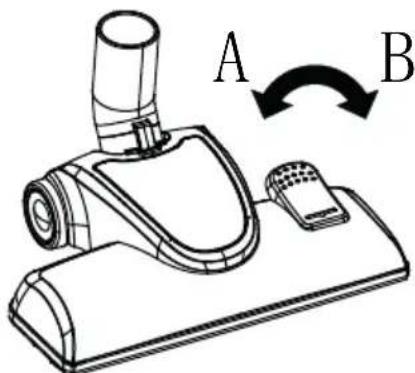
Carpet / hard floor nozzle
Carpets: Use with the lever in position A.
Hard floors: Use with the lever in position B.
MAINTENANCE
When to empty
We recommend that the dirt cup be emptied before the dirt reaches the dirt full level mark (Fig. 3-1) or after every use if you prefer.
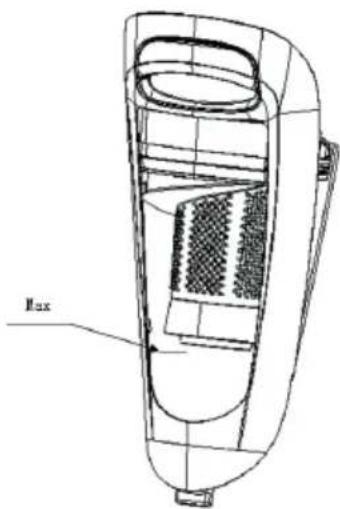
Note: Very tiny dust, such as flour or cornstarch, may block the filter and cause loss of suction. When using the cleaner for this type of dust, empty the cup and clean the filters required.
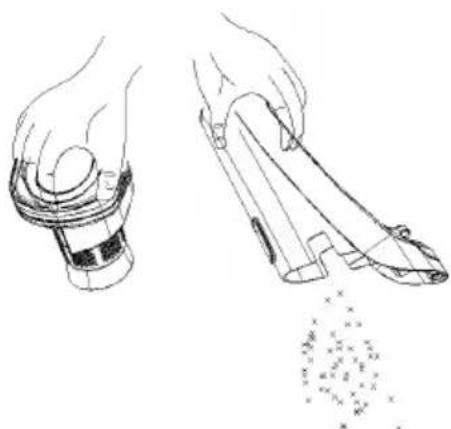
How to empty
Disconnect cleaner from electrical outlet. Do not use cleaner without dirt cup or filters in place.
Remove dirt cup: Life down slightly and firmly pull dirt cup straight up. Take out the filter support base and empty the dirt cup.
TROUBLESHOOTING
| Problem Possible Cause Possible Solution | ||
| The vacuum cleaner does not start. | The plug is not plugged in. | Put the plug into the socket. |
| Check that the plug and power cord are not damaged. | If the plug or power cord are damaged, contact the customer support. | |
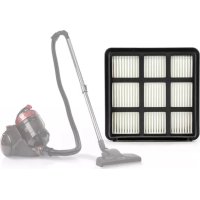
| Poor suction or the vacuum cleaner stops. | Is the dirt cup full? Is the nozzle or air channel blocked? Is the HEPA filter blocked or needs to be cleaned. | Remove the blockage from the nozzle or the HEPA filter. |
DISPOSAL CONSIDERATIONS
m = 311 ;
According to the European waste regulation 2012/19/EU this symbol on the product or on its packaging indicates that this product may not be treated as household waste. Instead it should be taken to the appropriate collection point for the recycling of electrical and electronic equipment. By ensuring this product is disposed of correctly, you will help prevent potential negative consequences for the environment and human health, which could otherwise be caused by inappropriate waste handling of this product. For more detailed information about recycling of this product, please contact your local council or your household waste disposal service.
Declaration of Conformity

Producer: Chal-Tec GmbH, Wallstraße 16, 10179 Berlin, Germany
This product is conform to the following European Directives
2009/125/EC (ErP)
2011/65/EU (RoHS)
2014/30/EU (EMV)
2014/35/EU (LVD)
Chere cliente, cher client,