
HPS532S - Washing machine ASKO - Free user manual and instructions
Find the device manual for free HPS532S ASKO in PDF.
| Product type | Washing machine |
| Brand | Asko |
| Model | HPS532S |
| Washing capacity | 8 kg |
| Dimensions (H x W x D) | 85 x 60 x 60 cm |
| Weight | 70 kg |
| Power supply | 220-240 V, 50 Hz, 10 A |
| Rated power | 2200 W |
| Energy class | A+++ |
| Maximum spin speed | 1600 rpm |
| Noise level (wash/spin) | 52 dB / 73 dB |
| Main functions | Programs: cotton, synthetic, delicate, wool, quick, rinse+spin, drain; options: delayed start, prewash, hold |
| Child safety | Yes (key lock) |
| Display | LED screen with remaining time indicator |
| Stacking compatibility | Yes (with Asko stacking kit) |
| Maintenance and cleaning | Regular cleaning of filter and door seal; periodic descaling |
| Spare parts and repairability | Available from Asko after-sales service |
| General information | User and installation manual included; anti-tip kit supplied |
Frequently Asked Questions - HPS532S ASKO
User questions about HPS532S ASKO
0 question about this device. Answer the ones you know or ask your own.
Ask a new question about this device
Download the instructions for your Washing machine in PDF format for free! Find your manual HPS532S - ASKO and take your electronic device back in hand. On this page are published all the documents necessary for the use of your device. HPS532S by ASKO.
USER MANUAL HPS532S ASKO
natural_image
Close-up of a textured ceramic or ceramic object with layered, crumpled surfaces (no visible text or symbols)
natural_image
Stack of knitted fabric sheets with visible folds and texture, no text or symbols presentBruksanvisning
Operating Instruction
Käyttöohje
Fitting and countersink instructions for integrated door.
natural_image
Exterior view of a white stainless steel cabinet with two doors and ventilation grilles (no text or symbols visible)Tippskydd
Appliance wallmounting kit instructions
When installing your Hidden Helper® as the picture shows, you must use tip guards on the washer and dryer. These can be required from your local dealer. Art. No. 8082293
Including this kit you will find.
I pc. Paper template
6 pcs. Screws
6 pcs. Plugs
2 pcs. Tip guards
To reduce the risk of fi re, electric shock, or injury to persons when using your appliance, follow basic precautions, including the following:
- Read all instructions before using the appliance.
- Do not allow children to play on or in the appliance. Close supervision of children is necessary when the appliance is used near children.
- Do not install or store this appliance where it will be exposed to weather.
- Do not repair or replace any part of the appliance or attempt any servicing unless specifically recommended in the user-maintenance instructions or in publiced user-repair instructions that you understand and have the skills to carry out.
- Save these instructions for future reference
Grounding instructions
• This appliance must be grounded.
- In the event of malfunction or breakdown, grounding will reduce the risk of electric shock by providing a path of least resistance for electric current.
This appliance is equipped with a cord having an equipment-grounding conductor and a grounding plug. The plug must be plugged into an appropriate outlet that is properly installed and grounded in accordance with all local codes and ordinances.
Warning!
- Improper connection of the equipment-grounding conductor can result in a risk of electric shock.
- Check with a qualified electrician or serviceman if you are in doubt as to whether the appliance is properly grounded.
- Do not modify the plug provided with the appliance - if it will not fit the outlet, have a proper outlet installed by a qualified electrician.
Connect to individual branch circuit
Installation of spacer in new machines
Note: The spacers must only be used with washing machines and tumble dryers manufactured by Asko Appliances, Sweden.
| Instruction Picture | |
| 1. Put the spacers on the washing machine. Make sure that the edges of the spacers are lined up carefully with the edge of the washing machine panel. | 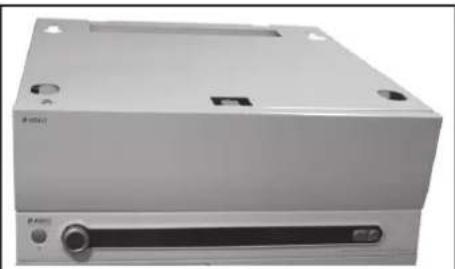 |
| 2. Remove the anti-tilt device from the tumble dryer. This is no longer needed. | 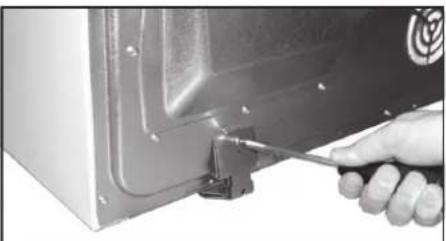 |
| 3. Open the knockout hole on the back of the dryer using a hammer and screwdriver. (You must not remove it completely, just open it.) | 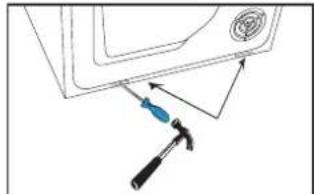 |
| 4. Screw out the feet of the tumble dryer 3 turns from their fully screwed-in position.Then lift up the tumble dryer. Put the back feet of the tumble dryer in the "keyholes" in the spacer and slide the tumble dryer backwards. Put the front feet down in the holes. | 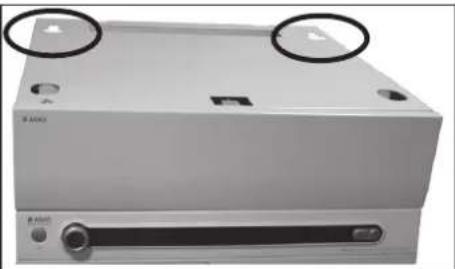 |
| 5. Remove the two outer screws on the back of the washing machine so that you can fit the anti-tilt device. | 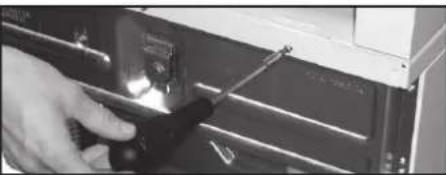 |
| 6. A Stacked installation. Attach the enclosed anti-tilt protection to the washing machine and the dryer.Push the upper part of the anti-tilt protection into the dryer until it hooks into place. Screw the lower part into place with the screws you removed from the washing machine (A).If the machines are set right against the wall, the dryer cable must be routed through the cutout on the middle section (B). | 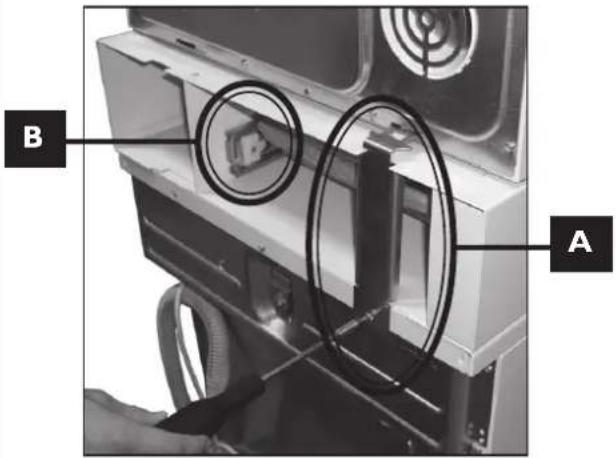 |
| 6. B Installation on washing machine or tumble dryer. Attach the enclosed anti-tilt protection as illustrated.Screw them into place with the screws you removed from the washing machine (A). | 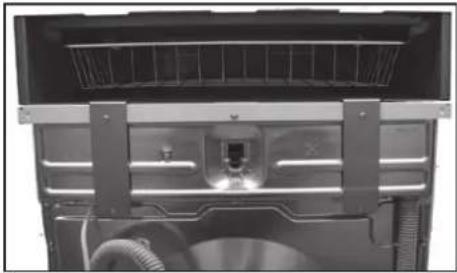 |
| Note!Check that the edges of the spacers are lined up carefully with the edges of the washing machine and tumble dryer before you screw the anti-tilt device in place. | |
Installation of spacer on machines that have been stacked
Note: The spacers must only be used with washing machines and tumble dryers manufactured by Asko Appliances, Sweden.
| Instruction Picture | |
| 1. Remove the anti-tilt device, which is no longer needed. Lift the tumble dryer down. | |
| 2. Put the spacers on the washing machine. Make sure that the edges of the spacers are lined up carefully with the edge of the washing machine panel. |  |
| 3. Screw out the feet of the tumble dryer 3 turns from their fully screwed-in position.Then lift up the tumble dryer. Put the back feet of the tumble dryer in the "keyholes" in the spacer and slide the tumble dryer backwards. Put the front feet down in the holes. | 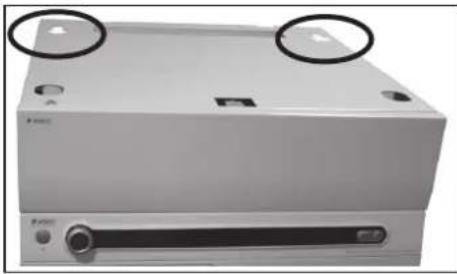 |
| 4. A Stacked installation. Attach the enclosed anti-tilt protection to the washing machine and the dryer.Push the upper part of the anti-tilt protection into the dryer until it hooks into place. Screw the lower part into place with the screws you removed from the washing machine (A).If the machines are set right against the wall, the dryer cable must be routed through the cutout on the middle section (B). | 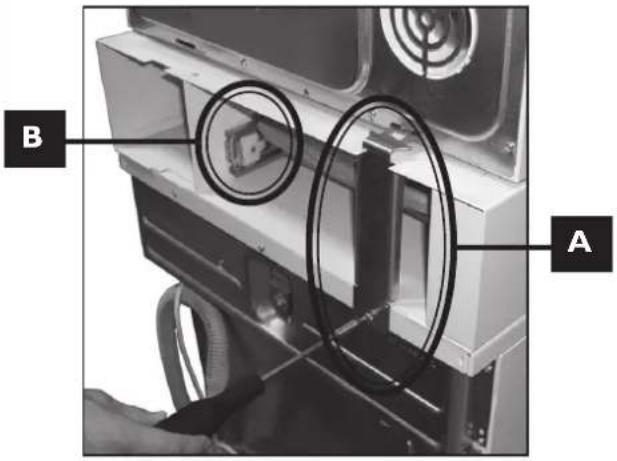 |
| 4. B Installation on washing machine or tumble dryer. Attach the enclosed anti-tilt protection as illustrated.Screw them into place with the screws you removed from the washing machine . | 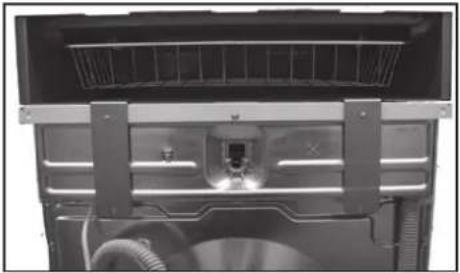 |
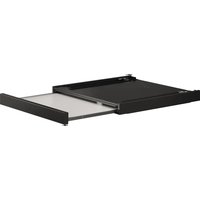
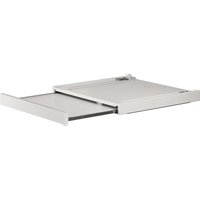
Adjusting the ironing board
| Instruction Picture | |
| 1. Press the door to open it. | |
| 2. Take hold of the handle and pull it out until it is fully extended. Fold up the ironing board. | 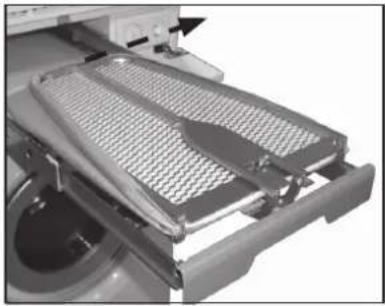 |
| 3. To ensure that it is stable, it is important that the back edge of ironing board is pushed firmly against the tumble dryer when it is in the locked position. | 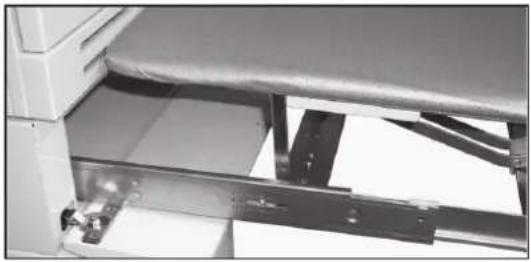 |
| 4. If necessary, you can adjust the ironing board.Carefully bend out the two plastic latches (one on each side) using a screwdriver. Pull out the ironing board. | 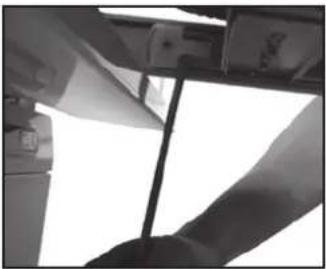 |
| 5. Adjust the extension length by undoing the screws on the two stops A(one on each side). Check that the plastic pins are locked B.Replace the ironing board.A sleeve board is available as an accessory for the ironing board. | 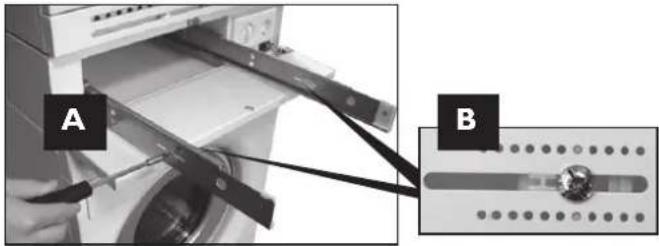 |
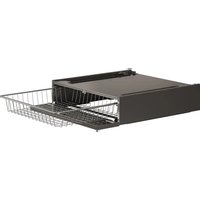
Installing the sleeve board (accessorie)
| Instruction Picture | ||
| 1. Assemble the enclosed holder on right or left side of the Ironing Board with the two screws. | 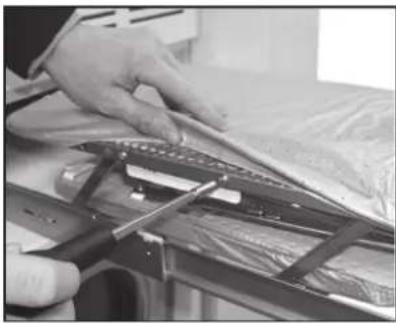 | |
| 2. Fold out the bars on the Sleeve Board and put these in the holder. | 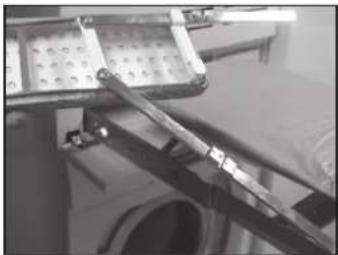 |  |
| 3. To loosen the Sleeve Board:• Push up and pull out.• Keep the board under the Ironing Board when it's not in use. |  | |
FI
natural_image
Interior view of a refrigerator with ventilation grilles and a central control unit (no visible text or symbols)Item No.: 80 810 26. SE Rev. 05. We reserve the right to make changes. Printed on environmentally-friendly paper that meets the demands of the Swedish environmental organisations Miljöförbundet and Naturskyddsförreningen.

Brand : ASKO
Model : HPS532S
Category : Washing machine