PHLGA 20Li A1 - Heat gun PARKSIDE - Free user manual and instructions
Find the device manual for free PHLGA 20Li A1 PARKSIDE in PDF.

| Product Type | Cordless Hot Air Gun |
| Brand | Parkside |
| Model | PHLGA 20Li A1 |
| Rated Input Voltage | 20 V== |
| Motor Power Consumption | 250 W |
| Protection Type | IPXO |
| Maximum Airflow | 170 l/min |
| Temperature - Position I | 250 °C |
| Temperature - Position II | 550 °C |
| Cold Air (Position 0) | Yes |
| Runtime with 2 Ah Battery | Approx. 8 min |
| Runtime with 4 Ah Battery | Approx. 16 min |
| Compatible Batteries | PAP 20 A1, PAP 20 A2, PAP 20 A3 (X 20 V TEAM series) |
| Compatible Chargers | PLG 20 A1, PLG 20 A3, PDSLG 20 A1 |
| Included Accessories | Reduction nozzle, surface nozzle, reflector nozzle, scraper (2 pieces), manual |
| Functions | 3 temperature levels + cold air, switch with lock |
| Main Applications | Paint stripping, heat shrink tubing, plastic forming, glue dissolving, pipe thawing |
| Warranty | 3 years |
| Maintenance | Clean with brush or cloth; do not use detergent |
| Storage | Dry place, out of reach of children, after cooling down |
| After-Sales Service | Grizzly Tools (contact details in manual) |
| Spare Parts | Available at www.grizzlytools-service.eu |
| Charging Temperature | 4 to 40 °C |
| Operating Temperature | -20 to 50 °C |
Frequently Asked Questions - PHLGA 20Li A1 PARKSIDE
User questions about PHLGA 20Li A1 PARKSIDE
0 question about this device. Answer the ones you know or ask your own.
Ask a new question about this device
Download the instructions for your Heat gun in PDF format for free! Find your manual PHLGA 20Li A1 - PARKSIDE and take your electronic device back in hand. On this page are published all the documents necessary for the use of your device. PHLGA 20Li A1 by PARKSIDE.
USER MANUAL PHLGA 20Li A1 PARKSIDE
text_image
PDF ONLINE www.lidl-service.com
natural_image
Black outdoor portable hair dryer with 'PARKSIDE' branding and a cross symbol on a box (no readable text beyond branding)
Cordless Hot Air Gun
Translation of the original instructions
NL BE
Accu-heteluchtventilator
Before reading, unfold the page containing the illustrations and familiarise yourself with all functions of the device.
FR BE
GB / IE Translation of the original instructions Page
Service-Center....13
Importeur 13
Original-
Intended Use......14
General description......15
Extent of the delivery 15
Overview....15
Functional description 15
Technical specifications......15
Safety information......16
Symbols used in the instructions ..... 16
Symbols on the device 16
General notes on safety 16
Additional safety instructions ..... 17
Initial start-up 18
Operation 18
Removing/inserting the rechargeable battery....18
Switching ON and OFF 18
Assembling the paint scraper .....18
Use of adapter nozzles....18
Restrictor....18
Surface nozzle.... 19
Reflector nozzle 19
Paint scraper 19
Cleaning/maintenance/storage.19
General cleaning and maintenance work.... 19
Storage....19
Waste disposal and environmental protection ......19
Spare parts/Accessories......20
Guarantee 21
Repair Service....22
Service-Center......22
Importer 22
Translation of the original EC declaration of conformity .....74
Exploded Drawing 81
Introduction
Congratulations on the purchase of your new device. With it, you have chosen a high quality product. During production, this equipment has been checked for quality and subjected to a final inspection. The functionality of your equipment is therefore guaranteed. It cannot be ruled out that residual quantities of lubricants will remain on or in the equipment/hose lines in isolated cases. This is not a fault or defect and it represents no cause for concern.

The operating instructions constitute part of this product. They contain important information on safety, use and disposal.
Before using the product, familiarise yourself with all of the operating and safety instructions. Use the product only as described and for the applications specified. Keep this manual safely and in the event that the product is passed on, hand over all documents to the third party.
Intended Use
The device is suitable for removing coats of paint, for heating (for example, shrink tubing), and for plastic deformation and welding. It can be used to loosen adhesive joint and defrost water pipes.
This equipment is not suitable for commercial use. Commercial use will invalidate the guarantee. Any other use that is not explicitly approved in these instructions may result in damage to the equipment and represent a serious danger to the user. The use of the device in the rain or a damp environment is prohibited.
The manufacturer is not liable for damage
which is caused through inappropriate use or incorrect operation. The device is part of the Parkside X 20 V TEAM series and can be operated using Parkside X 20 V TEAM series batteries. The batteries may only be charged using chargers from the Parkside X 20 V TEAM series.
General description
An illustration of the most important functional components can be found on the fold-out page.
Extent of the delivery
Carefully unpack the appliance and check that it is complete:
- Cordless Hot Air Gun
- Restrictor
- Surface nozzle
- Reflector nozzle
- Paint scraper (2-piece)
- Instruction Manual

Battery and charger are not included.
Dispose of the packaging material properly.
Overview

1 Blow-off pipe
2 Air inlet
3 On/off switch
4 Release switch
5 Metal triangle
6 Handle
7 Paint scraper
8 Surface nozzle
9 Reflector nozzle
10 Restrictor
11 Rechargeable battery
11a Release button
12 Charger

13 Base

14 Nut

15 Step switch "high"
16 Step switch "medium"
17 Step switch "cold"
18 LEDs
Functional description
The device can be operated at three temperature levels. On level "0", cold air is blown out. On level I, an air temperature of 250^ C is reached. On level II, the device reaches an air temperature of 550^ C. Please refer to the descriptions below for information on how the operating elements work.
Technical specifications
Cordless
Hot Air Gun ......PHLGA 20-Li A1
Motor P power input....250 W
Nominal input voltage U....20 V==
Protection category......IPXO
Rechargeable battery runtime
2 Ah....8 min
4 Ah....16 min
Maximum air volume....170 l/min
Air temperature....250°C
Level I....250°C
Level II 550 °C
Temperature.....max. 50 °C
Charging process....4 - 40 °C
Operation....-20 - 50 °C
Storage....0 - 45 °C

Attention! An up-to-date list of battery compatibility can be found at: www.lidl.de/akku
This device can only be operated with the following rechargeable batteries: PAP 20 A1, PAP 20 A2, PAP 20 A3. This type of battery may only be charged with the following chargers: PLG 20 A1, PLG 20 A3, PDSLG 20 A1.
| Charging time (min.) | PLG 20 A1 | PLG 20 A3PDSLG 20 A1 |
| PAP 20 A1 | 60 30 | |
| PAP 20 A2 | 75 30 | |
| PAP 20 A3 | 90 60 |
Safety information
Symbols used in the instructions

Hazard symbols with in- formation on prevention of personal injury and property damage.

Notice symbol with information on how to handle the device properly.
Symbols on the device

Read carefully before use.

Do not expose to rain or moisture.
Caution! Hot surface. Risk of burns.

This device is part of the Parkside X 20 V TEAM series
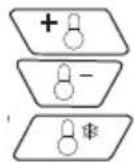
Step switch
Electrical machines do not belong with domestic waste.
General notes on safety

This device may cause serious injury if used improperly. To avoid personal injury and damage to property, read and comply with the following safety instructions and familiarise yourself with all control elements.

Caution: This is how to avoid accidents and injuries:
Preparation
- This appliance can be used by children aged from 8 years and above and persons with reduced physical, sensory or mental capabilities or lack of experience and knowledge if they have been given supervision or instruction concerning use of the appliance in a safe way and understand the hazards involved. Children shall not play with the appliance. Cleaning and user maintenance shall not be made by children without supervision.
• Children should be supervised to ensure that they do not play with the device.
- The operator or user is responsible for any accidents or personal injury and/or material damage to third parties or their property.
- Only use spare parts and accessories which are supplied and recommended by the manufacturer. Using externally produced parts results in the immediate loss of the warranty claim.
- The device must always be kept clean, dry and free of oil or lubricating greases.

Caution! This is how to avoid damage to the equipment and possible personal injuries resulting from this:
Using the device
- Do not use the device in the rain. Only work in daylight or at good light.
- If you are fired or lacking in concentration or have consumed alcohol or tablets, do not work with the device. Always have a break on time. Work using common sense.
- Never leave the device unattended at the workplace. Remove the mains plug from the socket when not in use as well as when taking a break from working or while carrying out work on the device, e.g. changing the nozzle.
-
A fire can develop if the device is not handled carefully.
-
Be careful when using the devices near flammable materials.
- Do not point at the same location for an extended period of time.
- Do not use in the presence of an explosive atmosphere.
- Heat can be passed to flammable materials that are hidden.
- After using the device, put it on the stand and allow it to cool down before it is packed away.
- Do not leave the device un- attended as long as it is in operation.
- In the case of danger, remove the battery from the device immediately. • Never use the device as a hair dryer.
- Never direct the hot air flow at people or animals.
- Do not look directly into the nozzle opening on the blow-off pipe.
- Do not touch the nozzle when it is hot.
- Maintain distance between the nozzle outlet and the surface or workpiece you are working on. The device could overheat.
Additional safety instructions
- Do not use any accessories that are not recommended by PARKSIDE. This can result in electric shock or fire.

Observe the safety information and notes on charging and proper use as shown in the instruction manual
for your battery and charger from the Parkside X 20V Team series. A detailed description of the charging process and further information can be found in the separate operating instructions.
Initial start-up
When used for the first time, some smoke may escape. The smoke is caused by binders which are removed from the insulating film of the heater by the heat during first use. To ensure that the smoke escapes quickly, the device should be placed on the stand area. Be sure to ventilate the working environment during first use. If the smoke/odour is too strong, move the initial start-up to outside!
Operation

Removing/inserting the rechargeable battery
-
To remove the battery (11) from the device, press the release button (11a) on the battery and pull the battery (11) out.
-
To insert the battery (11), push the battery (11) along the guide rail into the device. You will hear it click into place.

Switching ON and OFF
-
Press and hold the release switch (4).
-
Press and hold the on/off switch (3). You can let go of the release switch (4).
- The device automatically launches at level "0" for cold air. Press the step switch "cold" 8* (17) for level "0".
- Press the step switch "medium" (16) for level "I". The device will
reach an air temperature of 250°C.
- Press the step switch "high" +9 (15) for level "II". The device will reach an air temperature of 550 °C.
- To switch off, release the on/off button (3).
The LEDs (18) above the step switch display the level at which the device is currently operating.

The position as a floor-mounted appliance in a switched off state is ideally suited to allowing the device to cool down after use.

Assembling the paint scraper
- Unscrew the top nut (14) from the handle (6).
- Place the metal triangle (5) onto the lower nut.
- Screw the top nut back on in order to tighten the metal triangle.

Use of adapter nozzles

Before exchanging adapter nozzles, the adapter nozzle (8/9/10) and blow-off pipe (1) must be sufficiently cooled down to avoid burns.

Various uses are possible. Always comply with the safety instructions and always handle the device with care and caution.
Restrictor
Place the restrictor (10) on the blow-off pipe (1).
Use the restrictor (10) to obtain selective heat.

When using the restrictor (11), pay particular attention to the heat development at the cutting point. If in doubt, do not stay in the same place for too long in order to avoid overheating the workpiece.
Surface nozzle
Place the surface nozzle (8) on the blow-off pipe (1).
Use the surface nozzle (8) to obtain heat over a large surface.

When using the surface nozzle (8), pay particular attention to the heat development in adjacent locations of the cutting point. So that in cases of doubt, no adjacent component is overheated.
Reflector nozzle
Place the reflector nozzle (9) on the blow-off pipe (1). Use the reflector nozzle to solder and tin pipes, as well as to shrink shrink tubing.
Paint scraper
Heat up the paint and lacquer surfaces, using an adapter nozzle if necessary. The paints and lacquers can be removed with the paint scraper (7). The adapter nozzles (8/9/10) themselves are not suitable for removing paint.
Cleaning/maintenance/storage

Ask our service centre to carry out any work that is not described in these instructions. Do not try to repair the device by yourself, unless
you have professional training. Use only original parts.
General cleaning and maintenance work
• Always keep the device clean. Use a brush or cloth for cleaning, but do not use any cleaning agents or solvents.
Storage
- Store the appliance in a dry place well out of reach of children.
- Give the device time to cool down before you store the device in an enclosed space.
We are not liable for damages caused by our equipment. Insofar as these are caused by improper repair or the use of non-original parts or use contrary to instructions.
Waste disposal and environmental protection
Remove the rechargeable battery before disposing of the device. Be environmentally friendly. Return the tool, accessories and packaging to a recycling centre when you have finished with them.
Instruction on how to dispose of the rechargeable battery can be found in the separate instruction manual for your battery and charger.
Electrical machines do not belong with domestic waste.
- Hand over the device at an utilization location. The plastic and metal parts employed can be separated out and thus recycled use can be implemented. Ask our Service-Center for details.
Spare parts/Accessories
Spare parts and accessories can be obtained at www.grizzlytools-service.eu
If you have issues ordering, please use the contact form.
If you have any other questions, contact the "Service-Center" (see page 22).
| Position instruction manual | Description Order No. | |
| A 7 | Paint scraper | 91105840 |
| A 8 | Surface nozzle | 91105412 |
| A 9 | Reflector nozzle | 91105413 |
| A 10 | Restrictor | 91105414 |
Guarantee
Dear Customer,
This equipment is provided with a 3-year guarantee from the date of purchase.
In case of defects, you have statutory rights against the seller of the product. These statutory rights are not restricted by our guarantee presented below.
Terms of Guarantee
The term of the guarantee begins on the date of purchase. Please retain the original receipt. This document is required as proof of purchase.
If a material or manufacturing defect occurs within three years of the date of purchase of this product, we will repair or replace – at our choice – the product for you free of charge. This guarantee requires the defective equipment and proof of purchase to be presented within the three-year period with a brief written description of what constitutes the defect and when it occurred.
If the defect is covered by our guarantee, you will receive either the repaired product or a new product. No new guarantee period begins on repair or replacement of the product.
Guarantee Period and Statutory Claims for Defects
The guarantee period is not extended by the guarantee service. This also applies for replaced or repaired parts. Any damages and defects already present at the time of purchase must be reported immediately after unpacking. Repairs arising after expiry of the guarantee period are chargeable.
Guarantee Cover
The equipment has been carefully produced in accordance with strict quality guidelines and conscientiously checked prior to delivery.
The guarantee applies for all material and manufacturing defects. This guarantee does not extend to cover product parts that are subject to normal wear and may therefore be considered as wearing parts (e.g. adapter nozzle) or to cover damage to breakable parts (e.g. switches).
This guarantee shall be invalid if the product has been damaged, used incorrectly or not maintained. Precise adherence to all of the instructions specified in the operating manual is required for proper use of the product. Intended uses and actions against which the operating manual advises or warns must be categorically avoided.
The product is designed only for private and not commercial use. The guarantee will be invalidated in case of misuse or improper handling, use of force, or interventions not undertaken by our authorised service branch.
Processing in Case of Guarantee
To ensure quick handling of you issue, please follow the following directions:
- Please have the receipt and identification number (IAN 355418_2004) ready as proof of purchase for all enquiries.
- Please find the item number on the rating plate.
- Should functional errors or other defects occur, please initially contact the service department specified below by telephone or by e-mail. You will then receive further information on the processing of your complaint.
GB IE
- After consultation with our customer service, a product recorded as defective can be sent postage paid to the service address communicated to you, with the proof of purchase (receipt) and specification of what constitutes the defect and when it occurred. In order to avoid acceptance problems and additional costs, please be sure to use only the address communicated to you. Ensure that the consignment is not sent carriage forward or by bulky goods, express or other special freight. Please send the equipment inc. all accessories supplied at the time of purchase and ensure adequate, safe transport packaging.
Repair Service
For a charge, repairs not covered by the guarantee can be carried out by our service branch, which will be happy to issue a cost estimate for you.
We can handle only equipment that has been sent with adequate packaging and postage.
Attention: Please send your equipment to our service branch in clean condition and with an indication of the defect.
Equipment sent carriage forward or by bulky goods, express or other special freight will not be accepted.
We will dispose of your defective devices free of charge when you send them to us.
Service-Center
Service Great Britain
Tel.: 0800 4047 657
E-Mail: grizzly@lidl.co.uk
IAN 355418_2004
IF Service Ireland
Tel.: 1890 930 034
(0,08 EUR/Min., (peak))
(0,06 EUR/Min., (off peak))
E-Mail: grizzly@lidl.ie
IAN 355418_2004
Importer
Please note that the following address is not a service address. Please initially contact the service centre specified above.
Service Réparations ......34
Service-Center 34
Importateur 34
Service-Center....71
Dovozca....71
 | Translation of the original EC declaration of conformity |
| We hereby confirm that the Cordless Hot Air Gun model PHLGA 20-Li A1 Serial number 000001 - 095250 conforms with the following applicable relevant version of the EU guidelines: | |
| 2014/30/EU • 2014/35/EU • 2011/65/EU* • (EU) 2015/863 | |
| In order to guarantee consistency, the following harmonised standards as well as national standards and stipulations have been applied: | |
| EN 60335-1:2012/A2:2019 • EN 60335-2-45:2002/A2:2012 EN 55014-1:2017 • EN 55014-2:2015 • EN 62233:2008 • EN IEC 63000:2018 | |
| This declaration of conformity (20)** is issued under the sole responsibility of the manufacturer: | |
| CE Grizzly Tools GmbH & Co. KG Stockstädter Straße 20 63762 Großostheim Germany 31.12.2020 |  Christian Frank Documentation Representative Christian Frank Documentation Representative |
* The object of the declaration described above satisfies the provisions of Directive 2011/65/EU of the European Parliament and the Council of 8 June 2011 on limiting the use of certain harmful substances in electrical and electronic appliances.
** The last two digits of the year in which the CE marking was affixed.
text_image
FSC www.fsc.org MIX Paper from responsible sources FSC® C150223
text_image
FSC www.fsc.org MIXTE Papier issu de sources responsables FSC® C150223IAN 355418_2004

8