
Cubase AI 9 - Software license & extension STEINBERG - Free user manual and instructions
Find the device manual for free Cubase AI 9 STEINBERG in PDF.
| Product type | Music production software license (DAW) |
| Brand | Steinberg |
| Model | Cubase AI 9 |
| Category | Software license & extension |
| Manual languages | French, German, English, Spanish, Italian, Japanese, Portuguese, Russian |
| Number of manual pages | 114 pages (PDF) |
| Minimum system requirements | Windows 7/8.x/10 64-bit or OS X 10.11/macOS Sierra, 64-bit multi-core processor, 4 GB RAM, 12 GB free hard disk space, 1366x768 resolution, DirectX 10 graphics card with WDDM 1.1 (Windows), compatible audio interface, Internet connection for activation |
| Recommended system requirements | Intel i5 processor or higher, 8 GB RAM, 1920x1080 resolution, dedicated ASIO audio interface |
| License type | Electronic license (eLicenser) |
| Activation | Required via activation code at www.steinberg.net/activate with Internet connection |
| Audio compatibility | Dedicated ASIO drivers (recommended), generic low-latency ASIO driver (Windows), Mac OS X drivers |
| Key features | Recording, editing, mixing, MIDI sequencing, VST instruments, audio effects |
| Maintenance and cleaning | Not applicable (software) |
| Safety | Keep the activation code in a safe place; activation is mandatory |
| Spare parts and repairability | Not applicable |
| General information | Software by Steinberg Media Technologies GmbH, 2016; manual downloadable at www.steinberg.help |
Frequently Asked Questions - Cubase AI 9 STEINBERG
User questions about Cubase AI 9 STEINBERG
0 question about this device. Answer the ones you know or ask your own.
Ask a new question about this device
Download the instructions for your Software license & extension in PDF format for free! Find your manual Cubase AI 9 - STEINBERG and take your electronic device back in hand. On this page are published all the documents necessary for the use of your device. Cubase AI 9 by STEINBERG.
USER MANUAL Cubase AI 9 STEINBERG
This PDF provides improved access for vision-impaired users. Please note that due to the complexity and number of images in this document, it is not possible to include text descriptions of images.
The information in this document is subject to change without notice and does not represent a commitment on the part of Steinberg Media Technologies GmbH. The software described by this document is subject to a License Agreement and may not be copied to other media except as specifically allowed in the License Agreement. No part of this publication may be copied, reproduced, or otherwise transmitted or recorded, for any purpose, without prior written permission by Steinberg Media Technologies GmbH. Registered licensees of the product described herein may print one copy of this document for their personal use.
All product and company names are ^™ or ^® trademarks of their respective owners. For more information, please visit www.steinberg.net/trademarks.
© Steinberg Media Technologies GmbH, 2016.
All rights reserved.
Table of Contents
5 Introduction
5 About the Documentation
5 Key Commands
5 Conventions
6 How You Can Reach Us
7 System Requirements and Installation
7 System Requirements
8 Installing the Program
8 Activating Your License
9 Hardware Installation
11 System Setup
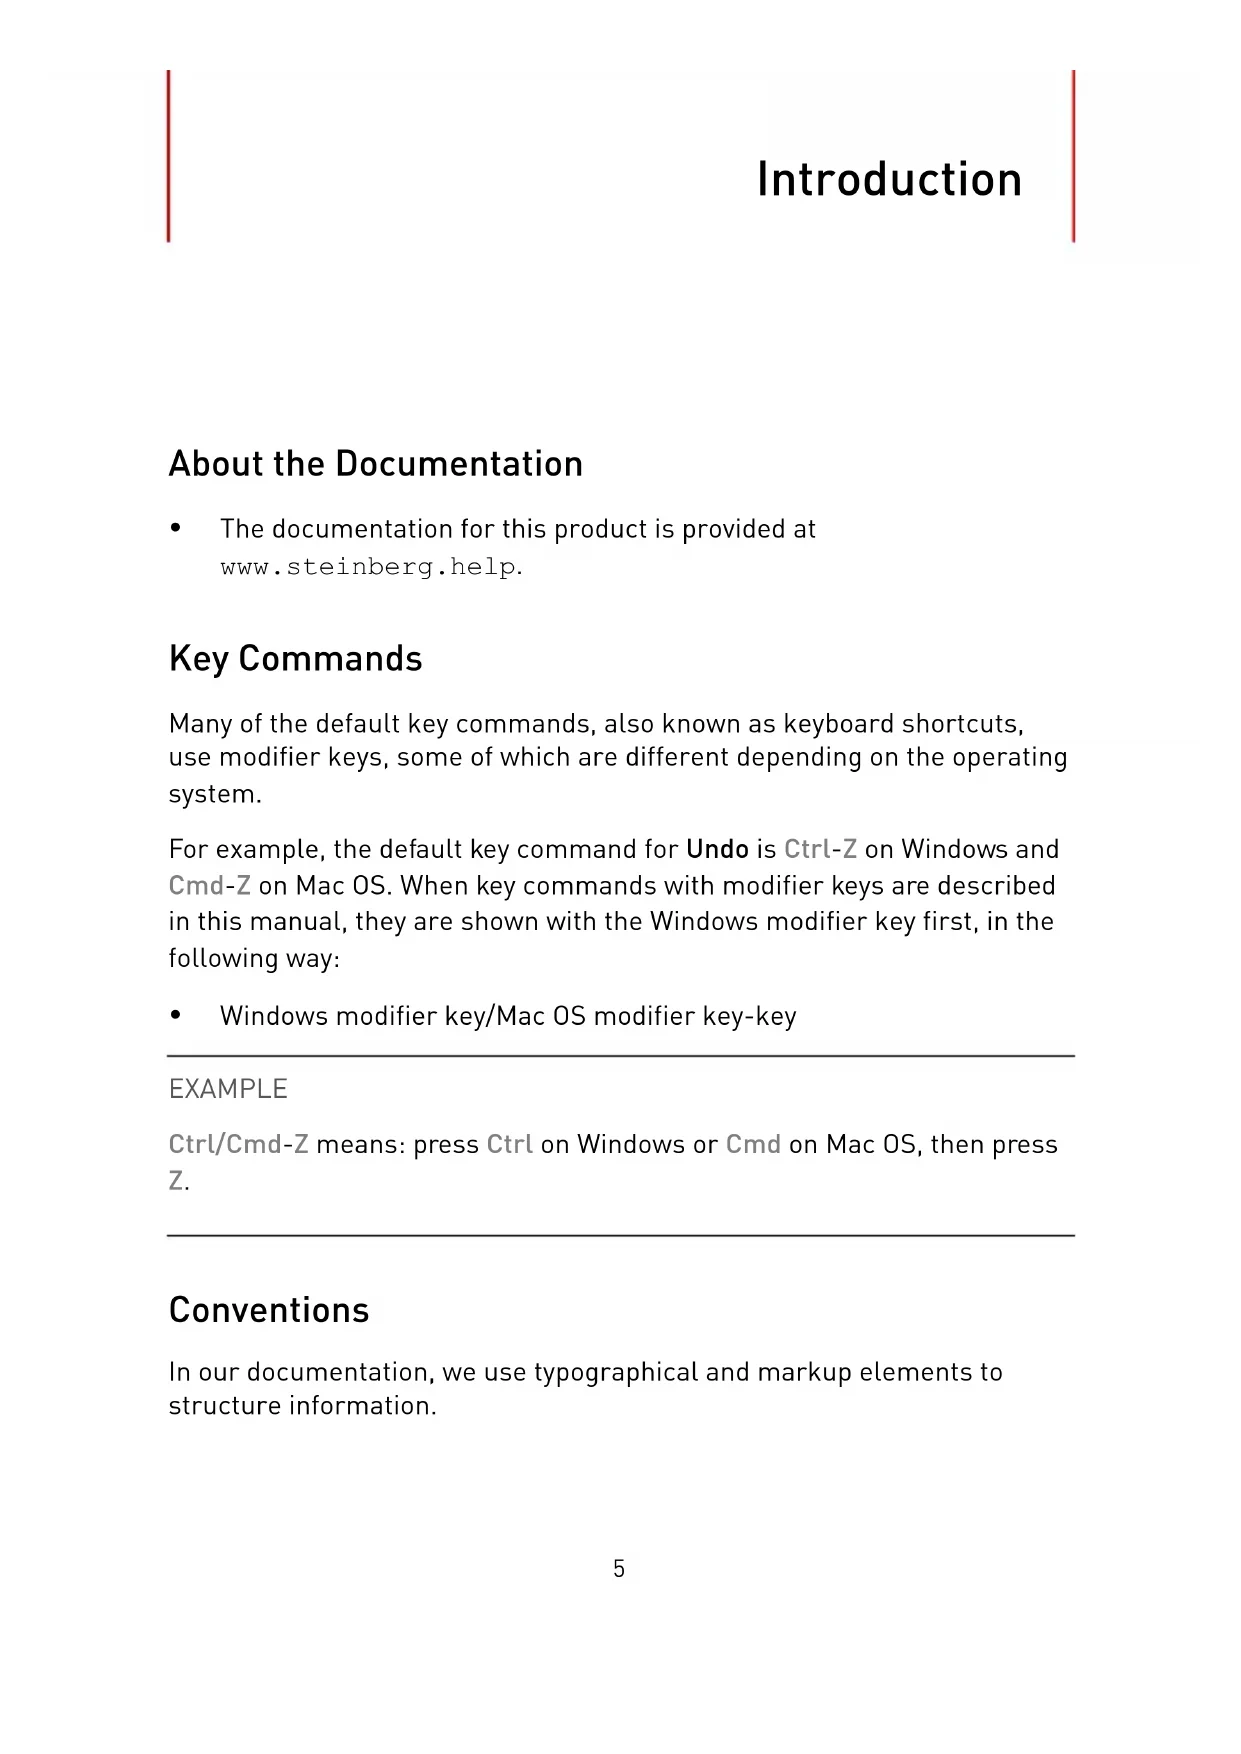
About the Documentation
- The documentation for this product is provided at www.steinberg.help.
Key Commands
Many of the default key commands, also known as keyboard shortcuts, use modifier keys, some of which are different depending on the operating system.
For example, the default key command for Undo is Ctrl-Z on Windows and Cmd-Z on Mac OS. When key commands with modifier keys are described in this manual, they are shown with the Windows modifier key first, in the following way:
• Windows modifier key/Mac OS modifier key-key
EXAMPLE
Ctrl/Cmd-Z means: press Ctrl on Windows or Cmd on Mac OS, then press Z.
Conventions
In our documentation, we use typographical and markup elements to structure information.
How You Can Reach Us
On the Steinberg Hub menu in Cubase you find items linking to additional information.
The menu contains links to various Steinberg web pages. Selecting a menu item automatically launches your browser and opens the page. On these pages you can find support and compatibility information, answers to frequently asked questions, information about updates and other Steinberg products, etc. This requires that you have a web browser installed on your computer, and a working internet connection.
System Requirements and Installation
System Requirements
Your computer must meet the following minimum requirements for the Windows and Mac OS versions of Cubase:
64-bit Windows 7/8.x/10—OS X 10.11/macOS Sierra
- 64-bit Intel or AMD multi-core CPU (Intel i5 or faster recommended)
• 4 GB RAM (8 GB or more recommended)
• 12 GB free HD space
• 1366 x 768 display resolution (1920 x 1080 recommended) - Graphics card with DirectX 10 and WDDM 1.1 support (Windows only)
- OS compatible audio hardware (ASIO compatible audio hardware recommended for low latency performance)
• DVD ROM dual-layer drive (if you do not use the download version) - Internet connection required for activation, account setup, and personal/product registration. Additional downloads may be required for the installation.
For recommended systems and support of future operating systems, please refer to the Support section on our website www.steinberg.net.
Installing the Program
Launching Installation
PROCEDURE
- Double-click Start Installation.
- Follow the instructions on screen.
Activating Your License
You must activate your license.
PREREQUISITE
You have a working Internet connection and an activation code to download your license to your eLicenser.
NOTE
You can find the license activation code in an e-mail, if you purchased your product via the Steinberg online shop or on the Essential Product License Information sheet, if your product was delivered on an installation medium.
PROCEDURE
- Go to www.steinberg.net/activate for information about activation.
- Follow the instructions on screen.
RESULT
The license is downloaded to your eLicenser and activated.
Hardware Installation
Installing the Audio Hardware and its Driver
PROCEDURE
- Install the audio hardware and related equipment on the computer, as described in the hardware documentation.
- Install the driver for the audio hardware.
A driver is a piece of software that allows a program to communicate with a certain piece of hardware. In this case, the driver allows Cubase to use the audio hardware. Depending on the operating system of your computer, there are different types of drivers that can be used.
Dedicated ASIO Drivers
Professional audio hardware often comes with an ASIO driver written especially for the device. This allows for direct communication between Cubase and the audio hardware. As a result, the devices with specific ASIO drivers can provide lower latency (input-output delay), which is crucial when monitoring audio via Cubase or using VST instruments. The ASIO driver may also provide special support for multiple inputs and outputs, routing, synchronization, etc.
ASIO drivers are provided by the audio hardware manufacturers. Make sure to check the manufacturer's web site for the latest driver versions.
IMPORTANT
If your audio hardware comes with a specific ASIO driver, we strongly recommend that you use this.
Generic Low Latency ASIO Driver (Windows Only)
On Windows systems, you can use the Generic Low Latency ASIO driver. This driver provides ASIO support for any audio hardware supported by Windows, thus allowing for low latency. The Generic Low Latency ASIO driver provides the Windows Core Audio technology in Cubase. No additional driver is needed. This driver is included with Cubase and does not require any special installation.
NOTE
This driver should be used if no specific ASIO driver is available. Although the Generic Low Latency ASIO driver supports all audio devices, you might get better results with on-board audio cards than with external USB audio interfaces.
macOS Drivers (macOS only)
If you are using a Macintosh computer, make sure that you are using the latest macOS drivers for your audio hardware. Follow the instructions of the manufacturer to install the driver.
Testing the Audio Hardware
To make sure that the audio device works as expected, perform the following tests.
- Use any software included with the hardware to make sure that you can record and play back audio without problems.
- If the hardware is accessed via a standard operating system driver, try playing back audio using the standard audio application of the computer, for example, Windows Media Player or Apple iTunes.
Installing a MIDI Interface or USB MIDI Keyboard
Although many USB MIDI keyboards and MIDI interfaces are plug&play devices, you may have to install a dedicated device driver. Follow the installation procedure described in the documentation that came with the device.
NOTE
You should also check the web site of the manufacturer for the latest driver updates.
System Setup
Selecting the Driver for Your Audio Device
Before you can set up the routing for your audio signals and start recording, you need to make sure that the correct ASIO driver is selected.
PROCEDURE
- Select Devices > Device Setup.
- In the Device Setup dialog, click the VST Audio System entry on the left.
The VST Audio System page is shown on the right. - On the ASIO Driver pop-up menu, select the driver that you want to use.
- Click OK.
Setting Up the VST Connections
The VST Connections dialog allows you to set up the routing of input and output signals between Cubase and your audio hardware. These connections are called busses. In this section you learn how to set up the busses for playback and recording.
Removing Busses
Before you add busses, it is recommended to remove any outputs that were automatically added by Cubase.
PROCEDURE
- Select Devices > VST Connections.
- In the VST Connections dialog, select the Outputs tab.
- In the Bus Name column, right-click the top entry and select Remove Bus from the context menu.
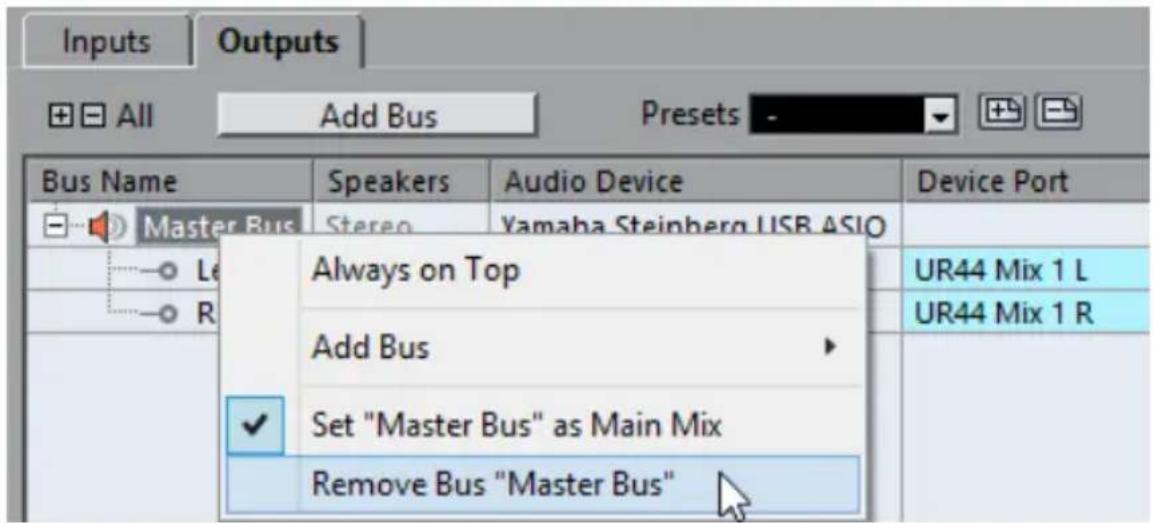
If necessary, repeat this step for any further busses.
Adding Outputs
You must set up the outputs for playing back audio in Cubase.
PREREQUISITE
Remove the busses that were automatically added by Cubase.
PROCEDURE
- Select Devices > VST Connections.
- In the VST Connections dialog, select the Outputs tab.
- Click Add Bus.
-
In the Add Output Bus dialog, make your settings.
-
Click Add Bus.
The new bus is added, allowing you to have audio in Cubase routed to your audio hardware.
- Optional: If you want to change the output ports that were selected automatically, open the Device Port pop-up menu and select different ports.
| Inputs | Outputs | |||||
| All Add Bus Presets | ||||||
| Bus Name | Speakers | Audio Device | Device Port | Click | ||
| Stereo Out | Stereo | Yamaha Steinberg FW | Click | |||
| Left | MR816CSX Analog 1 | |||||
| Right | Not Connected | |||||
| ✓ Not Connected | ||||||
| MR816CSX Analog 1 [ Stereo Out - Left ] | ||||||
| MR816CSX Analog 2 | ||||||
| MR816CSX Analog 3 | ||||||
Depending on your audio hardware, more than two output ports might be available. For most cases we recommend to use the main stereo outputs.
RELATED LINKS
Removing Busses on page 12
Adding Inputs
You must set up the inputs for recording into Cubase.
PROCEDURE
- Select Devices > VST Connections.
- In the VST Connections dialog, select the Inputs tab.
- In the Bus Name column, right-click the top entry and select Remove Bus from the context menu.
If necessary, repeat this step for any further busses. - Click Add Bus.
- In the Add Input Bus dialog, make your settings.
- Click Add Bus.
The new bus is added, allowing you to have audio from the input of your audio device routed to Cubase for recording. - Optional: If you want to change the input ports that were selected automatically, open the Device Port pop-up menu and select different ports.
RESULT
You are now ready to record audio in Cubase and play it back.
NOTE
To get started with Cubase, we recommend watching the video tutorials on the Steinberg YouTube Channel including a demonstration of the new features of Cubase.
Deutsch
Cristina Bachmann, Heiko Bischoff, Christina Kaboth, Insa Mingers, Matthias Obrecht, Sabine Pfeifer, Benjamin Schütte, Marita Sladek
Driver Mac OS X (solo Mac)
All rights reserved.
目次
75 はじめに
75 マニュアルについて
75 キーボードショートカット
75 表記規則
Generic Low Latency ASIO Driver (Windows のみ)
Configurando as conexões VST

- Table of Contents
- About the Documentation
- Key Commands
- EXAMPLE
- Conventions
- How You Can Reach Us
- System Requirements and Installation
- System Requirements
- 64-bit Windows 7/8.x/10—OS X 10.11/macOS Sierra
- Installing the Program
- Launching Installation
- PROCEDURE
- Activating Your License
- PREREQUISITE
- NOTE
- RESULT
- Hardware Installation
- Installing the Audio Hardware and its Driver
- Dedicated ASIO Drivers
- IMPORTANT
- Generic Low Latency ASIO Driver (Windows Only)
- macOS Drivers (macOS only)
- Testing the Audio Hardware
- Installing a MIDI Interface or USB MIDI Keyboard
- System Setup
- Selecting the Driver for Your Audio Device
- Setting Up the VST Connections
- Removing Busses
- Adding Outputs
- RELATED LINKS
- Adding Inputs
- Deutsch
- Driver Mac OS X (solo Mac)
- 目次
- Generic Low Latency ASIO Driver (Windows のみ)
- Configurando as conexões VST
Brand : STEINBERG
Model : Cubase AI 9
Category : Software license & extension