
Robomaster TT Tello Talent - Drone DJI - Free user manual and instructions
Find the device manual for free Robomaster TT Tello Talent DJI in PDF.
| Product type | Quadcopter drone with camera |
| Brand | DJI (Ryze Tech) |
| Model | Robomaster TT Tello Talent |
| Maximum flight time | 13 minutes (without wind, at 15 km/h) |
| Camera | 5 megapixels, 720p video at 30 fps |
| Battery | LiPo 1100 mAh, 3.8 V, 4.18 Wh |
| Device weight | Approximately 80 g (with battery) |
| Operating frequency | 2.4 to 2.4835 GHz |
| Main functions | Automatic hovering, 8D flips, Bounce mode, programming (Arduino, Scratch, MicroPython) |
| Included expansion kit | Open source remote control, 8x8 matrix display with spatial detection module (TOF), expansion board |
| Safety | Do not fly near people, respect no-fly zones, keep distance from propellers |
| Maintenance and cleaning | Clean with a soft cloth, avoid moisture and extreme temperatures |
| Spare parts | Propellers, propeller guards, flight battery, micro-USB cable |
| Repairability | Use the provided propeller removal tool, do not force during disassembly |
| Operating temperature | 0° to 40°C (32° to 104°F) |
| Charging temperature | 5° to 45°C (41° to 113°F) |
| Power supply | FCC/CE certified USB adapter 5V/1.5A |
| Compatible applications | Tello (iOS 9.0+ / Android 4.4+) and Tello EDU |
| General information | Indoor use recommended, requires activation via the Tello app |
Frequently Asked Questions - Robomaster TT Tello Talent DJI
User questions about Robomaster TT Tello Talent DJI
0 question about this device. Answer the ones you know or ask your own.
Ask a new question about this device
Download the instructions for your Drone in PDF format for free! Find your manual Robomaster TT Tello Talent - DJI and take your electronic device back in hand. On this page are published all the documents necessary for the use of your device. Robomaster TT Tello Talent by DJI.
USER MANUAL Robomaster TT Tello Talent DJI
KpaTKoe pyKOBOCTBO NOb3OBaTeA
v1.0
Contents
EN Quick Start Guide 2
ID Panduan Mulai Cepat 16
JP イルクスリ 一トガ リド 30
KR 奥斯泰德吉尼
DE Kurzanleitung 57
ES Guia de inicio rápido 71
FR Guide de démarrage rapide 85
IT Guida rapida 99
NL Snelstartgids 113
PT Guia de inicio=rápido 128
RU KpaTKoe pyKOBOdCTBO NOAb3OBaTeA 143
AR 157
Compliance Information 169
Disclaimer
It is not recommended for children under the age of 14 to use this product without adult supervision. Please note that in Japan the recommended age is 15 years. Adults should keep the aircraft out of the reach of children and exercise caution when operating this aircraft in the presence of children.
This product incorporates various advanced control technologies. However, inappropriate use of the product could result in personal injury or property damage. Please read the materials associated with the product before your first use of the product. These documents are included in the product package and/or are available online on the SZ RYZE TECHNOLOGY CO., LTD ("Ryze Tech") website (http://www.ryzerobotics.com).
This product is a flying camera that offers easy flight when in good working order as set forth below. Visit http://www.ryzerobotics.com for the most current instructions and warnings. Users operating their aircraft in the United States should visit http://knowbeforeyoufly.org for more information about flight safety and compliance.
The information in this document affects your safety and your legal rights and responsibilities. Read this entire document carefully to ensure proper configuration before use. Failure to read and follow the instructions and warnings in this document may result in serious injury to yourself or others, damage to or loss of your Ryze Tech product, or damage to other objects in the vicinity.
By using this product, you hereby signify that you have read this disclaimer carefully and that you understand and agree to abide by the terms and conditions herein. EXCEPT AS EXPRESSLY PROVIDED IN RYZE TECH AFTER-SALES SERVICE POLICIES AVAILABLE AT HTTP:// RYZEROBOTICS.COM/SERVICE, THE PRODUCT AND ALL MATERIALS, AND CONTENT AVAILABLE THROUGH THE PRODUCT ARE PROVIDED "AS IS" AND ON AN "AS AVAILABLE" BASIS, WITHOUT WARRANTY OR CONDITION OF ANY KIND, Either EXPRESS OR IMPLIED. RYZE TECH DISCLAIMS ALL WARRANTYES OF ANY KIND, EXCEPT AS EXPRESSLY PROVIDED IN RYZE TECH AFTER-SALES SERVICE POLICIES, WHETHER EXPRESS OR IMPLIED, RELATING TO THE PRODUCT, PRODUCT ACCESSORIES, AND ALL MATERIALS,
INCLUDING: (A) ANY IMPLIED WARRANTY OF MERCHANTABILITY, FITNESS FOR A PARTICULAR PURPOSE, TITLE, QUIET ENJOYMENT, OR NONINFRINGEMENT; AND (B) ANY WARRANTYARISING OUT OF COURSE OF DEALING, USAGE,OR TRADE. RYZE TECH DOES NOT WARRANTY, EXCEPT AS EXPRESSLY PROVIDED IN RYZETECH LIMITED WARRANTY, THAT THE PRODUCT, PRODUCT ACCESSORIES, OR ANY PORTION OF THE PRODUCT, OR ANY MATERIALS, WILL BE UNINTERRUPTED, SECURE, OR FREE OF ERRORS, VIRUSES, OR OTHER HARMFUL COMPONENTS, AND DOES NOT WARRANTY THAT ANY OF THOSE ISSUES WILL BE CORRECTED. NO ADVICE OR INFORMATION, WHETHER ORAL OR WRITTEN, OBTAINED BY YOU FROM THE PRODUCT, PRODUCT ACCESSORIES, OR ANY MATERIALS WILL CREATE ANY WARRANTY REGARDING RYZE TECH OR THE PRODUCT THAT IS NOT EXPRESSLY STATED IN THESE TERMS. YOU ASSUME ALL RISKS FOR ANY DAMAGE THAT MAY RESULT FROM YOUR USE OF OR ACCESS TO THE PRODUCT, PRODUCT ACCESSORIES, AND ANY MATERIALS. YOU UNDERSTAND AND AGREE THAT YOU USE THE PRODUCT AT YOUR OWN DISCRETION AND RISK, AND THAT YOU ARE SOLELY RESPONSIBLE FOR ANY PERSONAL INJURY, DEATH, DAMAGE TO YOUR PROPERTY (INCLUDING YOUR COMPUTER SYSTEM OR MOBILE DEVICE OR RYZE TECH HARDWARE USED IN CONNECTION WITH THE PRODUCT) OR THIRD PARTY PROPERTY, OR THE LOSS OF DATA THAT RESULTS FROM YOUR USE OF OR INABILITY TO USE THE PRODUCT.
SOME JURISDICTIONS MAY PROHIBIT A DISCLAIMER OF WARRANTY AND YOU MAY HAVE OTHER RIGHTS THAT VARY FROM JURISDICTION TO JURISDICTION.
Ryze Tech accepts no liability for damage, injury or any legal responsibility incurred directly or indirectly from the use of this product. The user shall observe safe and lawful practices including, but not limited to, those set forth in these Safety Guidelines. You shall be solely responsible for all your behaviors when flying Tello.
Warnings
-
Stay away from rotating propellers and motors.
-
DO NOT touch the underside of the aircraft as it may be hot.
- NEVER use non-Ryze Tech batteries and DO NOT short-circuit the Flight Battery.
- Important information is included on the product package and in the documentation included in the product package. Read all of this information carefully and retain the product package and documentation for future reference.
- Always use an FCC/CE (depending on location) certified USB adapter that is rated at 5V and 1.5 A or above.
- Ensure the aircraft is powered off before charging. It cannot be charged when it is powered on.
- DO NOT charge a Flight Battery immediately after flight, because its temperature may be too high. DO NOT charge a Flight Battery until it cools down to near room temperature.
- Charge the Flight Battery in the temperature range 41^ to 113^ F (5^ to 45^ C). The ideal charging temperature range is 72^ to 82^ F (22^ to 28^ C).
- If a low battery warning appears, charge the Flight Battery until the Flight Battery level reaches between 30 and 60% for long-time storage.
- Discharge Flight Batteries to the range 40 to 65% if they will NOT be used for 10 days or more. This can greatly extend battery life.
Regulations
To avoid serious injury and property damage, observe the following rules:
- DO NOT operate in the vicinity of manned aircraft, regardless of altitude. (Land immediately if necessary.)
- DO NOT fly the aircraft in or at densely populated areas including cities, sporting events, exhibitions, and performances.
- DO NOT fly the aircraft above the relevant maximum altitude set forth in your local laws and regulations.
- Remain well clear of and DO NOT interfere with manned aircraft operations. Be aware of and avoid other aircraft and obstacles at all times.
- DO NOT fly the aircraft near or inside no fly zones specified by local laws and regulations. The no fly zone list includes: airports, borders between two sovereign countries or regions, and major cities/regions, and is continuously updated. DO NOT fly around sensitive infrastructure or property such as power stations, water treatment facilities,
correctional facilities, heavily traveled roadways, government facilities, or military zones.
- Maintain visual line of sight with your aircraft at all times and use an observer to assist if needed.
- NEVER use the aircraft to carry illegal or dangerous goods/payloads.
- Make sure you understand the nature/type of your flight operation (such as for recreation, for public use, or for commercial use) and have obtained corresponding approval and clearance from the related government agencies before flight. Consult with your local regulators for comprehensive definitions and specific requirements. Users operating their aircraft in the United States should first visit http://www.knowbeforeyoufly.org and take the most appropriate action for their circumstances.
- Please note that remote-controlled aircraft may be banned from conducting commercial activities in certain territories and regions. Check and follow all local laws and regulations before flying as those rules may differ from those stated here.
- Respect the privacy of others when using the camera. Make sure you comply with local privacy laws, regulations, and moral standards. DO NOT conduct surveillance operations such as image capture or video recording on any person, entity, event, performance, exhibition, or property without authorization or where there is an expectation of privacy, even if the image or video is captured for personal use.
- Please be advised that in certain areas, the recording of images and videos from events, performances, exhibitions, or commercial properties by means of a camera may contravene copyright or other legal rights, even if the image or video is shot for personal use.
Flight Limit
- Fly NO higher than 33 ft (10 m) above ground level and stay away from any surrounding obstacles.
- The Vision Positioning System is only effective when the aircraft is at altitudes of 1.0 to 98.4 ft (0.3 to 30m ) and works best at altitudes of 1.0 to 19.7 ft (0.3 to 6m ).
- The performance of the Vision Positioning System is affected by the surface being flown over. The aircraft automatically changes to Attitude mode when the Vision Positioning System is unavailable. In Attitude mode the aircraft is not able to position
艺
艺
itself. Operate the aircraft with great caution in the following situations, which may cause the aircraft to enter Attitude mode:
a. Flying at high speed below 2 ft (0.5m)
b. Flying over monochrome surfaces (e.g. pure black, pure white, pure red, pure green).
c. Flying over highly reflective surfaces.
d. Flying over water or transparent surfaces.
e. Flying over moving surfaces or objects.
f. Flying in an area where the lighting changes frequently or drastically.
g. Flying over extremely dark (< 10 lux) or bright (> 100,000 lux) surfaces or towards bright sources of light (e.g. towards sunlight).
h. Flying over surfaces without clear patterns or texture.
i. Flying over surfaces with identical repeating patterns or textures (e.g. tiling).
j. Flying over small and fine objects (e.g. tree branches or power lines).
k. Flying at speeds of over 11 mph (18 kph) at 3.5 ft (1 m) or lower.
- If the aircraft's Vision Positioning system fails for 3 seconds when its flying altitude is above 20 ft (6 m), Failsafe Protection will automatically initiate landing. If the Vision Positioning system recovers during landing, Failsafe Protection will shut off and the aircraft will hover.
- The Vision Positioning System may not be able to recognize patterns on the ground in very dark (< 100 lux) environments. DO NOT take off if there is a warning prompt in the Tello app telling you that the environment is too dark.
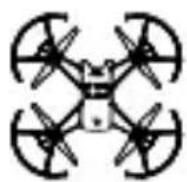
In the Box
Aircraft × 1
(Propellers and Propeller
Guards included*)
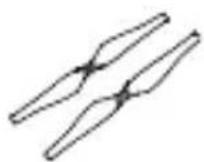
Spare Propeller × 2 (pair)
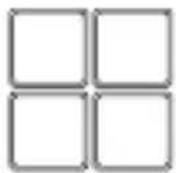
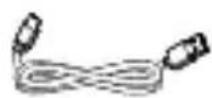
Mission Pad x4 Micro USB Cable x1

艺
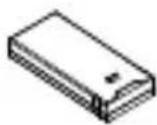
Flight Battery × 1
Propeller Removal
Tool × 1
Quick Start
Guide × 1


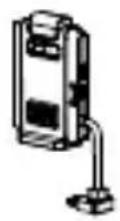
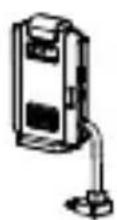
Open-Source
Controller × 1
Dot-Matrix
Display &
Extension Board
Distance Sensing
Module × 1

- The diagrams in this document are for reference only and may differ from the actual product.
1. Introduction
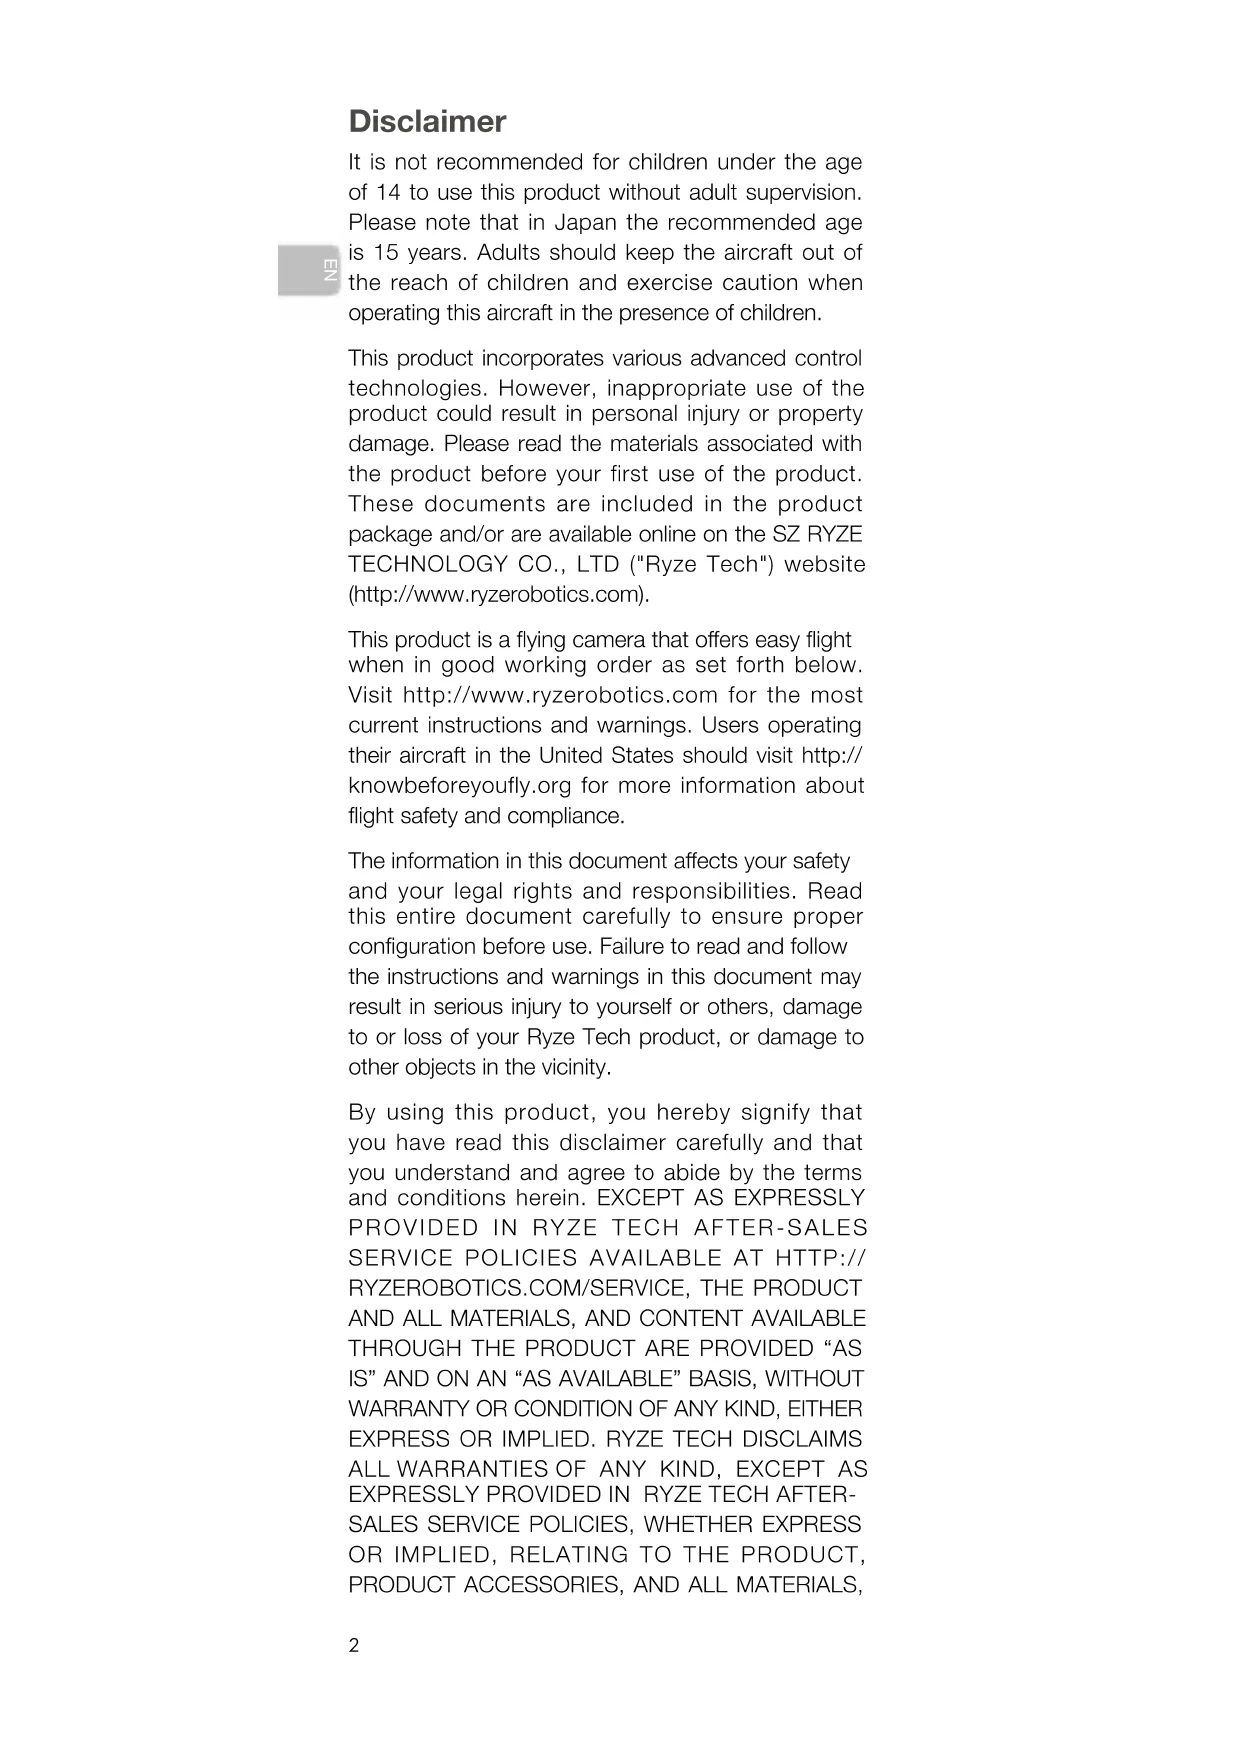
ROBOMASTER™ TT TELLO™ Talent includes the aircraft and the Expansion Kit. Tello is a small quadcopter that features a Vision Positioning System and an onboard camera. Using its Vision Positioning System and advanced flight controller, it can hover in place and is suitable for flying indoors. Advanced features like Bounce mode, 8D Flips, and EZ Shots make using Tello fun. Tello captures 5 megapixel photos and streams 720p live video to the Tello app on a mobile device. Its maximum flight time is approximately 13 minutes*.
Experience DIY flight with an Expansion Kit that includes an open-source controller, dot-matrix display & distance-sensing module, and extension board, which support programming with Arduino, Scratch, MicroPython, and more.
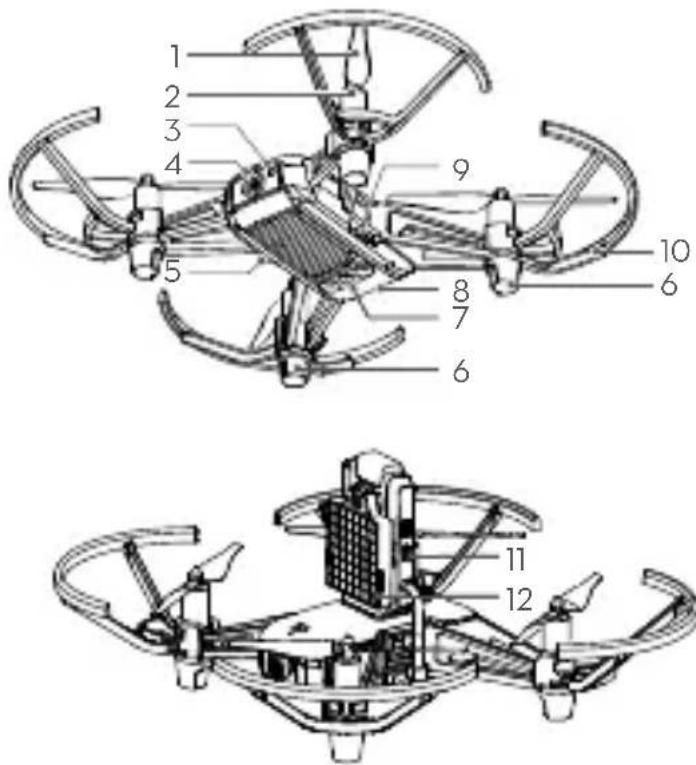
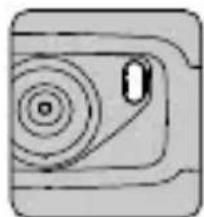
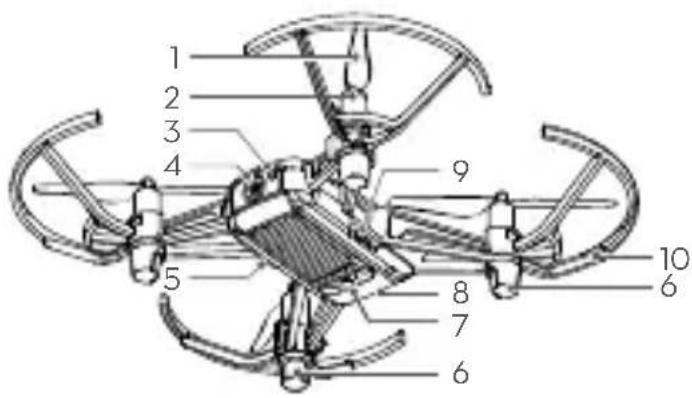
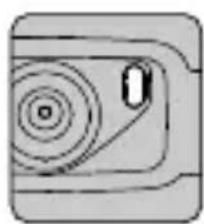
- Propellers
- Motors
- Aircraft Status Indicator
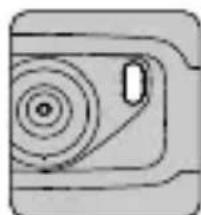
- Camera
- Power Button
- Antennas
-
Vision Positioning System
-
Flight Battery
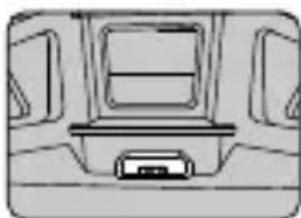
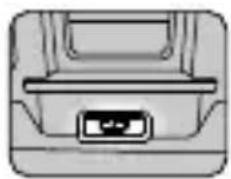
- Micro USB Port
- Propeller Guards
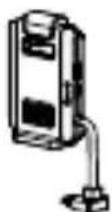
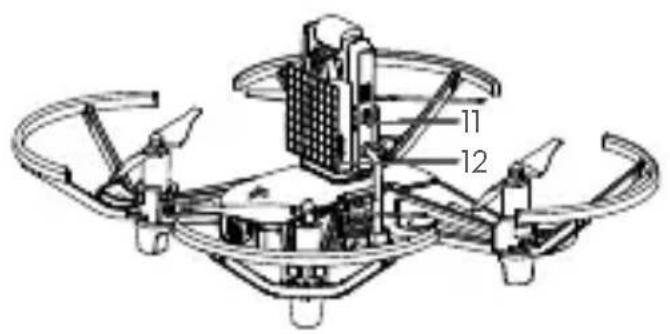
- Open-Source Controller
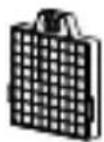
- Dot-Matrix Display
& Distance Sensing
Module
2. Downloading the Tello App and Watching Tutorial Videos
Search for "Tello" on the App Store or Google Play or scan the QR code to download the app on your mobile device. To ensure flight safety, watch the tutorial videos on the official Ryze Tech website (http://www.ryzerobotics.com) before your first flight.


- Operating system compatibility: iOS v9.0 or later; Android v4.4 or later.
- Only use the Tello app for activation.
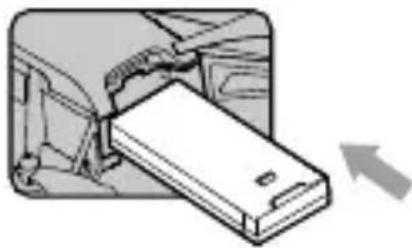
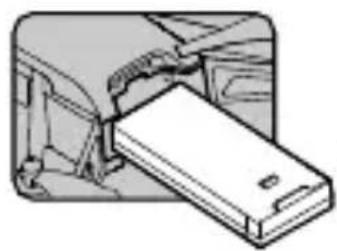
3. Charging the Battery
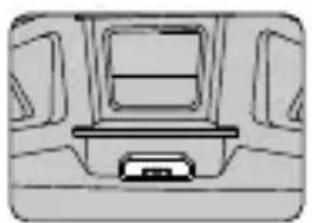
Insert the Flight Battery into the aircraft as shown.
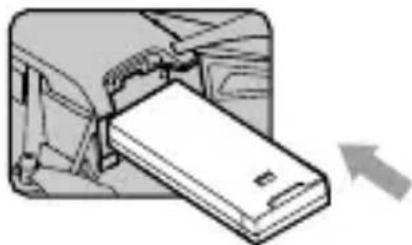
To charge the Flight Battery connect the Micro USB port on the aircraft to a USB adapter (not provided) using a standard Micro USB cable.
Charging time: Approx. 1 hour and 30 minutes.

Blinking blue slowly: charging.

Solid blue: fully charged.

Always use an FCC/CE (depending on location) certified USB adapter that is rated at 5 V and 1.5 A or above.
- Ensure the aircraft is powered off before charging. It cannot be charged when it is turned on.
4. Preparing for Takeoff
艺


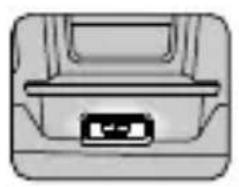
Press the power button once to turn the aircraft on. (Press again to turn off)
Enable Wi-Fi on your mobile device and connect to the network.

- With the open-source controller connected, the Wi-Fi network is RMTT-XXXXXX. The Wi-Fi network is Tello-XXXXXX without the open-source controller connected.
- Launch the Tello app. Connection has been established when the Aircraft Status Indicator blinks yellow slowly and the live camera view is shown on your mobile device.
5. Flight
In the Tello app:
- Auto Takeoff and Auto Landing


Auto Takeoff Auto Landing
- Taking Photos and Recording Videos


Tap to switch between Photo mode and Video mode.
Tap to take a photo or record video.
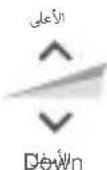
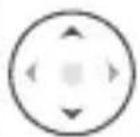
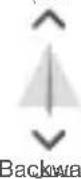
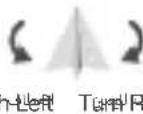
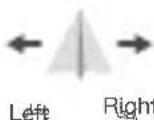
- Use the Virtual Joysticks in the app to control the aircraft (the default control stick mode is known as Mode 2)

Left Stick
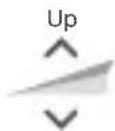
Down
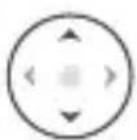
Right Stick
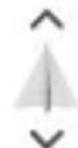
Forward
Backward

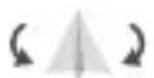
Turn Left Turn Right
Left Right
6. Programming with Tello
The RoboMaster TT Tello Talent can be programmed in several ways. Use the Tello EDU app for programming when using a mobile device. Scan the QR code to download the app on your mobile device or search for "Tello EDU" on the App Store or Google Play. Visit https://www.dji.com/robomaster-rt for more information about using computer program software to program the RoboMaster TT.
艺


The Tello Edu app is compatible with iOS 10.0 (or later) or Android 4.4 (or later).
- Users should be confident flying a Tello before they use the Tello Edu app to learn about programming. Please note that the Tello app and Tello Edu app cannot connect to the Tello simultaneously. Exit one app before using the other.
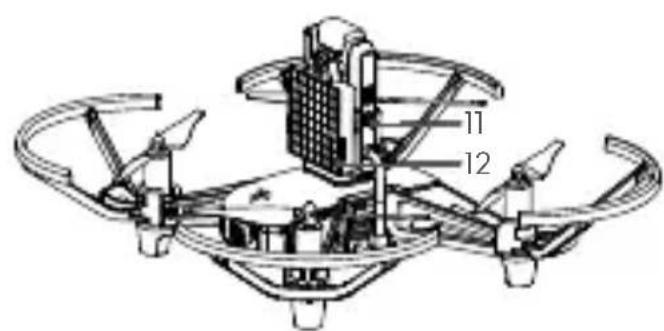
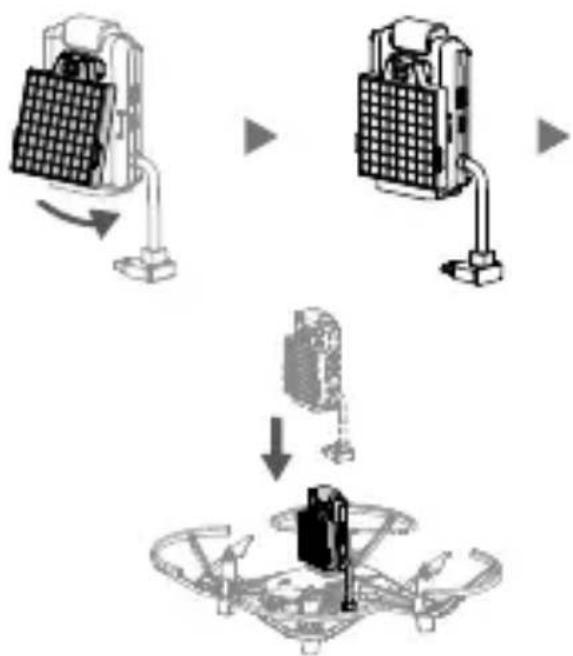
7. Using the Open-Source Controller and Dot-Matrix Display & Distance-Sensing Module
Attach the dot-matrix display & distance-sensing module to the open-source controller and attach the opensource controller to the aircraft. Program via the Tello EDU app or computer program software for DIY flight.

Installation Notes
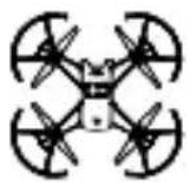
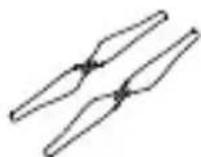
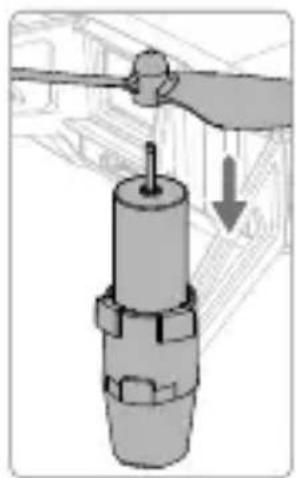
1. Installing the Propellers
艺
When mounting, ensure that the gap between the bottom of the propeller cap and the motor is no bigger than needed to insert the propeller removal tool.
Mount marked propellers on the motors with marked landing gear.
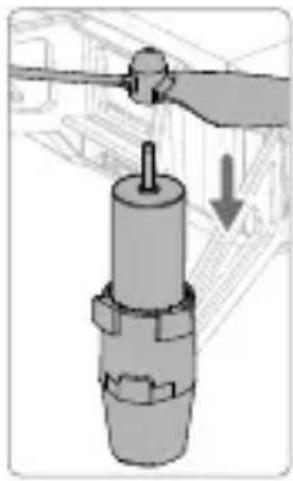
Mount unmarked propellers on the motors with unmarked landing gear.
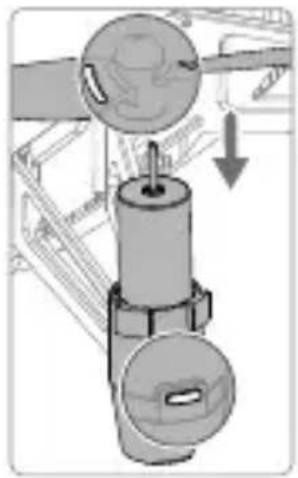
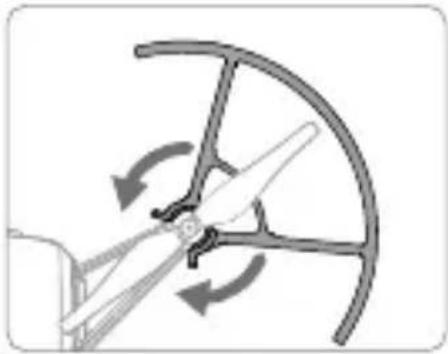
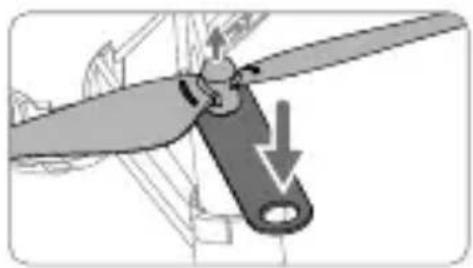
2. Detaching the Propellers
Insert the propeller removal tool between the propeller cap and the motor. Be sure to hold the motor while detaching the propeller.
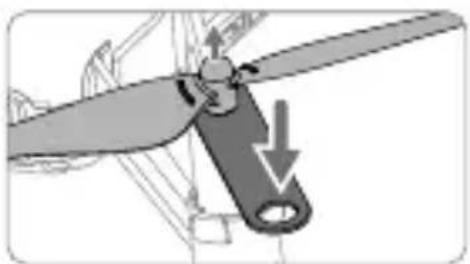

Always detach the propellers using the propeller removal tool. DO NOT remove the propellers by hand, or you may be seriously hurt, and may damage the motors.
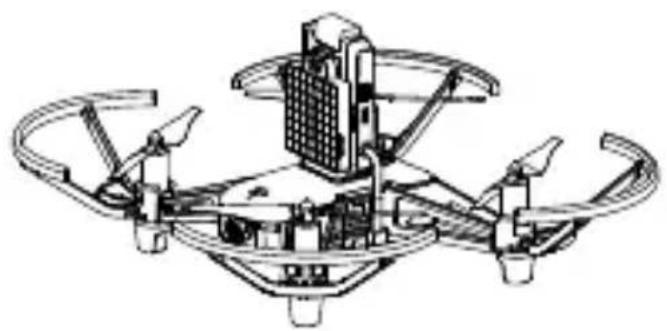
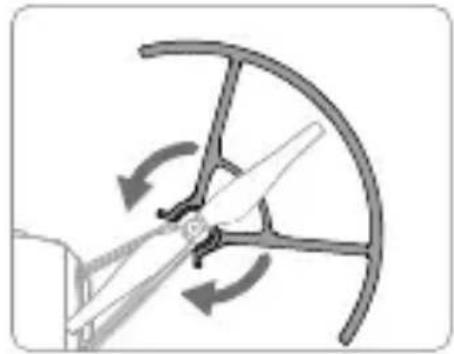
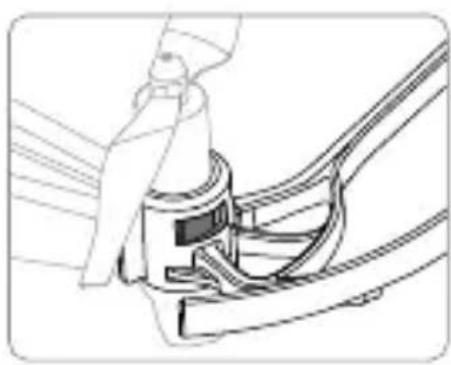
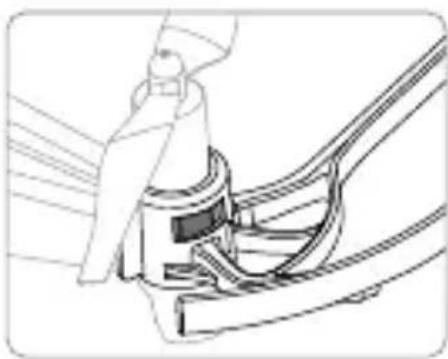
3. Installing the Propeller Guards
Push each propeller guard inwards to wrap it around the landing gear. Make sure it clicks into position and that the protruding parts of the landing gear securely fit into the notches on the propeller guards.

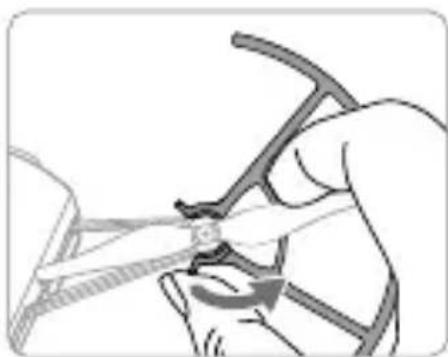
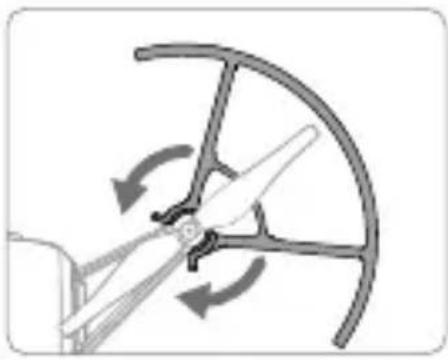
4. Detaching the Propeller Guards
To remove a propeller guard place your finger and thumb as shown in the figure below. With your thumb, gently apply a twisting force to the lip that protrudes from the propeller guard where it wraps around the landing gear.
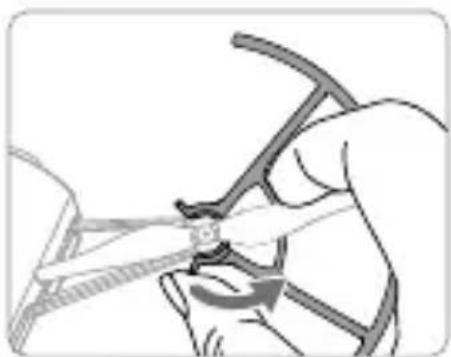

DO NOT use excessive force when removing propeller guards as doing so may damage the aircraft's arms and you may get hurt.
Specifications
Aircraft

Tello (Model: TLW004)
Weight (Propeller 87g
Guards Included)
Max Speed 17.8 mph (28.8 kph)
Max Flight Time 13 minutes (0 wind at a consistent 9 mph (15 kph))
Operating 32^ to 104^ (0^ to 40^)
Temperature
Operating Frequency 2.4 to 2.4835 GHz
Transmitter Power < 20dBm (FCC)
(EIRP) < 19 dBm (CE)
< 19 dBm (SRRC)
Camera
Max Image Size 2592× 1936
Video Recording HD:1280×720 30p
Modes
Video Format MP4
Flight Battery
Capacity 1100 mAh
Voltage 3.8 V
Battery Type LiPo
Energy 4.18 Wh
Net Weight 25 ± 2g
Charging Temperature 41^ to 113^ F
Range (5° to 45° C)
Max Charging Power 10 W
Expansion Kit
- Open-Source Controller
Model RMTTOC
Operating Mode Direct Connection Mode, Router Mode
Wi-Fi 2.4 GHz, 5.8 GHz*
Transmitter Power 2.4 GHz:
(EIRP) <18.5 dBm (FCC/SRRC/
MIC)
<17 dBm (CE)
5.8 GHz:
<15 dBm (FCC/SRRC)
<13 dBm (CE)
Bluetooth 2.4 GHz
MCU ESP32-D2WD, Dual-Core
Main Frequency:
160 MHz, Calculation
ability: 400 MIPS
Open-Source Supports SDK, Arduino, Scratch and MicroPython
Expansion 14-pin expansion port (I2C, UART, SPI, GPIO, PWM, power source)
LED Full Color LED
艺
Dot-Matrix Display & Distance Sensing Module Dot-Matrix LED Red and blue LED 8× 8
Dot-Matrix Driver function IIC data port, auto dot-matrix scan, adjustable 256 global brightness, adjustable single-pixel red and blue LED 256 brightness
Distance Sensing TOF Module
Maximum Sensing 1.2 m (indoors with white Distance of TOF wall)
- Extension Board
DIY Connection 14-pin extension port to 2× 7 pin, 2.54mm dual in-line package, two reserved positions for 5V/3.3V power indicators, two reserved positions for test indicators
- Only 2.4 GHz available in Japan.
Penafian
Mode Perekaman HD:1280x720 30p
Video
Format Video MP4
Baterai Penerbangan
Kapasitas 1100 mAh
Tegangan 3,8V
Jenis Baterai LiPo
Energi 4,18 Wh
Berat Bersih 25 ± 2 ~g
Rentang Suhu 41^ hingga 113^ F
(EIRP) <18,5 dBm (FCC/SRRC/
MIC)
<17 dBm (CE)
5.8 GHz:
<15 dBm (FCC/SRRC)
<13 dBm (CE)
Bluetooth 2,4 GHz
MCU ESP32-D2WD, Frekuensi
Utama Dual-Core:
160 MHz, Kemampuan
kalkulasi: 400 MIPS
https://www.dji.com/robomaster- tt
``"
``"
``"
``"
``"
``"
``"
``"
``"
``"
``"
``"
``"
``"
``"
``"
``"
``"
``"
``"
``"
``"
``"
``"
``"
``"
``"
``"
``"
``"
``"
``"
``"
``"
``"
``"
``"
``"
``"
``"
``"
``"
``"
``"
``"
``"
``"
``"
``"
``"
``'
``"
``"
``"
``"
``"
``"
``"
``"
``"
``"
``"
``"
``"
``"
``"
``"
``"
``"
``"
``"
``"
``"
``"
``"
``"
``"
``"
``"
``"
``"
``"
``}
구류로운 썸선이에 키어, 키어 쿕성서리 팀는모드자료로부터 어은 흠지나 콁본은 RYZE TECH 팀는 이 퍍과에서 썸서명서적요 for an gajohl jilng hong hong hong hong hong hong hong hong hong hong hong hong hong hong hong hong hong hong hong hong hong hong hong hong hong hong hong hong hong hong hong hong hong hong hong hong hong hong hong hong hong hong hong hong hong hong hong hong hong hong henghenghenghenghenghenghenghenghenghenghenghenghenghenghenghenghenghenghenghenghenghenghenghenghenghenghenghenghenghenghenghenghenghenghenghenghenghenghenghenghenghenghenghenghenghenghenghenghenghengheng
Mo baril gigi of Wi-Fi to 1
夸

音FJFJFJFJFJFJFJFJFJFJFJFJFJFJFJFJFJFJFJFJFJFJFJFJFJFJFJFJFJFJFJFJFJFJFJFJFJFJFJFJFJFJFJFJFJFJFJFJFJFJF
否
4. フローテルフド連版リ
FlorolelrGaIeRnAReGnRnAReGnRnAReGnRnAReGnRnAReGnRnAReGnRnAReGnRnAReGnRnAReGnRnAReGnRnAReGnRnAReGnRnAReGnRnAReGnRnAReGnRnAReGnRnAReGnRnA
<18.5 dBm (FCC/SRRC/MIC)
<17 dBm (CE)
5.8 GHz:
<15 dBm (FCC/SRRC)
<13 dBm (CE)
普早2.4GHz
<18,5 dBm (FCC/SRRC/
MIC)
<17 dBm (CE)
5,8 GHz:
<15 dBm (FCC/SRRC)
<13 dBm (CE)
Bluetooth 2,4 GHz
MCU ESP32-D2WD, Dual
Core-Hauptfrequenz:
https://www.dji.com/robomaster- tt
Ryze Tech no accepts responsibilities. Any legal responsibility for any actions or actions of employees is assumed by the company. The liability of employees is not limited to the individual employees, but rather to the company and to the employees' employers.
Advertencias
transmisor (PIRE) <18.5 dBm (FCC/
SRRC/MIC)
<17 dBm (CE)
5.8 GHz:
<15 dBm (FCC/SRRC)
<13 dBm (CE)
Bluetooth 2.4 GHz
MCU ESP32-D2WD,
Poids (protections 87g
d'hélice incluses)
Vitesse max. 28,8 km/h (17,8 mph)
Tailled image max. 2592 × 1936
Modes HD:1280×720a
14 broches (I2C, UART,
SPI, GPIO, PWM,
- Controller open-source
Modello RMTTOC
MCU ESP32-D2WD, dual
core, frequenza
principal:
Flight Battery × 1
<18.5 dBm (FCC/SRRC/
MIC)
<17 dBm (CE)
5,8 GHz:
<15 dBm (FCC/SRRC)
<13 dBm (CE)
Bluetooth 2,4 GHz
MCU ESP32-D2WD, dual-core
hoofdfrequentie:
160 MHz,
1. Instalar as hélices
2. Retirar as hélices.
transmitter (EIRP) <18,5 dBm (FCC/SRRC/
MIC)
<17 dBm (CE)
5,8 GHz:
<15 dBm (FCC/SRRC)
<13 dBm (CE)
Bluetooth 2,4 GHz
MCU ESP32-D2WD,
Frequencia principal do nucleo duplo: 160 MHz, Capacidade de calculo: 400 MIPS
Fonte aberta Suporte SDK, Arduino, Scratch e MicroPython
OTka3 OT OTBetCTBeHHOCTN
He peKOMeHnyeTcNcNoJIb3OBAHne DaHHoro npOdykTa DeTbMn MlaJme 14 let 6e3 npuCmOTpa B3pocIbIX.ObpaTnTe BHIMaHNe,HTo peKOMeHdyEmbI BO3pactB JnoHn -15 let. IpOH dOnJKeH XpaHITbcB MEcTx, HeDCtynbIX DnA DeTeB. B npCytCTBnN DeTei NOJETbl CJeDyET BbINOJIHrTb C OcOBoO OCTOpOXHOCTbIO.
Даньл порукт Исользует различные поюьtie texholoruynypablenya.Онako HeHaJIeKaIeeИСПЛБ3OBAHNE порукТа может пивесгК ТраВмAmIIповржденю ИмуцеCTBa.пeped ИсользOBaHemO3HaKOMbTeCb c MaTePmaJAMN, OTHOCYIMMCr K pa6OteпорукТа.ЗТДOKуMeHTbI COdEpKATcR B KOMПЛeKTeNoCTaBKN порукТа,a TaKKe DoCTyHbI Ha OФицalbHom caite Ryze Tech (http://www.rzyzerobotics.com).
Данньnpodykt npedctablaet coboi neTaOuhy Kaempey. Annapat lerko nCnoJIb3OBaTb, ecn OH haxoNTcB XopoWem pa6oYem COCTOHH (ONcaHO HIXe). Nocetnte caHT http://www.rzyzerobotics.com O3HaKOMLeHnC C camBIIM CBexmN INHCTpyKUmaMn IN npedynpexdEHHMa. Nolb3OBaTeIIN B CLUA dOnXhbl Nocetntb caHT http://knowbeforeyoufly.org dInr noJyehn DOnOHnHTeBHNO INHΦopMauIN O 6e3OnaCHOCTN NOJeTOB IN COOTBETCTBn Tpe6oBaHnM.
HOpMaCn,CoepKaaJcB3TOM DOkymeHTe, 3aTpaNbAet BaUy 6e3OanachocTb,3aKOHbIe npaba N 06raHHoCTN.BHIMATEJIbHO O3HaKOMbTEcB C daHHbIM DOKMeHToMpeE INCNOJB3OBAHmE INPOdyKTa. IpeHe6pExHne CoepKIMbIM DaHHoro DOkymeHTa HecobIOJeHne Mep 6e3OanachocTm MOKeT npVBectN K cepBe3hBM TpaBMam,yTepe INIINOBpeXdEHIO pOdyKTa Ryze Tech n dpyrO rmyuectBa.
NcnoJIb3yI daHHBI npOdyKT, BblIOJdTBePckJaTe, YTO BHIMATEJIbHO O3HaKOMNIICb C 3aBJIeHnEM O6 OTka3e OT OTBETCTBEHHOCTI IN COglaWaeTcB BblIOJIHrTb IpabINla I yCIOBnI HAcTOrUeI OOKyMeHTa. KPOME RAHBIM OBPA3OM PPEyCMOTPEHHOTO B PPABNJAX NOCJIENPODAJKHO O5CJLYXKBAHN RYZE TECH (HTTP://RYZEROBOTICS.COM/SERVICE), PPOdYKT IN BCE IOCTUYHbIE MATEPNAJIb I PPEIOCTABJIeHbI KAK ECTb" IN "B CYLlECTBYOLUeM COCTOHN BE3 KAKNX-JINBO TAPAHNTI INI YCIOBVIN, RBAHO BbIPAXKEHHbIX INI NIOPA3YMEBAEMbIX. 3A NCKJIIOUeHnEM TAPAHNTI, RBHbIM OBPA3OM PPEyCMOTPEHHbIX B PABINAX NOCJIENPODAJKHO O6CJLYXKBAHN RYZE TECH, KOMNAHRI RYZE TECH HE I PPEIOCTABJIeT HIKAKNX DpyTNX TAPAHNTI, RBAHO BbIPAXKEHHbIX INI NIOPA3YMEBAEMbIX, OTHOCRIUXCk K PPOdYKTU, AKCECCYAPAM IPOdYTKA IN BCEM MATEPNAJIAM, BKJIIOUHAR CJLEDyOLUeE: (A) JIOBAA NOIPA3YMEBAEMAR TAPAHNTI OTHOCITEJIbHO KOMMEPYECKOI PPINOHOCTN, COOTBETCTBNI HA3HAueHIO, HA3BAHNI, BECPENPTCTBEHHOTO INIb3OBAHN, OTCYTCTBNI HAPUHEHNI INPAB INTEJIeKTVAJbHOI CO8CTBEHHOCTN; IN (6) JIO6AB TAPAHNTI, BO3HINKAIOUAR B
PE3yIbTATE 3KcPJIYATALUIN, DEJIOBbIX ONEPALIN
NII KOMMEPUECKORO NcnoJIb3OBAHNI. 3A
NCKJIHOueHEM TAPAHNTNI, RHBbIM ObPA3OM
NPEDYCMOTPEHHbIX B OTPAHnueHHoIN
TAPAHNTNI RYZE TECH, KOMNAHNI RYZE TECH HE
NPEDOCTABJIaET HIKAKNX DpyNX TAPAHNTNI,
HTO PPOdYKT, AKCECCYAPBI NPOdykTA, LIOBAI
CACTb PPOdYkTA NII JIOBbIE MATEPNAJIb BYdUT
NOCTOHHO IN BE3ONACHO PA5OTATb, HE BdyUT
COIDEPXKATb HENCPABHOCTeIN, BIPYCOb NII
DPYTHX BPEdHbIX KOMHOHETOB, A TAKKE HE
NPEDOCTABJIeT TAPAHNTNI TOO, YTO LIOBAI IN3
3TINX PPOBJEM BydET NCPIPABJEHA.
HNIKAKNE PEKOMEHDAUIN INHOPMALUIN,
BY CTHOH INI NINCbMeHHOH NOFPME,
NOLUYEHhIE BAMN INPI NcnoJIb3OBAHNI
PPOdYkTA, AKCECCYAPOB PPOdykTA INI JIOBbIX
MATEPNAJIOB, HE JBJIaOTcR OCHOBAHNIEM
NPEDOCTABJIeHNI TAPAHNTNI, OTHOCAUeICR K
RYZE TECH INI PPOdykTy, 3A NICKLIQUeHIEM
TAPAHNTNI, RHBbIM OBpA3OM PDEyCMOTPEHHbIX
B 3TINX YCLOBnIX. Bbl INPHIMAETE HA CE6RA BCO
OTBETCTBEHHOCtB 3A JIOBbIE NOBPEKJDeHNI,
KOTOPbIE MOVT BO3HnKHHyTB B PE3yJIbTATE
NCIOJIb3OBAHNI PPOdykTA, AKCECCYAPOB
NPoDyKTA INI JIOBbIX MATEPNAJIOB INI
BALJEERO IOCTyNA K HIM. Bbl IIOHIMAETI
COfJIALJAETECb, YTO INCNoJIb3yETE NPOdyKT
NO BALJEMY COBCTBEHHOMY YCMOTPEHIIO
IN HA BALI PNCK INTOB bCMAOCTOReTIbHO
HECETE OTBETCTBEHHOCtB 3A JIOBbIE TPABMbI,
CMEPTb, ULLEPB BALJEMY IMYLlECTBY (BKJIIOUAR
KOMNbIOTEPHYIO CNCTEMY, MOBInbHOE
YCTPOJICTBO INI ANNAPATHOE OBeCNEHNE
RYZE TECH, NODKJIHOuAeMBIE K PPOdykTy) INI
IMUJLcETBy TPetbIX JILU, IN 3A NOTEPIO DAHHbIX,
NP0N3OLJeLIe B PE3yJIbTATE NCPOJIb3OBAHNI
BAMN INI NEBO3MOxHOCtN NCPOJIb3OBAHNI
BAMN PPOdykTA.
HEKOTOPbIE IOPINCDNIKUIMMOYT NCKJIIOUATb OTKA3OT OTBETCTBEHHOCTN,NBbIMoKETe IMETbIpyTNEIPABA,B3ABNCIMOCTNOT KOHKPETHOIPONCNIKUIM.
Ryze Tech He Hecet OTBETCTBEHOCb 3a NOBpeKdEHHa, TpaBMbl IINI JIObyIO UOpNIMUeCKyIO OTBETCTBEHOCb, IprMo INI KOCBeHHO BbI3BaHHyIO NcNOJIb3OBaHHeM DaHHoro npOdykta. Ha NoIb3ObaTeIa BO3laRaETc O6ra3aHHocb Co6JIoDAt b PpaBnIa TEXHNI K6e3ONaCHOCTn I 3aKOHOdaTeJIbCTBO, BKIOUa, HO He ORpaHnUBArcb I3IOXeHHbIMn BHaCToIeM pyKOBODCTBe IO TexHnke 6e3ONaCHOCtN. Bbl HeCeTe eDInHOJIuHHyIO OTBETCTBEHHOCTb 3a BCE DeIcTBnI pni UnpaBLeHHn NpIoTeOM dpoHa Tello.
PpeDynpexKdEHHa
- He npibnkaTecB K BpaauoUmmc nponeJIepam n 3JIeKtpoDburatelm.
- HE npikacauTecb K HxKHei CToPoHe DpoHa, OHa
MOXET 6bItb TogpaHei.
- 3anpeuetaTcra nCnOJIb30BaTb aKKMyIaTOpbl dpyuNX KOMNaHn (He Ryze Tech). TaKke 3ANPEUJAETCRA 3ambiKaTb aKKMyIaTOp Flight Battery hakopotko.
- Baxhna INHΦopMaζηв BKJIIOueHa B KOMπJEKT NOCTaBKn IpoIyKTa N B COOTBeTCTByIOUζI O DOKymeHTaζIIO. IpoHTte BHIMaTeJbHO 3Ty INHΦopMaζIIO N COxpaHnTE yNaKOBky IpoIyKTa N DOKymeHTaζIIO JIЯ NCNoJIb3OBAHnB 6dyuIeM.
5.Oba3aTeIbHo nCnoJIb3yIte USB-aIanTep, ceTpncnupoBaHHbI FCC/CE (B 3aBnCmOCTn OT MeCTOnHaxOxKdEHN), C HOMHaJIbHbIMn npaMeTpamN 5 Bn1,5 A nnBbIwe.
6.ПередЗаряковубintecь,yTOДрOHБИКIOUeH.
EclnДрОнВКIOUeH,ЗарядкHe 6уДETBыINOLHЯТьс. - HE 3apjkaite akkyMylTOp HENOCpeDCTBHeHNO nocJe noIeta, NOCKoJIbky OH MOKeT 6bITb OChEh TOpAHM. 3APPEUJAETCn pOn3BODInTb 3apJkdy akkyakmylToPa Flight Battery do Tex nop, noka OH He octbHet Do KOMHaTHOH TempeaTypbl.
- 3apjaKeTpeakKymJyTOpB TeMnepaTpPhOM dnaana3oHe 5-45 ^ C (41-113 F). ONTMaJIbHbI TeMnpaTpHbI dnaana3OH 3apjKn aKKymJyTota 22-28 ^ C (72-82 F).
- EcnnnoBnEeTc npdeynpeKdHHe O Hn3Kom ypOBHe 3apda akKymyIaTopa Flight Battery, 3apdnte ero do ypOBHr 30-60% dny dInTeJbHorO xpaHHeHr.
- Ecnn aKKymyIaTOpbI HE 6byuNT uCNOJIb3OBAIbCBA TteueHnE 10 nnn 6oJee dHei, INx Heo6xoIIMo pa3pIITb DO yPOBn4 40-65%. 3TO IO3BOJNT 3HaHTeJIbHO YBEJIInHTb CpOK CnyK6bl.
乙
HopmatNBHO- npaBOBbie aKTbl
Co6IIOeHHe cIeNyUoJnx npaBn IOMOKeT Bam n36ExaTb cepBe3hIx TpaBM n pInuHHeHryuep6a IMyueCTBy:
- HE BbINOJIHnIte NOJeTbI B HEnOcpeICTBeHHoI 6JIIN3OCTN OT Ipynx JETaTeJIbHbIX aannapatOB He3aBnCmO OT BbICOTbI. (PpH HeOxOIMOCtN npOn3BeDITe NocaIKy HEmdJIeHHO.)
- HE BbInOnHnIe Tne IoJIeTbI HaI rCyToHaceJeHHbIM paHOHAM, rOpOaAM, CnOpTINBbIM MeOpnpTnA M, BbICTaBKamN, KOHcEpTaMn n T. d.
- HE NOdHMaJTe DpOH BblIe MaKcImaJIbHOpa3peUeHHoB BblCOTbl, ONpeJeJIeHHoM MecTHbIM3aKOHOJaTeJIbCTBOM HOpMaTINBHO-IPABOBbIMnAKTaMn.
4.ДерхитесьHa paCCToHn HEMeuaite NINOTpyEmbIM IetaTeIbHbIM annapatam.Bcerda DepeXitte npyrne IetaTeIbHbIe annapaTbI n npenrTCTBna B 3OHe BNDIMOCtN NOBLeTaIte nx. - HE BbInonHnIte noJETbIB HEnocpeDCTBeHHoI 6JIIN3OCTN IN BHyTPN 3OH, 3aPpeUeHHbIX nIy IIOJETa, ONpeJeHHbIX MecTHbIM 3aKHOJaTeJIbCTBOM IN HOpMaTINBHO-IPaBOBBIM aKTAMN.CnICOK 3OH, 3aPpeUeHHbIX nIy IIOJETOB, BKIIIOuayet B Ce68 aApONOpTbI, rpaHnUb IMexkDy DByMcyBepEHbIMN ROCydapCTBaMn INI pERNOHAMN, KpyNHbIE rOPOda/ peHNoHbI IN T. IN, 3OT CnICOK NOCToRHHO O6HOBJIaETcRA. HE BBInonHnIte noJETbIB6JIIN3CtpaTeRueckn BaXhBx OBBeKToB INHpactpyKTypbl INI 3OH, TaKIN
Kak 3JIeKTpOCTaHcHn, BOIOOChTbIe COOpyKeHn,
NCpabNTeBbHbIe yUpeXdEHN, OKNBJIeHHbIe WOCCE,
npabNTeBCTBeHHbIe yUpeXdEHN, BOEHbIe 3OHbl N.T. d.
- Постогинов Держенидюн В пedingалх вдимoctи, рпбегая К пошни наарнka, ecn 3TO Heo6xOIMO.
- HNKOrIaHe IcnoJIb3yIe IpoH IJIpeBO3Kn He3aKoHHbIX INI ONaCHbIX TOBapOB/rgy3OB.
- BbIdoJXHbI NOHMaTb ceJIb BaWero NOJeTa (ДЯ pa3BLeueHnI,ДЯ O6UeCTBeHHOrO nI IN KOMMepueCKoRIO nCNoJIb3OBaHnI) I NOLyuHTb COOTBETCTByKUcEe pa3peUeHne opraHOB Blaactn IpeE INoTeOM. IpOKOHcyNbTpyITecb C MeCTHbIMN peYJInpuyUOImM OpRAHAMN IO BCEM COOTBETCTByUOIm BOpPocAM. POnJIb3OBaTeJAmB CCLJA peKOMeHNdyETcR ChauAna NocetNTb caIT http://www.knowbeforeyoufly.org/ n daJe e DeiCTBOBaTb COo6pa3HO 6ObCTOReTbCTBam.
9.ПOMHHTE,TOBHEKOTOpbIXOBlaCTxINpeHOHXMOXET 6bITb3aPpeUeHO KOMMepueckoe NcNoJIb3ObaHne INCTaHcIOHHO ynpabJIyEmbIXJeTaTeJIbHbIX aIInapaTOB. Ipeed NOJETOM O3HaKOMbTecB C MeCTHBIM 3aKOHAMN INIpaBnAMN IN CO6JIHOaIteNX,TaK KaK OHN MOrYT OTLIuHaTbC8OT Yka3aAHbIX B 3TOM DOKymente.
10.ПиИСЮЛБ3OBaHIMКAMepbI yBaKaIte KOHcHdEHNJIbHOCTb dpynX JIOJe.BaShI DeICTBnI YOJKHbI COOTBETCTBOBaTb MECTHbIM 3aKOHAm O KOHcHdEHNJIbHOCTN IN HOpMaM IN CTaHApTAM MopAIH. HE npOn3BOJNTe BVdeOHa6JIoDEHne 3a JIOJBMI, O6BeKTAMN, CO6blTnM, BbICTyJIeHnM, BbICTaBkAMN IN CO6CTBEHHOCtBu 6e3 pa3peLHeHnM, TAM, Ie BO3MOxH0 HApUWeHne KOHcHdEHNJIbHOCTN, DAJKe ECJI NCHrTBIE KaPbI INIIN BVJeO pPeHa3HaueHbI DJIYNHOrO NOJIb3OBaHnR. - IOMHInTe, YTO B ONpeJeIeHHbIX MeCTax FOToTpaΦnPoBaHne N BuDeO3aIINcB CO6bITn, BbICTyJIeHn, BbICTaBOK NIN KOMMepueCKoI CO6CTBeHHOCtN C NOMOuBIO KaMepbI MoXeT HApUwAtb ABTOPCKOE PpaBO NIN DpyrIe 3aKOHHbIE npaba, DaJXE ECNI CHrTbIe KaIpbI NIN BuDeO IpeDHa3HaueHbI DnA JInuHOrO NOJb3OBaHnI.
OrpaHnueHne BbICOTbl
- BbInonHnTe NoJET Ha Bbcote HE 6oJee 10 M (33 cyTa) H He npNknaTecb K nppeTCTBnM.
2.CnCTemaBn3yaJbHOroNo3nUHOHPOBaHnnaΦΦeKTHBHaTOLbKO npuYcIobu,HTO pOnHaxoDntcHa BbICote oT 0,3do10M(1,0-32,8fpya)NlyuWe Bcero pa6oTaet Ha Bbcote ot 0,3do6M(1,0-19,7fpya). - Pa6oTa CnCTeMbI Bn3yaJIbHOrO nO3NIOHnPoBaHnI 3aBnCIT OT NOBepxHOCTn, HAD KOTOpO IpnolTeaET dpOH. ApOH ABTOMaTneCKn IepexODHT B pExKIM IpnocTpAHCTBeHHOrO NOJIOXeHnI, ecIN CnCTeMa Bn3yaJIbHOrO nO3NIOHnPOBaHnI HeOcTyHnA. B peKIMe IpnocTpAHCTBeHHOrO nOJIOXeHnI dpOH He MoKet Ce6r nO3NIOHnPoBaTb. YnpabJIyTe DpOHOM C BoJbWOn OCTOpOXHOCtBu B CJeNyUQmX CNTyaUmAx,
I3-3a KOTOpbIX OH MOKeT NepeuIN B peKIM npOCTpaHCTBeHHOro NoJIOXeHnI:
a. Ipn nonete Ha BbICOKoN CKOpocTN Hxke 0,5 M (2 cyTOB).
6. Пи полеле Нд OДноцьETHО NOBepxHOCTbIO (HAnpIMeP, Hд NOBepxHOCTbIO YNCTO YepHOrO, YNCTO 6eIoro, YNCTO KpaCHOrO, YNCTO 3eJIeHOrO UBeTa).
B. Пи NOЛеТ Нд NOВЕХОCTЯМС CBICOKIMM OTPаЖАЮДМС CBOИCTBAМN.
I. Pn noJTe HAD BOdo nn npO3paHbIMN NOBepxHOCTaMn.
I. Pn noJte HaD DnKyUIMMCr NOBepXHOCTaMn nn oBeKTamn.
e. Pn NOJETB MecTax C yactbIM NIN pe3KIM N3MEHEHEMOCBEUEHNA.
K.Пи ПОЛЕТНД.KрАне TemHьIMN(MeHee10JIOKc) NIN KpaIHeApKIMN(6OJee1000JIOKc) NOBepXHOCTYMN NIN NO HAnPabJIeHIOKЯRPKM NCTOCHNKaM CBeta (HaNPIMep, K COJIHy).
3.Пи NOJIeTe HAn NOBepxHOCrMaN,He NMeIOLmMn HeTKnx KOHTyPoB INI TEKCTypbl.
I. IpnnoJTe HaI NOBepxHOCTaMn C IOBOTOPAOUIMMCRA OINHaKOBbIMKOHTypamN INI TEKCTypamN (HapnpMeP, NITTOOHoe NOKpbTne).
K.Пи NOIeTe HaI MeJIKIMN IOHKIMN O6BeKTaMn (HAnpIMep,BETBAMN DEpeBbeB NIN JINHHaMn 3JIeKTPoNEpeDa).
JI. Ipn noIeTe Ha ckopocTn 6oJIe 18 KM/4 (11 MInb/4) Ha BbICote 1 M (3,5 cyTa) nIN HnKe.
4.CnCTemaBn3yaJbHOroNo3nUHOHPOBaHHMOKeT He pa3JIuHTb PpeDMETbHa 3eMHe npN OueHcIa6oB oCBeueHHOCTn (Mehee 100 JIOKc).HE 3aynckaiTe dpOH,ecnB nPnIOXeHH Tello noRbUIOcb PpeDynpExEHHO HeNOCTaTOHOMOCBeueHH.
KOMnJIeKT NOCTaBKn
IpoHx1 (BkIIOUa nponeJIepebl 3auNTy nponeJIepeoB*)

3anachon nponeenep × 2 (napa)
Pnahwet c TpaekTopnei noleta × 4
KabebMicroUSBx1
Flight Battery × 1
Pnncoc6neHnE nA CHaTnA nponeJIepoB × 1
PykoBOCTBOx1AkkMyJnTTo

KoHTpOJInepeCOTKpbITbIMKOdomx1
MaTpyHbI
mHnKaTOp C
MOyJem DaTHnKa
pacCTOaHnX1
PacupeHHa naHeIb × 1


Cxembl, yka3aHHbIe B daHHOM DOKymeHTe, daHbI TOJIbKO IIN CnpaBKN MOnyT OTnUaTbcr OTO paKTnueCKoro npOdykTa.
1. Вてdeenne
ROBOMASTERTM TELLOTM Talent BKNHuaet B c6ea Дрон Tello n paCunpeHHbI HabOp. Tello npedctabJraet c6oBm MaJIeHbKn KBaDpOKONTep, OCHaUeHHbI CnCTeMoH Bn3yaJIbHO rO No3NIOOHUPOBAHn I bOpTOBoi KaMepoI. Бlaorapr cInTeMe BV3yaJIbHO rO No3NIOOHPOBAHn Y yCOBepuHEnCTBOBaHHOMy NOJETHMoy KOHTPOJInepy OH MOXET 3aBvCaTb Ha MeCTe N IOXODNT DIA NOJETa B NOMeUeHNx. DoNoJIHNTeJIbHbIe cyHKU, TAKHe KaK peXIM aBTOMaTIueCKOro B3JIeTa/NOCAIDKn Ha pyKy (Bounce Mode), 3anncb KOPOTKINX BnDEOpOLIKOB C nomoubTo texHOJorn EZ Shots u8D Flips, no3BOJIoUaz delaTb TpIKN B BO3dyxe, ppeBaIauT ynpabJeHne Tello B cnloshoe yIDOBoJbCTBne. Tello no3BOJraet chIMatb foToRpaФmC pa3peSeHEm 5 Mn n BVideo 720p c nepeDAyeB peXIMe peaJIbHO rPoMeHn peEe3 npiloxeHne Tello Ha MObIbHom yCTpoIcTBe. MaKcIMaJIbHOe NOJIeTHOE BPeM RA CoCTaBJraet Pn6blntelhno 13 mHyT*.
Co3daIte co6CTBENHbI NOJET,NCIOJIb3ypaCuspeHHbI
Ha6Op,B KOTOpbI BxOJIT KOHTPOJIeP C OTKpbITbIM
KOOM,MATpUHbI INHINKaTOp C MOyJEM DaTHNka
pacCToHnI N paUsPeHHa NaHeJIb.YCTpoNCTBO
NoIDepXnBaET npOrpaMMIpOBaHne Ha J3bIKax Arduino,
Scratch, MicroPython n dp.
图
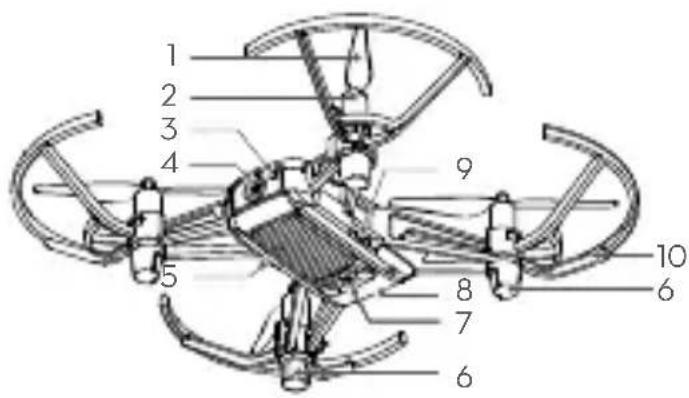
1.Прпеллеры
2. Θлектpondигатели
3.Индикатop coctoHnДроHa
4. Kamepa
5. Khonka nHTaHn
6. AHTeHHbI
7.CnCTemaBn3yaJIbHOroNo3nIIOHOHIpOBaHn
8. AkkymyIaTop Flight Battery
9. NopT Micro-USB
10. 3aunra nponeepeoB
11. KoHTpOJIJIeP C OTKpbITbIM KOIOM
12. Матричный Иndикатор с мodyем натунке пасстаян.
MaKcMnBHO BpEma NOIeta 6bIIO NOIyueHO B 6e3BeTppeHHbIX yCNOBmX npN cKOpOCTN 15 KM/4 6e3 nCNoJIb3ObaHnHa6opa. 3NaueHne npINBeDeHO TOnbKO IIN CnpaBKn.
2. 3arpy3ka npiloxeHn Tello n npocmoTp o6yauoXu BndeopolKOB
Haundte TelloB App Store nnn Google Play nnn otckaHpynte QR-kod, yTo6b3aRpy3nTb npInloXeHne Ha cBoe MoNlbHoe ycTpoNCTBO.ДЯ obecneueHn 6eOanachOCTn NOJeta NocMOTpnte oBuHaOnuHe BIndeopolnKa Ha OphiuaJIbHom Be5-caTe Rye Tech (http://www.ryzerobotics.com) nepeI nepBbIM noJeTOM.


- PpIIOXeHne Tello noJIepKnBaet iOS 9.0 (uNn 6OJIee nO3dHIO BepcHIO) uAndroid 4.4 (uNn 6OJIee nO3dHIO BepcHIO).
Tello.
E
3. 3apянka akkymлетopa
YcTaHOBnTe aKKyMylrTop Flight Battery Ha npOH, KaK noka3aHo Ha pncyHke.
ДлэзардкнakумлгетаFlight Battery noKJIIOHHTe nopt Micro USB ha prohe K USB-адanTepy (He BXoNT B KOMNKeT),ИспьзчstahdapThbКabeIb Micro USB.
Bpem3apdkn: npu6n. 1 yac 30 mnHyT.

MeHHeHHoMnraetCnHM:3apXkaeTcra.
续
TOpNTcHIM:3apXKeH NOJHOCTbIO.

063aTeJIbHO nCIOJIb3yIte USB-aIaITepeTINuPOBaHHBf FCC/CE (B 3aBnCIMoCTNOT MecTOHAXOKeHnA), C HOMHaJIbHbIMnnapametpAm5 B n1,5A nn BBiWe.
- Npeep 3apqkOy6eDntecb, yTO npOH BvIKIOUeyH. EcIn npOH BKIOUeyH, 3apqka He 6ydt BbINOJHrTbcR.
- Akkymyntop Flight Battery
EMK0CTb 1100MAu
HapjkeHe 3,8B
Tn aKkymyIaTopa IInTn-NOImepHbI
EMKOCtB 4,18BT-
Macca 25± 2 r
Дианазон Temператы OТ 5do 45^
3apn (ot 41 do 113 F).
MaKcImaJIbHa 10Bt
MOLUHOCTb3aPnKIN
PacunpeHHbHa6op
KoHTpoJIneP cOTKpbITbM KOIOM
MoeB RMTTOC
Pekim pa6oTbI Pekim noKluOHeHn
Haprymyo,pekim
poyTepa
Wi-Fi 2,4 ΓΓu
MoHOCb <18.5 DM (FCC/SRRC/
peepaTnka (3NIM) MIC)
<17ДБМ(CE)
Bluetooth 2,4 ΓΓu
MinkpokoHTpoJIneP ESP32-D2WD,
DByxbjaepHbI,
pa6o7a yactota: 160
Mf, BbHcJIeJIbHaI
CIOOC6HOCTb:400 MIPS
OTkpblk KoI PoJdepKka SDK, Arduino,
Scratch u MicroPython
PacunpeHne 14-KoHTaKTHbI npT
pacunpeHn (I2C,
UART, SPI, GPIO, PWM,
NCTOCHNK NITaHnA
CBeToDIOHbIe
IOnHOUcBETHbIe
INHnIKaTOPbI
CBETOIOIObl
- MatpruHbI INHdNkATOp C MoDyJem DaTnKa paCCTOHH
MatpnuHbI CBeToIOIO KpaChbIe n CnHHe
CBETOINIOIbI 8× 8
1.2 M (B NOMEUEHIN Ha
paCCToHHe,
fOHe 6eNoi CTehBi)
I3MepeEmoe DaTnKOM ToF
PacuipenHnnaHeIb
CamaocToTeIbHoe noKIOUOHeHne
14-KoHTaKTHoro nopta
paCunpeHnK pa3bemy
2x7, DIP c warom
BbIBOJOM 2,54 MM, DBa
CBOOOHbIX MECTA DIA
INHnkaTopOB NITaHn5B
/3,3B,Ba cB6oHbix
g 1 1 1 1 1 1 know before you fly.org
9
aalglgllgglgall gge 1 aagablaag
Lie 8g511 eli jx gall sia xia xia xia xia xia xia
10
Joo 2015 2016 2017
gJ, Jeo gJ, Joo gJ, Jus gJ, Juaa Juaa Juaa Juaa Juaa Juaa Juaa Juaa
j1 j 1000000000000000000000000000000000000
aill plll lll jll ooll bll
jg yall gblao jgall jyai jia 11
g 1xalgl jbi jz aJyaleil cJLabi g, yjabbl g, xlaol g, xlaol
gjggallbllll 1s! gssasaiagialllggealglnllg
a#
jll 10)33 2
. = , = , =
12
J 30 1.0
.(j60.3)19.711.0
3
g.4jyglal yu pbl jgy Lwue Attitude gog l jilab jilb
jol jilbll 100 gogg o jilbgl aAttitude
Attitude g 3 a jlll l s o
.(a0.5) aJzjxbl .a
gJ,galal gJ,galal gSIS) 10g jg Jcbaw gjblb .b
(1)
.
aalal gai 11 11 11 11
.25yao 1
.5u g jy Sua Jsu dol yI q aiaabio gjbl
<)gglg0(s10>)s0s p1b c1s gbi jbl.9
(100,000)
glgglglblte1cwwglgslbln
()jggsyagglbgl
.(sl)
(ayj51I bgsg jI gJy) aJzJng Jxall pluJy jJball
3.5 aIwJ (w/18) aLW/ Yo11 Jyj jyj jybl k
.15 31
151x6 151x6 151x6 151x6 151x6 151x6 151x6 151x6 151x6 151x6 151x6 151x6 151x6 151x6 151x6 151x6 151x6 151
a 10000000000000000000000000000000000000000000000000000000000
gagwll ojllal gaaug Jaeill
5
a 100>)
a 2000 Tello
og:glugoo
1 × =
(^*jgjj - 1b1j - 1gj - 1g_j - 1b_1)
(gj)2xJzdzab5zogj
4 × · ( 6 - 1) ·
1× Micro USB J5
1xj
1xg0g1c
1x


aogaa aagai
oo gg aaiaaaegaaaa
1xduail
1x.
1xdtalubj

aill 100
a.1
J 1000000000000000000000000000000000000000000000000000000000000000000000000000000000000000000000000000
j1,2n 8
291 × 291.1
Micro USB 12.9
15.2
10
jiall 3
jai 100
- 5,1 .4
gggaaaagaaa 12
aaij.5
dLubj j
6
aJyjy gajb1 wuus p2i .7
gblao 1jabll aax Jgaai jia jia jia jia jia
http://www.)Ryze Tech
.8JyJyJyJy (ryzerobotics.com

Android v4.4 iOS v9.0
Laii Tello

3
0000 0000

J 508 3111111111111111111111111111111111
Micro USB Ls pduu (g) USB
30g 20g a
.
Jouy aigaa:uyj


ue jua u (ggl) FCC/CE Jo Iuus USB Jnq 1
d1l1 与 l : y = 1
Jusu w gao jie y 1aia aai bai Jaa
Jzj0g 0a3111 jz Jb01 (Jz01111y y001)

4

JiWi-Fi jSoo p3
RMTT Wi-Fi 256, 1000, 1000, 1000, 1000, 1000, 1000, 1000, 1000, 1000, 1000, 1000, 1000, 1000, 1000, 1000, 1000, 1000, 1

1.5
Tello
julilbglg julll 1

jlll jy,1jLdl 1g


g 1
gall glalao gssg yall bll

gj 0jgo bjiy jki
(2gogjol)
left|left|right|left|right

Right Stick
Forward


Tello RoboMaster TT Tello Talent 2018
JL JI JI JI JI JI JI JI JI JI JI JI JI JI JI JI JI JI JI JI JI JI JI JI JI JI JI JI JI JI JI JI JI JI JI JI JI JI JI JI JI JI JI JI JI JI JI JI JI JI JI J1
s! App Store "Tello EDU" jjjjjjjj jj jj jj jj jj jj jj jj jj jj jj jj jj jj jj jj jj jj jj jj jj jj jj jj jj jj jj jj jj jj jj jj jj jj jj jj jj jj jj jj jj jj jj jj jj jj jj jj jj jj

)Android 4.4,1 (i0s 10.0 Tello Edu

Tello 150 Tello 150 Tello 150 Tello 150 Tello 150 Tello 150 Tello 150 Tello 150 Tello 150 Tello 150 Tello 150 Tello 150 Tello 150 Tello 150 Tello 150 Tello 150 Tello 150 Tello 1
#
aagaaalwogjawl gao gao 7
aLub1 jzaiwul oogg aabii
aagaa aal 100g aalw w w w g g aalw dgg aalw Jogg p
gai plauu y a a .yblally uabl aegao aalw oog g uab
aill oalaall jn bnnn n nn n n n n n n n n n n n n n n n n n n n n n n n n n n n
yj1 jL 1slo
29161 5j.1
j 51
aogj61e01 JyS yjU

Cioxl 15 ggl 1s s
bg 15 c15 p01
. Cioxl
cIoc 0g0 g0161 uS p3
b011 w01 c0150a01 Uc
.0e0
A
291.261.2
aai jyabil annl jao 5i .jaybi aggbl e baf n aegbbl dol
a1 = 30,a2 = 40
g 2 g 1 2 2 2 2 2 2 2 2 2 2 2 2 2 2 2 2 2
15 26
#
glblcglgj3.3
J 5000000000000000000000000000000000000000000000000000000000000000


答
gj61 4
pluay. alil jklal g 15 dolgl aelol gdo yg yllj
yll jlsl f do gdl g jz jll daaill de aag oag bclal
.

a 11 11 11 11 11 11 11 11 11 11 11 11 11 11 11 11 11 11 11

150
(TLW004:JT) Tello
87
(aLJ/05 28.8) aLJ/3a17.8
9 a12a 0) 13
aLwJ/JwJ
( (a < L < u < s15)
0) 104
(a)40
2.4835 2.4
(FCC) 20>
(CE) 19>
(SRRC) 19>
1936× 2592
30p 720x1280 :HD
(aaaa)
ds
1.1.1.2.
J 1
1
(EIRP)
- sol
oogall gao 83
gduu
1 1 MP4
a
10X
aJg3.8
aLiPo
23114sLw/0g 4.11
25+2
113 41
(4515)
10
RMTTOC
4261 g0g ju61 Juaui 6
*jyolao 5.8, jyolao 2.4
FCC/) b1g 18.5>
(SRRC/MIC
(CE) 17>
5.8
(FCC/SRRC) 15>
(CE) 13>
jj202.4
JES ESP32-D2WD
alil 1
:aaal 160
MIPS 400
all jn
jai jai jai jai
a
eoggll aegoo
https://www.dji.com/robomaster-
juaal jaoaai gaaia
.Ryze Tech a, a, a, a, TELLO
This device complies with Part 15 of the FCC Rules. Operation is subject to the following two conditions: (1) This device may not cause harmful interference, and (2) This device must accept any interference received, including interference that may cause undesired operation.
Any changes or modifications not expressly approved by the party responsible for compliance could void the user's authority to operate the equipment.
This equipment has been tested and found to comply with the limits for a Class B digital device, pursuant to part 15 of the FCC Rules. These limits are designed to provide reasonable protection against harmful interference in a residential installation. This equipment generates, uses and can radiate radio frequency energy and, if not installed and used in accordance with the instructions, may cause harmful interference to radio communications. However, there is no guarantee that interference will not occur in a particular installation. If this equipment does cause harmful interference to radio or television reception, which can be determined by turning the equipment off and on, the user is encouraged to try to correct the interference by one or more of the following measures:
—Reorient or relocate the receiving antenna.
- Increase the separation between the equipment and receiver.
- Connect the equipment into an outlet on a circuit different from that to which the receiver is connected.
- Consult the dealer or an experienced radio/TV technician for help.
RF Exposure Information
The aircraft complies with FCC radiation exposure limits set forth for an uncontrolled environment. In order to avoid the possibility of exceeding the FCC radio frequency exposure limits, human proximity to the antenna shall not be less than 20cm during normal operation. This transmitter must not be co-located or operating in conjunction with any other antenna or transmitter.
ISED Compliance Notice
This device contains licence-exempt transmitter(s)/ receiver(s) that comply with Innovation, Science and Economic Development Canada's licence-exempt RSS(s). Operation is subject to the following two conditions: (1) This device may not cause interference.(2) This device must accept any interference, including interference that may cause undesired operation of the device.
This equipment complies with RSS-102 radiation exposure limits set forth for an uncontrolled environment. This
KCC Compliance Notice
NCC Compliance Notice
EU Compliance Statement: SZ DJI TECHNOLOGY CO., LTD. hereby declares that this device is in compliance with the essential requirements and other relevant provisions of the Directive 2014/53/EU.
A copy of the EU Declaration of Conformity is available online at www.dji.com/euro-compliance
EU contact address: DJI GmbH, Industriestrasse 12, 97618, Niederlauer, Germany
GB Compliance Statement: SZ DJI TECHNOLOGY CO., LTD. hereby declares that this device is in compliance with the essential requirements and other relevant provisions of Radio Equipment Regulations 2017.
A copy of the GB Declaration of Conformity is available online at www.dji.com/euro-compliance
onplain fis-sit www.dji.com/euro-compliance.
Indirizz ta' kuntatt tal-UE: DJI GmbH, Industriestrasse 12, 97618, Niederlauer, il-Germanja
Declarata UE de conformitate: Prin preventa, SZ DJI TECHNOLOGY CO., LTD. declara faptul ca acest dispositiveste conform cu cerintele esentiale si celealte prevederi relevante ale Directivei 2014/53/UE.
Un exemplar al Declaratiei UE de conformitate estedisponibil online, la adresa www.dji.com/euro-complianceAdresa de contact pentru UE: DJI GmbH, Industriestrasse 12,97618,Niederlauer, Germania
Izjava EU o skladnosti: Družba SZ DJI TECHNOLOGY CO., LTD. izjavlja, da ta naprava ustreza osnovnim zahtevam in drugim ustreznim dolocbam Direktive 2014/53/EU.
Kopija izjave EU o skladnosti je na voljo na spletu na www. dji.com/euro-compliance
Kontaktni naslov EU: DJI GmbH, Industriestrasse 12, 97618, Niederlauer, Nemčija
EU Izjava o sukladnosti: Tvrtka SZ DJI TECHNOLOGY CO., LTD. izjavljube da je ovaj uredaj izraden u skladu s osnovnim zahtjevima i ostalim relevantnim odredbama Direktive 2014/53/EU.
Kopija EU Izjave o sukladnosti dostupna je na mrežnoj stranici www.dji.com/euro-compliance
Adresa EU kontakta: DJI GmbH, Industriestrasse 12 97618, Niederlauer, Njemačka
Vyhlasenie o zhode EU: SZ DJI TECHNOLOGY CO., LTD. tymto vyhlasuje, ze toto zariadenie je v zhode so zakladnymi poziadavkami a dalimi relevantnymi ustanoveniami smernice 2014/53/EU.
Kópia tohto Vyhlásenia o zhode EU je k dispozíci online na www.dji.com/euro-compliance
Kontaktná adresa v EU: DJI GmbH, Industriestrasse 12, 97618, Niederlauer, Nemecko
Environmentally friendly disposal
Old electrical appliances must not be disposed of together with the residual waste, but have to be disposed of separately. The disposal at the communal collecting point via private persons is for free. The owner of old appliances
is responsible to bring the appliances to these collecting points or to similar collection points. With this little personal effort, you contribute to recycle valuable raw materials and the treatment of toxic substances.
N3XbBpJHe COrneIOna3BaHe Ha OKoJIHaTa Cpena
CTapnte eIektpnueckn ypeNi He Tpr6Ba da ce n3XbPnT 3aedHO C bINTOBNTe OTnabu, a OTdeJIHo. N3XBpIHeTO B O6UHcKJnyKT 3a cb6npaHe Ha OTnabuOT acTHN IIncae 6e3nlaTHo. C6cTBBeHnKbT Ha cTAPNTe ypeNi e OTROBOpEn 3a npEHaCraHTo Ha ypeNTe Do Te3n nn IIO NOO6Hn C6bnpateJIHH nyHKTOBe. C TOBa MaJIKO CO6CTBeHO ycINne DOnpnHacrTe 3a peUNKInpaHTo Ha cEHNN CypOBHN n 3a ObpaOTkata Ha TOKCNHn BeIecTBA.
Ekologicky setrná likvidace
- Contents
- Disclaimer
- Warnings
- Regulations
- Flight Limit
- 艺
- In the Box
- Introduction
- Downloading the Tello App and Watching Tutorial Videos
- Charging the Battery
- Preparing for Takeoff
- Flight
- Programming with Tello
- Using the Open-Source Controller and Dot-Matrix Display & Distance-Sensing Module
- Installation Notes
- Installing the Propellers
- Detaching the Propellers
- Installing the Propeller Guards
- Detaching the Propeller Guards
- Specifications
- Aircraft
- Expansion Kit
- Penafian
- フローテルフド連版リ
- Advertencias
- Instalar as hélices
- Retirar as hélices.
- OTka3 OT OTBetCTBeHHOCTN
- PpeDynpexKdEHHa
- HopmatNBHO- npaBOBbie aKTbl
- OrpaHnueHne BbICOTbl
- KOMnJIeKT NOCTaBKn
- Вてdeenne
- 3arpy3ka npiloxeHn Tello n npocmoTp o6yauoXu BndeopolKOB
- 3apянka akkymлетopa
- og:glugoo
- a.1
- #
- A
- RF Exposure Information
- ISED Compliance Notice
- KCC Compliance Notice
- NCC Compliance Notice
- Environmentally friendly disposal
- N3XbBpJHe COrneIOna3BaHe Ha OKoJIHaTa Cpena
- Ekologicky setrná likvidace
Brand : DJI
Model : Robomaster TT Tello Talent
Category : Drone