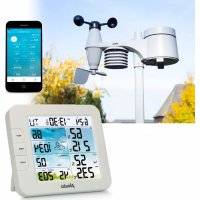
WS1560 - Weather Station ALECTO - Free user manual and instructions
Find the device manual for free WS1560 ALECTO in PDF.
User questions about WS1560 ALECTO
0 question about this device. Answer the ones you know or ask your own.
Ask a new question about this device
Download the instructions for your Weather Station in PDF format for free! Find your manual WS1560 - ALECTO and take your electronic device back in hand. On this page are published all the documents necessary for the use of your device. WS1560 by ALECTO.
USER MANUAL WS1560 ALECTO
natural_image
Illustration of a sun, clouds, and grass on a dark background with a directional arrow labeled 'TREND' (no text or symbols beyond the arrow)natural_image
Illustration of a rainy night scene with cloud, raindrops, and a cartoon egg on grass (no text or symbols)natural_image
Illustration of a weather scene with snow, clouds, and a cartoon egg on grass (no text or symbols)30-40% & 80-90%: ±8%
30-40% & 80-90%: ±8%
natural_image
Illustration of a sun, grass, and a flower under a black sky with a white arrow labeled 'TREND' pointing right (no text or symbols on the main elements)
text_image
TREND
text_image
TREND →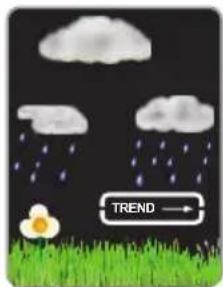
text_image
TREND →natural_image
Illustration of a rainy night scene with clouds, raindrops, and a flower on grass (no text or symbols)
text_image
TREND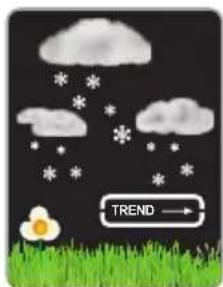
text_image
TREND →natural_image
Weather-themed graphic with sun, clouds, a flower, and grass on a dark background (no text or symbols)
natural_image
Illustration of a cartoon flower on grass under cloudy sky with a 'TREND' button (no text or symbols on the flower or grass)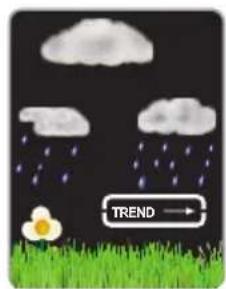
natural_image
Illustration of a rainy night scene with clouds, raindrops, and a flower on grass (no text or symbols)natural_image
Illustration of a rainy night scene with clouds, raindrops, and a flower on grass (no text or symbols)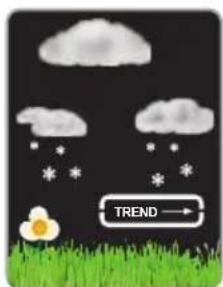
natural_image
Illustration of a weather scene with cloud, snow, and grass under cloudy sky (no text or symbols)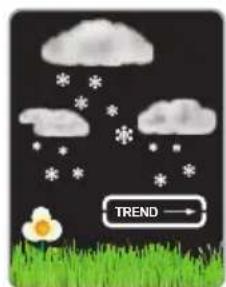
text_image
TREND30-40% & 80-90%: ±8%
30-40% & 80-90%: ±8%
The WS-1560 is suitable for displaying the temperature and humidity in and around your private location. The WS-1560 is not suitable for use in professional or commercial organizations.
The weather forecast is based on the temperature, humidity and air pressure measured by the weather station in and around your private location. This forecast has an accuracy of approximately 75%, provided that the weather station has been switched on continuously for a minimum of 12 hours and it concerns the region around the location of the weather station with a radius of approximately 30 to 50Km.
Declaration of conformity
Hereby, Hesdo declares that the radio equipment type Alecto WS-1560 is in compliance with directive 2014/53/EU. The full text of the EU declaration of conformity is available at the following internet address: http://DOC.hesdo.com/ WS-1560-DOC.pdf
About this user's manual

This symbol represents a warning. To ensure safe use, always adhere to the instructions described in this documentation.

This symbol is followed by a user's tip
Always check the Alecto website for the most recent version of this user's manual. See the version number at the back of this user's manual.
General installation and placement tips

Don't place the indoor unit in direct sunlight or next to a heat-emitting lamp or stove. Also avoid placing the indoor unit on a shelf above a radiator or next to a door that' regularly opens and s.

You may choose to place the outdoor unit onto a flat surface or to suspend it from a wall. Never place the outdoor unit in direct sunlight and make sure it's sheltered from rain and wind.

The outdoor unit has a range of 50 to 100 metres. It's advisable to first verify its correct operation on the desired locations before permanently installing the units.

Safety instructions
- The WS-1560 is not a toy. Keep the indoor unit, outdoor unit and adaptor out of reach of children younger than 8 years old.
- The power adaptor and indoor unit are not waterproof and are only suitable for indoor use. The outdoor unit is splash-proof and only suitable for outdoor use, provided it's suspended underneath a shelter.
- Only use the supplied power adaptor with model number XY06J-0500150Q-EW.
1. TABLE OF CONTENT
2. OVERVIEW
2.1 Indoor unit....31
2.2 Outdoor unit....31
3. INSTALLATION
3.1 Power supply 32
3.2 Pairing indoor unit / outdoor unit 32
3.3 Setup 33
4. FUNCTIONS OF THE WEATHER STATION
4.1 Temperature and humidity 33
4.2 Moon phase and air pressure....34
4.3 Weather forecast 34
4.4 Outdoor temperature and frost alert 34
5. OTHER FUNCTIONS
5.1 Wake-up alarm 35
5.2 Display lighting 36
-
SPECIFICATION......36
-
CLEANING AND MAINTENANCE 37
-
ENVIRONMENT......37
-
SYSTEM FAULTS....37
-
WARRANTY....37
2. OVERVIEW
2.1 Indoor unit
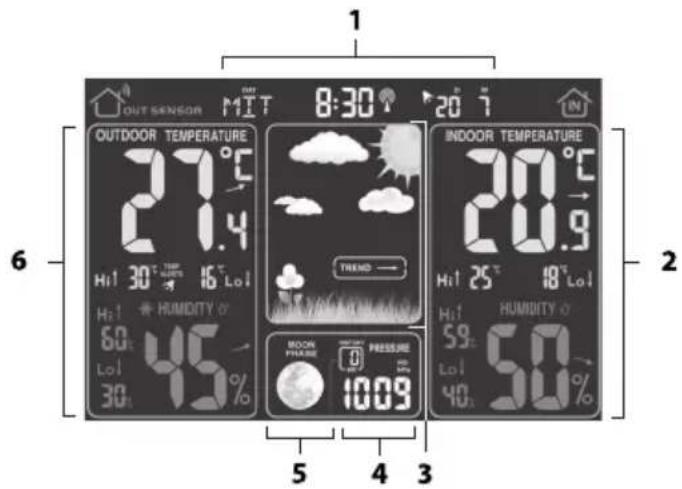
text_image
OUT SENSOR MIT 8:30' 20 °C OUTDOOR TEMPERATURE 21.4°C Hi 30° Hi 16° Lo1 Hi 60° HUMIDITY 0° Lo1 45% 30° INDOOR TEMPERATURE 20.9°C Hi 25° Hi 18° Lo1 Hi 59° HUMIDITY 0° Lo1 50° 40° MOOR PRESSURE Pressure 1009 5 4 3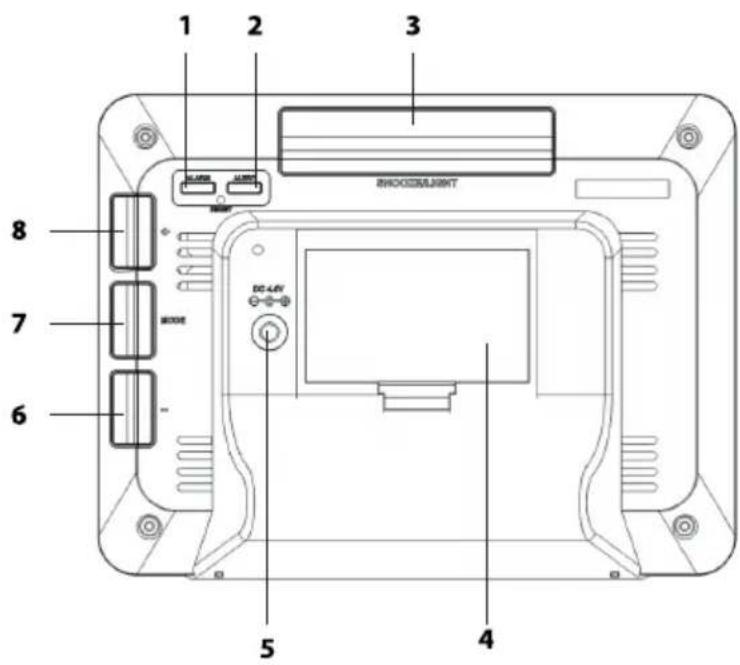
text_image
1 2 3 8 7 6 5 4 DHXOOSLIMNT DC-LAV2.2 Outdoor unit
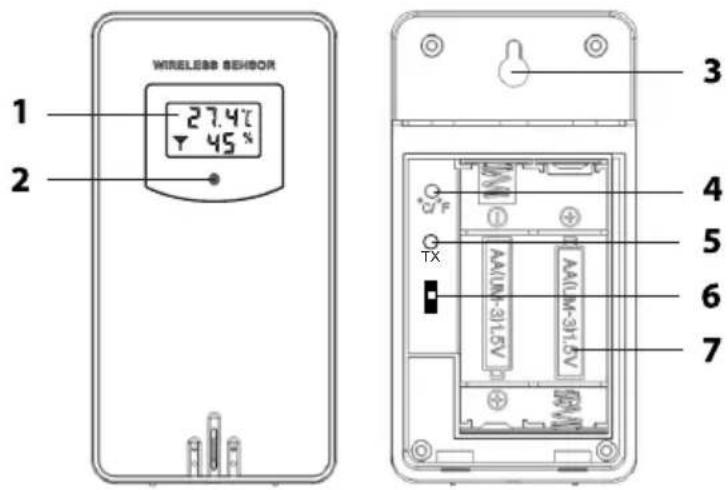
text_image
WIRELESS SENSOR 1 27.4°C 45% 3 4 TX AA(UN-31.5V) AA(UN-31.5V) 6 7- Time, day and date display
- Indoor temperature and humidity display
- Weather forecast
- Air pressure display
- Moon phase indicator
-
Outdoor temperature and humidity display (this display starts flashing when the connection with the outdoor unit is interrupted for longer than 60 minutes; after some hours without connection, '- -' is displayed here)
-
Alarm (wake-up) function activation
- Temperature alert button
- Display lighting button / snooze button for the wake-up function
- Battery compartment
- Power adaptor input
-
- button during setup
- MODE button, for setting the various functions
-
- button during setup
-
Outdoor temperature and humidity display
- Red LED light, illuminates while the outdoor unit is transmitting data to the indoor unit
- Suspension eye for wall-mounting
- Temperature display switch for degrees Celsius or degrees Fahrenheit
- Send button for transmitting a signal to the indoor unit to pair the units with each other (again)
- Channel selection
- Battery compartment
3. INSTALLATION

Attention: after the installation, it may take several hours up to a day before the correct values are displayed.

Attention: the indoor unit is powered by the supplied power adaptor. As a backup, you may install 2x AA 1.5V penlight alkaline batteries. (excl.).
3.1 Power supply
Indoor unit:
The indoor unit is powered by the supplied power adaptor with model number XY06J-0500150Q-EW. Connect this power adaptor to the rear of the indoor unit (see 6) and insert the adaptor into a 230V wall socket.
At the rear of the indoor unit, remove the battery cover and install 2x AA 1.5V penlight batteries according to the markings inside the battery compartment. Replace the battery cover onto the indoor unit.
Outdoor unit:
Remove the battery cover from the outdoor unit by sliding it somewhat downwards and then taking it off. Install 2x AA 1.5V penlight alkaline batteries according to the markings inside the battery compartment.
Replace the cover onto the outdoor unit and slide it somewhat upwards.
Batteries are not included.
Advice regarding the batteries for the outdoor unit:
Because normal alkaline batteries do not perform or do not perform well at temperatures around or below 0^ C, the use of standard alkaline batteries in the outdoor unit is not recommended. For the outdoor unit, we therefore recommend installing Lithium batteries that have been designed to function at a temperature range of -20^ C to 60^ C. These batteries are available through the service department of Alecto via internet www.alecto.info
The lifespan of Lithium batteries with a capacity of 2900mAh is well over a year.
3.2 Pairing indoor unit / outdoor unit:
Automatically:
As soon as the batteries are inserted into the indoor unit, the indoor unit starts searching a signal from the outdoor unit for 2 minutes. So, if you have installed batteries in the outdoor unit within that minute and these units 'find' each other, they will automatically connect with each other and the display of the indoor unit will show the temperature, humidity, rainfall amount, wind speed and the wind direction as the outdoor unit transmits this data.
Manually:
If the units can't find each other or you've replaced the batteries in the indoor unit, you may link the outdoor unit to the indoor unit as follows:
- Make sure each outdoor unit is set to a different channel.
- Press and hold the “-” button at the rear of the indoor unit for 2 seconds, the outdoor temperature and humidity indicators now show ‘- -’. The indoor unit now waits for a signal from the outdoor unit for up to 2 minutes.
- Within these 2 minutes, press the TX button on the outdoor unit (see the battery compartment of the outdoor unit).
- On the outdoor unit the red send light briefly illuminates and the outdoor unit transmits a signal to the indoor unit, automatically pairing both units with each other.

In case the paring between the outdoor unit and indoor unit doesn't succeed, it might be caused by the distance between the indoor unit and outdoor unit being to long. In this case, decrease the
distance and try pairing again. Also interference from other cordless devices or large steel surfaces such as walls of reinforced concrete may be the reason for a failed pairing. In this case, try a different location for the outdoor or indoor unit.
3.3 Setup
DCF function
The WS-1560 is outfitted with a DCF function, with which the time is automatically tracked and updated through signals from the closest DCF transmitter. After connecting the power supply, the WS-1560 will first make contact with the outdoor unit. As soon as the indoor and outdoor units are synchronized, the WS-1560 will automatically search for DCF signal. Starting the DCF search sequence is completely automated, no action is required. While searching for DCF signal, the base unit's backlight is turned off. Allow the WS-1560 10 - 20 minutes to find the DCF signal before setting the time manually. The WS-1560 finds the DCF signal faster when placed near a window. If the DCF signal is not found, move the WS-1560 to another location and try again.
Manual installation
You may set the time, date and other functions as follows:
- Press and hold the MODE button for 2 seconds, "12Hr" or "24Hr" starts flashing in the display
- Use the + and - buttons to adjust the setting and press the MODE button to continue to the next setting;
- One after the other, set the following functions:
• Time display in 12 hours or 24 hours format

For example, quarter past 3 in the afternoon: in 12h format: 3:15 pm and in 24h format: 15:15h
• Temperature display in degrees Celsius or degrees Fahrenheit
- Air pressure display in mmHg (mm mercury pressure), inHg (inch mercury pressure) or in mb / hPa (millibars / hecto-Pascal)

In the Benelux the hecto-Pascal notation is used; before the air pressure was sometimes also expressed in bar; 1 mbar equals 1 hPa.
- Time zone (set to '00' for use in the Benelux.
• The language for displaying the day
DUT = Dutch, ITA = Italian, SPA = Spanish, FRE = French, GER = German, ENG = English, DAN = Danish
- The hours
- The minutes
• The day notation (day / month or month / day) - The year
- The month
-
The date
-
After pressing the MODE button for the last time, your settings will be saved and the settings mode is ended.

Daylight saving time: When winter time is changed to summer time, the clock automatically adjusts itself and the abbreviation "DST" will appear behind the time display. This abbreviation s for "Daylight Saving Time" (= summer time)
If “DST” is shown when summer time changes to winter time, then “DST” disappears and the clock will again automatically adjust itself.
However, if you've set the time manually during daylight saving time, then "DST" won't appear and the clock does NOT automatically switch to winter time. You'll have to manually adjust it.
4. FUNCTIONS OF THE WEATHER STATION

Keep in mind that only after approximately 12 hours after installing and setting the units, the various sensor will have had enough time to adjust and will then start showing reliable measurement
results in the display.
4.1 Temperature and humidity:
The left part of the display shows the outdoor temperature and humidity. The indoor unit obtains this information from the outdoor unit.
The right part of the display shows the indoor temperature and humidity. The indoor unit uses its built-in sensors for these values.
Following the temperature and humidity, an indicator shows whether these values decrease ( ) remain unchanged ( ) increase ( )
In addition, the measured maximum and minimum values are shown. At Hi the measured maximum temperature and humidity are indicated and at Lo the minimum values are shown.
These MAX and MIN values are automatically reset each night at 12am.
4.2 Moon phase and air pressure
In the middle of the lower part of the display the moon phase and air pressure are indicated. The moon phase is linked to the date you've set.
The air pressure is measured by one of the built-in sensors of the indoor unit.
Repeatedly press the + button at the rear of the indoor unit to show the air pressure of the last 12 hours.
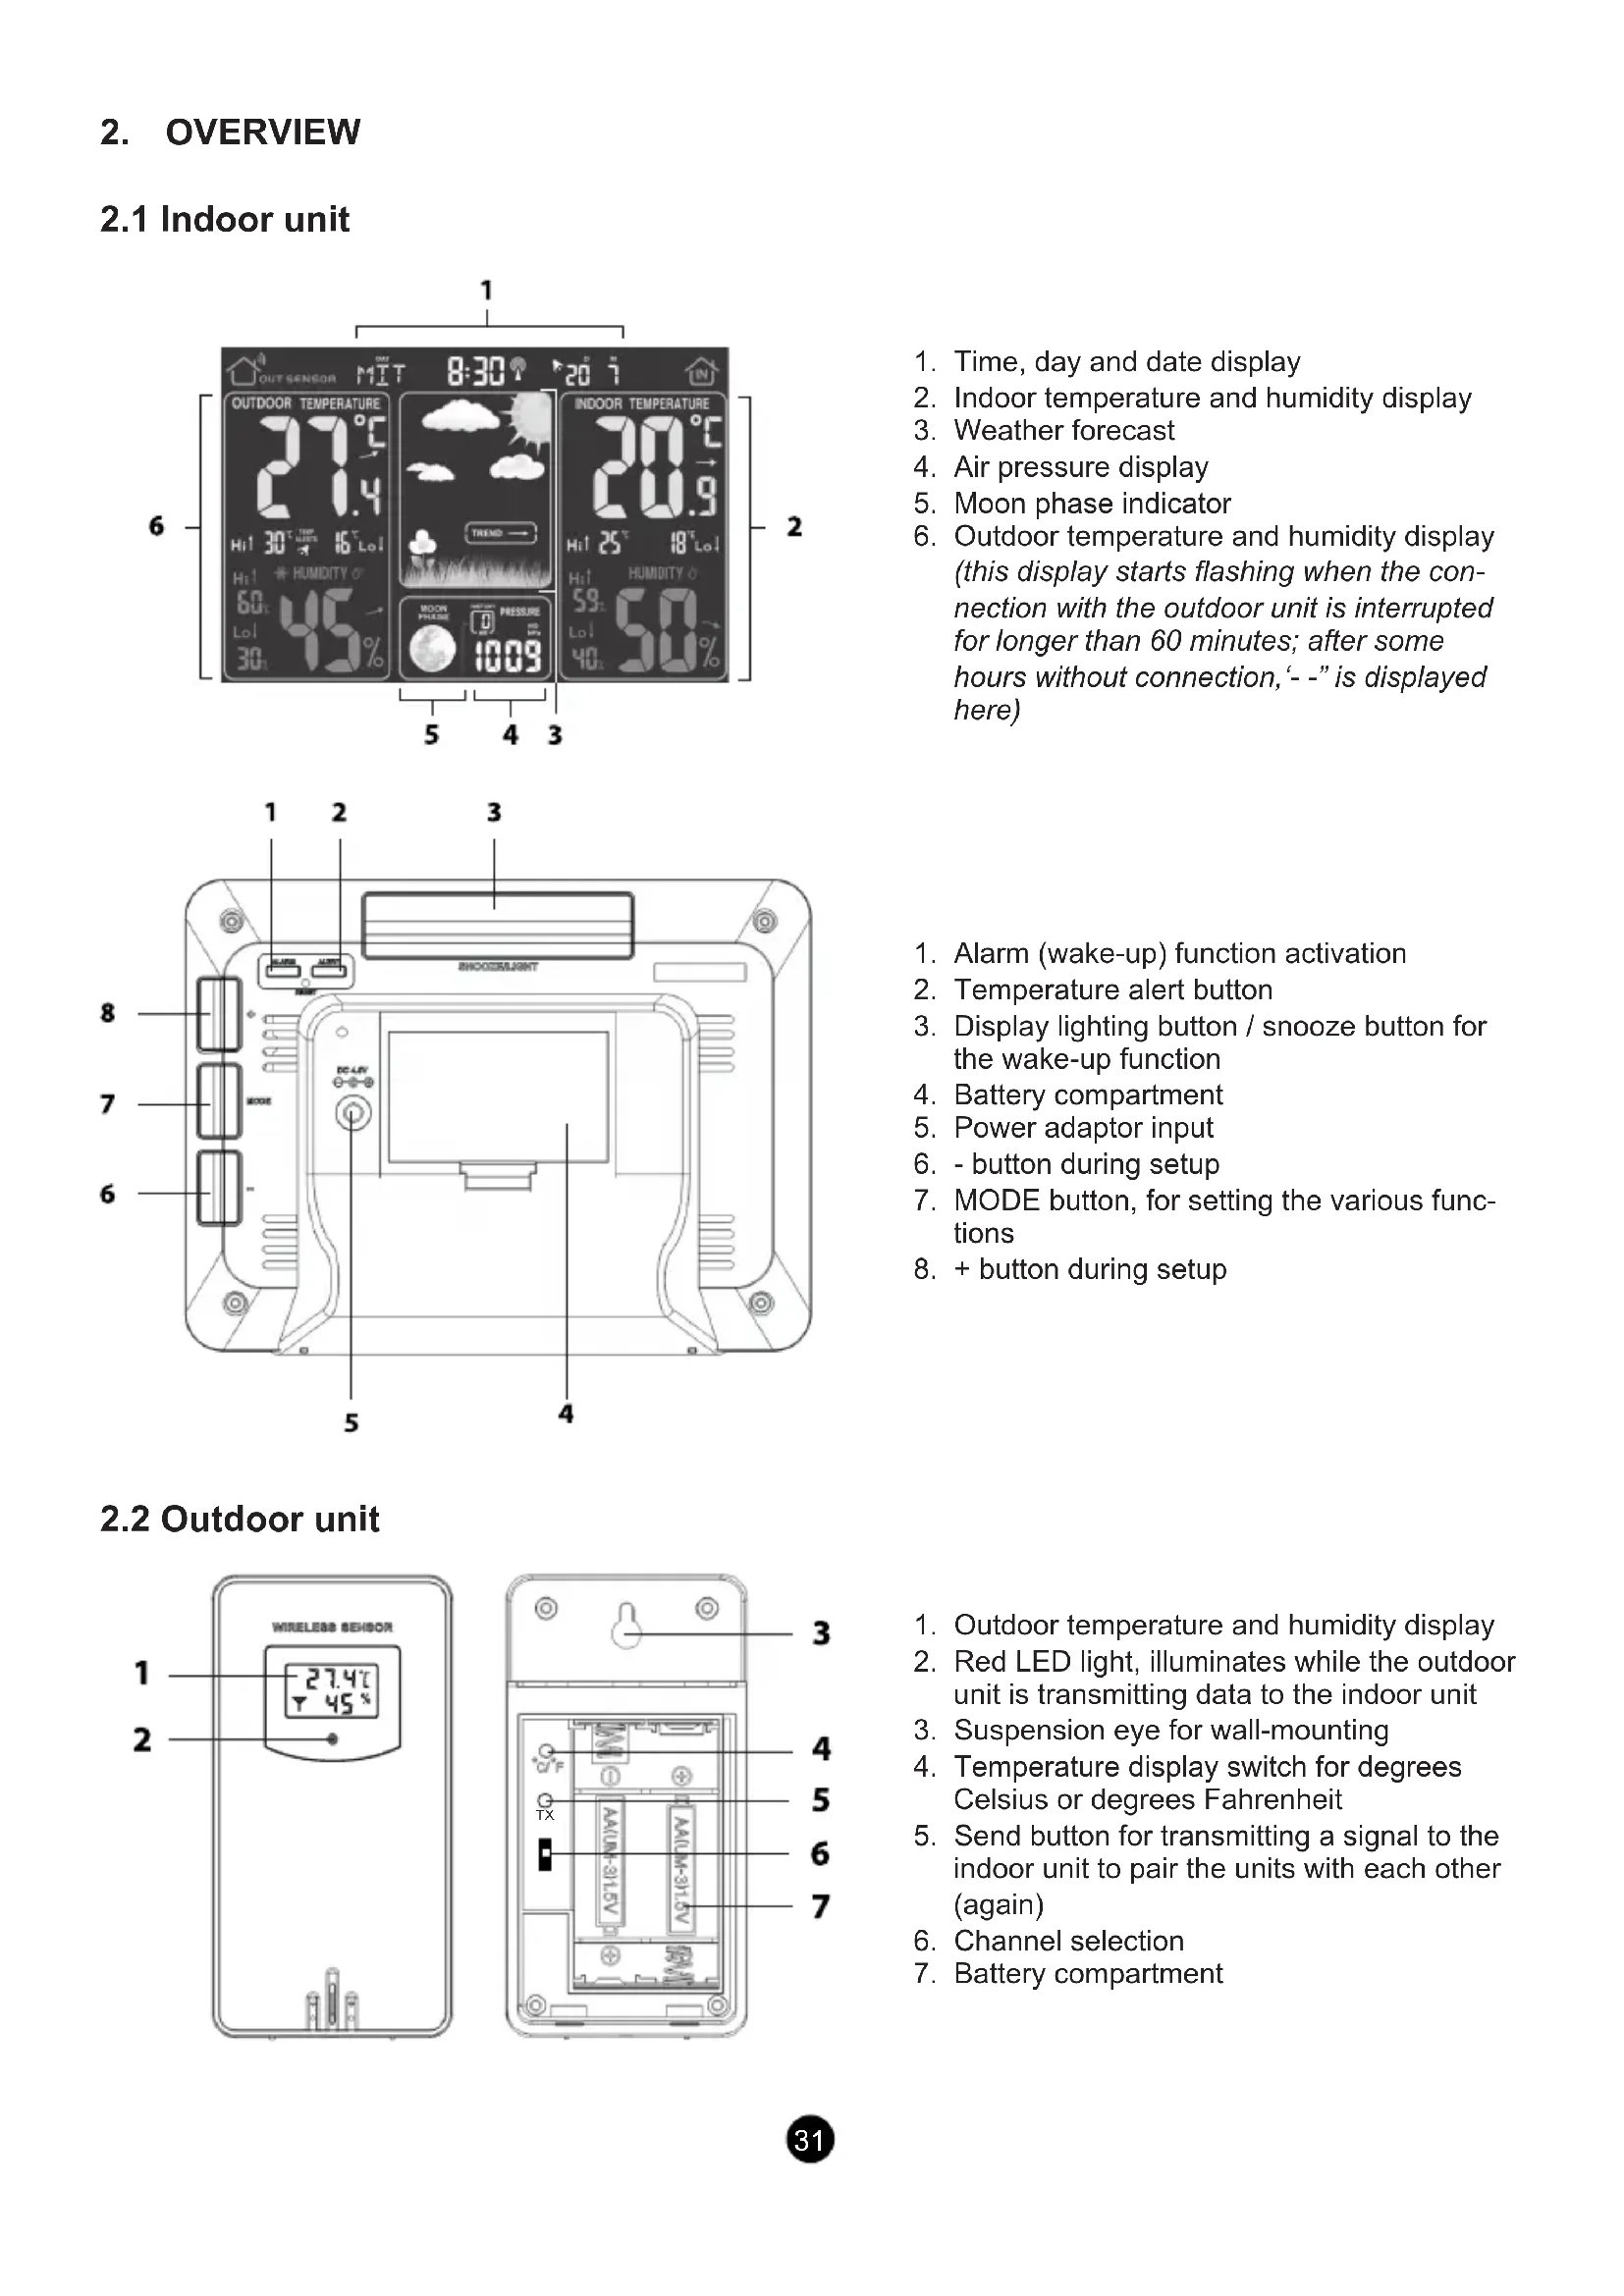
4.3 Weather forecast
The middle of the display shows the weather forecast using various animations:

text_image
TREND →sunny partly cloudy very cloudy rainy

natural_image
Weather-themed graphic with sun, clouds, a flower, and grass on black background (no text or symbols)
natural_image
Illustration of a cartoon cloud and a flower on grass with a 'TREND' arrow (no text or symbols in the image)
text_image
TREND →Combined with the outdoor unit and how fast the air pressure changes, the following weather forecasts are possible:

natural_image
Illustration of a rainy night scene with clouds, raindrops, and a cartoon egg on grass (no text or symbols)storm light snowfall heavy snowfall

text_image
TREND →
natural_image
Illustration of a weather scene with snow, clouds, and a cartoon egg on grass (no text or symbols)Additionally, the unit shows whether the air pressure decreases (TREND), remains the same (TREND) or increases (TREND).
4.4 Outdoor temperature and frost alert

When the outdoor temperature alert is enabled, an alarm will sound when the outdoor temperature exceeds a certain value you've set.
To set the MAX and MIN values for the outdoor temperature alert
- Press and hold the ALERT button for 2 seconds, directly underneath the outdoor temperature display the words "TEMP ALERTS" appear while the current MAX setting starts flashing.
- Use the + and - buttons to set the desired MAX value and then briefly press the ALERT button
- Use the + and - buttons to set the desired MIN value and then briefly press the ALERT button
- The MIN and MAX temperature values are now set
To enable/disable the alert functions:
Repeatedly and briefly press the ALERT button to enable or disable these alerts:
- If only the words "TEMP ALERTS" are illuminated together with the alert icon, then only the outdoor temperature alert is enabled
• These alert functions are disabled when these indications are not shown
Outdoor temperature alert operation:
- As soon as the MIN or MAX value is exceeded, the outdoor temperature display starts flashing while long beep tones sound for 5 seconds
- The outdoor temperature display keeps flashing and the beep tones are repeated every minute until the temperature falls back within the limits you've set
5. OTHER FUNCTIONS
5.1 Wake-up alarm

During setup the alarm time is shown in the upper right part of the display. Here you'll also see the alarm icon when the alarm is enabled.
To set the alarm time:
- Press and hold the ALARM button for 2 seconds, the hours of the wake-up time start flashing
- Use the + and - buttons to set the alarm hours and then press the ALARM button
- Use the + and - buttons to set the alarm minutes and then press the ALARM button
- The alarm time is now set
To enable/disable the alarm functions:
- Briefly press the ALARM button to make the alarm icon ▶ appear and enable the alarm function
- Briefly press the ALARM button again to disable the alarm function. The alarm icon disappears
To check the alarm time:
- Press and hold the ALARM button for 2 seconds and the wake-up time appears in the display while the hours are flashing
- Press 2x the ALARM button to hide the alarm time
Alarm operation:
- At the set time, the alarm will sound for up to 120 seconds:
- first 10 seconds, 1 beep per second
- the next 10 seconds, 2 beeps per second
- the next 100 seconds, 4 beeps per second
Press a random button at the rear of the clock to stop the alarm signal or press the SNOOZE/LIGHT button at the rear of the weather station to activate the snooze function; "Zz" appears in the upper part of the display and the wake-up alarm will sound again after 5 minutes
• The alarm is repeated daily until you briefly press the ALARM button and the alarm icon disappears
5.2 Display lighting
On adapter power:
- Repeatedly press the SNOOZE/LIGHT button at the rear of the weather station to set the display lighting to full intensity, half intensity or off.
- The selected setting will remain in the memory until you press the SNOOZE/LIGHT button gain
On battery power only:
- Briefly press the SNOOZE/LIGHT button at the rear of the weather station to switch the display lighting on at full intensity.
- To save battery power, the display lighting switches off after 10 seconds
6. SPECIFICATIONS
Indoor temperature
range: 0°C to 50°C / 14°F to 122°F
accuracy: 0°C to 40°C: ±1°C
40^ C to 50^ C: ±2^ C
Outdoor temperature
range: -20^ to 70^ / -4^ to 149^
accuracy: 0°C to 40°C: ±1°C
-20°C to 0°C & 40°C to 70°C: ±2°C
Indoor humidity
range: 20%RH to 95%RH
accuracy: 40-80%: ±5%
30-40% & 80-90%: ±8%
20-30% & 90-95%: not measured
Outdoor humidity
range: 20%RH to 95%RH
accuracy: 40-80%: ±5%
30-40% & 80-90%: ±8%
20-30% & 90-95%: not measured
Air pressure
range: 600 hPa/mb to 1100 hPa/mb / 17.72 inHg to 32.48 inHg
accuracy: ±5 hPa
Information Power Adapter:
Manufacturers name and address : Xing Yuan Electronics Co., Ltd, No.227 of Xiasha road, Shipai Town, 523350 Dongguan City
Model Identifier : XY06J-0501000Q-EW
7. CLEANING AND MAINTENANCE
Always remove the adapter from the wall socket before cleaning the indoor unit. If you make sure to install 2 backup batteries at the rear of the unit, you don't have to worry about losing any data. Clean the indoor unit with a moist cloth. Never use aggressive or abrasive cleaning products. The outdoor unit may also be wiped down with a moist cloth.
The weather station requires no maintenance. However, we advise you to replace the battery at least once a year.
8. ENVIRONMENT
Packaging:
The packaging of this weather station may be disposed of as waste paper.
Weather stations / batteries:

This product may not be discarded as normal household waste at the end of its life span, you must bring it to a collection point for the recycling of electric and electronic devices. Don't throw away exhausted batteries, but bring them to your local depot for Small Chemical Waste (SCW).
9. SYSTEM FAULTS
In case of a supposed system error, please remove the batteries from the indoor unit and outdoor unit and disconnect the adaptor from the wall socket. Wait several minutes, replace the batteries en plug the adaptor back into the wall socket. If this doesn't resolve the problem, please contact Alecto Customer Service via internet www.alecto.nl
10.WARRANTY
For the Alecto WS-1560 you have a warranty of 24 months from the date of purchase. During this period, we guarantee the free repair of defects caused by material and workmanship errors.
All this subjected to the final assessment of the importer.
HOW TO HANDLE:
If you notice any defect, first refer to the user's manual or the Alecto website. If the manual provides no definite answer, please contact the supplier of this weather station.
In the event of a defect, you may return the weather station with a clear description of your complaint and a dated purchase receipt to your supplier who will ensure a quick repair or otherwise send the product to the importer.
THE WARRANTY BECOMES NULL AND VOID:
In case of improper use, incorrect connections, leaking and/or incorrectly installed batteries. In case of unauthorised modifications and/or repairs performed by third parties. In case of incorrect transportation of the device without adequate packaging and when the device is not accompanied by this warranty card and proof of purchase.
All further liability, especially concerning any consequential damages, is excluded.
Bruksformål
NO
natural_image
Illustration of a rainy night scene with clouds, raindrops, and a green grassy field (no text or symbols)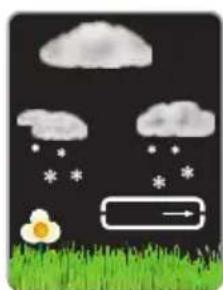
natural_image
Illustration of a weather scene with raindrops, clouds, a flower, and a directional arrow (no text or symbols)
natural_image
Illustration of a weather scene with snow, clouds, and a cartoon flower on grass (no text or symbols)Utgangsspenning: 5,0 V DC
Utgangsstrøm: 1 A
Utgangseffekt: 5 W
1. INNEHÅLLSFÖRTECKNING
Manuell installation
natural_image
Illustration of a rainy night scene with clouds, raindrops, and a cartoon egg on grass (no text or symbols)
natural_image
Illustration of a weather scene with raindrops, clouds, a flower, and grass under a dark sky (no text or symbols)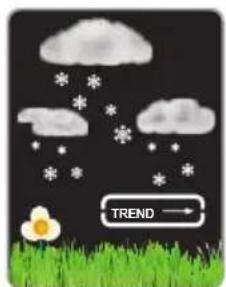
natural_image
Illustration of a weather scene with cloud, snow, and grass under a 'TREND' arrow (no text or symbols on the diagram itself)40 °C to 50 °C: ±2 °C
Utomhustemperatur
4. SÄÄASEMAN TOIMINNOT

natural_image
Illustration of a rainy night scene with clouds, raindrops, and a green grassy field (no text or symbols)
natural_image
Illustration of a rainy night scene with clouds, snow, a flower, and grass (no text or symbols)
natural_image
Illustration of a weather scene with cloud, snow, and grass under cloudy sky (no text or symbols)natural_image
Illustration of a rainy night scene with clouds, raindrops falling, and a green grassy field (no text or symbols)
natural_image
Illustration of a weather scene with cloud, raindrops, and a flower on grass (no text or symbols)