WS3300 - Weather Station ALECTO - Free user manual and instructions
Find the device manual for free WS3300 ALECTO in PDF.
User questions about WS3300 ALECTO
0 question about this device. Answer the ones you know or ask your own.
Ask a new question about this device
Download the instructions for your Weather Station in PDF format for free! Find your manual WS3300 - ALECTO and take your electronic device back in hand. On this page are published all the documents necessary for the use of your device. WS3300 by ALECTO.
USER MANUAL WS3300 ALECTO
natural_image
Technical line drawings of mechanical components including a bracket, flange, and electrical connector (no text or symbols)text_image
Diagram showing three electrical device configurations with labeled components and directional arrows indicating assembly or status.weerstation:
natural_image
Simple line drawing of a sun with rays (no text or symbols)Zonnig
natural_image
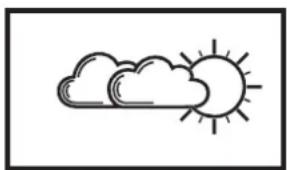
Simple line drawing of a sun partially covered by clouds (no text or symbols)licht bewolkt
natural_image
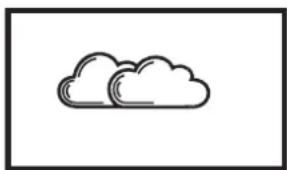
Simple line drawing of two clouds (no text or symbols)bewolkt
natural_image
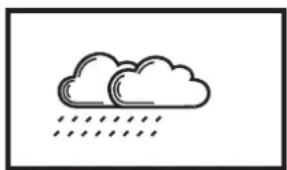
Simple line drawing of a cloud with raindrops falling (no text or symbols)regen
natural_image
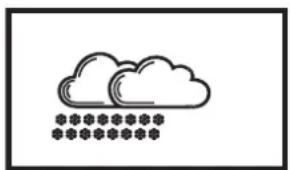
Simple line drawing of a cloud with five stars below it (no text or symbols)sneeuw
natural_image
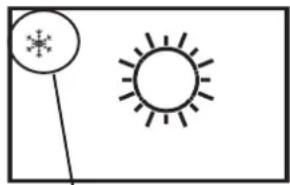
Simple line drawing of a sun and a snowflake on a pole (no text or symbols)'kans op ijzel
Weercondities:
text_image
°C/°F reset RESET3. PLAATSEN VAN DE BUITEN-UNIT
6.1 BASIS FUNCTIONS:
natural_image
Simple line drawing of a sun with rays (no text or symbols)Zonnig
natural_image
Simple line drawing of a sun and cloud (no text or symbols)licht bewolkt
natural_image
Simple line drawing of two clouds (no text or symbols)bewolkt
natural_image
Simple line drawing of two clouds with raindrops below (no text or symbols)regen
natural_image
Simple line drawing of a cloud with three stars below it, no text or symbols presentsneeuw
6.7 WIND METINGEN:
Wind Direction (windrichting):
natural_image
Technical line drawings of mechanical components and a device assembly (no text or symbols)natural_image
Five weather icons showing sun, cloud, rain, cloud with raindrops, and cloud with snowflakes (no text or symbols)natural_image
Simple line drawing of a sun and a snowflake with a pointer (no text or symbols)risque de gel
Conditions météo :
text_image
°C/°F reset RESET3. POSITIONNEMNT DE L'UNITÉ EXTÉRIEURE
natural_image
Simple line drawing of a sun with rays (no text or symbols)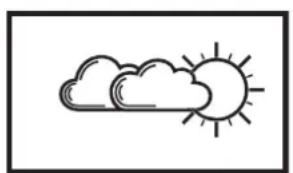
natural_image
Simple line drawing of a sun and cloud (no text or symbols)
natural_image
Simple line drawing of two clouds inside a rectangular frame (no text or symbols)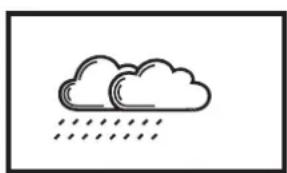
natural_image
Simple line drawing of two clouds with raindrops below (no text or symbols)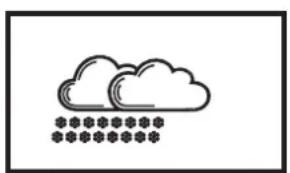
natural_image
Simple line drawing of a cloud with five stars below it (no text or symbols)natural_image
Technical line drawing of a mechanical component with a conical top and rectangular base (no text or symbols)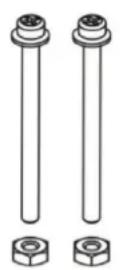
natural_image
Pure technical line drawing of three L-shaped pipe fittings without any text, numbers, or symbols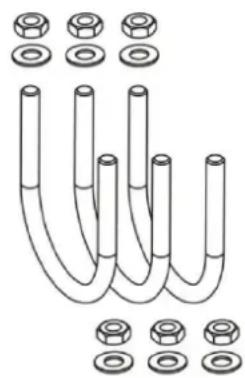
natural_image
Diagram of U-shaped pipes with various bolt holes and flanges (no text or labels)9. DECLARATION DE CONFORMITE
natural_image
Technical line drawings of mechanical components including a bracket, flange, and electrical connector (no text or symbols)natural_image
Five weather icons showing sun, cloud, rain, cloud with raindrops, and cloud with snowflakes (no text or symbols)natural_image
Simple line drawing of a sun and a snowflake with a pointer (no text or symbols)Möglicher Diebstahl
Wetterlage:
text_image
°C/°F reset RESETnatural_image
Simple line drawing of a sun with rays (no text or symbols)
natural_image
Simple line drawing of a sun and cloud (no text or symbols)
natural_image
Simple line drawing of two overlapping clouds (no text or symbols)
natural_image
Simple line drawing of two clouds with raindrops falling below (no text or symbols)
natural_image
Simple line drawing of a cloud with snowflake symbols below (no text or labels)1.1 Weather station:
text_image
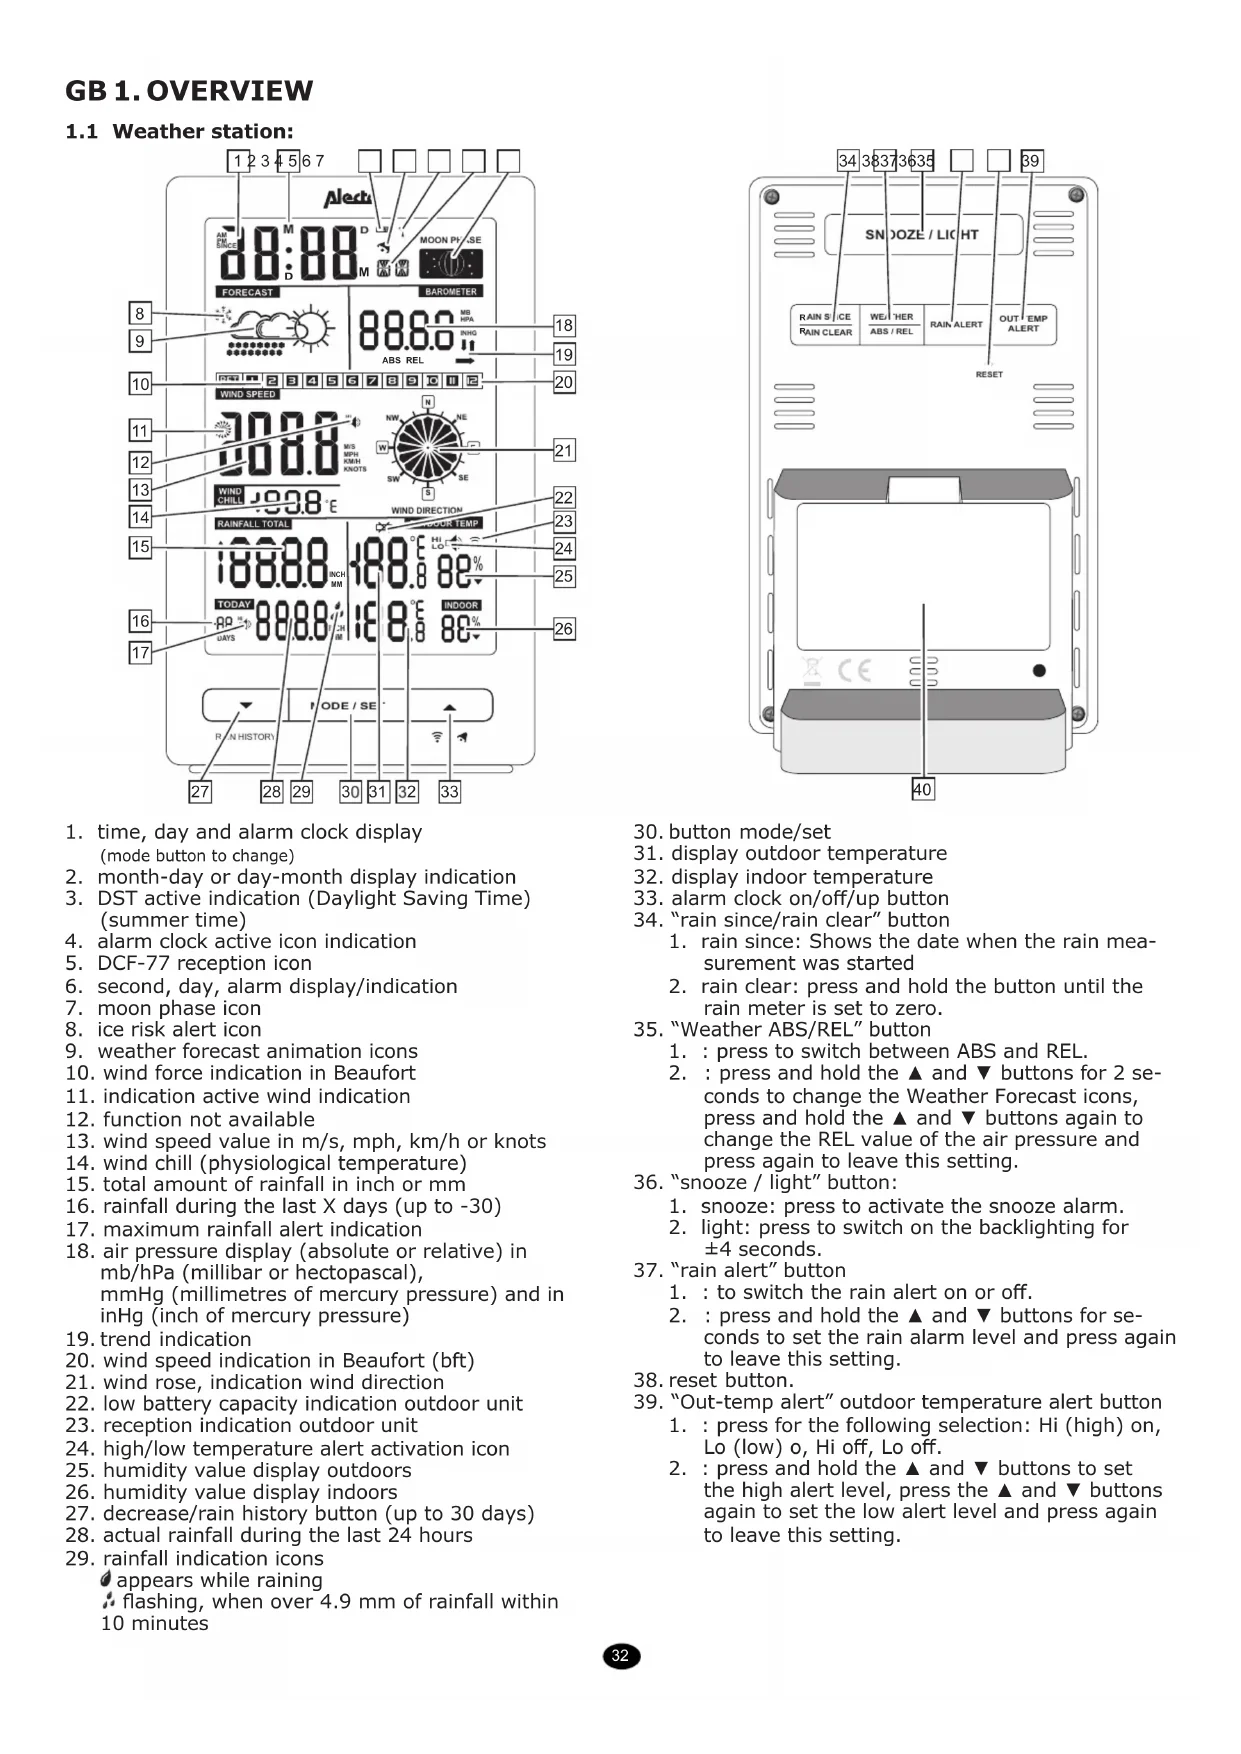
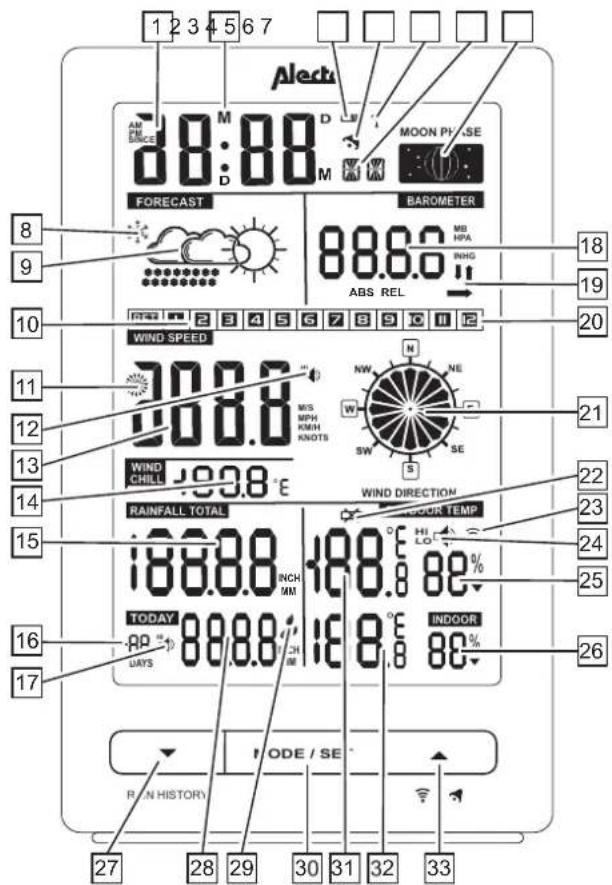
1 2 3 4 5 6 7 Alecta AM EM SCE M D D MOON PHASE M M FORECAST BAROMETER 88.6.0 MB HPA INHG ABS REL 18 9 19 10 WIND SPEED 30.8.8 MIS MPH KMH KNOTS NW NE SW SE S 20 11 12 13 14 WIND CHILL 19.8.8 °E WIND DIRECTION 21 22 23 24 25 15 TODAY 88.8.8 INCH MM INDOR INDOOR 88.8.8 INCH MM 26 16 17 UATS MODE / SE RUN HISTORY-
time, day and alarm clock display (mode button to change)
-
month-day or day-month display indication
-
DST active indication (Daylight Saving Time) (summer time)
-
alarm clock active icon indication
-
DCF-77 reception icon
-
second, day, alarm display/indication
-
moon phase icon
-
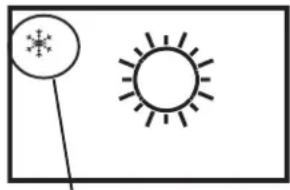
ice risk alert icon
-
weather forecast animation icons
-
wind force indication in Beaufort
-
indication active wind indication
-
function not available
-
wind speed value in m/s, mph, km/h or knots
-
wind chill (physiological temperature)
-
total amount of rainfall in inch or mm
-
rainfall during the last X days (up to -30)
-
maximum rainfall alert indication
-
air pressure display (absolute or relative) in mb/hPa (millibar or hectopascal), mmHg (millimetres of mercury pressure) and in inHg (inch of mercury pressure)
-
trend indication
-
wind speed indication in Beaufort (bft)
-
wind rose, indication wind direction
-
low battery capacity indication outdoor unit
-
reception indication outdoor unit
-
high/low temperature alert activation icon
-
humidity value display outdoors
-
humidity value display indoors
-
decrease/rain history button (up to 30 days)
-
actual rainfall during the last 24 hours
-
rainfall indication icons
appears while raining
: flashing, when over 4.9 mm of rainfall within 10 minutes
text_image
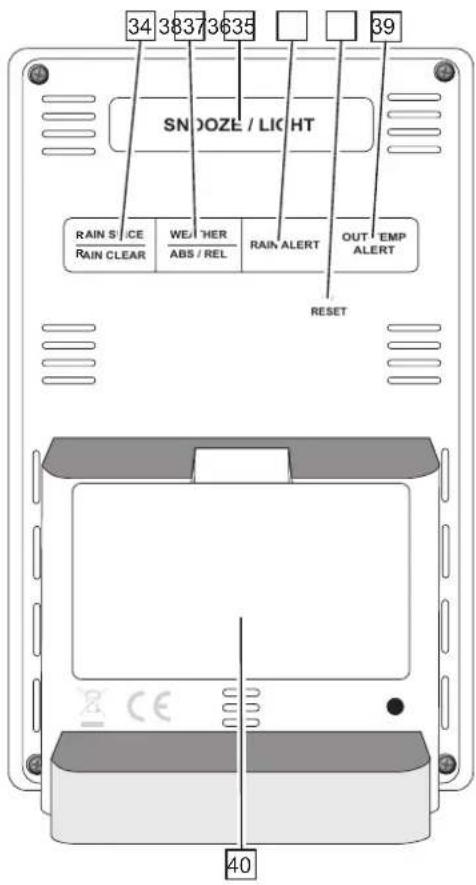
34 38373635 SNDOZE / LIGHT RAIN S/CE WEATHER OUT EMP RAIN CLEAR ABS / REL ALERT ALERT RESET 40-
button mode/set
-
display outdoor temperature
-
display indoor temperature
-
alarm clock on/off/up button
-
"rain since/rain clear" button
-
rain since: Shows the date when the rain measurement was started
-
rain clear: press and hold the button until the rain meter is set to zero.
-
"Weather ABS/REL" button
-
: press to switch between ABS and REL.
-
: press and hold the ▲ and ▼ buttons for 2 seconds to change the Weather Forecast icons, press and hold the ▲ and ▼ buttons again to change the REL value of the air pressure and press again to leave this setting.
-
"snooze / light" button:
-
snooze: press to activate the snooze alarm.
-
light: press to switch on the backlighting for ±4 seconds.
-
"rain alert" button
-
: to switch the rain alert on or off.
-
: press and hold the ▲ and ▼ buttons for seconds to set the rain alarm level and press again to leave this setting.
-
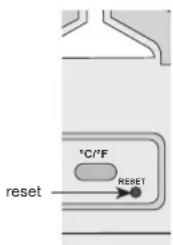
reset button.
-
"Out-temp alert" outdoor temperature alert button
-
: press for the following selection: Hi (high) on, Lo (low) o, Hi off, Lo off.
-
: press and hold the ▲ and ▼ buttons to set the high alert level, press the ▲ and ▼ buttons again to set the low alert level and press again to leave this setting.
1.2 Outdoor unit and sensor unit:
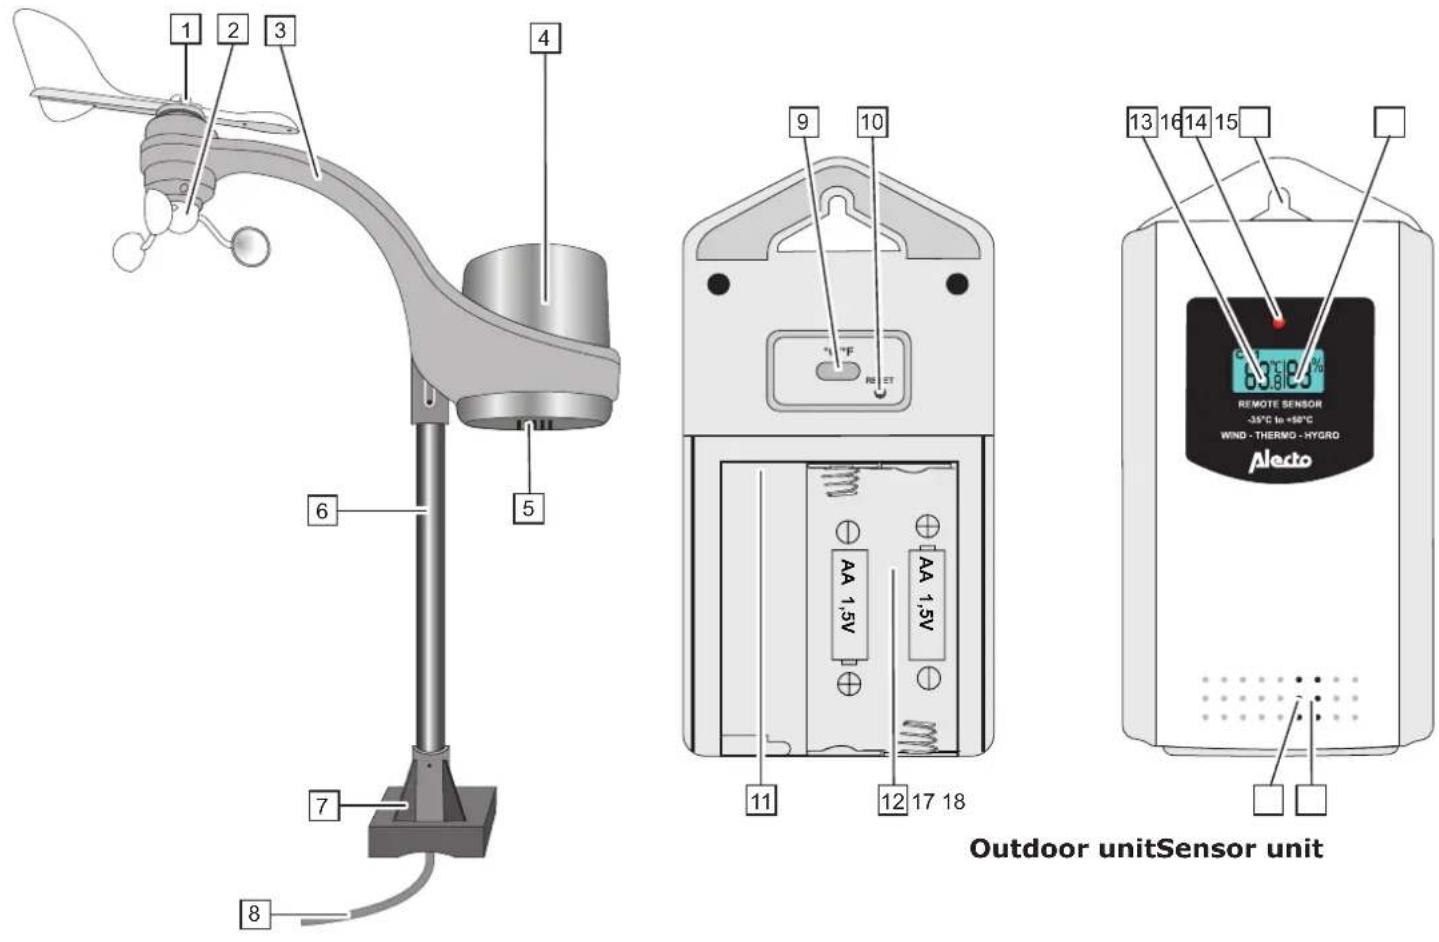
- wind vane
- wind speed meter
- outdoor unit support
- rain meter
- rain drain
- Post
- plastic feet base
- connecting cable (wind and rain sensor to outdoor transmitting unit)
-
°C and °F selection button
-
outdoor unit reset button
- connection for wind and rain sensor
- outdoor unit battery compartment
- outdoor temperature display
- transmission indication
- suspension hole
- outdoor humidity
- temperature sensor
- humidity sensor
2. INSTALLATION

Attention: after the installation, it may take several hours up to a day before the correct values are displayed. Additionally, after replacing exhausted batteries in the weather station, all measured data in the weather station will be erased.
2.1 Power supply:
Advice regarding batteries:
We advise you to use normal 2 x 1.5V AA (LR6) alkaline batteries of high quality for the weather station.
Alkaline batteries with a capacity of 2000mAh have a lifespan of over one year.
Rechargeable batteries are not recommended because of their lower supply voltage.
Also the outdoor unit is powered by 2 x 1.5V AA (LR6) batteries, but because normal Alkaline batteries perform poorly or not at all at temperatures of around or below 0°C, it's not recommended to use standard Alkaline batteries for the outdoor unit.
For that reason, we advise you to use Lithium batteries for the outdoor unit that are designed to function well within a temperature range of -20^ to 60^ . These batteries can be ordered via the service department of Alecto via internet: www.alecto.nl
Lithium batteries with a capacity of 2900mAh have a lifespan of over one year. When the ✕ icon appears in the display of the weather station, the batteries of the outdoor unit need replacement.
text_image
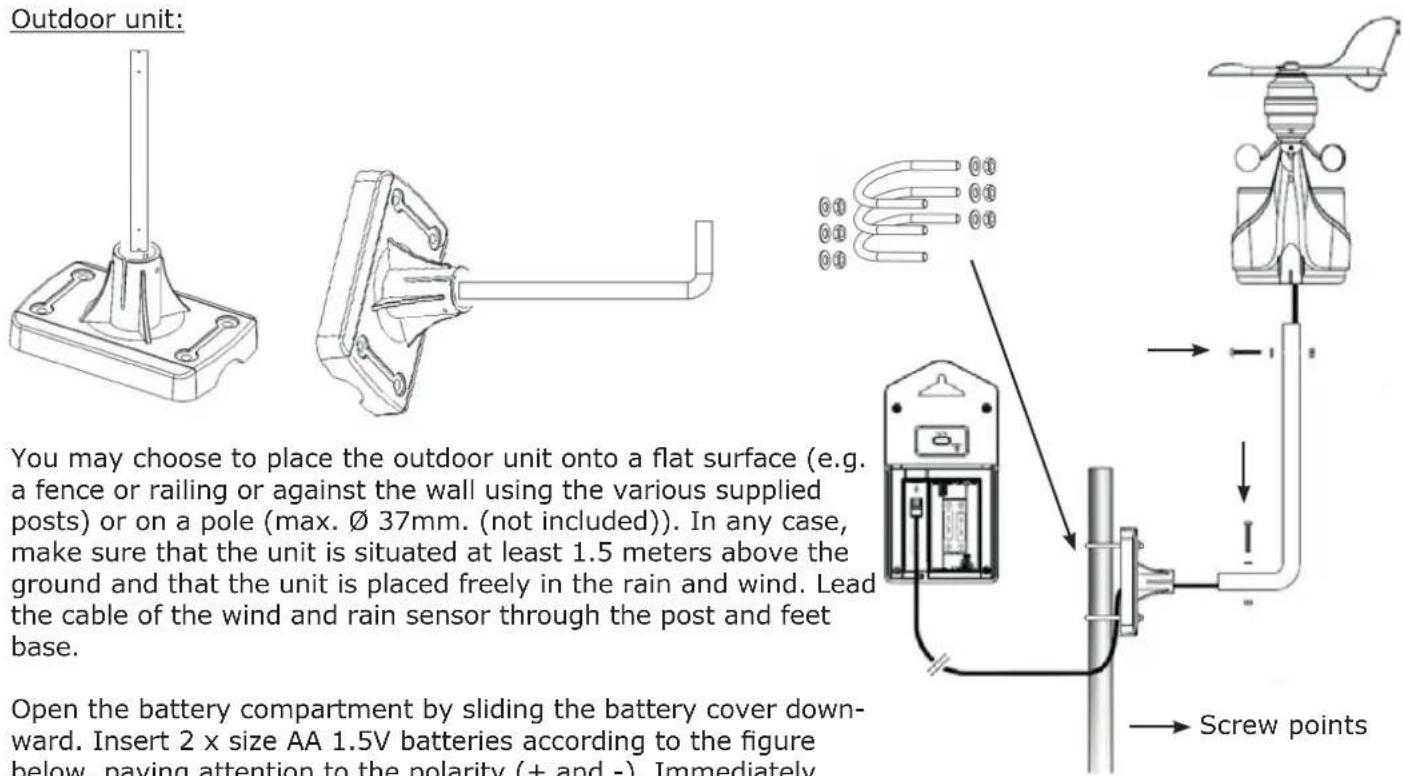
Outdoor unit: You may choose to place the outdoor unit onto a flat surface (e.g. a fence or railing or against the wall using the various supplied posts) or on a pole (max. Ø 37mm. (not included)). In any case, make sure that the unit is situated at least 1.5 meters above the ground and that the unit is placed freely in the rain and wind. Lead the cable of the wind and rain sensor through the post and feet base. Open the battery compartment by sliding the battery cover down- ward. Insert 2 x size AA 1.5V batteries according to the figure below, paying attention to the polarity (+ and -). Immediately Screw pointsconnect the cable of the wind and rain sensor and replace the cover (batteries are not included).
When everything then seems to work alright, the outdoor unit may be mounted in a fixed position.
text_image
Diagram showing three stages of an electrical device with labeled components and directional arrows indicating process flow.Weather station:
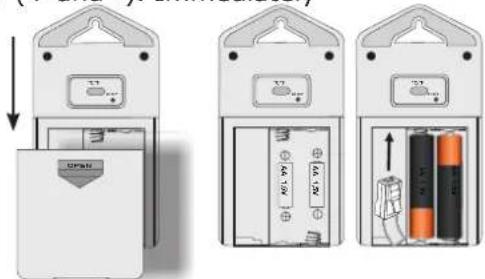
Click open the battery cover at the rear and pivot the cover open, insert 2 x size AA batteries according to the markings inside the battery compartment and pivot the battery cover back onto the weather station (batteries are not included).
The weather station now starts the reception from the outdoor unit.

text_image
SNOOZE / LIGHT RAM SWITCH RAN SWITCH HEATERS 240Ω/1Hz PARALERT OFF: 3600V 240Ω HOUST AA 1,5V AA 1,5V2.2 Weather forecast:
The weather forecast is displayed in the form of animations:
The weather station calculates the weather for the coming 12-24 hours based on air pressure.
After installing the batteries, the actual weather condition must be set by selecting the correct icon. The weather animation starts flashing upon installing the batteries in the weather station.
Use the ▼ and ▲ buttons to select the correct icon corresponding with the actual weather condition. After this setting, the weather station automatically enters the reception mode from the outdoor unit within 15 seconds.
For cloudy weather, select the cloud.
For sunny weather, select the sun, etc.
Press the "MODE/SET" button to leave this mode.
2.3 To adjust the weather icons at a later time:
Press and hold the "Weather ABS/REL" (35) button and hold until the clock starts flashing.
Press the ▼ and ▲ buttons to select the correct icon. Press 2x the "Weather ABS/REL" (35) button.
The weather forecast is now set. This forecast applies to an area of approx. 30-50km around the weather station and has an accuracy of 70-75%. Keep in mind that a correct display of the weather forecast cannot be guaranteed.
The weather station uses the following predictions:

natural_image
Five weather icons showing sun, cloud, rain, cloud with raindrops, and cloud with snowflakes (no text or symbols)sunny partially cloudy cloudy rain snow
natural_image
Simple line drawing of a sun and a snowflake with a pointer (no text or symbols)chance of frost
Weather conditions:
When the animation indicates rain, but one of the temperature displays is below 0^ C, snow will be displayed in the animation.
Frost alert:
The frost alert icon * will appear in the display when the outdoor temperature is between -2°C and +3°C.
When the weather station has received the outdoor sensor's signal, it'll automatically switch to the reception of the DCF-77 atomic time.
2.4 (DCF) time:
When the ♀ symbol is flashing, the clock is receiving the atomic time. When it's synchronized with the atomic time radio graphically sent by the 'DCF77' station, the ♀ symbol will remain lit. If this symbol doesn't appear, the time is shown via the internal clock of the weather station. The DCF77 station is situated in Frankfurt, Germany. The reception of the DCF77 time is basically possible in the whole of Western Europe. During daylight saving time, 'DST' will appear underneath the ♀ symbol.
2.5 Pairing the weather station / outdoor unit:
Automatically:
As soon as the batteries are installed in the weather station, the weather forecast animation icon starts flashing. Use the ▼ and ▲ buttons on the front panel of the weather station to input the actual weather type. After 1 minute the weather stations enters the reception mode from the outdoor unit and starts searching for a signal from the outdoor unit. Therefore, if you insert the batteries into the outdoor unit within that minute and the units will 'find' each other, they will be automatically paired and the display of the weather station will show the temperature transmitted by the outdoor unit. The weather station will then switch to the reception of the DCF-77 time signal to synchronise with the station in Frankfurt (see Clock).
Manually:
If the units cannot be paired automatically, or after replacing the batteries, you can pair the outdoor unit (again) with the weather station unit as follows:
- press and hold the ▲ button on the weather station for 2 seconds until the ⏻ antenna symbol starts flashing in the display
- Press briefly press the RESET button on the outdoor unit
- the units will have found each other (again) after several seconds
text_image
°C/°F reset REBE T3. POSITIONING THE OUTDOOR UNIT
When the outdoor unit is registered on the weather station and everything is working properly, you may place the outdoor unit with outdoor sensor (wind and rain sensor) outside.
Because the outdoor sensor and outdoor unit are connected with a cable, the outdoor unit may be placed closer to the weather station (max. distance 30 meters) or at eye-level to easily read the outdoor unit.
In case of wall-mounting, the weather station and outdoor unit may be suspended from a single screw. You may also fold out the table stand to place the weather station onto a flat surface.
3.1 Outdoor unit placement tips:
To have the rain and wind meter function as accurate as possible, the rain and wind meter must be placed exactly horizontal.
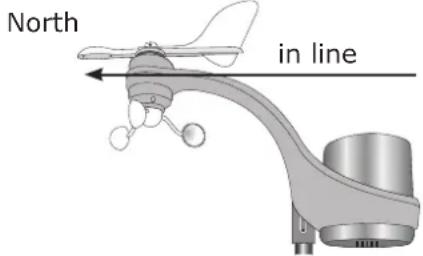
3.2 To set the wind meter:
To be able to indicate from which direction the wind is blowing, the rain and wind unit must face the North. Make sure that the wind vane is aimed to the front (the rear of the wind vane is located above the arm and closest to the rain sensor. for this, see the "direction for setting wind vane" marking above the rain and wind meter. Use an accurate compass (not included) to properly aim the unit.
The wind rose will indicate the wind direction. When the outdoor wind meter is installed correctly, the wind direction may be activated as follows. North
Press and hold the "MODE/SET" (30) button for at least 1 second until 12Hr or 24Hr starts flashing.
Then press the "MODE/SET" (30) 14 times until the wind rose starts flashing. Now use the ▲ and ▼ buttons to set the North. The settings menu closes after 15 seconds without pressing any buttons or you may press the "MODE/SET" (30) button.
text_image
North in line4. TO SETUP THE WEATHER STATION
Press and hold the "MODE/SET" (30) button for at least 1 second until 12Hr or 24Hr starts flashing.
Repeatedly press the "MODE/SET" (30) button to adjust the following functions using the ▲ and ▼ buttons (the setup menu will close after 15 seconds without pressing any buttons).
settings:
| 12/24 Hr RCC | on/off time zone | hours minutes se | conds year month | ||||
| day language | °C or °F | air pressure notation | wind speed notation | Rainfall notation | wind direction |
12/24 hour: To set the clock display to 12 hours or 24 hours format.
RCC (Radio Controlled Clock) on/off: To enable or disable the DCF-77 receiver.
time zone: To set the desired time zone (not functioning when RCC is set to off).
hours: To set the actual hours display of the time.
minutes: To set the actual minutes display of the time.
seconds: To set the actual seconds display of the time (setting 0 only).
year: To set the actual year.
month: To set the actual month.
language: To set the desired language for displaying the days.
| Language | Country Code | Sun-day | Mon-day | Tuesday | Wednesday | Thursday | Friday | Saturday |
| Deutsche | GE | SO | MO | DI | MI | DO | FR | SA |
| English | EN | SU | MO | TU | WE | TH | FR | SA |
| Русский | RU | BC | ПН | BT | CP | ЧТ | ПТ | СБ |
| Danmark | DA | SO | MA | TI | ON | TO | FR | LO |
| Nederlands | NE | ZO | MA | DI | WO | DO | VR | ZA |
| Italiano | IT | DO | LU | MA | ME | GI | VE | SA |
| Español | ES | DO | LU | MA | MI | JU | VI | SA |
| Français | FR | DI | LU | MA | ME | JE | VE | SA |
°C or °F: To set the temperature display to °C or °F.
air pressure notation: Indicates the air pressure display in: Bar/HPA, mmHG or InHG
mBar = milliBar
HPA= Hectopascal
mmHG = millimeter of mercury, millimeter of mercury column or
millimeter of mercury pressure
inHG = inch of mercury or inch of mercury column
wind speed notation: Indicates the wind speed in: Knots, Km/h, mph or m/s
Knots = knot
Km/h = Kilometers per hour
mph = miles per hour
m/s = meters per second
Via the Beaufort bar the wind speed is indicated in Beaufort (e.g. wind force 3).
rainfall notation: Indicates the rainfall unit in: Inch of mm = millimeter
wind direction: Indicates the wind direction. Use the ▼ and ▲ buttons to make a small adjustment.
5. CLOCK AND ALARM FUNCTION
5.1 Clock:
Introduction:
The WS-3300 is provided with a built-in DCF receiver which receives the DCF time signal from Frankfurt. This signal ensures that the clock shows the time very accurately, provided a strong enough signal is being received. The clock is synchronized with the station in Frankfurt each night at 3am.
Automatic:
Upon installing the batteries in the indoor unit, the weather station performs an automatic setup. After approx. 3 minutes or quicker, the clock starts searching for the DCF radio signal for the time and date while the antenna symbol 🔒 is flashing. After several seconds or minutes the WS-3300 will start showing the correct time. In extreme cases, it can take over a day before the DCF time is shown.
Manually:
If the clock cannot receive the radio signal or cannot receive it well enough, you can set the clock manually as follows:
- press and hold the button "MODE/SET" (30) for 2 seconds, 12Hr or 24Hr will appear in the display
- Use ▼ and ▲ to set the time format, then briefly press the "MODE/SET" (30) button
- use the ▼ and ▲ buttons to set the DCF receiver (radio controlled clock RCC function) to on (on) or off (off)
- briefly press the "MODE/SET" (30) button
- use the ▼ and ▲ buttons to set the time zone (TZ) (-12 through +12), then briefly press the "MODE/SET" (30) button
- use ▼ and ▲ to set the hours and then briefly press the "MODE/SET" (30) button
- use ▼ and ▲ to set the minutes and then briefly press the "MODE/SET" (30) button
- use ▼ and ▲ to set the seconds to 0 (this allows you to have the clock run synchronously with your own clock) and then briefly press the "MODE/SET" (30) button
- use ▼ and ▲ to set the year and then briefly press the "MODE/SET" (30) button
- use ▼ and ▲ to set the month and then briefly press the "MODE/SET" (30) button
- use ▼ and ▲ to set the date and then briefly press the "MODE/SET" (30) button
- use the ▼ and ▲ buttons to set the language for displaying the days, then briefly press the "MODE/SET" (30) button
- after approx. 15 seconds the display stops flashing.
The clock is now set manually.
When the DCF receiver is enabled and a strong signal is being received, the receiver will overwrite the clock display (provided that RCC is set to "on").
The symbol indicates the status of the DCF clock:
no symbol: the DCF receiver is disabled; the displayed time is provided by the internal clock of the WS-3300
flashing: the DCF receiver is enabled and is searching for the DCF signal; the displayed time is provided by the internal clock of the WS-3300
f remains lit: the DCF receiver is enabled and is receiving the DCF signal; the displayed time and date are provided by the DCF atomic clock in Frankfurt
5.2 ALARM CLOCK FUNCTION:
Briefly press 3x the "MODE/SET" (30) button until the alarm clock time appears. When the wake-up time is displayed, press and hold the "MODE/SET" (30) button for 2 seconds to change the wake-up hours with the ▼ and ▲ buttons. Press "MODE/SET" (30) again to change the wake-up minutes with the ▼ and ▲ buttons. Press the button "MODE/SET" (30) again to save the alarm time.
The weather station is provided with wake-up functions. The alarm clock is activated when the alarm clock icon 🔔 appears in the display. During the basic display, press the “→” button to activate the alarm clock. The 🔔 icon appears in the display.
5.3 TO DISABLE THE ALARM SIGNAL:
As soon as an active wake-up time is reached, the weather station will sound an alarm signal.
For the first 10 seconds, the rhythm of the alarm signal is slow.
From 10 to 20 seconds, the rhythm of the alarm signal becomes quicker.
From 20 to 30 seconds, the rhythm of the alarm signal becomes even quicker.
The alarm signal has the fastest rhythm after 30 seconds and stops automatically after 2 minutes.
After 24 hours the alarm signal, connected to the set wake-up time, will sound again.
You may stop the alarm beforehand by pressing the "SNOOZE/LIGHT" (36) button or a random button to permanently switch off the alarm for the next 24 hours.
When the snooze function is activated, the alarm will sound again after 5 minutes. The 🔔 icon flashes in the display. The snooze function can be repeated 7 times.
5.4 TO RESET THE RAIN DATA:
After everything is installed, press and hold the "RAIN CLEAR" (34) button for 2 seconds to delete all measurement data up to that moment. This prevents you from seeing measurement data at a later time that was caused by movements during the installation.
6. USE
6.1 GENERAL FUNCTIONS:
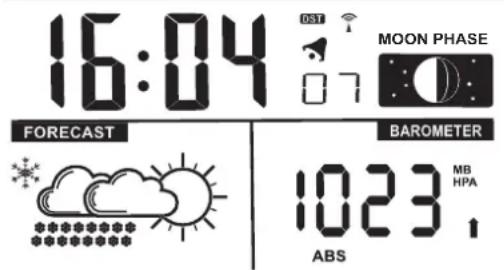
The display shows the following basic functions / data:
text_image
16:04 FORECAST BAROMETER 1023 MB HPA ABS6.2 CLOCK:
Clock with DCF-77 reception indication.
In the image above the DST logo (daylight saving time) is visible.
Upon receiving the DCF-77 signal, the indicated time is correct.
Briefly press the "MODE/SET" (30) button to view the day, date and alarm time.
6.3 MOON PHASE:
The moon phase indication shows the moon phase by means of an icon.
This allows you to keep track of the moon phase.
The display of the moon phase is linked to the settings of the date, month and year.
The following moon phases may be indicated:


new moon waxing crescent first quarter waxing moon full moon waning moon last quarter ashen moon
6.4 BACKLIGHTING:
Press the "SNOOZE/LIGHT" (36) button to switch on the backlighting.
The backlighting will remain on for approximately 5 seconds and will then turn off automatically.
6.5 LOW BATTERY INDICATION:
When the ✕ icon appears, the batteries of the outdoor unit are nearly exhausted.
Replace the batteries as soon as possible.
6.6 BAROMETER:
The barometer shows the actual air pressure value. This value may be indicated as an absolute or relative value.
Relative air pressure:
The air pressure varies depending on the altitude (compared to sea level).
The absolute air pressure is the air pressure that is present independent from this altitude (take this value as reference). For the prediction of the weather, it's essential to measure the correct air pressure, also when you're e.g. 100 meters above sea level. This is called the relative air pressure. For every 8 meters, the air pressure decreases by 1 hPa. When you're not located in the mountains, you don't have to adjust the air pressure.
Press the "WEATHER-ABS REL" (35) button at the rear to switch the display between Absolute and Relative.
Adjustment of the weather forecast icons and the relative air pressure indication.
- press and hold the "WEATHER-ABS REL" (35) button until the weather station emits a beep tone and the weather forecast icon starts flashing.
- use the ▼ and ▲ buttons to select the actual weather condition.
- briefly press the "WEATHER-ABS REL" (35) button again.
- the air pressure value now starts flashing.
- you may now use the ▼ and ▲ buttons to adjust the relative air pressure.
- the air pressure value can only be adjusted in the relative air pressure mode.
- press the "WEATHER-ABS REL" (35) button again to save your setting.
Trend indication:
The air pressure is higher compared to before
The air pressure remains the same as before
The air pressure is lower compared to before
Weather forecast by means of animation icons:
The following forecasts are possible:
natural_image
Simple line drawing of a sun with rays (no text or symbols)
natural_image
Simple line drawing of a sun and cloud (no text or symbols)
natural_image
Simple line drawing of two clouds inside a rectangular frame (no text or symbols)
natural_image
Simple line drawing of two clouds with raindrops below (no text or symbols)
natural_image
Simple line drawing of a cloud with five stars below it (no text or symbols)sunny partially cloudy cloudy rain snow
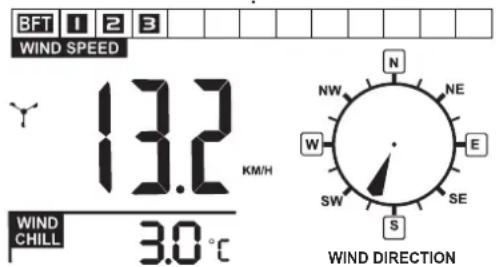
6.7 WIND MEASUREMENTS:
The display shows the following wind measurements:
text_image
BFT 1 2 3 WIND SPEED 13.2 KM/H WIND CHILL 3.0°C N NW NE W E SW SE S WIND DIRECTIONWind force indication in Beaufort:
The actual wind force is indicated in the table in Beaufort (BFT).
Wind speed meter indication:
The indication of the wind speed meter starts turning when wind is being measured ↗.
Wind Speed:
This shows the wind speed values. (Choose from: m/s, mph, km/h or knots)
Wind Direction:
The wind direction is indicated in the compass card. If the outdoor wind sensor is installed correctly the wind direction is indicated (see 3.2 To set the wind meter).
Wind Chill:
On cold days and windy days it's not the temperature that makes it cold, but the combination of the amount of wind and the temperature. When the outdoor temperature falls below 10^ C and the wind speed is above 4.8 Km/h, the wind chill is indicated. The display shows “--.-°C” outside this value.
6.8 RAIN MEASUREMENTS:
The display shows the following rain measurements:
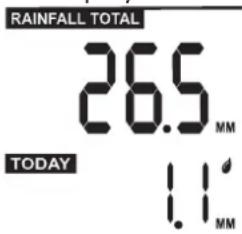
text_image
RAINFALL TOTAL 26.5 MM TODAY 1.1 MMTotal:
This shows the total amount of rainfall from the beginning (last reset or battery placement) until now.
Press the "RAIN SINCE" (34) button to check the starting date.
The date will be shown instead of the clock.
Today:
This shows the rainfall of today (the last 24 hours).
Rain History:
Press the "RAIN HISTORY" (27) button to view the rainfall history up to 30 days ago. The history disappears from the display after 15 seconds without pressing any button.
To delete the rainfall data:
Press and hold the "RAIN CLEAR" (34) button for 2 seconds to delete the rainfall data.
Rainfall alert function:
When a certain amount of rain has fallen, the weather station can be set to emit an acoustic alert signal.
To set the rainfall alert:
Press and hold the "RAIN ALERT" (37) button for at least 2 seconds.
"HI" starts flashing. Use the ▼ and ▲ buttons to select the desired rainfall alert level and press the "RAIN ALERT" (37) button to confirm the value.
Press the "RAIN ALERT" (37) button to activate or deactivate the rainfall alert ("HI" appears in the display when the rainfall alert is enabled).
The alert starts as soon as the rainfall level is reached.
Press any button to stop the alert (the "HI" icon remains flashing).
6.9 TEMPERATURE:
Indoor and Outdoor TEMP:
Indoor and outdoor temperature with humidity (when the humidity is below 20%, the ▼ icon appears). The display shows LL.L or HH.H when the temperature is outside the value that can be measured.
Outdoor temperature alert function:
When the outdoor temperature becomes Higher or Lower than certain values, the weather station can be set to emit an acoustic alert signal.
This can be set for when the temperature falls below a certain value.
When the temperature rises to above a certain value.
When the temperature is below and above a certain value.
To set the temperature alert:
Press and hold the "OUT TEMP ALERT" (39) button for at least 2 seconds.
"HI" starts flashing. Use the ▼ and ▲ buttons to select the desired high temperature alert and then press the "OUT TEMP ALERT" (39) button.
"LO" starts flashing. Use the ▼ and ▲ buttons to select the desired low temperature alert and then press the "OUT TEMP ALERT" (39) button to save your settings.
Press the "OUT TEMP ALERT" (39) button to choose: "HI" high temperature alert "HI-LO" high and low temperature alert "LO" low temperature alert
The alert is active when one of the icons is selected.
The alert starts as soon as a set value is exceeded.
Press any button to stop the alert (the alert icon remains flashing).
7. TECHNICAL SPECIFICATIONS
Weather station:
indoor temperature measurement range: -10^ +50^ ( 32^ 122^ )
humidity measurement range: 20% \~ 99%
clock synchronization signal: DCF-77 Frankfurt.
power: battery 2 x 1,5V type AA (LR6) alkaline
display dimensions:: 110 x 72mm
dimensions:: 153 x95 x 45mm
Outdoor sensor:
outdoor temperature measurement range: -20 \~ +50°C (-4°F \~ 122°F)
humidity measurement range: 20% \~ 99%
mounting on pipe maximum ∅ 37mm
cable lengthl : 9.50 meter
power supply: battery 2 x 1.5V size AA (LR6), preferably Lithium batteries
transmission frequency: 868.34 MHz
transmitting power: < 1 dBm
range: ± 30 meter
dimensions:: 70 x 135 x 25mm
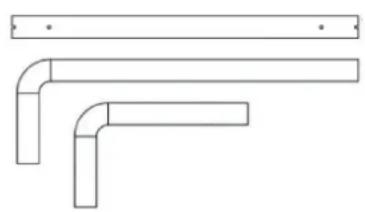
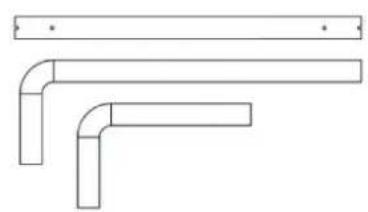
8. ACCESSORIES
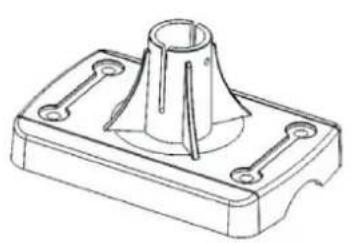
natural_image
Technical line drawing of a mechanical part with a conical top and flange base (no text or symbols)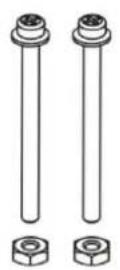
natural_image
Pure technical line drawing of three L-shaped pipe fittings without any text, numbers, or symbols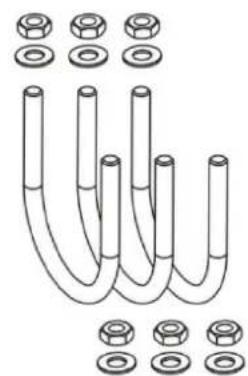
natural_image
Diagram of U-shaped pipes with various bolt holes and flutes, no text or symbols present9. DECLARATION OF CONFORMITY
Hereby, Hesdo declares that the radio equipment type Alecto WS-3300 is in compliance with directive 2014/53/EU. The full text of the EU declaration of conformity is available at the following internet address: http://DOC.hesdo.com/WS-3300-DOC.pdf

text_image
Alecto®ServiceHelp


WWW.ALECTO.NL SERVICE@ALECTO.NL