Smartfix - To scan Veho - Free user manual and instructions
Find the device manual for free Smartfix Veho in PDF.
User questions about Smartfix Veho
0 question about this device. Answer the ones you know or ask your own.
Ask a new question about this device
Download the instructions for your To scan in PDF format for free! Find your manual Smartfix - Veho and take your electronic device back in hand. On this page are published all the documents necessary for the use of your device. Smartfix by Veho.
USER MANUAL Smartfix Veho
Negative & Slider Scanner
VFS-014-SF
veho®
EnglishCon
English 03
Français 13
Deutsche 23
Italiano 34
Portugues 44
Espanol 54
pycckn 64
日本語 74
中文 84
1. What's in the box?
Veho Smartfix SF-1 Scanner
135 slider tray
135 negative tray
110 negative tray
126 negative tray
Cleaning brush
USB-A to Mini-B USB cable
3.5mm jack to yellow RCA cable
Lithium-ion battery
Multi-Lingual user manual
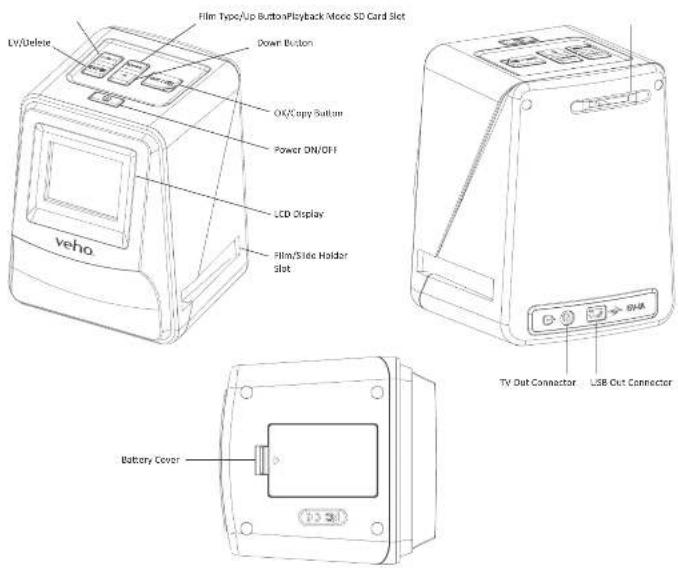
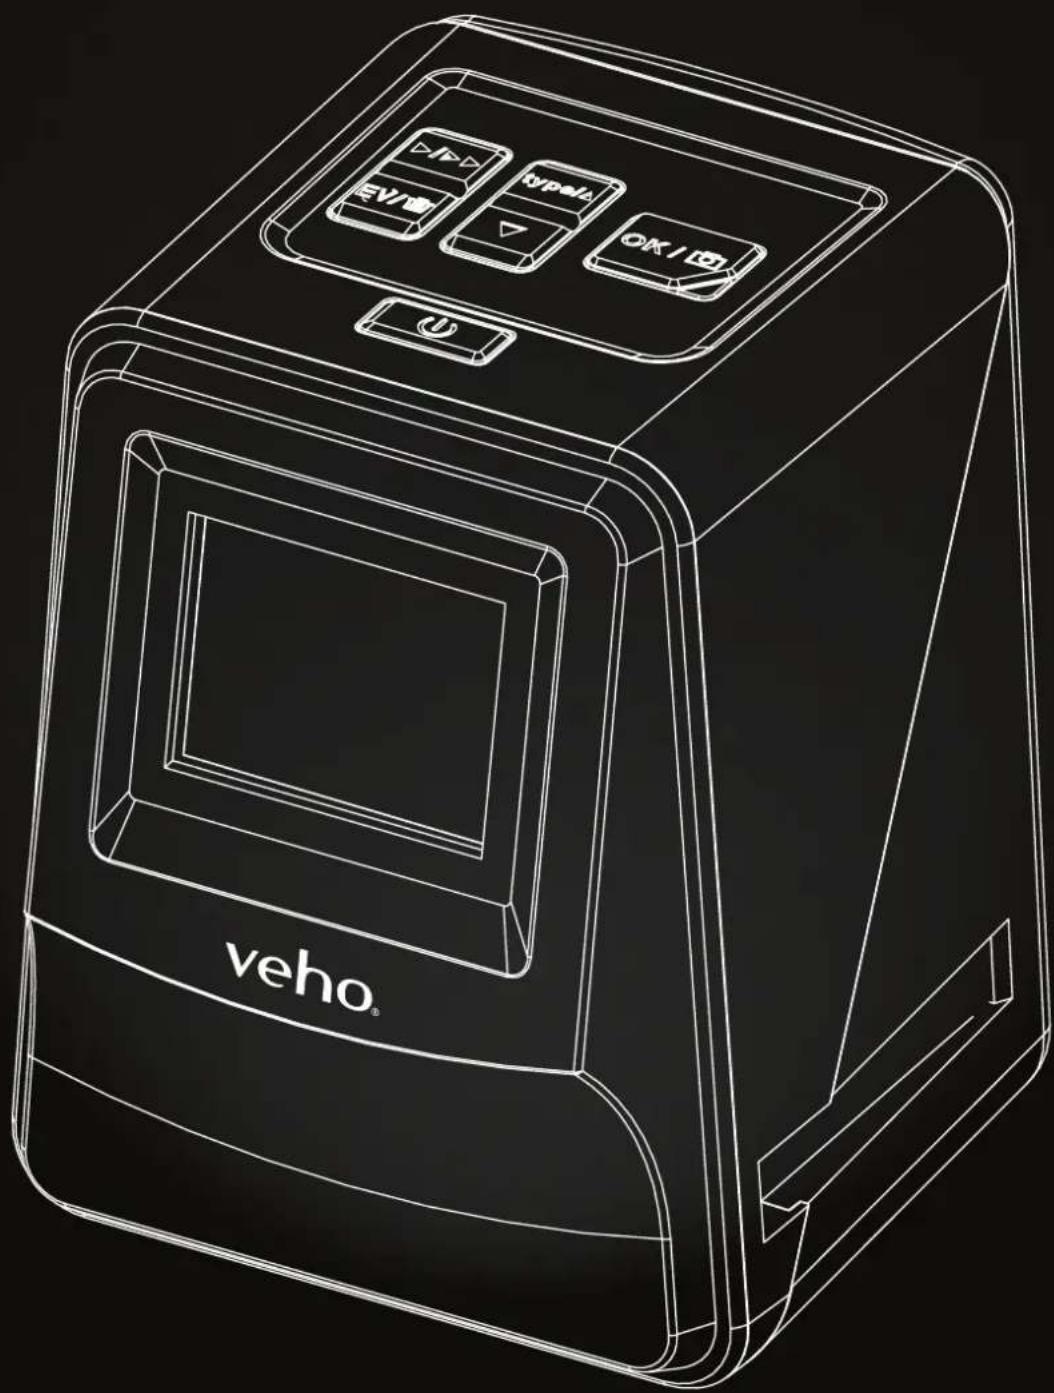
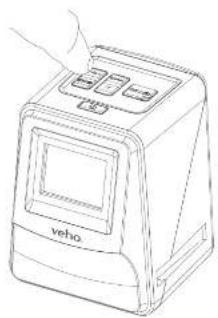
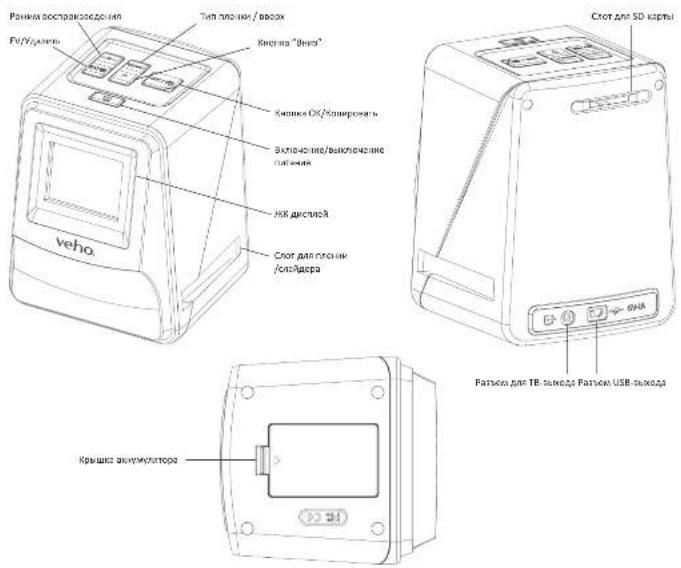
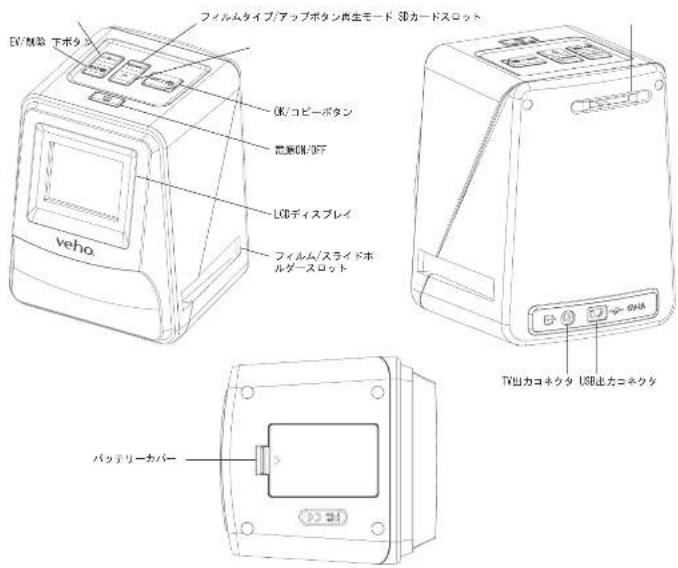
2. Controls
EnglishEng
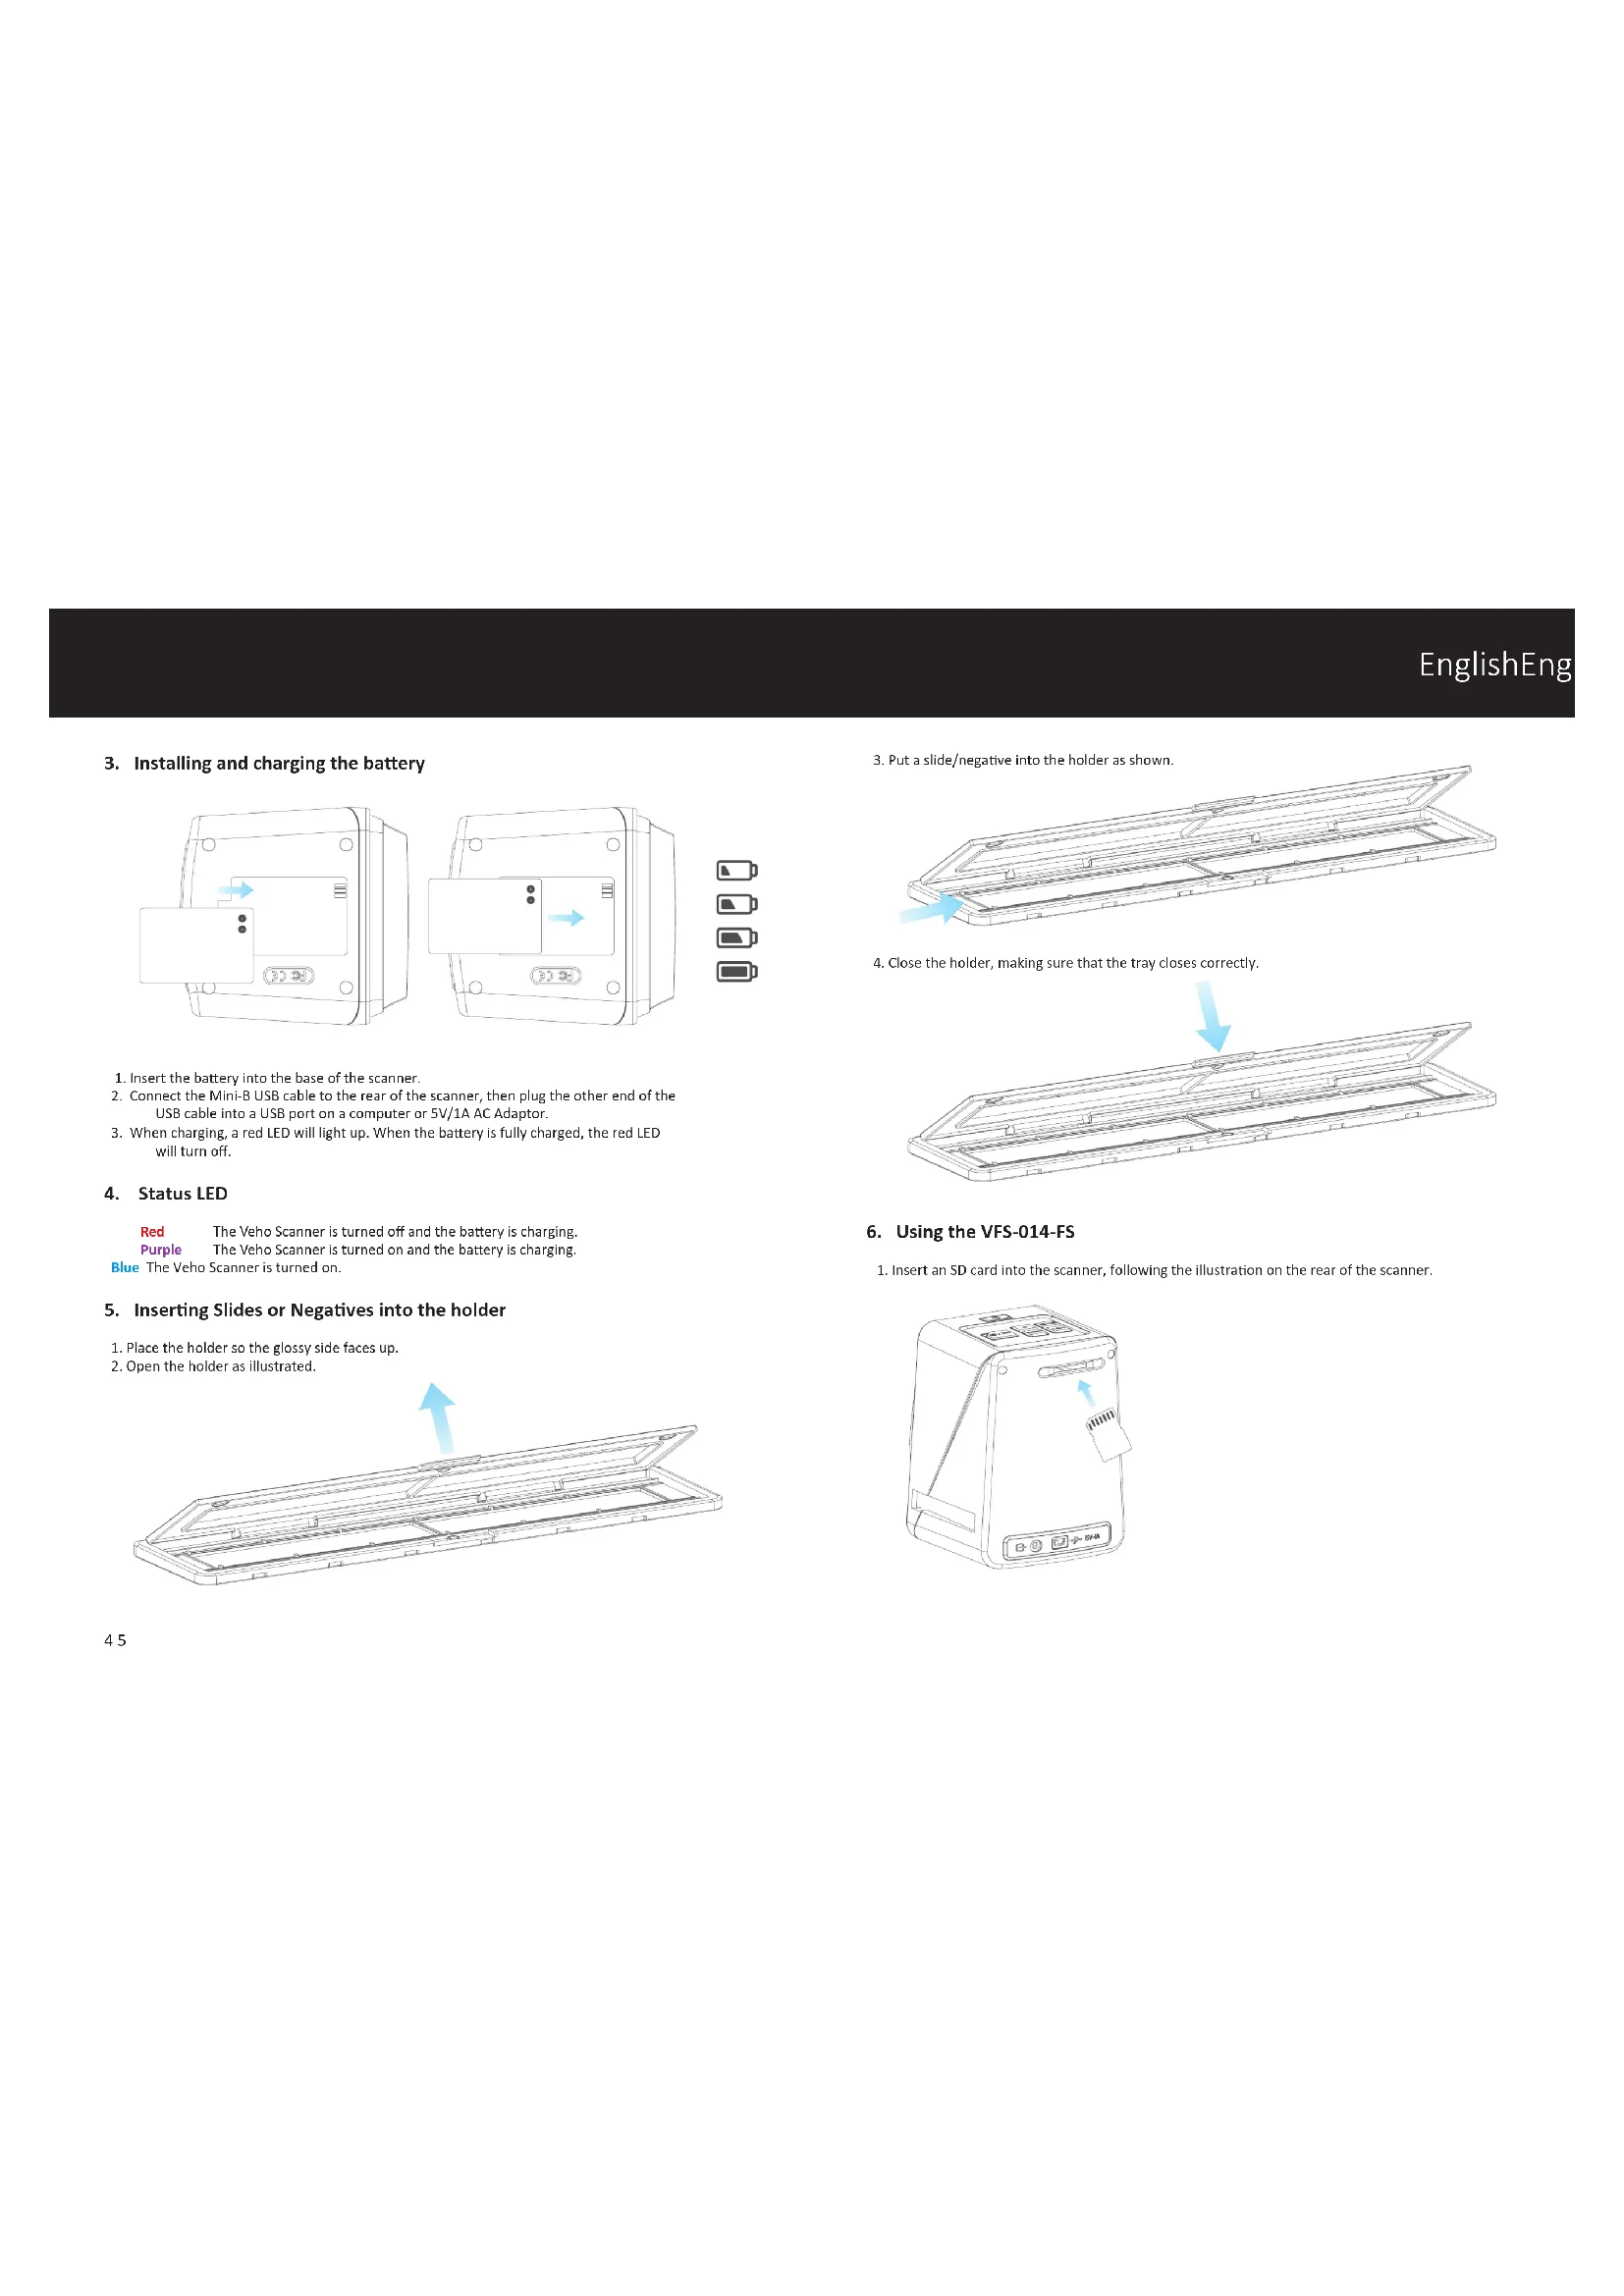
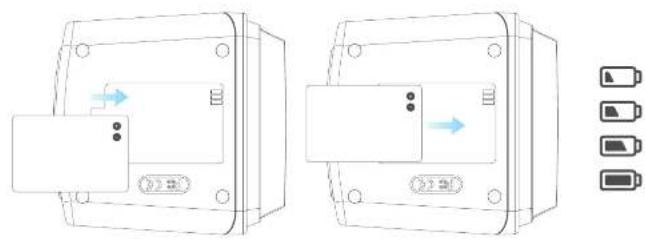
3. Installing and charging the battery

- Insert the battery into the base of the scanner.
- Connect the Mini-B USB cable to the rear of the scanner, then plug the other end of the USB cable into a USB port on a computer or 5V/1A AC Adapter.
- When charging, a red LED will light up. When the battery is fully charged, the red LED will turn off.
4.StatusLED
Red
The Veho Scanner is turned off and the battery is charging.
Purple
The Veho Scanner is turned on and the battery is charging.
Blue The Veho Scanner is turned on.
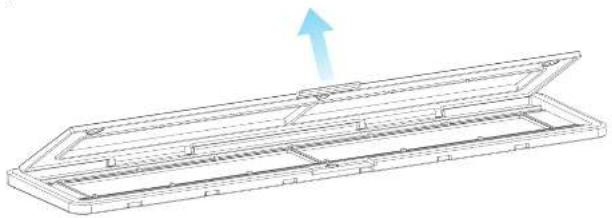
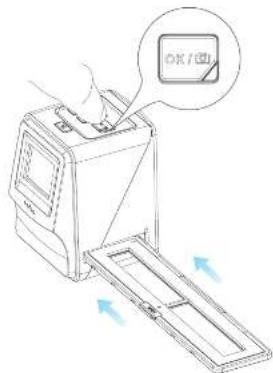
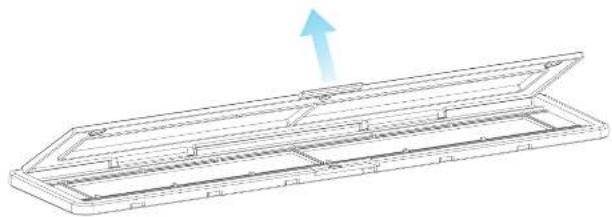
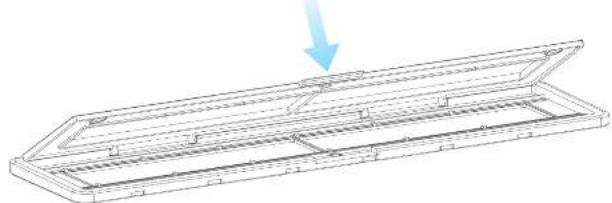
5. Inserting Slides or Negatives into the holder
- Place the holder so the glossy side faces up.
- Open the holder as illustrated.
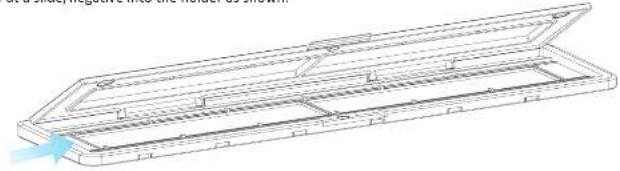
- Put a slide/negative into the holder as shown.
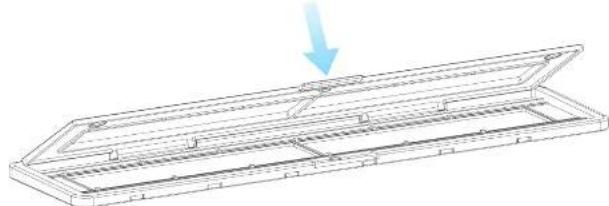
- Close the holder, making sure that the tray closes correctly.
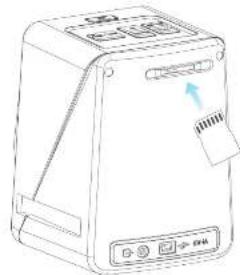
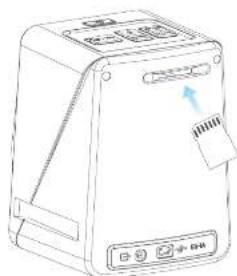
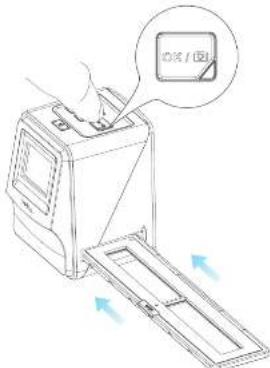
6. Using the VFS-014-FS
- Insert an SD card into the scanner, following the illustration on the rear of the scanner.
EnglishEng
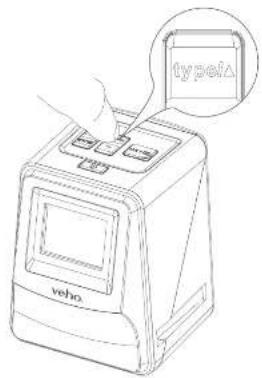
- Press the power button to turn the power on.
- Press the Film Type button to select the correct mode for the slide/negative in the holder.


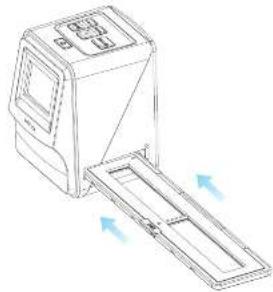
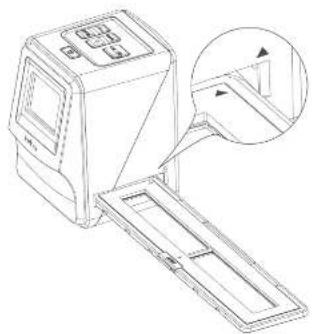
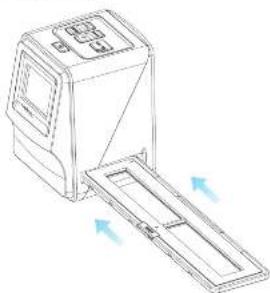
- Insert the slide/negative holder into the right hand side of the scanner, as indicated by the symbol on the scanner and the slide/negative holder.

- Align the slide/negative holder in the scanner using the LCD screen on the front.
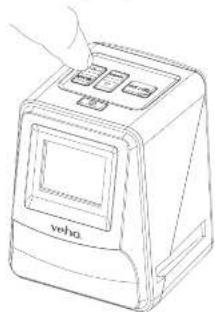
- Press the copy button to scan the slide/negative into a digital image. To get the best result, wait for 3-4 seconds for the scanner to adjust the brightness for each slide/negative before pressing the copy button.
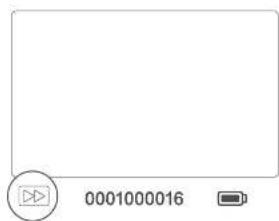
- After the brightness has automatically been set, you can manually adjust the exposure of the image before scanning. Press the EV/Delete Button to adjust the exposure Value (EV), then use the Up to Down button to adjust from +2EV to -2EV in increments of 0.5. The value of EV adjustment is shown at the bottom of the LCD screen.
- Once you have scanned the first image in the holder, move the holder to the next position and repeat until you need to put new slides/negatives into the holder.
English
English
Please note: To save power, the Veho Scanner will go to sleep mode after 3 minutes of being inactive. You can come out of sleep mode by pressing any button on the scanner.
If the Veho Scanner is inactive for 6 minutes, it will turn off automatically.
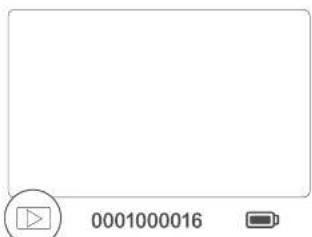
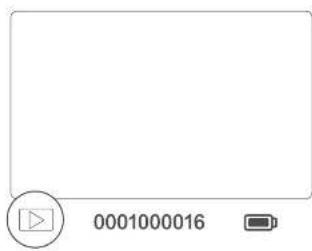
7. Playback mode
- You can use Playback mode to view the images that you have scanned onto the SD card.
- Press the Playback button to enter playback mode:
- Press the Up or Down button to change the selected image.
- Press the playback button again to enter slideshow mode.
- Press the Playback button again to go back to scanning mode.
8. Deleting images
- Enter Playback mode, then select the image you want to delete.
- Press the Delete button once, then Okay to delete the selected image.
- Press the Delete button twice, then Okay to delete all images.
- Press the Delete button three times then press the Okay button to format the SD card.
Please note: formatting the SD card will remove all files from the SD card, not just the images saved by the scanner.
9. Connecting the scanner to a computer.
- Plug the USB cable into the rear of the scanner and to a USB port on the computer.
- Press the Power button to turn the scanner on.
- Use the Up or Down button to select Yes or No and press Okay.
- Select Yes to view the files on your computer, the SD card will appear as a removable disc in "My Computer" or "This PC" for Windows users or on your desktop for Macintosh users
- Select No to use the scanner to scan slides/negatives while charging from a USB port.
10. Viewing images on a TV
The scanner is compatible with Mac and Windows operating systems, allowing you to copy the files directly from the SD card in the scanner without using a USB card reader. There is no software included or required to use the scanner on either operating system.
- Set the TV to the correct input, and then connect the scanner to the TV using the 3.5mm jack to yellow RCA cable.
- Turn the scanner on.
- Press the Playback button.
- Use the Up or Down button then the Okay button to select PAL or NTSC to match your region.
- Press the Up or Down button to change the selected image
- Press the Playback button again to start a slideshow. You can use the Up or Down button to pause a slideshow, then press the Playback button to resume the slideshow.
11. Safety information and specifications
Specifications
Image Sensor 1/2.33" 14 Mega CMOS Sensor,
Preview and Review 2.4" Color LCD Display
Lens Specification F=4.8, f=12.95mm
Color Balance
Exposure Control
Automatic
Automatic & Manual adjustment
English
English
Support Film Size Auto Cropping 135 Negative & Slide (3:2)
110 Negative (4:3) (optional)
126 Negative (1:1) (optional)
Support Film Type Auto Converting 135 Slide
Color Negative Film (135,110 & 126)
Black & White Negative Film
Focusing Fixed Focus
EV adjustment + 2.0 EV
PC Interface USB 2.0
Image Format 135 Negative 3:2 Ratio
110 Negative 4:3 Ratio
126 Negative 1:1 Ratio
Light Source 3 white LED
Power From USB port, Li-ion 3.7V/ 1050mAh Battery
TV System NTSC and PAL
Dimension 14.4 (H) x 11.6 (W) x 11.9 (L) cm
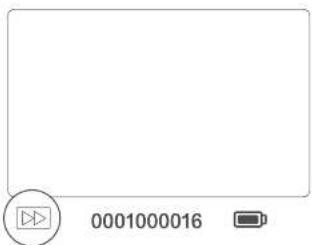
Icons & Indicators
| Battery Full |
| Battery 2/3 |
| Battery 1/3 |
| Battery Empty |
| 135 Slide |
| 135 Negative Film |
| B/W B/W 135 Negative Film |
| 110 Negative Film |
| 126 Negative Film |
| PC-SD Card Selection |
| PC-SD Card Link-Connected |
| TV System Selection |
| EV Compensation indicator |
| +0.0EV FV Compensation |
| 0888 Available number take in SD card |
| Delete? | Delete One |
| Delete all? | Delete All |
| Format? | Format SD Card |
| Yes | Yes |
| No | No |
| X | Card Error |
| 0% | Card Full |
| E | Card Lock |
| Playback Mode | |
| Slide Show | |
| Wait |
System Requirements
PC System Requirements
Pentium P4 1.6GHz or equivalent AMD Athlon
Free USB2.0 port
512MBRAM
500MB free hard disk space
1024 x 768 pixel colour monitor
CD-ROM drive
WindowsXPServicePackII/Vista,32/64bits
Windows 7/Windows 8/Windows 10
Mac System Requirements
PowerPC G5 or Intel Core Duo processor recommended
Free USB2.0 port
768MB RAM
500MB free hard disk space
1024 x 768 colour monitor
CD-ROM drive
Mac 10.5~Up
This symbol on the product or in the instructions means that your electrical and electronic equipment should be disposed at the end of its life separately from your household waste. There are separate collection systems for recycling in the EU. For more information, please contact the local authority or your retailer where you purchased the product.
Before using the VFS-014-SF (Who Scanner), please ensure that you read and understand the safety precautions described below. Always ensure that the VFS-014-SF is operated correctly.
Never operate the VPS-014-SF Inside of an aircraft or anywhere else where operation of such devices is restricted. Improper use creates the risk of serious accident.
Do not try to open the case of the VFS-014-SF or attempt to modify the VFS-014-SF in any way. High-voltage internal components create the risk of electric shock when exposed. Maintenance and repairs should be performed only by authorised service providers.
Keep the VPS 014 SP away from water and other liquids. Do not use the VPS 014 SP with wet hands. Never use the VPS 014 SP in the rain or snow. Moisture creates the danger of fire and electric shock.
Keep the VPS 014-5F and its accessories out of the reach of children and animals to prevent accidents or damage to the VPS 014-5F.
The VFS D14 SF may become slightly warm during use. This is normal and does not indicate malfunction.
If the exterior of the VFS-014-SF needs cleaning, wipe it with a soft, dry cloth.
If you notice smoke or a strange odour coming from the VFS 014 SF, turn the power off immediately. Take the VFS 014 SF to the nearest authorised service centre for repairing. Never attempt to repair the VFS 014 SF on your own.
Use only the recommended power accessories. Use of power sources not expressly recommended for the VFS-024-SF may lead to overhearing, distortion of the equipment, fire, electrical shock or other hazards.
FCC Notice
This equipment has been tested and found to comply with the limits for a Class B Digitalise device, pursuant to Part 15 of the FCC Rules. These limits are designed to provide reasonable protection against harmful interference in a residential installation. This equipment generates, uses and can radiate radio frequency energy. If not installed and used in accordance with the instruction, it may cause harmful interference to radio communication. However, there is no guarantee that interference will not occur in a particular installation. If this equipment does cause harmful interference to radio or television reception, which can be determined by turning the equipment on to off, the user is encouraged to try to correct the interference by one or more the following suggestion.
FrançoisEng
Reorient or relocate the receiving antenna.
- Increase the distance between the equipment and the receiver.
- Connect the equipment to a different power outlet other than the one where the receiver is connected.
- Consult an experienced television or radio technician for help.
CAUTION
To comply with the limits for a Class B Digitalis device, pursuant to Part 15 of the FCC Rules, this device must only be installed on computer equipment certified to comply with the Class B limits.
This unit may contain a microcomputer for signal processing and control function. In very rare situations, severe Interference, noise from an external source, or static electricity may cause it to lockup. In the unlikely event that this should happen, turn off the unit, wait at least five seconds, and then turn it back on again.
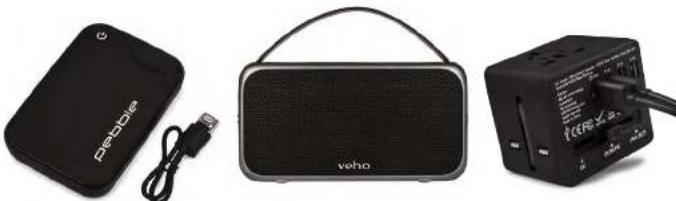
Other Veho Products
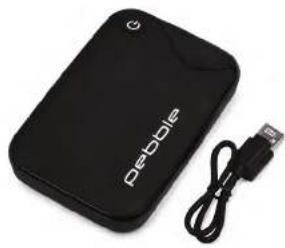
Pebble P1 10,400mAh Portable Charger VPP-007-P1
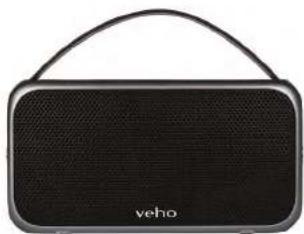
M7 Bluetooth Wireless Speaker VSS 0.4 M7
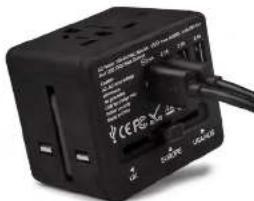
USB Travel Adapter VAA 200 TA1
M7 Bluetooth Wireless Speaker VSS D14-M7
USB Travel Adapter VAA-200-TA1
Black & White Negative Film
Pebble P1 10,400mAh Portable Charger VPP-007-P1
M7 Bluetooth Wireless Speaker VSS-014-M7
USB Travel Adapter VAA 200 TA1
Italianolitali
M7 Bluetooth Wireless Speaker
USB Travel Adapter
VAA200-TA1
Português
Portugues
Pebble P1 10,400mAh Portable Charger VPP.007 P1
M7 Bluetooth Wireless Speaker VSS-014-M7

USB Travel Adapter VAA-200-TA1
Espanol
Espanol
M7 Bluetooth Wireless Speaker
USB Travel Adapter
VAA-200-TA1
1. TTo HaxoNTcB Kopo6ke?
Crahep Veho Smartfix SF-1
135 nonayno
135MHNYCOBOJOTOK
110MHHC-LOTOK
126MHVCOBOJOTOK
HCTAHA HETK
Ka6eB USB-A dnn Mini-B USB
3.5 MM paaem dnn kentoro ka6en RCA
JIHTH-NHOHHbAKKyMnyTATOp
Hctpyku no Haany pa60b
2. OpraHbI ynpaBHeHH

3. YCTAHOBKa n 3apAka AKKyMylTOpa
1.BctabBe aKKyMnTOp B OCHOBAHHe cHaHepa.
2. Podknochnye USB-Kabels Mini-B KdAedn Chutz Czheba, 3aTepe NodKIOHATe DpyrO KOHeL KABeEs USB K nDyTb USB HA KcMnOtePte Hm A aJdIantPeY PneMeHENHO Tko 5 B/1 A
3.Пи зарлдке загоретаск крastsс bсгетид.Кordа akkymylatop noIHOCTbIO zarapdntcA, kprashc bсгетид bblKIOHNTC.
4.ИндкатOP COCTOHHN
KpachnckanepeVehoBbKJIeHnAkkymyIaTOp3apKaetc.
ΦHoneTobbl cKahep Veho Bknohen n AkkymyTAOp aapAAeTCA.
CnHnn cKaHep Veho BKnIOueH.
5. BCTaBka cnaIIOB mH HeratNBOB B depKaTeNb
- Nomecnte depkaTeb TaK, TcO6blraHueBa CTopoHa 6bIna HappaBnHa BBePx.
2.OTKpoIeepKaTeB,KaKnok3aHoHa pucyHKe
pycckn pycc
3.BcTaBbTe cnaI/MnHyc B depKaTeNb, KaK nok3aHo

4.3akpoIte depKaTeIb, y6eINBUnCb, YTO IOTOK 3aKpbBaTcN npAunlbHO.
6.ИспοЛьзоване VFS-014-FS
1.Bctabte 5D-Kapry B cKaHep, cIeIy pncyHKy Ha 3adHe nane nncaHepa
2.HaMMTe KhoNkY NtAHn, YTO6bI BKnIOHTb NtAHnE.
3. HAKHNTHE KINOHY (“TIN PIIENHIN”, YTO6b Bi0p8a7p npabnBbIe peKIM, dnn CnaJaD / HeraTHoA B DEPKHTAE

- BCTaBte cIaIepe/OTPiAtAEtENbIeDPKaeTbe I pIpaYbUcTaCKePA, kAn NkOkaaHO CnBOLOM ▲ HA KcAepeE nCJIaPeDe/OTPiAtAEtHOmDPKeTaeIe.
pycckn pycc
- Bbipohnre cna/otpuatelbhi depkae b ckahepe, hcnnohay KK-epaHa na nepedne nanei.
6.HaMMrHEHONKHOHNOPSAHH,HTObIOTCKAHHPOBATcnaIa/HerTHA B uHPOOOe HIO6paKeHHeN,HTObIbNOHYHHTBHLHNNype3yIbTaT,poDKmTe 3-4 cekHyd,HTObIckAhe OTPeryHApBnPKoCTbIaHAKDORo CnAda/ HerTHAepNEpehKaHINHcKHOHNKHOHNPAH
- Nocne toro, k3K JpKcObT cytaHOBHeA b0tOMaTHeCNH, Bbl MoHETe BpyHyIO pTepyHPOBaTB 3KNOHIOIOIIO6pKaENHnpeE KAnHPOBAAHMe. HAnMITE KOHNY EV/DeTe,TO6bI OTpeyHPOBAtb 3HAHENE 3KNOHIOIN (EV), 3ATEM McNIOblyte KHOKNy Up To Down DnHactPknr +2EVdo-2EV cuaor O5.3HAHENE pTepyHPOBKn EV NOkA3aB HNNKHe HAcNTKnHa KRJ.
- Tocne toro, KaB bI OTCHAHPOBAH NepBoe HIO6paKeHNE B depKATene, nepeMeCTnE DePcATEB CNDyUOyIO IOAUMN NOBTOPTME, NOA BAM He IOHAODbTCNOMETNTB HOBUE cnaiBy /GERTHAI B DEpKATEB.
NOKANHYCTA,OBAPHTHE BHIMAHNE:HTOb6I C3KOHOMHTB 3NkETPO3HEPRHO,CKAHEP VeHO nepejEET BcIINH PekHM PEe3 3 MNHYbTb 63e3dCTBn. BblMOKeTe bbltN H3 cIaIeO peKHMNA, HAKAH NIO60y HOKNKY Ha cKHePE.
EcnVeho Scanner HeAKTHBEN B TeueHne 6 MNHT, OH ABOTOMATUeCKN BIKIOHTTC.
7. Pexmm Bocnpn3BeDenHn
1.BbMOKeTe HcN0B3ObAte PBKmHcBnPOH38eDHeHH dJIr pOcMoTpa H3o6pBeHH, KOTOpHeB 6bIy OTHcHApOaHH Na SD-KaPTy.
2.HaKMMTe KhoNky Bocnpn3BeDeHH, YTo6blnepeTn B pexMM BoCpno3BeDeHH:
3.HAKMITE KHOKNY BBepx NIN BHN3, TTO6bl HMeHHTb BbIbpaHHeN3O6paKeHHe
4.HaXMMTe KHNkY Bocppon3epeHn eue pa3, TObb BOITN B peKIM cnaI-woy
5.HaKMTe KONKY BOCINPOBEDAEDENH CHOB, YTObI BEpyTcB R PekMMCKAHNPoBAHN.
pycckn
pycckn
8. ydaenne n3o6paekhen
- BOJNITE B PEKMH BOCPON38EDEHH, 3AETM Bb6pATEHIO6pAKEHNE, KOTOPOE Bb XOTNE ydaJIaNTb.
- HAnMKeH KHOHNK YdAaNtB OaHN PA3, 3aTeM O'KeB, YTOb6y ydaNtB 3b6paHHeo HsO6BaKHeHc
3.DaBnDbHaKMNTeKHOHky YdaNtB, 3aTeM OKeH, 4ToBbYdaNtB Bce N3o6paKeHH - HAMKNTYE KHNOKY «YdAaHnTb» TPN p3aa, 3aTeM HAMKNTE KHNOKY «OK», «To6bI» oTfOpMaTHPOBAtb SD-KAPRTy.
06Putnhe BHMHANee:OpMFMTHoBAAHNE SD-KaPTbI PnABEETK YdALAEHHIO BCEX FAnOB CSDKAPtB, A he ToIbKO IIO6PAkHNK, COxPAHENHb KCHSKePOH.
9. NpoknloueHne cKahepa K KomblTepy.
CkahecoBMAeTMMcOpeaONHbMMnCHTeMaMM Mac nWindows,TOPOBNOETKNOHPoBaTb
PAHbHHeNOCpECDTBHeHO CSD-KapTb B cKahepe63 HcNoIbTaOBaHHyCTPPOIcTAuHTA KAPT
USB.4nHcNoIbTaBBaHHaCKaHepe HbOIOHOpeaONHOOH CHTeMe Het npOrpAMMHO
0eBceHcHHeHmHHeo6XdMnOCTM.
- Pnoknouhte Ka6eb USB K 3aHney aactn cKaHepa H N npTy USB Ha KomnbItepe.
2.HAKMTE KONKNYIHTAHN,UTO6bI BKNKNTB CHAHEP
3.CnMOOsbIO KhoNNK BBepxNnnBHNaBb6epTeDaNnnHHeTNaHAAmTe OK - Bb6epte 1Da)T06bI npocmptetbaHb Haauem KOMbIbepe,SD-kapTa nonBHTCB B BnDE cbHMO DnckBaB MokcmboTeepMnN TOr PI dnnnbOaTeeWindows nHa baempaOohc cTne I nnnooBaeaneMacintosh.
- Bébephe Het, Tócbb I cnObnla0aobt b CkAepe IraIcKAnHPOBaHn cnaIdoB / herAtnoBo BO apema 3apJINC USB-NOTA.
10. Ipocmtp n3o6paXeHn Ha 3KpaHe TeLEBn3opa
1.YatahONITE TEHEN3OP HnpaIINbIIbIbXoD, a3aTeMnOJIaKIOHTE cAeHep K TeLEsIOPOy, nObnb3yN PAbsEM 3,5 MM,KeKNTMOY RCA-Ka6JIeNo.
2.BKIOHHTe cKaHep.
3.HaMMTe KHOHky BOCPONMBeDEHnA.
4. IcnoB3y3e KhoNkUn Up Dnny, aTeM KhoNkOky Okay, 106bI b6BaT PAL INH NTSC, 106bI COOTHTCTOBAT BAIUEMY PERHOY.
5.HaHMMTe KONKy BBePxNINBnBn3,HTO6bI NMaMeHHbBb6paHHeN3o6paKeHNe
6.HaHMMTE KHOHNY BOCPOHAEHEHNE Eue pa3 IanyCAHcIa-woy. Bbl MoMeTe HcNlB3OaBH KHOKNY BEEPxH NnBnBnH3, YTObI npOCTAOHOBt bNOA3 cNAd08, 3aTEM HAHMMTE KOHNY BocPONBAEHEHNE, TcOb6I BO3OBOHbNTb NOA3 cNAd08.
IepoTt VFS-014-SF 27a30 oToBnH 16VFS-014-SF 29pOyAeKHe HcnoHbOyE TVE-014-SF 29pOyAeKHe HcnoHbOyE TVE- D14 S F 29pOyAeKHe NcoHbOyE TVE-
dape Vf 014-SF HIO EOCCEcPb H NIOCTYHNOI DIN TEHN I KHOHOTX MecTe BO HOBANHE NOCTHX CNYAHI HNIOHNOHNTVFS-014-SF
Boppenenpananies VFS 014 Smoner ene nperatana. Tnnpnna Hte yxnnnact Hcnpanct
EeHn Hnnn nnnn nnnn nnnn nnnn nnnn nnnn nnnn nnnn nnnn nnnn nnnn nnnn nnnn nnnn nnnn nnnn nnnn nnnn nnnn nnnn nnnn nnnn nnnn nnnn nnnn nnnn nnnn nnnn nnnn nnnn nnnn nnnn nnnn nannn nnnn nnnn nnnn nnnn nnnn nnnn nnnn nnnn nnnn nnnn nnnn nnnn nnnn nnnn nnnn nnnn nnnn nnnn nnnn nnnn nnnn nnnn nnnn nnnn nenn
Cnuu bnuuunmnnn nn nnnn nnnnnnnnnnnnnnnnnnnnnnnnnnnnnnnnnnnnnnnnnnnnnnnnnnnnnnnnnnnnnnnnnnnnnnnnnnnnnnnnnnnnnnnnnnnnnnnnnnnnnnnnnnnnnnnnnnnnnnnnnnnnnnnnnnnnnnnnnnnn
Hcnnnnae Tmnnn nnnnnnnnnnnnnnnnnnnnnnnnnnnnnnnnnnnnnnnnnnnnnnnnnnnnnnnnnnnnnnnnnnnnnnnnnnnnnnnnnnnnnnnnnnnnnnnnnnnnnnnnnnnnnnnnnnnnnnnnnnnnnnnnnn nnne
YbDnueHne FCC
30000000000000000000000000000000000000000000000000000000000000000000000000000000000000000000000
- AsmHbOpHeTaIO Hn MeTOnOeKeHne IpprenOH AHTehHbI.
PANHNEKNTNPOOENBNNXNDYQONNGTNNNHNNNTNNNNNNNNNNNNNNNNNNNNNNNNNNNNNNNNNNNNNNNNNNNNNNNNNNNNNNNNNNNNNNNNNNNNNNNNNNNNNNNNNNNNNNNNNNNNNNNNNNNNNNNNNNNNNNNNNNNNNNNN
PNEDOCTEPEKENHE
Hofo Coote,et al. 1000b oBnienen Bum yIyDcEIO DigiZie KACB, a cOETRtB C HcTbS L2Pbn FCC, 2010 cyTOFIOBIO BHO, yETAHONBOHIO TAOH NOMBIKOMBTHNIOBIOO OOBIOYADHIO, cTeAIPINAPBIOA bCOTrAETPOBIO COTIRHNOA KACB A
EOTI BOK MOKI Cogepakr KINKOSKOBIHIEO OIOBOPADN CHINHOH NVPABENHNI. BCHNE PZAKA CNYAN CNBNA FIOKMA, WYJN OT BSEHEIRO HIOHNKA KITATKHEDE SHIKETHEO ABOY INPINEK E KIO KOBPOBKE. B MIOEPOTHONKCNAYE, ECN HTO IPOPOBESKI, SOKHRIYE YUCIPDKTIO, IOLODNI HE NEEH NIN KENLY, A SEHN CHOU KEBKIOE IEO.
Dpyrme npOdyKtbVeho
Pebble P1 10,400mAh Portable Charger VPP-007 P1
M7 Bluetooth Wireless Speaker VSS 014 M7
USB Travel Adapter VAA 200 TA1
1. 何が入ていすか?
VehoSmartfixSF-12
135Sralyda-1TLE
135本力TPTLE
110
126不方T
一 一
USB-A与Mini-B末のUSBケームル
3.5mmJAPCK与黄色RCAK一
1
夕ISSKST-上
2.コINT口一ル
3. ロルリーニの取り付けと充電
1)卡T一をスカフ一のP一上中捷入は。
2)Mini-BUSKFALOSKUANBAPREI-UBSFOPLMOHUAUEA 15V/1AACFALTSF0BUBOHT一工
3)充電中に赤いLEDが点灯しま。バツテリ一が完全に充電さると、赤いLEDが消灯しま。
4. ST子一夕STLED
赤VehoScanner的才下在,八T元力充重产
Veho. Scannerの電源が入つ工い。はテリ一を充電中了。
Veho Scannerが工に広ていは。
5. Sralidもは不力を木ル一中插入る
1354135413541354135413541354135413541354135413541354135413541354135413541354135413541354135413541354135
110負の4:3の比率
126負の1:1比率
光源 3白色LED
M7 Bluetooth Wireless Speaker
USB Travel Adapter
VAA-200-TA1
中文
中文
1. 盒子里有什么?
Pebble P1 10,400mAh Portable Charger VPP-007-P1
M7 Bluetooth Wireless Speaker VSS-014-M7
USB Travel Adapter VAA-20C-TA1
veho®
veho-world.com